
このガイドでは、すべてのロックを解除する方法を説明します。 ヘルダイバー 2 実績. 執筆現在, ゲームの特徴は合計 38 実績. This guide is expected to update as soon as new achievements are released to the game.
基本的な実績

本当の取引
チュートリアルを完了する
Ensure you complete the tutorial without skipping to unlock this achievement.

Bug Stomper
Complete one bug mission
No additional explanation needed; simply follow the instructions provided.

Bot Scrapper
Complete one bot mission
同上; straightforward and self-explanatory.

They mostly come out at night…
Extract from a mission during the nighttime
To trigger night time on planets, wait for a mission during the night cycle, complete it, and then extract.

Strapping young lad
Customize your Helldiver
Customize your character’s appearance by swapping out your cape, body armor, and helmet. This can be done either at the armory or while inside your hellpod.
Extractinating the countryside
Complete a defence mission
Look out for DEFEND missions on planets where sectors are under attack. These missions are indicated by the DEFEND text and a faction bar displaying Helldiver (青) and enemy faction (Red/Yellow) 進捗. Complete one defense mission on any difficulty level.

In the nick of time
Extract after the mission timer hits zero
Complete a blitz mission by finishing the main objective, then wait until the timer reaches 1 時間, 59 分. The shuttle takes 2 minutes to arrive, ensuring your extraction once the timer runs out.
あるいは, allow the timer to hit zero, triggering an emergency shuttle. しかし, this method provides no reinforcements or stratagems and is not recommended for optimal gameplay.
The long arm of Justice
Kill something past 100m
Equip an anti-materiel rifle or bring a Diligence DMR. Maximize your scope zoom and ping a distant enemy. Back up until you’re 100 meters away and eliminate the target. レベル 3 missions provide ample space for this tactic, and patrol units often succumb to a single shot.

Cool guys don’t loo- AAAA
Get launched over 25m by an explosion
Utilize various explosives such as the 500KG bomb, Hellbombs found on maps, or 380mm ordinance to propel yourself. If these aren’t available, employ smoke spores found on certain planets. Dive onto a grey fungi-looking bulb, shoot it, and it should launch you a considerable distance, counting toward the achievement.
Job’s done
Complete a mission but fail to extract
Commence a level 1 ミッション, complete the objective, then intentionally perish until your reinforcements are exhausted.

Promote Synergy
Assisted reload a teammate
Coordinate with a teammate wielding the Recoiless rifle, 槍, or Autocannon. Grab the support pack for their weapon and replenish their ammo by interacting with them when they run dry.
Democracy ain’t done with you yet
Stim a teammate
Administer a stimulant to a teammate by shooting them in the rear.

They don’t call it Tacticool for nothin
完了 10 side objectives
Optimal on bug planets, locate spore spewers (large mushrooms akin to those in Morrowind). 奴らを破壊せよ, then finish the mission. Repeat as necessary. Any side objective suffices, and completing the radar tower task reveals all others on the map.

Eat this!
Kill a bug warrior with a shotgun within 1m
Eliminate enemies by blowing their heads off with any shotgun.
Get some!
殺す 10 enemies firing at least 150 bullets in the process
Deploy a Stalwart LMG in a low-level bug mission, provoke the bugs, and lure ten or more tiny scouts into the open. Continuously fire until your magazine is empty or until the achievement unlocks.

Stalking is illegal
Destroy a Stalker Lair
Locate a side objective marked by a small blue icon resembling a spider on the map. Destroy it as you would any other bug nest.
Extractomundo
Extract as a full team on mission difficulty 5 以上
Select a mission on Hard difficulty (レベル 5) and complete it with all four players boarding the extraction ship at the end. Ensure the survival of all team members. Consider disabling cross-play or playing with competent friends to streamline the process.

For the greater good!
殺す 5,000 敵
No further explanation needed; the instruction is clear.

Nothing is bigger than freedom
Kill an Automaton Hulk
Target the giant weak spot on the enemy’s back with weapons requiring medium penetration. Railcannon strikes can instantly eliminate these foes. あるいは, use 500kg bombs, Railgun rounds, Spear missiles, mini-nukes, or reinforcements to deal the final blow and earn the achievement.
The taller they are…
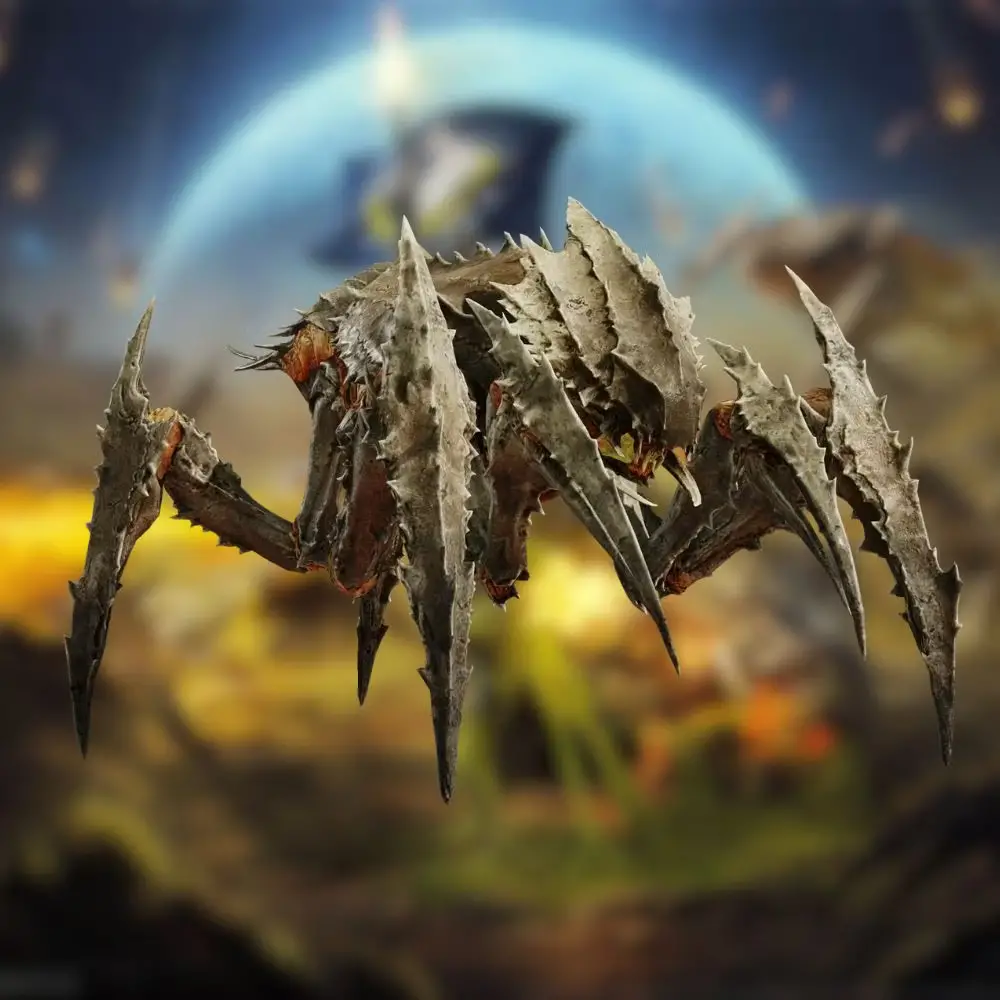
Kill a Terminid Bile Titan
Railcannon strikes won’t instantly defeat these enemies but inflict significant damage. Employ two hellpods, 500kg bombs, repeated railgun shots, or spam railcannon strikes or Spear shots for a swift victory. Utilize hellbombs if available. You must land the finishing blow to unlock the achievement.

Hot potato!
Throw a grenade back
Return a teammate’s grenade or take cover against any automaton by going prone behind suitable cover. Achievable on level 2-3 ミッション; simply interact with the grenade or automaton to complete this task.
Patriot
完了 50 ミッション
No further explanation needed; the instruction is clear.

Doing your part
完了 100 ミッション
The details are clear. You must complete 100 ミッション.

Spread Managed Democracy
殺す 150 enemies during the same mission
Complete a solo Extermination mission with a difficulty level of 5 以上, ensuring every kill to secure this achievement.
Advanced Achievements

発送してください!
Upgrade all ship modules at least one level
Accumulate approximately 400 common samples to fulfill this requirement. If prioritizing speed, reserve common samples for tier one upgrades.
Fully operational
Reach max level on one ship module
Gather around 160-200 common samples and 100-120 rare samples, とともに 5 または 10 Super samples depending on your chosen upgrade path. To expedite this process, avoid investing in the Engineering Bay or Robotics Workshop, as their tier 2 と 3 upgrades also require Super samples. Opt for alternative upgrades unless abundant in Super samples.

Helldive
Complete an Extreme difficulty mission or higher with none dying
Opt for an Eradication mission with sparse enemy numbers, maintain group cohesion, and utilize railcannons against larger foes while deploying turrets to manage lesser threats. These missions typically conclude within a few minutes. Employ shield generator packs and relays for additional survivability, alongside strategic positioning and avoidance of reckless actions. Avoid bringing mines, mortar turrets, napalm, or gas unless communication with team members is feasible.

Kill it with fire!
殺す 100 enemies with fire in a single mission
Employ flamethrowers, Eagle Napalm Strikes, Incendiary grenades, or Breaker Incendiary weapons to fulfill this objective. Focus on low-level bug missions as most robotic enemies resist or are immune to fire damage.
Science is done by quantity
Extract with 15 common samples
Complete missions with a difficulty level higher than 3 to maximize sample acquisition efficiency. The lower the mission difficulty, the fewer samples available, necessitating thorough exploration. It’s unnecessary to personally extract with the samples; if a single team member boards the extraction ship with 15 or more samples, all participants receive credit.

Samples are a diver’s best friend
Extract with 15 rare samples
Similarly to the previous achievement, focus on missions with a difficulty level of 7 以上. Thoroughly explore every minor point of interest and ensure boarding the extraction ship. Side objectives such as spore spewers often yield multiple samples.

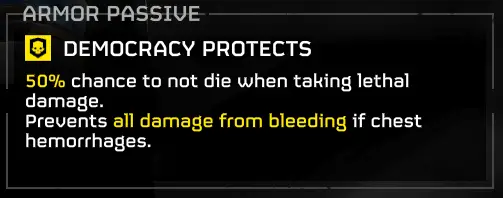
That which does not kill you…
Have all your limbs broken and survive
One method involves allowing a charge to inflict significant damage, potentially launching you into a wall and reducing your health to one hit point, albeit with possible broken bones.
あるいは, equip armor with a passive ability that facilitates surviving otherwise lethal damage.
Enter any mission and attempt to eliminate yourself with a grenade, preferably a G-16 impact grenade for efficiency. があります 50% chance of survival, and explosions at close range can obliterate limbs if you remain in close proximity to the grenade.
Hold my libertea
Ragdoll yourself while using the Jetpack
Enter a mission equipped with the jumpack, それをアクティブにする, and have a teammate melee you while you ascend. Though it may take a few attempts, this method proves to be the simplest. If playing solo, initiate a jump before a charger attacks or an explosion occurs.

The power of Democracy
殺す 25 enemies with one stratagem
Engage in high difficulty missions, particularly defense missions, where enemies swarm rapidly. Utilize weapons such as the 380MM, mini-nukes, hellbombs, napalm, gas strikes, or Gatling barrages. Focus on causing singular massive explosions or creating persistent fields of damage. Group enemies on their own drop points, including nests, dropships, and outposts, to efficiently fulfill this objective.
The Tough Ones

Let’s call it a draw
Shoot both arms off a hulk, then extract
Participate in an Eradication mission with a difficulty level of 4 以上, focusing on robotic enemies. Equip a railgun (the weapon, not the railcannon stratagem) and eliminate foes until the mission objective is achieved. その後, await the spawning of a hulk enemy and target its arms with railgun rounds until they are both severed. Once accomplished, extract from the mission. このタスクは比較的簡単です, with the primary challenge lying in avoiding accidentally destroying the hulk while dispatching its comrades or preventing teammates from inadvertently eliminating it prematurely.
Caught them by supplies!
Kill a Charger with the resupply pod
Equip a railgun, and optionally an EMS strike for increased assurance. Fire two to three shots into the front leg of the target charger. その後, deploy your resupply, またはその代わりに, throw an EMS strike followed by the resupply. It’s advisable to position the resupply near a wall and lead the charger around until it collides with the wall, momentarily stunning it and potentially causing it to flatten. Any weapon capable of penetrating heavy armor can sufficiently weaken the charger, but three railgun shots typically leave it vulnerable enough for a fourth shot to secure the kill.
Hold my primary, im going in!
Complete a full Hard difficulty mission or higher without anyone firing their primary or support weapon
This achievement can be accomplished either solo or through coordinated communication with teammates. Eliminate targets using grenades, stratagems, or environmental hazards. しかし, it’s crucial to refrain from firing any primary or support weapon shots, as this action will nullify the achievement. Opt for easy and quick mission types such as Hatchery destruction or Blitz. Disregard side objectives and prioritize swift completion of the main objective before extracting. Any sidearm will suffice for this task.

It’s the only way to be sure…
持っている 6 orbital barrage stratagems in the same place at the same time
This achievement is most efficiently tackled with a team of 3-4 選手, although it’s feasible with just 2. Each member should equip themselves with a selection of orbital stratagems, 含む:
- Precision Strike
- Gatling Barrage
- Airburst Strike
- 120MM HE Barrage
- 380MM HE Barrage
- Walking Barrage
しかし, it’s advisable to exclude Orbital Laser and Railcannon Strike from the strategy, as the former dissipates quickly after deployment, and the latter tends to stray off target.
Coordinate with your team to unleash all orbital stratagems simultaneously in a concentrated area. This overwhelming barrage should trigger the achievement. It’s particularly amusing to execute this tactic against a level 1 mission Brood Commander.

入ってきました 360 秒!
Complete a full Extreme difficulty Blitz mission and extract in under 6 分:
Prepare for the mission by equipping light armor and the stamina booster perk. Choose either the jetpack or personal shield generator for your back slot, and equip a grenade launcher as your support weapon. Ensure you have Precision Strikes, 110MM rockets, 500kg bombs, and other quick-damage options capable of taking out nests. Consider armor with the +2 grenades attribute for additional firepower.
Before dropping into the mission, assess the map for areas marked with blotches of red, particularly large ones. Aim to land as close to these as possible to immediately begin assaulting the nests upon touchdown. It’s even viable to eliminate a few nests with your initial hellpod descent, extending the effectiveness of this strategy.
While this strategy can be executed solo, it requires finesse and relies heavily on RNG for nest spawns. Focus on bug missions; engaging bots is not recommended due to their unfavorable mechanics.
Hives possess a more forgiving hitbox for destruction. Upon landing, swiftly acquire your pack and grenade launcher, and rush to dismantle the nests as quickly as possible. 終わったら, make a beeline for the extraction point. Your objective is to traverse the map in a straight line, eliminating nests along the way. If you become sidetracked or diverted to an obscure corner, consider restarting depending on the remaining time.
When operating with a team, designate one member to head straight for the extraction point from the outset. Keep in mind that the ship takes 2 minutes to arrive, giving you exactly 4 minutes to eradicate all nests. Commencing extraction at 4:01 into the run renders the attempt unsuccessful. Beware of SOS beacons, resupply pods, and team reinforcements, as they can inadvertently destroy nests. If you deplete your grenade supply, consider sacrificing yourself to respawn and resume the assault.
これが今日私たちがこの目的で共有するすべてです ヘルダイバー 2 ガイド. このガイドは元々、次の者によって作成および執筆されました。 BEASTESS 🐺. このガイドを更新できなかった場合, これに従って最新のアップデートを見つけることができます リンク.