- タイトル: 予告
- 発売日:
- 開発者:
- 出版社:
Information about FOREWARNED is still incomplete. これを使用してゲームの詳細を記入するのにご協力ください。 お問い合わせフォーム.
Are you finding those laser puzzles a bit tricky? 良い, 心配しないで! This guide will help you out by providing all the solutions and some tips to make it super easy for you. そして、何を推測します? This guide is all set for the latest version, v0.75.2. それで, let’s get started and solve those laser puzzles together!
基本
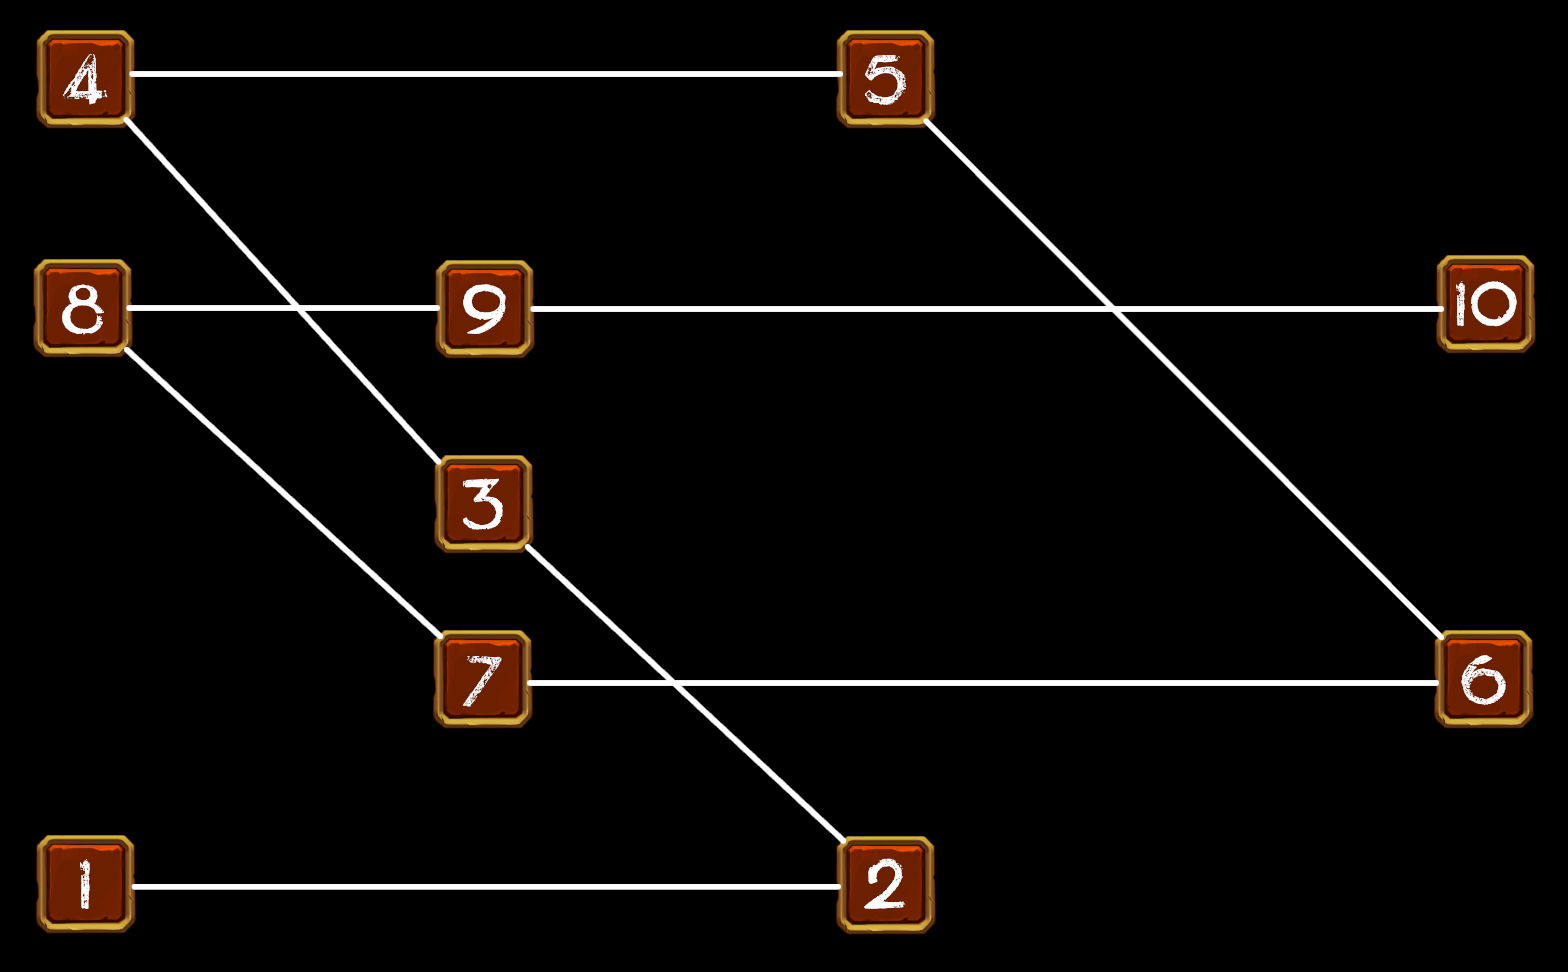
Let’s break it down. このゲームでは, a map determines the outer appearance of the tomb and its variations, while a tomb variation determines the unique look and features inside the tomb. When you’re down in the lower tomb and you pull that blue lever, you’ll encounter the laser puzzles. These puzzles always contain 10 crystals and are consistent within each tomb variation.
If you want to delve deeper into maps, I suggest checking out your comprehensive map guide here: Forewarned Ultimate Map Guide and Tips. 覚えて, even though some puzzles might seem complex initially, most of them can be solved by just rotating crystals to point at the first one they connect to. While some puzzles have multiple solutions, this guide focuses on providing the simplest versions.
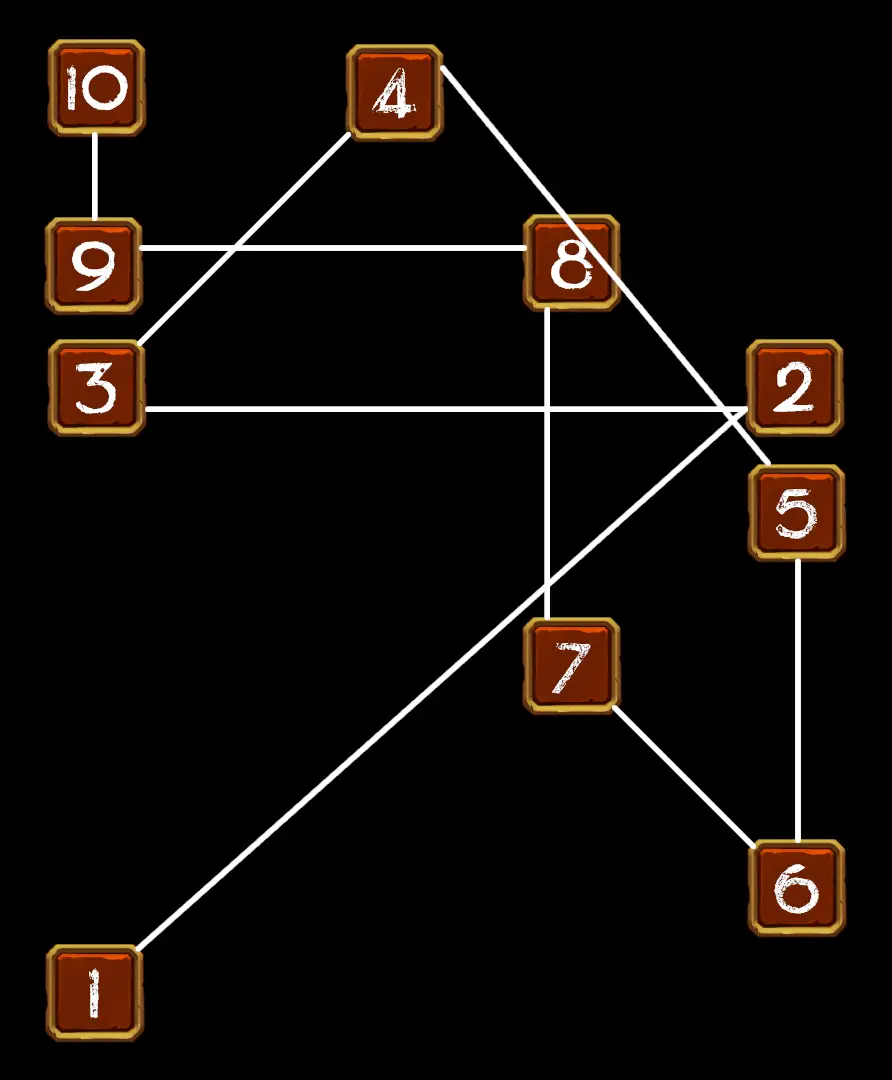
Tomb Variation 1 – Vanilla Tomb
大丈夫, let’s focus on Tomb Variation 1, which includes the maps Cursed Sand Ruins and Crypt of the Great Pyramid.
For these maps, here’s a simple trick to solve the laser puzzle: Start by turning crystal #1 until the laser connects to the second crystal. その後, the other crystals are set up to be solved by directing the laser to the first crystal it connects to. This method should make it much easier for you to conquer these puzzles. 幸運を!
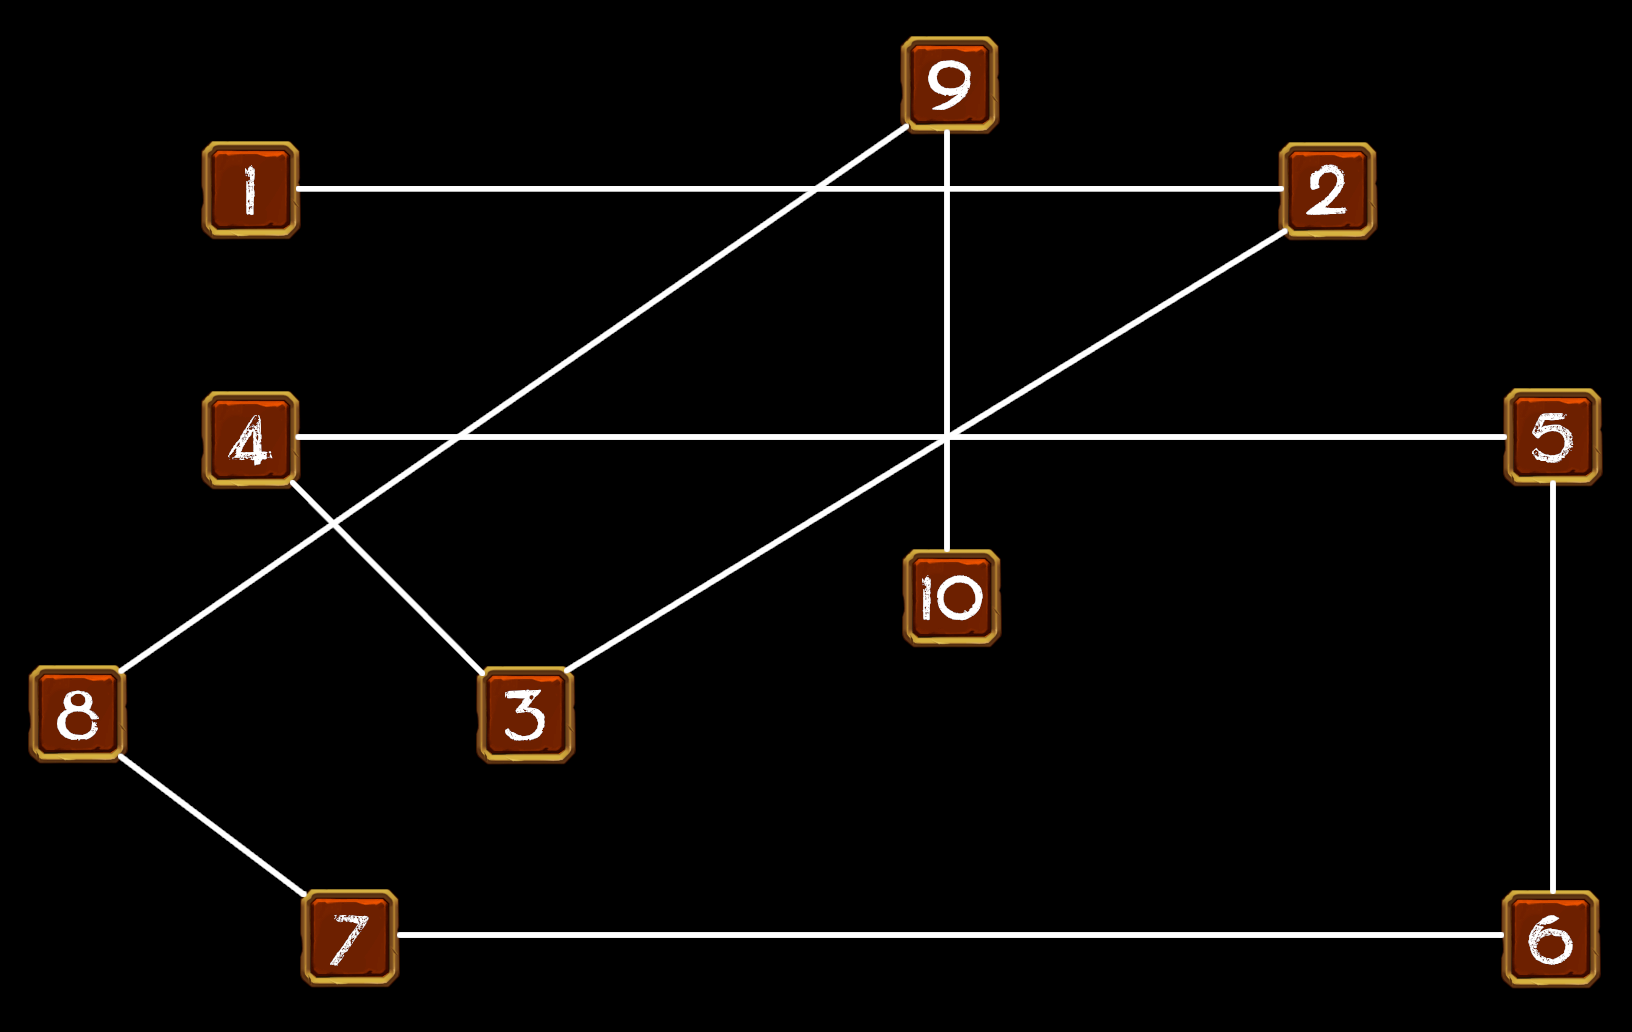
Tomb Variation 2 – Snake Tomb
今, let’s shift our attention to Tomb Variation 2, which includes the maps Temple of the Pharaoh and Undercroft of Akar.
Here’s a handy solution for the laser puzzle on these maps: Rotate the crystals until the laser points at the first crystal it connects to, except for crystal #3, which should skip a crystal. To help you remember this solution, envision the completed puzzle as a clockwise spiral, resembling a snake, which matches the theme of this tomb variation. This should help you breeze through these puzzles!
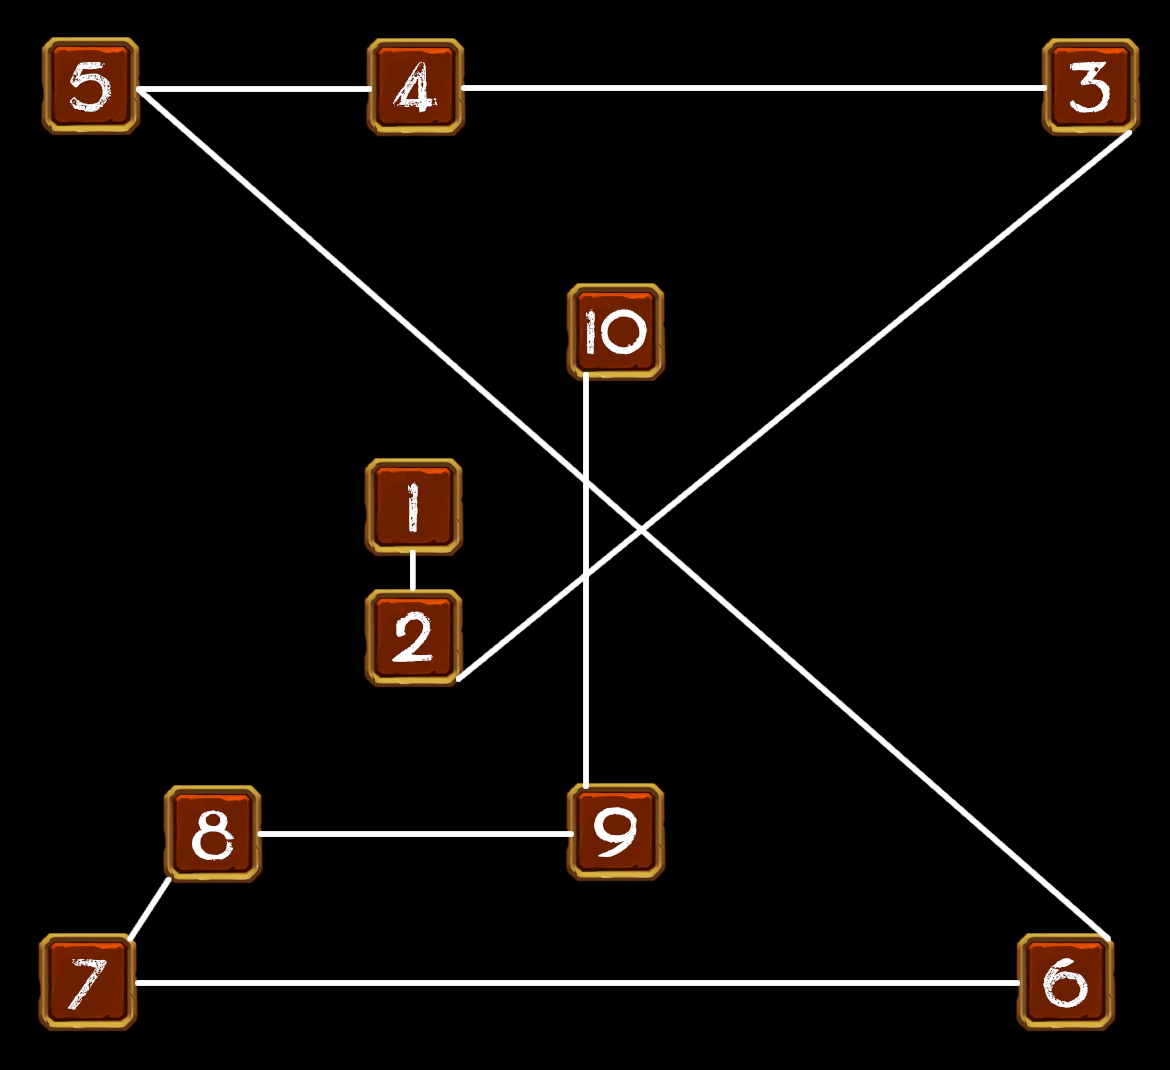
Tomb Variation 3 – Sand-Spider Tomb
Let’s tackle Tomb Variation 3, which includes the maps Sunken Dune Shrine and Hidden City of the Sahara.
Here’s a clever way to solve the laser puzzle on these maps: Rotate the crystals until the laser points at the first crystal it connects to, with the exception of crystal #1 and crystal #3, which should skip a crystal. To help you remember this solution, picture the completed puzzle as an hourglass, symbolizing the sand, which aligns with the theme of this tomb variation. This should make these puzzles a breeze for you!
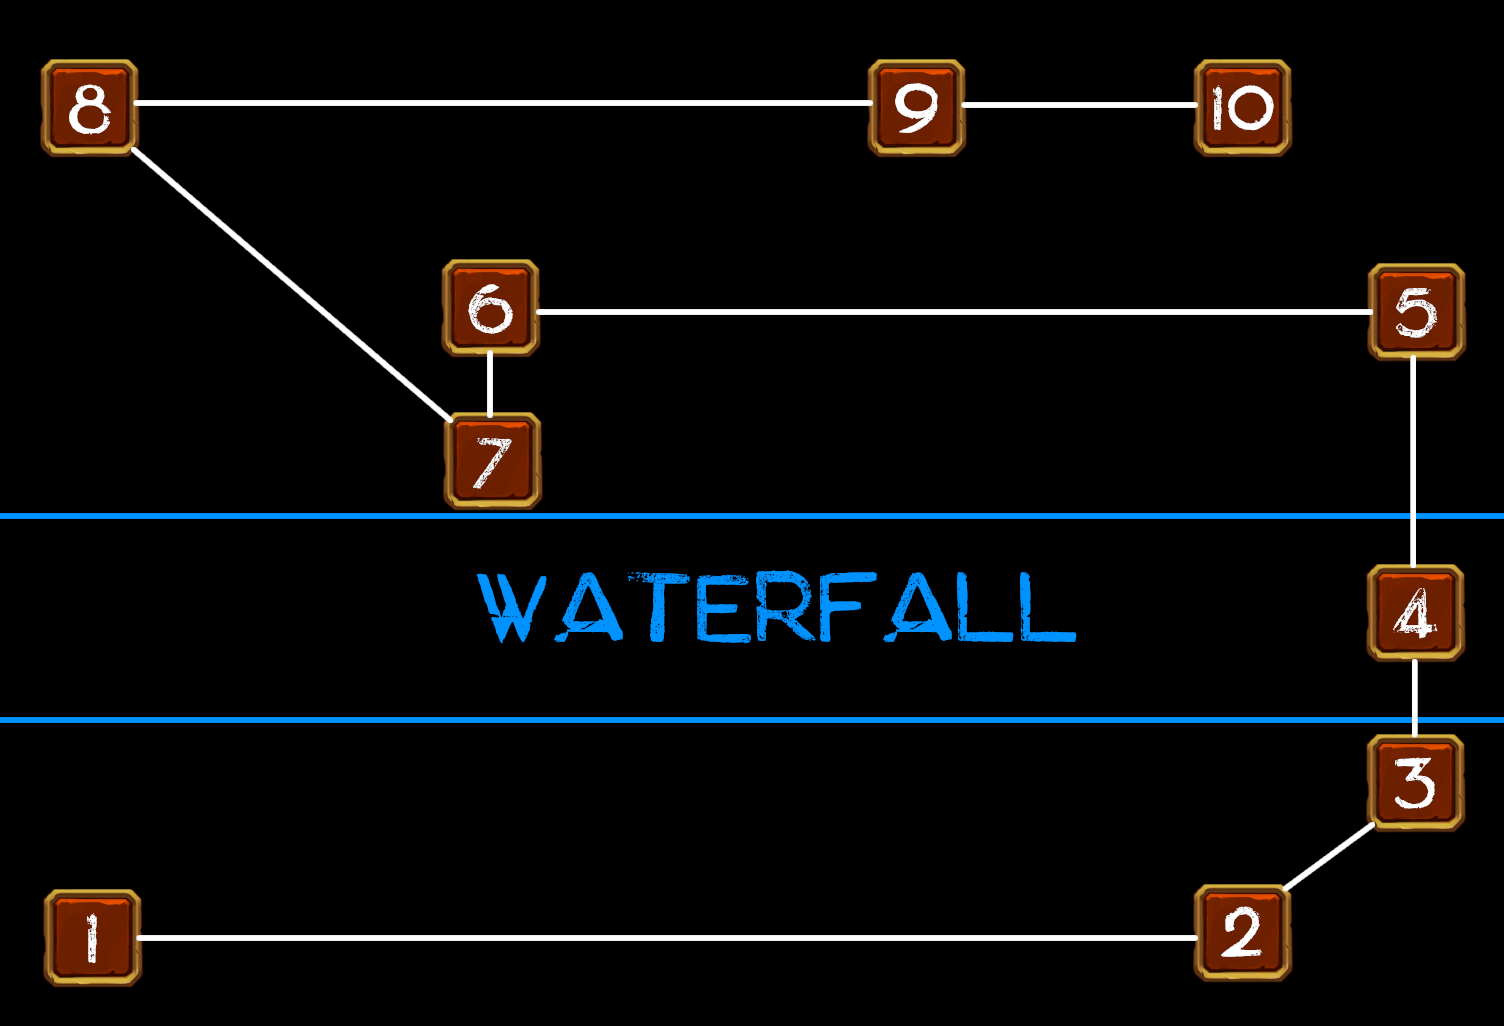
Tomb Variation 4 – オアシス
今, let’s delve into Tomb Variation 4, which includes the maps Sobek Oasis (夜) and Sobek Oasis (日).
To conquer the laser puzzle on these maps, follow this strategy: Rotate the first three crystals until each one connects to the second available crystal. その後, every crystal should connect to the first available crystal the laser reaches.
To help you remember this solution, keep in mind that the laser must pass through the right-hand waterfall. The remaining crystals are designed to be solved by pointing to the first available crystal. This should make these puzzles a walk in the park for you!
Tomb Variation 5 – Underground Palace
素晴らしい, now let’s explore Tomb Variation 5, which includes the maps Dread Valley and Nekhbet Chasm. The solution for this variation is identical to Tomb Variation 1:
To conquer the laser puzzle, start by rotating crystal #1 until it connects to the second crystal the laser points to. その後, the other crystals are arranged to be solved by directing the laser to the first crystal it connects to. This method should work smoothly for these puzzles as well. 幸運を!
これが今日私たちがこの目的で共有するすべてです 予告 ガイド. このガイドは元々、次の者によって作成および執筆されました。 AveryHyena. このガイドを更新できなかった場合, これに従って最新のアップデートを見つけることができます リンク.