

使用する QuartzBeam’s great guide on crop combinations, I compiled a visual guide for easy choosing of crops that provide nutrients for one another. This is basically a cheatsheet – it is assumed you already know about crops, nutrients etc. I made this for myself because I have a problem with words and I figured it would be simpler to just look at the pictures. Every guide I’ve seen lists all combinations as separate entries or describes in many words that you can choose one crop instead of another in specific season – and I don’t really understand, much less remember. I find that these tables make it simpler, also showing which crops can be substituted for others.
I also divided the combinations according to seasons.
General combinations
初め, let’s take a look at the nutrients:
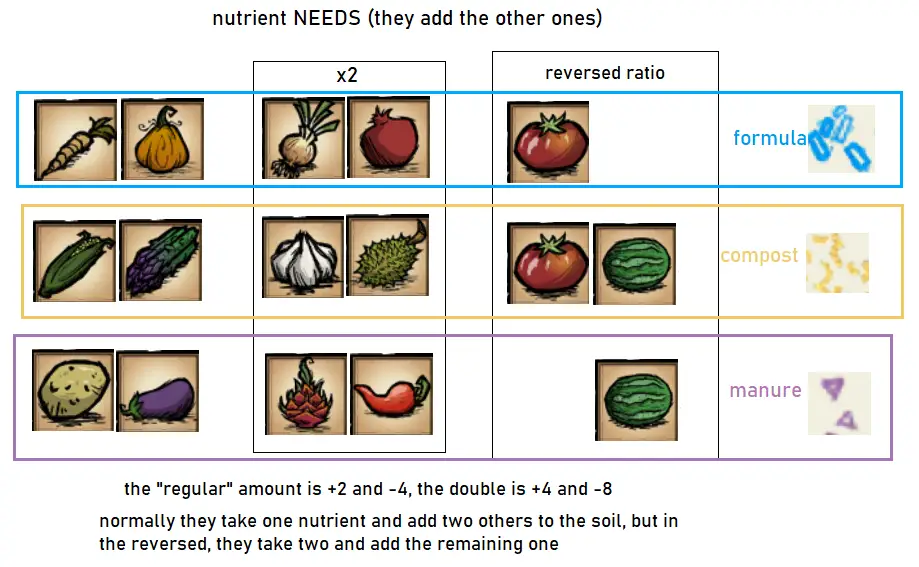
ニンジン, パンプキン, トウモロコシ, アスパラガス, じゃがいも, and Eggplant drain 4 of their respective required nutrient from the soil, and add 2 of the remaining ones (I think this happens once per plant, per stage growth). タマネギ, ザクロ, ニンニク, ドリアン, ドラゴンフルーツ, and Pepper drain 8 of one nutrient and add 4 of the other 2. Toma Root and Watermelon are different – they drain 2 of two nutrients and add 4 of the remaining one.
わかった, so here are the combos that provide nutrients for one another. Grouped into buckets such as 1:1:1, in which you grab whichever crop is more available or more season-fitting from each 行, and you have to include crops from every column within each tile*. Also remember that in order to get family bonus, each crop needs to have 3 plants of the same kind close by. So if you ONLY use one tile, that will be fine nutrient-wise, but in the 1:1:1 設定, you’ll still be getting lack of family stress (not in the 1:1, けれど!).
*I think that wording is actually wrong. You have to include plants from each ROW, but you can choose which one 内で each row. So like…you have to include all rows, but you have a choice of columns.
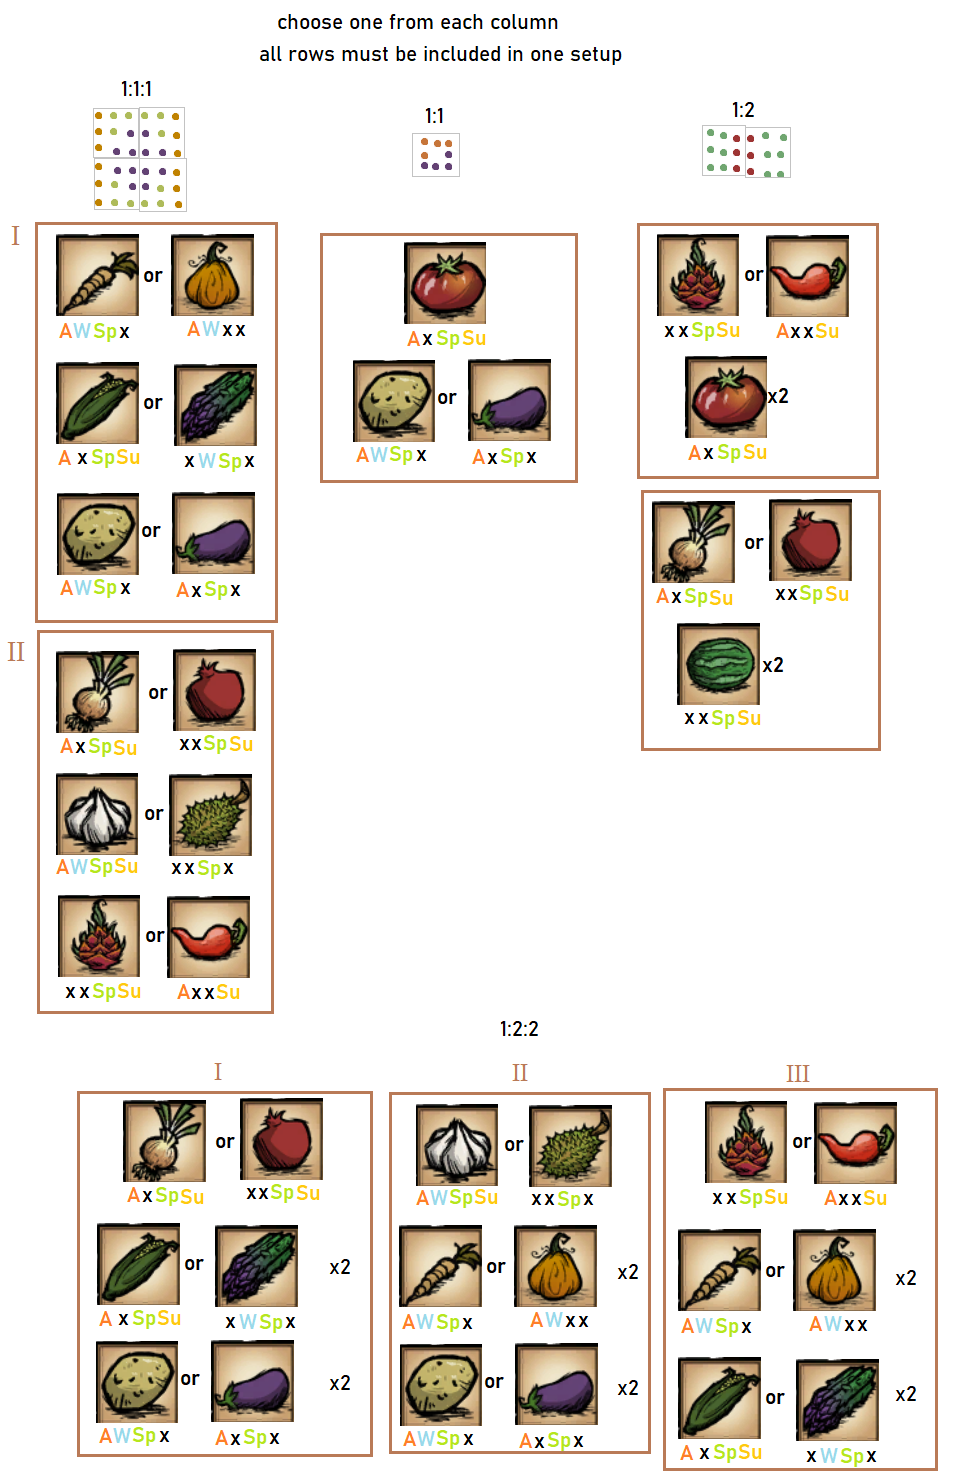
Provided are also examples of layouts (as coloured dots), also included in QuartzBeam’s quide. For more I recommend Iota’s spreadsheet. Could be especially useful for the weird 1:1:2 または 1:2:2 combos.
また, the letters below each crop show their preferred seasons, but you probably figured that out.
秋
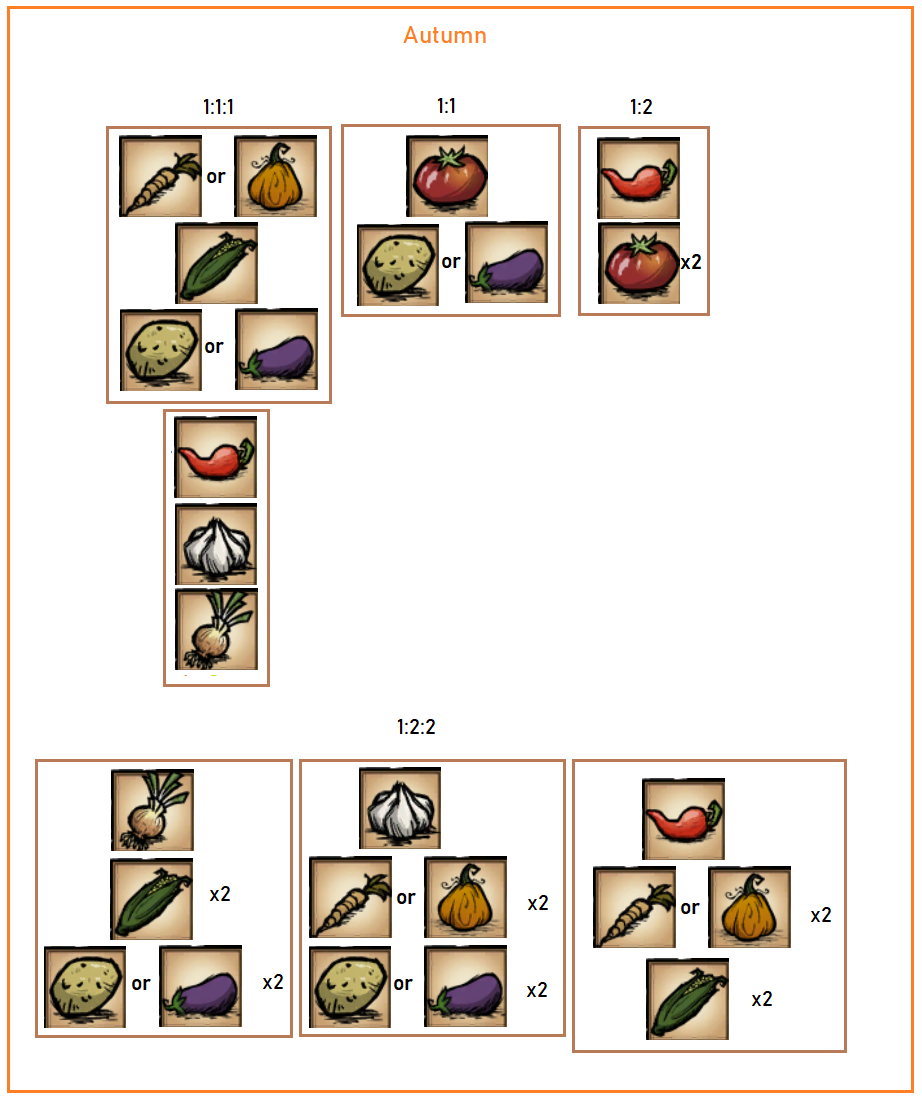
So in the first example, you can use Carrots OR Pumpkins (preferably not both to increase the family value), they will require formula, while providing compost and manure. Requiring compost, providing formula and manure, we’ve only got Corn for this season. As seen before, Asparagus is in the same nutrient category, but it’s not happy in Autumn. But of course you can still use it and it’s better to use it than have those nutrients unbalance. And then for needing manure, but deploying formula and compost, we can choose from Potato and Eggplant. This gives us 4 combinations just from this first 1:1:1 バケツ. 今, we can choose any of the other layouts, remembering to choose one crop from each row (if there’s a choice).
冬
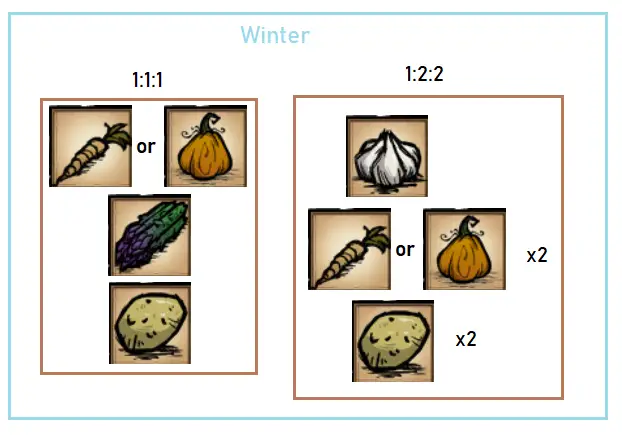
I made the whole 1:2:2 section because I wanted to find a combo for Garlic and there wasn’t one. But since it likes Winter, there has to be something, 右?
春
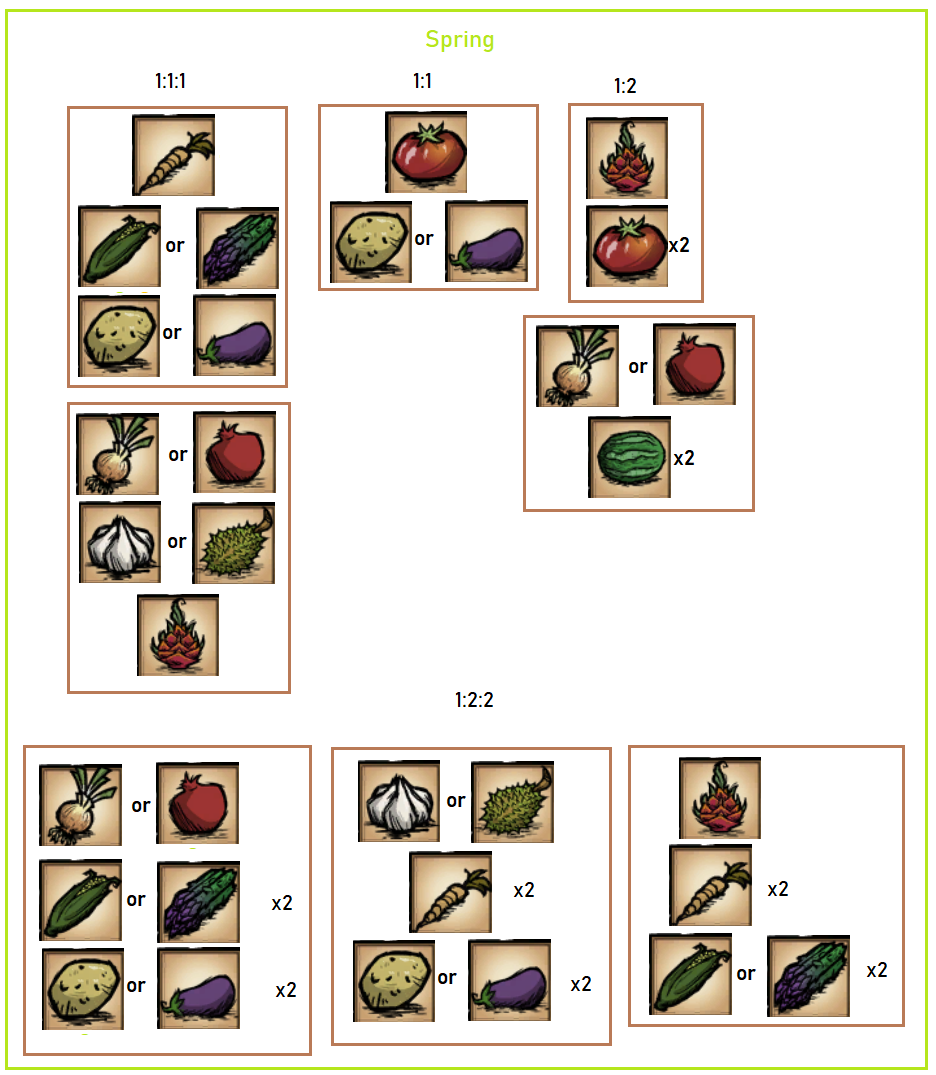
Spring is by far the most versatile. It is also the のみ season preferred by Durians, if for some reason you want to grow them.
夏
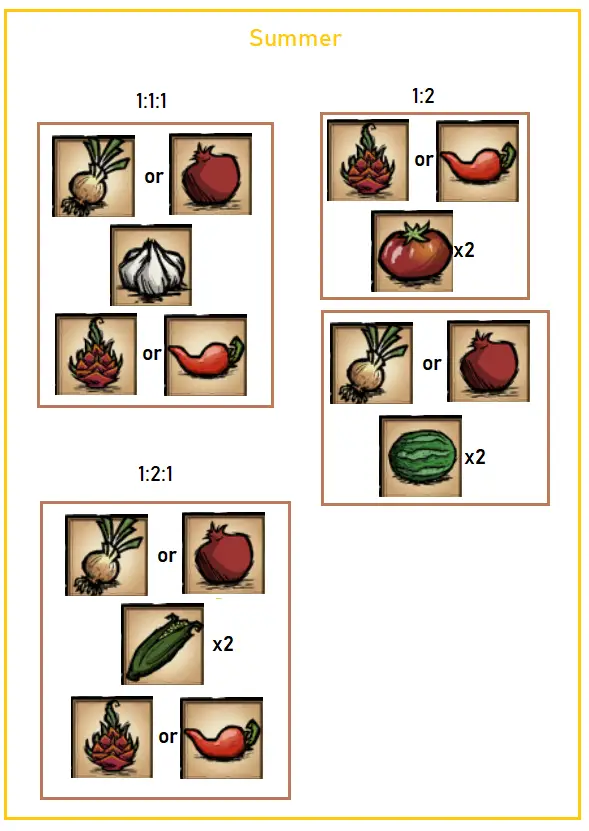
Not that much variety here either.
結論
Basically what I’ve figured out thanks to studying the table, you can combine one of each “通常” crops or one of each “ダブル”. Those are the two 1:1:1 buckets. If you want to combine the “ダブル” と “通常”, you need to double the amount of the latter, hence the 1:2:2. And in the case of Corn in Summer, I didn’t expand it further, but that’s where 1:1:2 入ってくる (1 ダブル, 1 ダブル, 2 通常). I can already figure out that a different combo would be e.g. 2x Carrot/Pumpkin + Garlic/Durian + Dragonfruit/Pepper.
そしてもちろん, you might not even use combinations at all. I think the tables can help in planning crop rotation too.
これが今日私たちがこの目的で共有するすべてです 一緒に飢えないでください ガイド. このガイドは元々、次の者によって作成および執筆されました。 6lancmange. このガイドを更新できなかった場合, これに従って最新のアップデートを見つけることができます リンク.