This guide is about one particular quest called The Teleporter Pyramids. しかし, you can apply the advice in this guide to other quests if you grasp the main idea.
準備
はじめに, you should get the program, and you don’t have to put it on your computer. Just click on このリンク.
次, make three empty folders on your desktop.
今, go into the game and save it separately so you can find it easily in your save folder. The path for that is:
C:\Users\user name\Documents\Larian Studios\Divinity Original Sin Enhanced Edition\PlayerProfiles\Profile Name\Savegames_patch.
ステップ 1
Begin by opening the archive and running ConverterApp.exe.
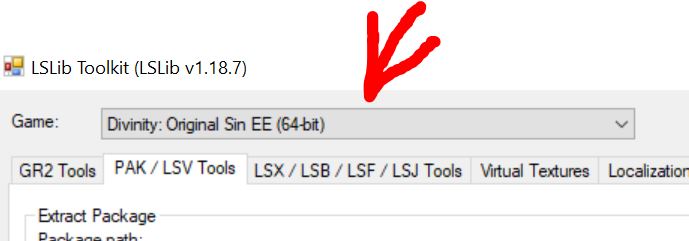
Choose Divinity Original Sin EE from the options.
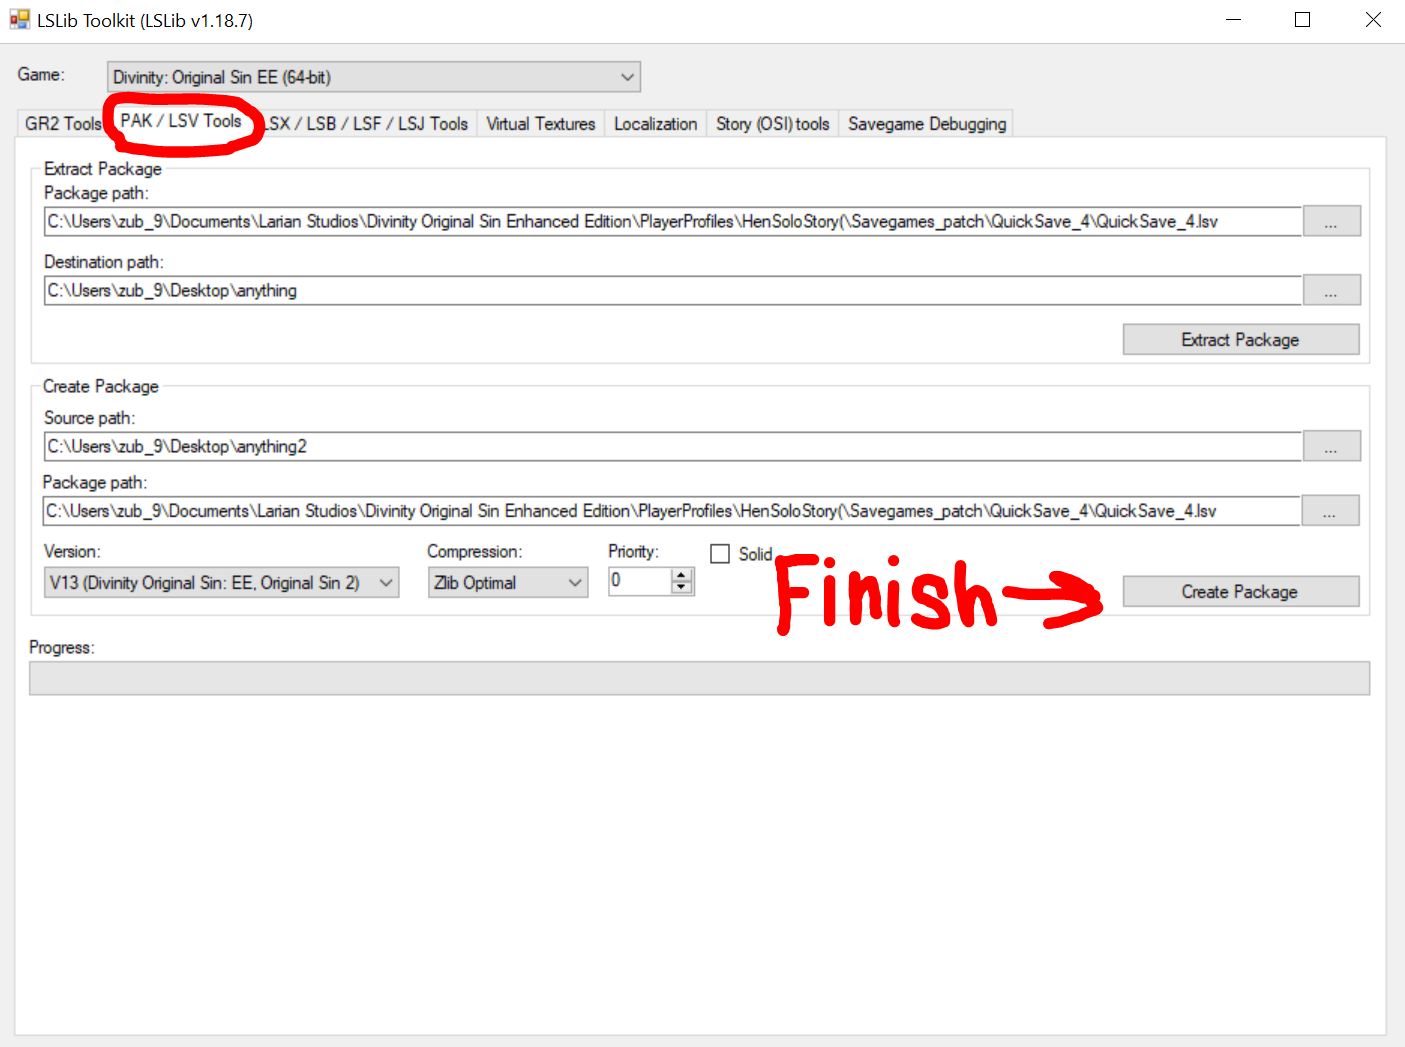
次, go to the PAK/LSV Tools tab and set the values just like in the screenshot:
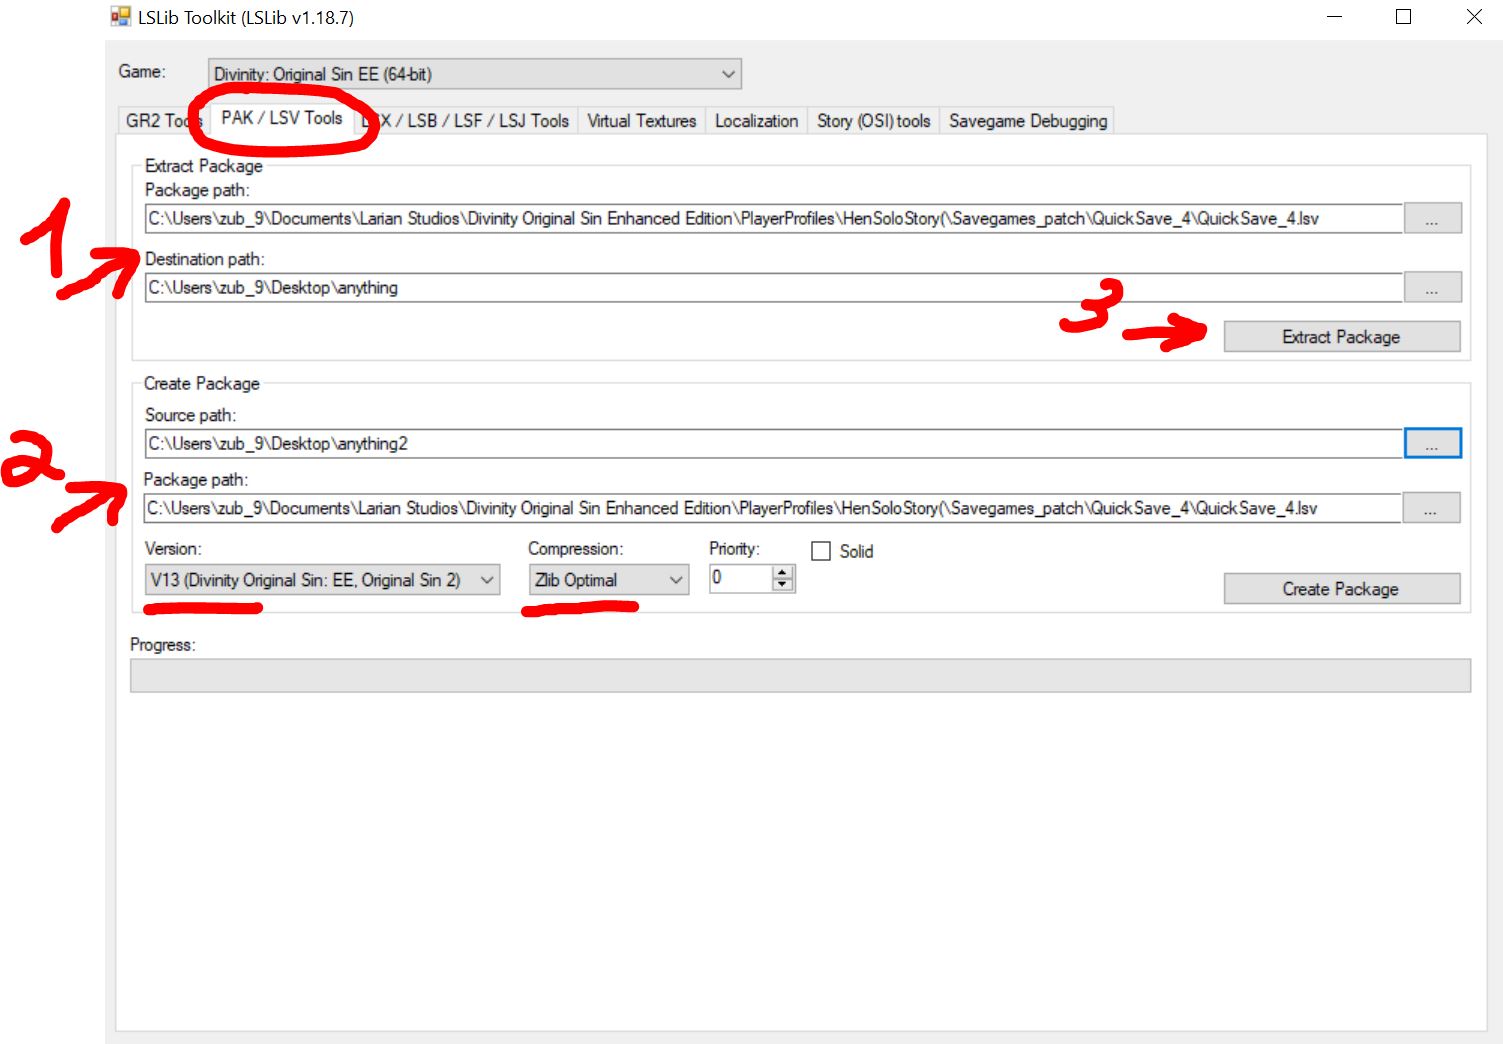
- In the first line, put the path to your save file in the LSV extension. In the second line, add the path to the first empty folder you made on your desktop.
- In the first line, enter the path to the second empty folder you created on your desktop. In the second line, include the path to your save file in the LSV extension.
- 今, ボタンをクリックしてください.
結果として, you’ll find files with the LSF extension in your first folder.
ステップ 2
今, move to the next tab.
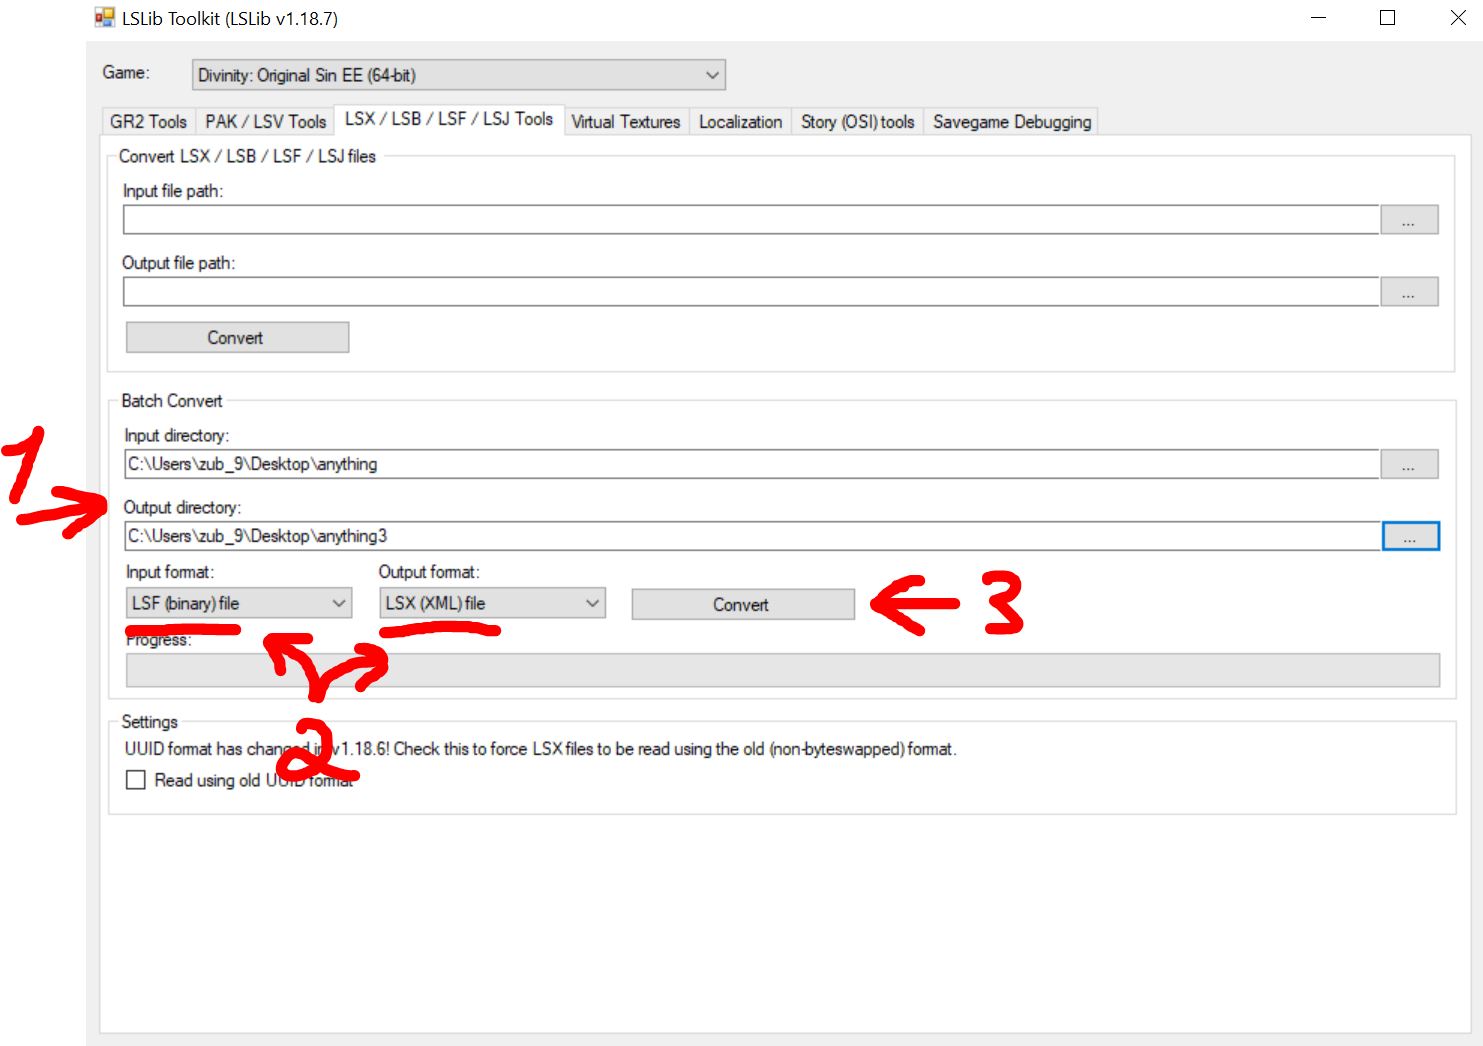
- In the first line, specify the path to your first folder on the desktop. In the second line, specify the path to your third folder, which you should have created on the desktop.
- Set it up just like in the screenshot.
- ボタンをクリックしてください.
結果として, you’ll find files with the LSX extension in your third folder, and you can open them using notepad.
ステップ 3
今, we’re onto the tricky part. Go to the third folder on your desktop and open the globals.lsx file using notepad. Ctrl キーを押します + F to find the keyword associated with the quest, in our case, その “pyramid.” In your case, it could be something else; I can’t say for sure what other quests have similar issues, but they definitely exist.
Once you’ve located the line related to the quest about pyramids, follow the instructions below:
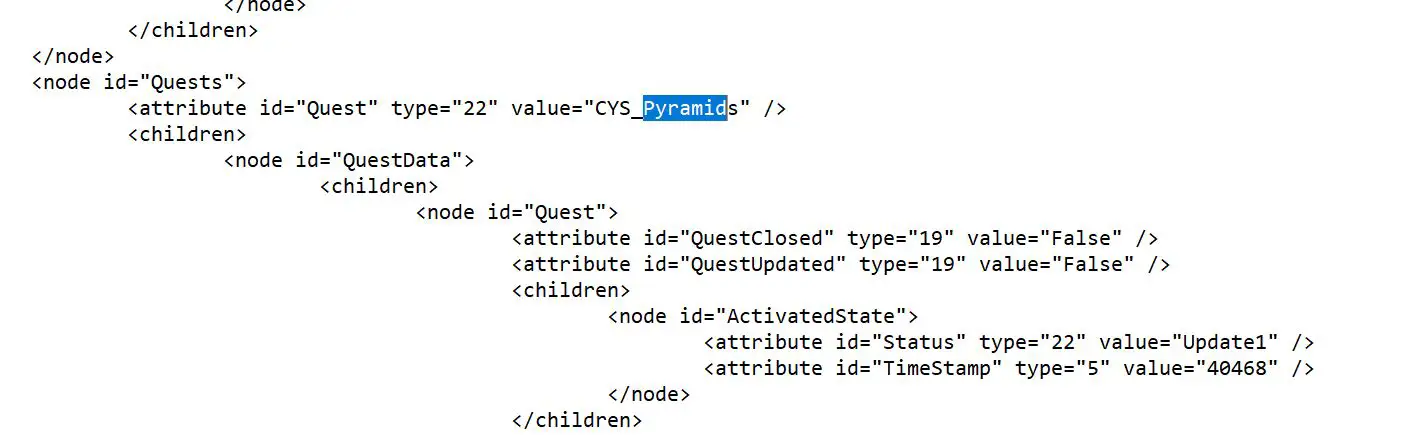
初め, read the explanation under the screenshot below.
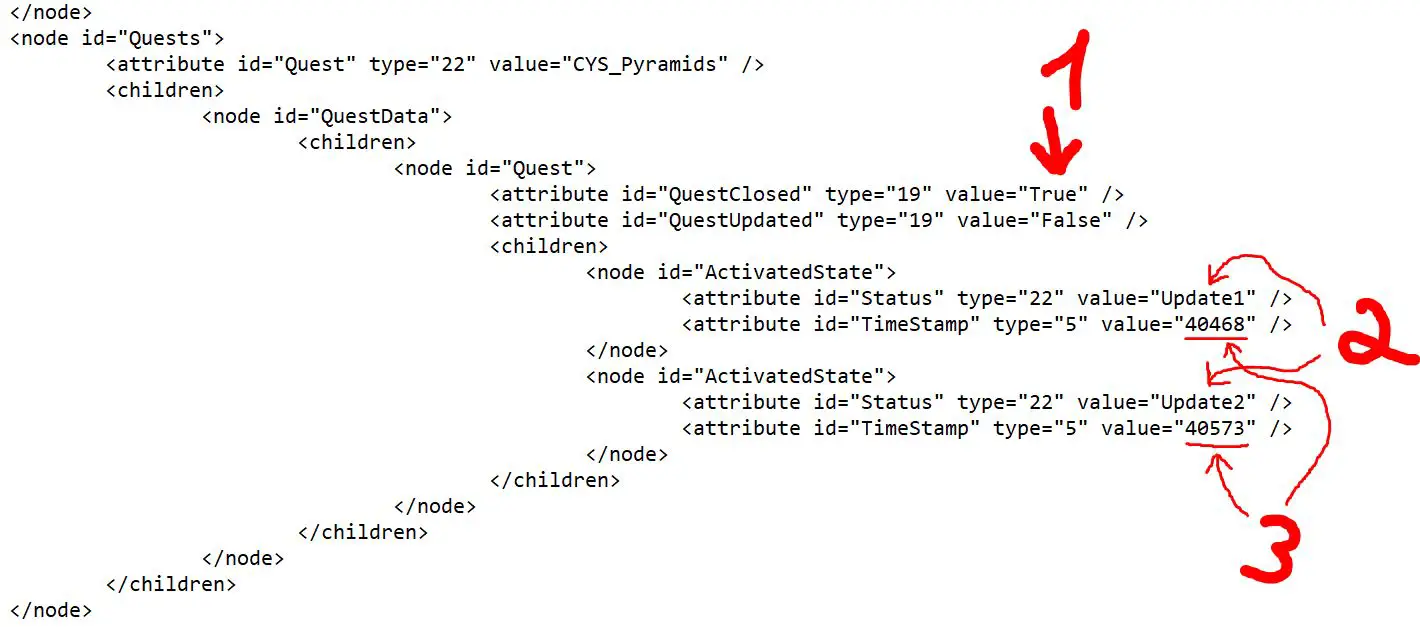
今, we need to insert this text exactly as in the screenshot; any extra spaces or shifts may cause your save file to not start or give an error until you correct it, だから気をつけて.
<node id="ActivatedState">
<attribute id="状態" タイプ="22" 値="Update2" />
<attribute id="TimeStamp" タイプ="5" 値="40573" />
</ノード>
説明
- Setting the “価値” to True will display your quest as completed, but the stage in the journal that should have closed your quest in the usual way will not appear. If you don’t mind this, you can set the value to True instead of False, ファイルを保存する, 閉めてください, and proceed to step 4. しかし, if it’s important to you, continue reading.
- These are the stages that are in the quest. 私たちの場合, the quest has only 2 ステージ. Update1 is the initial stage, Update2 is the stage that completes the quest. 重要: If you are trying to fix a different quest, find out how many stages it has and create a similar line for each stage, changing “Update3,” “Update4,” “Update5,” 等々.
- 数字 40468 と 40573 represent seconds, and you’ll have your own values. They indicate when the quest was taken since the start of the game. 私が使用した 40573 as an example by adding 105 seconds to the previous value. You can estimate how much time has passed between your stages and adjust the values accordingly. It’s not very critical, but it’s better to make sure the difference is at least a minute.
If you’ve read this far, you can scroll up and paste the text with the stage and replace the time value in it. Once everything is done, save the file and close it.
ステップ 4
今, we’ll repeat the first 2 ステップ, but in reverse order.

- In the first line, specify the path to your third folder on the desktop. In the second line, indicate the path to your second folder on the desktop.
- Set it up exactly as shown in the screenshot, but swap their positions.
- ボタンをクリックしてください.
This step has re-encoded the save into an unreadable extension.
終わり
今, let’s go back to our very first tab and finish this. You don’t need to change anything anymore; we already did that in the first step unless you closed the program.
この段階では, we’re archiving the expanded save file back into our usual save.
これが今日私たちがこの目的で共有するすべてです 神性: 原罪強化版 ガイド. このガイドは元々、次の者によって作成および執筆されました。 Hen&Square Pleasure. このガイドを更新できなかった場合, これに従って最新のアップデートを見つけることができます リンク.