- タイトル: クロノクロス: The Radical Dreamers Edition
- 発売日:
- 開発者:
- 出版社:
Information about Chrono Cross: The Radical Dreamers Edition is still incomplete. これを使用してゲームの詳細を記入するのにご協力ください。 お問い合わせフォーム.
Skip all the unnecessary stuff and have straightforward instructions on what’s needed for achievements available through New Game+.
序章
This guide is specifically for New Game+ only. While doing my other playthroughs, I was slightly annoyed at having to follow the same guide as I did for the first playthrough because it lists a bunch of item locations for things I don’t need since New Game+ allows the player to keep quite a bit from the first playthrough. したがって, this guide will skip all the unnecessary low-level elements and items that someone on New Game+ will not need. それ’ll skip character recruitments with the exception of branching path characters. 私’ll list things that need to be done to get achievements because let’s be honest, most people are playing the game more than once for more than just the gameplay. Having Chrono Cross on that 100% completion showcase will look damn fine.
How To New Game+
At the end of your first playthrough, you should have saved the file after the credits. Once on the title screen again, press CONTINUE, then select that save file. The option for New Game+ is there. If you’re paranoid about messing something up, there are plenty of save spots, so utilizing multiple saves isn’t a problem. You’ll know that you’re on a New Game+ file if you have to summon stars and items from the first playthrough. そうしないと, you accidentally started a regular new game. Story-related items will not be among the items carried over from the first playthrough.
Achievements Covered
Achievements Covered Include:


Permanently Recruiting Harle

シンプルです, 本当に. You have to beat the game while Harle is still in your party and SAVE, then continue from that save file. それから, when you use the Chrono Cross in the Dimensional Vortex, she’ll be among the others. Just do this on one of your playthroughs while recruiting other characters you haven’t before. 例えば, I did this on my second playthrough while recruiting Guile, then choosing NOT to save Kid to recruit those characters. それから, upon using the Chrono Cross on my third playthrough after getting Pierre, voilà: The Recruiter 成果.
始まり
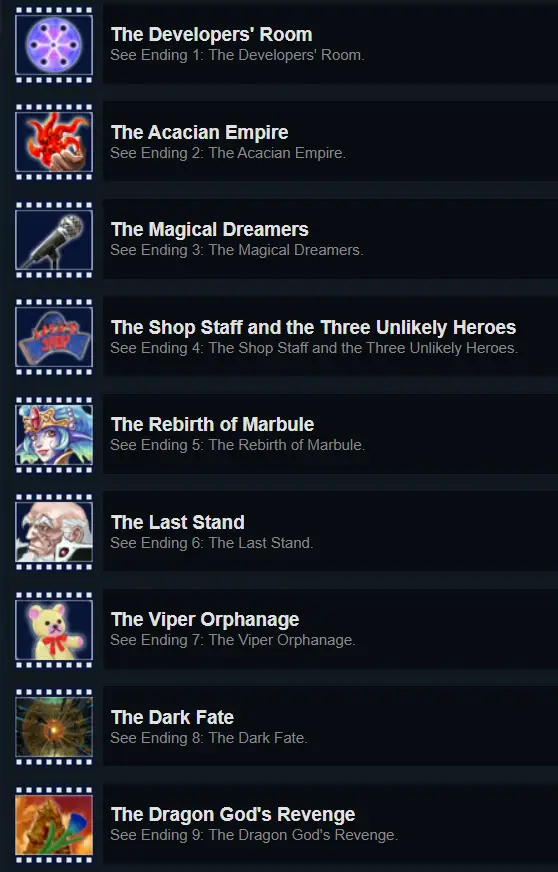
- Right from the start when Serge wakes up, go to Opassa Beach, use the Time Egg at the purple wormhole, and fight the Devourer of Time for Ending #1 and its correlating achievement: The Developers’ 部屋. Suggestion: Equip a Red Brooch on Serge to prevent confusion, as it is definitely the most annoying status effect in the fight without anyone to cure Serge of it. Important info: You have until talking to Leena on the pier to do this or you’ll miss the chance to do so until another playthrough. Do not recruit Poshul yet, as Serge needs to fight alone to obtain Ending #1.
- To progress the story, get the Komodo Scales at Lizard Rock for Leena, then talk to her at Opassa Beach.
- After Serge enters Another World the first time, go to the purple wormhole and fight the Devourer of Time for Ending #2 and its correlating achievement: The Acacian Empire. Important info: You have until before you reach Termina to get this ending.
- To advance the story, talk to Leena (Another World) at the pier in Arni Village, then visit Cape Howl to see Serge’s grave. Fight Karsh. Go to Fossil Valley; fight the Shaker Brothers. Go to Termina.
Nikki, Razzly, エンディング #4, & エンディング #3
You can recruit Nikki, Guile, or Pierre. しかし, to get Ending #3, you must recruit Nikki, so I hope you didn’t recruit him in a previous playthrough or you’ll have another playthrough to add to the count to obtain all characters.
- In Termina, talk to the guy polishing the Viper statue for a scene with Kid. Go to Nikki’s ship, get informed that he’s missing, then head to Shadow Forest.
- Get the Aroma Pouch from under the little waterfall cave and lure the blob to the monster blocking the path with pollen. Fight Zoah and the Shakers. Go into the tree and follow the path forward.
- At Viper Manor, go to the stables and feed the “ドラゴンズ” the minimum amount to obtain the manor key. In the manor, fall through the trap by the snake statue. Find the dragoon dining area with Glenn, then the rest area to find the code. Go the treasure room. の “パスワード” is silence. Take the silver pendant from the wall. Go through Luccia’s BS. Return to the snake statue and put in the correct code. Go to the library to fight Marcy. In the main hall, hit the switch on the left side, second-to-last pillar. Ascend to the second level. Go into Viper’のオフィス, examine the Dragon Tear, and fight Lynx.
- When the menu screen comes up, take everything valuable off of Kid since she won’t be in your party for a bit and because Mel’s a little thief.
- At Guldove, choose to save Kid, as you’ll need Razzly for Ending #3 同じように.
- After events with Kid getting poisoned, talk to the shaman at the dragon shrine, then go to Opassa Beach and fight that damn Devourer of Time again for Ending #4. あなた’ll receive the achievement: The Shop Staff and the Three Unlikely Heroes. Important info: You can accomplish this until either Kid is healed or you recruit Razzly.
- In Guldove, go to the bar and talk to the dwarf to receive the Green Tinkler so you can get through the Hydra Marshes.
- Go to Opassa Beach to return to Home World, then head to the Hydra Marshes.
重要な注意事項: To recruit Razzly, you must go rescue her before fighting the hydra. From the first screen in the Hydra Marshes, go to the left where Razzly’s shadow went. Follow the path until you fight a beeba, obtain the Beeba Flute, use the flute in the open area, fight the wingapede, then fall through the broken ground, and fight the pentapus. Rescue Razzly from the cage. ドン’t put her in your party for the hydra fight. After defeating the hydra, examine its corpse for the Hydra Humour.
- Leave Hydra Marshes and go to Opassa Beach to get Ending #3. あなた’ll get the achievement: The Magical Dreamers. Important info: You must have Nikki and Razzly in your party.
- Go back to Guldove to cure Kid and get her back in your party.
Skip to Getting to Fort Dragonia of the guide to proceed.
Pierre or Guile & NOT Saving Kid
For simplicity sake, I’ll write Pierre and Guile’s playthroughs along with ない saving Kid, as recruiting Nikki is required for endings you can only get while also saving Kid.
For Pierre, go to Zappa’s smithy, to the room to the east, and talk to Pierre. Go outside to the south and talk to the child running around. After obtaining the Hero’s Medal, go talk to Pierre again. Go straight to the front gate of Viper Manor.
For Guile, go to the bar in Termina. Talk to Korcha (near the shrine) to get a ride to Viper Manor Bluffs. Climb the bluffs and fight the bird enemies.
- Once you’re at Viper Manor, it’s pretty much the same instructions as the ones on Nikki’s route.
- Once you’re in Guldove, choose not to save Kid.
- Go talk to Korcha in the residential tent (which is to the east of the shop tent). Macha suggests going to the shaman; the Dragon Shrine is all the way to the west. Go to the entrance of Guldove where Macha is waiting.
- Go to the Termina entrance to witness Glenn talking to the flower seller, then return to where Macha is. Both join the party, and now you’ve got a boat.
- Go to Hermit’隠れ家; fight Harle. Talk to Radius.
Continue onto the next section (skip the first bullet), as at this point, それ’s about the same regardless of who you chose at Termina.
Getting to Fort Dragonia
- To advance the story, witness Glenn talking to the flower seller at the entrance of Termina. Go back to Korcha. Head to Burned-out Hermit’隠れ家; fight Harle. Talk to Radius.
- Try to go to Mt. Pyre via boat and you’ll run into the S.S. 無敵, then the ghost ship. Reminder: To get the key needed to advance the story whilst fighting ghosts on the S.S. 無敵, you have to talk to every single pirate until they say they don’t have the key or their dialogue repeats, さもないと, 最後 3 (who are all together) 勝利した’t have it and you’ll have to go searching for whoever you missed.
- After the events on the S.S. 無敵, あなた’ll need the protection of the Water Dragon to get through Mt. Pyre. (ノート: あなたがしなかったら’t help Kid with the Hydra venom, あなた’ll need to go to Guldove to get her and the Astral Amulet now. Doc also joins the party.) Head to Opassa Beach and then head to Water Dragon Isle (Home World) via the guy at the dock in Arni Village. あなたが持っているなら’t recruited Razzly before, bring her along to Water Dragon Isle for extra story-related dialogue.
- After the events on Water Dragon Isle and receiving the Ice Breath, go back to Another World and then to Mt. Pyre. Fight your way through.
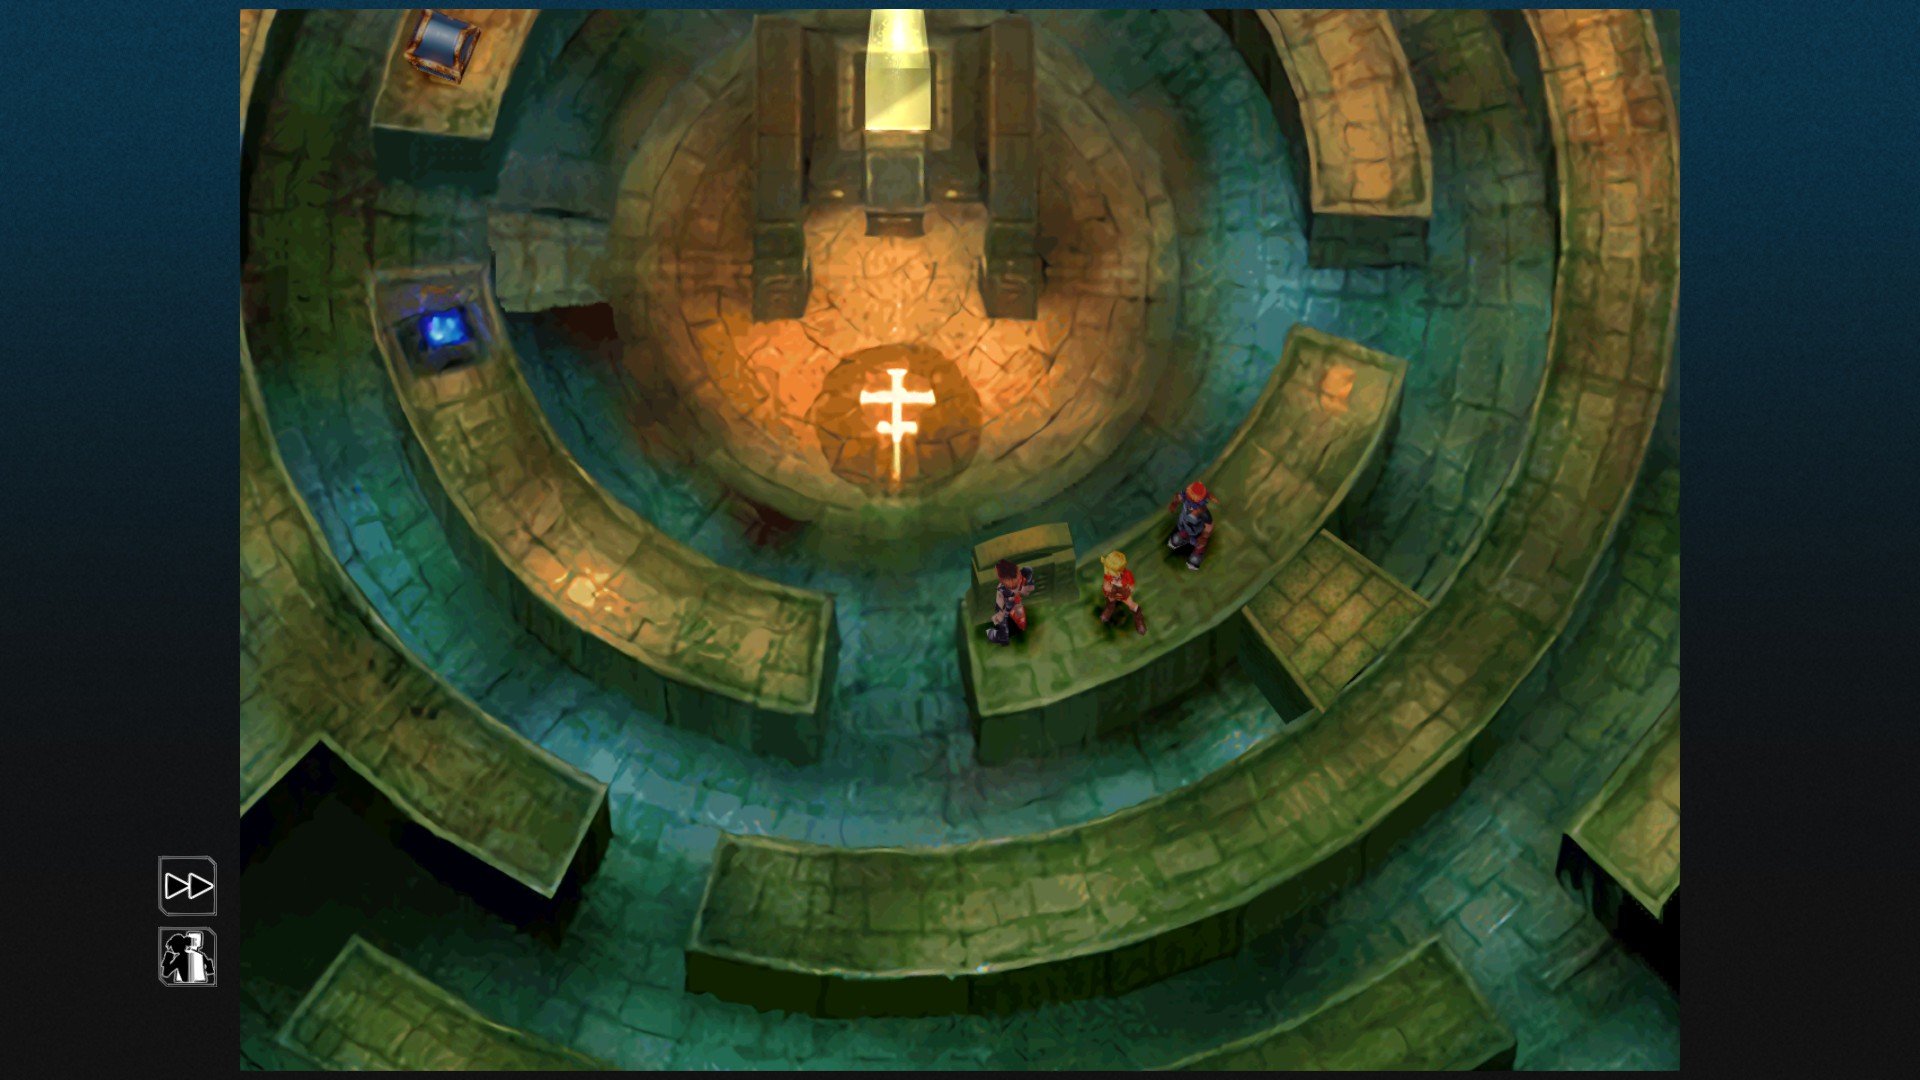
- At Fort Dragonia, the fastest way to get through the puzzles …
Eastern puzzle: The statue always faces north. したがって, if the statue is facing to the left, that makes the right “south.” Aim for the right-side dropdown.
It leads to illuminating the Red Dragon statue.
Northeastern puzzle:
Go to the stairs on the left, then go north and around.
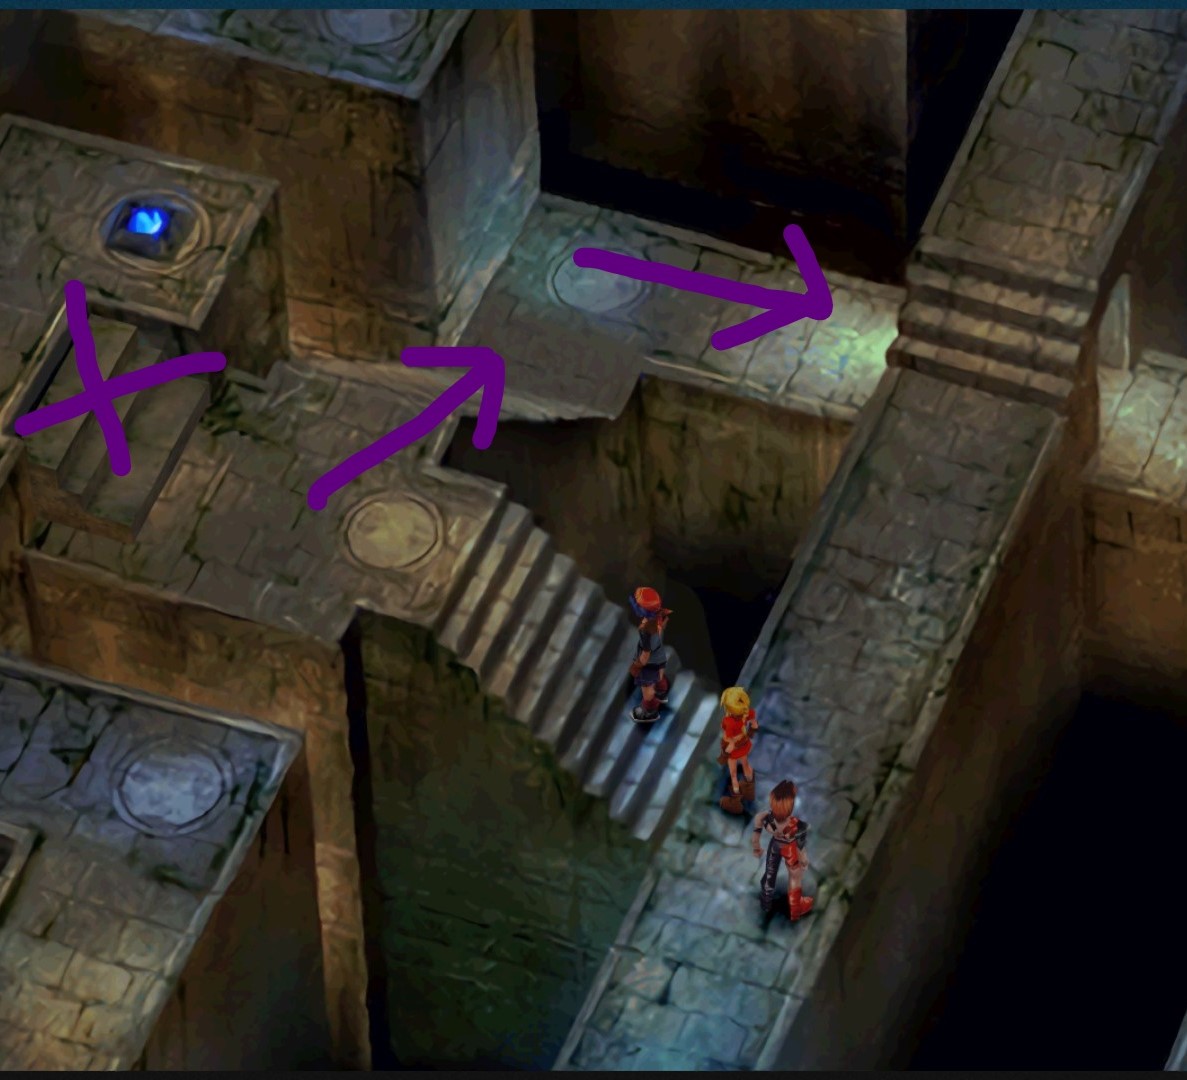
Go around the spiral, then go north and around.
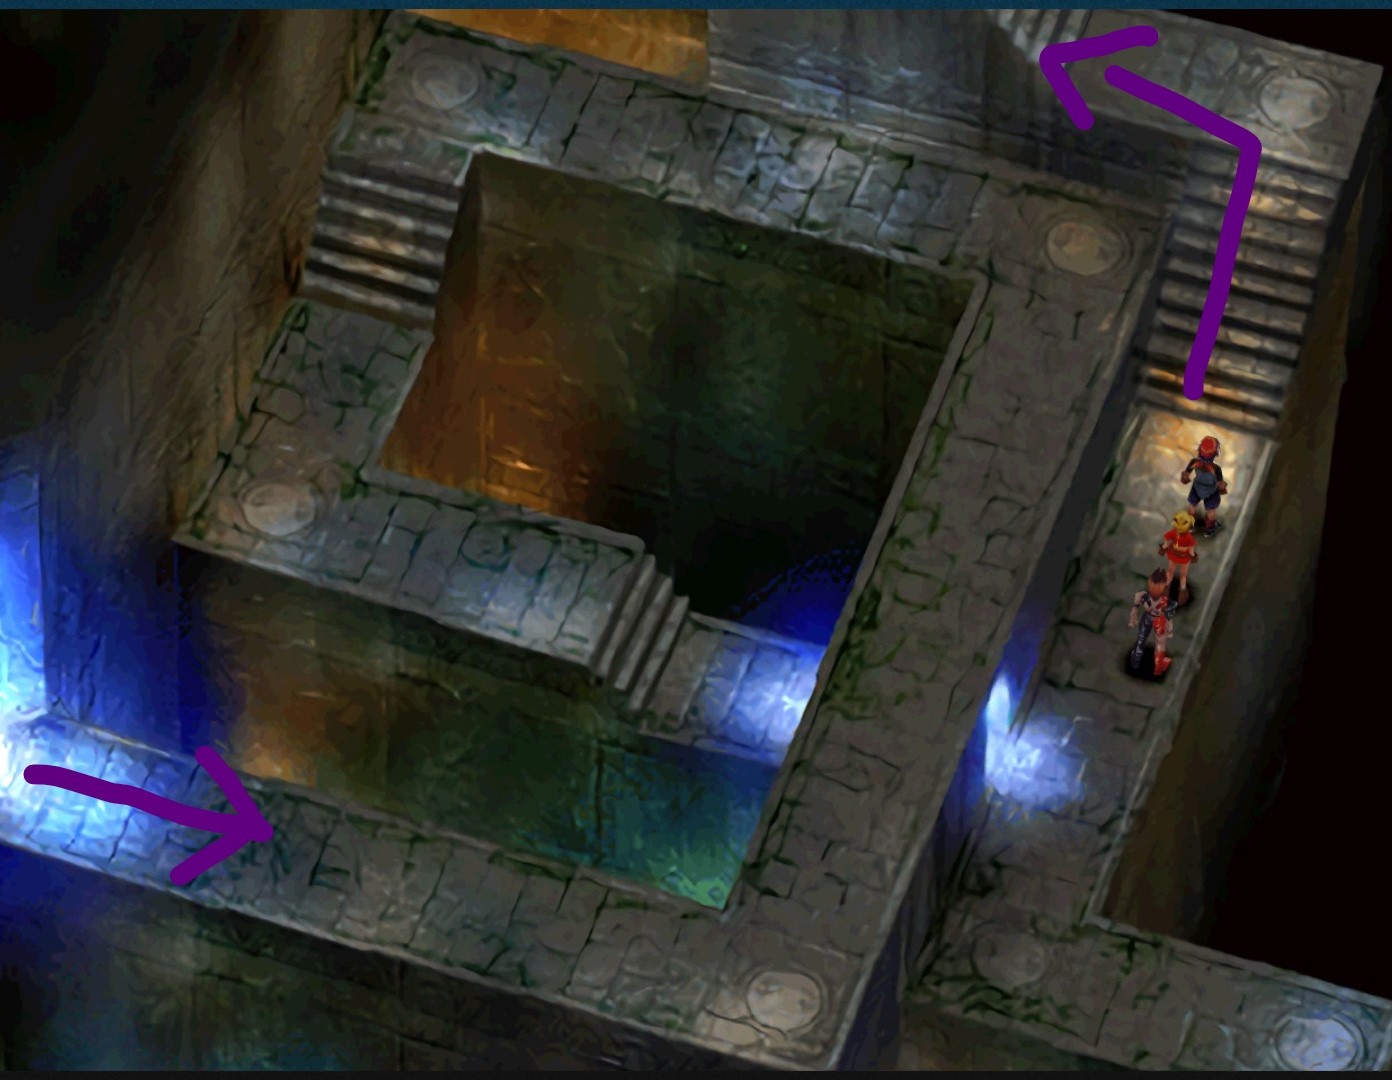
Go up the stairs and around.
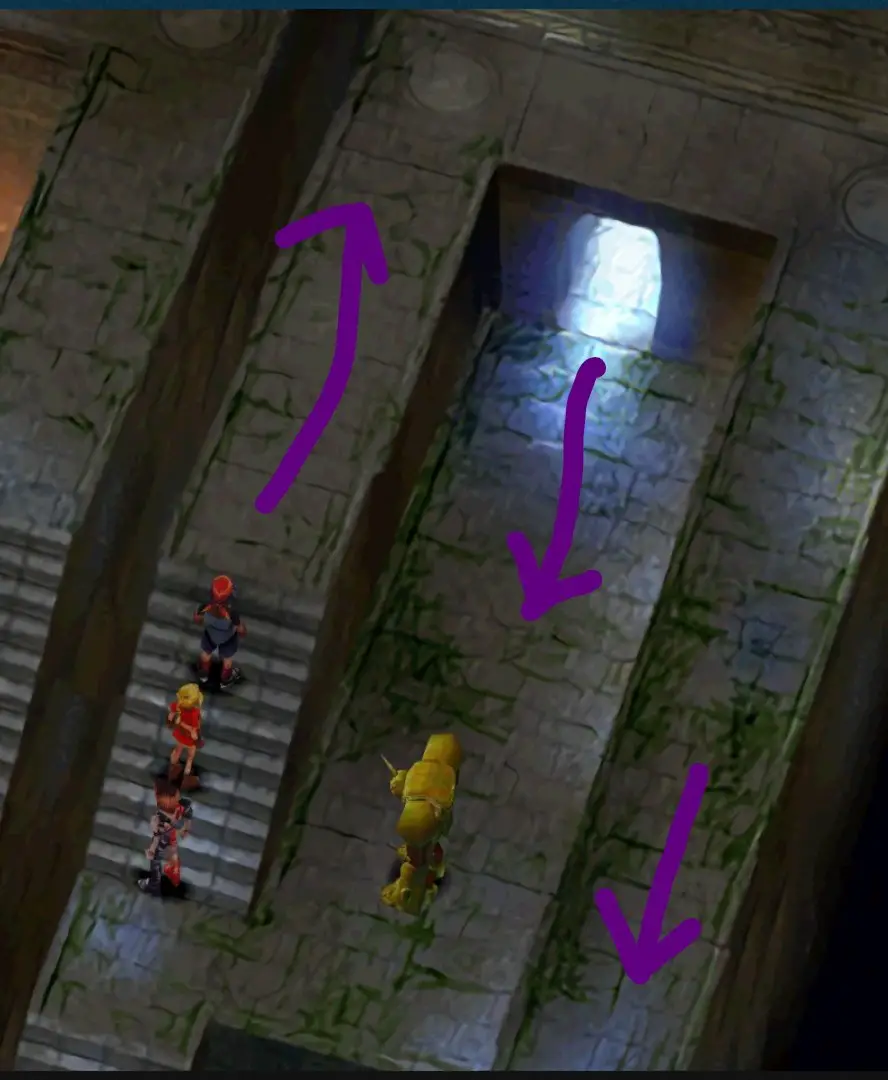
Activate the blue switch, then keep going on the left.
Keep going, then fight the enemy guarding the pillar, あなたも’ll be able to illuminate the Green Dragon statue.
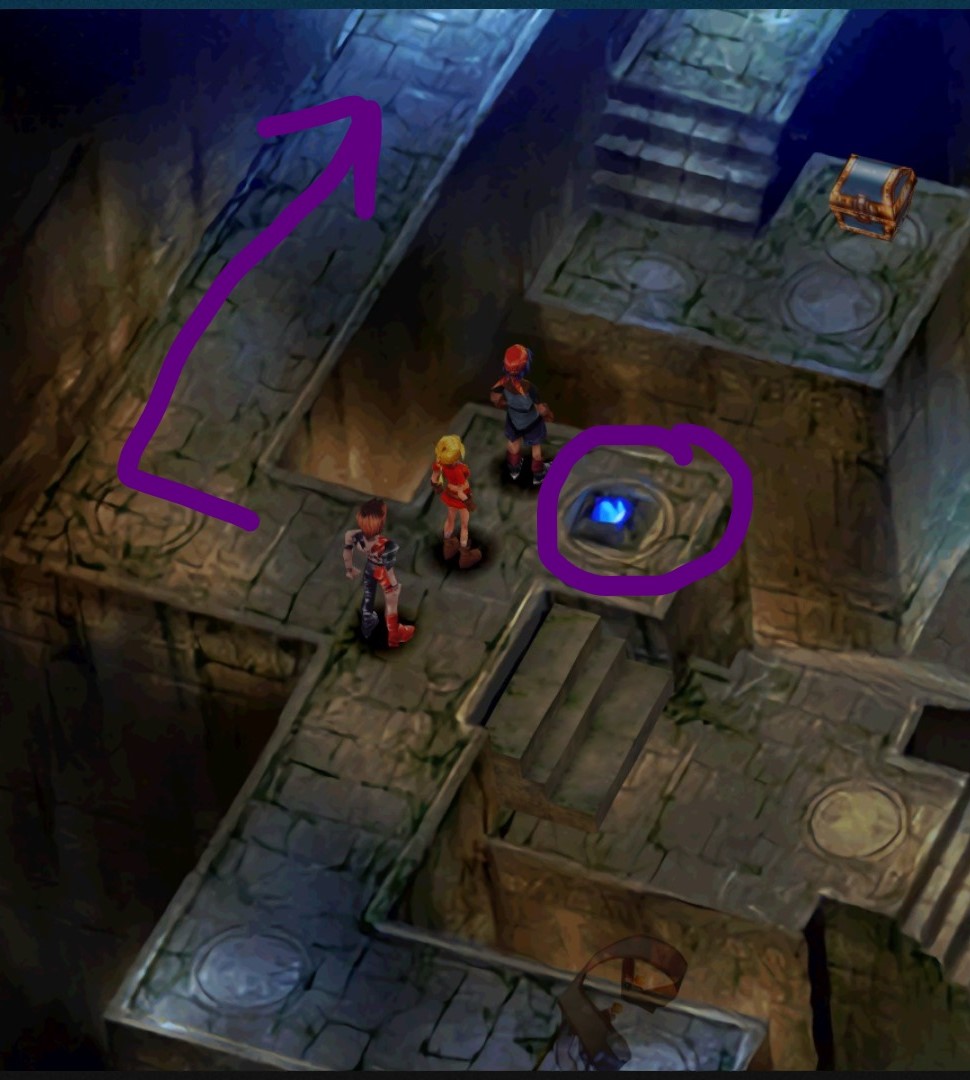
Northwestern puzzle: Mess around with the fake treasure chests until the path leads to the biggest opening with the glowing blue light.

Fight the enemy guarding the pillar, then illuminate the Blue Dragon statue.
Western puzzle: 頭, 体, Tail. Press the blue button to lower stairs, それから: Tail, 体, 頭. Make your way to the switch that lowers the yellow pillar.
Illuminate the Yellow Dragon statue.
Getting to the Tower of Geddon
- After the events at Fort Dragonia, あなた’ll end up in another dimension. Reminders: Knock down the fruit to get into Sprigg’の家. Within the tower, go in the same direction as the faux Serge a few times to escape it.
- You might’ve been like me and didn’t use Harle much on the first playthrough (because she’s black elemented, so Serge as Lynx has to share black elements if they’re both in the party). On your 2nd playthrough, you should be able to use Harle’s level 7 tech as soon as you get her and get the achievement: Lunacy. Just be sure to do this before Harle leaves your party.
- Leave the Hydra Marshes and go to Opassa Beach. Fight the Devourer of Time for Ending #5 and its correlating achievement: The Rebirth of Marbule. Important info: You have until before you rescue Riddel to get this ending.
- To advance the story, try to use the Astral Amulet on the regular wormhole to discover it doesn’t作業. Talk to Serge’s mom in Arni Village, then fight Radius. Go to Termina and talk to Zappa twice to get Smith Spirit again. Try to head to the dock to discover you need to talk to Norris. Go to Viper Manor; talk to Norris. あなた’ll appear in Termina; use the boat at the dock. Go to Marbule; spend the night there. Go to the S.S. Zelbess and go through all the various things there until you can fight the Sage of Marbule and obtain the Fiddler Crab. (ノート: If you want to save Marbule and fight the Black Dragon later, be sure to talk to Nikki in his dressing room and agree to his request.)
- Go to the Dead Sea and use the Fiddler Crab to make Death’s Door appear.
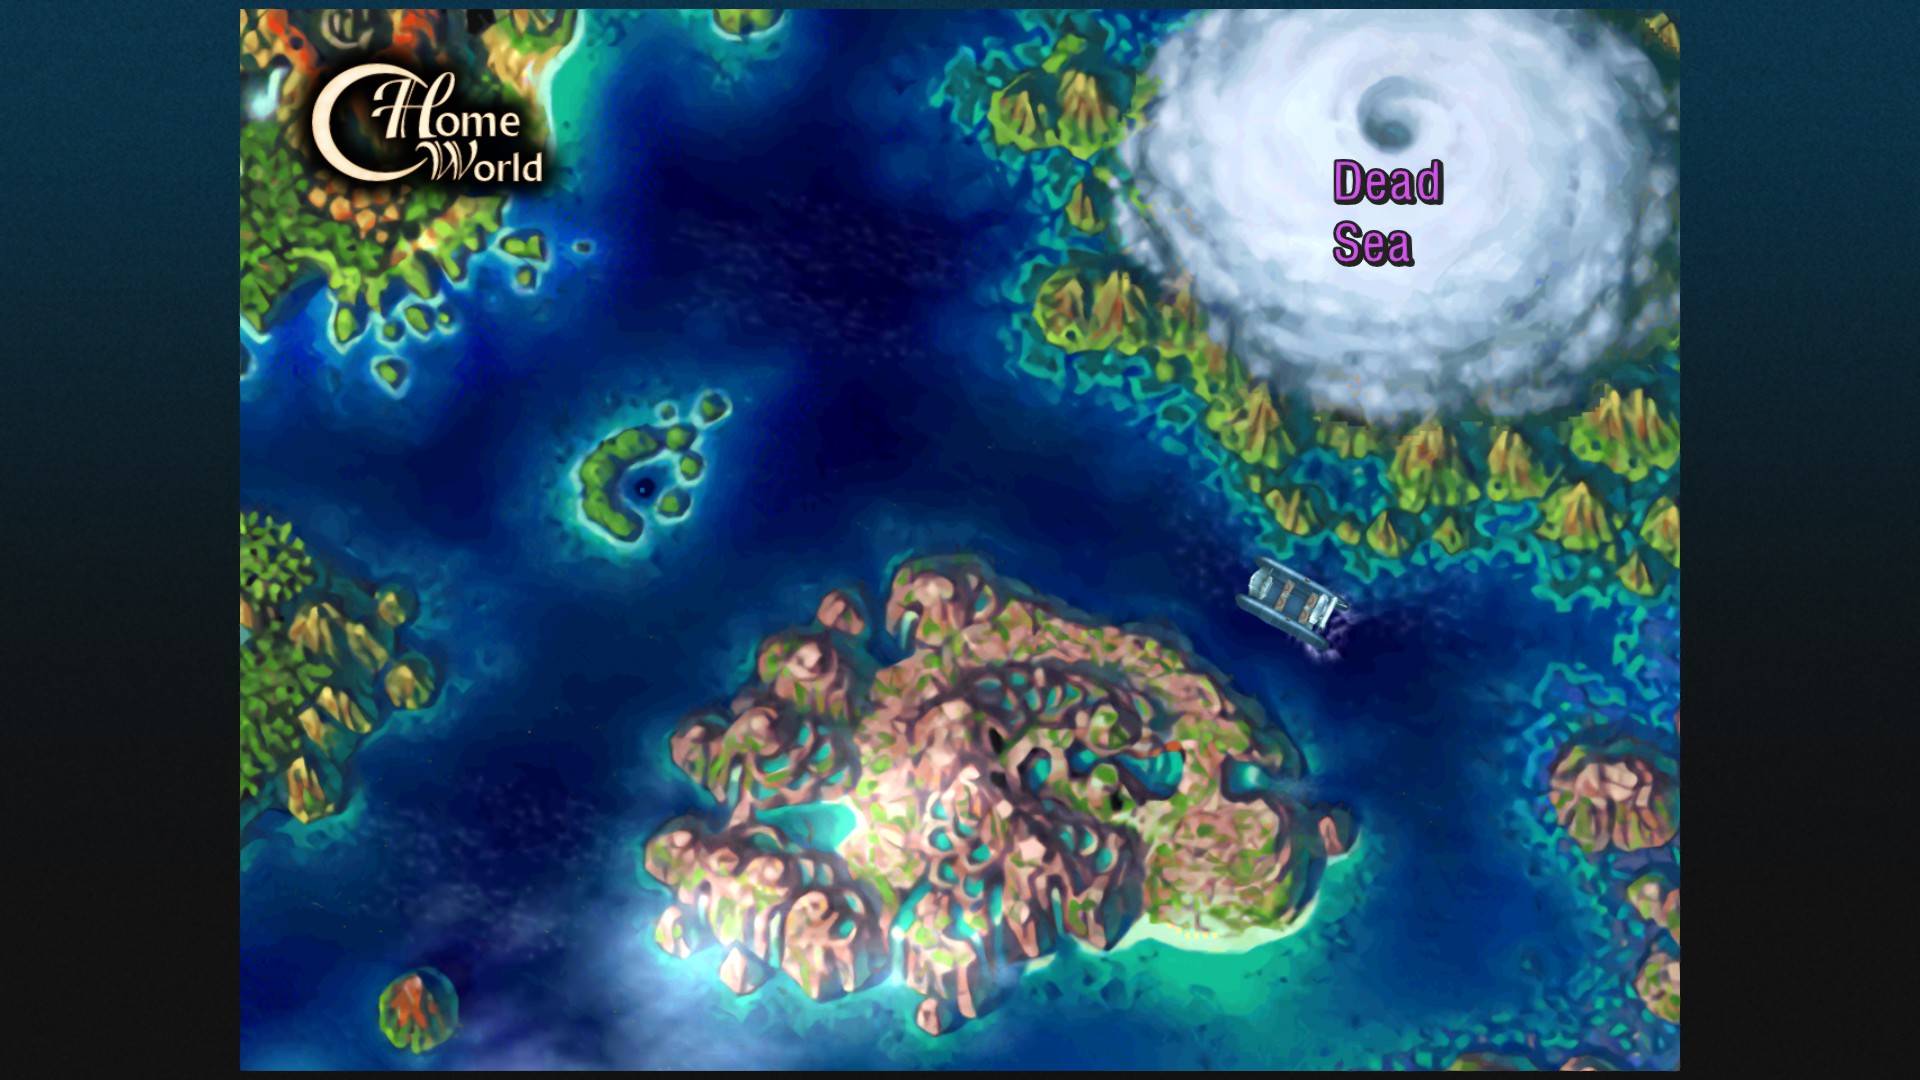
- Go to Death’s Door to find out that you need the Einlanzer.
- Go to Hermit’s Hideaway to get Garai Keepsake. Go to the Isle of the Damned and fight Garai’s ghost. Go back to Death’s Door and finally enter the Dead Sea.
- Once you reach the Tower of Geddon, go to the top of the stairs and to the left opening. (ノート: あなたはしません’t need the Medical Book or Prop Sword unless you want Doc and Pierre’s final moves.) Keep going until you find Miguel; fight him.
Obtaining the Dragon’s Tear
- Go to Opassa Beach and return to Another World. Head to Termina, then the bar. Talk to Karsh and Zoah to receive the Tear of Hate. Go to Viper Manor to rescue Riddel. Upon entering the manor, go to the left and enter the second room to talk to Norris and obtain the Prison Key. Go through the sewer and into the prison area, then make your way to the right door to fight Orcha and save Riddel. If you try to leave the manor after saving Riddel, one of your characters will say that the party is completely surrounded. Go through the main double doors to fight サイボーグ Grobyc and the Guillot. Run to the library on the left, 階段を上ります, fight Guillot again, then escape out the window.
- 一度あなたが’re back on the world map, go straight to Opassa Beach and fight the Devourer of Time for Ending #6 and its correlating achievement: ラストスタンド. Important info: This is the only time you can get this ending. It has the smallest window of opportunity than any other. Do nothing else after escaping Viper Manor and go straight to Opassa Beach.
- 次, head to Hermit’隠れ家. After various events and people joining the party, あなた’ll be on the S.S. 無敵. 一度あなたが’re free to do whatever on the world map, go to Opassa Beach again. それ’s right – “To the darkness of time!” あなた’ll obtain Ending#8 and the achievement: The Dark Fate. Important info: You have until before you obtain the Mastermune to get this ending.
- Go to Guldove, fight Orlha, and show the Tear of Hate to Direa to obtain the Dragon Emblem. それから, head to the Home World at Opassa Beach. Go to Guldove and show the guy guarding the tent the Dragon Emblem. Steena will be a total b*tch and make you collect all the dragon relics before giving you the Dragon Tear.
- Go to the S.S. Zelbess to talk to Fargo with the other Fargo in order to save Marbule (if you talked to Nikki earlier). “A dragon’s cry can be heard in the distance” lets you know that you’ve defeated all the Lagoonates. あるいは, you can skip this and get the Black Relic while the Black Dragon sleeps later. あなた’ll miss out on stealing the Black Plate from the dragon, being able to forge Rainbow equipment, the Grim Reaper summon, and Fargo’s level 7 動く “無敵” けれど. それ’s up to you, 仲間.
- 関係なく, now go to the Forbidden Island to fight Dario. You should be overpowered enough to defeat him easily this time. 後, あなた’ll get the Mastermune. Defeating Dario and obtaining the Mastermune is required for Ending #7. それで, once you’re on the world map again, go to Opassa Beach and fight the Devourer of Time and receive the achievement: The Viper Orphanage.
Dragon Relics:
- Blue Relic – Water Dragon Isle (Home World); fight Water Dragon.
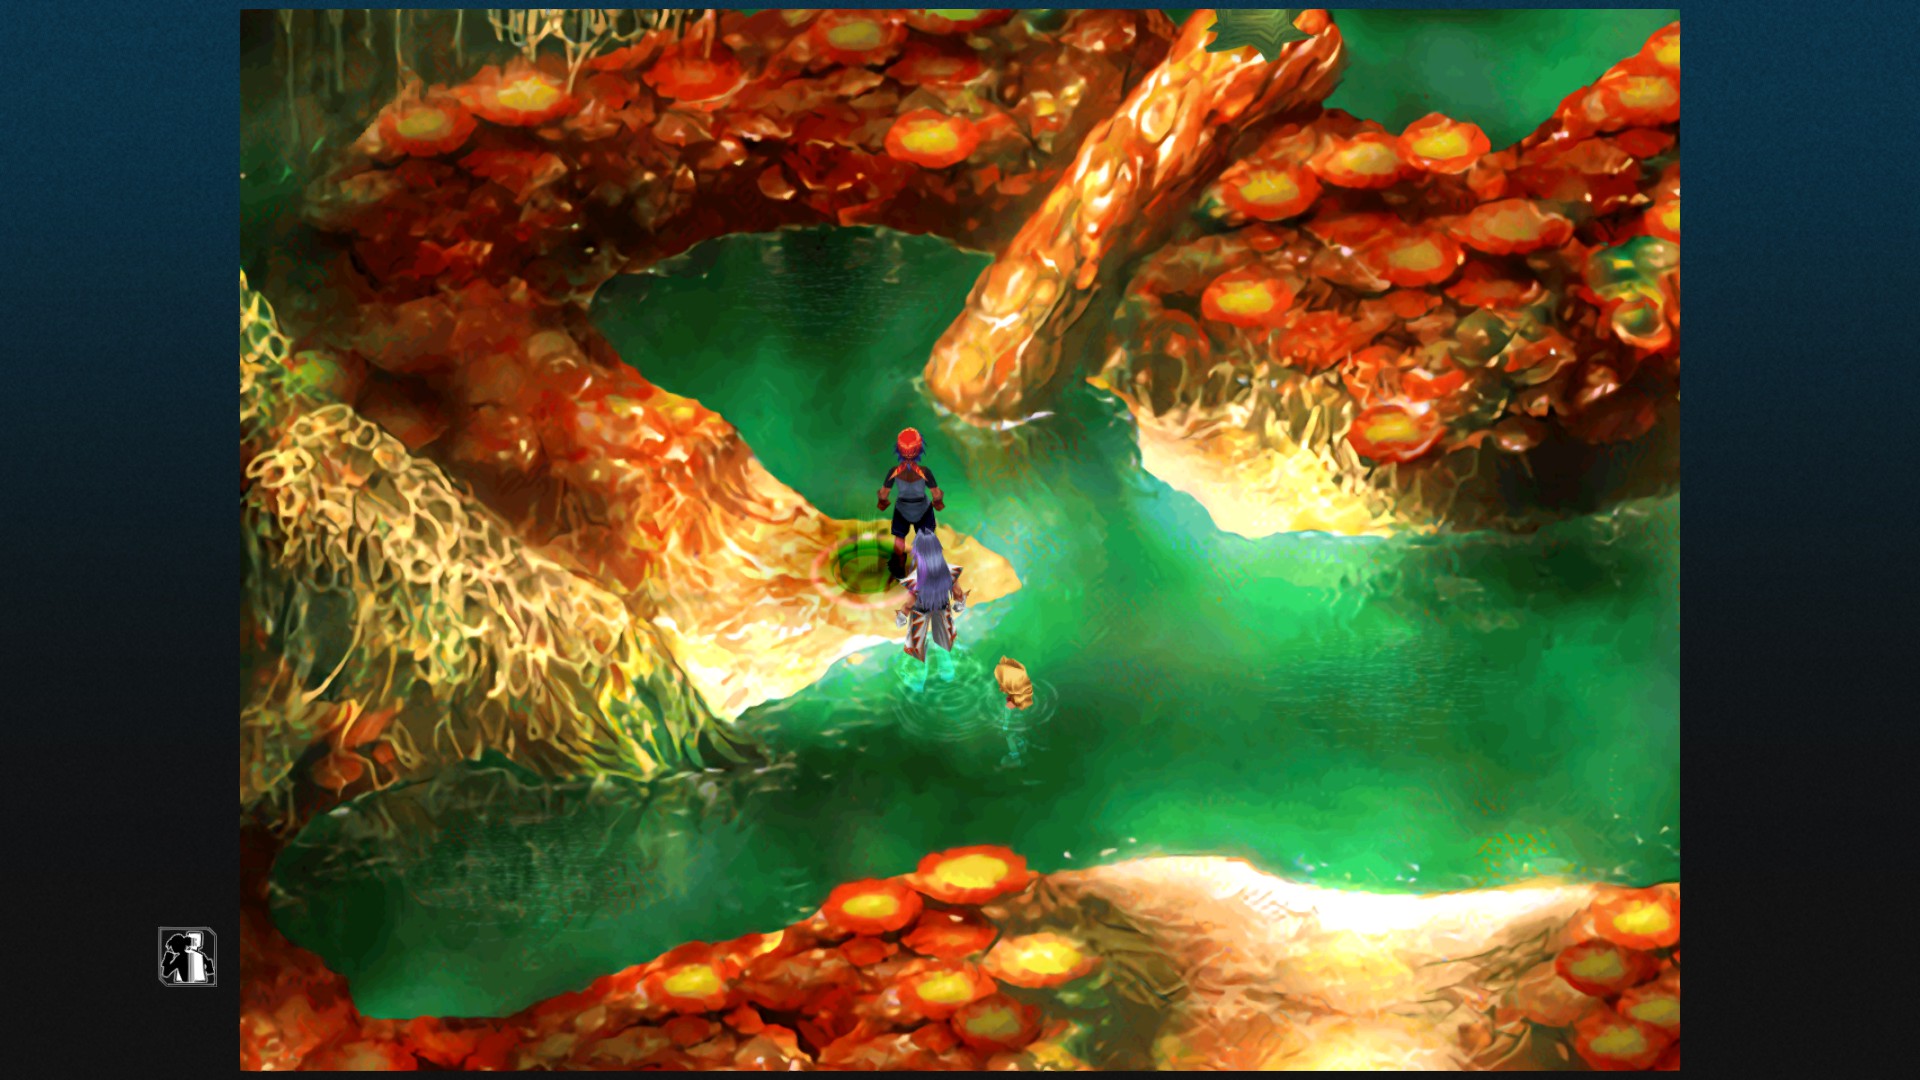
- グリーンレリック – Gaea’s Navel (Home World) via Hydra Marshes by using the Beeba Flute/Ancient Fruit and riding the wingapede; fight Green Dragon. (ノート: The no encounters mechanic didn’t work for me in Gaea’s Navel. It might have to do with how there aren’t supposed to be any enemies onscreen when the tyrano shows up, but regardless, I hope they fix that.)
- Yellow Relic – Earth Dragon Isle (Home World); Go into the quicksand, come back out via the sand boil, 離れる, then come right back, そして “キャプテン” will say he cleared the path already; fight Earth Dragon.
- レッドレリック – 山. Pyre (Another World); fight Fire Dragon.
- Black Relic – Marbule (Another World); fight Black Dragon or take the relic while it sleeps.
- White Relic – Sky Dragon Isle (Another World); fight Sky Dragon.
After collecting all the relics, return to Guldove (Home World) and talk to Steena again. 彼女’ll finally give you the Dragon Tear, so head to Fort Dragonia. (If you want Steena’s level 7 動く, go to Isle of the Damned.)
Enter Fort Dragonia with Steena in your party and all the puzzles will be done for you. Just head on up to the elevator and fight Dark Serge.
Getting to/through Chronopolis
- Go to Divine Dragon Falls (Another World) with Steena in the party. Try putting the Tear of Hate or Love onto one of the pedestals to discover that you can’t make the Chrono Cross yet. (You can stop by Marbule (Home World) and buy the Master Hammer to make rainbow equipment now.)
- 次, go to the Dead Sea Ruins (which is in the Home World) and to the fate distortion.
- Do the three islands in whatever order you want. The water barrier will drop and behold: Chronopolis.
Chronopolis
- Fight PolisPolice.
- 次のエリアでは, 右の方へ, go down the hatch.
- Press the orange switch north of the stairs. Go to the console on the far left and control the robot to finish the bridge. Go up the next stairs.
- Press the glowing blue button on the desk to open the path (in case you want to leave for some reason).
- The elevator in the next area needs to be unlocked. The area to the left has the save point. The area to the right leads to stairs, so go that way.
- Go up the staircase to the 2nd level.
- Go through the red laser bars.
- Go down into the next area, then to the far left. The room will have an image of the world map. Go up to the computer and press the glowing pink button to unlock the elevator.
- Use the elevator to go to the 4th floor. Go to the room on the right and witness a scene discussing the events of Chrono Trigger. The shadows will mention that someone is missing.
- Go down to the 1st floor and to the docks (where the save point is) and in the far upper-left corner is a shadow. Interact with it and it’ll leave.
- Go back up to the 4th floor and the room with all the shadows is closed for “the experiment.” それで, go to the room on the left instead. On the left side of that room is a combot, fight it, and get the Card Key from the chest behind it.
- Return to the elevator and go to the floor B1.
- Fight or avoid the combots patrolling. Interact with the blue glowing circle. “Welcome back Chrono Trigger.”
- Fight Fate.
お先にどうぞ’ve got control on the world map again, go to Opassa Beach and get the final ending: Ending #9 そして 成果: The Dragon God’s Revenge.
The Chrono Cross & Terra Tower
- Go to the Divine Dragon Falls (Another World) and finally create the Chrono Cross!
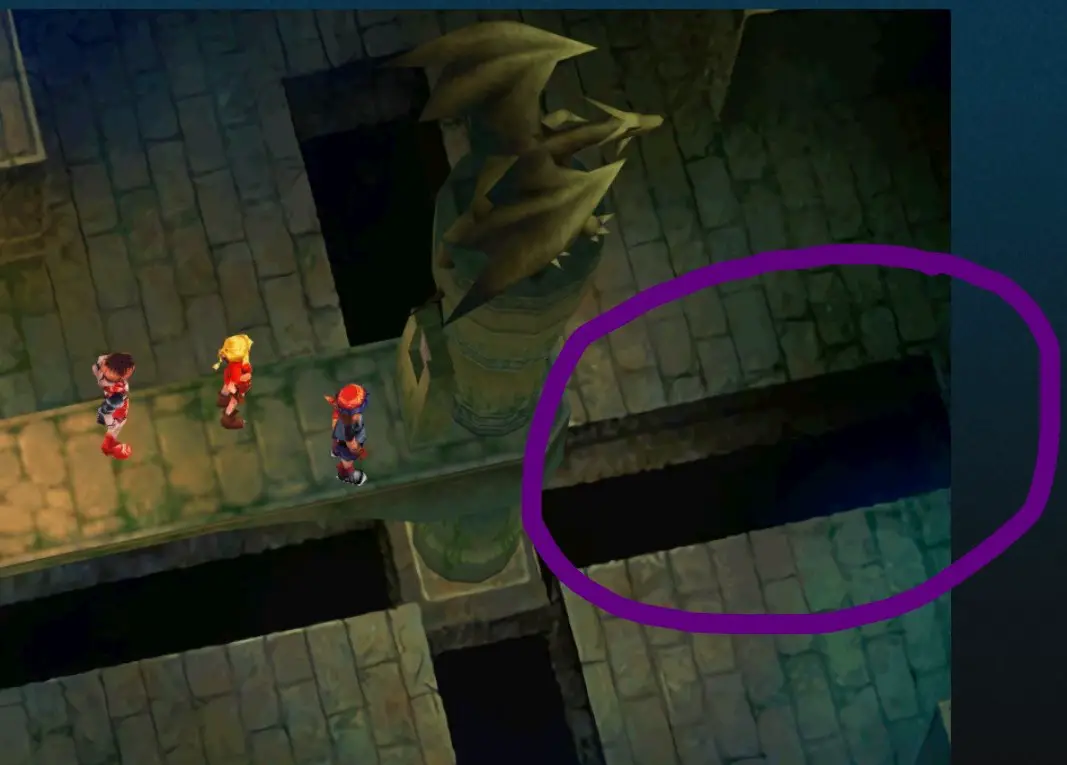
- Go to the Hydra Marshes in the Home World. Go north to the next screen. Go to the spot that connects to the Dimensional Vortex and use the Astral Amulet.
After Sprigg loses her will to live, use the Chrono Cross from the key items. 勝った’t be until at least your 3rd playthrough that you get the 成果: The Recruiter.
Head to Hermit’隠れ家 (Another World).
ルッカ’の家
- Fight Lavaboy. 次のエリアでは, go up the left set of stairs. In the upper-right corner of the room is the Ice Gun; それを取る.
(オプション) If you want Kid’s level 7 技術, read the notes on the floor, then return to the first room. Use L1 (on controller) to start at the machine.
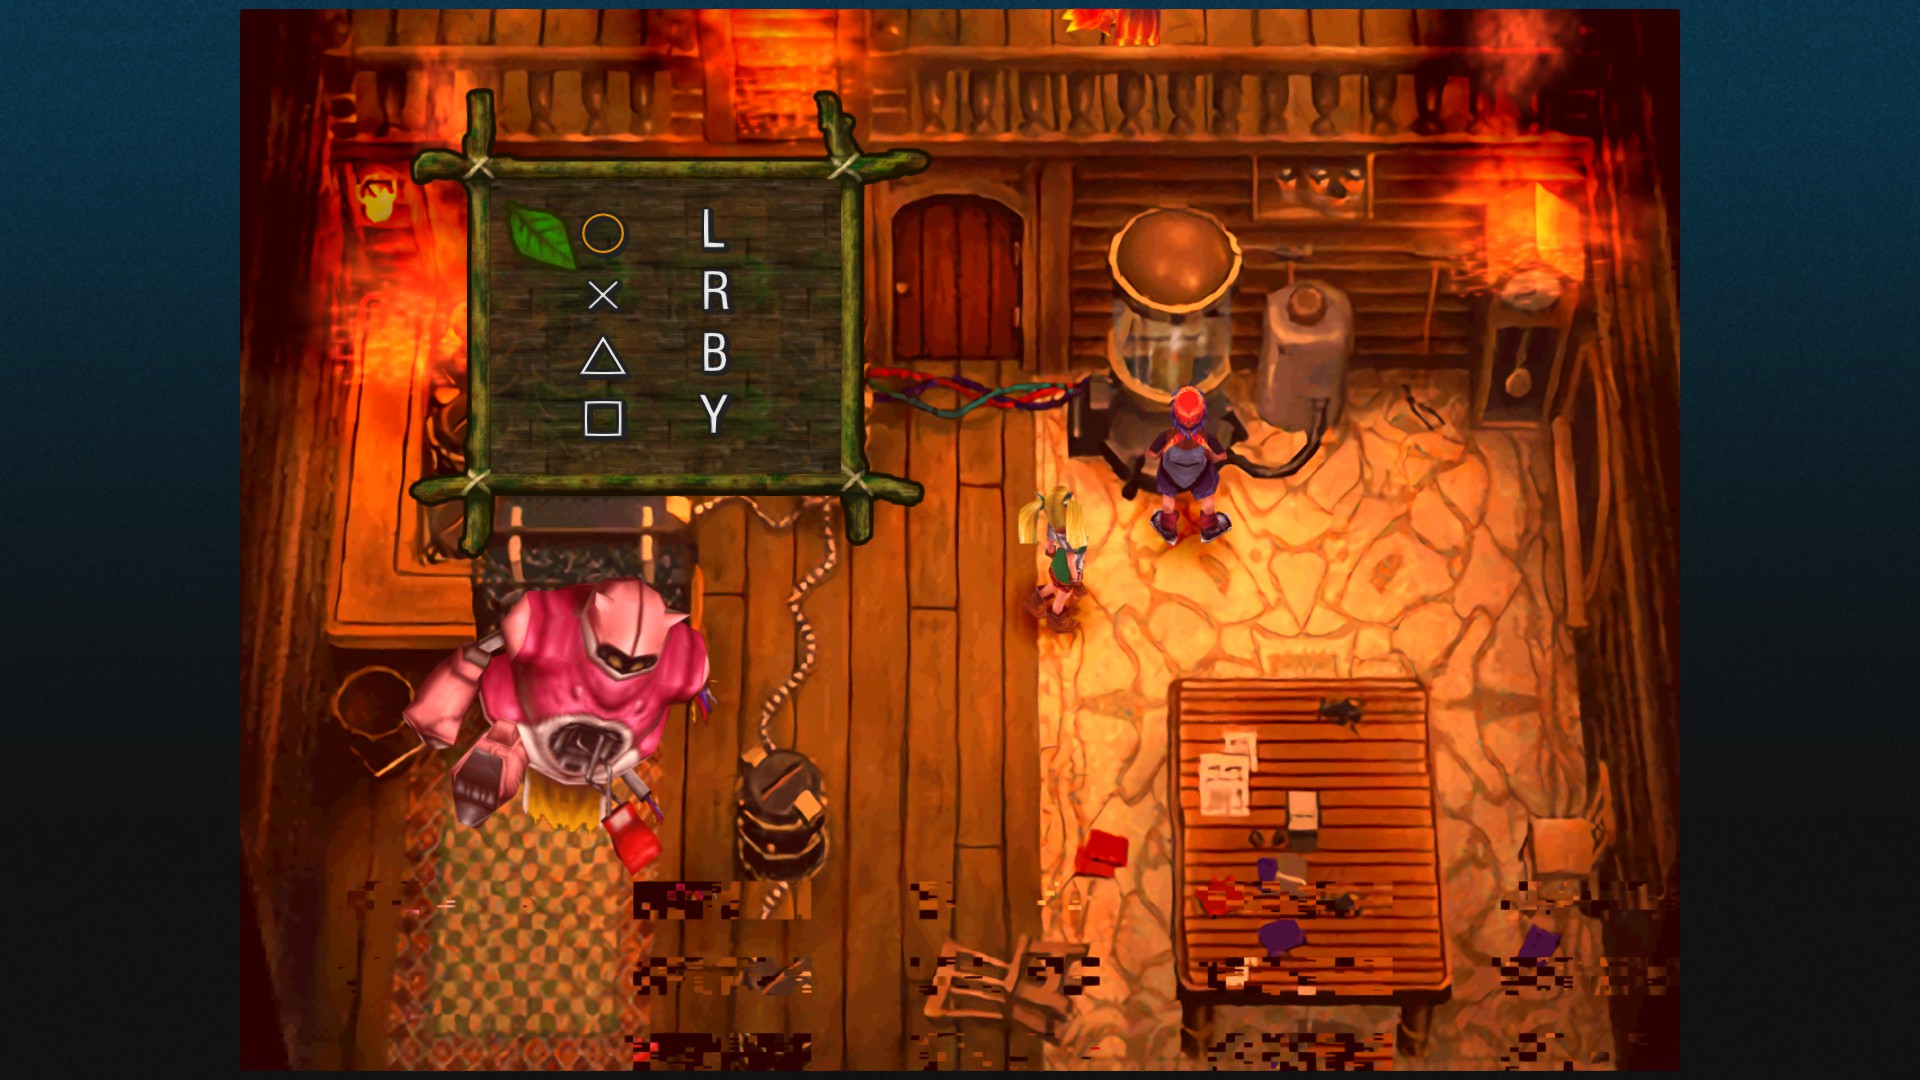
コードはです: L, 三角形, R, 三角形.
- Go back to the pair of staircases and go up the right set. Use the floor panel in the corner. Follow the path down, その後、右に進みます. Use the Ice Gun on all the flames, then head into the room to the north.
Put Starky in your party and go to the El Nido Triangle. また, make sure to bring a red-elemented character or allocate red elements on whoever you’re going to use. Make your way to the spaceship, fight the enemy guarding it (only damaged by red elements), then Starky will find an engine to put on your boat so you can float up to the Terra Tower.
Terra Tower
(ノート: If you’re low on rainbow shells, a lot of chests in this dungeon have them.)
- Fight Terrator.
- 次のエリアでは, knock over the pillar to the left and go south.
- (Optional Note) You can steal Winged Shoes from Myxomycete and Third Eyes from Whoot enemies, もしあなたが’re low on these items. I only had a couple of each myself on my 2nd playthrough.
- Go down the lengthy staircase, then go down the vine to the right. Cross the area diagonally until you reach the exit on the lower-left corner.
- Fall down the branch in the next area.
- After the big face talks to you, go upward on the path.
- 次のエリアでは, make your way up to the top most exit.
- 次のエリアでは, climb up several vines until you reach the exit at the top.
- Knock over the other two pillars and head to the upper-left corner exit.
- Fight Pyrotor and keep going.
- Make your way up the ladders, then up the vine.
- Make your way up several stairs. The exit is to the upper-left corner.
- シーンの後, leave the way you came. A new exit will have appeared in the previous room.
- Make your way across the bridge.
- Fight Anemotor and use the teleporter.
- 左に進みます, use the teleporter, and defeat the Gravitor.
- Return to the central area, それから右に行きます, use the teleporter, and defeat Luxator.
- Return to the central area and head into the middle door.
- Fight Aquator. Head up the stairs and use the teleporter.
- Keep going until you find the Frozen Flame.
一度あなたが’re on the world map, go to the place we all know and love at Opassa Beach.
If you want to use the Chrono Cross in battle, the element sequence is: 黄色, 赤, 緑, 青, 黒, 白.
Gold Stars For Everyone
You should get this achievement after a few boss fights on your 3rd playthrough.
これが今日私たちがこの目的で共有するすべてです クロノクロス: The Radical Dreamers Edition ガイド. このガイドは元々、次の者によって作成および執筆されました。 絶え間ない二元性. このガイドを更新できなかった場合, これに従って最新のアップデートを見つけることができます リンク.