
Ever hoe the entire floor in the mines just for the ladder to be on the last space? Yeah me too. Here’s a somewhat detailed explanation of the ladder mechanics I’ve noticed.
Disclaimer: What I write in this guide is purely my own experience, and may not be how the ladder is actually coded. I have done testing, and it seems solid enough but there is always that small chance that I just didn’t get all the possibilities.
Introduction
Has this ever happened to you? Really upsetting isn’t it? You spend 2 and a half hearts of stamina hoeing the entire floor with your unupgraded hoe, just for the ladder to be on the last remaining space.
Turns out, there’s an easy way to figure out where that dumb ladder will be. Save yourself the frustration of spending minutes upon minutes just hoeing and hoeing and hoeing.
Spend your stamina mining ores, not hoeing floors.
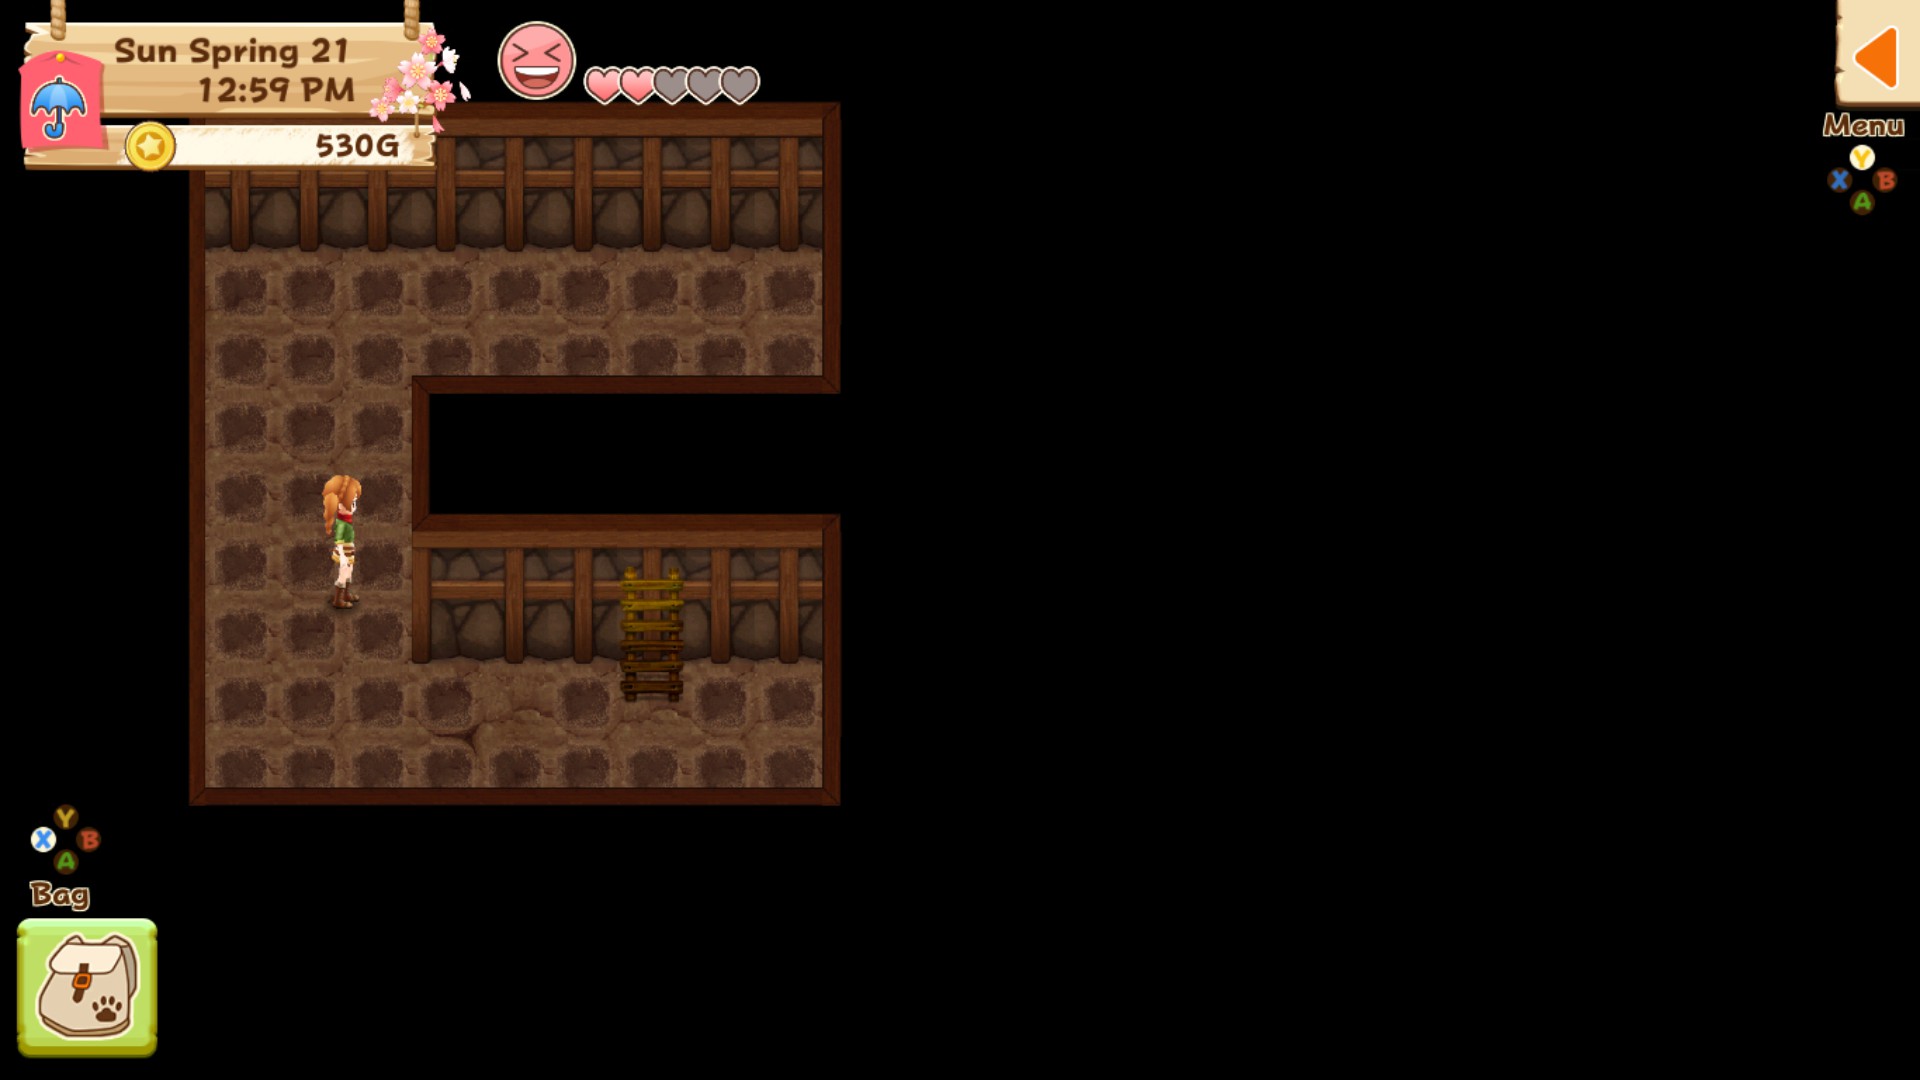
See this photo isn’t even something I did just for the guide this genuinely happened to me before I knew there was a trick and I was super pissed.
3 Things to Keep in Mind
First, DO NOT BREAK THE ORE IF YOU’RE LOOKING FOR THE LADDER ON THE FLOOR.
The ore shows you where the ladder is NOT, so if you’re looking for the ladder, you really should find the ladder first, then break all the ore before continuing on to the next floor.
Second, the floors have 2 options of grids. Either 3×3 or 4×4. If there are any prop walls, the 3×3 prop walls and the 4×4 prop walls will technically be one taller, because the ceiling of the tile can’t be walked behind.
Don’t let that fool you though, because if the grid is 3×3 then 3 is the max height of the grid box.
Here’s an example of how grid boxes work.
Notice how the top left and top right grid boxes extend down next to the ceiling tile of the middle wall, but the top middle grid box is 3×2.
This is again because ceiling tiles cannot be walked behind. It messes with the grid a little.
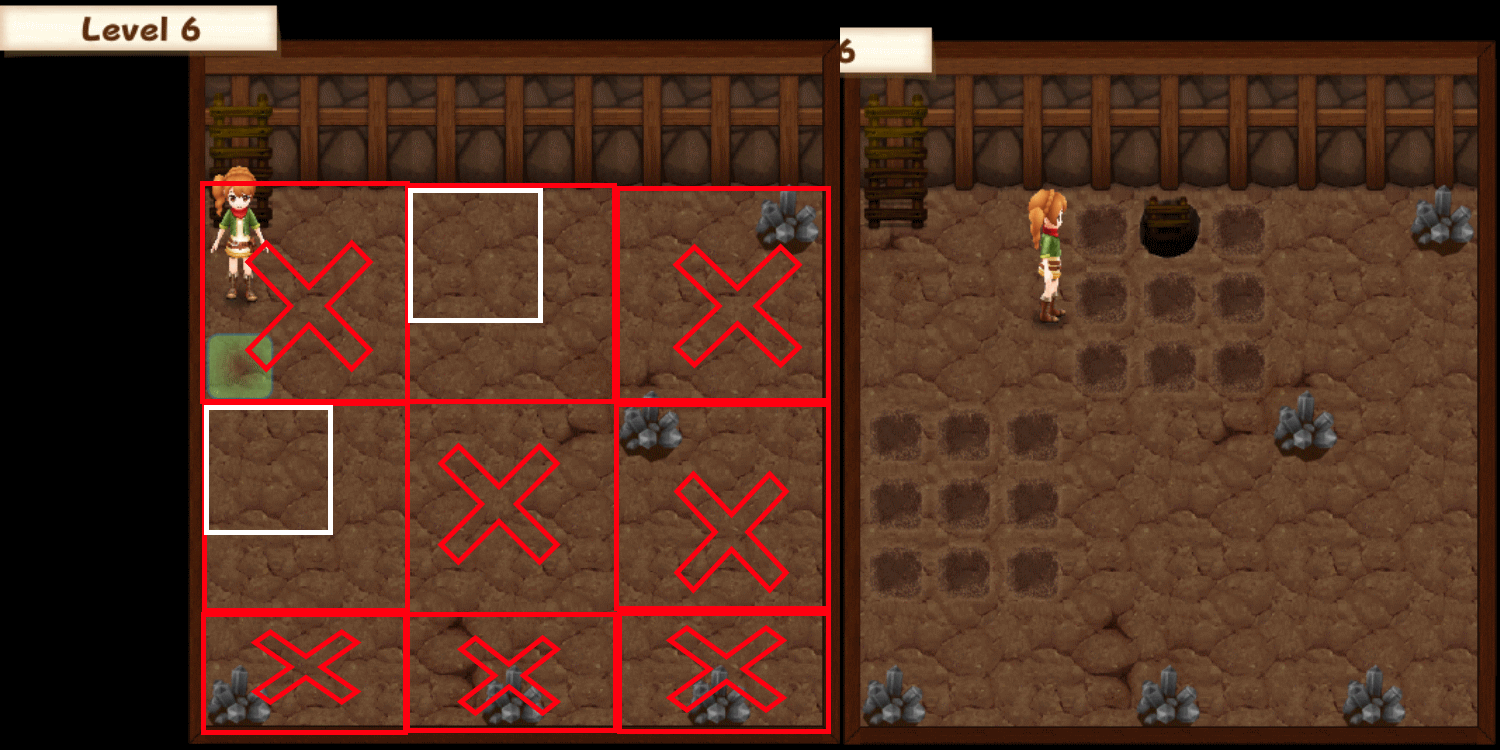
And third, all the floors are rectangular. You might say, “but there are irregularly shaped floors” and I respond with there are 2 “types” of walls. The outer walls, and the prop walls. What I refer to as “prop walls” are the walls that take up a grid box and give some floors an irregular shape. For example, the image of floor 6 is an “empty” floor. The only walls are the outer walls. The image of floor 7 however has one prop wall in the top middle grid box, but that prop wall is NOT an outer wall. It is merely in front of the outer wall.

You can ignore all the prop walls. Only the outer walls matter in determining where the ladders are. Ignoring all the prop walls reveals that yes, every floor is rectangular.
Now, why is it important to ignore the prop walls? Because 95% of the time, the ladder spawns on a grid box next to the outer walls, and I wanted to clarify that prop walls are no outer walls. Don’t bother hoeing the grid boxes in front of the prop walls. The ladder will not spawn there. (except for the 5% chance I will explain later)
Now keeping those 3 things in mind, here’s how you determine where the ladder is.
Where’s the Ladder
95% of the time, the ladder spawns in a grid box touching an outer wall. The other 5% of the time the ladder spawns in the exact center grid box of the floor. You can immediately eliminate any grid boxes that don’t match either of these 2 conditions.
Each grid box can only hold one item, such as a ladder or a chunk of ore. You can eliminate any grid boxes that have ore or the exit ladder.
You should now be left with only a few grid boxes the ladder can possibly spawn in.
For people with unupgraded hoes, the ladder will not spawn in the bottom horizontal tiles and the right vertical tiles of the grid boxes. (you will see what that means exactly in the photos. This one is also my personal experience with the ladder spawns, so despite going through 50 something floors trying to get the photos for this guide, there is a very small chance that this is not true.)
Example Screenshots
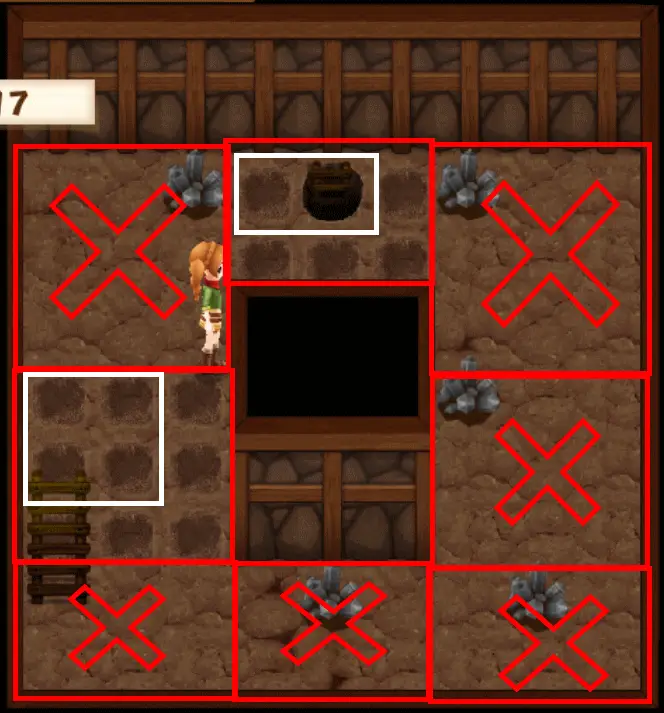
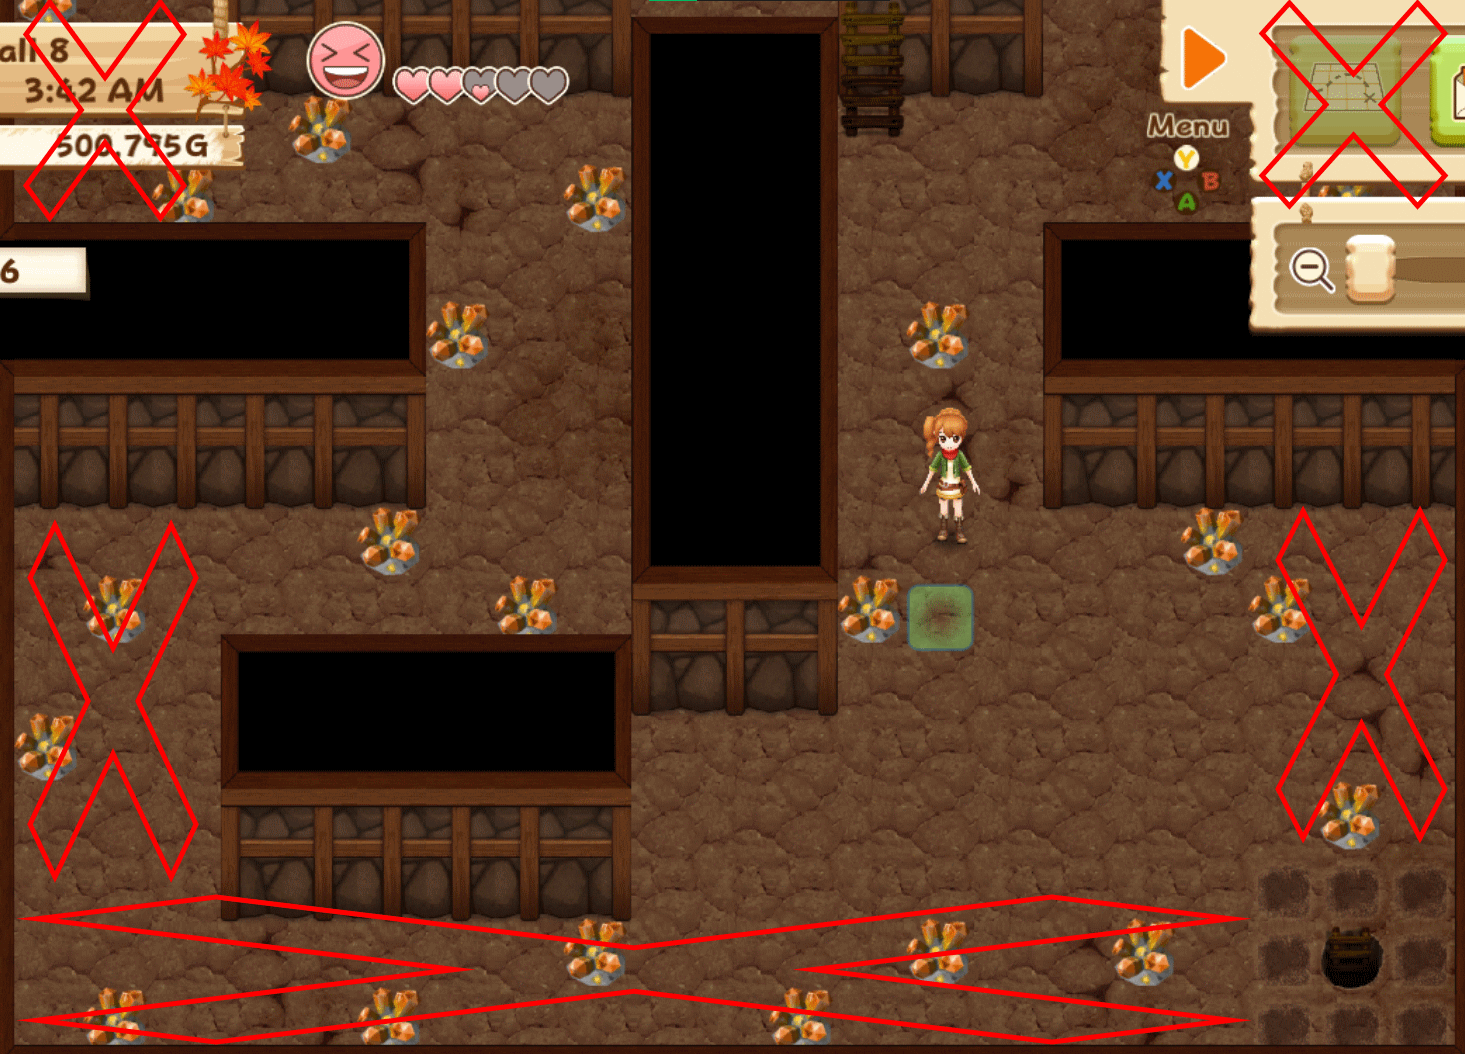
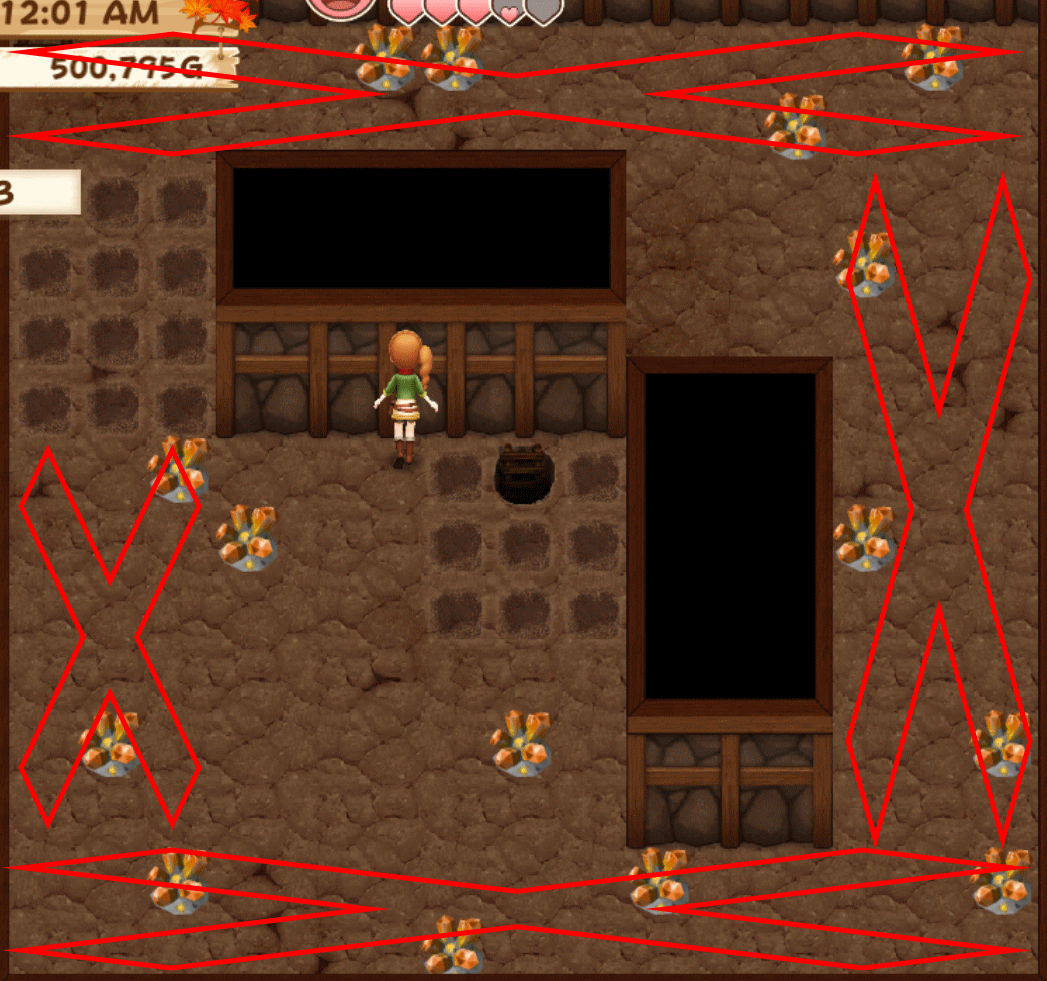
Here are some example screenshots I made for better clarification/for people who don’t like reading large bodies of text.
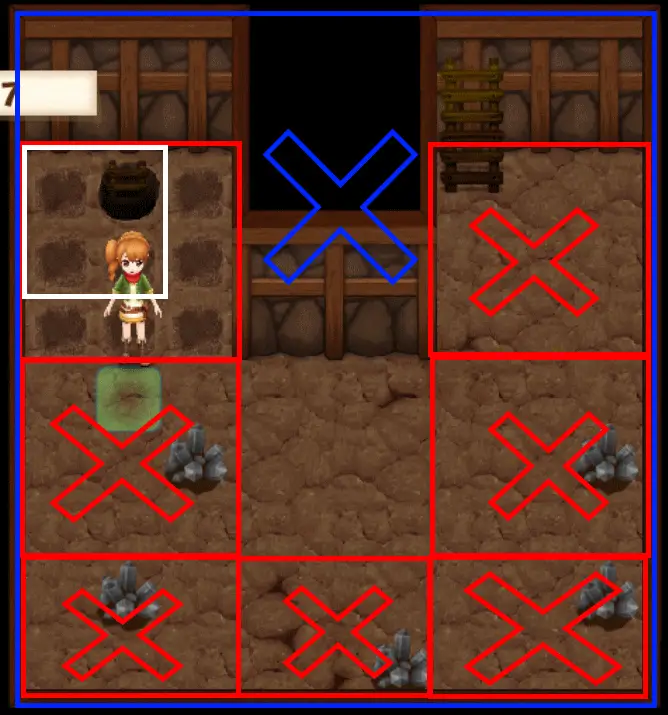
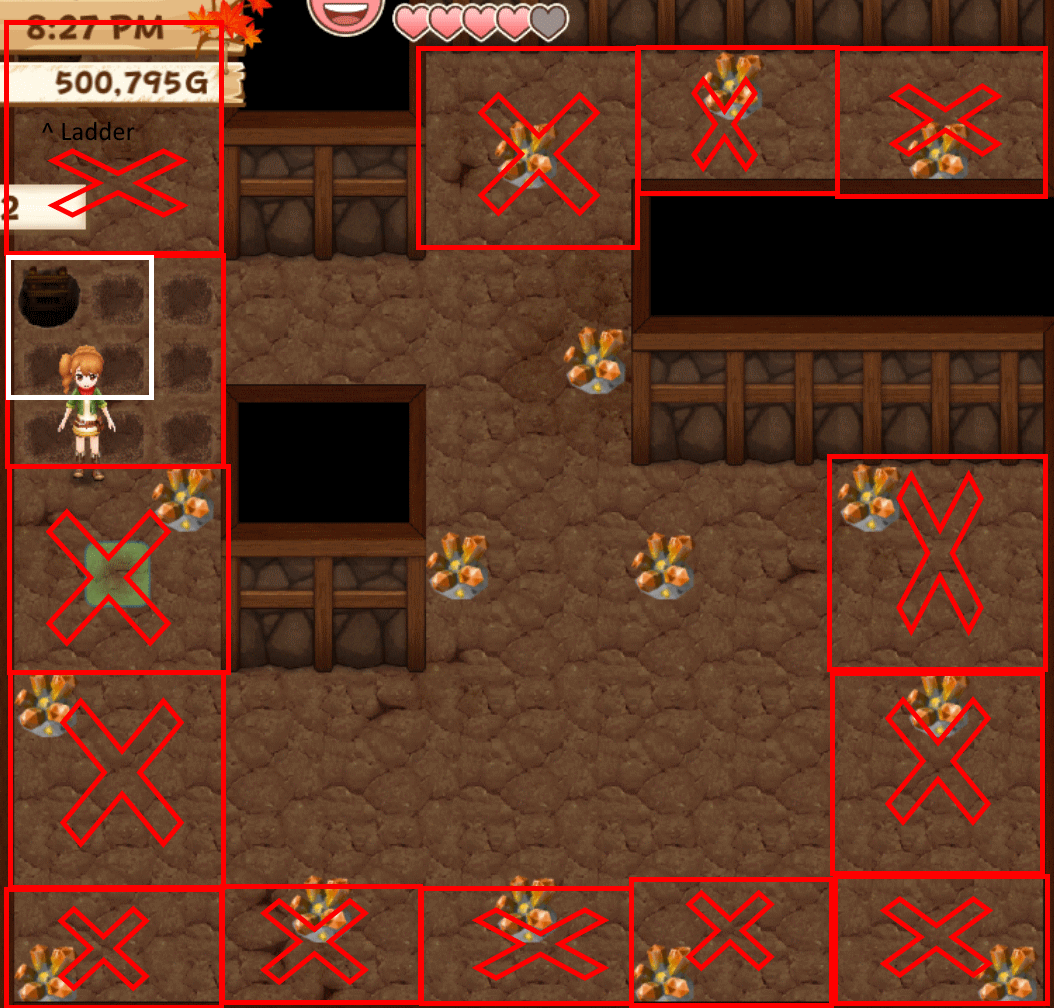
The red boxes are the grid boxes, the red x’s mark that the ladder cannot spawn in those grid boxes, and the white boxes are the tiles the ladder can spawn in the grid boxes where the ladder can spawn.
I tried to get photos from different floor layouts and grid sizes to leave as little room for confusion as possible.
The middle one here is x’d because I made that before I realized the center ladder was a thing.


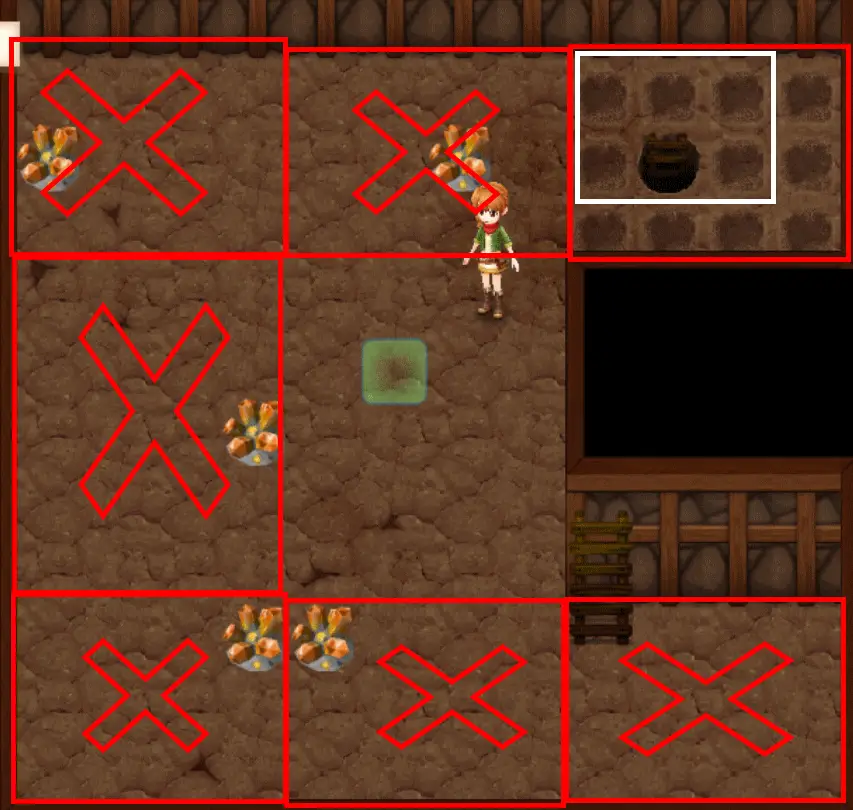
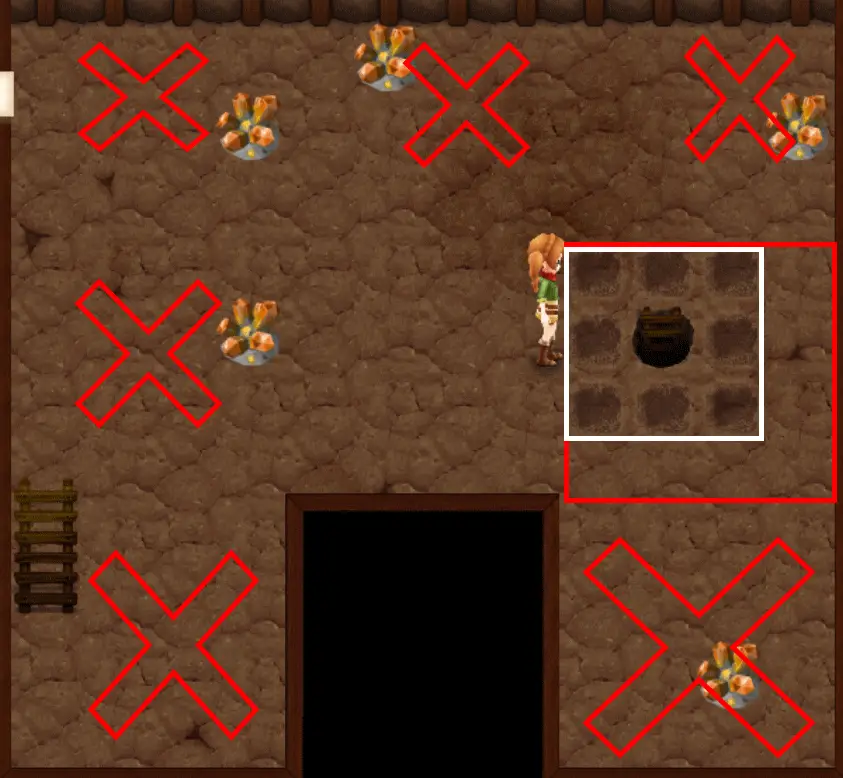
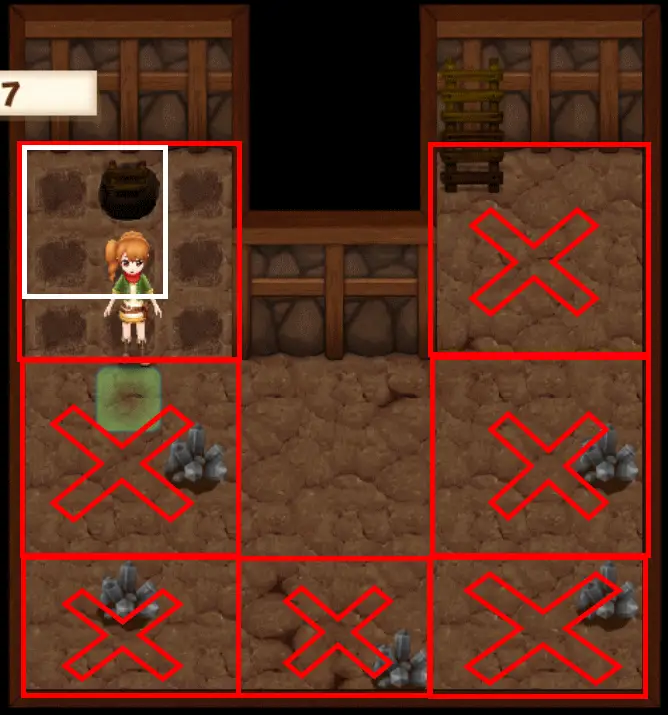
This one is an example of the elusive middle ladder.
If you’ve tried all the possible outer grid tiles and the ladder didn’t show, it’s in the center grid space.
That's everything we are sharing today for this Harvest Moon: Light of Hope guide. This guide was originally created and written by (Influ)Enza. In case we fail to update this guide, you can find the latest update by following this link.
thank’s for the tip
Danke, der Tipp war wirklich großartig.
Hab es sofort probiert und es hat wirklich jedes mal geklappt.
ça fonctionne très bien merci
Wie komme ich tiefer die Etagen sind bis 31 gespeichert danach geht es nicht mehr egal wie tief ich mit einenmal komme immer bin ich als tiefster punkt Level 31 wenn ich nächsten tag wieder buddeln will