- Titre: La fièvre des transports 2
- Date de sortie:
- Promoteur:
- Éditeur:
Informations sur la fièvre des transports 2 est encore incomplet. S'il vous plaît, aidez-nous à remplir les détails du jeu en utilisant ceci formulaire de contact.
Addresses for modders how to incoproate and how the random number mod works.
introduction & Bases
Random numbers is a low resource cost solution to cleaning up the buy menu while adding more realism to your consists.
The mod runs off small texture files around 250kb with 10 different cube meshes. Each is UVed next to each other for different numbers. In the code, it uses custom loads in the mdl to achieve this.
The PSD is in two places, in my Google Drive, and in the mod folder (IDENTIFIANT: 2913933660). My google drive also contains a .blend file and obj containing the needed mesh files for modders to incorporate and easily access values for rotations and scaling and transforms needed for the custom cargo slots in the vehicle’s mdl.
Il y a 14 fonts included in the base mod, in white (and one for the UG boxcar):
- CarKnocker
- Helvetica Neue LT Std
- Pressure Tank
- RRoman
- Railtnk1
- Railtnk2
- Rrnumber1
- Rrnumber2
- Rrnumber3
- Rrnumber4
- Rrnumber5
- RRoman 1916
- RRoman 1916 Ultra Expanded
- RTTX
Textures & the UV Map
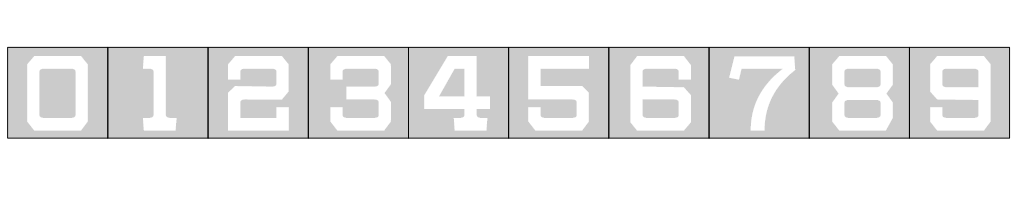
Above is an example of the font using the rroman font. It uses a blank background with the color white chosen for the font. You can change the color of the font to your liking in your image editing program. Personnellement, I use photoshop.
Comme vous pouvez le voir, the numbers are arranged in a way for each mesh to read the texture. The image size is 1024×256.
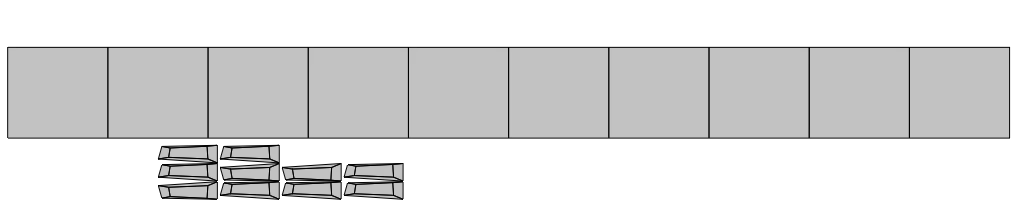
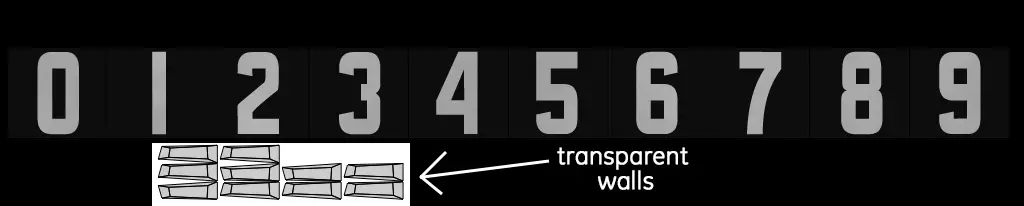
These images must be interpolated alpha (dxt5/bc3) with the transparent background.
The walls are indicated below:
PSD Overview
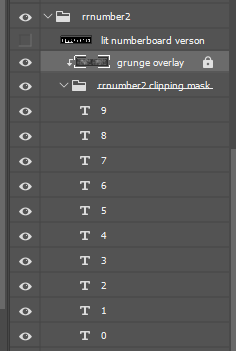
To the right is the structure of each font.
D'abord, we have the emissive mask used for lit number boards on locomotives or other various uses.
Pour ça, you will need a large mesh (#1), behind the numbers meshes (#2).
#1 will be an emissive type material, and preferably a separate object, so you can duplicate it in your mdl for when they’re not lit. Quand il’s not lit, toi’ll need mesh #1 to be white/the color of your choice for the number board digits. je’ll cover this more in the MDL section.
Suivant, we have the grunge overlay, which uses a clipping mask tied to the folder below containing the text for each digit. This layer (the grunge) is at 30% opacity, feel free to adjust to your own needs.
I should note I use Photoshop, donc je’m not aware if clipping masks are a feature offered in Gimp or paint.net. Sinon, you will have to come up with another method or just ditch the grunge. Photopea.com may have it however, il’s very close to the UI of PS.
Shout out to YeastCheese for sending me those grunge textures.
Folder Structure
This is important because going forward, we need to think of all the different font materials that will be used over time.
The MTL folder structure should be used as below:
/res/models/material/meatball/loads/fonts/[font name]_[font color].mtl
The MDL structure:
/res/models/model/vehicle/waggon/fonts/[font name]/[font color]/[mdl files]
Meshes should not be included in your mod, require the base set for your mod as a dependency.
MDL Section
D'abord, lets set up your numberboard emissive meshes:
{
materials = { "[Votre nom]/[nom du module]/[other folders]/numberboard_background_emmissive.mtl", },
mesh = "[path to your numberboard background mesh]",
name = "Lit Numberboard",
transf = { 1, 0, 0, 0, 0, 1, 0, 0, 0, 0, 1, 0, 0, 0, 0, 1, },
},
{
materials = { "[Votre nom]/[nom du module]/[other folders]/numberboard_background_physical.mtl", },
mesh = "[path to your numberboard background mesh, should be same as above]",
name = "Unlit Numberboard",
transf = { 1, 0, 0, 0, 0, 1, 0, 0, 0, 0, 1, 0, 0, 0, 0, 1, },
},
I would say its incredibly important to give a read over at the wiki regarding custom loads to get a better understanding of the feature, ici’c'est le lien.
cargoSlot Provider
Ici, is the first step. This is where you define the paths, transforms and the random ID.
A random ID is a number that, whenever another slot has a matching ID, they will share the same
number choice by the AI. This is how you can have the same road number showing all over one vehicle.
So with this said, if you want two different locations of road numbers (IE one on each side), alors vous’ll need two instances of each random ID.
Due to character limits in this steam guide, take a look at this mdl for the boxcar.
Because I wanted a road number marking on each side of the vehicle, et 5 different digits per marking, il y a 4 different iterations of Random ID’s #s 1-5 for each ID (that makes 20 different slots).

toutefois, if you take notice of Random ID #1 in each one, I have only one mdl referenced, #9. I did this so because I wanted any number generated (the number seen in game) to always start with « 9 ». You can do this with any digit in the road number.
To get the transforms, rotations, and scales of the numbers, I use the model editor. Gardez à l'esprit, le
width of each number is .187m et le
height is .211m.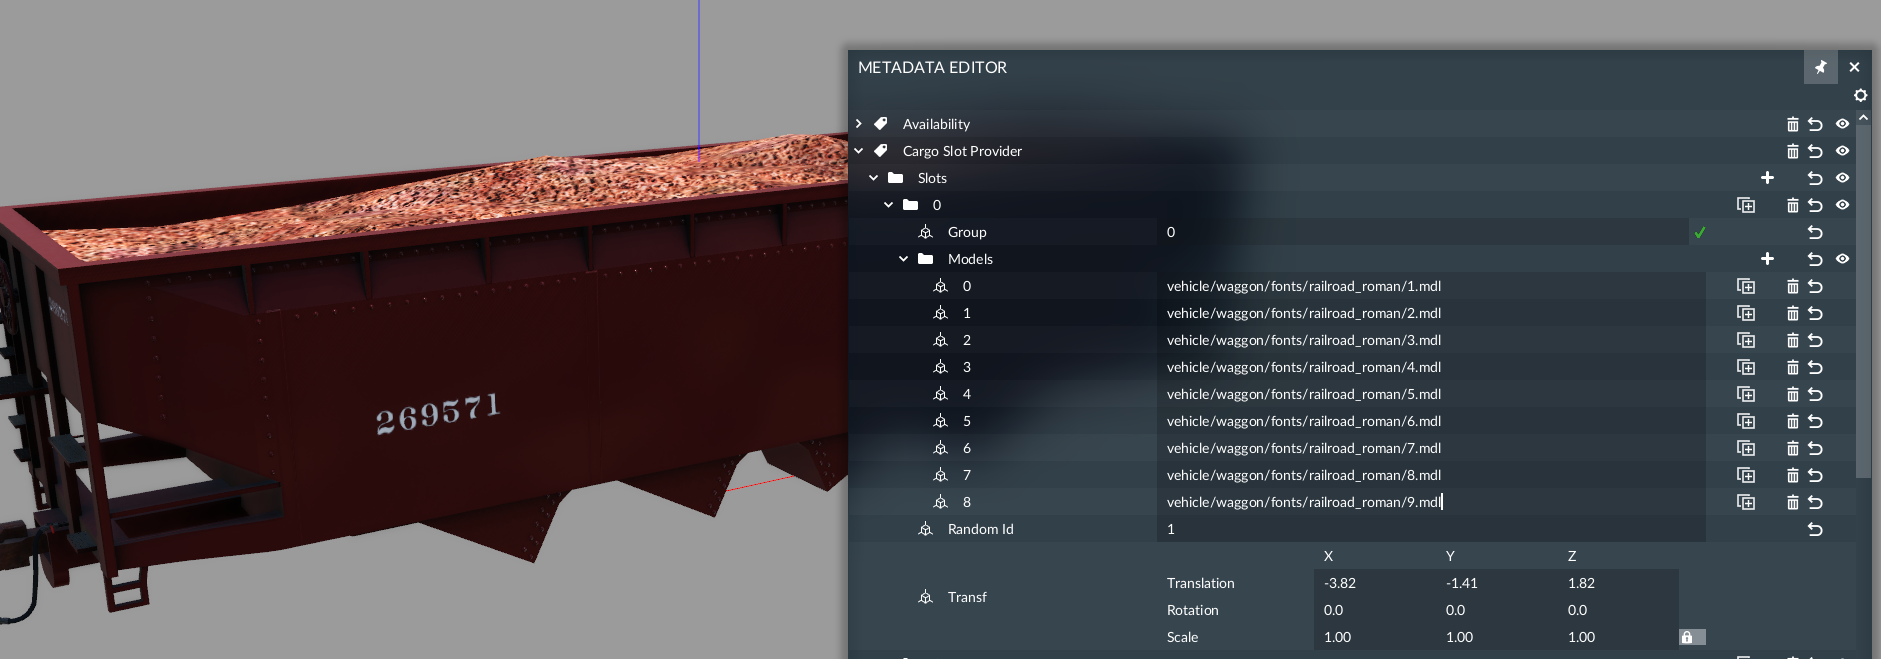
This is where using Blender or another 3d model application is helpful in getting the rotations, especially for numberboards.
cargoEntries
{
loadConfigs = {
{
cargoEntries = {
{
capacity = 4, --make this a low number but not 0 so the train will display any open loads as well
customCargoModels = {
configurations = {
{
slotLevels = {
{ 0, 1, 2, 3, 4, 5, 6, 7, 8, 9, 10, 11, 12, 13, 14, 15, 16, 17, 18, 19, },--this makes it always show regardless of if car is filled or not. You need to list all slot IDs (numbers next to each slot in the Cargo Slot Provider section, sous "modèles" in the model editor)
},
},
},
},
seats = { },
type = "IRON_ORE",--because these are supposed to contain industry loads, you have to define a type. Make it any vanilla industry type.
},
},
toHide = { },
},
},
},
I encourage you once again to take a look at the wiki to understand the slotLevel section a bit more.
C'est tout ce que nous partageons aujourd'hui pour cela La fièvre des transports 2 guide. Ce guide a été initialement créé et rédigé par themeatballhero. Si nous ne parvenons pas à mettre à jour ce guide, vous pouvez trouver la dernière mise à jour en suivant ceci lien.