- Titre: Railroad Corporation
- Date de sortie:
- Promoteur:
- Éditeur:
Information about Railroad Corporation is still incomplete. S'il vous plaît, aidez-nous à remplir les détails du jeu en utilisant ceci formulaire de contact.
While creating a scenario for Railroad Corporation, le plus probable, you will want to create a unique land for your map. The in-game editor allows you to create almost every land you want, but it might be difficult to find out how to do it. Dans ce guide, we will take a look at each available option for land creation.
Pour ce guide, we will assume that you have already created a project. When you open a project (either a new or an existing one), go to the Land Manager tab (1).
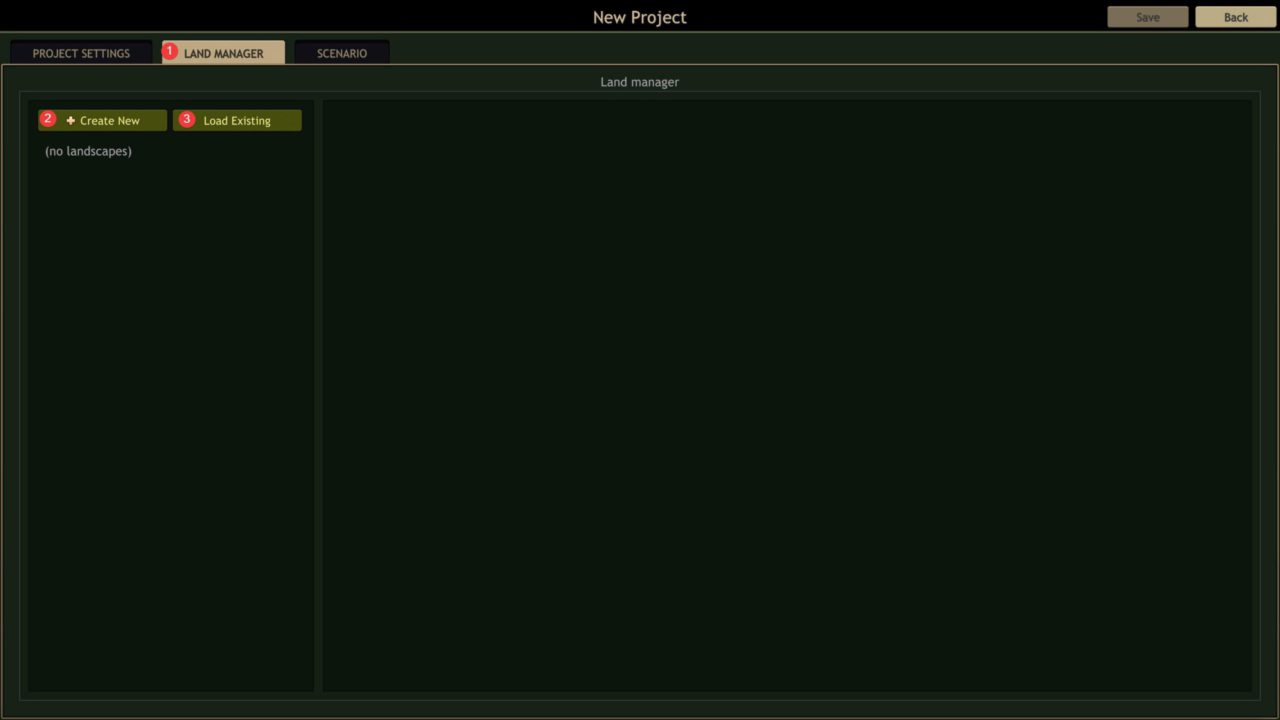
There you can load an existing land (3) or create a new one (2). An existing land can be not only your own but from any other Railroad Corporation Steam Workshop item you subscribed on.
Si c'est’s very clear with land selection, it can be tricky with custom land creation. Laisser’s click Create New button.
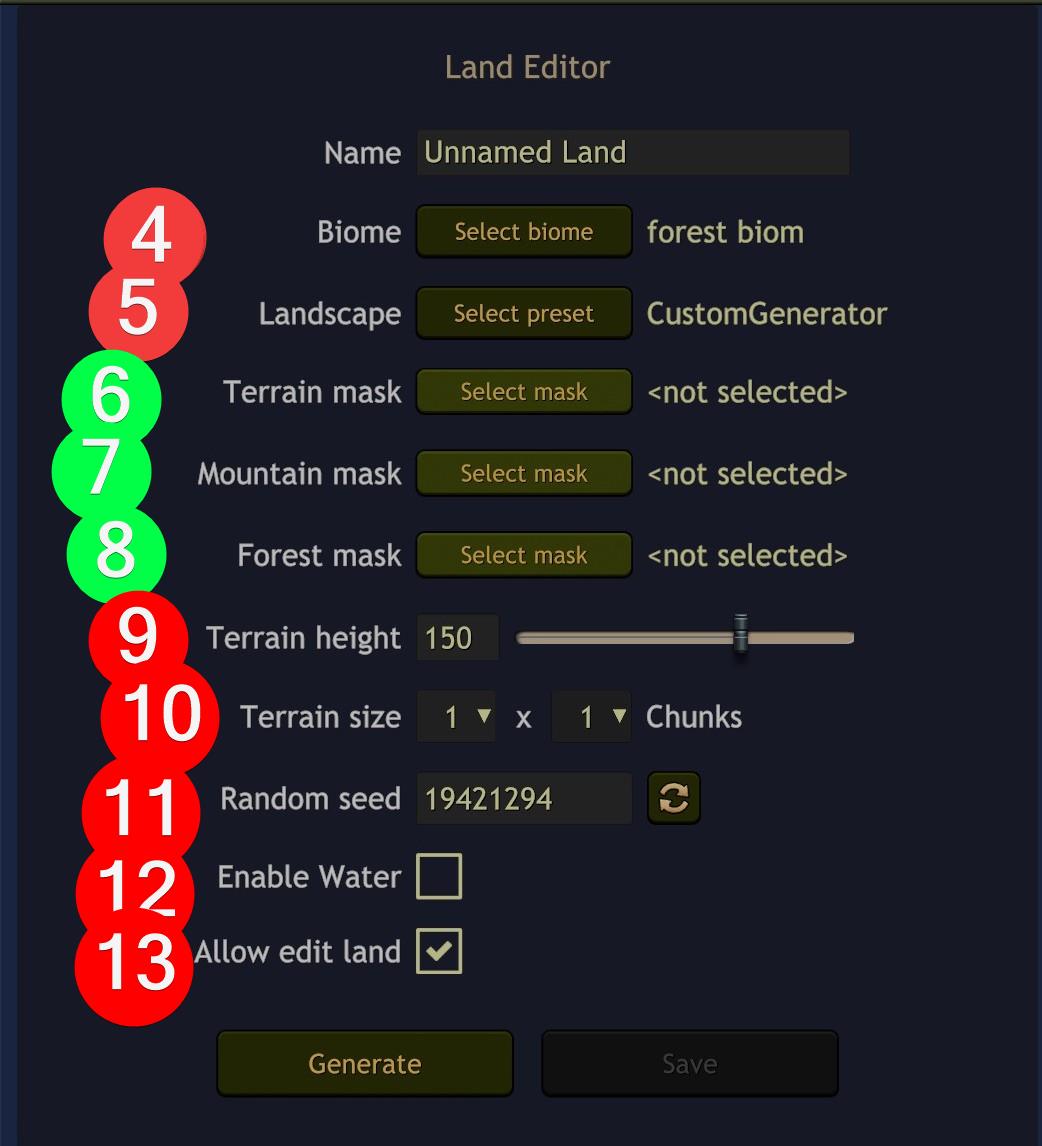
In the top left corner, you will see a menu with several options you need to deal with. (4) — Biome. There is only one available.
(5) — Paysage. There are a few available: CustomGenerator, Lots Mountains, Planes, Rare Mountains. Names speak for themselves. The latter three allow you to create a random land very easily. You can select one of them and get your very first land very soon.
In case you want something specific, you should use CustomGenerator. (6), (7), et (8) are only available when CustomGenerator is selected. If you have selected the other landscape, skip these explanations and go to (9).
(6) — Terrain mask. Here you need to provide a greyscaled heightmap. Read the dialog window to find out the path, where you need to place a heightmap file. In a Terrain mask, 0 (noir) is land bottom and 255 (blanc) is land top excluding mountains. Remove mountains from your heightmap, Si vous en avez. In case you are not very familiar with image editors, you can draw the river bottom (the lowest part of the land) like dark grey and use white for the part of the map, where you want to place towns and play. Il’s a common practice to give a 2048×2048 sized image, but any other size should also work. Just bear in mind that image size must have the same aspect ratio as your land size (10), otherwise it will be stretched.
(7) — Mountain mask. En général, it is the same Terrain mask, but only for mountains. 0 (noir) is flat land and 255 (blanc) is the highest point of mountains. Même si tu ne le fais pas’t want to add any mountains, you still need to create and select a fully black image. Sinon, toi’ll have default mountains at the bottom right corner of the land.
(8) — Forest mask. It can be omitted if you are happy enough with default random forests. They are pretty good. toutefois, you can provide your own forest mask to specify high and low forest regions.
(9) — Terrain height. The height difference between the highest and the lowest point. It takes mountains into account. If you have a black mountain map, then all other lands will be higher to fit the specified value.
(10) — Terrain size. The bigger the numbers, the bigger the land. 1×1 is a very tiny land. The tutorial map has a 1×1 taille. The first and second missions have 2×2 tailles. Mission 6, Par exemple, has a 4×4 taille.
(11) — Random seed. Affects bumps and mountains look.
(12) — Enable water. Select this, if you need water.
Ahh… I had to take a screenshot with this option selected. D'ACCORD. Laisser’s imagine you’ve selected it.
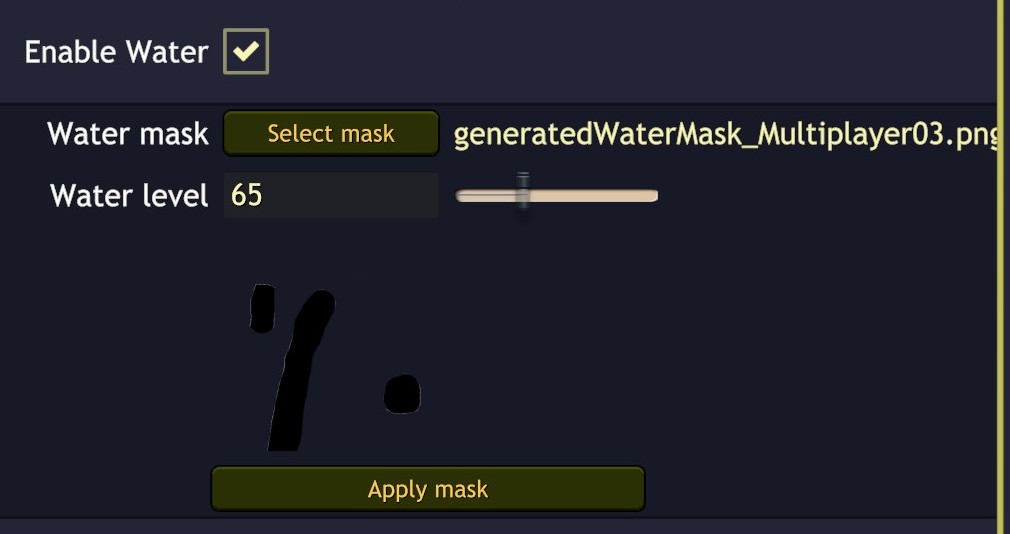
There you need to provide a water mask (optional*), water level (hauteur) and click Apply* mask. *Apply button works only if water mask was specified.
Water mask allows you to tell the land editor where you want it to draw water. Unlike heightmap, a water mask is a 512×512 size image with an alpha channel, where any color (usually black) means water and no color = no water.
(13) — Allow edit land. Just leave it ticked as is.
Enfin, you are ready to click Generate and wait for the result. If you like it, name the land (top most field in the land editor menu) and save it. If you want to change something, edit your heightmaps and masks, click Back and re-enter land editor, otherwise it won’t correctly update your land. Pour autant que je sache, seulement (9) Terrain height works correctly without leaving the editor.
C'est tout ce que nous partageons aujourd'hui pour cela Railroad Corporation guide. Ce guide a été initialement créé et rédigé par Personnel RB. Si nous ne parvenons pas à mettre à jour ce guide, vous pouvez trouver la dernière mise à jour en suivant ceci lien.