- Título: WILD HEARTS
- Fecha de lanzamiento:
- Revelador:
- Editor:
Information about WILD HEARTS is still incomplete. Por favor ayúdanos a completar los detalles del juego usando esto formulario de contacto.
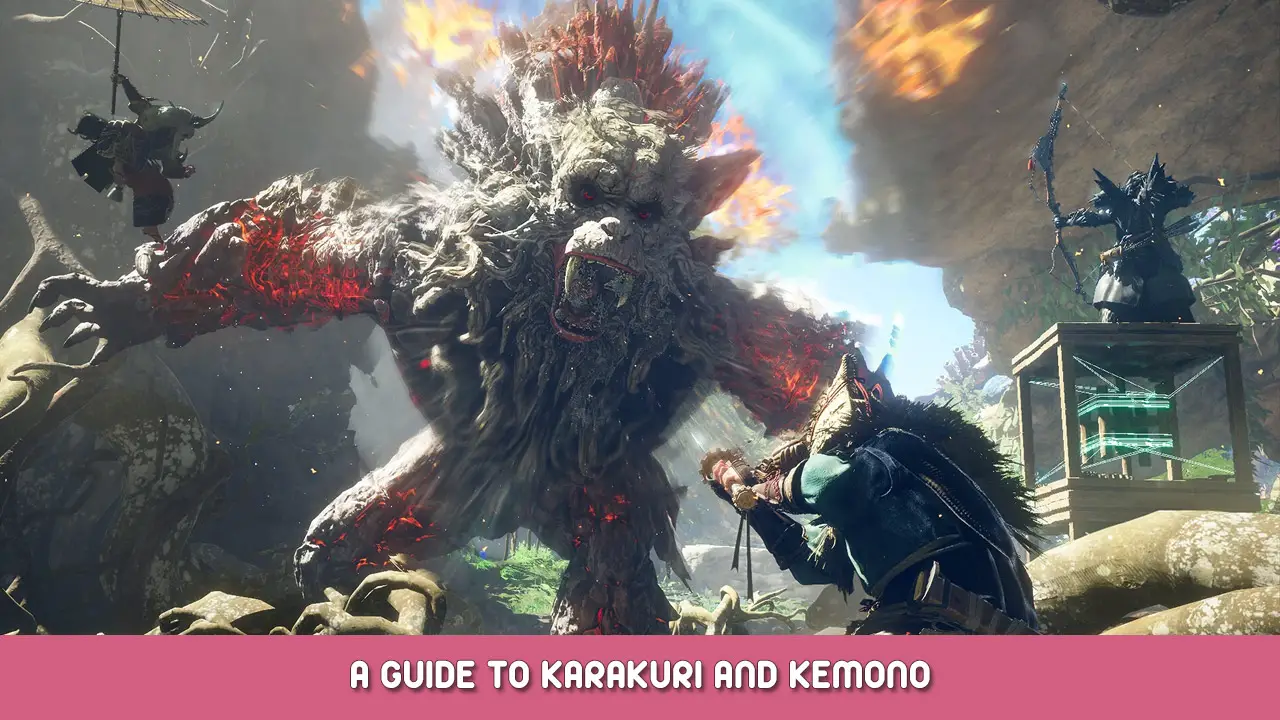
This guide contains a wealth of information on various topics, such as the user interface, making sense of the food system, general questing tips, how to make the most of exploration and combat with karakuri, and other miscellaneous advice.
Hola, Cazador!
Saludos! I’m a long-time hunting genre veteran, hoping to give you a solid base of information to succeed in this unique entry in the genre.
While Koei Tecmo is famous for their musou-style games like Dynasty Warriors, Wild Hearts is actually their third hunting game – the first two were Toukiden and Toukiden 2, both good games in their own right. They made Wild Hearts as a departure from the Toukiden series, so if you enjoy this game, I suggest giving Toukiden a try!
Hunting games are notorious for being difficult to get into. It took me many attempts to understand, but once the game clicks and you’re «en», you’ll find the experience quite rewarding, with dozens if not hundreds of hours of enjoyment ahead.
This guide is meant as more of a reference than a walkthrough, so feel free to jump around each section as you need.
As is often the case with games like this, information gathering is a group effort – while most of the information in this guide is something I’ve learned myself, others have gathered and provided information in a better way than I ever could. If I place their work in this guide, I’ll provide their username, as well as a link to their original post if possible.
Buena suerte, cazador!
What Makes Wild Hearts Different?
While somewhat popular nowadays (especially since the massive success of Monster Hunter World), the monster hunting genre still has relatively few games. This makes most hunting games relatively unique, but there’s still a few things that sets Wild Hearts apart from most hunting game conventions. Here are some of the more notable ones, for better or worse:
- The biggest difference is the use of karakuri structures as an integral part of hunting. This can often lead to comparisons to Fortnite. This allows more freedom in playstyle and the ability to customize your bases and traversal while out in the field.
- While the game is multiplayer, it only supports up to three-player combat rather than the genre-standard four.
- There is cross-platform play, so players on PC can freely play alongside Playstation or XBox players.
- Despite the cross-play, there is no cross-save functionality. If you own Wild Hearts on multiple platforms, progress will not transfer between them.
- Multiple players in the same gaming lobby share story progress as long as they’re all at the same point in the story, rather than being forced to play story solo.
- Most hunting games offer all weapon types at the start; Wild Hearts restricts weapon choice behind story progression.
Introduction and Lore
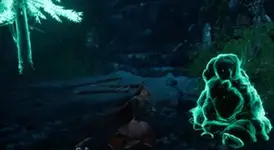
Kemono are creatures that resemble animals with plants infused in their bodies. Some with exceptional power can manipulate the elements to attack and defend, creating roots and branches, gusts of wind, spires of stone, y más. Most are peaceful, but lately they have become more aggressive.
In days of old, hunters used to stave off the kemono from attacking human settlements. Sin embargo, in a flash of tragedy, torrential rains caused a great flood that killed most everything, human and kemono alike.
Whether you’re from the fiercely frozen north, the war-torn kingdom of the west, the wildlands of the east, the tempestuous seas to the south, or from somewhere else entirely, you’ve found yourself at the foot of a sacred mountain in the region of Azumo.
After a meeting involving a mysterious entity known as Mujina, you find yourself in control of an old power involving the manipulation of celestial thread, creating wooden constructs out of thin air to assist in your hunts against kemono.
You’ll soon find yourself on the way to Minato, a small village on the verge of dying out due to the threat of kemono and overall lack of support or interest from other human settlements. De eso, you will be able to explore surrounding areas themed around the four seasons and hunt to your heart’s content.
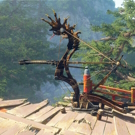
You start the game using a Karakuri Katana, but early on will be able to switch to the Nodachi, Mazo, Arco, or Bladed Wagasa. The last three weapons, the Hand Cannon, Claw Blade, and Karakuri Staff, won’t be unlocked until later on in the story.
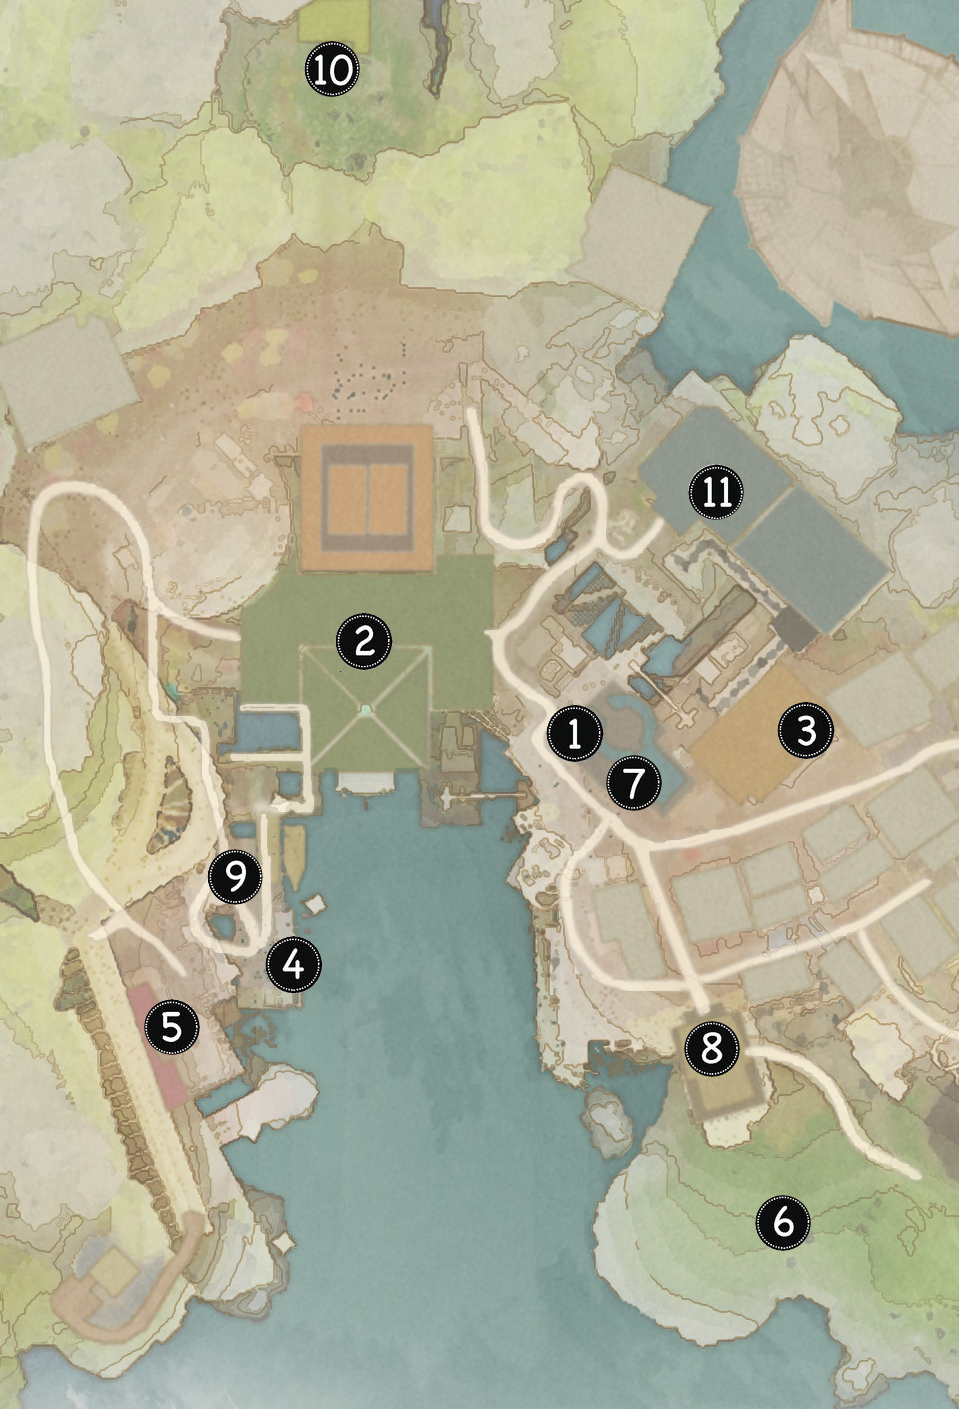
The People of Minato, the Hunting Village
There’s a decent amount to explore in Minato. The people and locations listed below are roughly labelled from most important or most often interacted with. There are other characters that offer minor services or sidequests, but they’ll be marked on the map so you’ll know when to visit them.
If you can’t find a character, they may be temporarily displaced due to your current story progress, you may need to proceed in the story to unlock them in the first place. De cualquier manera, continuing in the story will be the solution.

Locations on the map below are approximate. Minato has some verticality so if you don’t see someone, they may be a level above or below you. Most of these locations have a teleport icon that you can use from the map menu to go straight there.
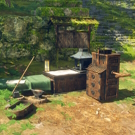
Possibly the most important character you’ll interact with, Natsume will create and upgrade weapons and armor for you whenever you’re in Minato. Speaking to her will give you options to do so, along with changing out your current equipment that you’ve already made.
Entonces otra vez, you can also interact with a Field Forge Dragon Karakuri, which will give you pretty much the exact same options. You can place a Field Forge anywhere you have enough water dragon pit power.
The sultry proprietor of the Crimson Treasury. You can buy food or crafting ingredients from her. Sin embargo, some of her wares are somewhat unique to your game save – some materials rarely found in your shop may be common in someone else’s game; visit other players’ versions of Minato to get some. Her stock changes out after each successful hunt.

Sometimes referred to as «ren», she’s the one to see to help build up Minato. Aesthetically, this means more structures are built around town. Functionally, this means you pay money to increase your food inventory. Sometimes it will give you more inventory slots, sometimes it will increase the stack size of those slots. De cualquier manera, you’ll have to complete a few hunts between each upgrade.

Nobumitsu offers mini quests or challenges you can do in addition to the main hunts to help give you more materials and money. None of it is explicitly necessary, but they can help you get some of those rare materials Kōgyoku won’t sell or provide cash for Seren’s money sink of inventory upgrades.

Tamakazura hosts the village bathhouse, which offers maximum health increases for each unique bath type you unlock.
Check back every now and then to see if you’ve unlocked a new one.

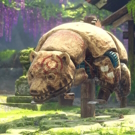
Any time you want to test a new weapon, karakuri, or strategy involving both, come down to the grassy training area to figure things out. Interacting with the bear will give you options to assist in your training, such as offering tutorials, whether it attacks back, etcétera.

Yatarō’s the one to see for minor customizations to your character, such as ribbons for your head or hands, masks, earrings, y similares.
He will require materials gained from quests, bought from the store, or a reward from a fisherman task.
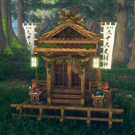
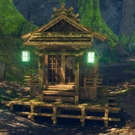
 8. Hogar
At home is a campfire to enable online features and upgrade your Tsukumo. You can also rest in bed to change the current time of day, which can be useful for skills based on time or you just want an aesthetic change.

(Note the icon above the head) Every once in a while, an NPC based on the character of another player will spawn near the front gate. Speaking to them will offer you a quest. You will embark immediately upon accepting, Así que prepárate. This quest will be based on su version of the map, so you won’t have access to your own bases or supplies. On completion, you get a guaranteed talisman and have the option to return to their Minato. The main thing to do so is visiting their store, where you can find things for sale that are generally harder to find in your own store. You can return to your own Minato by speaking to the Other Hunter again.
Speaking to Toga-Hime will rank up your hunter’s rank based on how much you’ve accomplished so far. As best I’ve found, this is only useful for changing the icon on your hunter’s card and online lobby. It has no gameplay effects.

Suzuran plays a big role in the story but has no gameplay interactions other than flavor text.
She may be found in other locations as the story requires.

Placing him at the bottom of this list is a shame since Ujishige’s a great character to interact with. If this were a list of characters I liked most, he’d be at the top. Ay, he’s only important for story reasons, and has no set location in town since he wanders around.
Upgrading Weapons – The Weapon Tree
The weapon tree to create and upgrade weapons is massive and interconnected.
It’s simple enough to go downward through the tree and make a good weapon with decent damage. It’ll be good enough to get you through the main story, con seguridad.
Sin embargo, to make a truly great weapon, you’ll need to pay a little more attention. As you upgrade, you are able to transfer over some traits from the previous upgrade onto the new one.
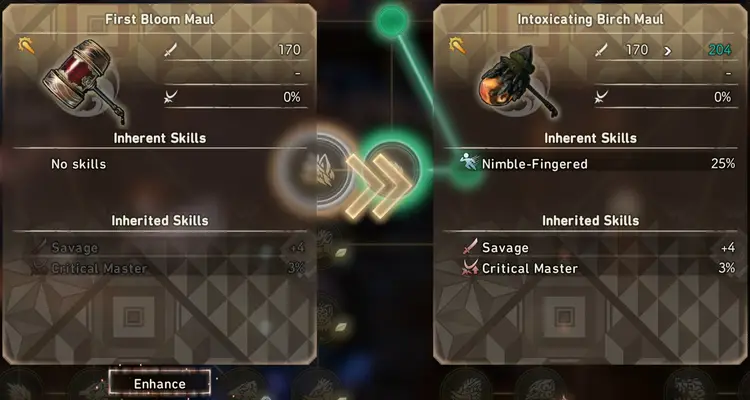
como ejemplo: by selecting this weapon upgrade from First Bloom Maul to Intoxicating Birch Maul, the damage will upgrade from 170 a 204, the critical chance will remain unchanged, but most importantly below that, let’s look at the skills.
Inherent Skillsare tied to that
specific weapon. The Intoxicating Birch Maul always has Nimble-Fingered 25%, and if you upgrade away from it, you can’t transfer it over.
Sin embargo, el
Inherited Skillscan be carried over to
any weaponas long as they have enough skill slots. When I upgrade away from the Intoxicating Birch Maul, I can take the Savage +4 and Critical Master 3% with me to the new weapon.
You can go up, abajo, sideways, all around in any direction in the weapon tree, picking up whatever Inherited Skills you want, as long as you can afford the money and materials. Some weapon builds take long winding paths, but the end result can be a very powerful weapon for the trouble.
You are able to revert upgrades to weapons for a small gold fee, which returns all monster materials used to upgrade it. This allows you to do many things, como:
- Go down a different upgrade path to get different skills.
- Test whether the presence or absence of a skill affects your build/strategy much if combined with testing on the training bear.
- Make an entirely different weapon. Just unlocked the claw blade and want to make one based on your current katana’s material? Revert that katana, get those materials back, and make that shiny new Claw Blade!
Some extra notes about the weapon upgrade tree:
- Multiple traits of the same kind stack, even if they’re identical. Putting two Critical Master +3% skills on a weapon will still take up two slots, but will effectively give you +6% total crit chance.
- Beware when heading upwards on the upgrade tree. You might lose out on a skill you want because the weapons don’t have enough skill slots to hold them.
- You can’t go back onto the same weapon node and retrace your steps; each weapon in your path has to be a unique node.
- If you’re unsure what a skill does (because let’s be honest they’re somewhat hard to understand), check the button legend at the bottom of your screen to see Skill Details, which will list out what every skill on the current screen does.
Elements and Ailments
While brute force, piercing beaks, and slashing claws make the majority of the kemono arsenal, they often also make use of the elements to fight. Your armor can make you strong or weak to these attacks (though personally I’ve never noticed a difference). Weapons made from kemono materials can also put this power in your hands, allowing you to deal extra damage to kemono who are weak to your weapon’s alignment.
Physical characteristics of your weapons are as such:

Barra oblicua. Katana, Nodachi, Claw Blade, and Karakuri Staff deal slash damage.

Aporrear. The Maul and Hand Cannon deal pummel damage, as does the Pounder fusion karakuri. Hitting kemono on the head can cause knockout, stunning them in place.

Estocada. The Bow and Bladed Wagasa deal Lunge damage, as does the Harpoon fusion karakuri.
All physical damage types are well-balanced among kemono weaknesses.
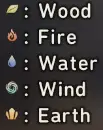
Elemental characteristics of kemono, armas, armadura, and karakuri are indicated as such:
There are also status ailments, which mostly affect hunters and kemono differently.

Veneno. Hunters slowly take damage for the duration. Kemono are similarly affected in the same way.

Fatiga. Hunters will fall asleep, standing in place. They will wake up over time, or when they take damage. Kemono will also fall asleep. The first attack to connect will deal additional damage.

Frozen. For hunters, stamina recovers much more slowly. Frozen kemono will reel from attacks more often.

Enredado. Hunters will be unable to conjure karakuri for the duration. Entangled kemono will take increased damage from karakuri-based attacks.

Ablaze. Hunters take damage quickly over time, but can set it out by rolling on the ground or getting into water. Ablaze kemono will flail around wildly trying to put out the flames, open to attack.
Note that Ablaze is NOT related to the fire element! Fire attacks will not inflict Ablaze; you need specifically Ablaze-oriented skills for that.
Understanding Armor
Armor is fairly straightforward in Wild Hearts. You have armor slots for head, cuerpo, brazos, piernas, and feet. To make a piece of armor, go to Natsume or a Field Forge and selection the option to do so. You’ll see an image similar to this:
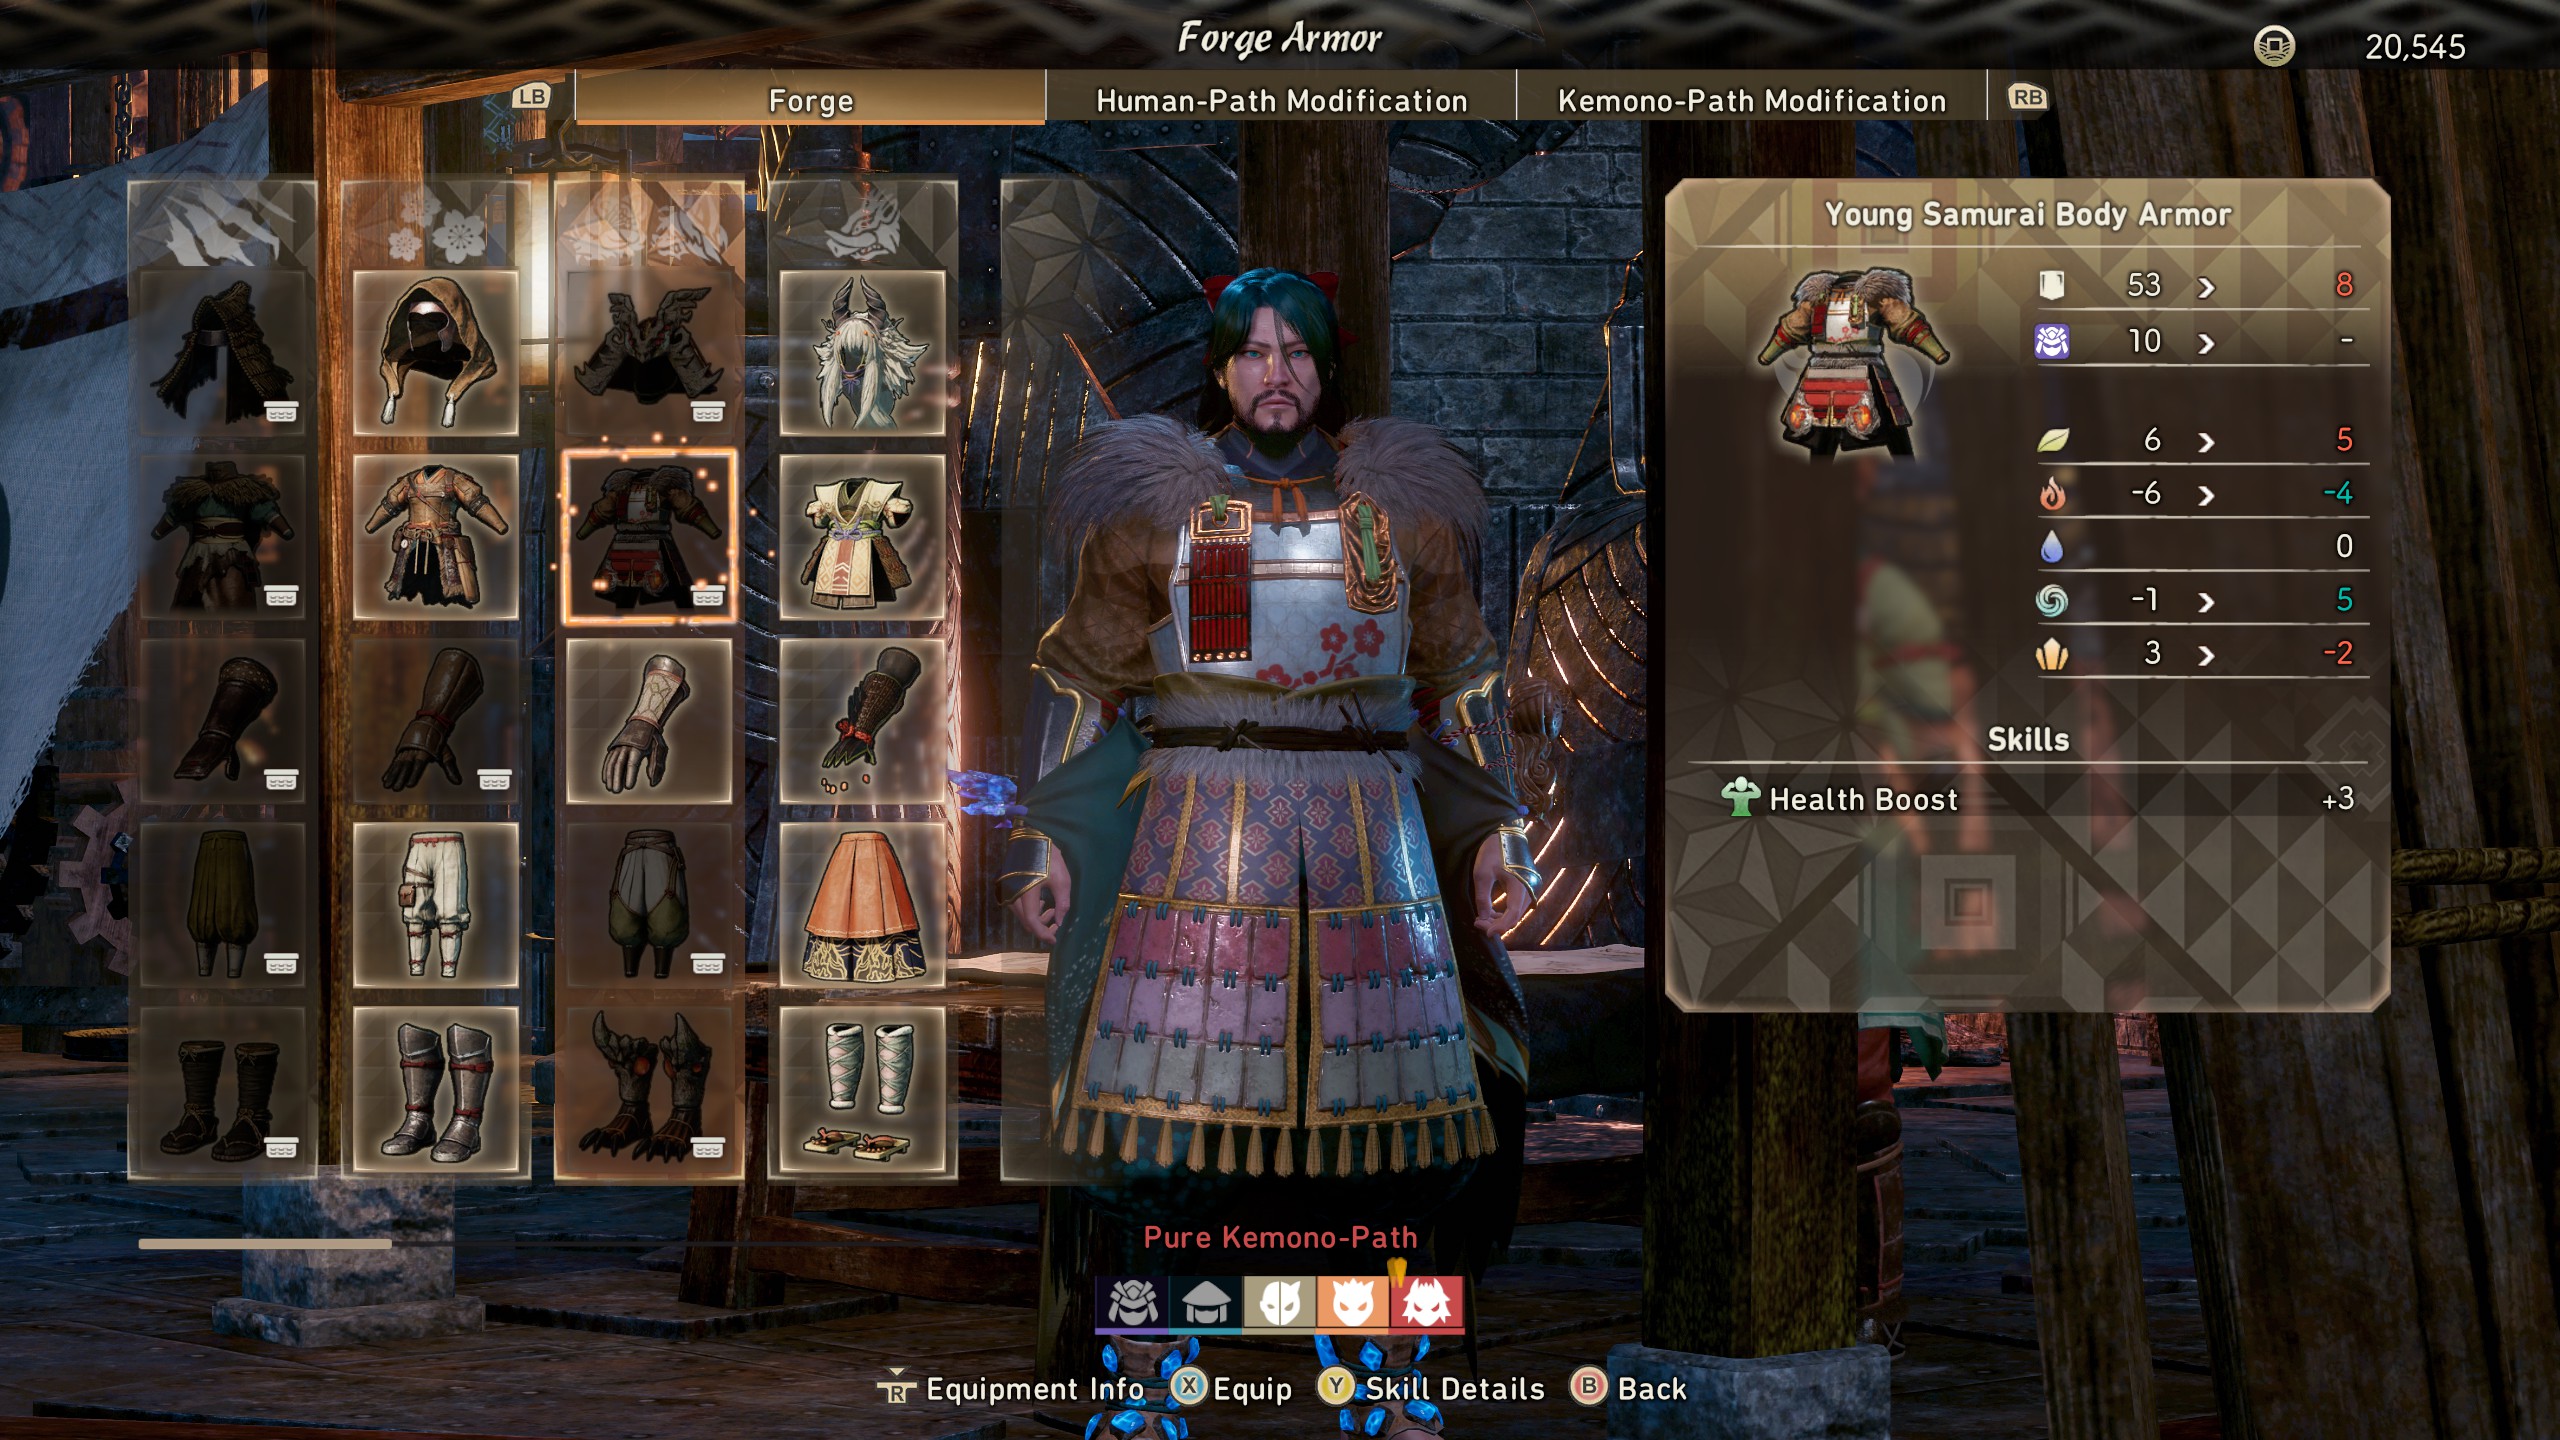
At the very top, you’ll see Forge, Human-Path, and Kemono-Path. All armor forging starts with the first one, Fragua. a la izquierda, you’ll see a grid of options of armor pieces to craft. En el centro, your character previews what the armor piece looks like. A la derecha, you’ll see the details of what the armor will give you.
In the details on the right, the white numbers on the left column indicate the stats of the armor you’re currently wearing. The red and blue numbers on the right show the stats of the armor you’re currently selecting on the grid to craft. Blue numbers mean the number has improved, and red indicate that particular stat has decreased. En este caso, I’m currently wearing armor that gives 53 defensa, 10 Human-Path (explicado más tarde), 6 wood elemental resistance, -6 fire resistance, 0 agua, -1 viento, y 3 tierra. The armor selected on the grid to craft would change that to 8 armadura, no path at all, 5 wood defense, etcétera, you get the idea. The new armor will also give the skill Health Boost +3.
I already have that armor piece crafted, but if I didn’t, the materials required to craft it would be listed on the bottom right.
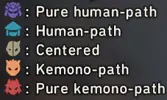
The unique twist on armor in Wild Hearts is the ability to set your armor towards being more human-like or kemono-like, the sum total of which is shown at the very bottom of the screen. en mi caso, I’m Pure Kemono.
Armas, Armadura, and Talismans all can have skills that have a human or kemono path requirement before they activate. They will have the corresponding icon next to the skill name if it’s required. If you do not meet the requirements, the text will be faded out, indicating the skill is not active.

Generalmente, human-path skills will boost skills that embody human ingenuity, like enhancing karakuri abilities. Kemono-path skills will boost skills that embody a wild spirit, such as sacrificing defense for greater offense.
Build Customization with Talismans
Talismans, often also referred to as charms, offer a small extra bit of customization to your builds.
Even though your equipment screen only displays one talisman, you are able to equip up to five talismans at the same time. Each talisman has a «costo», which roughly corresponds to how powerful the skills on them are. The cost limit is 50, but most talismans you’ll find take up 5-10 points so you won’t struggle to fit them in until much later on when you find more powerful talismans.
There are three ways to obtain talismans:
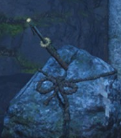
1. Finding them and picking them up while exploring the hunting zones. These talismans are in set locations and have a specific skill attached to them; it will always be the same talisman between playthroughs.
They appear as swords, usually leaning against a wall, plunged into a rock, or sticking out of the ground. They are usually decently hidden, but will be revealed as a question mark on the map once you’ve upgraded your hunting towers.
2. Getting them as random drops from hunting kemono. You will be getting most of your talismans from this. Preliminary testing shows that it’s roughly a 1-in-4 chance of getting a talisman drop. There are rumors based on a developer interview that using Hunter’s Arm on a kemono increases the chances of obtaining one, but that same testing found no appreciable difference in drop chance.
Talismans from hunting kemono have randomly-generated skills on them, but the skills are somewhat weighted to thematically match the kemono you’re fighting. Por ejemplo, if you’re looking for Fatigue Wielder skill on your talismans to make kemono fall asleep in hunts, you’ll have the most luck hunting Sporetail.
Check here to get an idea of what talismans to expect when hunting kemono.
3. The last method is to assist Other Hunters who are visiting your Minato. By accepting and completing their quest, you are guaranteed a talisman drop. Sin embargo, testing has shown that these talismans are seeded in a different way, and are likely not worth the farm. They tend to have worse skills at lower amounts and lack skill variety.
Exploring the Hunting Areas
The vast majority of your playtime will be spent among four hunting zones where you will explore, set up bases and paths of traversal, and hunt kemono. These main four locations are each themed around a season of the year.
Each location has 50 tsukumo to find, 13 dragon pits, and a various amount of lore documents, talismans, and creatures to find and pick up. You are under no obligation to find everything all at once – take your time and pick up what you find naturally. Eventualmente, you’ll get an upgrade for the hunting tower that will highlight any hidden items you’ve missed.
dicho eso, the first time you visit a zone, you should do these things early on.
- Explore the zone to get your bearings and learn the lay of the land
- Pick up any tsukumo and activate all dragon pits you can find along the way
- Place a hunting tower roughly around each corner of the map, enough that you cover the entire area but don’t overlap so much that the green glow on the map obscures all details
- Plan out where you’d like to place camps in the future
- Figure out where you should put dragon karakuri for fast traversal of the map
When exploring a map, keep an eye out for plants that give you crystals – these crystals are used to activate dragon pits, which will give you more elemental energy in the map to place dragon karakuri like tents and hunting towers. More crystals can be found by praying at bone sites randomly generated around the map – you’ll know what they are from the butterflies that fly off when you approach. Eventualmente, you’ll need larger crystals to upgrade dragon pits, which can be obtained by hunting large kemono.
When upgrading dragon pits, prioritize ones that give earth element first, as they’ll allow you to place more tents for teleports. Second priority is any pit that upgrades four elements at once.
When elemental power is scarce, don’t leave flying vines and wind vortexes around. Destroy them when not in use so you can use a few of them in a row to explore hard-to-reach areas. Don’t forget you can destroy flying vines from both ends. Once you’ve fully explored a zone and have your camps set up, then feel free to place traversal dragon karakuri in more permanent spots.
Be careful where you place your flying vines. They can easily break from any contact with a kemono or its attacks. Place them out of harm’s way if you can.
There is no fall damage in Wild Hearts, so feel free to explore without worry. If it’s a fall from a great height, you will fade out and return to where you first fell. The same happens if you fall in deep water. These will reset your weapon gauge if you have any, but you will be otherwise unharmed.
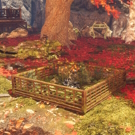
Each zone has two spots where placing a camp tent is remarkably cheap – one is the camp you start with when you first come to the zone, and the other is hidden somewhere in the zone. The game will notify you if you discover this second ideal camp area. De lo contrario, I’ll post them in the spoiler tags underneath each area’s section.
You begin the game with access to this spring-themed vale full of sakura trees and bamboo forests. There are many small arenas with a web of short paths connecting between them.
Second camp location: Northwest part of the map has a small cavern that turns north and ascends to a flower field with a healing tree near a shrine.
This island shows off a relaxing summer atmosphere, full of turtles, cangrejos, coral desposits, shipwrecks, and ancient ruins. This area is like a large circle with the surrounding cliffs and beaches serving as accessory zones to the main one in the center.
Second camp location: Northeast of the giant shipwreck in the center of the map. Up some cliffs and hidden in a thicket of trees. A small open circle with a healing tree marks the spot.
This canyon sits in perpetual autumn, full of yellows, rojos, and golds. This place has multiple wide-open plains making for easy large arenas to fight within. In the northern part of the map is a series of caverns with long corridors.
Second camp location: From the giant wheat field in the center of the map, follow the ascending winding path to the northwest to find a hot spring with a healing tree and a shrine.
The fort and its surrounding ruined city are locked in a neverending winter thanks to kemono interference. Like Harugasumi Way, this place consists of many arenas with short paths between them, albeit in an urban sprawl than a natural formation.
Second camp location: A large building in just east of the center of the map has a healing tree upstairs. The doors open up to rooftops that are perfect for flying vine ziplines all around.
Camp Building Tips
- Always have tents at the two cheap camp areas! They’re at naturally good locations at a corner or roughly center of the map, and have a healing water tree available.
- Choose camp locations that are near a water tree or can reach one within one or two ziplines. Quick access to refills can be helpful on difficult, time-sensitive hunts.
- Place hunting towers at camp locations. If you activate one, you activate them all, so by doing this you’ll be able to start the hunt with your search active no matter where you start.
- If there’s no good place to put a camp in a corner where you’re missing hunting tower coverage, just place a hunting tower in that corner without a camp. It will activate when you turn on the others, so it’ll be fine.
- Camps atop cliffs or on rooftops can be ideal as the vantage point often allows easy zipline travel.
- With the above criteria, most of my maps have a camp in most corners along with one in roughly the center of the map, with one hunting tower alone to cover a corner with no camp. That’s just what works for me; your own choices may vary.
- If you’re going to farm materials on the map, choose one camp with a lot of space to place down all of your ore shrines, food shrines, paddle scoops (if near water), ingredients chests, and cooking implements. Visit that base often to collect and process foods. si te gusta, have one of these «major bases» on every map.
- You can only have a maximum of three wildlife cages or pens per map, so if you’re farming creature matierals it’s a good idea to have three on each map.
- Don’t forget to upgrade dragon pits! More elemental power means more shrines, food processing/storage, and traversal options!
You will also be able to place some dragon karakuri in Minato. It won’t be a lot at first, but after a story event you’ll have a little more breathing room. It will be nowhere near what you have available on the hunting maps, but it’s enough to set up some food storage and processing, or place decorations. Traversal karakuri aren’t really needed since most important locations can be teleported to directly from the map.
!! ADVERTENCIA !!If you keep food storage in Minato,
noplace them anywhere on the same elevation as Natsume’s forge, or near any platform edges that has direct line of sight to it.. There is a high chance they will be destroyed during a main story quest, deleting all of its contents. To reiterate, if you’re storing any food in Minato, do not place them in that area and keep them away from platform edges. The downstairs interior of your house is also a safe location.
Setting out on Hunts

This Main Map screen is how to select what you’re hunting. A kemono’s head icon indicates that it is a hunt for that particular kemono. More kemono heads means it’s a multi-kemono hunt in a single mission.
To the right of the kemono’s head can be two diamonds – if you’ve completed one of these hunts already, these diamonds are used to select the normal version of the hunt or the slightly more difficult Recondite version, which gives more rewards. Normal hunts give you 60 minutes or 3 knockouts before failure. En este caso, the Recondite Sticky Trickster quest is harder by restricting it to 30 minutos y 2 knockouts. These quests can be infinitely repeated.
If there is a scroll icon, that indicates a side quest. You can only complete these once, but you’ll get unique rewards, character interaction, and cutscenes for doing so.
Selecting the camp tent icon will put you onto a generic expedition to that area instead with no time or knockout limits, perfect for exploring, picking up materials, or hunting stress-free.
On the bottom left of the Main Map is the Chapter Selection. A medida que avanzas en la historia, different missions involving different kemono will become available. Use Chapter Selection to go backward and hunt earlier kemono that you may have missed or need more materials for.
When selecting a mission, you have the option to immediately depart (which will bring you in solo or with fellow hunters in your lobby) or search to join others who have asked for help. If you join others through the menu, you will stay in their world until you complete the entire mission with them.
The other option for multiplayer is to use a Hunter Gate found throughout the areas. Interact with it and select a kemono you wish to hunt; you will automatically be put into a hunt with someone against your selected target. Unlike joining a mission, sin embargo, you will be automatically booted as soon as the finishing blow against that kemono is complete.
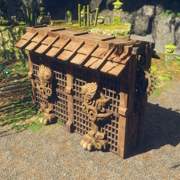
Basic Karakuri

The most unique feature of Wild Hearts, the basic karakuri form the building blocks of construction to enhance (and sometimes interrupt) your hunts. Each one you summon costs Celestial Thread. The diamond on the bottom of your screen will show much you have left.
If you find yourself running low on Celestial Thread, activate your hunter’s vision. Nearby trees or rocks will be highlighted that can be chopped or mined for more. If you jump onto a large kemono and activate Hunter’s Arm on a glowing green area, you’ll end up with double your maximum amount of thread; a massive boost. Interacting with a karakuri tsukumo shrine will also give you the same Hunter’s Arm effect.
You will gain Celestial Thread over time by dealing damage to large kemono, which provides a slow stream of thread back. If you take advantage of a large opening, you’ll gain decent amount of thread.
Basic karakuri remain indefinitely on the map if not destroyed, so pathways, bridges, stairways, plataformas, and such will stay there between hunts. It is fully possible to build a base on a platform built entirely out of crates. Sin embargo…
There is a maximum limit per map, but it’s difficult to reach in normal gameplay. You would have to actively try to reach the limit, upon which the oldest karakuri will be destroyed first to make room for any new ones you make.
Celestial Thread Cost: 1
desbloqueado: en el tutorial
The most basic of all karakuri. It builds a solid block that can be walked on. It springs slightly when jumped off of, giving you extra height and changing your weapon moveset for that jump. Crates can quickly be built upwards in stacks of threes, or slowly built horizontally while standing on them to build bridges. Small attacks can be blocked by the crate. The smaller of the large kemono, like the Ragetail, can have their charge attacks nullified by blocking them with a crate. This will leave them vulnerable.
 Primavera
Celestial Thread Cost: 2
desbloqueado: Defeat a Ragetail
The spring is a bounce pad that will quickly launch you in any horizontal direction you choose. This can be great for traversing small pits without having to jump. This can be used offensively in combat by lunging at a kemono with a special attack done mid-launch from a spring. It can also be used defensively by quickly pushing you out of the way of a dangerous attack, as not only is it a quick traversal, it gives you more invincibility frames than a normal dodge.
 Antorcha
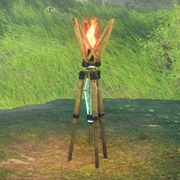
Celestial Thread Cost: 1
desbloqueado: Defeat a Kingtusk
A torch has many uses. Approaching a torch will push your character forward, making an arcing fire attack. This is a decent attack in it’s own right, but it also adds

fire damage to your weapon for a short time. You can climb multiple torches on top of each other, but it’s less effective than jumping from crates. Some hidden areas are blocked off with vines, which you can burn away to gain access.
 Planeador
Celestial Thread Cost: 3
desbloqueado: Defeat a Spineglider
A handheld glider that flies upward like a helicopter when held. You can place it on the ground and approach or deploy it immediately mid-air. The glider can take you far distances and can be re-used if picked up again soon after landing. It will destroy itself after a short time on the ground.
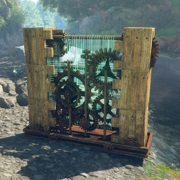
 Celestial Anchor
Celestial Thread Cost: 3
desbloqueado: Purchased in Karakuri Menu
A flexible pole struck into the ground with ample amounts of celestial thread available for movement. Activating this gives your hunter powerful movement capabilities, which significantly affects defensive and offensive maneuvers. Your moveset is different while flying through the air, so give it a try!
 Stake
StakeCelestial Thread Cost: 2
desbloqueado: Purchased in Karakuri Menu
A platform with a grapple hook in front, which can be used to launch a hunter forward into a kemono for damage and repositioning.
It can also be used to launch into a wall, or simply placed while climbing, to allow scaling of tall cliffs with ease.
—
You can only have four of these basic karakuri equipped at a time. You switch them out from the equipment menu at Natsume or at a Field Forge.
Aside from their straightforward individual uses, your selected four will indirectly choose the fusion karakuri you have available. It’s a good idea to experiment with different loadouts to see what fits your playstyle and cover various bases. Por ejemplo, you generally want to keep at least one fusion karakuri that can affect flying kemono, and having access to at least one of the two healing fusion karakuri will help out in quests that limit your healing water.
It is best to get used to the idea of using karakuri in combat and grow familiar with the flow of combat. Kemono in this game, especialmente juego tardío, are incredibly fast and aggressive, even by monster hunting standards. Wild Hearts expects you to use karakuri wisely to give yourself breathing room from their relentless attacks and grant opportunities to fight back.
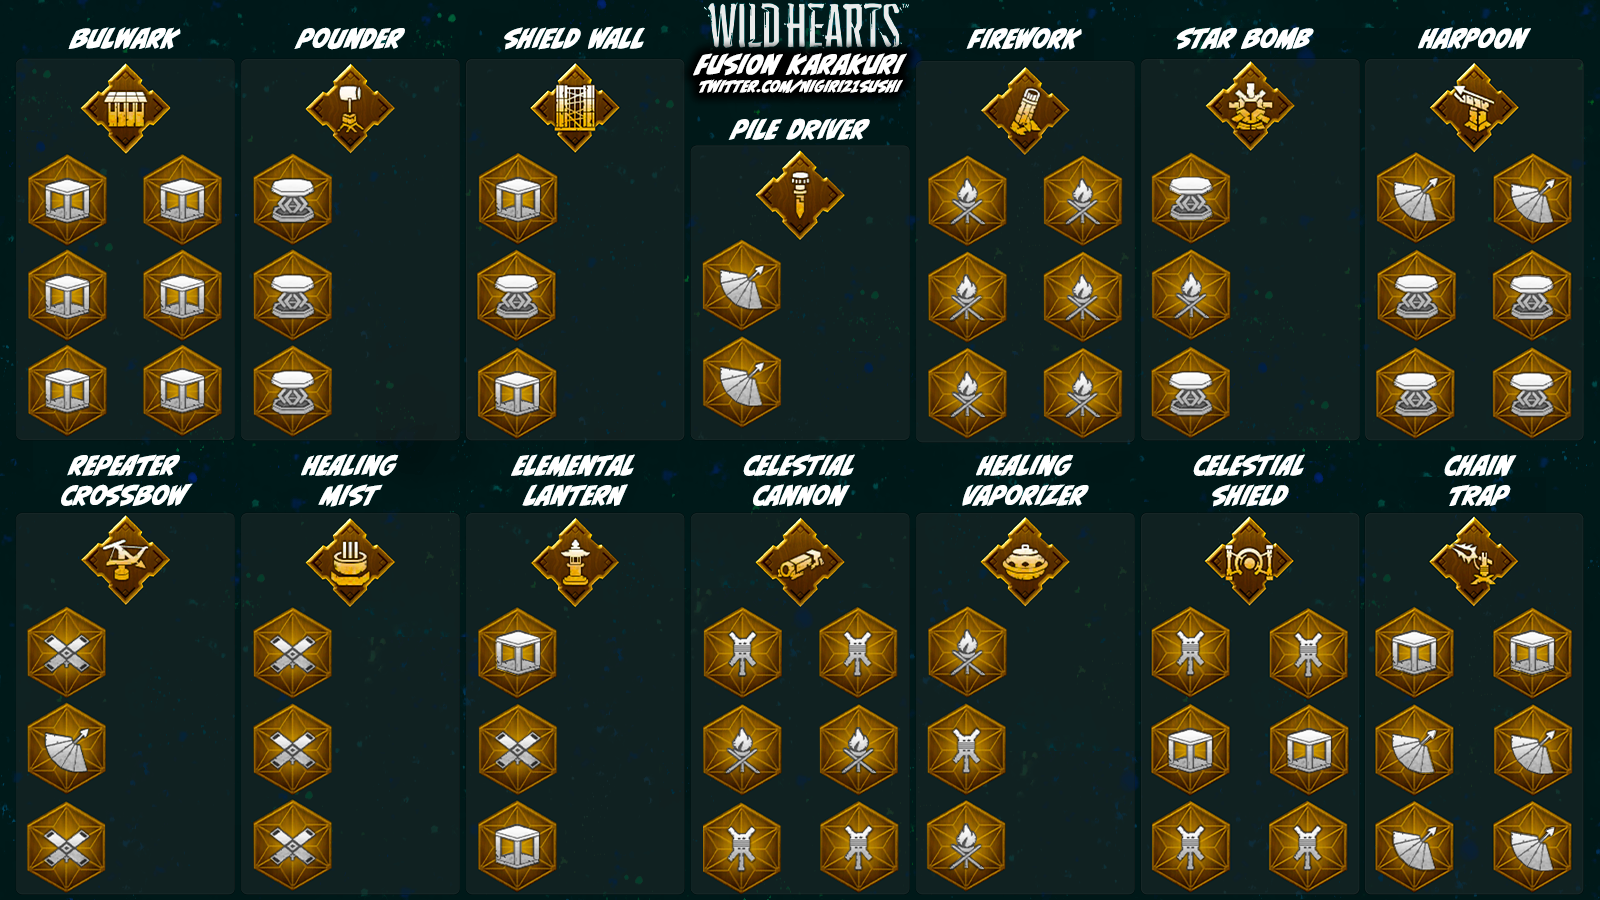
Fusion Karakuri – Parte 1
These more advanced karakuri are built by building basic karakuri in a certain order. The basic karakuri will then transform to a specific powerful tool with highly specialized uses.
You will unlock fusion karakuri by meeting the following criteria:
- You currently have all required basic karakuri equipped for that hunt
- You are hunting a specific large kemono
- That specific kemono will prepare to do a specific attack
- If in multiplayer, you must be the target of that specific attack
- You must be on the ground when the moment triggers, otherwise it instantly cancels
If those conditions are met, the sound of a water drop will play, the screen will desaturate, and time will slow down. Follow the button prompts to build the basic karakuri used to create the fusion karakuri. Si tiene éxito, you’ll create it and successfully counter the kemono’s attack in spectacular fashion.
What if you fail, or you were playing multiplayer and weren’t the one to unlock it?
No te preocupes, you’ll get more chances. If the kemono does the attack again with you as the target, you’ll get another try. Si no, you can always unlock it later the next time you face that type of kemono.
Unlike basic karakuri, fusion karakuri is temporary and will disintegrate after a set amount of time passes or if they’re destroyed by kemono.
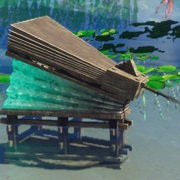
combinado: Crate x6 (Crate → Crate → Crate → Crate → Crate → Crate)
Celestial Thread Cost: 6
Inspiration Kemono:
KingtuskA strong wall able to block charges and projectiles. You are able to climb and jump off of it like a 3-stack of crates for offensive combos. En multijugador, it’s a good idea to build a bulwark to protect yourself when reviving others.
combinado: Spring x3 (Primavera → Primavera → Primavera)
Celestial Thread Cost: 6
Inspiration Kemono:
SpinegliderConjure a giant hammer that smashes down with tremendous force. Deals high amounts of pummel damage, which can blackout (aturdir) monsters if hit on the head. Can break structures like Spineglider towers in combat, or break down stony walls to open up new passageways or secret rooms.
combinado: Glider x3 (Planeador → Planeador → Planeador)
Celestial Thread Cost: 9
Inspiration Kemono:
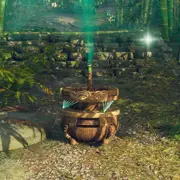
LavabackHealing water is dispensed from this incense burner, slowly healing all hunters in a medium range for a decent while. The Healing Mist is invulnerable when deploayed and cannot be broken by kemono early.
 Elemental Lantern
combinado: Crate → Planeador → Crate
Celestial Thread Cost: 5
Inspiration Kemono:
GritdogCuando se coloca, an Elemental Lantern sits dormant until a hunter gets hit by a large kemono’s attack that dealt elemental damage. The Elemental Lantern then activates, shielding the hunter from the attack. Elemental Lantern will remain in effect for a short while. Like the Healing Mist, it cannot be destroyed by kemono.
 Star Bomb
combinado: Primavera → Antorcha → Primavera
Celestial Thread Cost: 5
Inspiration Kemono:
SporetailA bomb set to detonate after a few seconds, dealing fire damage and inflicting some aflame ailment buildup on all kemono and hunters within its explosion radius. It will detonate early if a kemono touches it or if a hunter attacks it. Like the Pounder, it is able to break down stone walls to open up passages.

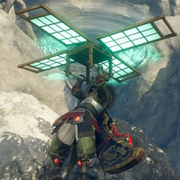
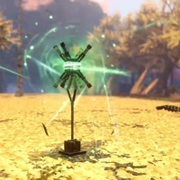
combinado: Torch x6 (Antorcha → Antorcha → Antorcha → Antorcha → Antorcha → Antorcha)
Celestial Thread Cost: 6
Inspiration Kemono:
DreadclawIt acts as a bright flare to stun any kemono that see it, interrupting attacks. It is particularly effective against flying kemono currently in the air, as it will knock them down and leave them vulnerable. Unlike restraining effects from other fusion karakuri, the fireworks remains fully effective no matter how many times a kemono is knocked down.
Fusion Karakuri – Parte 2
combinado: Crate → Primavera → Crate
Celestial Thread Cost: 4
Inspiration Kemono:
GoldshardAkin to the Bulwark, the Shield Wall blocks charging kemono and projectile attacks. It is much, much sturdier than the bulwark, but collapses quickly over a few seconds. If you know the timing right, the resulk is like a Bulwark that is cheaper and deploys faster.
combinado: Planeador → Stake → Planeador
Celestial Thread Cost: 8
Inspiration Kemono:
FumebeakA crossbow that aims at a large kemono and fires barbed arrows repeatedly into the target. Good for damage dealing fast targets. Also especially effective against flying kemono.
combinado: Stake x2, Crate, Stake x2, Crate (Stake → Stake → Crate → Stake → Stake → Crate)
Celestial Thread Cost: 10
Inspiration Kemono:
DeathstalkerAn unassuming pressure plate appears on the ground and remains there for a long period of time. If a kemono lands on it, a fierce volley of harpoons spring out and pin it in place for a long period of time. A powerful tool, but loses effectiveness if used repeatedly. Be prepared for frustration when a kemono dances around it without triggering the trap.
combinado: Antorcha → Celestial Anchor → Antorcha
Celestial Thread Cost: 6
Inspiration Kemono:
SapscourgeThe Healing Vaporizer sits dormant for a short bit before releasing a powerful burst of healing to all hunters in the area, curing wounds and a single status ailment. It also leaves behind a short healing over time effect to all affected.
combinado: Spring x2, Stake, Spring x2, Stake (Primavera → Primavera → Stake → Primavera → Primavera → Stake)
Celestial Thread Cost: 12
Inspiration Kemono:
AmaterasuWhen deployed, a massive harpoon emerges from the ground and automatically takes aim at the nearest kemono. It fires at a high speed, dealing heavy damage and pinning the kemono in place. Effective at bringing flying kemono down. It doesn’t hold kemono for as long if used repeatedly. The harpoon can miss if the target is particularly evasive.
combinado: While climbing on kemono, Stake x2 (Stake → Stake)
Celestial Thread Cost: 4
Inspiration Kemono:
AmaterasuUnlike all other fusion karakuri, the pile driver is built directly on a large kemono while climbing on it. It’s inconsistent and difficult to apply, but once it does, it emits a large green glow on the affected area. It severely reduces the kemono’s defense there, so it’s advisable to focus attacks while it lasts.
combinado: Celestial Anchor, Antorcha, Celestial Anchor x2, Antorcha, Celestial Anchor (California → Antorcha → California → California → Antorcha → California)
Celestial Thread Cost: 14
Inspiration Kemono:
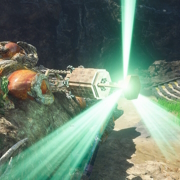
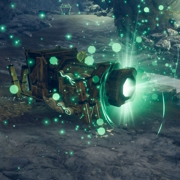
Golden TempestA large energy cannon that fires directly ahead after a short delay. The initial impact is weak, but a while later the projectile detonates in a massive blast for devastating damage. Best used at the start of a hunt before the kemono is aware of your presence. Use a karakuri tsukumo shrine beforehand to obtain more thread beforehand and fire two at once!
combinado: Celestial Anchor, Crate, Celestial Anchor x2, Crate, Celestial Anchor (California → Crate → California → California → Crate → California)
Celestial Thread Cost: 14
Inspiration Kemono:
EmberplumeMuch like the Elemental Lantern that protects against elemental attack, the Celestial Shield protects hunters from normal physical attacks. After absorbing some damage, it will take a short amount of time to recharge before it can absorb an attack again.
Here are some tips to help out:
- Memorize the thread requirements of a fusion karakuri before building. Nothing is worse than building a Celestial Cannon at the perfect moment only to realize you’re one thread short.
- Practice the button combination until it becomes second nature. Panic invites mistakes.
- Are your basic karakuri coming out diagonally or otherwise out of place? Break the habit of moving while building and learn to stand still for fusions.
- Are you playing multiplayer and fusions aren’t coming out right? It’s likely the lag, and unfortunately the best solution is to pace your building slower so each input goes through.
- Recognize the best times to use fusion karakuri. Any karakuri you summon too early or too late end up wasted, taking up thread that could have been used more effectively later.
- Ensure you’re in the right location for building fusions. Aside from the pile driver, most fusions are best built on solid, flat ground in front of you. Low ceilings, slopes, or other obstructions can cause the build to fail.
made this wonderful quick reference for fusions.
Dragon Karakuri – Parte 1
Unlike Basic Karakuri and Fusion Karakuri which require celestial thread to build, Dragon Karakuri draw their power from the environment, which requires Dragon Pit energy. As mentioned before in the exploration part of the guide, opening up Dragon Pits and upgrading them gives you more elemental energy to work with, and in turn, opportunities to build more bases, more elaborate traversal systems, and resource gathering automation. It’s well worth the investment.
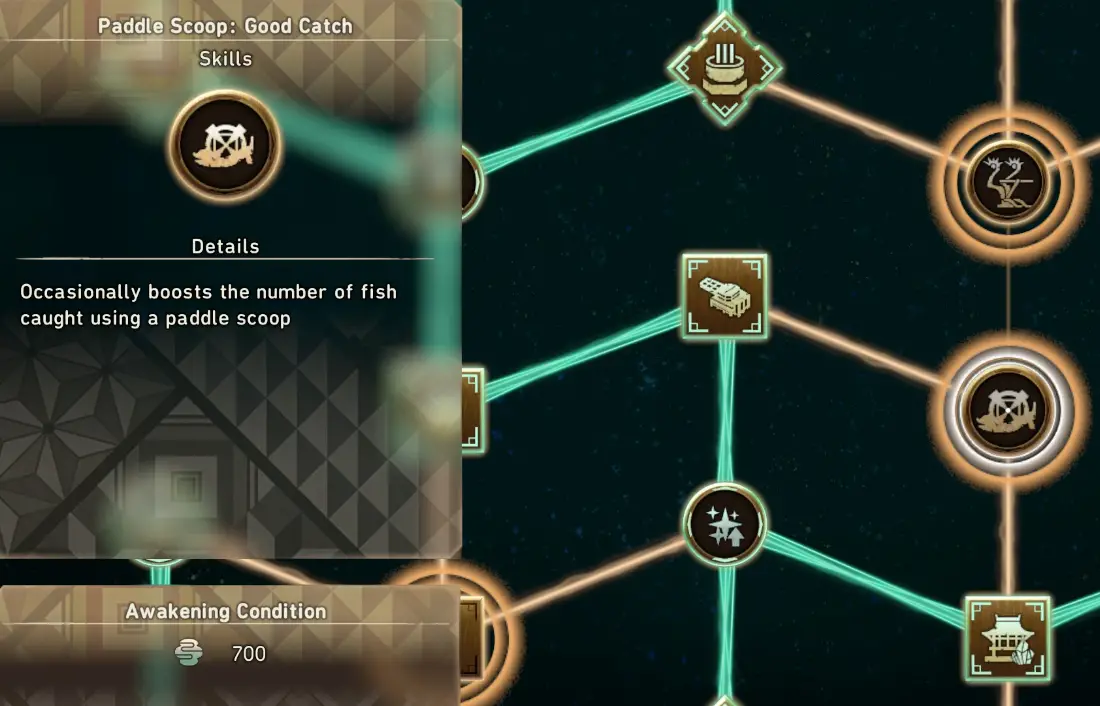
To unlock dragon karakuri to be used in the first place, you first need to collect Kemono Orbs dropped in combat against large kemono. Entonces, go to the karakuri tree in the menu to unlock them through «despertar». In the above example, I can make my paddle scoops pick up more fish by spending 700 Kemono Orbs.
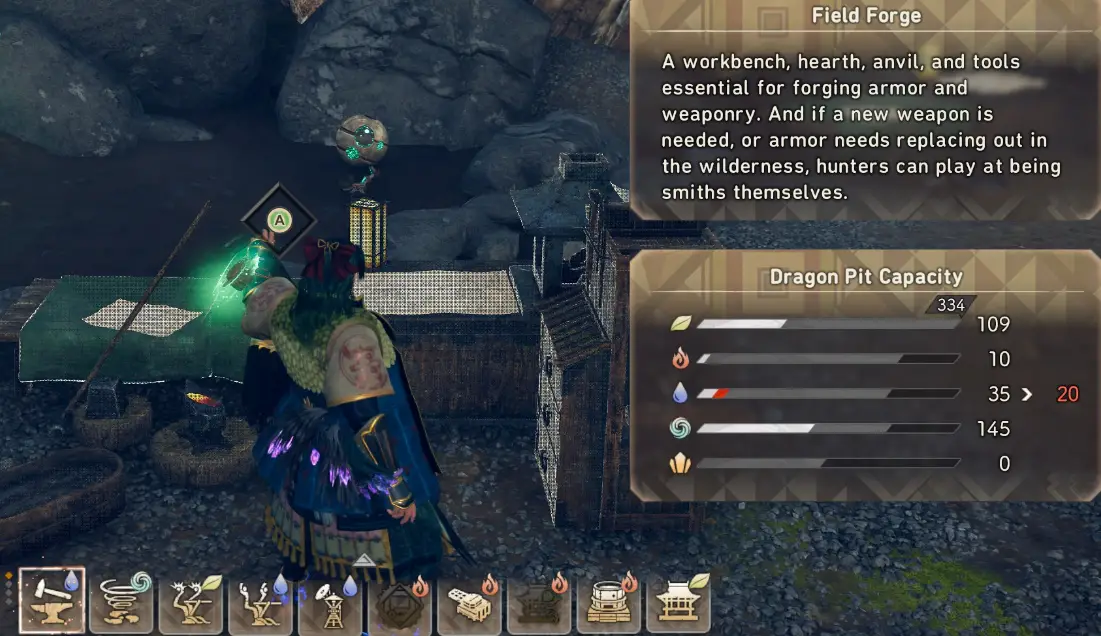
When placing Dragon Karakuri, you can place them almost anywhere, provided you have enough energy and a flat piece of ground to place it on. In the above example, I’m placing a Field Forge, que requiere 15 Water Energy. The box on the right is showing I’ll go from 35 available Water Energy to 20. If placed, I can destroy it at any time to get that Water Energy back.
This following list is not comprehensive, but it will cover most important ones.
Elemental Power Cost:

50 tierra (5 Earth if placed in «ideal spot»)
A tent is the heart of your base, the fast travel spot and respawn location should you be knocked out in combat. Two spots in each zone are considered ideal for tents, which reduces the cost by 90%. One is always the one you start with, and the other must be found. Place tents wherever you think is best.
Tents can be placed cheaply in Minato, but have no effect as you cannot travel to tents there.
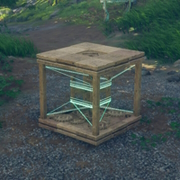
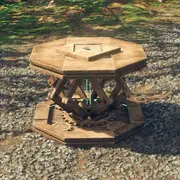
Elemental Power Cost:
10 Fuego
Campfires are where you create or join online lobbies. You can also upgrade your Tsukumo here. A campfire can be found in your home in Minato as well to perform these same functions. If you don’t plan on using lobbies and your Tsukumo is fully upgraded, these are no longer needed.
Elemental Power Cost:

15 Agua
The Field Forge allows you to create new weapons and armor while out in the field, or change out your equipment for others you’ve already made. You can do nearly everything here that Natsume the Blacksmith can do. You don’t have to keep these at camp; any time you want to change loadouts, place one down, make the switch, and destroy it. The portability is useful.
Elemental Power Cost:
15 Agua
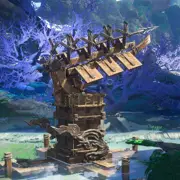
Hunting Towers show the silhouette of every large kemono in its range, depicted on the map screen. It pays to have enough coverage for the whole map, but if you place too many the map becomes unreadable. The towers can be upgraded to show off Tsukumo, Voluta, and Talisman locations.
Elemental Power Cost:

15 Madera
One of the most versatile and useful traversal methods. This zipline can fire a good distance away, allowing fast travel between two locations both ways. If the either part of the zipline gets destroyed, the zipline resets but can be redeployed without issue. You can use the Flying Vine to attack kemono, but it’s not very effective.

Elemental Power Cost:
20 Agua
The first of the «alternar» dragon karakuri. Despite the name and in-game description, it functions identically to the normal Flying Vine. It just looks different and has a different energy cost. Use both Flying Vines to make an interconnected travel network for fast, easy access to various parts of the map.
Elemental Power Cost:
10 Fuego
The Launcher has two potential uses: the first is as a combat karakuri. You can stand behind the launcher and place Basic Karakuri into it, where it will launch the contents at any large kemono in front of it. It’s not very effective, aunque. The second use is to launch yourself – stand on top of it and it will propel you forward. Use it to cover medium gaps that are too far for springs but too close for Flying Vines.
Elemental Power Cost:

10 Viento
The Wind Vortex is a straightforward fan that throws you upward. If you jump into it alone, your movement will be slow and restricted, but it can get you high up steep cliffs as long as the destination isn’t too far from the wind current. If you jump into it with the Glider basic karakuri, you’ll be given a great boost in height with more maneuverability.
Elemental Power Cost:
40 Fuego
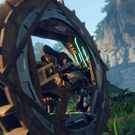
This mono-wheel vehicle allows fast travel along the ground. Best placed right outside camps where you have long stretches of ground to cover. You don’t have fall damage while riding it, so feel free to take any plunge if it will get you to your destination faster. You can run over small kemono or collide with large kemono, but the damage isn’t great.
Dragon Karakuri – Parte 2
Elemental Power Cost:
30 Viento
You’re going to end up with a lot of food items throughout the game. Place extras in these chests. They’re useful early on when you don’t have much food space, and useful later on when you have food processing setups at your bases.
TENER CUIDADO:Don’t place these at Natsume’s elevation in Minato or anywhere with direct line of sight to it. There is a good chance they’ll be destroyed in the story and lose all their contents.

Elemental Power Cost:
30 Madera
Functions identically to the normal Ingredients Chest, but has a different elemental cost, looks different, and other players in your lobby can take items from them. Good for sharing ingredients or fully cooked items between friends.
TENER CUIDADO:Don’t place these at Natsume’s elevation in Minato or anywhere with direct line of sight to it. There is a good chance they’ll be destroyed in the story and lose all their contents.
Elemental Power Cost:
30 Fuego
The first cooking implement you’ll unlock, and an important one. It’s often the first step to cooking any ingredients you like the stats of. See the food section later in the guide for how to best make use of these.
Elemental Power Cost:
30 Agua
A cooking implement used to combine base ingredients with a seasoning to create food with various effects. Used for more complex recipes.
Elemental Power Cost:
30 Viento
Identical to the regular Pickling Jar, but with a different cost and look. Other players in the lobby can make use of it.
Elemental Power Cost:
30 Fuego
Another cooking implement meant more for getting rid of unwanted ingredients to make seasoning. This is used for more complex recipes.
Elemental Power Cost:
30 Agua
Same as the regular Fermenting Cask, except with a different cost and appearance. Other players in the lobby can use it.

Elemental Power Cost:
30 Madera
The final part of cooking, which usually makes a cooked item strictly better. Unlike other cooking implements which have different numbers of inputs and outputs, Smokers only take in and output one item at a time.
Elemental Power Cost:
30 Fuego
Identical to the regular Smoker, with a different cost. Other players in the lobby are able to make use of it.
Dragon Karakuri – Parte 3
Elemental Power Cost:
30 Viento
Throughout the game, you’ve been collecting small creatures and placing them in your inventory. They don’t do much until you place small creatures into a Wildlife Cage. Al poco tiempo, the creature inside will give you an item. You can find a list of what you gain from each type of critter in the item compendium. You can have a maximum of up to 3 Wildlife Cages or Pens per map.
Elemental Power Cost:
30 Agua
Much like the Wildlife Cage, you put larger creatures into the Pen. Al poco tiempo, the creature inside will give you an item. Check the item compendium at the bottom of the guide to find out what you get from each critter. You can have a maximum of up to 3 Wildlife Cages or Pens per map.
Elemental Power Cost:
30 Fuego
The Food Shrine generates raw ingredients that can be found in the map and stockpiles up to 9 of them for you to pick up. They give mostly vegetables and a few grains, but you can rarely get salt and other spices for cooking more specific foods. These are also a good way to passively get rare ingredients like Bulbous Turnips or Gem Rice.
Elemental Power Cost:
30 Viento
The Ore Shrine generates stone, mineral, and other related items that can be found in the map. Like the Food Shrine, it can hold a maximum of 9 before you have to loot it for it to generate more.
Elemental Power Cost:
30 Madera
The Celestial Tusukumo Shrine can only give you 1 offering at a time. When taken, it grants you a full Hunter’s Arm benefit – that’s double your maximum capacity for Celestial Thread as well as any extra Hunter’s Arm benefits you have on weapons, armadura, or talismans. Great for starting a hunt with extra thread for a Celestial Cannon alpha strike, or for restocking when you’re critically low.
Elemental Power Cost:
30 Agua
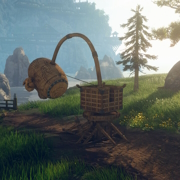
Unlike all other Dragon Karakuri, this must be placed in shallow water. Once deployed, a paddle scoop will leave the dock you placed and begin to gather/generate up to 9 fish at a time. It will only give you one type of fish specific to that body of water.
Elemental Power Cost:
10 Fuego
Interacting with a Training Bear opens up a menu that gives you multiple training options to customize your training experience. You can practice weapon combos, karakuri combos, dodging timing, etcétera. The tutorials offered from the Training Bear are more in-depth than the one you get from first equipping a weapon.
Elemental Power Cost:
15 Agua
The Looking Glass allows you to change your character name or return to the character creator, allowing you to make adjustments or create an entirely new look. Since it’s likely to rarely be used, it’s best not created until needed, or perhaps placed in Minato if you have the Water energy to spare.
Tsukumo, Your Friendly Assistant Ball
Tsukumo are odd spherical contraptions found throughout the hunting zones. Hay 200 in total in the base game to find. The first one pick up will join you on your hunts. Any picked up after that will give you Old Cogs, which are used to upgrade your main Tsukumo. Any Tsukumo you find with new appearances will unlock that appearance for you main Tsukumo.
Ante todo, your main Tsukumo will help you out when playing solo, providing assistance by attacking kemono, attracting kemono attention away from you, deploying healing mist, and renewing your Celestial Thread from time to time. It won’t help when you’re playing multiplayer, but it’s still a good idea to upgrade it, as the more upgrades you put in, the more Celestial Thread you can hold.
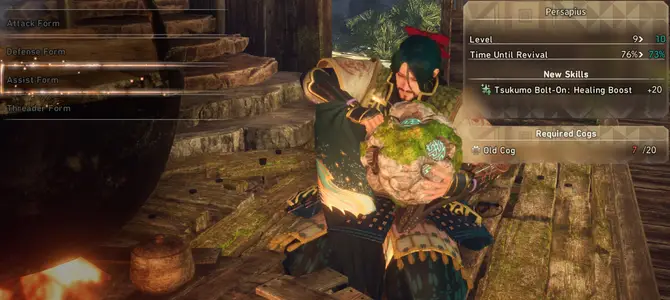
To upgrade your Tsukumo, sit down at a campfire, either at your home in Minato or one placed via Dragon Karakuri. Choose the Tsukumo option and you’ll see something similar to the above.
Upgrading Attack Form increases how much damage it deals when attacking Kemono. Some upgrade levels will add new attacks to its arsenal.
Upgrading Defense Form increases its defense and HP, allowing it to tank more hits before it’s knocked out of combat. If it takes too much, you’ll get a notification saying that your Tsukumo «has experienced an error» and it will take time to recharge itself.
Upgrading Assist Form gives it the ability to heal you, with each subsequent upgrade increasing the amount of healing it provides. Some levels will let it heal more often or make the healing mist last longer.
Upgrading Threader Form increases «Thread Recharge Speed», which will renew your Celestial Thread more often.
A pesar de la «forma» naming convention, you don’t choose a particular form for it to stay in. It will perform all unlocked actions in combat.
Nota – there is not enough Old Cogs in the game to fully upgrade your Tsukumo to level 10 in all categories, even after finding all 200 Tsukumo. You’ll have to choose what abilities you want to prioritize.
The maximum amount of Celestial Thread you can hold from upgrading your Tsukumo is 24.
You have some minor customization options at the bottom of the upgrade screen, allowing you to rename your Tsukumo and change its appearance to match any you’ve found so far.
provided a list of upgrades, their Old Cog cost, and their build recommendations
. I recommend checking it out.
The Simple Guide to Food
Just as the weapon upgrade tree offers great complexity and enables variety in playstyle, the food system has just as much depth, if not more. De hecho, most would say it’s needlessly complex, and I’m inclined to agree.
(Skip the below paragraph if you like, it’s justification as to why.)
I spent
horasbuilding up perfect food farms, from sourcing raw ingredients to processing them to storing them properly to eat optimized foods against each individual kemono I fought. I also played through the entire game alongside a friend who did no cooking at all, and simply ate the raw ingredients he picked up from the map. Y tu sabes que?
Neither of us noticed a difference.We both performed at a roughly similar level. We dealt and took roughly equal damage.
There is some benefit to cooking, but the sheer effort and time it takes is hardly worth worrying over, as the results are balanced around the Fullness limit. So instead…
Let’s just focus on the things that are quick, fácil, and work well enough, Debemos? Let’s go over some basics, then I’ll give my suggestions of what to make.
There are four main food groups: Carne, Pez, Verduras, y grano. Each individual ingredient has its own effects. If you cook with that ingredient and
solothat ingredient, you’ll retain its effects and make it stronger. If you mix different ingredients, you’ll get a generic mixed version. You can only mix ingredients of the same type, so you can only mix meats with meats, grains with grains, etcétera.
If you want to experiment, feel free to try out the Fermenting Jar and the Pickle Jar, but for the purposes of this simplified guide, we are ignoring them.
The Drying Rack is the first part of the cooking process. Put in your ingredients (all the same item, or a mix of the same type) to get a dried version of the food. It will take some time to dry. Karakuri tree upgrades allow you to cook faster, use fewer ingredients, or get higher yields.
The Smoker is unlocked later, but is the final part of the cooking process, and is a decent 1-to-1 buff to the dried food item you put in. You generally want to put dried foods into the smoker. Putting in anything else, like raw ingredients, can change the food effect.
Entonces, there’s the Ingredients Chest. You’ll be storing excess ingredients in these. They’re useful early on when you don’t have as much inventory space for food, but they’re also costly in dragon pit resources. Place them next to your Drying Racks and Smokers. You can keep any cooked items in your inventory – you’ll be eating them often, después de todo.
When you eat food, there’s also a Fullness value, which limits how much food you can eat. You have a maximum of 100 Fullness you can have at one time, which clears after a successful hunt. You could eat ten food items that have 10 Fullness each, or four items with 25, or one item with 60 and another with 40… any combination that is 100 or below will work.
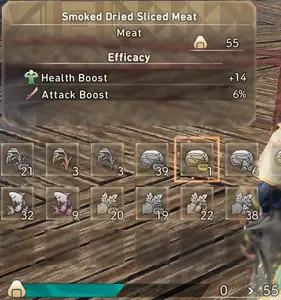
In this example on the left, I’m looking at the Smoked Dried Sliced Meat in my inventory. The onigiri (rice ball) icon in the top right shows it gives 55 Fullness. If I eat it, I’ll gain the listed health and attack buffs until I succeed at the next hunt. These stack with any other food, even if they provide similar bonuses. If I fail a hunt, the food is not used up and I can hunt again without wasting it.
Para empezar con, the majority will be gathered by hand as you walk around exploring or chasing kemono.
Luego, you can place down Tsukumo Food Shrines that will give you ludicrous amounts of vegetables (and some grains) for little effort. They will give you all materials that can be found on that particular map.
Fish can be gathered in a similar with the Paddle Scoop, but will only give you fish found in that particular body of water.
Meat is the only ingredient that’s somewhat annoying to get, as you’ll have to manually kill and carve it out of small kemono or buy it in small amounts from the store after each quest.
Entonces, what are we eating?
These are my recommended foods for a no-nonsense playstyle. If you don’t have a Smoker yet, just eat the dried version instead. Most of these can also be eaten just fine raw – people may find the drying and smoking steps too tedious or not worth the time investment.
I don’t expect you to have all of these at the same time. Pick and choose what you like; you get what you put into it. Time and effort with inventory management is the main cost.
Nota: For some food effects, I’ve renamed the skills to be clear and concise, so that they fit the table and are easy to understand. The real skill names will vary, but will mean the same thing.
Attack is always among the most popular of buffs to go for. Sliced and Cubed Meat are relatively easy to get; just kill most small kemono and carve. It’s just time consuming. The mixed meats are less powerful, but don’t cost as much Fullness, so you can fit in more food buffs elsewhere.
Sesame Seeds, like most vegetables, are common. You’ll get a lot of them, so feel free to stockpile them and sell any excess. Golden Sesame Seeds are stronger, but rarer.
Most of these are vegetables, which you are going to get
muchode.
Knotweed is found in Haragasumi Way.
Green Soybeans and Eggplants are found on Natsukodachi Isle.
Gem Rice is found in Akikure Canyon.
Turnips and Bulbous Turnips are found in Fuyufusagi Fort.
Gem Rice and Bulbous Turnips are exceptionally powerful, but are rare to make up for it.
Pebblegloss Sweetfish can be fished up in Haragasumi Way. They’re the go-to for stamina management, but notice this is Fatigue Alleviation (which deals with stamina), not Fatigue Resilience (which deals with the sleep ailment). Be wary when looking at other foods with similar-sounding skills.
The Spiral Fern can be given to you by a Ferntail Gecko you put into a Wildlife Cage. Catch them in Haragasumi Way. Acquisition Art helps you obtain more items on a successful hunt.
Similarmente, the Inari Fruit is given to you by a Kudzuclad Fox in a Wildlife Pen. Catch them in Akikure Canyon. Eating Inari Fruit gives you a chance to get your celestial thread refunded when making basic Karakuri.
—
You might notice that I’ve left out elemental resistance foods. After multiple hours of testing, I’ve found that they’re not worth it – too much time and effort for a barely noticeable difference. Spare yourself the inventory slots and stick to the above.
The Inari Fruit is somewhat uniquely special in that it takes nearly no effort to get once set up and has a universally useful effect for nearly all playstyles. A smoked or dried Inari Fruit is 60 Fullness and a raw one is 40 Fullness. A perfect match. If you want the least amount of effort possible, place Kudzuclad Foxes in pens around your camps – set it and forget it.
One last thing: if you eat exclusively smoked dried foods, you will often be left at 70-90 Fullness. Feel free to eat whatever raw ingredients you find along the way to your current target to squeeze out extra benefits and reach 100. Keeping a stack of 10-Fullness food in your inventory could be handy.
Consejos y trucos generales
A section of miscellaneous aid that don’t really fit elsewhere, or are otherwise so important that they bear repeating.
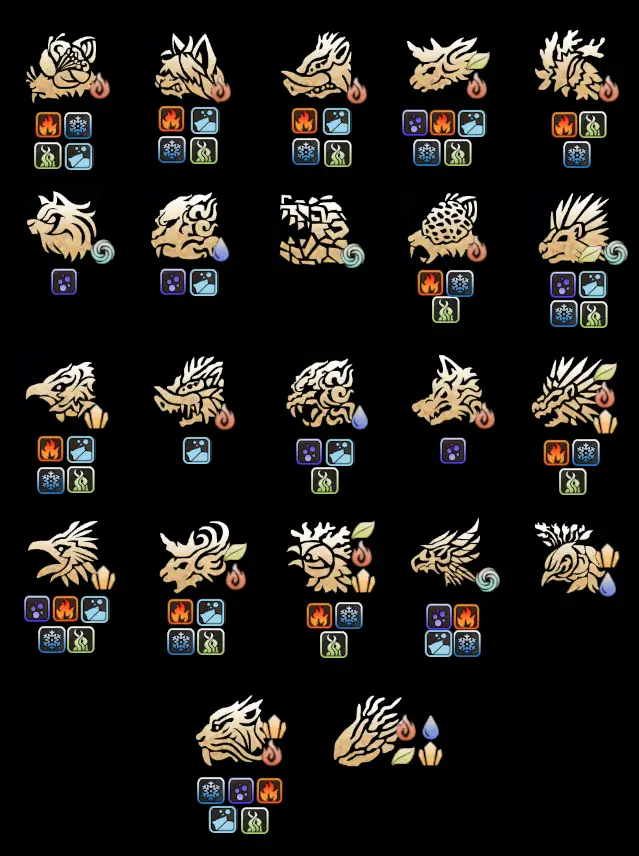
Here is a Large Kemono weakness reference provided to the community by AngrySalesman:
- This game is generous with invincibility frames when dodging. You can dodge through most attacks with the correct timing and dodge direction. Make good use of it!
- Don’t forget to eat before every hunt! You’re missing out on tons of health and other bonuses by ignoring the food system. Hunting without food is much, much harder.
- Try out every weapon at least once! Monster hunting games have heavy depth throughout their weapon variety, to the point where it can sometimes be like playing an entirely new game.
- While you get a short weapon explanation when you first equip a new weapon, it’s not much. Go to and interact with a training bear, and enable weapon tutorials. It will have a much more in-depth explanation of what to do.
- Take a glance at the moveset guide in the top right of the screen when trying out your combos. You might find that there’s extra actions available you’ve never thought to take.
- Similarmente, experiment with different basic karakuri loadouts. Not only do basic karakuri change up your playstyle, you’ll have access to different fusion karakuri combos.
- The moveset guide in the top right of the screen also provides fusion karakuri combos while you’re building basic karakuri.
- With that settled, experiment with your weapon moveset while simultaneously using basic karakuri. Por ejemplo, a katana using Celestial Anchor has a wildly different moveset. The bow has a powerful combo involving the glider. Nodachi can simultaneously charge while dodging and restoring stamina by using springs.
- If you find yourself at maximum Celestial Thread most of the time, you should use karakuri more often.
- After a certain point in the story, Celestial Thread will automatically slowly renew in Minato. This can help out when practicing fusion karakuri builds or fighting against the test dummy.
- In combination with the above, if you’re given a Guild of Fishermen job to conjure basic karakuri or fusion karakuri, you can complete those jobs without ever leaving town. They’re essentially free to complete.
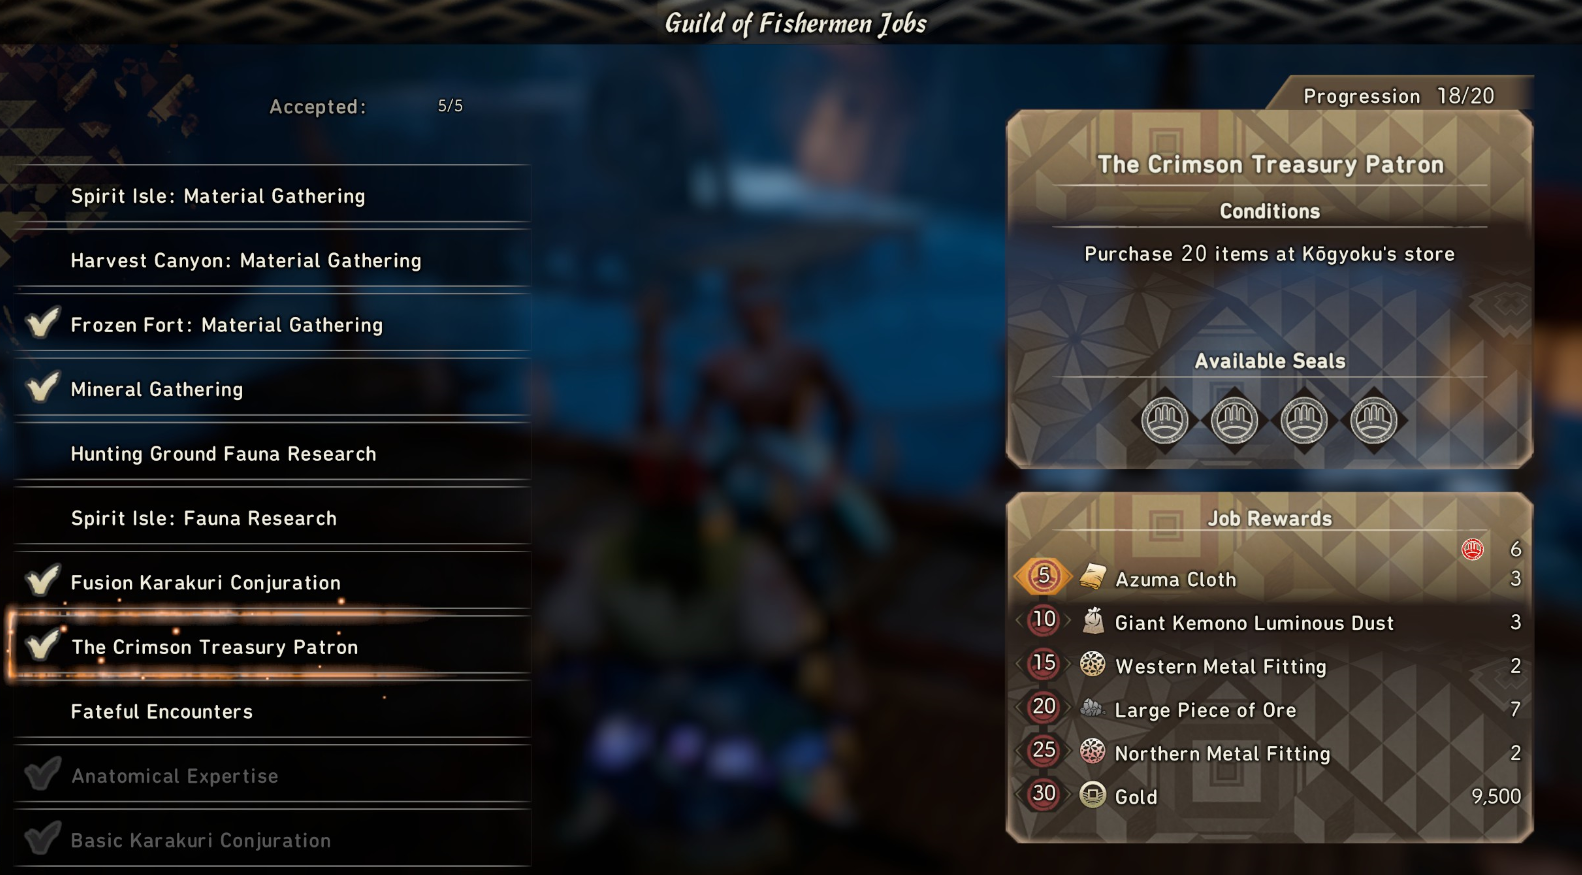
- Let’s review the Fishermen Jobs menu. On the left is a list of possible jobs we can take on. On the top right is a description of the currently selected job, how to complete it, and how many seals (en este caso 4) are the reward. The box on the bottom right shows that I currently have 6 seals, meaning I’ve earned 5 Azuma Cloth. As I complete more jobs, I’ll get the rest of the rewards in the box. Once I’ve reached 30 seals, the Job List will refresh with new jobs and new rewards, starting again at 0 seals.
- «Hunt Kemono» Fishermen Jobs are somewhat misleading. If the target is a large kemono, you must deal the finishing blow to gain credit; this makes completing jobs in multiplayer harder. If the target is a small kemono, it doesn’t matter who kills it; you get credit as soon as you carve it. Stealth kills automatically kill and loot the small kemono, giving credit.
- You can save loadouts while in the equipment menu, so if you have specific talismans and armor for different weapons, this would be a quick way to switch between them all without having to change them all manually.
- When reviving other players in multiplayer, it can be prudent to build a bulwark between you and the kemono to prevent interruption. It won’t stop projectiles that go through the ground, aunque.
- Don’t forget to upgrade your Tsukumo, even if you’re playing multiplayer! The more it’s upgraded, the more Celestial Thread you can carry at one time.
- A medida que avanzas, you might find that you need materials you have no idea how to get. Check the Item Compendium at the bottom of the guide to quickly learn how to obtain them. If you can’t find it out in the world, on a creature, small kemono, or large kemono, it might be found:
- For sale in the store
- As a Guild of Fisherman job reward
- As a sidequest reward
- Use the in-game Cyclopedia! It contains a lot of information about large kemono, including its elemental type, its elemental and ailment weaknesses, and weak points on the body. It also includes a list of item drops.
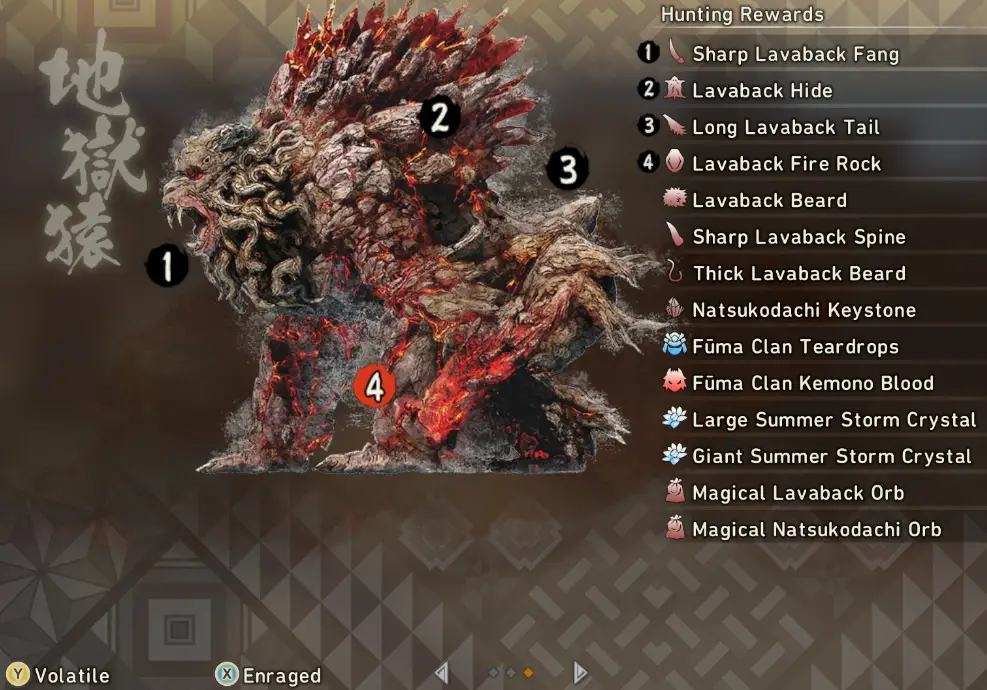
- Looking at the above example in the Cyclopedia, on the right you’ll see a list of materials. The first four are numbered, meaning you can obtain them by destroying the corresponding body part on the kemono. Número 4 is red, indicating that you can only break that part and obtain that material while the kemono is enraged. All the other materials in the list are generic drops you can obtain from completing the hunt. En la parte inferior, you can see button prompts to see other forms of the kemono. These different versions often have different material drops. Hitting left or right will change the display to show the locales where it’s found and a list of its strengths and weaknesses.
- Small kemono give you different items depending on whether you kill or pet them. In order to pet them, sneak up behind them without them being aware.
- Some small kemono poison you while you try to pet them. If you become poisoned, the pet attempt fails and the creature becomes aggressive. Mitigate this by having some poison resist before petting. You can also just forget about petting and instead kill these poisonous kemono, as their kill loot also includes the item you’d get for petting them.
- Small Creatures can be put into a wildlife cage and Large Creatures can be put into wildlife pens. Both will give you an item exclusive to that creature after waiting a while.
- Hunter’s Arm is an underutilized technique, likely because the game never really explains it. Doing so gives you double your maximum Celestial Thread. To perform Hunter’s Arm:
- Damage a large kemono’s body part until a persistent green oval appears on the body.
- Sheathe your weapon!
- Hold sprint and jump towards the green glow as best you can. Use fusion karakuri to restrain it if necessary.
- You likely grabbed a body part close, but not quite on the green part. Move over to it as best you can, given the wildly flailing camera.
- Once you get the Hunter’s Arm prompt, hit it!
- While the animation plays, hope the kemono doesn’t move your body into some world geometry, which will likely knock you off with no Hunter’s Arm.
- If Hunter’s Arm is successful, the green part disappears and you have tons of Celestial Thread!
- While holding onto a kemono, you’re somewhat immune to its attacks. I’ve seen people avoid large attacks while holding on, but it’s inconsistent.
- If you run out of stamina while holding onto to a kemono, you’ll be thrown off and take damage.
- Once you have upgraded Hunting Towers and pick up all Tsukumo, Talismans, and Scrolls hidden around each map, keep in mind that new hidden items can come up in volatile or invasion versions of each map.
Troubleshooting Problems
Desafortunadamente, Wild Hearts has seen some issues post-launch, most notably performance issues even on higher-end PCs. Here are some solutions to try that have worked for some people:
- Go to audio settings and change from Stero audio to 7.1/5.1
- Set PC maximum FPS to your desired amount both in-game options and out-of-game through your graphics card control panel
- Play in borderless windowed mode
- Si tienes múltiples monitores, clicking out of game then back in-game
- For lack of anything else, lower graphical settings and hope for the best
—
If you get a «Your game save is missing and can’t be retrieved from the cloud, either start over with new data or wait five minutes and try again» error, or something else that implies that your game save could be lost, your Steam and EA clients have de-synched.
Hit NOon that window. Close both EA and Steam clients, make sure they’re not showing up in the system tray or in the task manager. Abrir vapor, then EA, and try playing the game again.
—
If you’re opening up your game lobby but your friends can’t find you, o viceversa, ensure you’re both logged in to the EA client and shared the right lobby info. If you’re friends on EA and Steam, the lobby should automatically show up at the top of the list. Si no, cerrar el juego, EA, and Steam clients, then open them up again. Start up the game from the EA client instead of Steam. It’ll still launch with Steam, so you’ll still get achievements and such. This should fix the issue.
—
All of my flying vines keep resetting even though I know they haven’t been broken!This seems to be tied to calling for multiplayer help while still in the map mission select menu. Call for help while already on the mission to avoid this issue.
—
When assisting others, I get kicked immediately from the hunt when the finishing blow is dealt. I missed out on some kemono pieces still on the ground!You joined the hunt through a Hunter’s Gate, which kicks you immediately on finishing blow. If you instead assist through the map mission select menu, you get the full 30 seconds after the finishing blow before you go your separate ways.
Item Compendium – Materiales
Looking for an item but don’t know how to get it? Try searching here! If it cannot be found in this compendium, it may be found:
- For sale in the store
- As a Guild of Fisherman job reward
- As a sidequest reward
- Corestone
- Mineral
- Large Piece of Ore
- Lump of Ore
- Small Crystal Ore
- Sakura Stone
- Ancient Lumber
- Supple Lumber
- Bluestone
- Blue Columnar Ore
- Coral Fragment
- Ancient Lumber
- Supple Lumber
- Mirror Stone
- Golden Hematite
- Fine-Grained Lumber
- Silken Thread
- Lightstone
- Demon Rock
- Fine-Grained Lumber
- Peculiar Cocoon
Item Compendium – Criaturas
Locations can vary during invasive quests. Check the Cyclopedia for more details.
- Berrybright Squirrel: Pet Kemono Seed
- Cherrytail Ladybug: Orb Cherry
- Grasswing Swallow: Pet Kemono Tail Feather
- Goldchrysanth Crane: Chrysanthemum Feather
- Glowstar Snail: Gleaming Pet Kemono Shell
- Ferntail Gecko: Spiral Fern
- Canecrown Viper: Pet Kemono Seed
- Gorgonian Hermit Crab: Gleaming Pet Kemono Shell
- Nectarbelly Cicada: Naturaleza’s Nectar or Golden Nectar
- Lotuswing Swallow: Pet Kemono Tail Feather
- Hotbellied Gecko: Scarlet Pet Kemono Spores
- Orangetufted Constrictor: Pet Kemono Seed
- Prismwhelk Salmon: Prismwhelk Salmon
- Kudzuclad Fox: Inari Fruit
- Chestnutkeeper Hedgehog: Backnut
- Cherrytinge Ladybug: Pet Kemono Seed
- Wasabiskimmer Dragonfly: Fall Wasabi
- Dogwood Catfish: Dogwood Catfish
- Crystalcap Sweetfish: Crystalcap Sweetfish
- Rockfoil Rabbit: Snow Leaf
- Frostberry Squirrel: Pet Kemono Seed
- Violetbulb Snowbug: Crystal Snowflake
- Citrusscent Owl: Belly Yuzu
- Silverchrysanth Crane: Chrysanthemum Feather
Item Compendium – Small Kemono
Locations can vary during invasive quests. Check the Cyclopedia for more details.
- Sagecane Deer
- Matar: Carne roja
- Mascota: Lessar Cane Antler
- Ragetail Pup
- Matar: Small Kemono Skin
- Mascota: Rodent Bud
- Gladefruit Hare
- Matar: Cubed Meat
- Mascota: Leporine Fruit
- Springwatch Monitor
- Matar: Small Scale or Lizard Blood
- Mascota: Lizard Bloom
- Sparkshower Monitor
- Matar: Small Scale
- Mascota: Corestone
- Coralcoat Turtle
- Matar: Sliced Meat
- Mascota: Coral Shell
- Whipthrash Serpent
- Matar: Serpent Slough
- Mascota: Serpent Beard
- Snapspine Wisp
- Matar: Snapspine Cotton
- Mascota: Obsidian Snapspine Needle
- Grassghoul Decapod
- Matar: Crustaceous Moss or Small Kemono Carapace
- Mascota: Crustaceous Moss
- Conkclad Buffalo
- Matar: Sliced Meat
- Mascota: Fungal Conk
- Sporetail Pup
- Matar: Small Kemono Carapace
- Mascota: Goldcap
- Deadleaf Slater
- Matar: Small Kemono Carapace
- Mascota: Slater Exoskeleton
- Noblegrass Hound
- Matar: Small Kemono Skin
- Mascota: Wild Dog Pampas
- Nightshade Monitor
- Matar: Pointed Scale or Lizard Bloom
- Mascota: Lizard Bloom
- Shardshower Monitor
- Matar: Pointed Scale
- Mascota: Corestone
- Gemcast Monkey
- Matar: Simian Yin Organ Gem
- Mascota: Monkey Liquor
- Icebloom Hound
- Matar: Small Kemono Skin
- Mascota: Canine Ice Crystal
- Deathspine Nighthawk
- Matar: Strigine Flight Bone
- Mascota: Strigine Plume
Item Compendium – Large Kemono (1)
- Ragetail Plum (Tail)
- Ragetail Pelt (Cabeza, Calma)
- Ragetail Fang (Can also drop from Head when enraged)
- Ragetail Claw
- Rare Ragetail Pip
- Young Warrior Teardrops
- Young Warrior Kemono Blood
- Small Plum Scent Crystal
- Ripe Ragetail Plum (Tail, Calma)
- Ragetail Pelt (Cabeza, Calma)
- Hard Ragetail Fang (Can also drop from Head when enraged)
- Ragetail Claw
- Ragetail Whiskers
- Prized Ragetail Pip
- Red Plum Teardrops
- Red Plum Kemono Blood
- Large Spring Dust Crystal
- Harugasumi Keystone
- Giant Spring Dust Crystal
- Magical Ragetail Orb
- Magical Harugasumi Orb
- Sapscourge Materials List
- Sapscourge Lead Beard (Cabeza)
- Sapscourge Horn (Cuerna)
- Sapscourge Amber (Atrás)
- Sapscourge Tail (Tail)
- Rare Sapscourge Sap
- Young Warrior Teardrops
- Young Warrior Kemono Blood
- Small Plum Scent Crystal
- Kingtusk Ivory (Tusks)
- Kingtusk Horn (Horns along back)
- Kingtusk Thorn (Tail)
- Kingtusk Hide
- Kingtusk Bristle
- Rare Kingtusk Seed
- Basara Teardrops
- Basara Kemono Blood
- Plum Scent Crystal
- Sharp Kingtusk Ivory (Tusks)
- Sharp Kingtusk Horn (Horns along back)
- Thick Kingtusk Thorn (Horns along back)
- Long Kingtusk Tail (Tail)
- Kingtusk Hide
- Kingtusk Bristle
- Kingtusk Hoof
- Prized Kingtusk Seed
- Great Juniper Teardrops
- Great Juniper Kemono Blood
- Giant Spring Dust Crystal
- Spineglider Horn (Bocina)
- Spineglider Dripstone (Atrás)
- Spineglider Hide
- Spineglider Claw
- Rare Spineglider Brine
- Roaming Bard Teardrops
- Roaming Bard Kemono Blood
- Small Zephyr Crystal
- Sharp Spineglider Horn (Bocina)
- Saturated Spineglider Dripstone (Atrás)
- Spineglider Hide
- Spineglider Claw
- Spineglider Patagium
- Prized Spineglider Brine
- Jadedance Teardrops
- Jadedance Kemono Blood
- Large Summer Storm Crystal
- Dreadclaw Corona (Cabeza)
- Dreadclaw Skin (Cuerpo)
- Dreadclaw Talon (Pies)
- Dreadclaw Sickle Feather (Tail)
- Rare Dreadclaw Plume
- Roaming Bard Teardrops
- Roaming Bard Kemono Blood
- Small Zephyr Crystal
- Tall Dreadclaw Corona (Cabeza)
- Dreadclaw Skin (Cuerpo)
- Sharp Dreadclaw Talon (Pies)
- Dreadclaw Sickle Feather (Tail)
- Dreadclaw Beak
- Prized Dreadclaw Plume
- Jadedance Teardrops
- Jadedance Kemono Blood
- Large Summer Storm Crystal
Item Compendium – Large Kemono (2)
- Gritdog Tail (Tail)
- Gritdog Enteric Sack (also regular drop when enraged)
- Gritdog Claw
- Gritdog Fur
- Gritdog Incisor
- Gritdog Iron Nugget (also from head when enraged)
- Rare Gritdog Stone
- Grithide Teardrops
- Grithide Kemono Blood
- Small Zephyr Crystal
- Spiny Gritdog Tail (Tail)
- Gritdog Enteric Sack (also regular drop when enraged)
- Heavy Gritdog Claw
- Thick Gritdog Incisor
- Gritdog Hard Iron Nugget (also from head when enraged)
- Gritdog Gastric Wall
- Prized Gritdog Stone
- Myorata Teardrops
- Myorata Kemono Blood
- Large Summer Storm Crystal
- Lavaback Fang (Cabeza)
- Lavaback Hide (Atrás)
- Lavaback Tail (Tail)
- Lavaback Beard
- Lavaback Mudstone (also from arms once enraged)
- Lavaback Spine
- Rare Lavaback Tufa
- Ninja Teardrops
- Ninja Kemono Blood
- Zephyr Crystal
- Cobalt Lavaback Fang (Cabeza)
- Cobalt Lavaback Hide (Atrás)
- Cobalt Lavaback Tail (Tail)
- Cobalt Lavaback Molten Rock (also drops from arms when enraged)
- Giant Kemono Slack
- Rare Cobalt Lavaback Tufa
- Bandit Teardrops
- Bandit Kemono Blood
- Small Brumal Wind Crystal
- Sharp Lavaback Fang (Cabeza)
- Lavaback Hide (Atrás)
- Long Lavaback Tail (Tail)
- Lavaback Beard
- Lavaback Fire Rock (also from arms once enraged)
- Sharp Lavaback Spine
- Thick Lavaback Beard
- Prized Lavaback Tufa
- Fuma Clan Teardrops
- Fuma Clan Kemono Blood
- Giant Summer Storm Crystal
- Giant Kemono Gem
- Rare Earthbreaker Stone
- Corestone
- Mineral
- Mirror Stone
- Plum Scent Crystal
- Sporetail Stipe (Tail)
- Sporetail Hide (Cabeza)
- Sporetail Fang (also from Head when enraged)
- Sporetail Claw
- Giant Kemono Essential Oil
- Rare Sporetail Cell
- Veteran Teardrops
- Veteran Kemono Blood
- Small Harvest Crystal
- Thick Sporetail Stipe (Tail)
- Sporetail Hide (Cabeza)
- Hard Sporetail Fang (also from Head when enraged)
- Sporetail Claw
- Sporetail Whiskers
- Prized Sporetail Cell
- Cutthroat Teardrops
- Cutthroat Kemono Blood
- Large Autumn Breeze Crystal
- Akikure Keystone
- Giant Autumn Breeze Crystal
- Magical Sporetail Orb
- Magical Akikure Orb
Item Compendium – Large Kemono (3)
- Goldshard Incisor (Cabeza)
- Goldshard Tail (Tail)
- Goldshard Claw (Garras)
- Goldshard Spine
- Rare Goldshard Calculus
- Veteran Teardrops
- Veteran Kemono Blood
- Small Harvest Crystal
- Goldshard Incisor (Cabeza)
- Long Goldshard Tail (Tail)
- Goldshard Claw (Garras)
- Sharp Goldshard Spine
- Spinous Goldshard Hide
- Prized Goldshard Calculus
- Cutthroat Teardrops
- Cutthroat Kemono Blood
- Large Autumn Breeze Crystal
- Akikure Keystone
- Giant Autumn Breeze Crystal
- Magical Goldshard Orb
- Magical Akikure Orb
- Fumebeak Tail Feather (Tail)
- Fumebeak Toxic Lung (Cuerpo)
- Fumebeak Bill (Cabeza)
- Fumebeak Skin
- Fumebeak Claw
- Fumebeak Wing
- Rare Fumebeak Remex
- All-Black Teardrops
- All-Black Kemono Blood
- Harvest Crystal
- Icetusk Ivory (Tusks)
- Icetusk Horn (Horns on back)
- Icetusk Tail (Tail)
- Icetusk Frost Limb
- Rare Icetusk Seed
- Bandit Teardrops
- Bandit Kemono Blood
- Small Brumal Wind Crystal
- Freezing Icetusk Ivory (Tusks)
- Icetusk Horn (Horns on back)
- Icetusk Tail (Tail)
- Sharped Icetusk Frost Limb
- Icetusk Hoof
- Prized Icetusk Seed
- Wayward Brigand Teardrops
- Wayward Brigand Kemono Blood
- Large Winter Lull Crystal
- Deathstalker Pelt (Cabeza)
- Deathstalker Ice Tail (Tail)
- Deathstalker Hide
- Deathstalker Claw
- Deathstalker Fang
- Deathstalker Icicle (also from shoulder branches when enraged)
- Deathstalker Ice Bead
- Argent Teardrops
- Argent Kemono Blood
- Brumal Wind Crystal
- Frozen Deathstalker Pelt (Cabeza)
- Deathstalker Floe Tail (Tail)
- Deathstalker Hide
- Deathstalker Claw
- Icy Deathstalker Fang
- Glacial Deathstalker Icicle (also from shoulder branches when enraged)
- Deathstalker Ice Water
- Deathstalker Pogonip Bead
- Moonshadow Teardrops
- Moonshadow Kemono Blood
- Giant Winter Lull Crystal
- Onyxshard Rock Incisor (Cabeza)
- Onyxshard Tail (Tail)
- Onyxshard Rock Claw (Garras)
- Onyxshard Spine
- Spinous Onyxshard Hide
- Giant Kemono Essential Oil
- Onyxshard Mass
- Sunrise Princess Teardrops
- Sunrise Princess Kemono Blood
- Giant Spring Dust Crystal
Item Compendium – Large Kemono (4)
- Long Pearlbeak Tail Feather (Tail)
- Pearlbeak Light Orb (Cuerpo)
- Sharp Pearlbeak Bill (Cabeza)
- Pearlbeak Razor Wing
- Sharp Pearlbeak Talon
- Giant Kemono Luminous Dust
- Great Pearlbeak Remex
- Brighteye Archer Teardrops
- Brighteye Archer Kemono Blood
- Giant Summer Storm Crystal
- Venomglider Bloom Horn (Cabeza)
- Venomglider Toxic Lintel (Atrás)
- Venomglider Petal Derm
- Venomglider Blood Claw
- Venomglider Patagium
- Giant Kemono Petal
- Rare Venomglider Succus
- Sunrise Princess Teardrops
- Sunrise Princess Kemono Blood
- Large Autumn Breeze Crystal
- Ripclaw Corona Spray (Cabeza)
- Ripclaw Petal Derm (Cuerpo)
- Shard Ripclaw Talon (Garras)
- Ripclaw Sickle Feather (Tail)
- Ripclaw Bloom Beak
- Grand Ripclaw Plume
- Brighteye Archer Teardrops
- Brighteye Archer Kemono Blood
- Giant Winter Lull Crystal
- Amaterasu Bast (Pecho)
- Diabolic Amaterasu Talon (Garras)
- Diabolic Amaterasu Tail (Tail)
- Amaterasu Backbone (Atrás)
- Diabolic Amaterasu Pinion
- Diabolic Amaterasu Horn (Also from horns when enraged)
- Diabolic Amaterasu Beak
- Amaterasu Pinion
- Dawn Guard Teardrops
- Dawn Guard Kemono Blood
- Giant Autumn Breeze Crystal
- Emberplume Fire Crown (Cabeza)
- Emberplume Fire Claw (Garras)
- Emberplume Tail Feather (Tail)
- Emberplume Fire Skin
- Emberplume Display Feather
- Emberplume Wing Feather
- Emberplume Fire Beak
- Emberplume Eye Feather
- Garuda Teardrops
- Garuda Kemono Blood
- Giant Summer Storm Crystal
- Golden Tempest Auric Saber (Cabeza)
- Golden Tempest Auric Claw (Garras)
- Golden Tempest Tail (Tail)
- Golden Tempest Auric Pelt (Atrás)
- Steely Golden Tempest Hide
- Golden Tempest Celestial Robe
- Golden Tempest Auric Ruff
- Golden Tempest Nugget
- White Fang Teardrops
- White Fang Kemono Blood
- Giant Autumn Breeze Crystal
Eso es todo lo que estamos compartiendo hoy para este WILD HEARTS guía. Esta guía fue originalmente creada y escrita por ̧҉ ҉Minorou ꧁💀꧂. En caso de que no actualicemos esta guía, puede encontrar la última actualización siguiendo este enlace.