
This guide teaches you how to bring in your own LOD Models for your creations using the SteamVR Environment’s Workshop Tools!
Requisitos previos
To grasp this guide well, it’s helpful to know the basics of SteamVR Environment’s Workshop Tools and be familiar with using different tools and locating their menus. Además, you should have some prerequisites covered, como:
- Importing Models: Understand how to bring in models.
- Tool Locations: Know where to find tools like Model Editor, Martillo, Material Editor, etc..
- 3D Art Vocabulary: Have a basic understanding of general 3D art terms.
Create Your Model
Antes de nada más, ensure you have your LOD models prepared. Organize them with the following naming convention:
modelname_lod0: This represents the highest LOD model with the most detail.modelname_lodx: Aquí, ‘x’ is a number, indicating the lowest LOD model with the least detail.
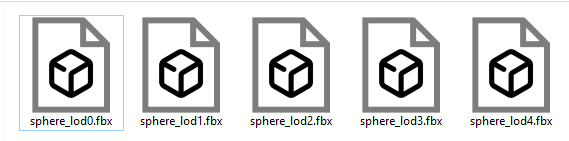
The LOD models between the first and last numbers should decrease in detail as the numbers increase.
Save these models in your preferred file format within your addons content directory. Locate it at:
SteamVR Directory/steamvr_environments/content/steamtours_addons/<project name here>/modelos
Importing into the Model Editor tool.
Begin by launching the Model Editor herramienta through the Asset Browser. Elegir «New VMDL from Mesh File» and pick your LOD0 model. Save it in your desired location.
After your model appears in the editor and you’ve made necessary adjustments for materials, animaciones, collision, etc., it’s time to import the LODs.
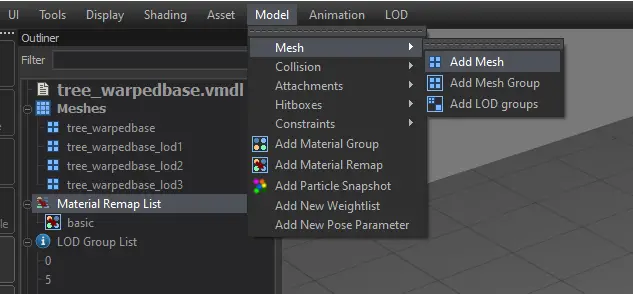
- Navigate to Model > Malla > Add Mesh.
- Pick your LOD model; it will now be visible under «Meshes» in the Outliner.
- Repeat these steps for each LOD mesh you want to import.
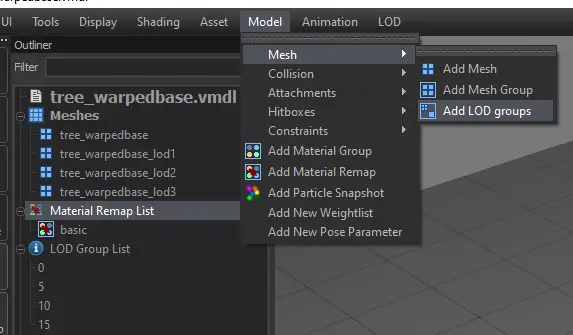
Once all LOD meshes are in, the next step is to create the groups.
- Click on Model > Malla > Add LOD Groups.
- In the Outliner, locate and select «LOD Group List.»
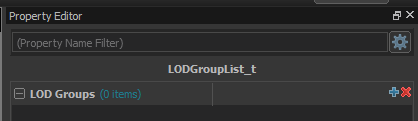
In the Property Editor:
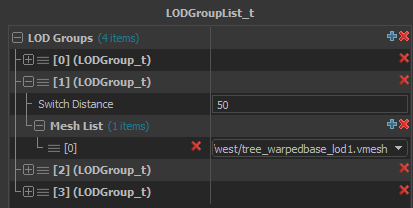
- Expand the LOD Groups section.
- Utilice el «+» icon to add the number of LOD meshes you created.
For each LOD Group:
- Start with LOD Group [0].
- Expand the mesh list under it to represent the meshes for that LOD group; típicamente, the first group should have your highest detail mesh.
- For each LOD Group, use the Mesh List to add all the LOD meshes.
- Utilizar el «Switch Distance» field under each LOD Group to determine the camera distance for switching to that LOD model (assuming the field is in inches, as Hammer uses).
When you finish putting in all your LOD Groups with meshes, your work is complete.
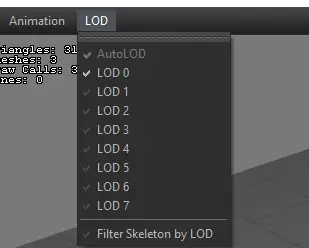
To check out different LOD Models, just click on the «LOD» botón en la parte superior de la ventana.
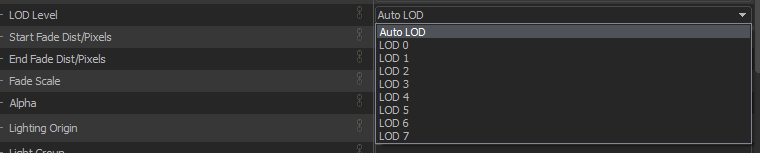
If you include the model in hammer, ir a «Render Properties,» and you can pick the LOD level you prefer the model to show in. si tu eliges «Auto LOD,» it will change groups as the camera moves. Alternativamente, you can manually set a specific model to be visible all the time.
Notas adicionales
I hope to add more information as I learn more about the system, pero por ahora, here’s what I understand.
- When set to «Auto LOD,» models won’t automatically switch when the player moves their head in real life. The switching only happens when the player teleports to a different location.
Eso es todo lo que estamos compartiendo hoy para este SteamVR guía. Esta guía fue originalmente creada y escrita por KartMakerBrosU. En caso de que no actualicemos esta guía, puede encontrar la última actualización siguiendo este enlace.