Finished the game but can’t locate those tricky boomboxes? No hay problema! This detailed guide will help you snag the boombox-related achievement called «Chonky Boi» rápidamente!
Note that this guide has significant SPOILERS! To fully enjoy the game, make sure to finish it before using this guide. It’s meant for those genuinely struggling to find boomboxes, not for saving time during a regular play. Uncovering the secret spots on your own adds to the enjoyment! Y, por supuesto, vibing to the boombox song is part of the fun.
Parte 1 (Niveles 1-4)
Nivel 1 – Get That Deed Back!
- Towards the end of the level, right before encountering three red pipes, dar un giro a la derecha. Spot the sneaky boombox cleverly concealed in tall grass.

Nivel 2 – Morning Marsh
- Al comienzo del nivel, right after descending the waterfall onto the island to the left. Entonces, execute a jump dash onto the path of logs leading to the hidden boombox.
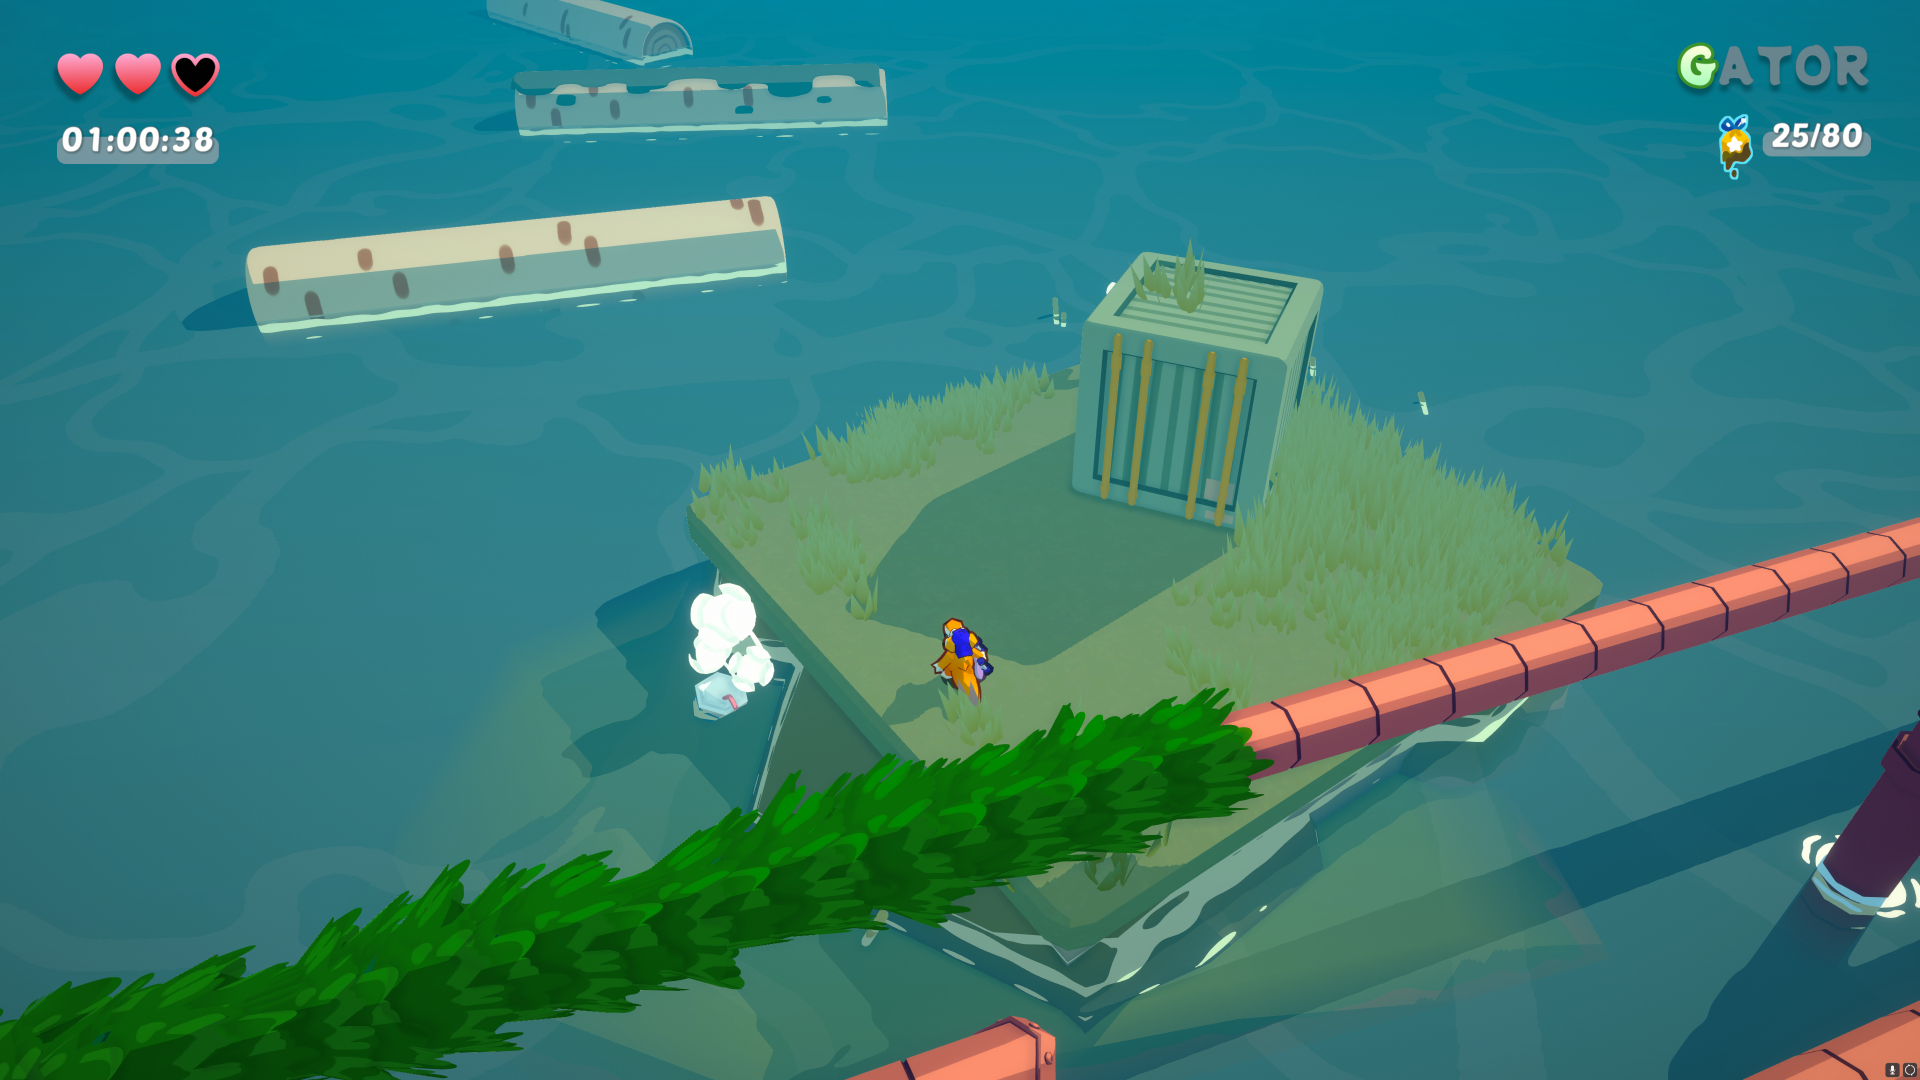
Nivel 3 – Daytime Bog
- Towards the end of the level, located at the lower edge of the massive cliff island protruding from the water.
Nivel 4 – Sundown Duel
- Upon completing the level, navigate around and behind the flagpole. Gran trabajo, and that wraps up part 1!

Parte 2 (Niveles 5-9)
Nivel 5 – Sunset Swamps
- This one might take some time because the environment offers a lot to explore! Towards the end of the level, just before reaching the finish line, Giro de vuelta 180 grados. You’ll spot a trail of birch logs floating below the grind rails. Jump dash across these logs to find the boombox nestled in tall grass.

Nivel 6 – A Shocking Ally
- Perhaps the easiest boombox to locate! Right at the beginning, turn left and jump onto the logs. Entonces, use the tire to boost up on the final jump to reach the boombox.

Nivel 7 – Twilight Town
- After passing the first frog checkpoint in the level, stick to the left side and drop down off the yellow guard railing into the tall grass. The boombox is cleverly hidden on top of a tree stump.
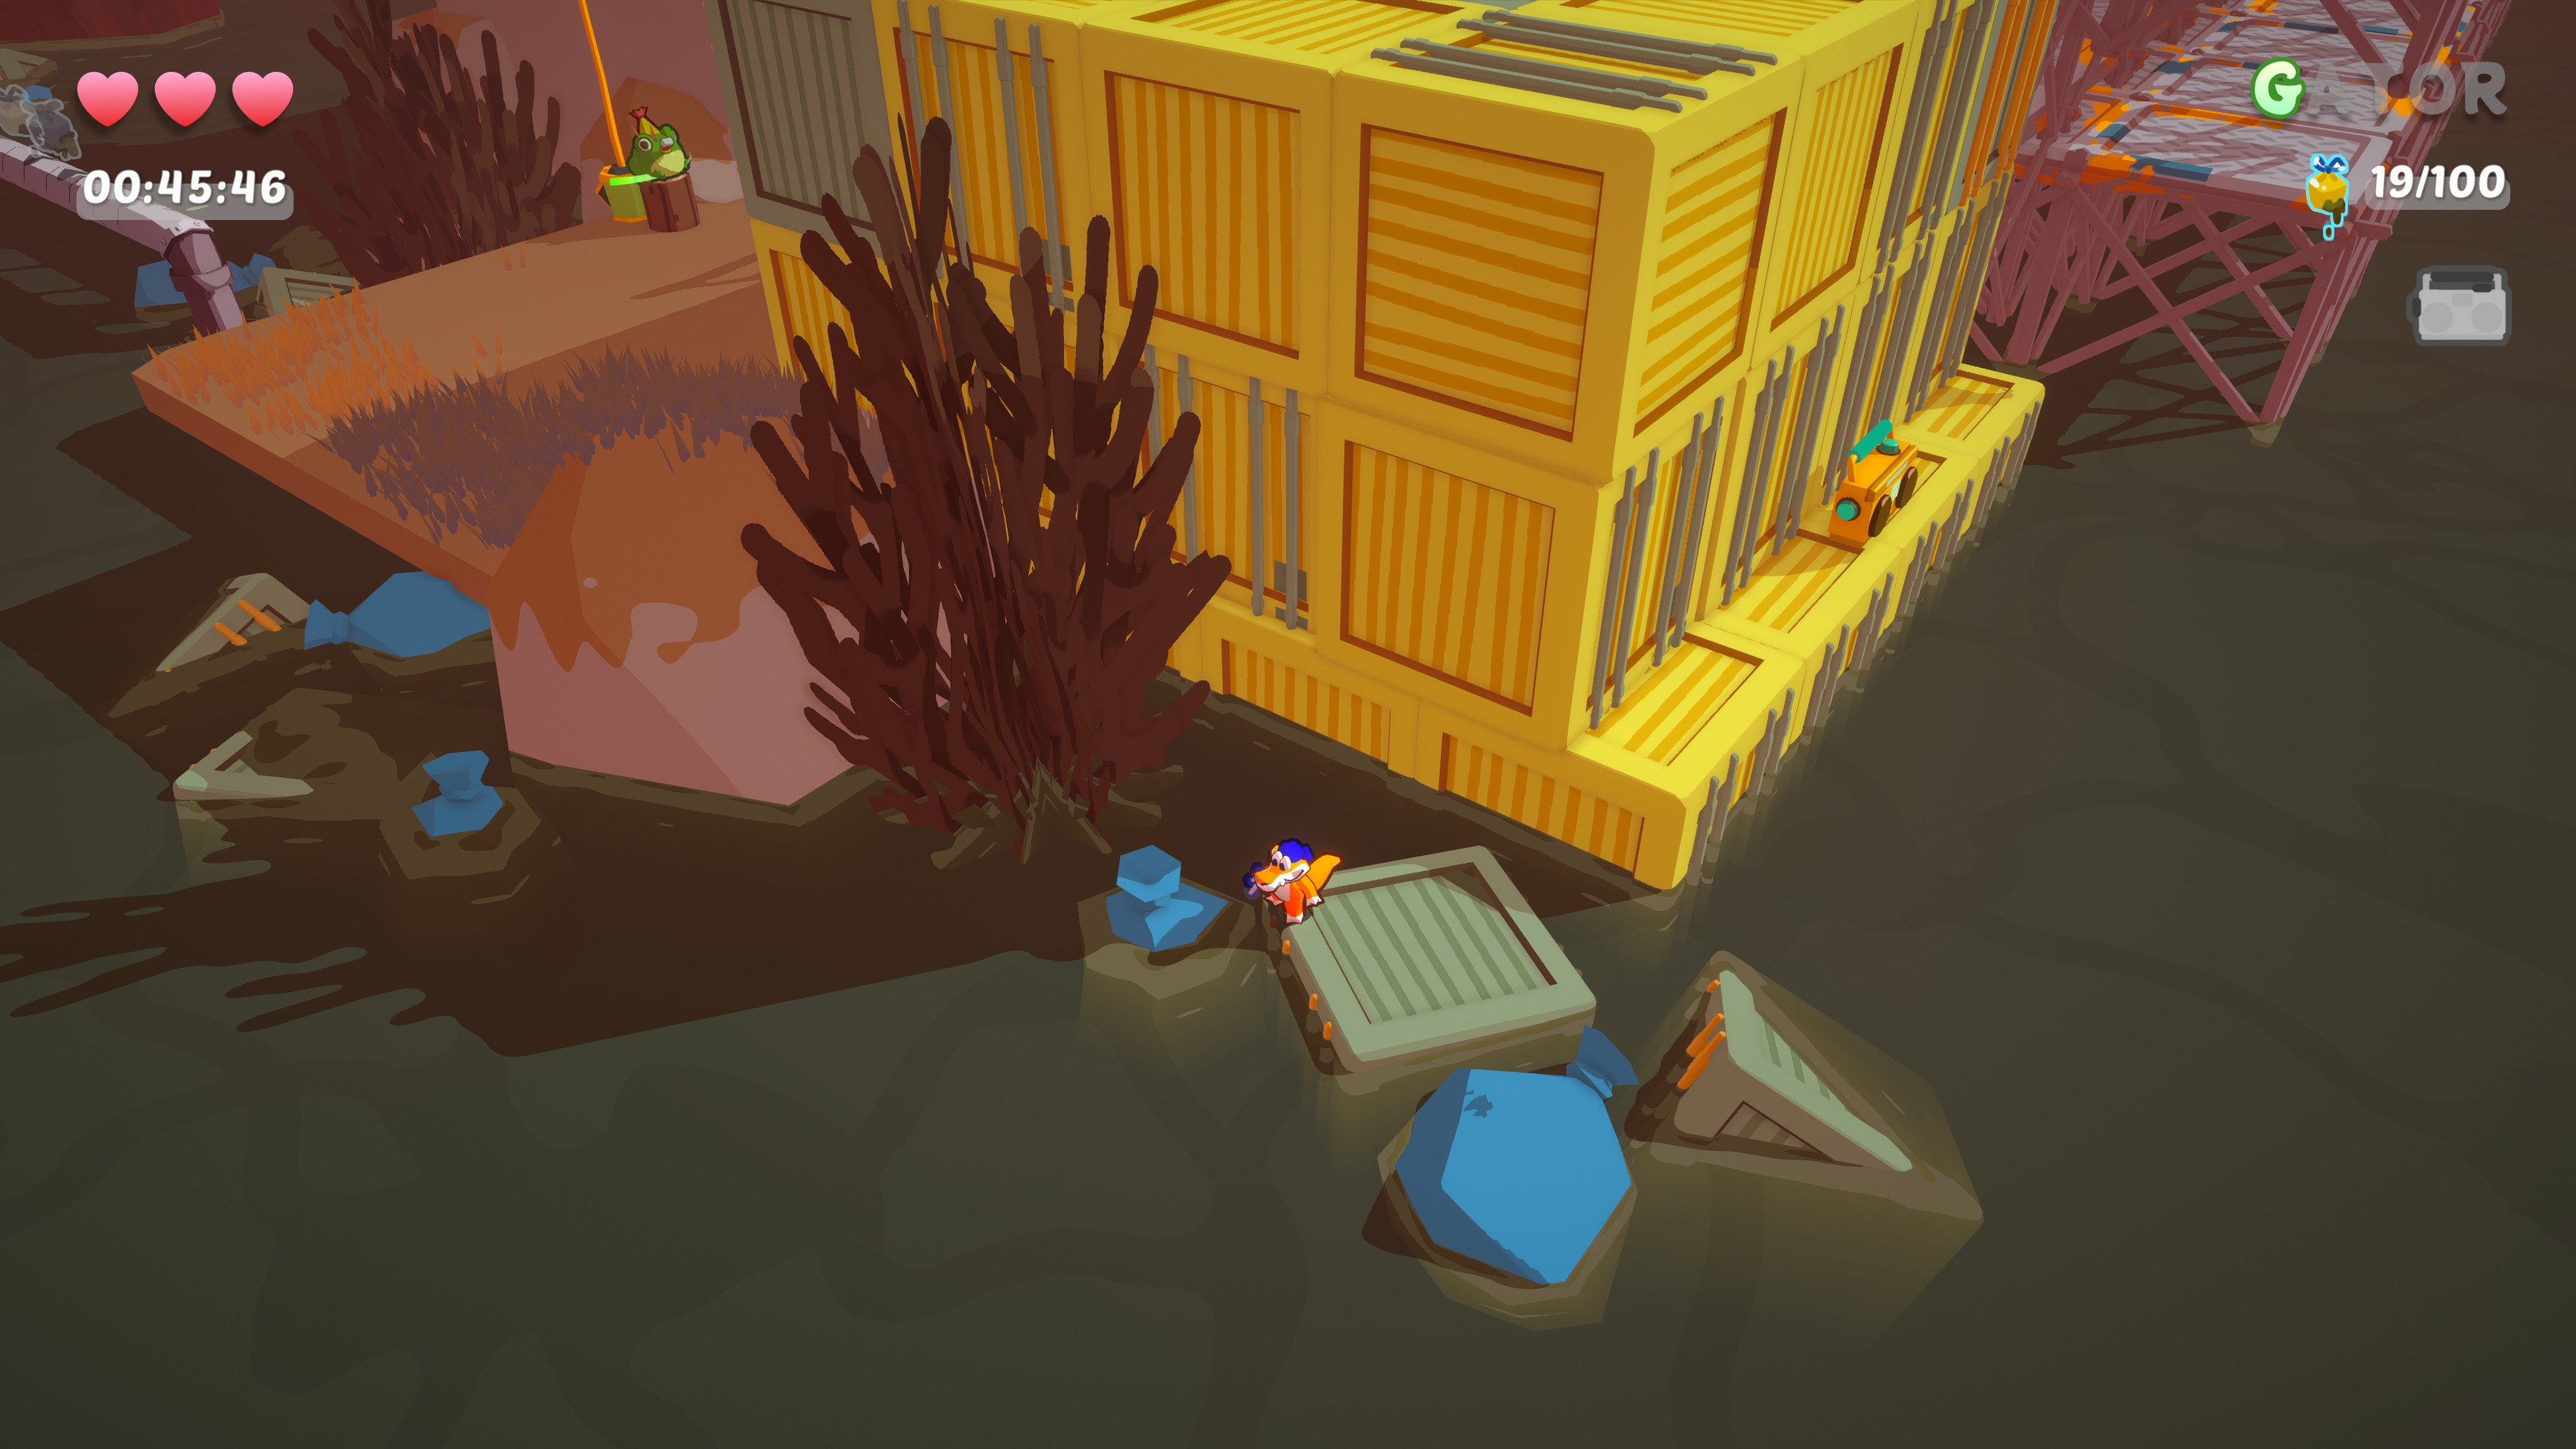
Nivel 8 – Bee-ware of Foes
- Following the second checkpoint (past the large bee horde), stick to the left wall of yellow crates all the way around.
Nivel 9 – Fight ‘til the Night
- Right at the very end of the level, the boombox is tucked behind the flagpole. Bastante sencillo. Moving on to part 3
Parte 3 (Niveles 10-13)
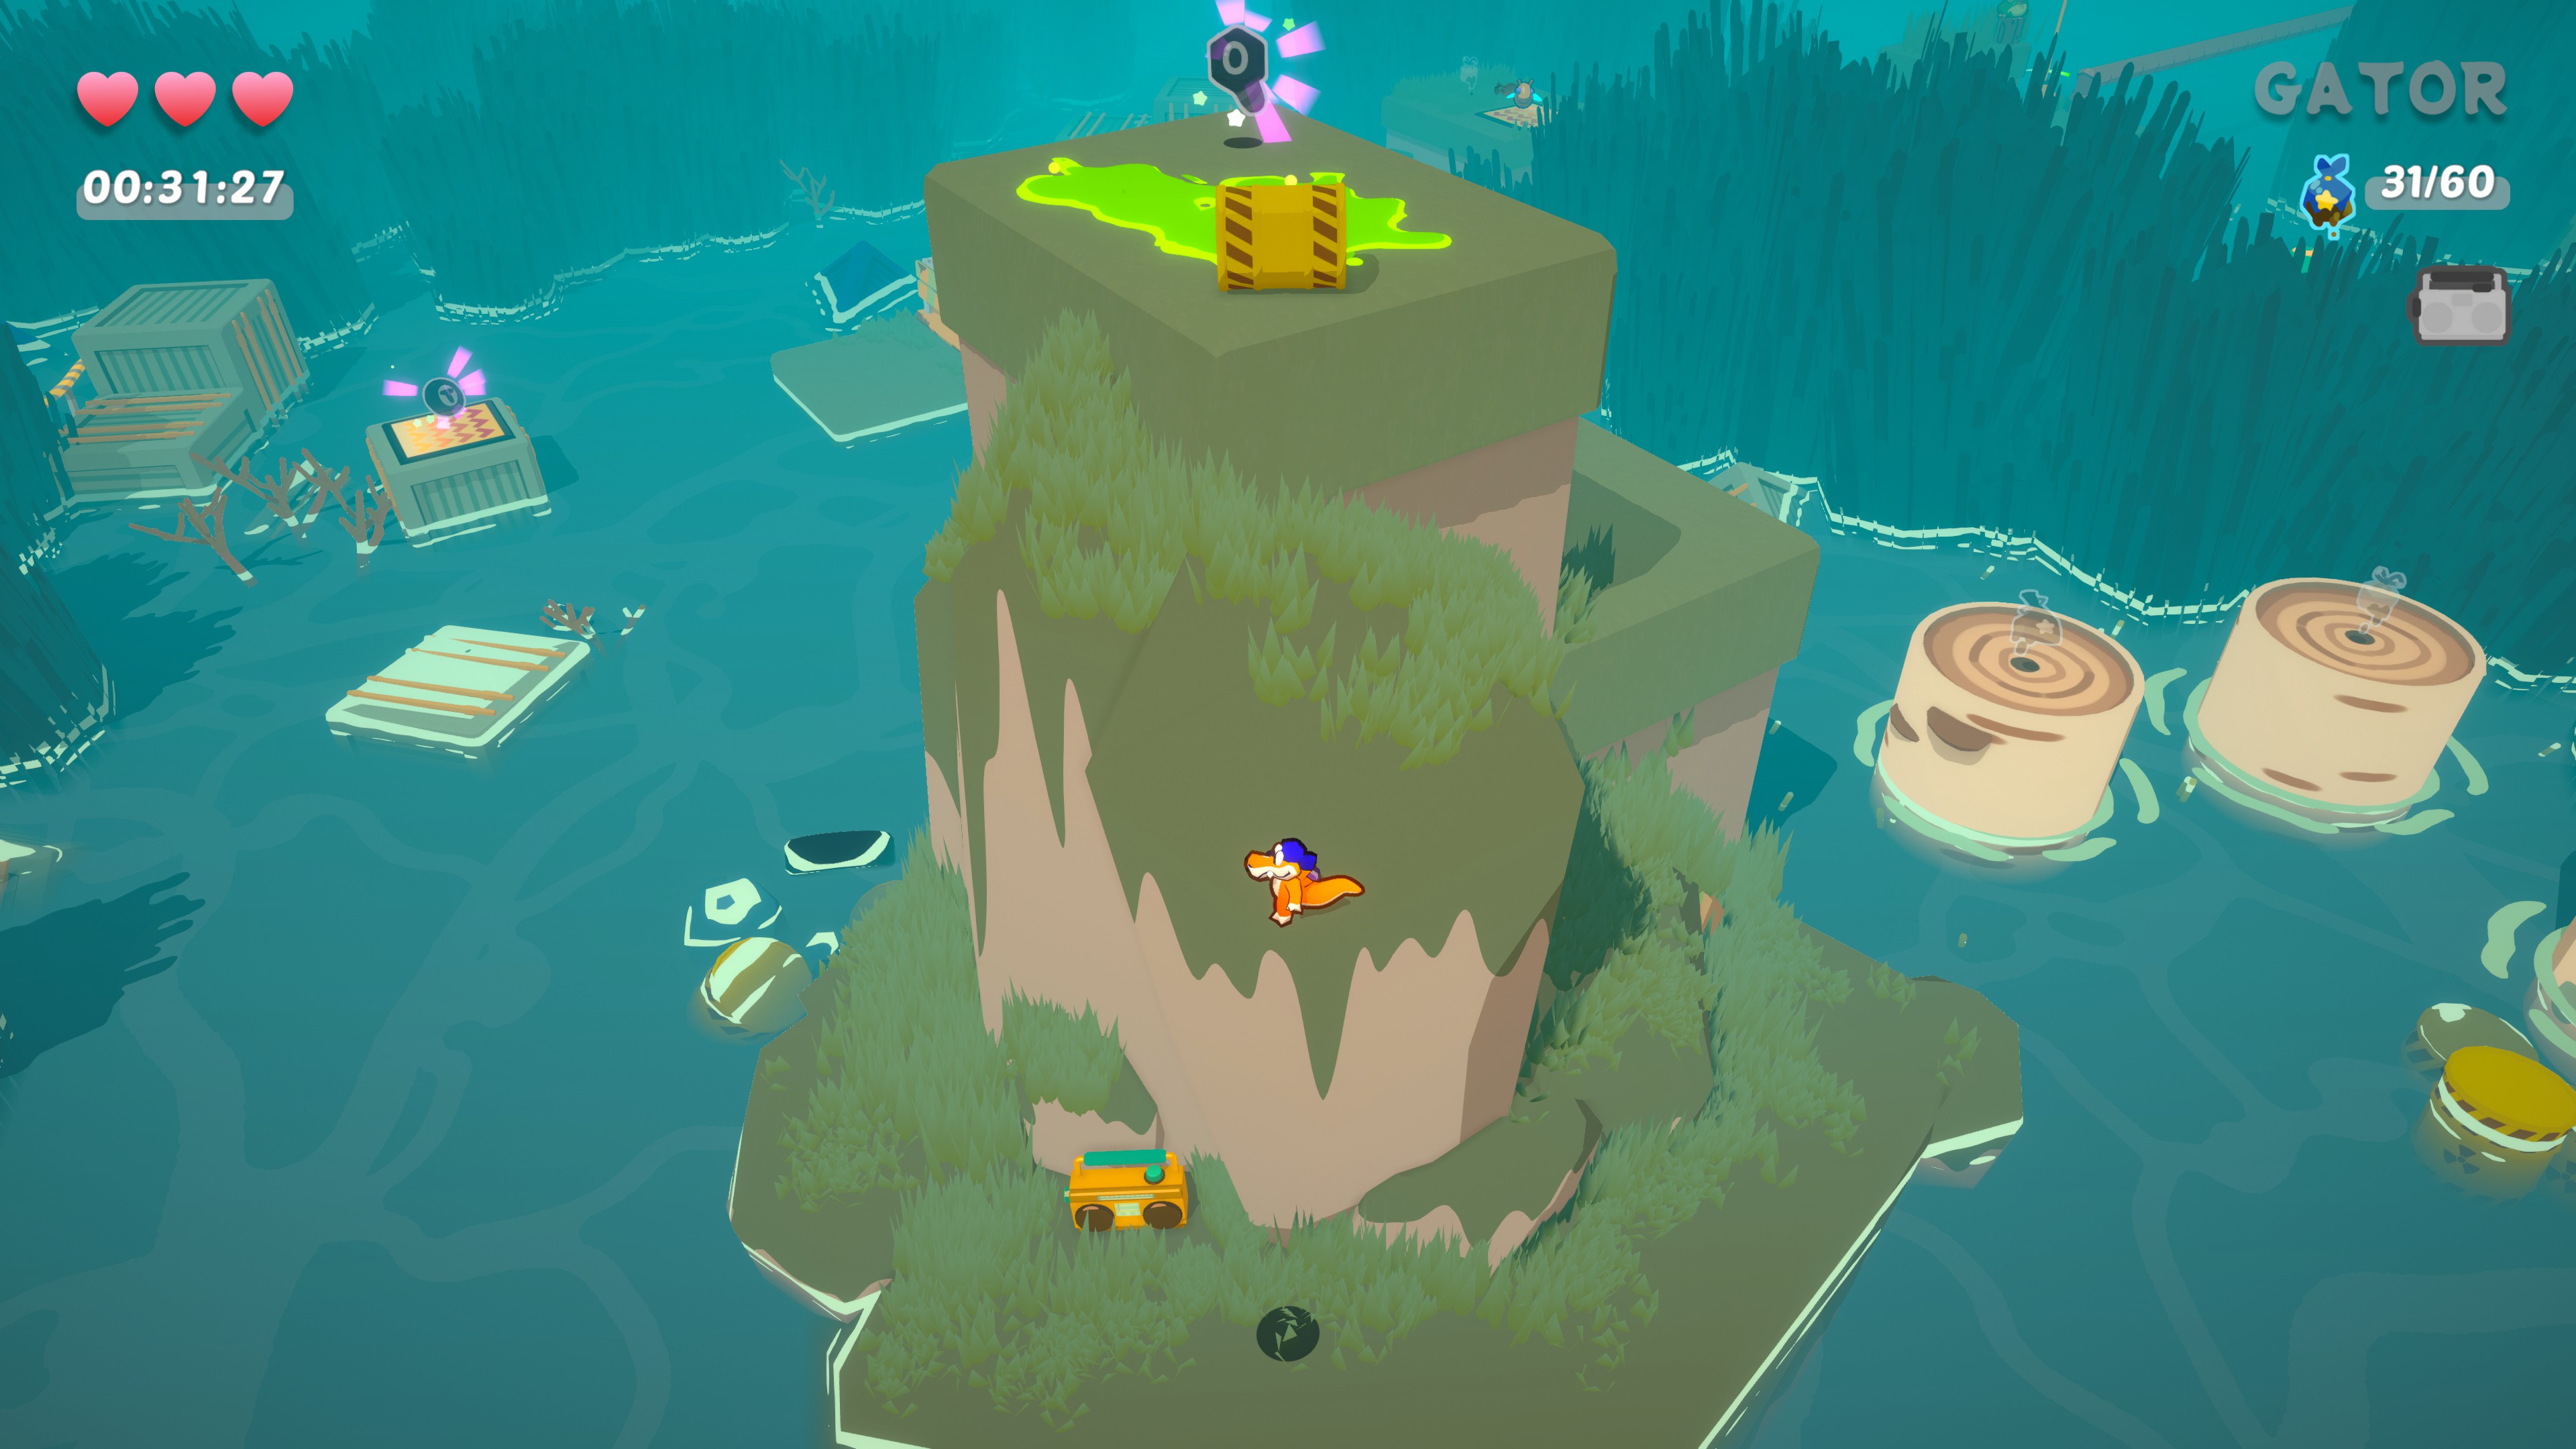
Nivel 10 – Midnight mire
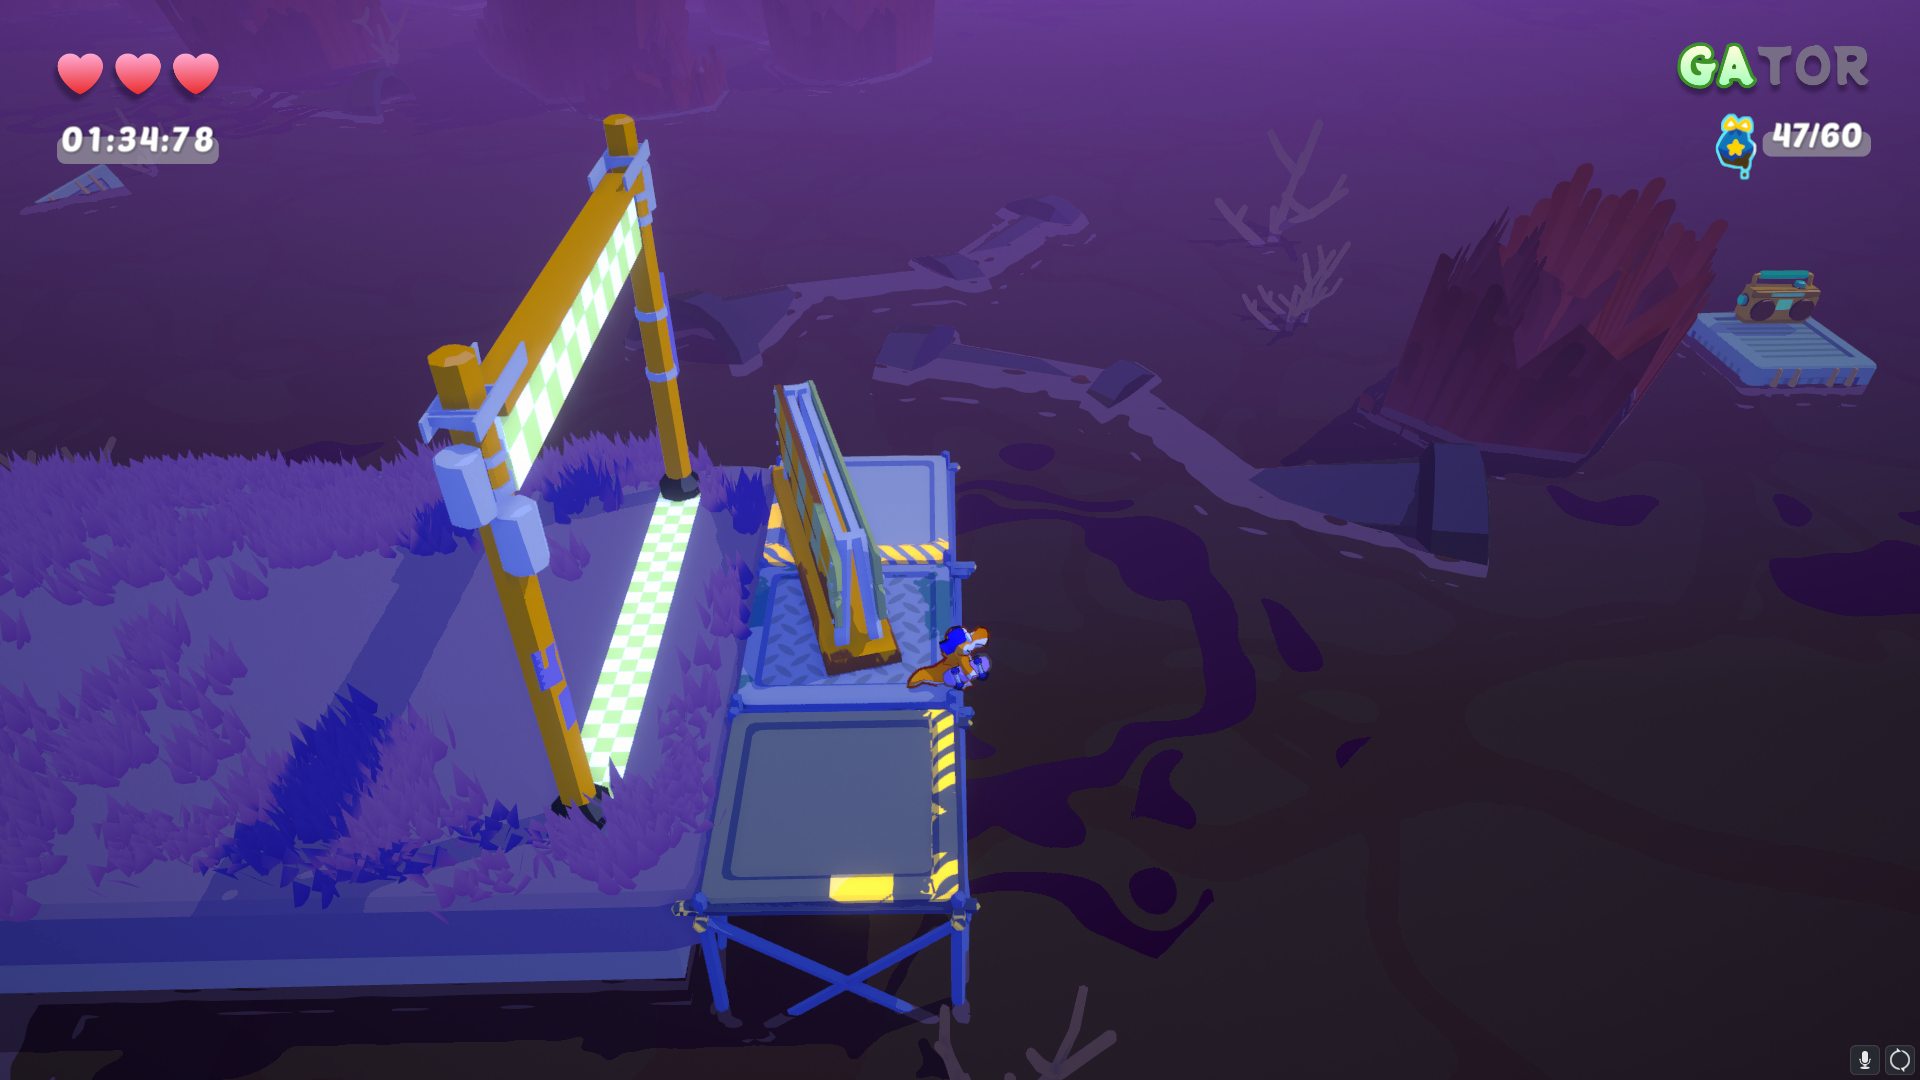
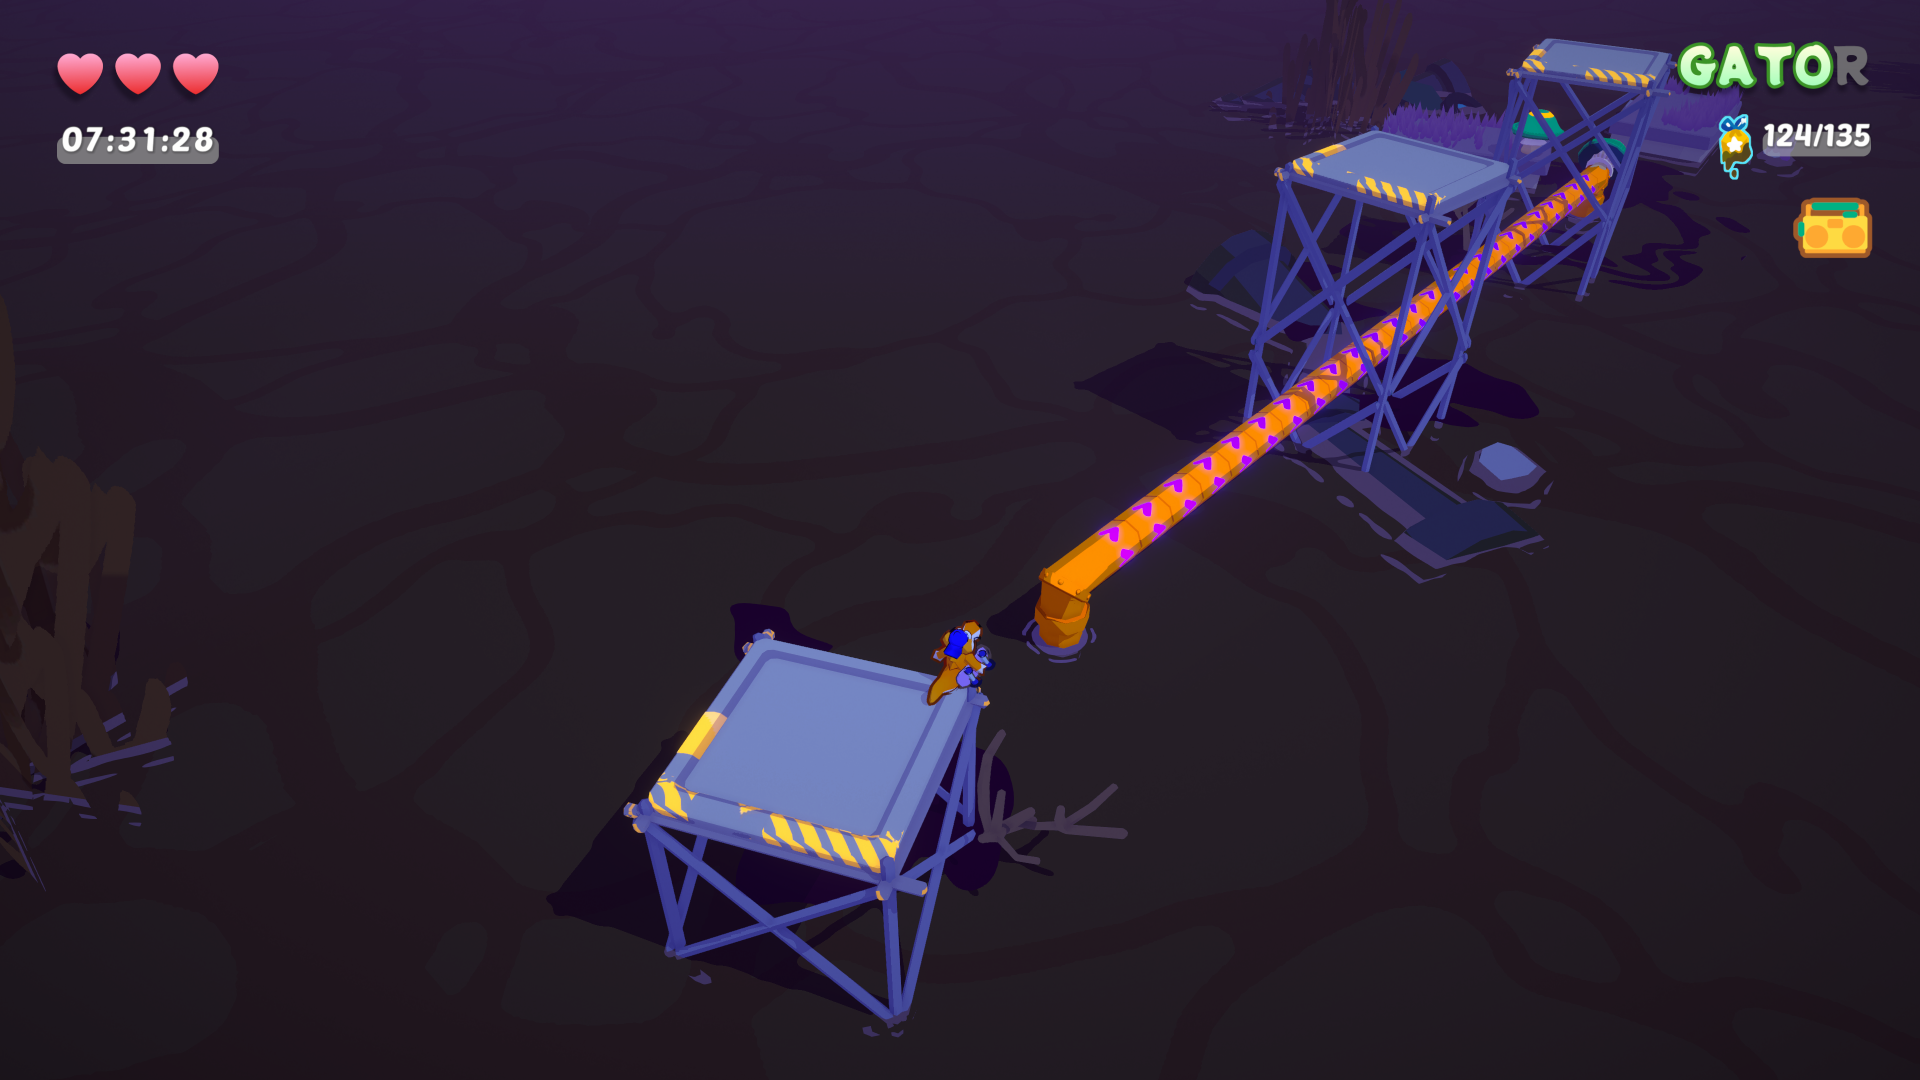
- To reach this boombox, you’ll need multiple wings (minimum of 3, recomendado 4). When you reach the spot in the screenshot, proceed a bit further until you encounter a series of blue crates. Gather at least 2 wings here, and find a 3rd on the small floating crate nearby. You can collect more wings earlier in the level by super jumping (dash then immediately jump to gain a short boost) in areas that typically require wings. Once you have enough wings, jump and dash after each wing use to cross the sea of tar. Keep hopping between platforms until you reach the boombox!
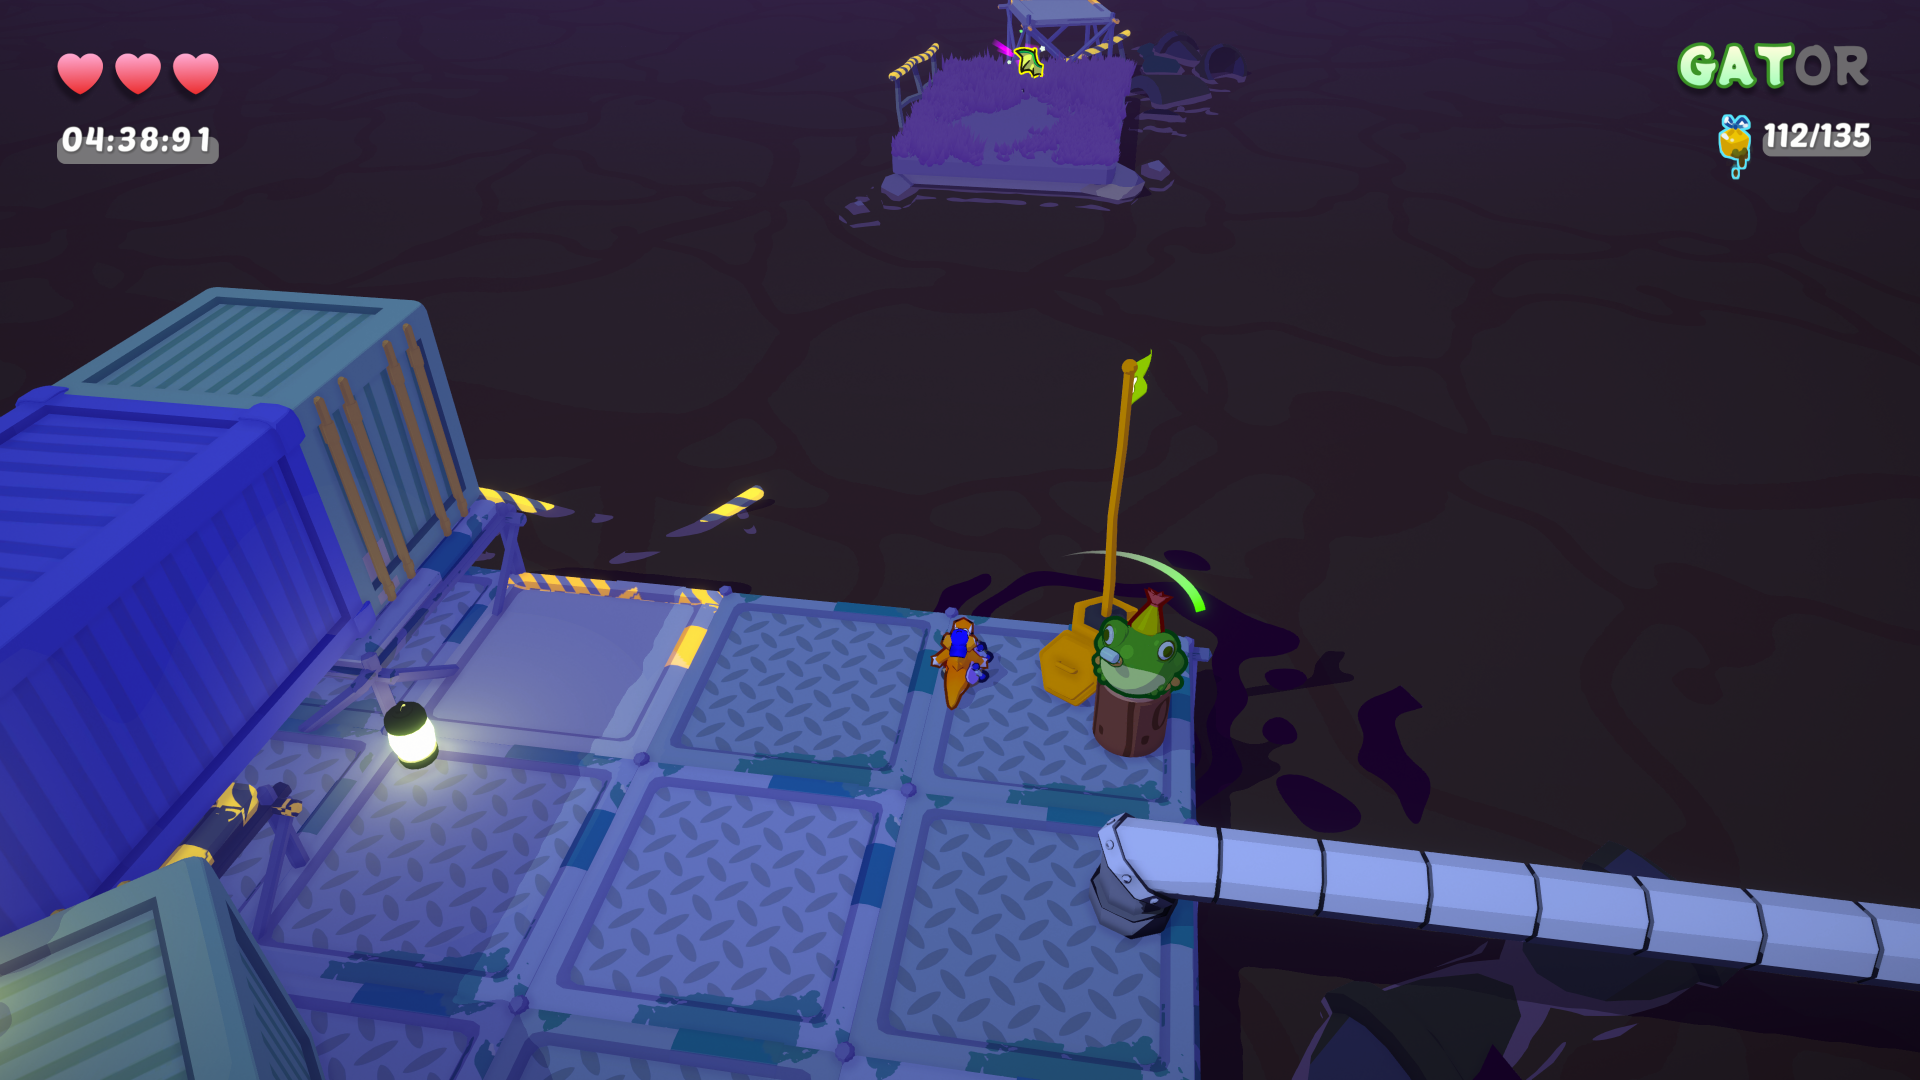
Nota: The yellow rail in the screenshot below can send you back to the start, wasting any wings you’ve gathered if the boombox hasn’t been activated yet. To avoid undoing your progress, refrain from touching this rail until you’ve interacted with the boombox.
Nivel 11 – Pollution Panic
- This one’s a breeze. After advancing a bit into the level, you’ll come across this spot. Turn your camera, and the boombox should be in view. It’s just a matter of jump-dashing to the pipe leading to it. Fácil.

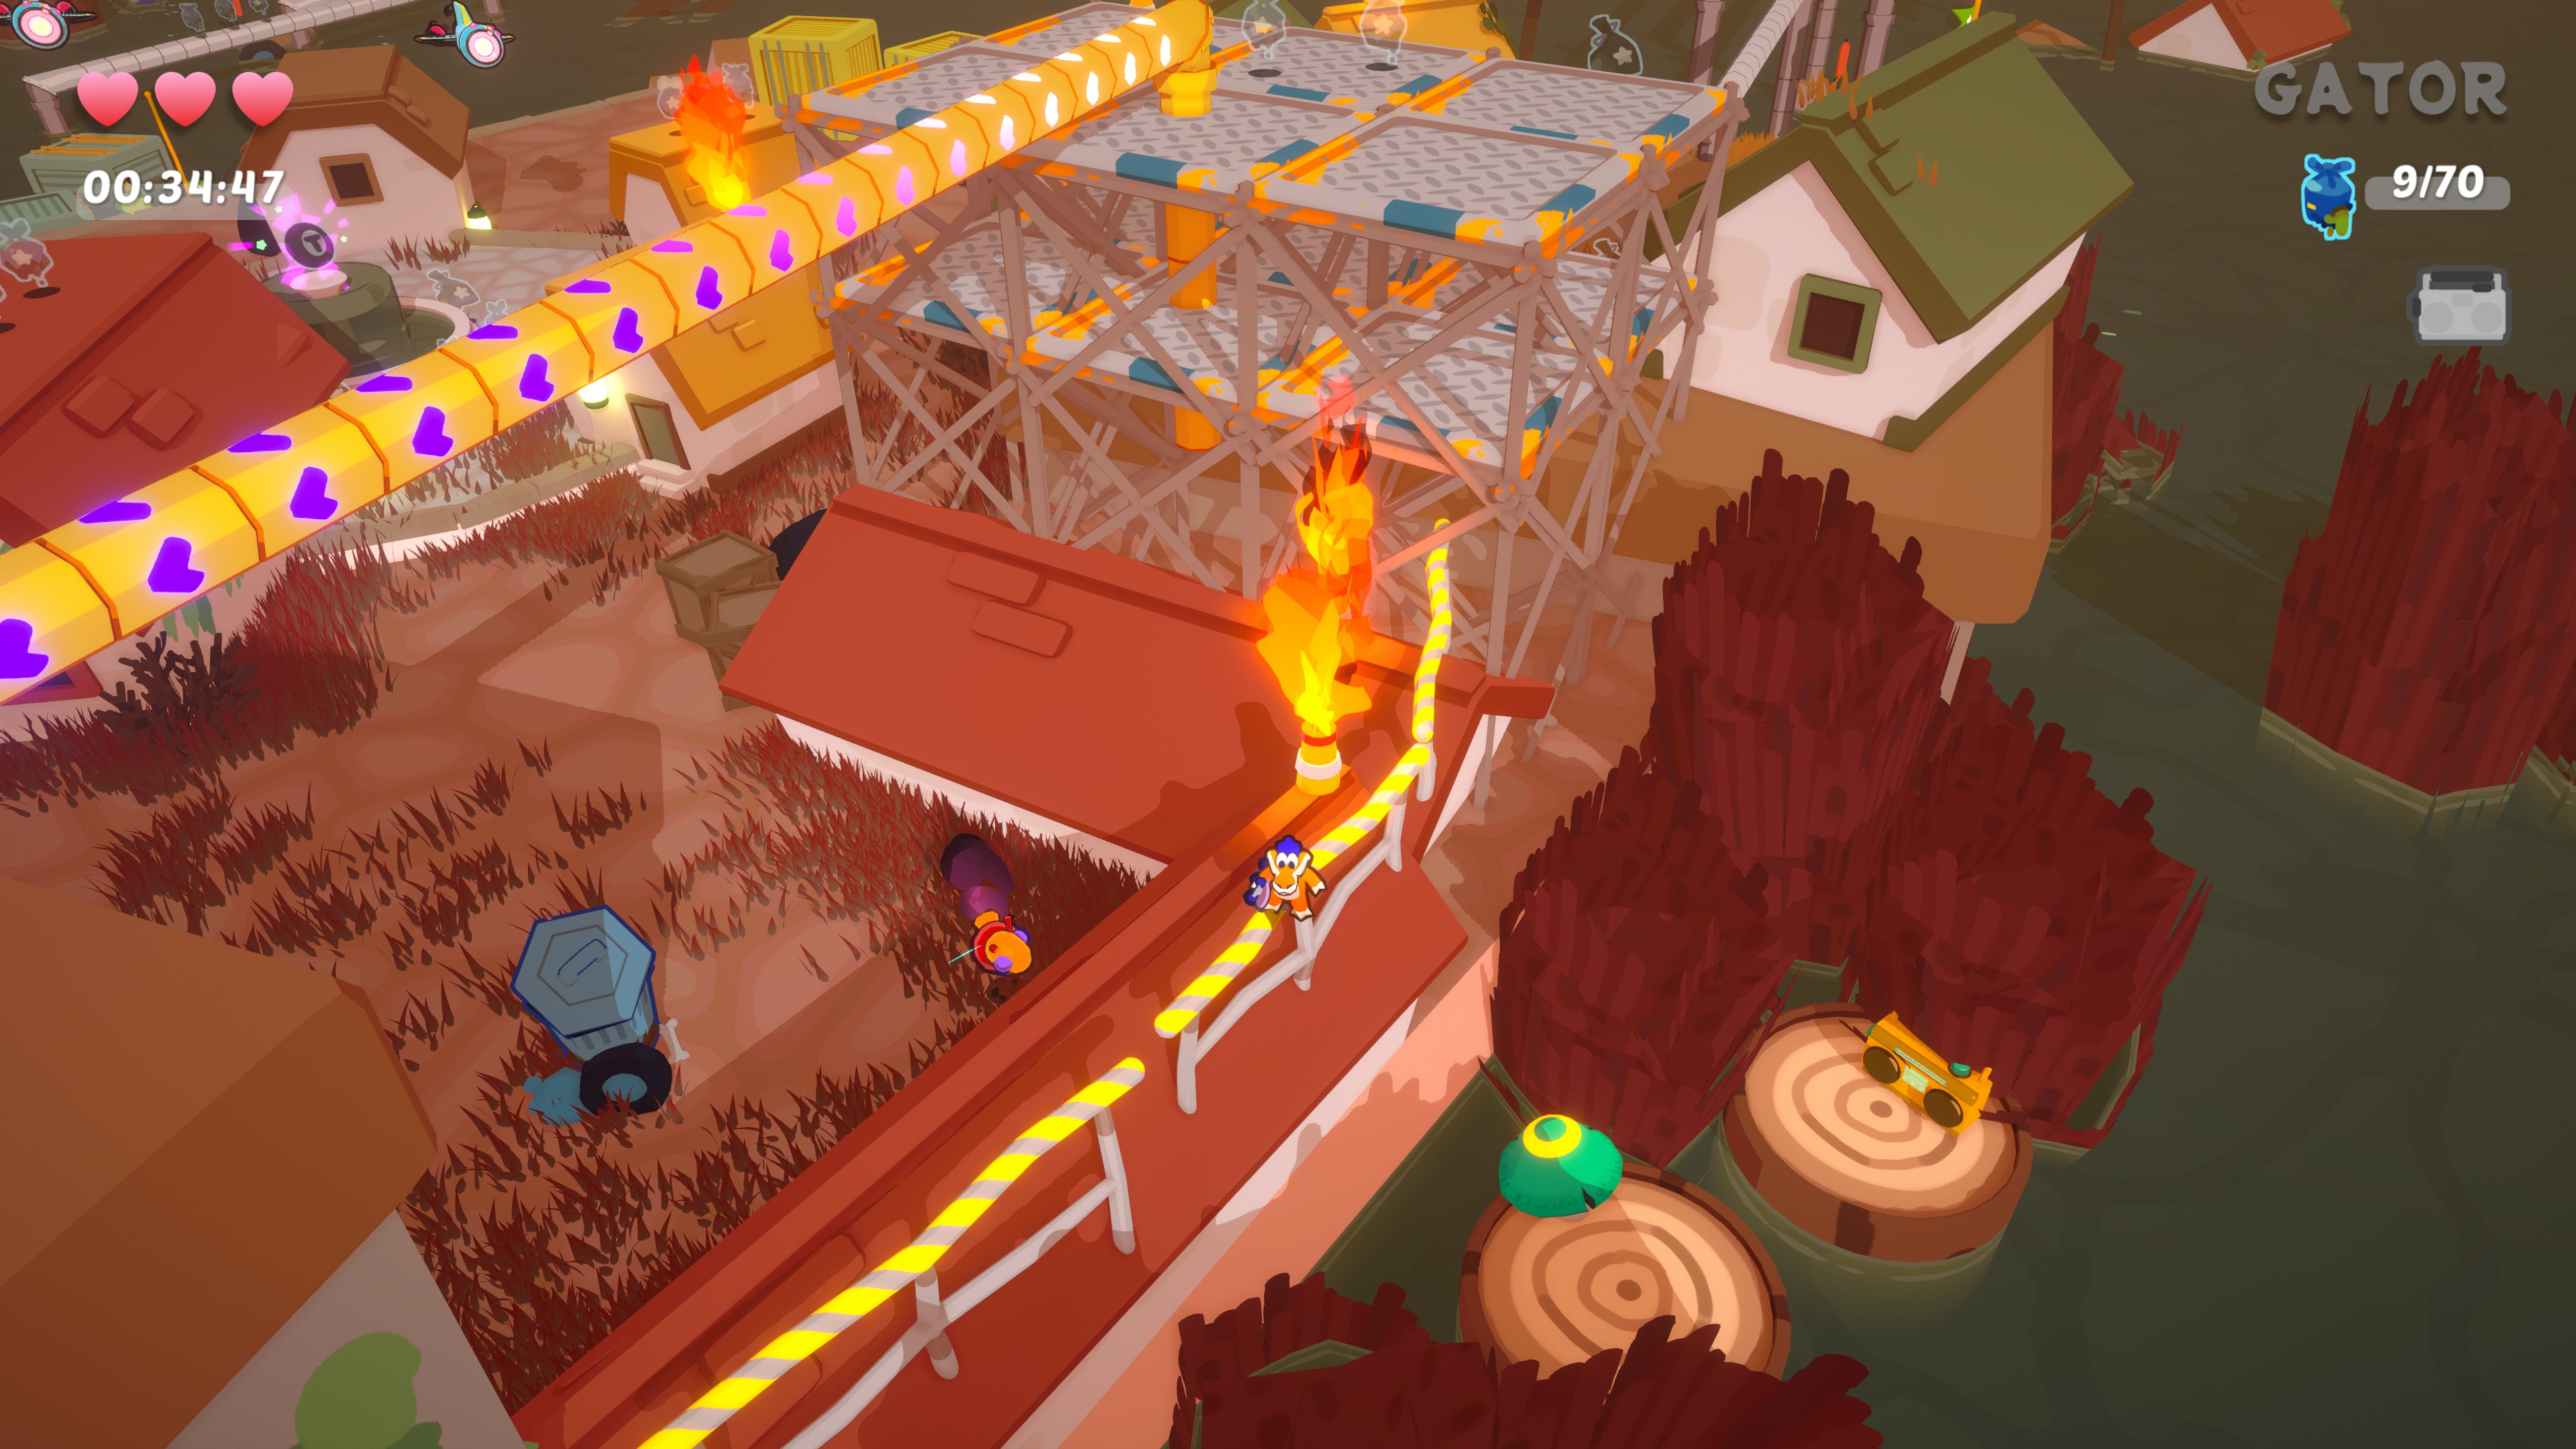
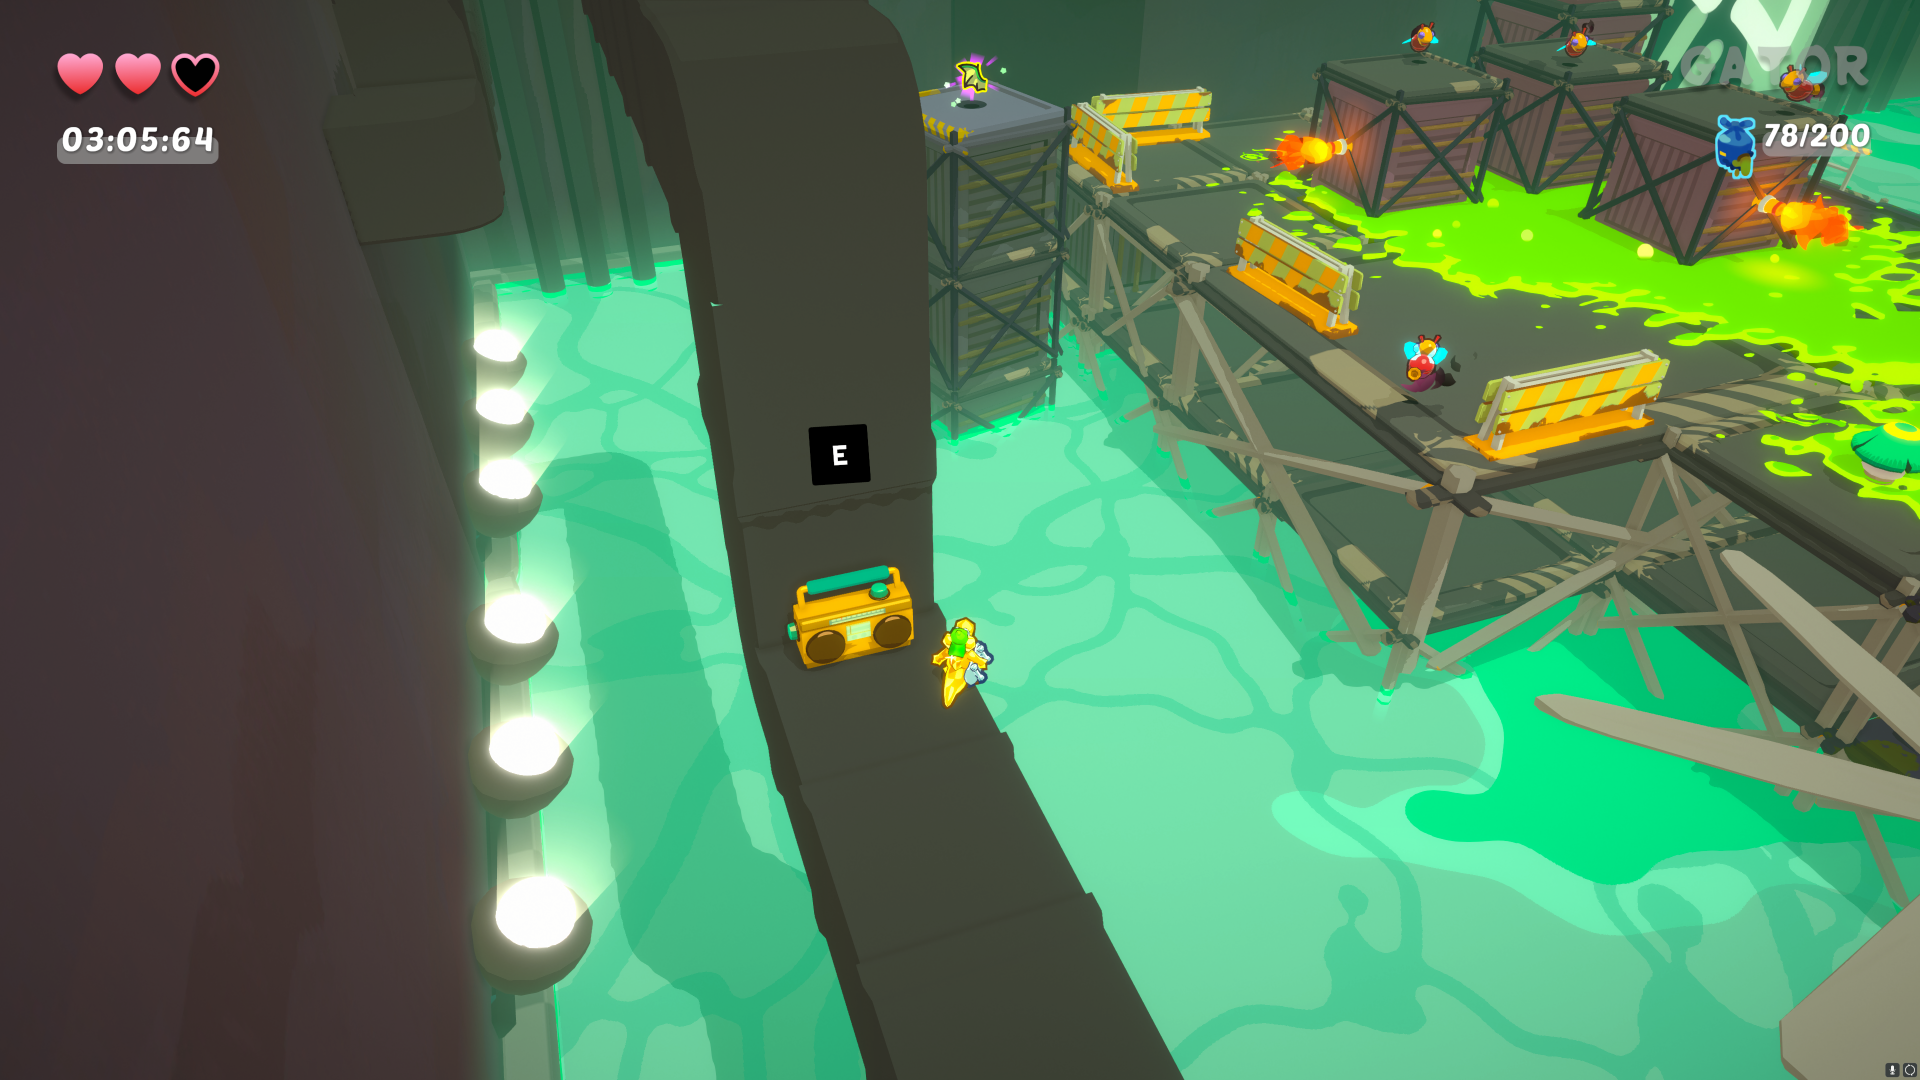
Nivel 12 – La Fábrica
- This one gave me a tough time (jumped on many things unnecessarily). About halfway through the level in the green toxic waste area, you’ll encounter a checkpoint frog. Gire a la izquierda, jump on the yellow guard rail, and proceed to jump dash from the rail to the spinning fan. Jump dash to the black vent where the boombox rests, y listo!
Nivel 13 – Traitor Gator
- The grand finale! Right at the very end of the level, resist picking up the deed. En cambio, super jump dash off the right side to the giant toxic waste barrels. Hidden behind them is the last boombox!

Conclusión
Y ahí lo tienes! Felicidades, you’re now a boombox hero, unlocked a chonky new character to try out, and earned a shiny achievement to showcase to your friends. Una vez más, I hope this guide proved helpful to all those who needed it.
Eso es todo lo que estamos compartiendo hoy para este Skator Gator 3D guía. Esta guía fue originalmente creada y escrita por Da Best Chance. En caso de que no actualicemos esta guía, puede encontrar la última actualización siguiendo este enlace.