Esta guía le mostrará cómo desbloquear todos Retro Mistery Club Vol.1 The Ise-Shima Case logros.
Descripción general
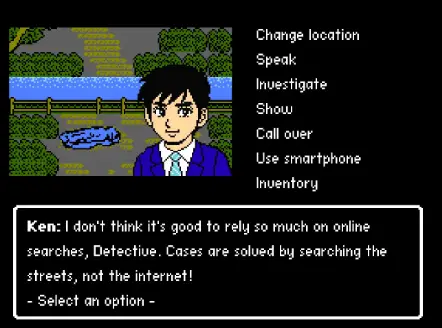
This guide explains how to get each of the 12 logros en el juego. It doesn’t provide a complete walkthrough for the story because there might be different ways to progress, and some dialogue could be optional. If you’re familiar with games like Famicom Detective Club, this game is similar. You have a menu with commands like changing location, talking to people, asking questions, and showing evidence. You can also use your smartphone, which lets you save with the Case notebook command.
To advance the story, use relevant menu options logically. A veces, you may need to select the same command multiple times on the same topic or follow suggestions from your detective colleague Ken. Si estas atascado, you can keep trying different options until you make progress. Con un poco de suerte, brute-forcing won’t be necessary!
The story unfolds over 9 días, so the guide is divided into those days with achievements available. One achievement is not tied to a specific day; it’s earned by playing a game on your smartphone.
If you find any errors in this guide, please inform me so I can update it.
Retro Mystery Club Vol.1 Achievements Guide

Ninja Kai Master
Play Ninja Kai and get a score higher than 1500m

Para obtener este logro, you can play a game on your smartphone by selecting Use smartphone > Juego. Sin embargo, your ability to access this game may vary, as sometimes Ken will stop you from playing it.
The game itself is straightforward: press the spacebar to jump and use the arrow keys or WASD for movement. Your goal is to jump on clouds to ascend as high as possible. If you fall off the bottom of the scrolling screen or collide with an enemy, se acabó el juego. Para obtener el logro, you must reach a score of at least 1500m.
I spent numerous attempts trying to achieve this, so don’t be discouraged if you find yourself facing the game over screen often.

There are four types of clouds in the game:
- Blue Clouds: These are the standard, safe clouds you can jump on without any risk.
- Blue Clouds with an Enemy: These clouds have an enemy sitting on top. You can land on them, Pero sea cauteloso, as touching the enemy will end the game. Wait for the cloud to fully appear at the top of the screen before jumping onto it to avoid surprises.
- Green Clouds: These clouds start falling as soon as you land on them. It’s best to avoid them if possible, but they can be useful as stepping stones to reach the next blue cloud.
- Orange Clouds: These clouds phase in and out of existence slowly. Time your jumps carefully to avoid landing on them right before they disappear.
In addition to enemy-laden clouds, there’s also a flying enemy you need to avoid.
Clouds can either remain stationary or move horizontally, sometimes with a slight upward or downward trajectory. They also vary in speed. The highest cloud at the start may not always be the best choice, as another cloud might end up higher depending on its movement. If you’re on a cloud and another passes through the same spot, you’ll often transfer to the upward-moving cloud.
Once you reach a score higher than 1500m, you’ll earn the achievement «Ninja Kai Master.»

It Could Be Anyone
Ask for Ken’s alibi until the text line stops changing
To quickly earn the first achievement on Day 1, sigue estos pasos:
- Call over the person who found the body.
- Speak to Ken about his alibi five times in a row.
Ken will keep repeating the line, «Why does everyone think I did it? Based on what?» After asking about his alibi five times consecutively, the achievement should trigger.

Off to Ise!
Clear Tokyo
The achievement should trigger automatically upon completing Day 1.
Reiji’s Testimony
Make Reiji Hamazuki remember the name of the victim
To trigger this achievement automatically, follow these steps while talking to Reiji Hamazuki in the parking lot outside Michiru Spa on Day 3:
- Show him the photo of the victim.
- Ask him some follow-up questions.
Completing these actions during the conversation should automatically trigger the achievement.
Akiko’s Side Gig
Listen to Akiko’s life story
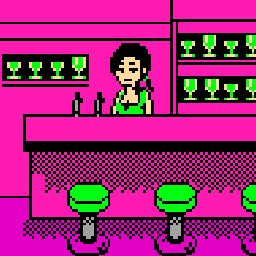
It seems like you unexpectedly unlocked an achievement while conversing with Nishizawa in Ozaki towards the conclusion of Day 3. Sin embargo, according to the game’s design, this achievement typically activates a bit later, once you’re situated in the Pefru bar at the day’s end. en la barra, direct your attention to the counter, where you’ll discover that the bartender is named Akiko. Summon Akiko over, and you should be treated to an extensive tale from her, presumably serving as the intended catalyst for the achievement.
Playmobil Girl
Find who the receptionist is at Le Bijou
Upon entering Le Bijou on Day 4, swiftly turn your focus to the receptionist. Ken will eventually take notice and inspect their nameplate, resulting in you earning this achievement.
On the morning of Day 5, it’s advisable to create a save point by navigating to the «Use smartphone» option and selecting «Case notebook.» This action is pivotal because an event occurs later in the day, which can unfold in various ways based on whether or not you choose to text Tamami using your smartphone. While both outcomes of this event don’t significantly impact the overarching story, having a save allows you to explore both branches of the narrative.
Además, if you’re aiming to unlock the «Ninja Kai Master» achievement and haven’t done so yet, the beginning of Day 5 presents an ideal opportunity to engage with the game on your smartphone. This achievement requires dedicated gameplay and Day 5 offers a convenient window to progress towards this goal.

2 Minutos
Wait a few minutes for Kana’s towel to fall off
Para conseguir este logro, when you reach Day 5, don’t pick «Use smartphone > Contacts» at the beginning. En cambio, play through the story normally until you reach Michiru Spa. Una vez allí, sigue estos pasos:
- Talk to Hamazuki.
- Move to the Men’s baths.
- Talk again.
- Move to the Outdoor baths.
Eventualmente, you’ll be in the spa with Kana. Ahora:
- Leave the bath three times.
En la tercera vez, Kana will say, «Detective? Just a few more minutes. If you hang in there, you might win.» Let the screen stay with that text and the «- Select an option -» menu visible. Esperar 2 minutos, and an event will trigger, unlocking the achievement.

If You’ll Excuse Me…
Get Tamami alone in the bath with you

In Hot Water
Wait a few minutes for Tamami’s towel to fall off
To earn these two achievements, sigue estos pasos:
- Start by reloading your save from the beginning of Day 5.
- Immediately choose «Use smartphone > Contacts» to trigger Ken sending a text to Tamami.
- Continue playing through the day as usual until you reach the scene at Michiru Spa. Esta vez, you’ll end up in the spa with Tamami, triggering the «If You’ll Excuse Me…» logro.
- Ahora, sigue estos pasos:
- Leave the bath three times.
- Wait for Kana six times.
When you see the text saying, «Tamami seems to be dizzy and is about to drop her towel,» let the screen remain with that text and the «- Select an option -» menu visible. Esperar 2 minutos, y eventualmente, another event will trigger, desbloqueando el «In Hot Water» logro.

The King of FeastAdvisor
Check the Italian restaurant’s rating
When you get to the Italian restaurant on Day 7, simply whip out your smartphone and search for it using the search engine. Doing so will unlock this achievement for you!
A Pile of Treasure
Find some treasure in the abandoned factory
En el día 9, when you find yourself at the abandoned factory, follow these steps to unlock the achievement:
- Change your location to «Inside the factory.»
- Move forward five times.
- Turn to your right.
- Move forward three times.
- Face left.
- Move forward once.
- Abrir la puerta.
- Investigate what’s inside.
If you’re having trouble navigating, refer to the map of the area provided.
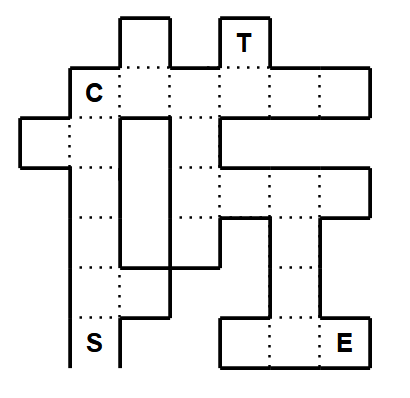
Leyenda del mapa:
- S – Start location once you’ve changed location to inside the factory
- C – Gato
- t – Tesoro
- mi – Fin (where you need to go for the story)

Case Closed
Termina el juego
Once you’ve completed the story, this achievement should automatically unlock without any additional actions required from you.
Eso es todo lo que estamos compartiendo hoy para este Retro Mystery Club Vol.1 guía. Esta guía fue originalmente creada y escrita por Gláe Bolg. En caso de que no actualicemos esta guía, puede encontrar la última actualización siguiendo este enlace.