
If you’re looking to get to Way of the Nioh as fast as possible and believe you possess enough knowledge or skill to do so, this guide may help you do so. This guide only presents my methods based on my style of gameplay and may not be suitable for your desired playstyle. You can always re-spec your character later with a Book of Reincarnation after reaching a point where you no longer need the methods described in this guide. This guide also presents only my preferred missions of choice and may not reflect the best choices other players would have in some cases.
How to Unlock the Next Region and Difficulty
To unlock the next difficulty, you must complete The Queen’s Eyes mission. This mission will only be unlocked when your Mission Achievement Rate bar fills up to the fourth bar, which also unlocks all remaining DLC regions and Omi missions normally unlocked from completing The Queen’s Eyes.
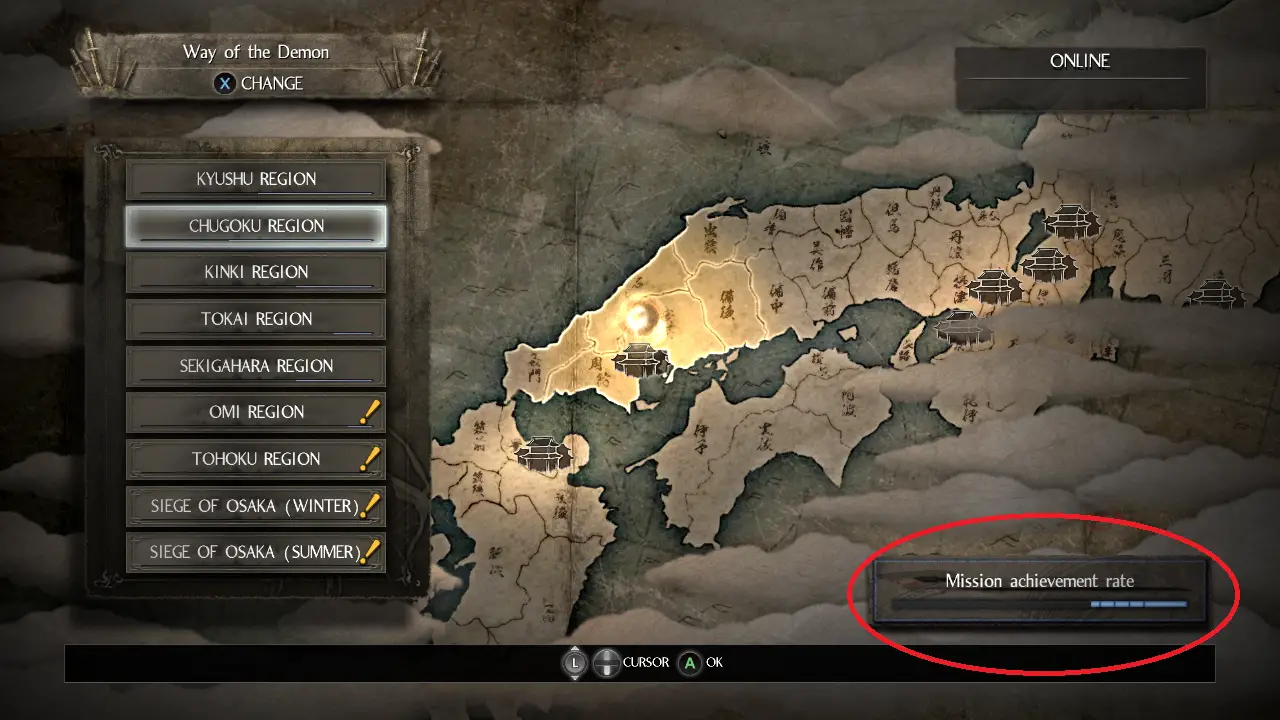
The first bar is the largest and requires completing nine missions. The next three smaller bars each require completing three missions, totaling to eighteen missions required to unlock The Queen’s Eyes for the difficulty.
Requisitos previos
The following should be done during Way of the Samurai:
- Finish Way of the Samurai by completing The Queen’s Eyes
- Start a DLC region to unlock the second Guardian Spirit slot
- Complete the Dojo missions El camino del guerrero: Veterano, A True Ninja, A Greater Harmony
- El camino del guerrero: Veteran unlocks certain essential weapon Skills for most weapons
- A True Ninja unlocks instant casting of Jutsus
- A Greater Harmony unlocks instant casting of Talismans
- Learn the Samurai Skills Ki Pulse (preferred stance) and its corresponding Living Water habilidad
- Become adept with Flux for animation canceling and Ki management
My Method to Speed to Way of the Nioh
Most missions are completed by either defeating the boss of the mission, a specific target, or defeating waves of enemies. I exclude missions from choosing based on general difficulty, time length, or environmental risk factor. Below is my non-weapon specific*, minimal arsenal used every time I start over:
- Extraction Talisman
- Pleiades Talisman
- Barrier Talisman
- Guardian Spirit Talisman/Moment Talisman
- Quick-change Scroll
- Tiger-running Scroll
- Guardian Spirit with knock-down on summon
- Weapon with element different from Guardian Spirits
- Fire Talisman (if you don’t use Fire on your weapon or your Guardian Spirit is not fire-based)
- A second Guardian Spirit with high Amrita Gauge Rate rank and different element from your weapon and first Guardian Spirit
- Elemental Shot Talismans (if you use weapons with low hit rates, such as Axe or Odachi)
*This is essentially a Living Weapon build. Extraction Talisman benefits you more when using Elemental Shot Talismans or multi-hit weapons. Debido a esto, even though this build is non-weapon specific, it is not as useful with slow weapons.
The reasons for this build being my go-to are:
- Survival tool even with low base health
- Can activate during Out of Ki state
- Knockback shockwave when activating or switching Living Weapon
- Invulnerability while activating or switching Living Weapon
- Can switch Living Weapon mid-attack for emergencies
- Additional element to inflict Confusion, making Yokai susceptible to constant stagger
- Easy to restore Amrita Gauge in a short amount of time with the Guardian Spirit that has high Amrita Gauge Rate
The other things to consider are Equipment Weight/Agility, and Toughness. Whatever your preferred are, stick with them, but do not grow any attachments to your sets. Your goal is to rush the difficulties, meaning the gear you first go into each difficulty with will become obsolete quickly. Your first priority should be a new weapon, followed by new armor that will add up to be whatever your preferred armor stats are. My personal preference is staying below 70% Equipment Weight (translates to B rank Agility) y teniendo 200 Toughness for blocking.
You don’t need to follow this, as it is only an example.
Much of this build and method of speeding through the game relies on your ability to avoid death or use of Quick-change Scroll. Speeding through difficulties means constantly being faced with enemies that kill you in one or two hits. I usually survive one or two hits with the use of Heavy armor granting more damage reduction, but for Yokai bosses, it is only useful for blocking. Dying with Quick-Change Scroll still removes buffs, meaning you will need to reapply Talismans or Jutsus soon after respawning. This would require immediate repositioning or activating Living Weapon depending on the circumstances. This build is also not favorable for weapons with slow, single strikes.
Cautions
Given that we are attempting to rush difficulties and my method involves a Living Weapon build, there are inevitable problems that will be noticed quickly:
- If you attempt to and successfully rush Way of the Samurai, you will not have enough weapon proficiency to complete The Way of the Warrior: Veterano.
- Enemies in Way of the Demon and above include red enemies with additional debuffs, one of them removing buffs on hit. Getting hit by these particular enemies can render you vulnerable or straight up get you killed in the moment.
- Very few pieces of gear will be acquired in a true rush
- You will have few options to choose from
- Reforging can become difficult to do with lack of Gold from completing missions or materials normally gained from dismantling acquired drops
- You will be weak against several bosses and must have sufficient knowledge of some bosses to beat them in endurance battles. I chose those who were the easiest for myself, but it does not necessarily mean they will be for you.
It is up to your memory of each mission you have played and your own skill level to decide which ones you are better off skipping when using your own or my method of fighting.
Kyūshū
The Man with the Guardian Spirit
- Reach the top of the prison and defeat the executioner
- Take the route outside where the two Knights are guarding the door to get to the Shrine sooner. If they are following, run downstairs or upstairs and wait a bit until they turn to leave. Pray at the Shrine in case you die.
- Hitting the boss while he is afflicted with Confusion will temporarily stun him. On recovery, he will do AoE damage at melee range and stand up. If he is still afflicted, hitting him will result in another stun.
Isle of Demons
- Rush through enemies to the top of the hill to the building with the key on the corpse guarded by the Yoki you once underestimated the first time you played.
- Open the door out to the next area and reach the Shrine. If your health and Fire resistance allow it, rush through the flames that block the path down to the lower part of the village, and continue through the second set of flames if your health permits it.
- Open the shortcut to the shrine in case you die to the boss. Enter the boat and defeat Onryoki.
- Utilize Confusion with your weapon’s Element and Living Weapon for a trivial fight. Susceptible to all Elements.
Death to Bandits
- Rush to the hut seen from the beginning of Isle of Demons. Make use of the cliffs and drop down to reach the destination faster and potentially discourage other enemies from chasing you.
- Defeat the armored man sitting down.
- You may wish to fight the other bandits before fighting the target him. De lo contrario, you may have to fight up to six enemies at once.
Wreathed in Flames
- For players who can survive the flames without a problem.
- Defeat the three Wheelmonks located throughout the village. Living Weapon activation and switching knocks them down temporarily as if you depleted their Ki.
Deep in the Shadows
- Rush to the boss. If your health permits it, you can drop from where the wooden fence/rail is to save time. Image provided for clarity.
- After the shrine, take the super long ladder down and drop to the right where the giant boulder is. There is a safe spot to land and avoid fall damage.
- Continue to the boss and defeat her. Living Weapon activation and switching knock her down as if you depleted her Ki.
Finders, Guardianes
- Locate the Kappa and be prepared to inflict Confusion. Una vez infligido, strike once to make it vulnerable for a Final Blow. After the Final Blow, hit one time again to make it vulnerable for Final Blow again. Repeat this until it dies.
- Be wary of locations of Yokai Realms and other enemies. Attracting enemies can make this mission more difficult for no reason.
A Request from Ginchiyo
- Locate the chest containing the Old Charm. This is randomized each time.
- Never check chests with three stripes, as these have mimics and never contain the Old Charm.
China
The Ocean Roars Again*
- Light the first bonfire.
- Proceed to the boss arena and defeat the boss.
- Do not use the flame from the bonfire unless you are confident in handling three Lesser Umi-Bozus at once while fighting the boss.
- Lesser Umi-bozus will be replaced by Harinobos, their red counterparts with needles in them. These enemies are much more dangerous as they can roll into you and deal a lot of damage. Take them out as they spawn.
*I strongly advise you to only do if you are comfortable with Living Weapon and use Fire Talismans or Fire Guardian Spirits. You can also do this with Fire-based Ninjutsu. It’s a relatively quick mission, but if you do not use sources of Fire damage, it will be a living hell.
The Magatama of Fire
- Rush to the location of the boss room.
- Defeat the Onyudo at the far end of the room and pick up the Magatama.
Heir to the Nioh
- Rush to where you fought Umi-bozu
- Fight the Lesser Umi-bozu/Harinobo with Fire damage sources as you normally do
- For other enemies, use Living Weapon’s shockwave from switching Living Weapon to knock them off into the water
- Repeat shockwaves until all waves are defeated. The final wave is when the Tengu spawns.
The Guardian of the Underworld
- Waves of enemies. Dwellers, Oni-Bi, bigger Dwellers, Yoki, a One-Eyed Imp, a One-Eyed Oni, and a Wheelmonk.
Kinki
Greater Demon Hunting
- Defeat the sped up Onryoki. Sí, the first one on the boat was actually slow.
- Utilize Confusion and constant offense to avoid worrying about getting one-shot
- Additional enemies are spawned on Way of the Demon and above, making focusing on Onryoki more difficult
- Kintoki can take a few hits for you but should not be depended on for completion of this mission
The Battle of Ohashi Bridge
- Assuming this map is not broken on PC still (it still crashes my game to this day), you can spam Living Weapon switching on the target when he is close to the edge of the bridge to knock him off. The AI normally performs ridiculous amounts of recovery from the edge, but the shockwave hits fast enough during his tripping animation to prevent him from recovering with a roll.
The Disappearing Ranjatai
- A diferencia de «A Request from Ginchiyo», you need to locate the mimic chest (three stripes on each side)
- Defeat the enemies near it first, then use the Whistle emote or open the chest to draw out the Mujina
- Perform the same emote to avoid fighting it and end the mission
The Ogress
- Make the loop around the map to get to the building blocked by the door that cannot be opened from the side you spawn on
- Defeat the Flying Bolt
- Confusion will help stun lock the Flying Bolt or let you spam Final Blow on it
- I recommend defeating the umbrella outside the building before engaging the Flying Bolt.
Tokai
Memories of Death-Lilies
- desde el principio, where the route splits, take the left path and hug the left going around the unsafe pool of water. Continue past the Wheelmonk down the hill to the door. Obtain the key at the watchtower and head to the boss room after.
- Confusion method again. Susceptible to Earth, Viento, and Water.
The Giant Frog Brawl
- Confusión. Straight up. You can attempt fighting him, but because of his new move unlocked in Way of the Demon and above, it can be too difficult for many players. Susceptible to Earth, Agua, and Lightning.
Sekigahara
The Source of Evil
- Skip the first crystal seen and loop around the map to the crystal guarded by an Onryoki. Purify this crystal, then drop into the pit for the boss fight.
- Make use of Living Weapon spam in this fight, as the purified puddles were designed to give you indefinite Living Weapon. Extraction Talisman will make it guaranteed to keep Living Weapon.
- Take out the feet first. If necessary after destroying both feet, destroy the two hands on the lower elevated section.*
- Destroying four parts resets all parts if you cannot deal enough damage to defeat the boss after four iterations.
*Significantly easier with Elemental Shot Talismans to hit the hands that are typically out of reach.
The Demon’s Daughter
- Rush to the final room in the tomb
- Defeat the bandit guarding the door for the key
The Unrepentant Thief*
- Move to the shores and locate the Kappa
- Defeat the Kappa
*As this involves an environmental hazard of drowning and many enemies, you may wish to skip this mission.
Kuroda’s Determination
- Defeat all waves of enemies
- Mainly Skeleton Warriors. Also two Tengus on one wave
- The final wave is the Onryoki
- Confusión, Lightning damage, and Living Weapon switching will help greatly with the Tengus and Onryoki
Omi
I do not touch any of these missions if I am strictly going for next difficulty as fast as possible. They are all long or too far in the game to be convenient for filling the Mission Achievement Rate bar. This would be the time to backtrack to other regions and finish missions in them.
Results from the Test Run (for bookkeeping and reference purposes)
Stats restricted to maximum level 200
Cuerpo – 12 (Minimum for Hanzo armor for 2 piece bonus or Onmyo mage headpiece for faster cast in Way of the Samurai)
Corazón – 7 (Bring Ki up to 100 in beginning of playthrough)
Aguante – 30 (weight capacity)
Fortaleza – 17 (in case of Tatenashi armor drop, weight capacity)
Habilidad – 30 (13 in Way of the Samurai for Hanzo and Onmyo, weapon damage, Ki Pulse stat)
Destreza – 25 (Quick-change, Tiger-running scrolls, Paralysis pills)
Magia – 50 (Onmyo capacity, Talisman duration, passives)
Espíritu – 71 (GS Bond stops increasing by 20 después 71)
Unused Amrita added up to 92 niveles.
Personal essential gear drops
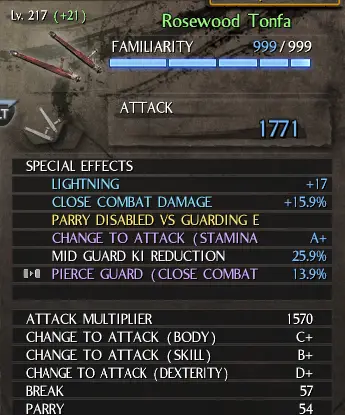
Arma – tonfa
– Secondary fulfilled Head of the Iga Ninja set.
– Did not acquire Ravenwing Rifle or Warrior of the West Bow for future damage reduction
Armadura – Heavy Head and Torso, Light Arms, Medium Legs, Heavy Feet
– Reforged Chest to have Life Recovery from Amrita Absorption
– Of the armor pieces and weapons, 5 pieces were from sets, granting additional 10% DR with Yasakani equipped
– Received Firearms Damage acquired on three armor pieces
– Muramasa was not rescued until Way of the Wise was almost completed. Tome was lonely.
– Yasakani was not acquired until mid Way of the Wise
Talismans and Jutsus
The usual used.
– Extracción, Pleiades, Kekkai (Barrera), Fuego, Guardian Spirit Talisman
– No Elemental Shot Talismans used this time
– Quick-change, Tiger-running scrolls, anti-paralysis pill
– No shuriken or kunai were used
Misiones
Way of the Nioh unlock successful. Could have been done in under 20 hours you dingus.
– Skipped all DLC region missions. Did not acquire Blue Dragon for Elemental Damage Reduction (Guardia)
– Stop playing Falling Snow, The Demon of Mount Hiei, Invitation from the Warrior of the West, The Demon King Revealed.
– The Battle of Ohashi Bridge is still broken
– Shima Sakon is easy now, but Lightning still sucks to fight
– White Tiger no problem
– Tenkai’s past is too strong on Way of the Wise
– Omi region sucks
– If you get bored, go fight Sanada Yukimura
Total Playtime to Unlock
Including Torii Gate gameplay and AFK hours ~33 hours.
Do it in 20 or less next time.
Epílogo
Remember that you may find some of my selected missions too difficult to complete, and you may find some better missions to complete quickly. Some were also excluded on the basis of the bosses generally being too fast for most players and thus too difficult to fight. This guide only presents my perspective and experience in rushing a new playthrough from Way of the Strong to Way of the Nioh. You can find more or better advice from other players in Discussions by looking up terms in the search bar for specific topics or asking around.
This guide was created with Ethereal gear and how quickly other gear become obsolete in mind. This should save you some time from grinding for gear only to not use it after moving to the next difficulty and from inventory management.
This should have been made along side with my first guide I made almost exactly a year ago, but with how long that one took and other commitments I had, I shut out the thought of making this and other potential resources. Here we are now. Hope this helps someone out there.
Eso es todo lo que estamos compartiendo hoy para este nioh: Edición completa guía. Esta guía fue originalmente creada y escrita por horik. En caso de que no actualicemos esta guía, puede encontrar la última actualización siguiendo este enlace.