
- Título: Sicario 3
- Fecha de lanzamiento:
- Revelador:
- Editor:
Información sobre Hitman 3 todavía está incompleto. Por favor ayúdanos a completar los detalles del juego usando esto formulario de contacto.
This guide serves as a walkthrough for the 9 different Elusive targets that can be found in Paris. Includes pics, tips and maps.
The Forger

DIFICULTAD: 5/10
GUARDS?: Sí, One Bodyguard
RANDOM LOOP?: No
MY RATING: 8/10 One of the better targets to come out of Paris. Not too easy and not too hard, with many opportunities to isolate him from his bodyguard throughout his loop.
LOOP MAP:
Piso 2:
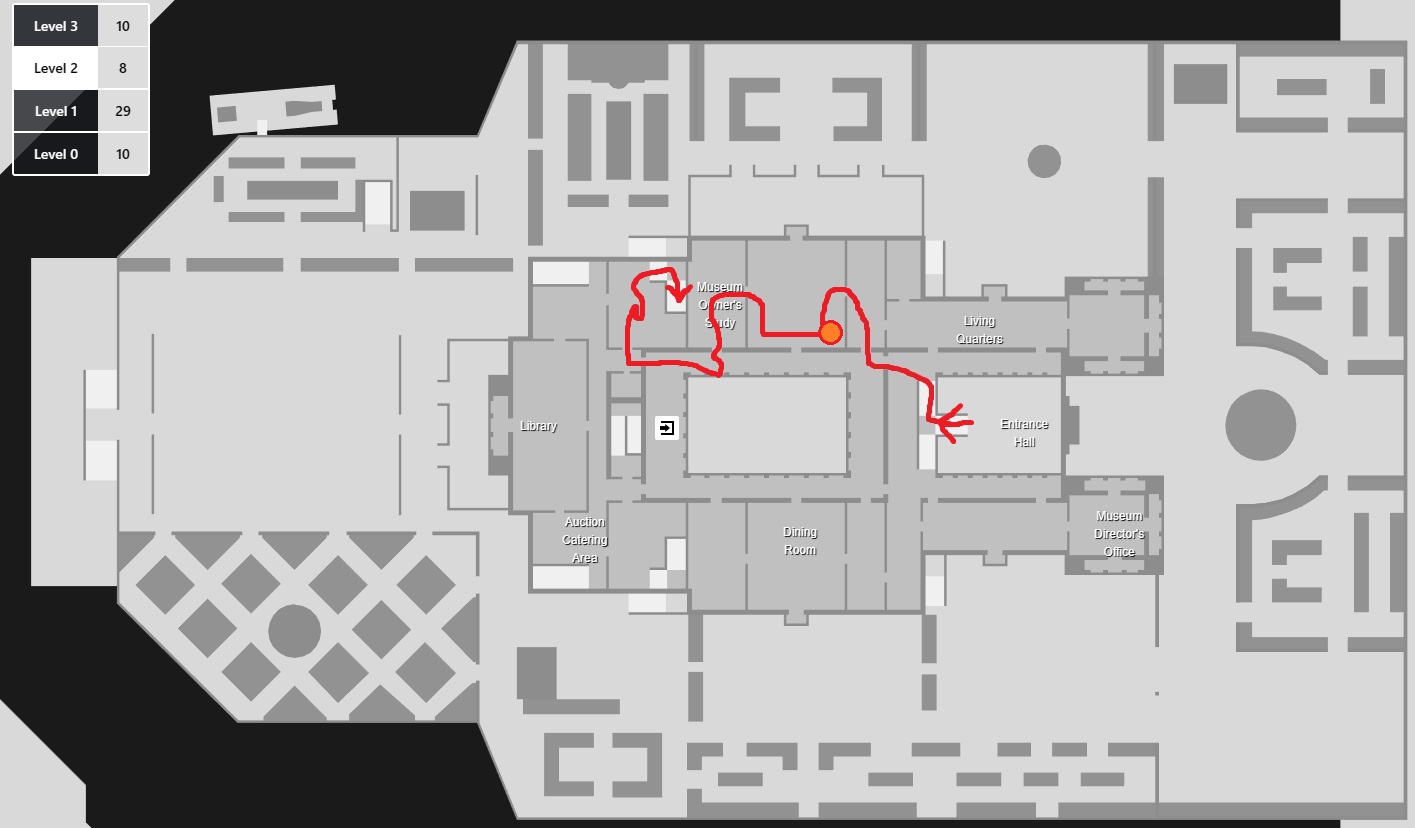
Orange Circle = Good Area to Isolate him
Piso 3:
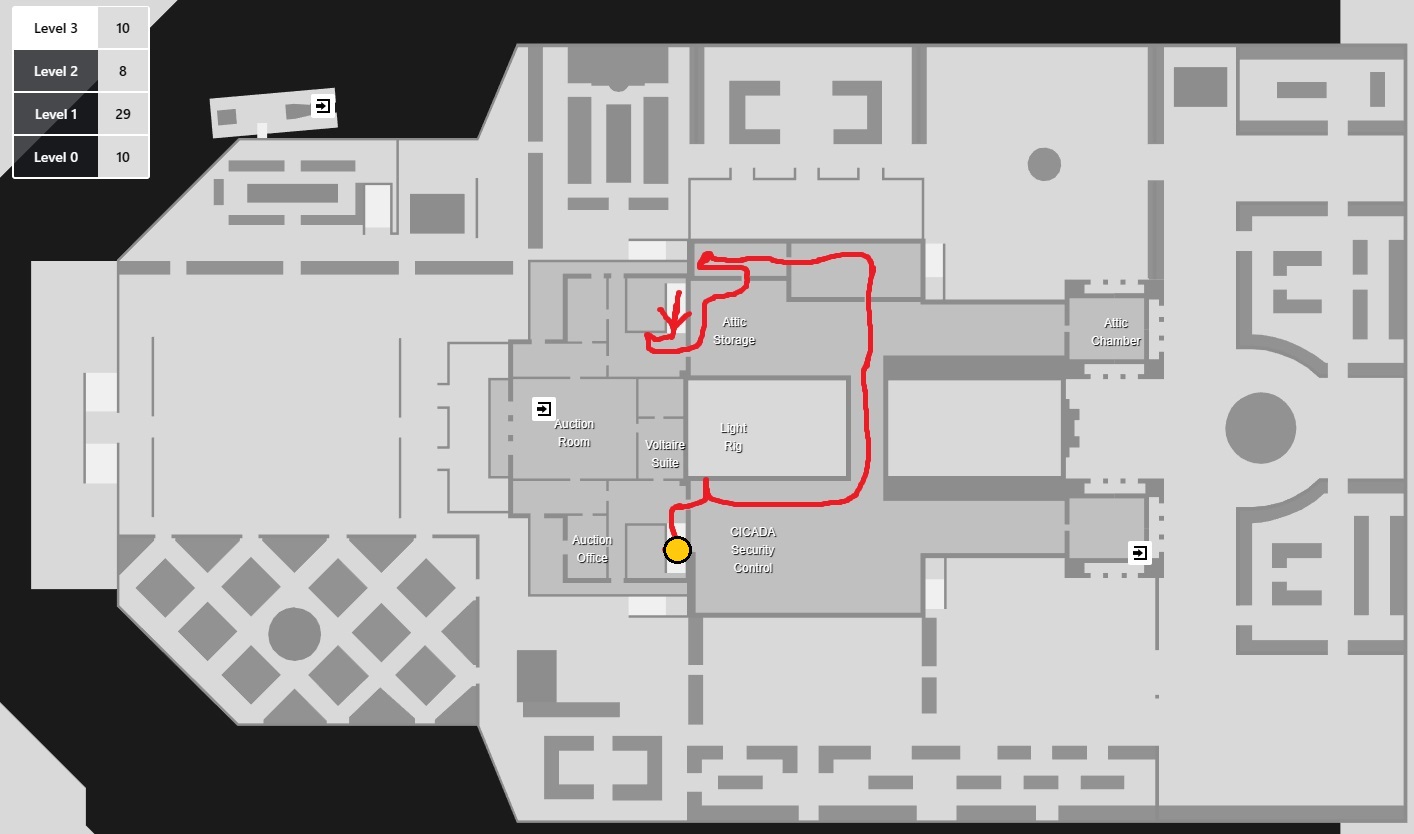
I stopped following his loop where the Yellow circle is
The Sensation

DIFICULTAD: 8/10
GUARDS?: Sí, many guards around the area. No enforcers thankfully.
RANDOM LOOP?: No
MY RATING: 3/10 A Terrible target with zero isolation options, doesnt move around the map, is surrounded by guards and has a tiny loop where the only part you can exploit is the fact that he drinks from a glass you can poison. Very dissapointed in the lack of freedom here.
The inside of the Pagoda Garden is NOT a trespassing area to the default suit, sin embargo, the areas outside the walls are. Watch out for guards and have a lockpick or crowbar ready to bypass one of the large gates.
NOTA: The Best disguise for this area is Palace staff. It also lets you poison his Whiskey glass as shown below: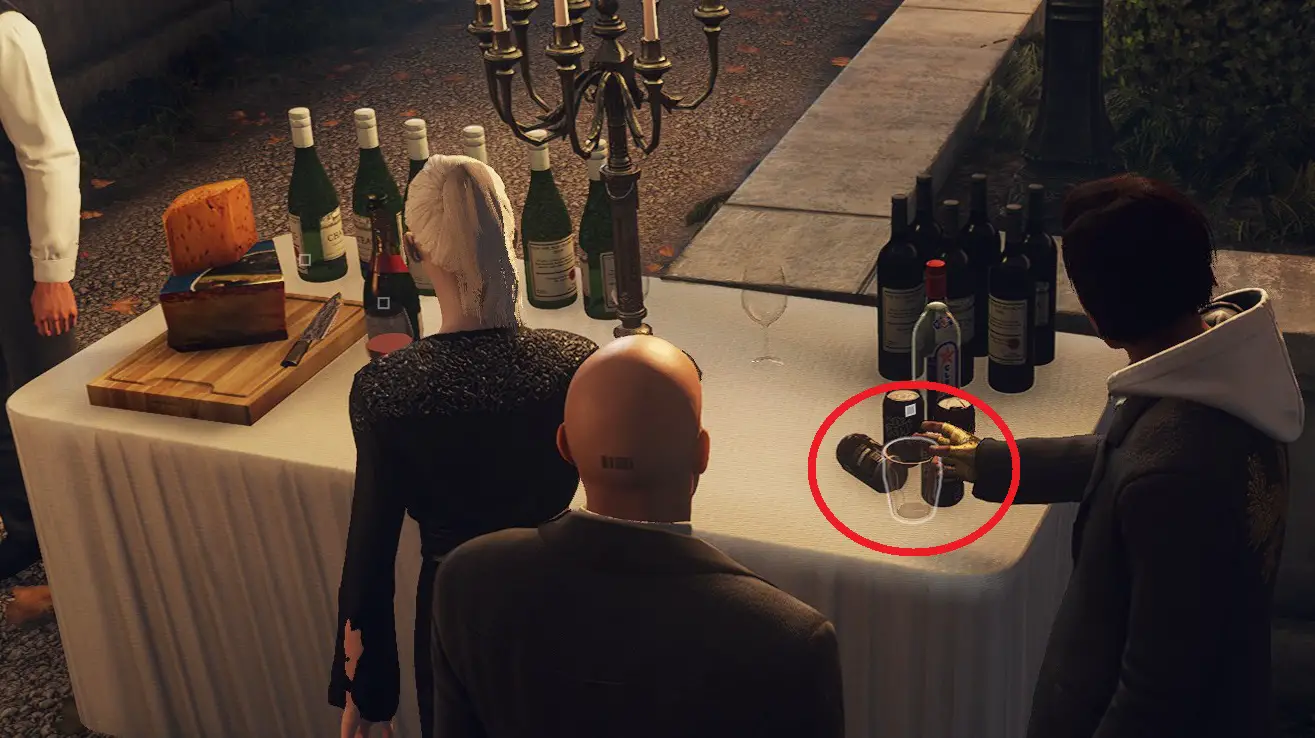
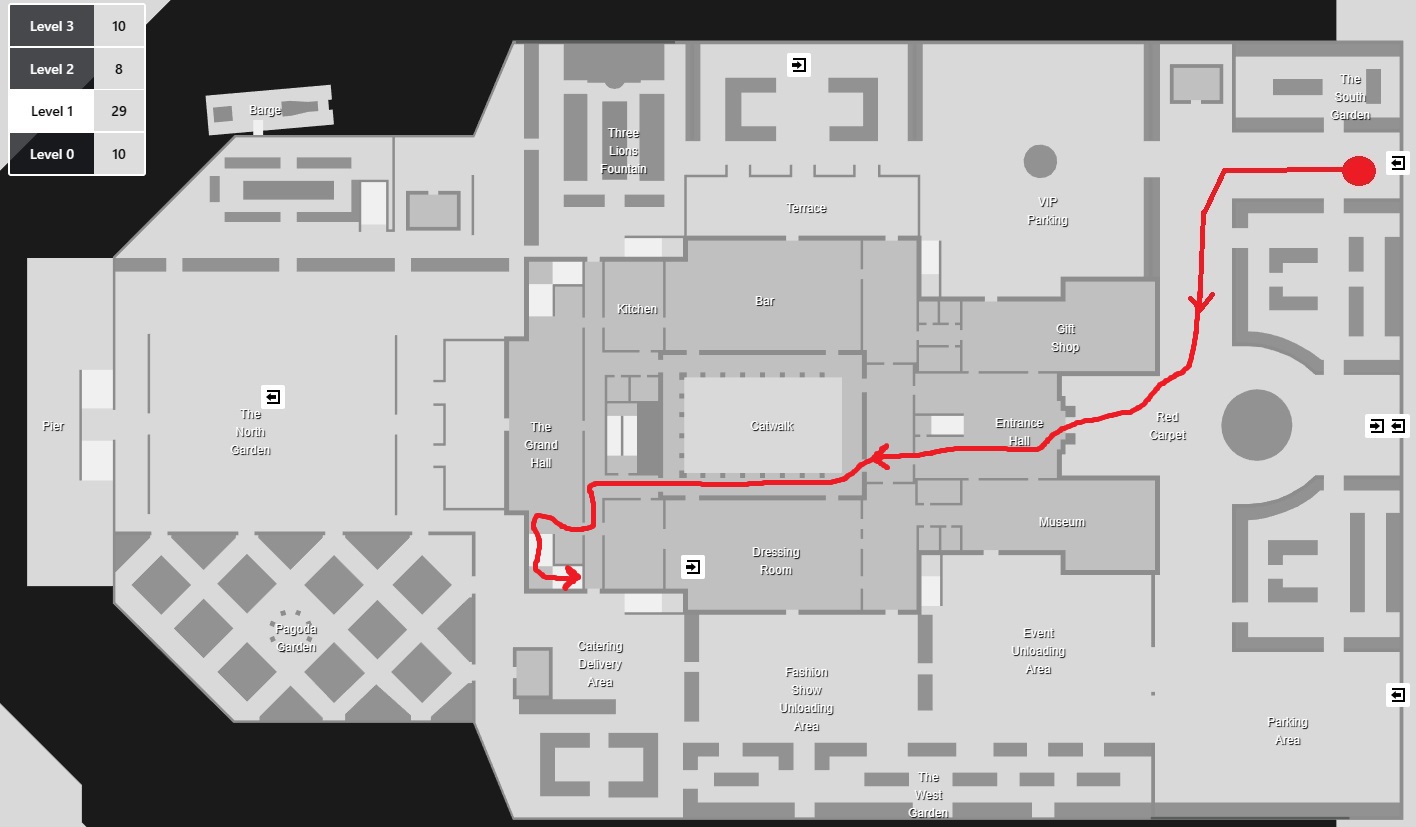
The Broker

DIFICULTAD: 7/10
GUARDS?: Sí, One Bodyguard
RANDOM LOOP?: Sí, his spawn remains the same, sin embargo.
MY RATING: 4/10
A generic target with an interesting side objective that brings an added challenge, sin embargo, his random loops and lack of isolation potential make this target pretty irritating.
Target Map:
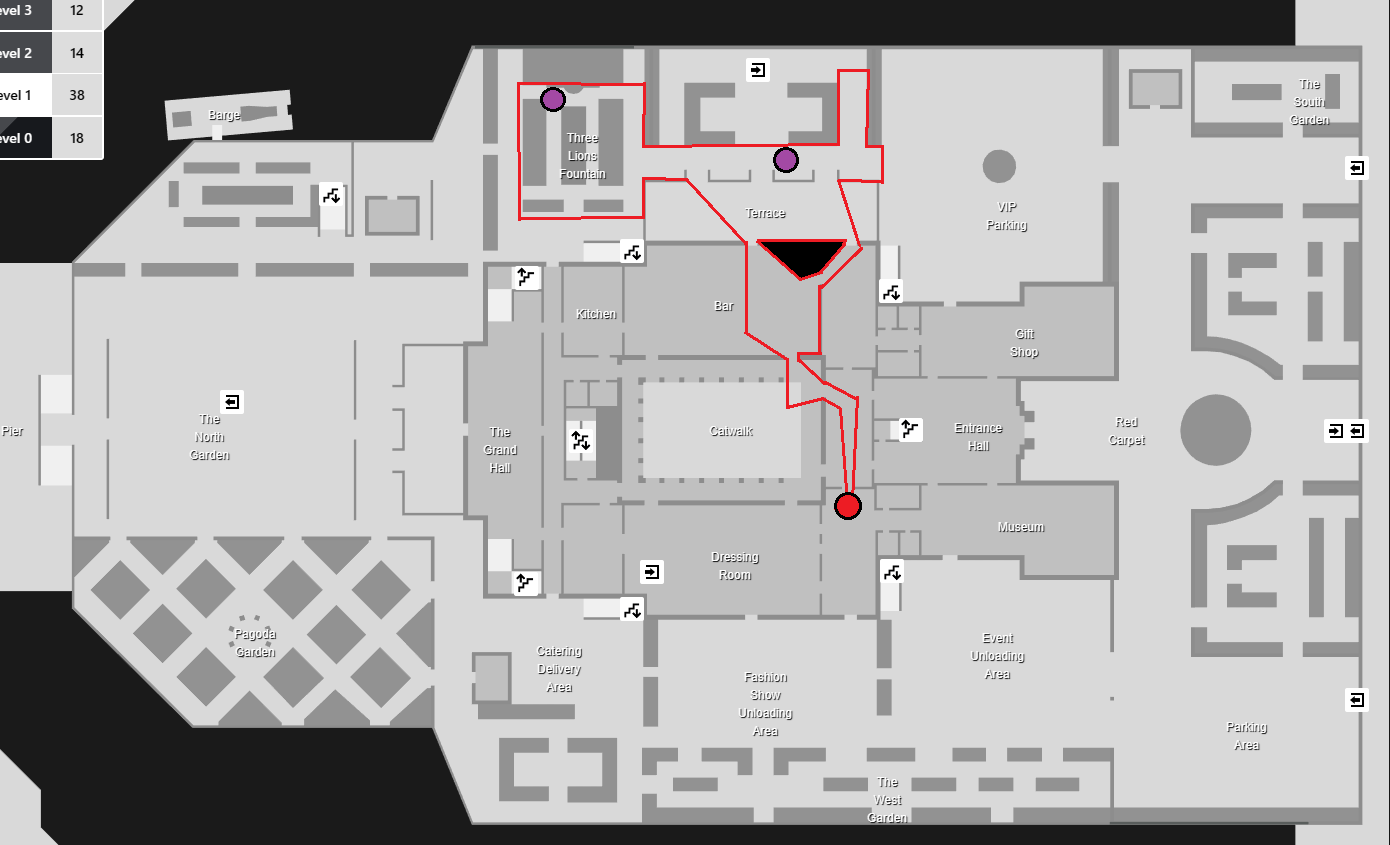
De mis pruebas, the Target will wander around but always stay within the red lines on the map.
He travels between the Bar, Terraza, and the Fountain pretty regularly.
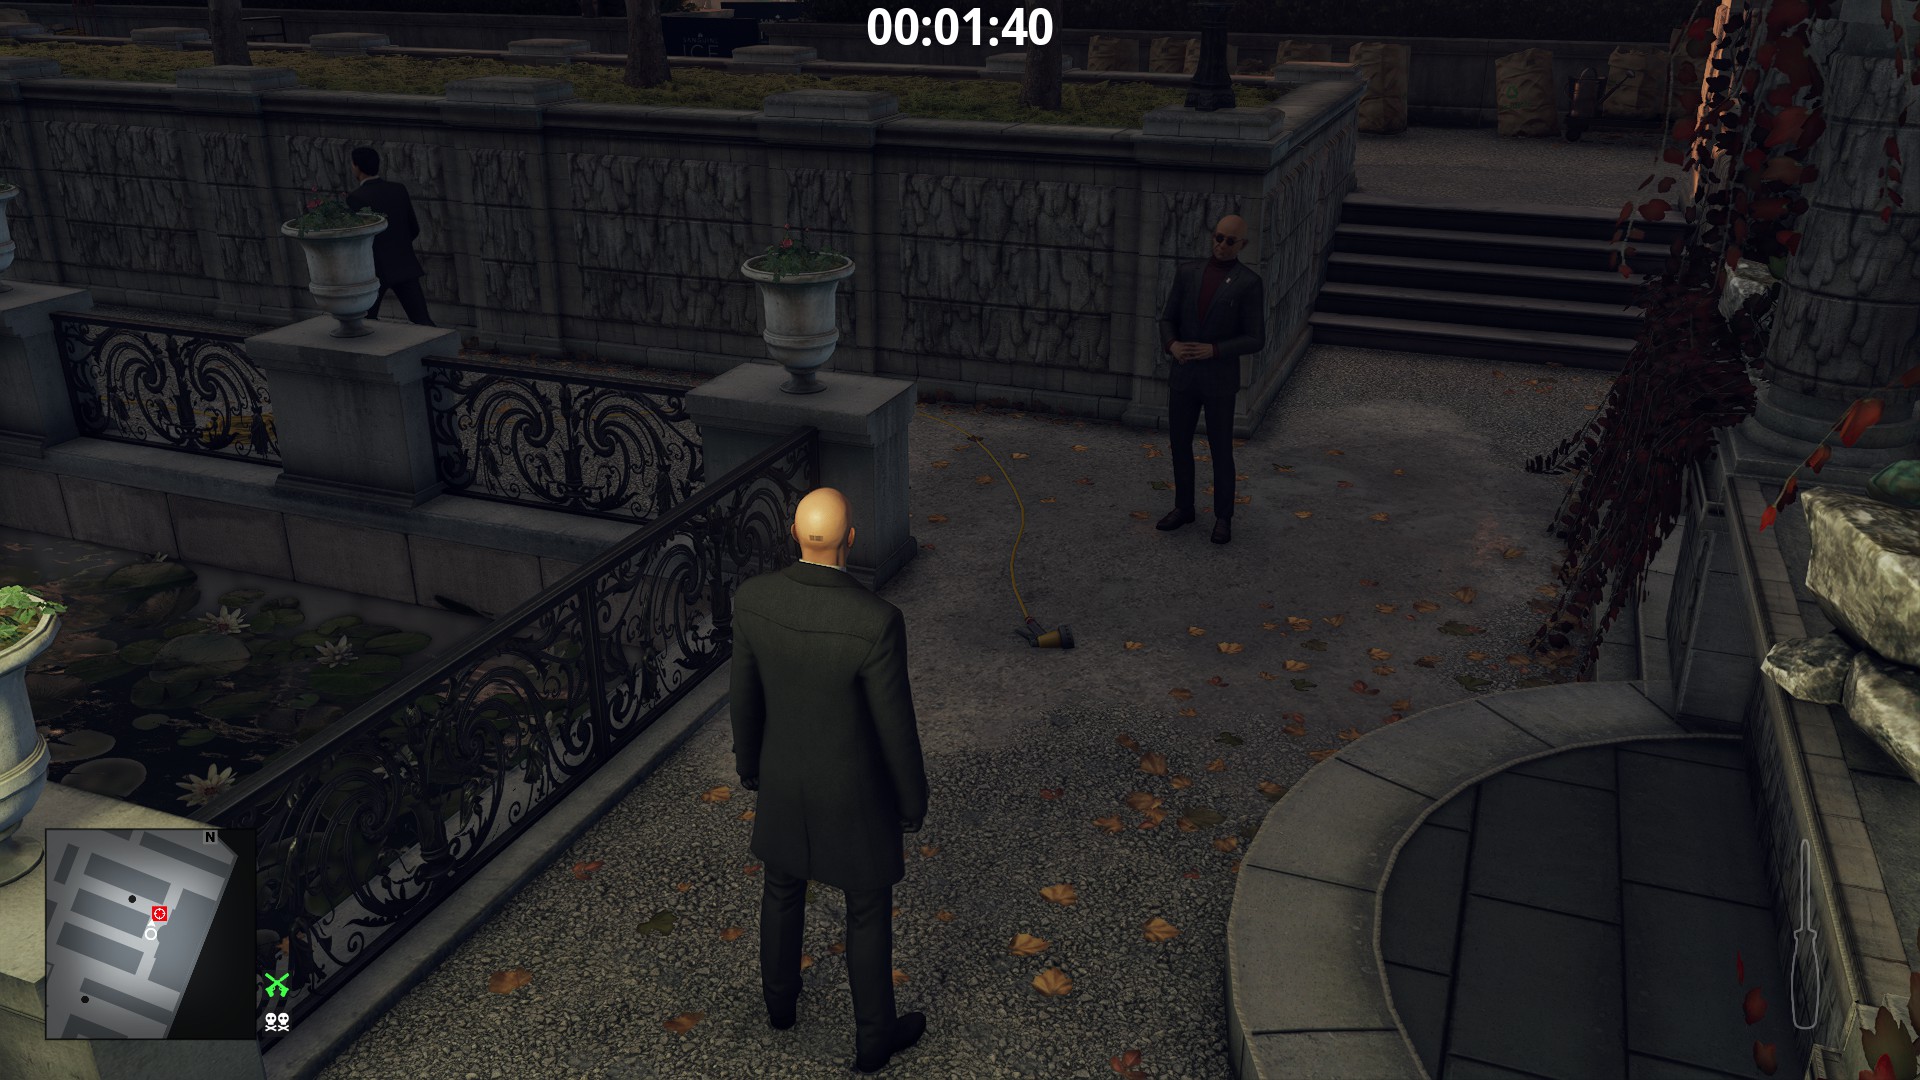
NOTA: The purple Circles indicate puddles that the target walks over. These can be electrified with the proper setup.
Aquí hay un ejemplo:
EGG LOCATION:
This is inside Dahlia Margolis’ Suite, you will need a crowbar or lockpick to get inside the safe.
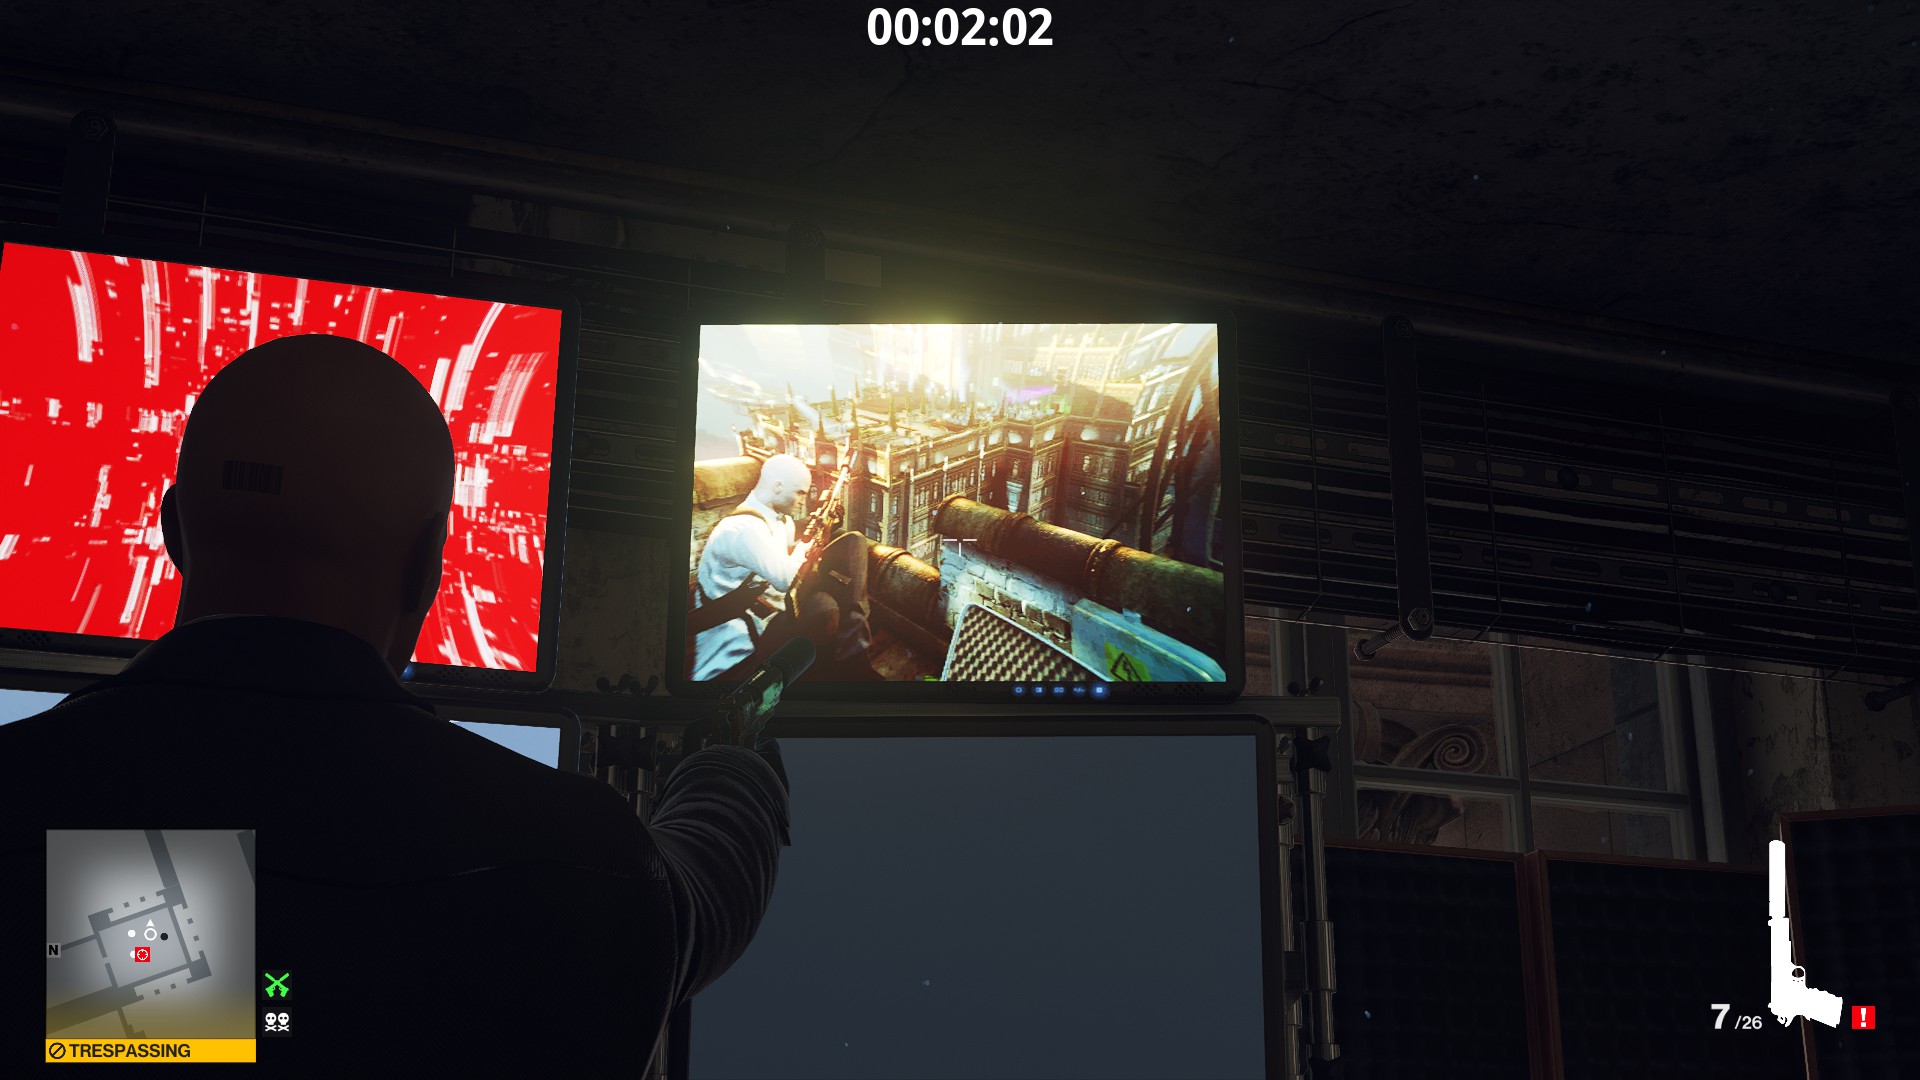
The Blackhat

DIFICULTAD: 8/10
GUARDS?: Many guards nearby but only 1 enforcer guard inside the room with him.
RANDOM LOOP?: No
MY RATING: 10/10 Easily one of the best Elusive Targets in the Trilogy. He might not move around, but getting to him is the real challenge here. There are loads of Guards on the way, many cameras and a keycard locked door!
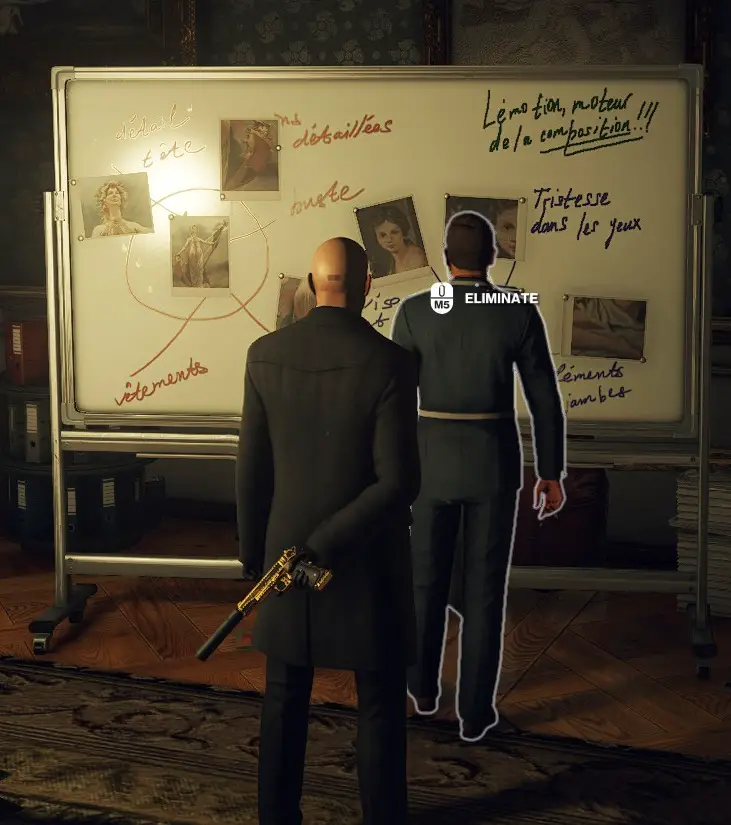
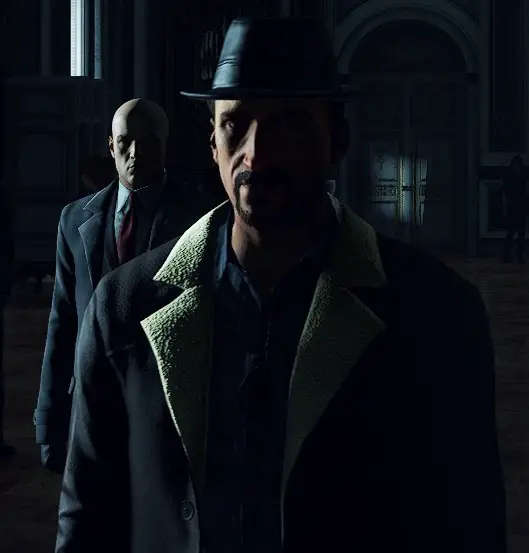
TARGET LOCATION:
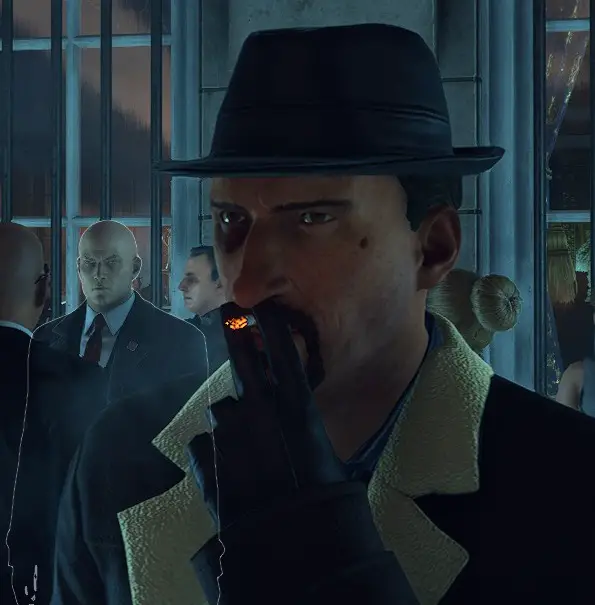
Make sure you eliminate the CORRECT person. The guy on the right with the white shirt is the «Blackhat».
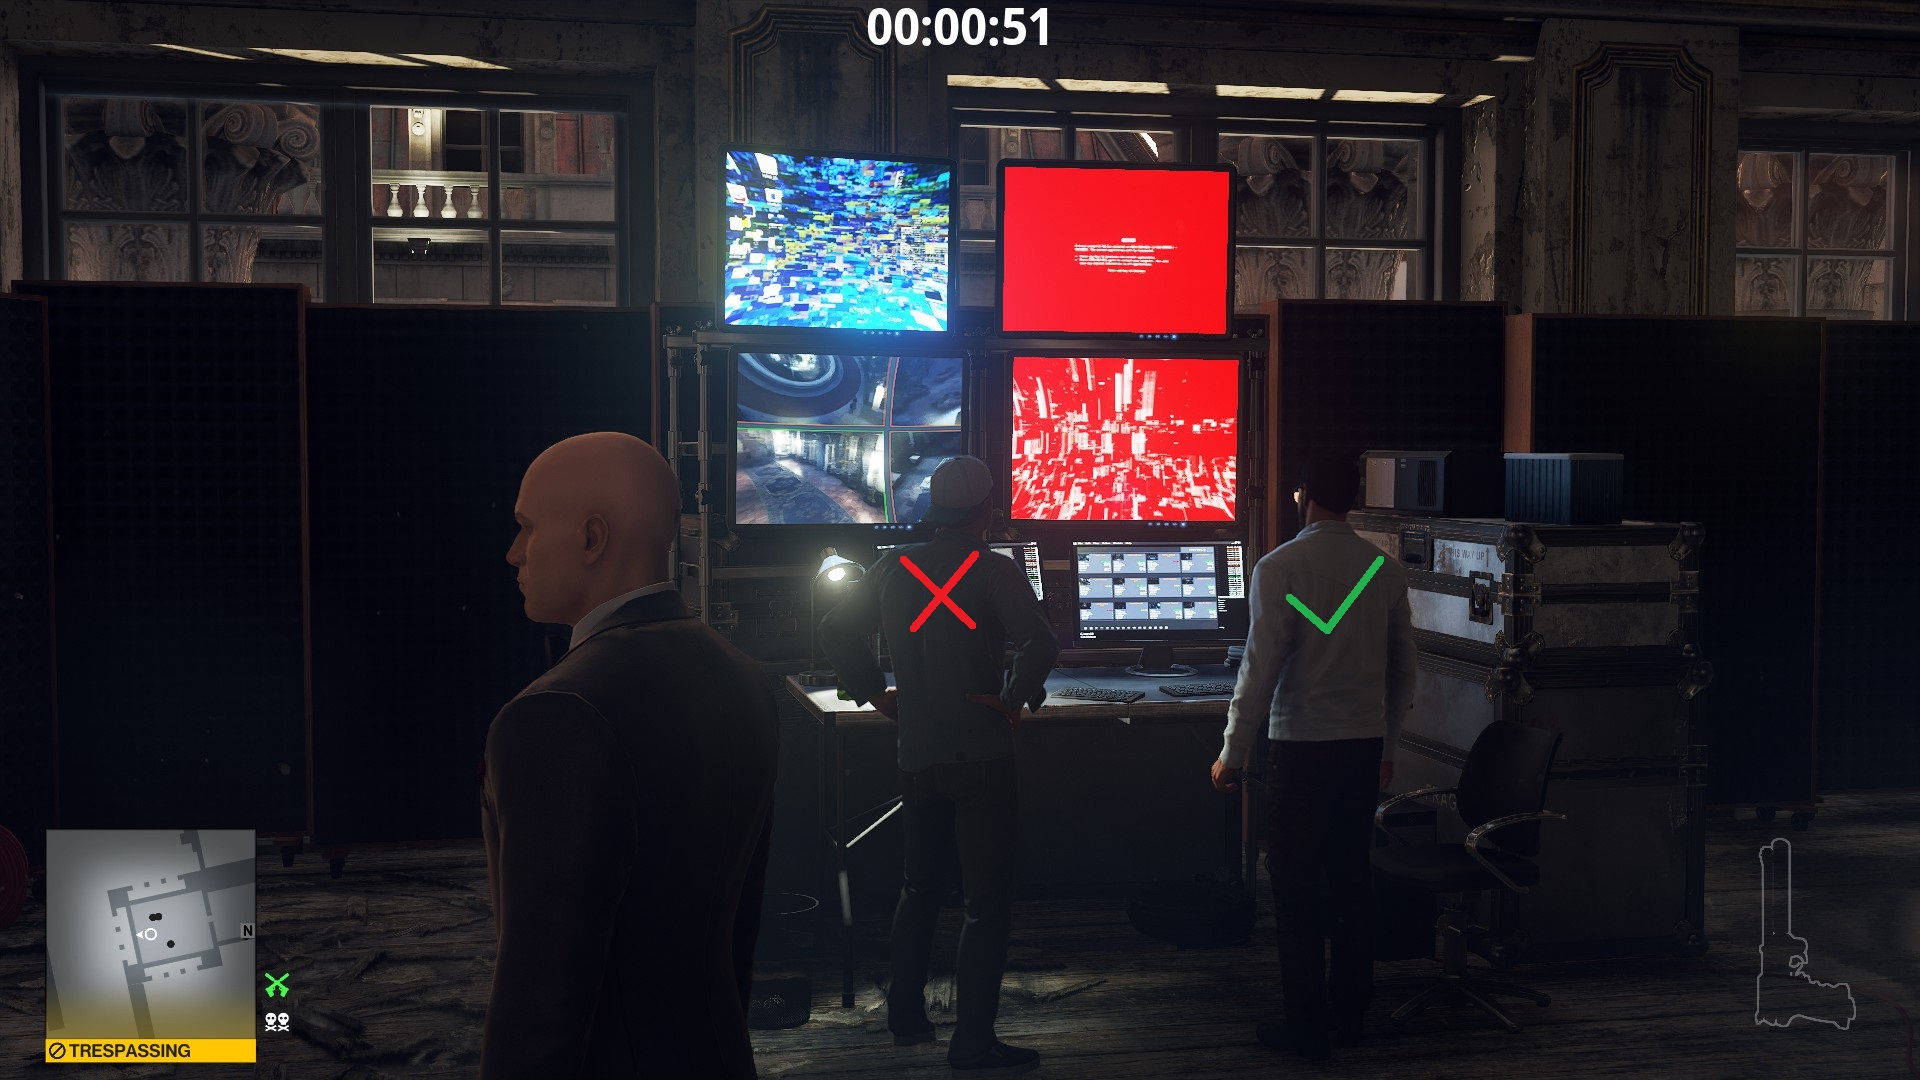
NOTA: The Target and ONLY the target will (very occasionally) eat some of his favorite Orange Jam. It is located on a table in the same room as him. You can easily poison this once you have dispatched the guard and once the target’s back is turned.
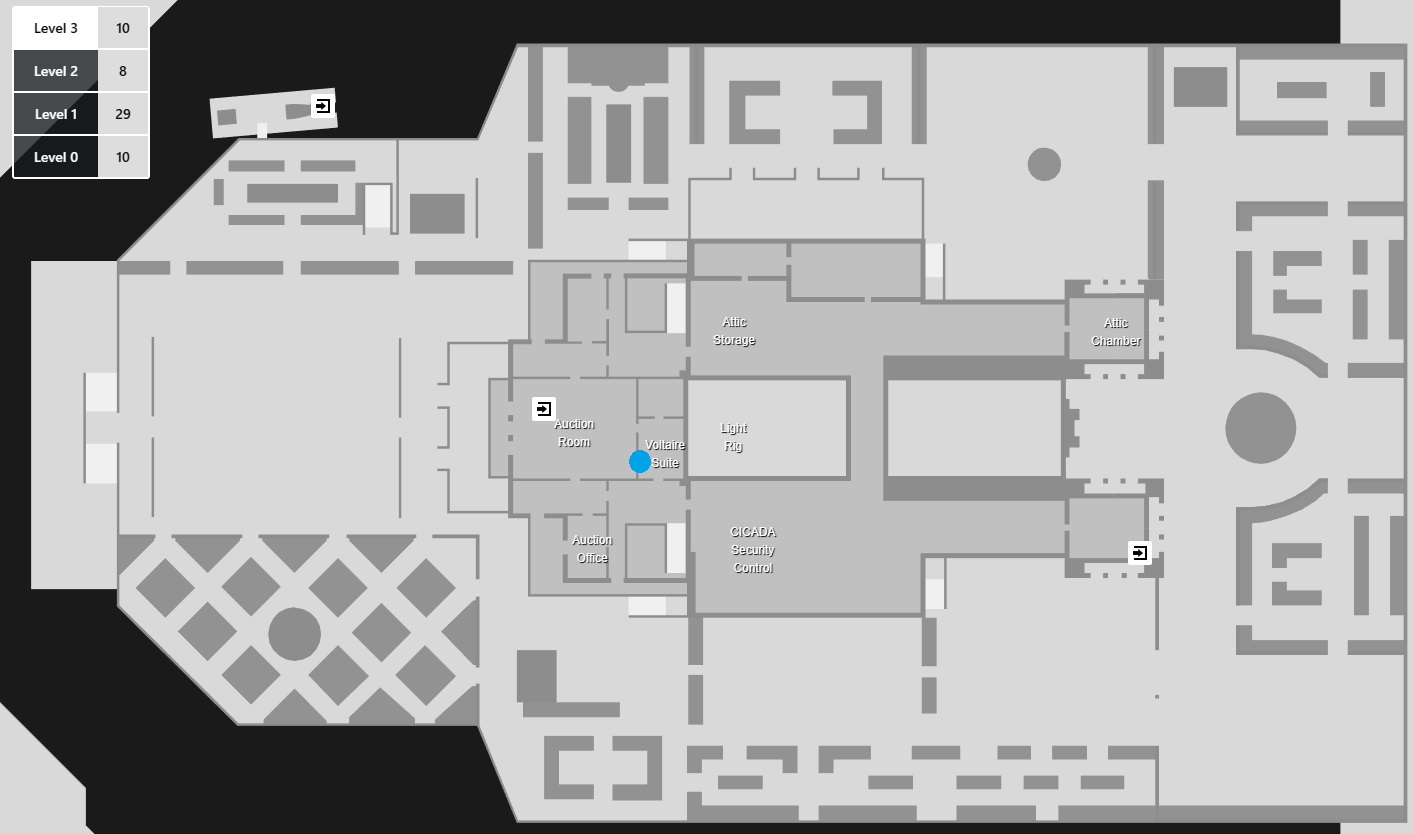
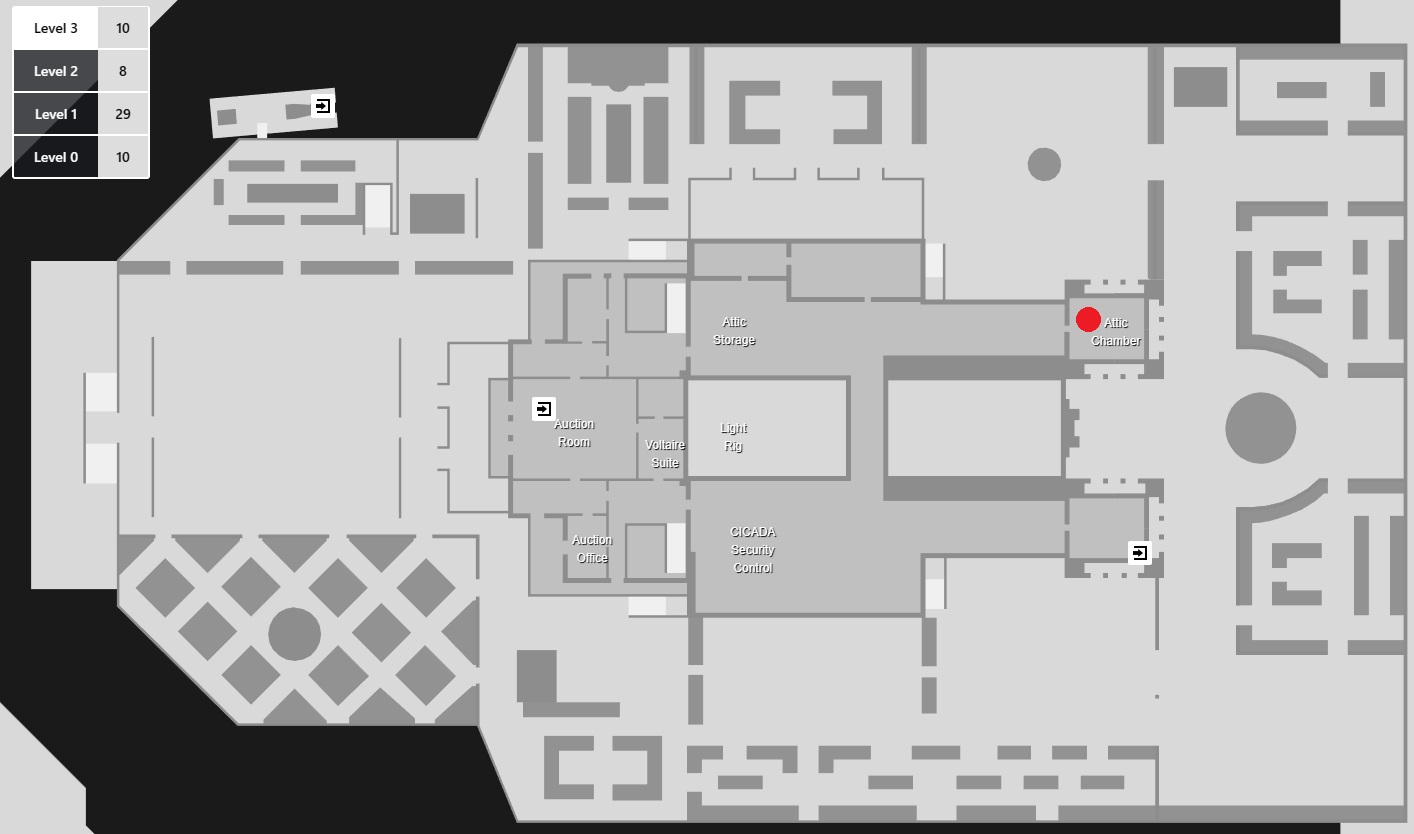
The Pharmacist

DIFICULTAD: 9/10
GUARDS?: Sí, 2 guardaespaldas
RANDOM LOOP?: No
MY RATING: 4/10 An tricky Target with almost zero isolation opportunities before she eventually meets with Dahlia in her office on the 3rd floor. Her guards are very annoying and 2 feels a bit over the top.
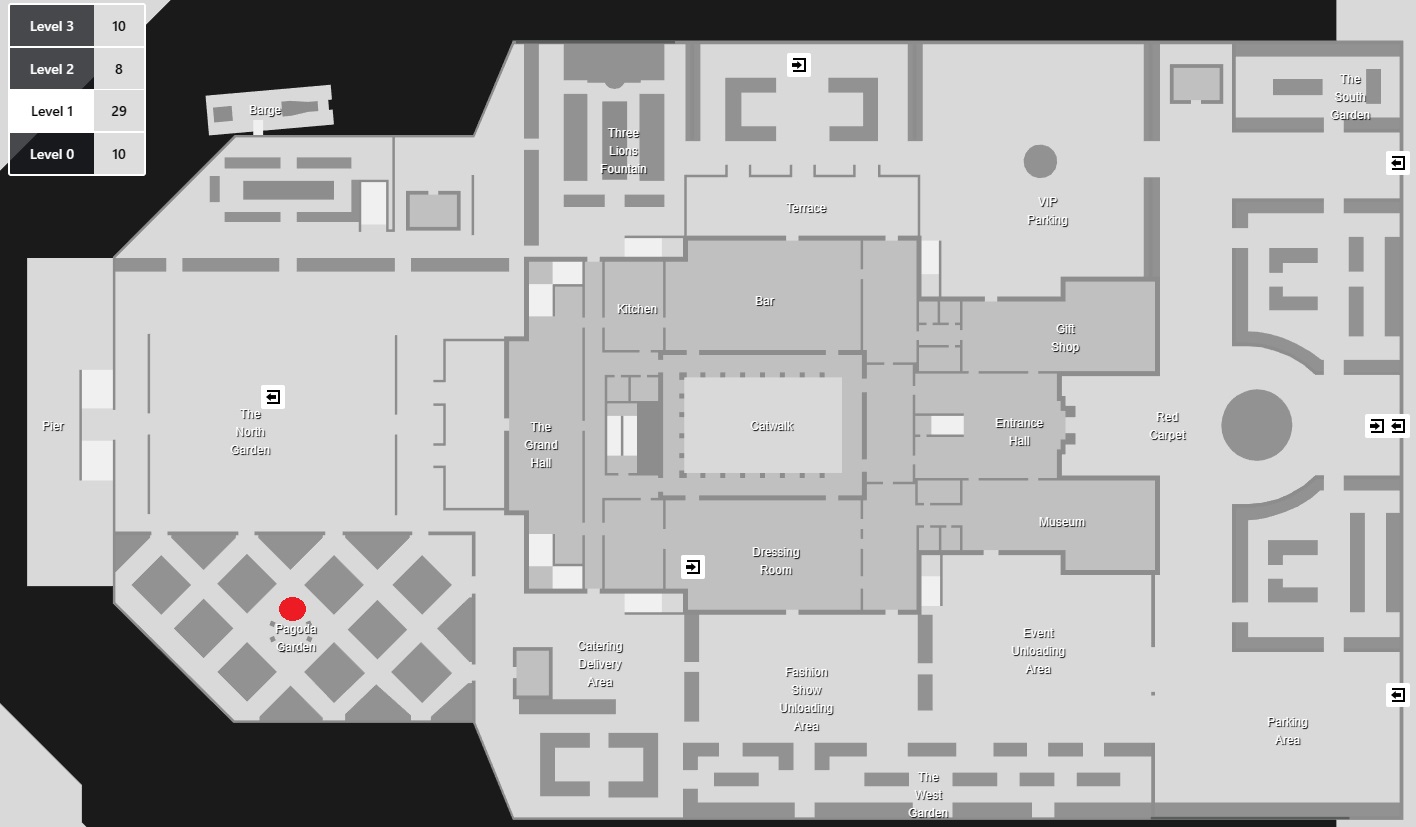
Target Map:
Nivel 1
 Nivel 2-
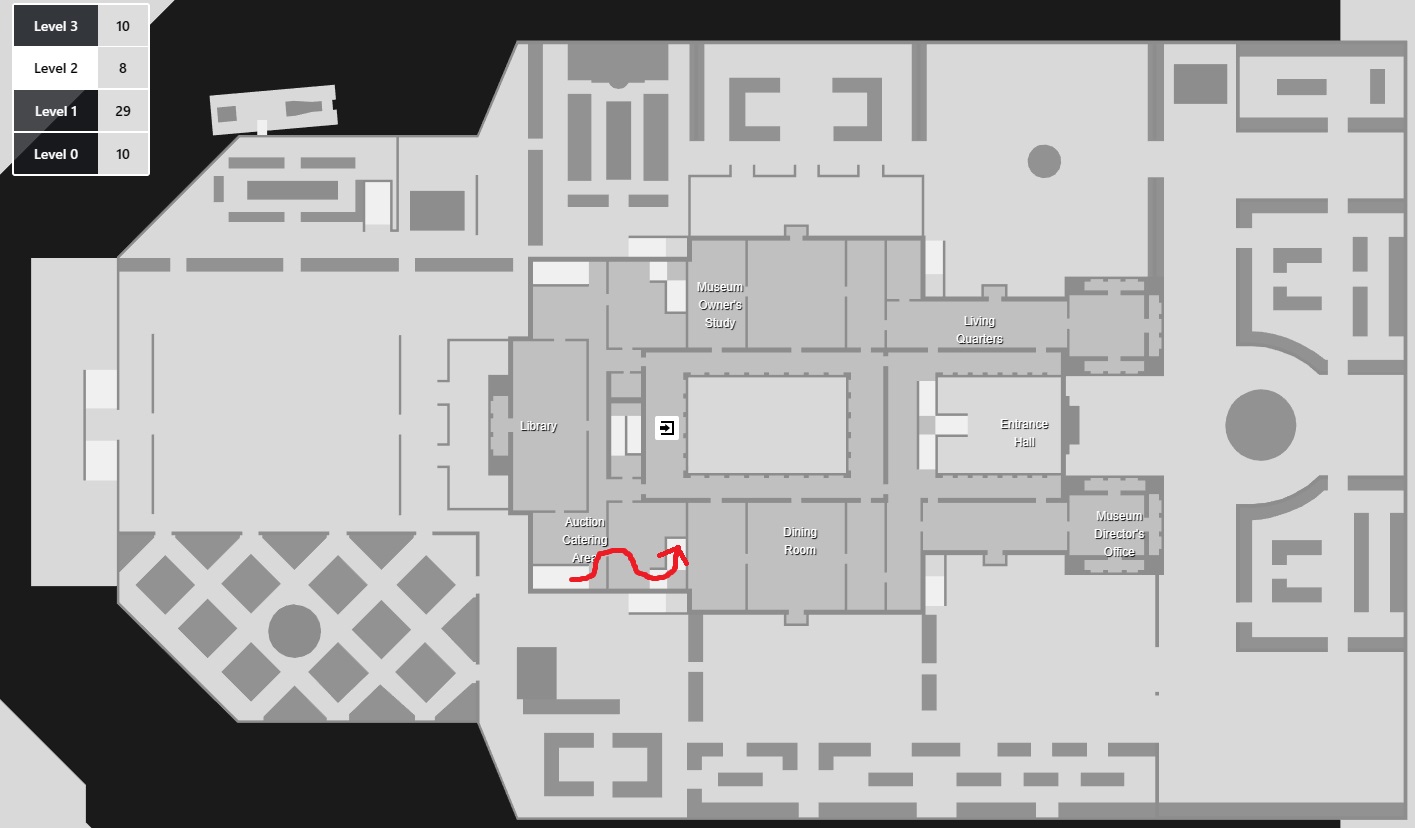 Nivel 3-
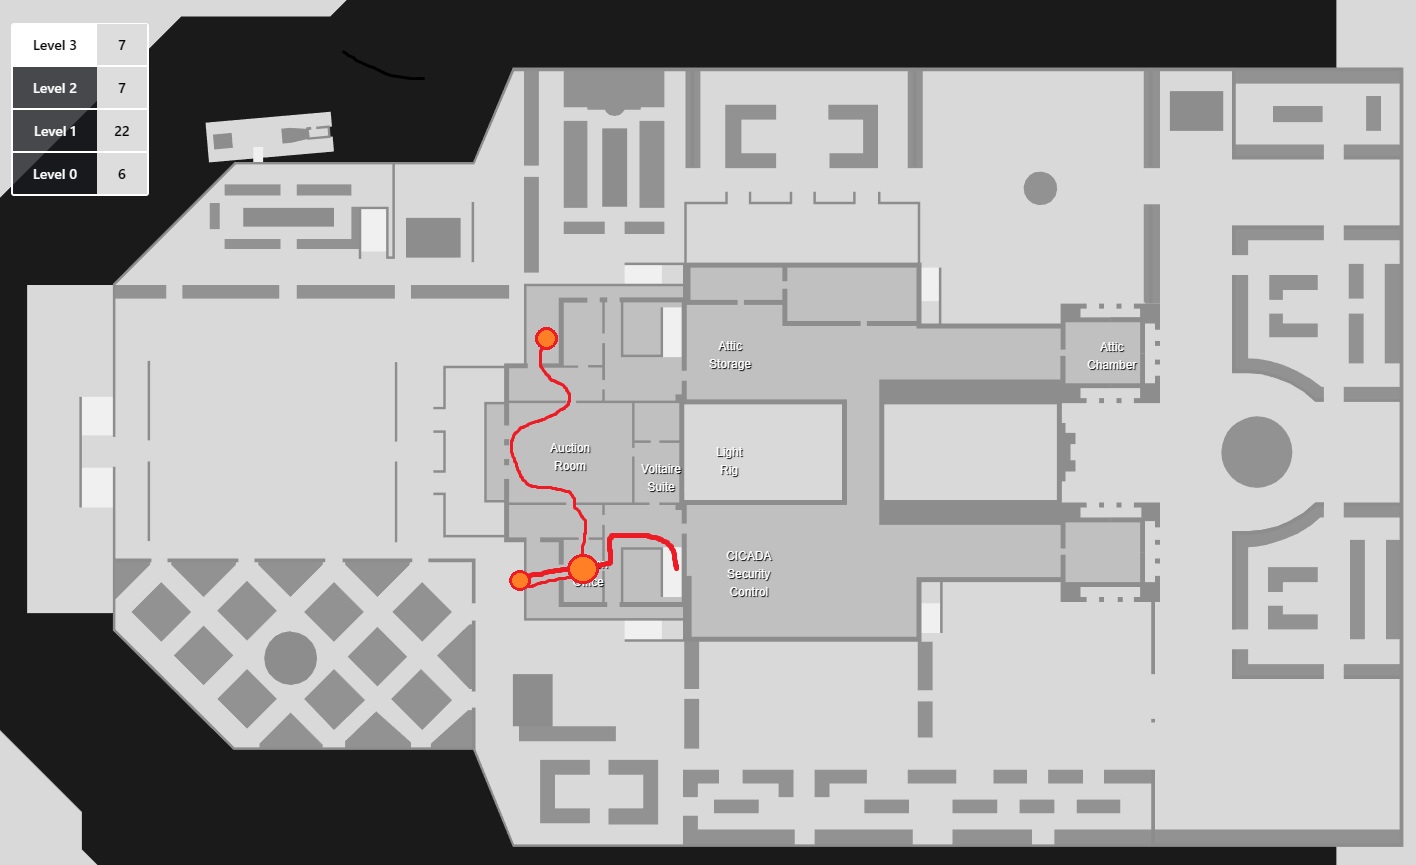
NOTA: The Orange Circles are where she idles, they can be possible Isolation opportunities if you clear out that area first! Overall the best ways to kill her are: with a Chandelier drop, SIeker + drowning or by pushing her over the balcony outside Dahlia’s Office after their meeting. (The last method requires you to get rid of the guard that stays on the balcony beforehand.)
The Identity Thief

DIFICULTAD: 5/10
GUARDS?: No
RANDOM LOOP?: No
MY RATING: 7/10A pretty good target with many Isolation opportunities once he separates from his assistant. He walks over a puddle pretty early on too to make for an easy accident kill!
I have not followed his entire loop yet but I feel like I have recorded enough info to help most players.
Target Map:
NOTA: The Purple Circle indicates a puddle that he walks over. This can be electrified for an easy accident kill pretty early into the mission.
My tracking ends when he goes up to level 2 because I got bored lol.
The Chef

DIFICULTAD: 8/10
GUARDS?: Unfortunately this irritating Target has got 1 Bodyguard AND 2 Female NPCs following him around.
RANDOM LOOP?: Sí
MY RATING: 3/10I always have and will continue to hate RANDOM LOOPS. Players like me are unable to create a neat, sound strategy or help other people. I get why the devs make random loops but they are so irritating to replay over and over!
Target Map
The following maps show the 3 possible areas he visits.
NOTA: He always spawns in the Basement kitchen, where the number 1 is on the map, sin embargo, what he does after that is unfortunately unpredictable.Nivel 0 –
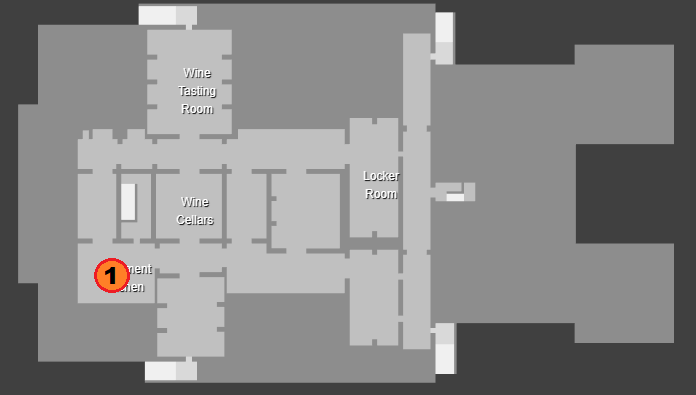
Nivel 1-
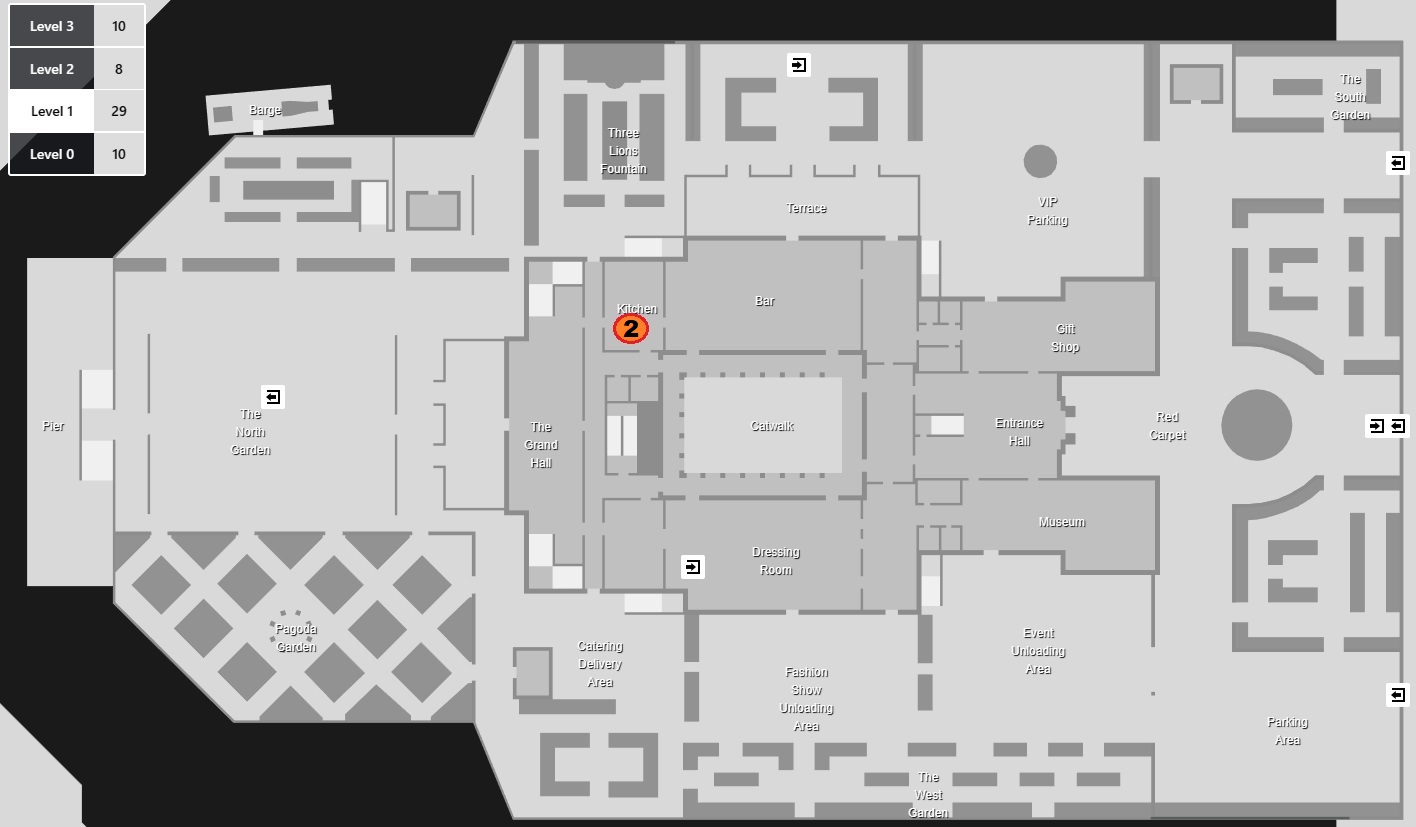
Nivel 2-

The Blackmailer

DIFICULTAD: 8/10
GUARDS?: Ninguno, but the area he loops in is full of npcs…
RANDOM LOOP?: Sí, though thankfully his «Bucle» is short.
MY RATING: 2/10Random Loops + Very few Isolation opportunities + Boring and easy side objective (Pick up the USB stick that he carries around with him) + Not viable for suit only = Terrible Target.
Target Spawn and Notable locations map:
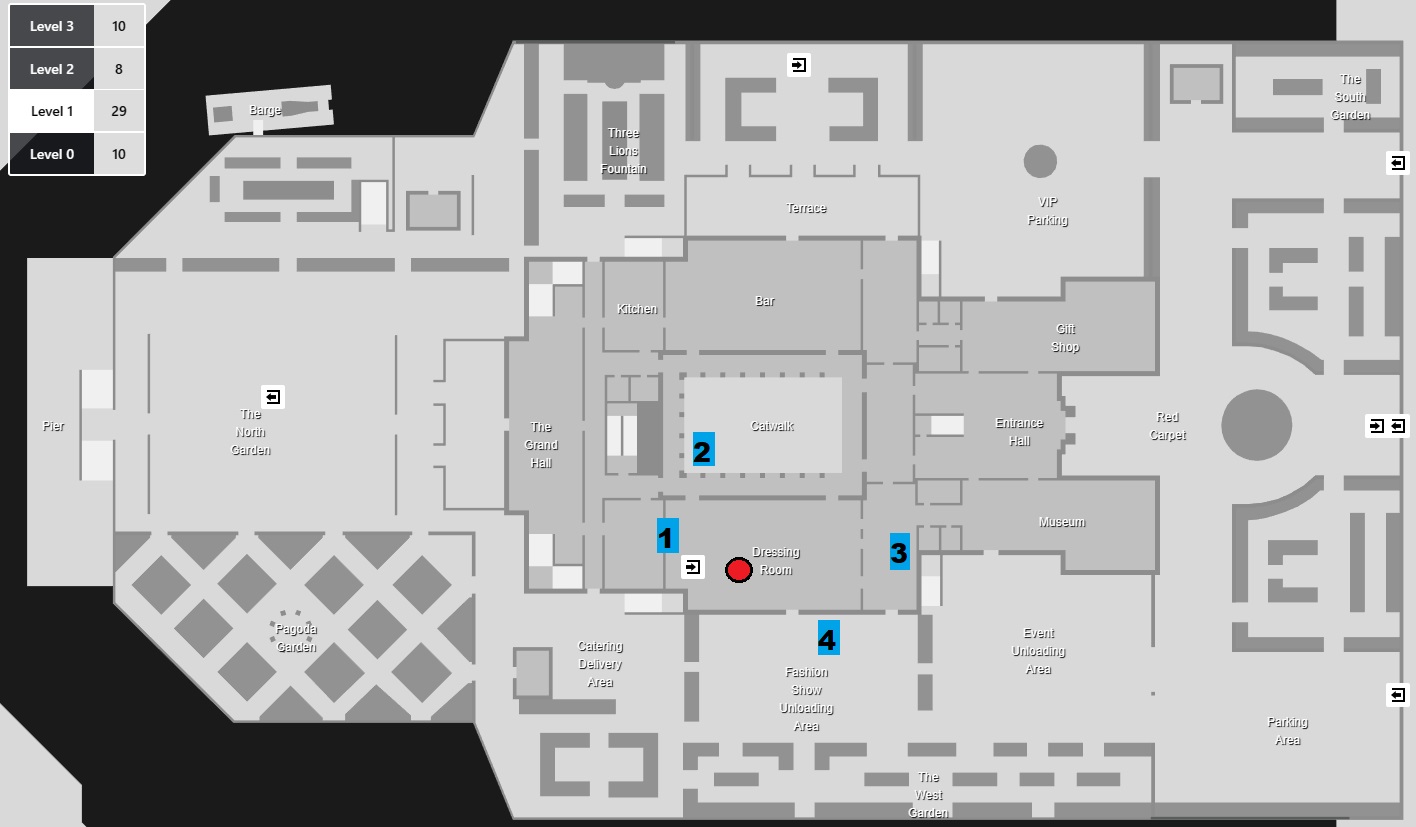
#1 – Talks to Sebastian Sato and looks at his phone prior to going on the catwalk
#2 – Queues up to go onto the Catwalk
#3 – Walks over to the Helmut Kruger bookstand
#4 – Takes a Phone call outside.
The two «mejor» areas to isolate him are probably outside when he takes the call and by using a coin to distract him into the bathroom closest to the catwalk exit. He has no bodyguards to investigate for him so fortunately he will go towards any distraction you create.
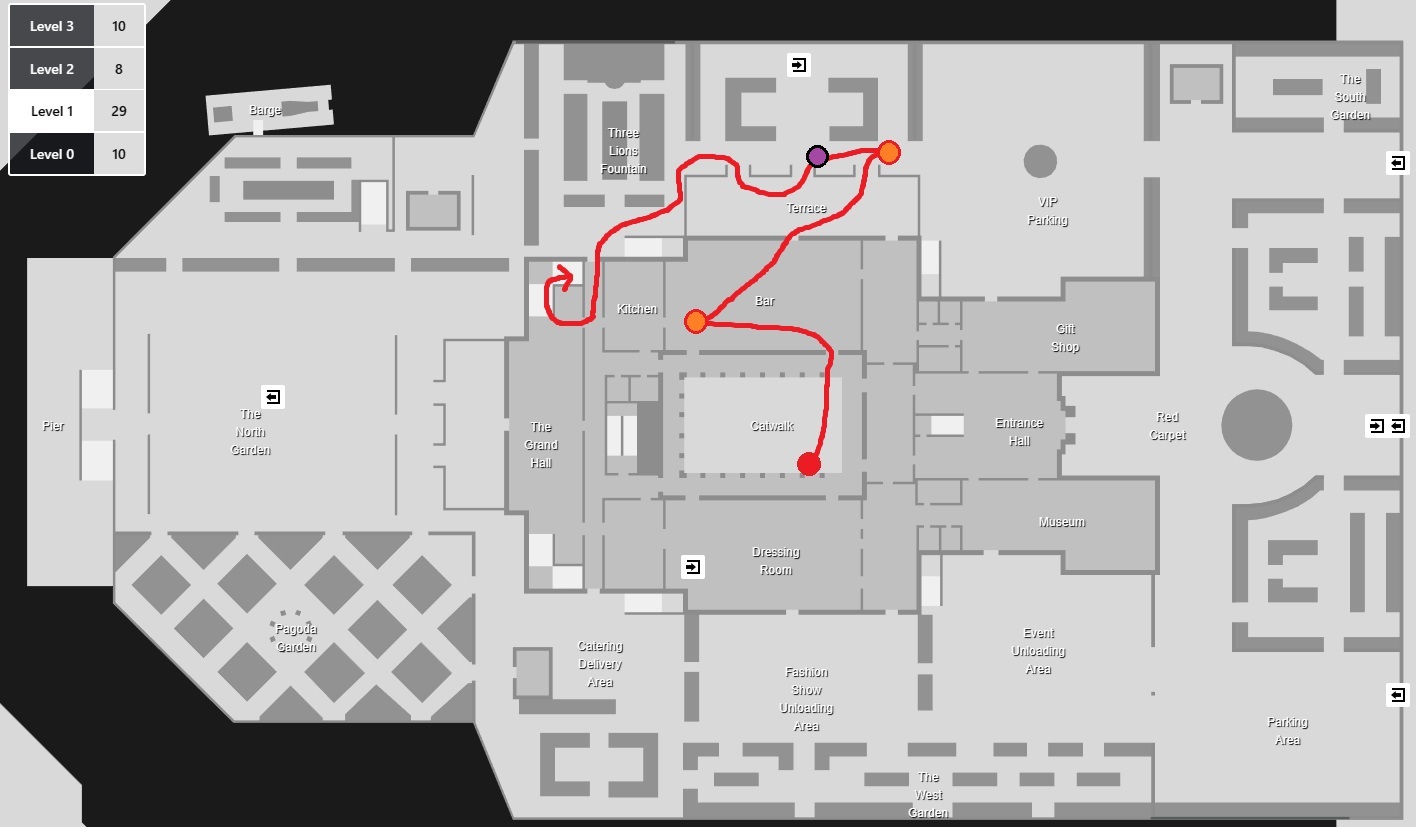
The Paparazzo
DIFICULTAD: 4/10
GUARDS?: Sí, 1 CICADA Guard that follows him a few meters behind at all times.
RANDOM LOOP?: No
MY RATING: 6/10An average target that is made surprisingly easy with a few well placed distractions/ coin lures. He will follow any distraction instead of sending his guard to do it for him. This makes for some very simple Isolations!
Loop Map:

NOTA: The Blue Area on the map indicates the best rooms to lure him into. Simply get rid of the Guard that is already inside of that zone first, then just lure the Target into one of the 2 closest Rooms. You should lure him when he travels along the route that is highlighted in naranja as he will be in earshot of audible distractions.
EXTRA NOTE: I stopped following him once he entered the Dressing Room.
Extra Info
By completing any of the mentioned targets above, desbloquearás el
Tuxedo with Gloves Suit Variant.
Sin embargo, you can NOT obtain this suit by beating any of the mentioned targets in Elusive Target Arcade as it is a separate game mode with its own rewards.
The Suit looks like this:

Eso es todo lo que estamos compartiendo hoy para este Sicario 3 guía. Esta guía fue originalmente creada y escrita por jäger. En caso de que no actualicemos esta guía, puede encontrar la última actualización siguiendo este enlace.