En esta guía completa, we will delve into the intricacies of achieving precision sniping with exceptional range in BattleBit Remastered. This tutorial includes detailed instructions and accessible range references tailored to each sniper rifle available in the game.
Introducción
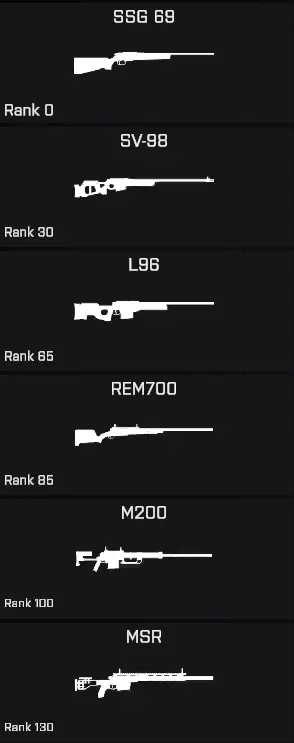
To begin the discourse, within the realm of BattleBit Remastered, a myriad of sniper rifles grace the terrain. Each individual rifle has its own set of statistics, including bullet speed, bullet drop, and zeroing range, creating a situation where no two rifles have identical attributes.
Universal Attachments
If you’re looking for the optimal attachments to improve your long-range shooting performance, let’s start with the primary sight: the PTR-40 Hunter.
PTR-40 Hunter
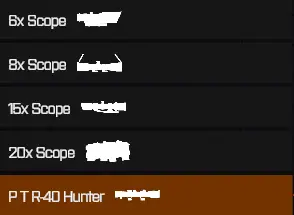
Sin duda, the PTR-40 Hunter scope proves to be an invaluable asset when engaging targets beyond 2 kilometers, regardless of the rifle you use.
This particular riflescope boasts the most substantial magnification among all optics available in the game, surpassing even the zoom capabilities of the 20x riflescope.
Además, a notable advantage of the Hunter scope is its compatibility with a top sight attachment, which makes it particularly well suited for close quarters combat. Sin embargo, it is advisable to refrain from attempting to use the Hunter scope with a quickscope, as this may not yield the desired results.
Moving onto your barrel
Guardabosque
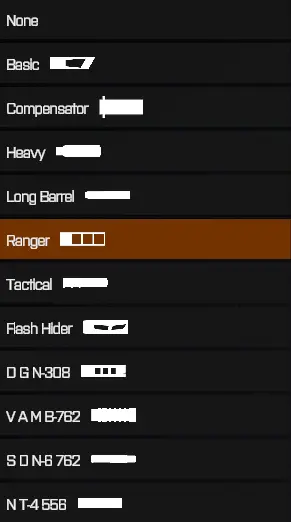
The Ranger Barrel is the premier choice for sniper rifle enthusiasts within the gaming community due to its remarkable effect on both damage and bullet speed.
Típicamente, the Ranger barrel imparts a significant 6 a 7 damage per shot increase, accompanied by a notable 90 a 140 unit increase in muzzle velocity, depending on the weapon. Despite the acknowledged drawbacks, primarily an increased muzzle flash and increased sonic spread, the positive attributes of this attachment far outweigh any negative aspects.
It is true that the use of the Ranger barrel can result in a more noticeable muzzle flash and increased sound spread, aspects that some may view as drawbacks. Sin embargo, it is important to consider the context of use, as snipers often position themselves at considerable distances from the main battlefield, rendering these statistical concerns largely inconsequential.
Además, to address concerns about increased recoil, there is a complementary attachment specifically designed to address this issue.
Siguiente, is the under-barrel rail.
Bipod
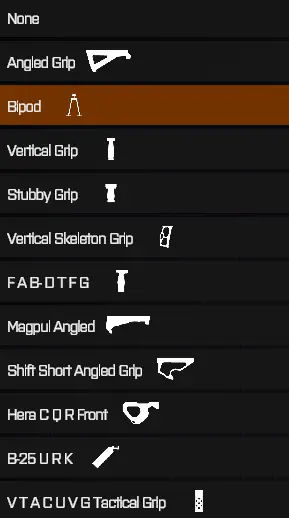
Typically considered a controversial accessory, the bipod proves to be extremely valuable when dealing with long ranges.
De hecho, en la superficie, the bipod introduces negative effects in various aspects, including recoil.
One might assume that this would make it unsuitable for long-range shooting, but that’s not entirely true.
There’s a crucial detail left out of the statistics page: the effect on scope wobble.
You can probably see where this is going.
Using the bipod completely eliminates scope wobble.
No more holding your breath or waiting for your stamina to regenerate before taking that perfect shot. Such frustrations are a thing of the past, especially when aiming at tiny targets that are only visible as four pixels on a hill two kilometers away.
As soon as you lie down on a flat surface, your bipod automatically deploys, eliminating all scope sway from your rifle. No further explanation is needed; you can experience it firsthand at the range.
Oh, and don’t forget your bolt
Bolt Action E
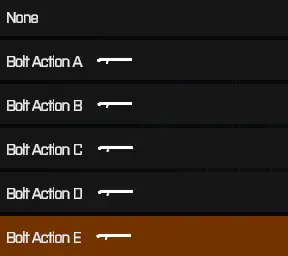
Introducing the Bolt Action E – a life-saving, sanity-saving attachment that solves a myriad of frustrating problems.
Manual bolting after every shot? Annoying.
Insanely slow bolt speed? Annoying.
Being forced to remove the ADS to bolt a new round? Annoying.
The frustration is enough to drive anyone crazy…
Pero no temas! The Bolt Action E is here to revolutionize your experience. With its automatic bolting mechanism, you can now effortlessly change bullets without interrupting your ADS. Not to mention, the whole process is significantly faster.
Say goodbye to your conventional sniper rifle and welcome the upgraded version that resembles a superior DMR in function and efficiency.
Sin embargo, there is one missing piece to the tactical camping puzzle – an attachment to effectively counter unsuspecting enemies.
Introducing our beloved side rail attachment
Rangefinder
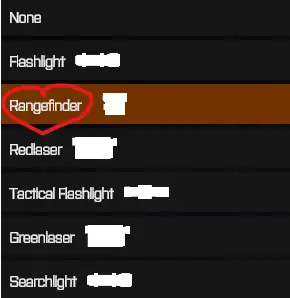
ah, behold the esteemed rangefinder, my valued companion in the art of shooting. Oh, greetings! My apologies for the momentary distraction. Allow me to delve into the subject of this extraordinary device, which I presume is primarily intended for marksmanship purposes.
Let us begin by listing the statistical disadvantages of the rangefinder.
En primer lugar, the drawing speed of this device is significantly reduced, with a considerable delay of 0.04 unidades.
Y, Bueno, that concludes the list of drawbacks.
De hecho, there are few obstacles that prevent you from using this device effectively.
The rangefinder proves to be an invaluable asset when it comes to accurately engaging enemy targets, even at relatively modest distances such as 100 metros.
Curious as to how it works, puedes preguntar?
En esencia, it simply presents numerical data on your screen as you aim.
Sí, its primary function is to display range, and that is all.
Sin embargo, in order to make the most of the range information, it is imperative that you become familiar with the process of zeroing your rifle. Pero no temas, as we will explore this aspect in the following discussion.
Zeroing and the Art of Calculating Long-Range Shots
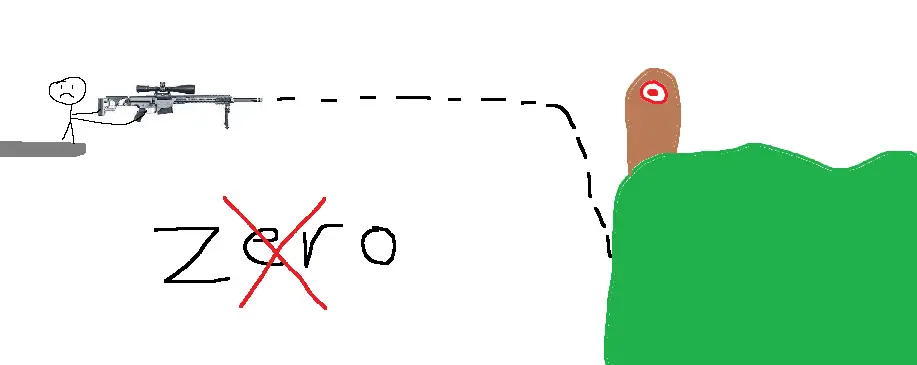
The concept of a rifle zero refers to achieving accurate shooting by aligning the point of aim with the trajectory of the bullet at a given distance.
para ilustrar, using a rifle zeroed at, decir, 1000metro (1kilómetros), compensates for the downward trajectory of the bullet due to gravity, ensuring its accurate impact on the intended target.

Sin embargo, without the application of a rifle zero, attempting the same shot at the intended target will likely result in a significant deviation, missing the mark entirely.
Afortunadamente, the process of zeroing a rifle is relatively simple in this context.
Sin embargo, this ease of zeroing is limited to the range at which the rifle’s zero is effective. Beyond that range, alternative methods must be employed.
Dicho esto, let’s look at the basic principles of zeroing a rifle.
Rifle Zeroing 101

Keybindings and how to use them!
Necessary Keybinds
- Your left alt key is known as the Zeroing Adjustment Hold Key.
- Used alongside your mouse scroll wheel
If you don’t want to use the above method of holding a key and to use your scroll wheel to select your range, there is another option.
Optional Keybinds
- Su [unbound] key is known as the Zeroing Increase Key.
- Su [unbound] key is known as the Zeroing Decrease Key.
If you would like to change any of these keybinds, you can find them inside the in-game settings under the section Keybindings>Arma

To calibrate your rifle in BattleBit Remastered using a level 7 formality, we can explore two methods. Primero, you can opt for the first method: hold down the left Alt key, or use any other preferred key bind, and then adjust the zeroing distance using the mouse scroll wheel.
Alternativamente, for the second method (assuming the necessary keys are binded), you can increase the zeroing distance by activating the Zeroing Increase key, or conversely, decrease the distance by activating the Zeroing Decrease key.
Felicidades! You now know how to effectively calibrate your rifle in BattleBit Remastered. Próximo, we will delve into the techniques of aiming with your zeroed rifle and how to deal with situations where the range of the target exceeds the zeroing distance of your rifle.
Shooting within a rifle’s zero
To shoot effectively at long distances, you’ll need a reliable rangefinder or SOFLAM binoculars for spotting. The shooting process consists of three consecutive steps:
- Determine the distance of your target with the rangefinder or SOFLAM.
- Adjust your rifle to match the distance you have determined.
- Take your shot at the target, making corrections if necessary.
If your rifle is already zeroed to the exact target distance, all you need to do is aim the center crosshairs at the target and fire.
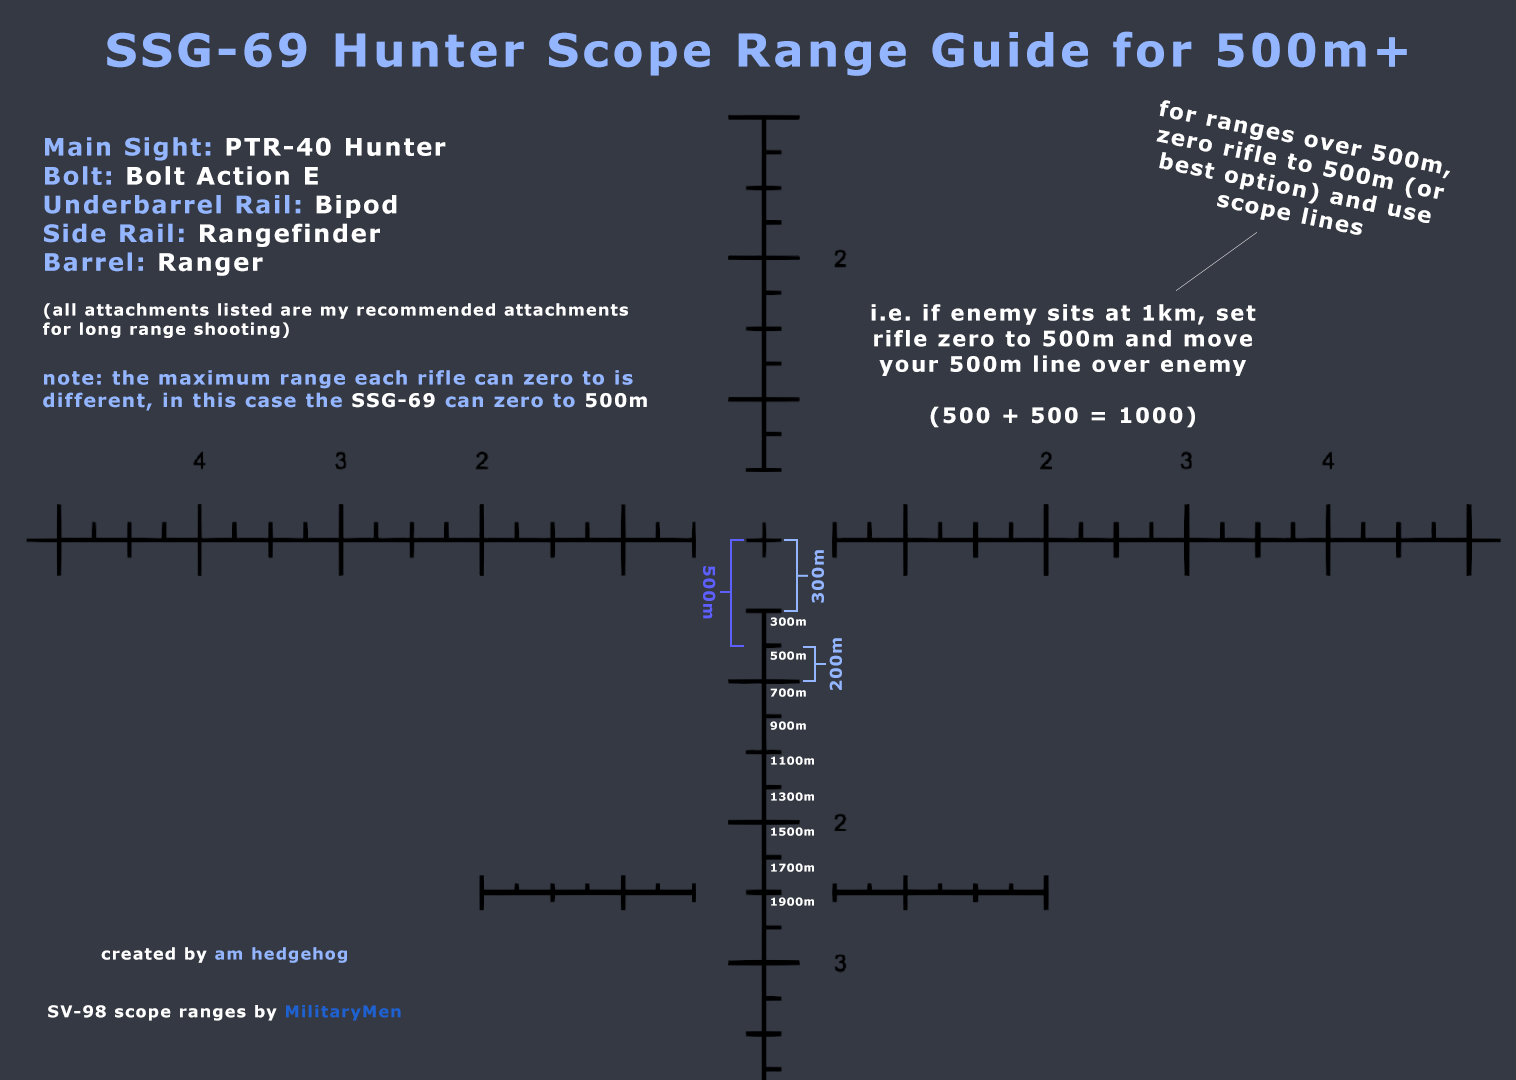
Sin embargo, if your target is beyond the zero range of your rifle, you’ll need to use the range lines in your scope. Asombrosamente, these range lines below the center crosshair are accurate and convenient.
It’s worth noting that the range lines are not universally applicable to every rifle. Each line may correspond to a different distance on different guns, requiring some mathematical calculations.
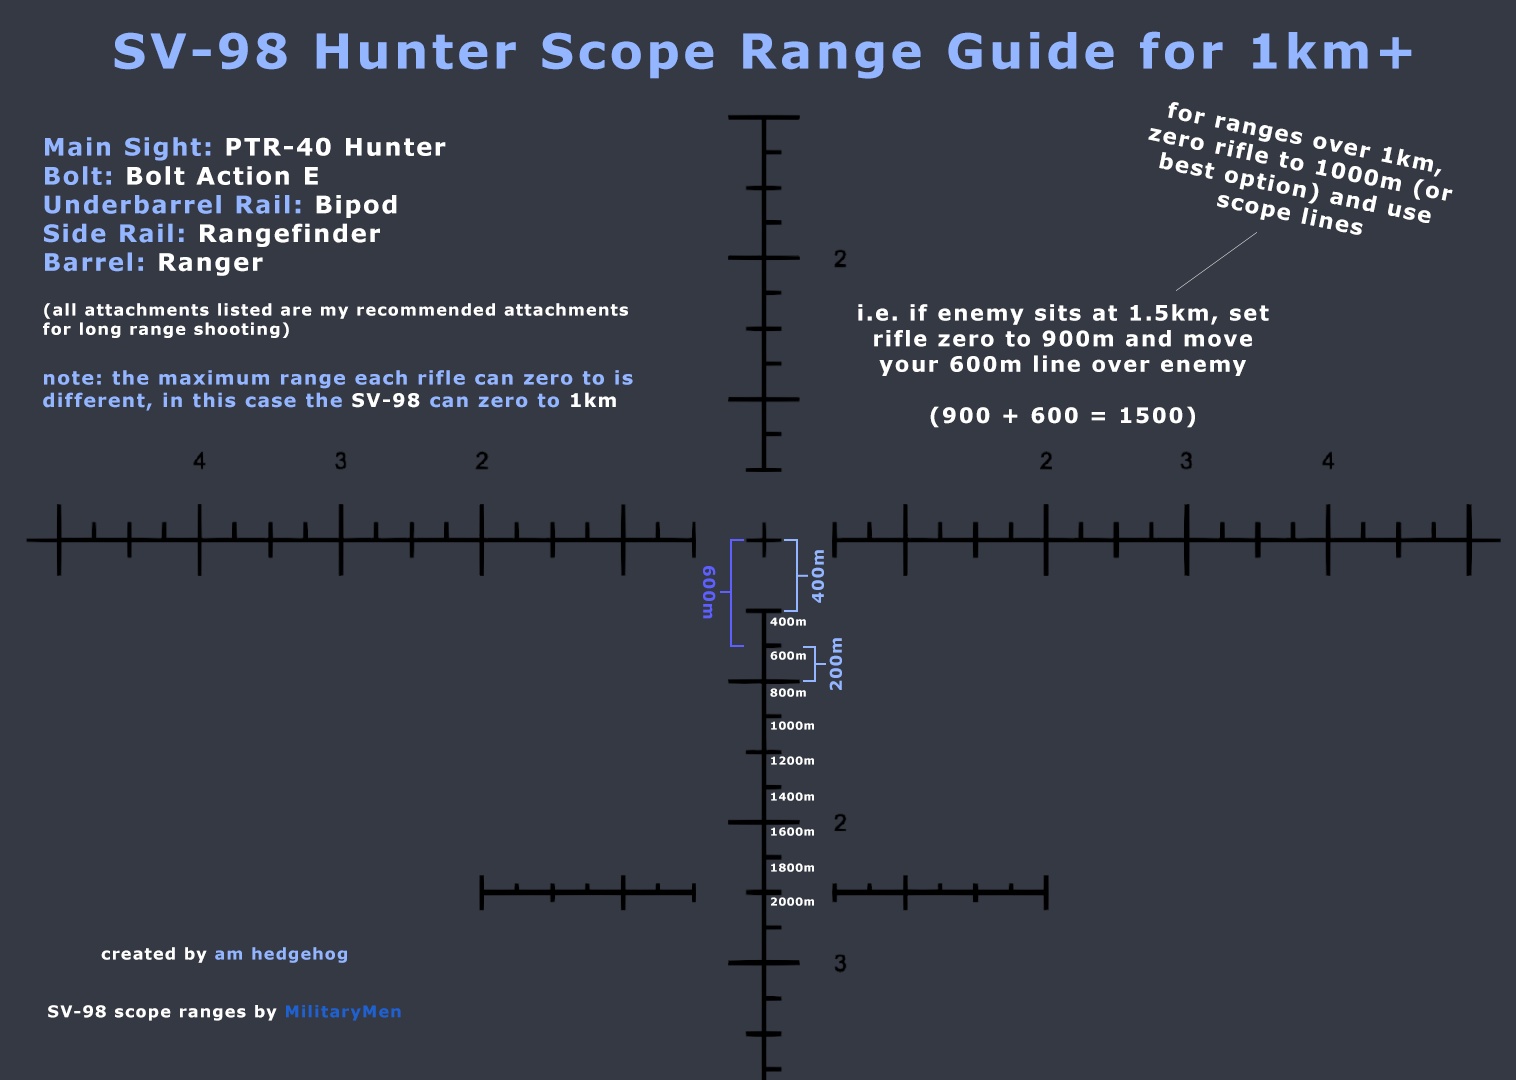
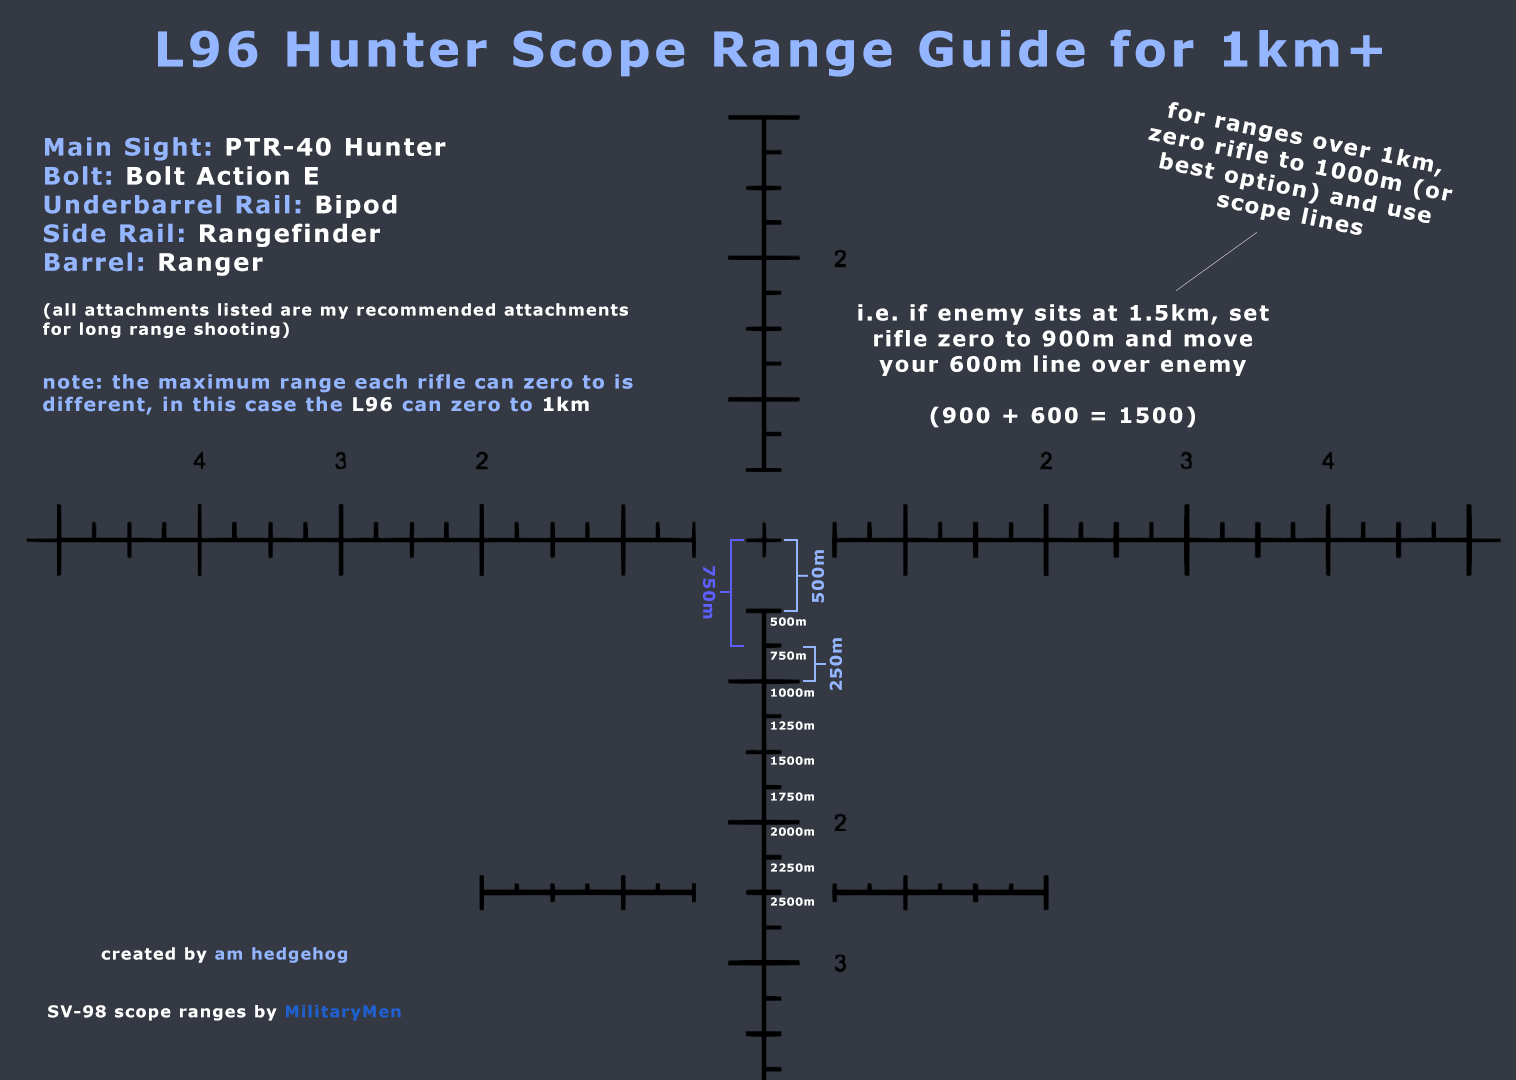
After much effort, I present to you the Hunter Scope Range Guides for ALL sniper rifles currently available in the game. It’s important to mention some details before concluding:
- These guides are specifically designed for the Hunter Scope, as other scopes have different zoom levels and may not work well for extremely long ranges.
- Calculating the exact range for each line was an exhaustive process involving manual testing of each line, on each rifle, for each range. Como resultado, some ranges may not be completely accurate.
- Writing this guide was quite an undertaking, and it’s taken a toll on my sanity.
- Credit goes to MilitaryMen as well as myself for introducing me to the concept of scope ranges, especially the SV-98 scope ranges.
Ahora, with the help of these picture guides, I’ll close this guide. Happy sniping!
Hunter Scope Guides for Every Gun
SSG-69
SV-98
L96
Rem700

M200

MSR

Eso es todo lo que estamos compartiendo hoy para este BattleBit remasterizado guía. Esta guía fue originalmente creada y escrita por am hedgehog. En caso de que no actualicemos esta guía, puede encontrar la última actualización siguiendo este enlace.