- Título: Automatización - El juego Tycoon de la compañía de automóviles
- Fecha de lanzamiento:
- Revelador:
- Editor:
Information about Automation - The Car Company Tycoon Game is still incomplete. Por favor ayúdanos a completar los detalles del juego usando esto formulario de contacto.
A multi-part guide for setting up and using photo scene spheres and custom backdrop images.
Loading Custom Photo Sphere Images (jpg/png)
This section will explain how to load custom 360 images off your computer to use as photo spheres in unreal.
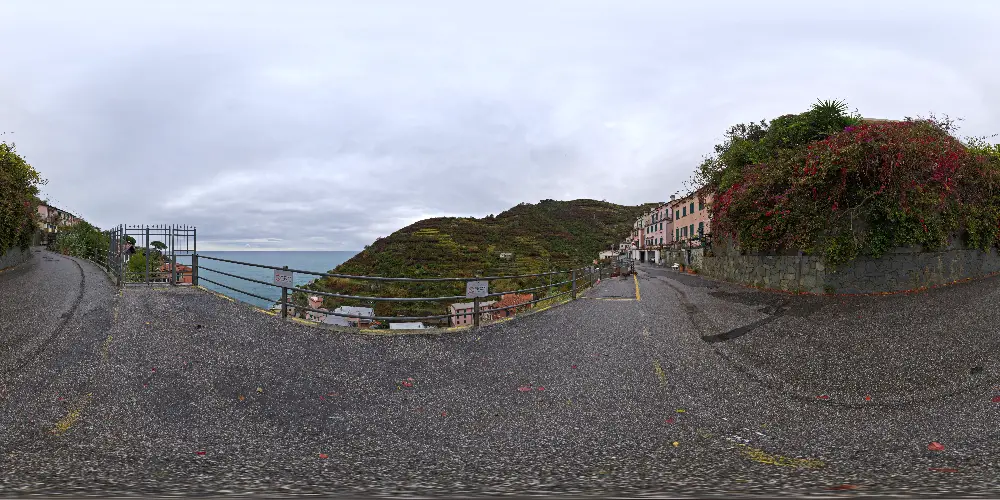
- Find a “lat-long” style photo sphere image in either .png or .jpg format that you enjoy. You will need to convert .exr or .hdr images to .png or .jpg using your desired photo editing software.
- Polyhaven has a considerable library of free HDRI. We use several in Automation.
https://polyhaven.com/hdris. They usually come in HDR or EXR format so will need to be converted. Some will allow you to download jpg copies if you click the menu on the top right. Consider supporting Polyhaven if you enjoy their content. - This is the kind of image format you are looking for
- Polyhaven has a considerable library of free HDRI. We use several in Automation.
- Place the .png or .jpg in the following folder in AppData.
C:\Users\[Tu nombre de usuario]\AppData\Local\AutomationGame\Saved\UserData\PhotoScene\BackdropImages
- App data is hidden by default in windows, so you may need to show hidden files to be able to find it.
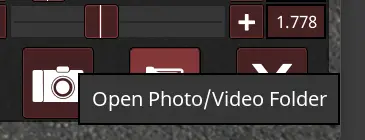
- También puedes usar el “Open Photo/Video Folder” button in the photo scene to find the automation appdata folder
- Open up Automation and enter the photo scene with a car.
- Under Scene->Nivel, click the currently opened level preview to open the level selection screen.

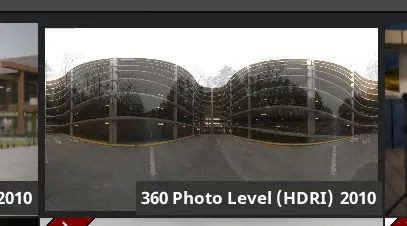
- Seleccione el 360 photo level preview.
- Alternatively load a default photo preset that has HDRI in the name. These can be found under the Scene->Level->Default Photo Presets collapsable box. These may be configured slightly differently to the basic level, so you can experiment with these later.
- You should now see additional Photo Sphere controls under the level settings once the level has loaded. Under Scene->Level->Texture click Mode and change it to Custom Images.

- Now click the Image selection below and your new photo sphere or image should appear in the list.
- If you already have a photoscene opened when you add a new image you can change the mode to HDRI and back to update the Images list with your new images.
- If the image doesn’t show in the list, make sure it’s in the right folder and is actually a .jpg or .png. Just renaming your .hdr or .exr files will not work.
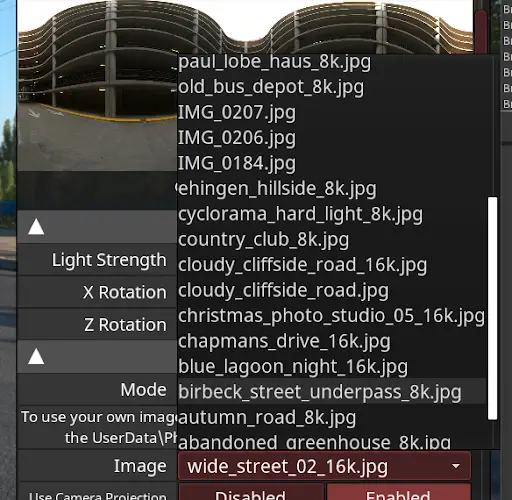
- Select your desired image and you should see it in the scene!
Loading .png/.jpg photos as backdrops
(Prewritten for hotfix 4.2.25 where the new backdrop image preset was added)
If you want to superimpose your automation cars onto photos off your cellphone or camera, or images you’ve found online, the photo scene HDRi sphere prop can help you out!
We have provided a default photo scene preset to make this setup process easier.
- Find a photo backdrop you want your car to be placed on to. Any photo will work, provided it’s a .png or .jpg format.
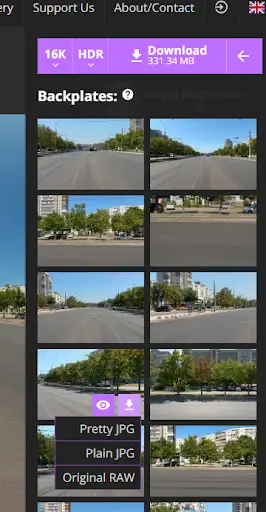
- You can get really nice backdrops from https://polyhaven.com/hdris. Find an HDRI you like, then click in the top right corner and check if the creator has uploaded any “Backplates”. These are high resolution context images used as backdrops. Consider supporting Polyhaven if you enjoy their content.
- Place the .png or .jpg in the following folder in AppData. “C:\Users\[your username here]\AppData\Local\AutomationGame\Saved\UserData\PhotoScene\BackdropImages”
- App data is hidden by default in windows, so you may need to show hidden files to be able to find it.
- También puedes usar el “Open Photo/Video Folder” button in the photo scene to find the automation appdata folder
- Open up Automation and enter the photo scene with a car.
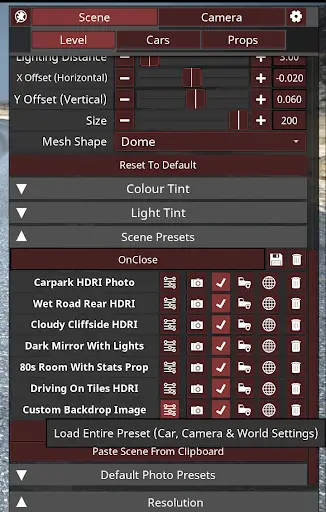
- Under Scene->Level->Default Photo Presets collapsible area, load the Custom Backdrop Image preset by clicking the load entire preset button.
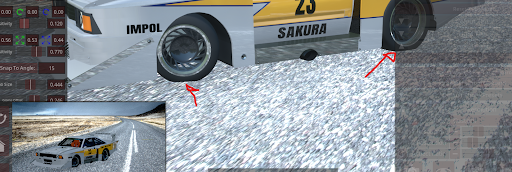
- Depending on the car selected, you may need to move the car up and down to fit the loaded scene. Change to the layout camera by pressing Shift + C or clicking the switch camera button

- Move the layout camera to see the wheels of your spawned car. As you can see here the wheels are slightly in the ground.
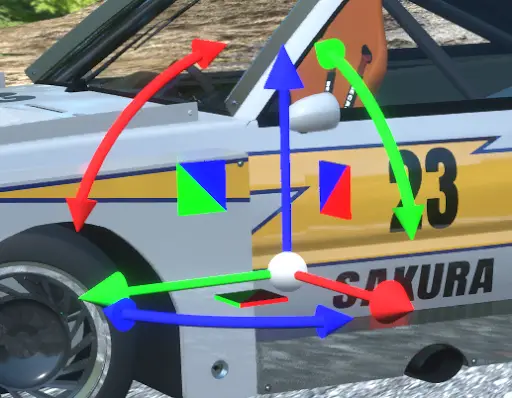
- To solve this we click the car, making sure the gizmo shows up
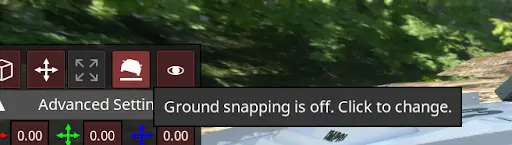
- Then make sure ground snapping is off
- Then use the gizmo to move and rotate the car till it looks like it’s sitting on the surface.

- Una vez que tu’re happy with the car sitting on the surface, switch back to the photo camera with Shift + C or the switch camera button.
- Now we can change the backdrop to our custom image. This scene defaults to having 2 photo sphere objects, 1 is controlled from the level tab and is used for lighting and reflections and is a sphere. The other is a prop, which is used as the actual backdrop. To change the background/backdrop we need to select the prop. You can select it by pressing the TAB key or finding it in the spawned props list.
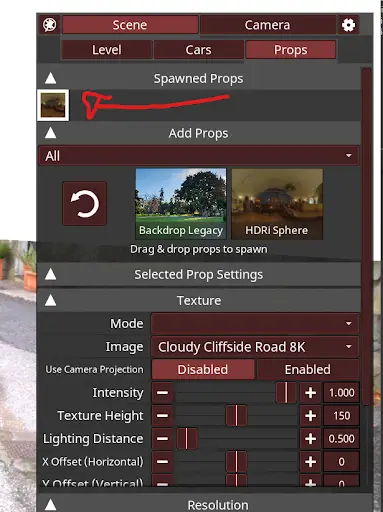
- Now with the prop selected, under Props->Level->Texture click Mode and change it to Custom Images if it isn’t already.
- Now click the Image selection below and your new image should appear in the list.
- If you already have a photoscene opened when you add a new image you can change the mode to HDRI and back to update the Images list with your new images.
- If the image doesn’t show in the list, make sure it’s in the right folder and is actually a .jpg or .png. Just renaming your .hdr or .exr files will not work.
- Select your desired image and you should see it in the scene!
Eso es todo lo que estamos compartiendo hoy para este Automatización - El juego Tycoon de la compañía de automóviles guía. Esta guía fue originalmente creada y escrita por Automation Bot 2.0. En caso de que no actualicemos esta guía, puede encontrar la última actualización siguiendo este enlace.