
This guide will show you how to properly add and install custom assets in Amnesia: El búnker.
Downloading the Assets
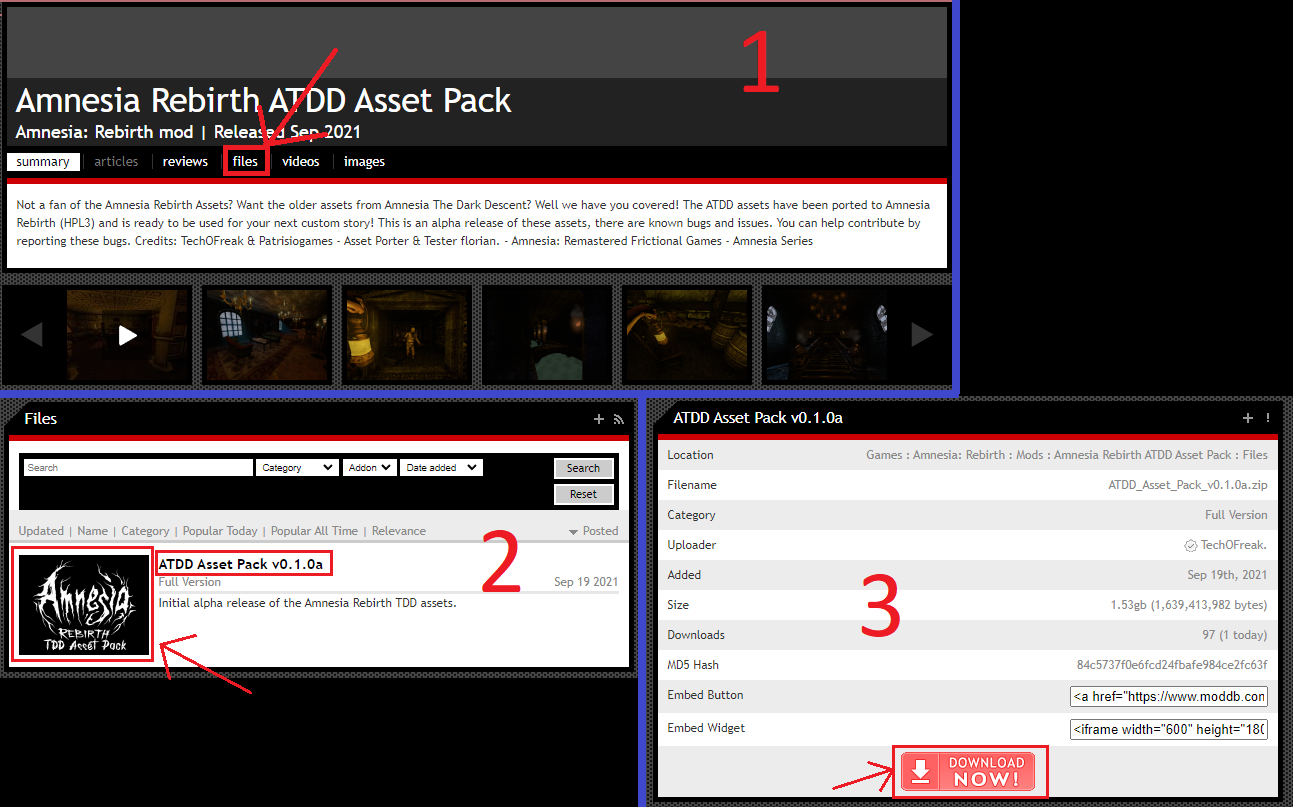
En esta guía, we’re using the Amnesia Rebirth ATDD Asset Pack created by TechOFreak & Patrisiogames.
To get a file from moddb, sigue estos pasos:
- Visit the «archivos» sección.
- Select the desired file.
- Presione el «Descargar ahora» botón.
Assets Installation
To add the assets to your mod in Amnesia: El búnker, sigue estos pasos:
- Unzip the file and navigate to the «activos» carpeta (Consulte Imagen 1).
- Choose the folders you want and move them to: Amnesia The Bunker\mods\YOUR MOD\ (Consulte Imagen 2).
Make sure NOT to copy the «modelos» carpeta, as it’s designed for Amnesia: Rebirth and won’t function correctly in Amnesia: El búnker. Avoid placing assets in: Amnesia The Bunker\mods\YOUR MOD\Assets; they should go directly into the mod’s root directory.
Imagen 1

Imagen 2

Adding More Required Files
To make the assets work, you need to create specific files. Sigue estos pasos:
resources file
- Make a new .txt file called resources.txt in your mod’s main folder: \Amnesia The Bunker\mods\YOUR MOD
- Open the file and paste the directories you want. Ejemplo:
<Recursos>
<Directory Path="/billboards" AddSubDirs="verdadero"/>
<Directory Path="/config" AddSubDirs="verdadero"/>
<Directory Path="/entities" AddSubDirs="verdadero"/>
<Directory Path="/gráficos" AddSubDirs="verdadero"/>
<Directory Path="/mapas" AddSubDirs="verdadero"/>
<Directory Path="/música" AddSubDirs="verdadero"/>
<Directory Path="/sonidos" AddSubDirs="verdadero"/>
<Directory Path="/static_objects" AddSubDirs="verdadero"/>
<Directory Path="/texturas" AddSubDirs="verdadero"/>
</Recursos>
- Save the file as resources.cfg.
lookUpDirs file
- Crea una carpeta llamada «editor» in your mod’s root directory: \Amnesia The Bunker\mods\YOUR MOD
- Abre el «editor» carpeta.
- Make a new .txt file called lookupdirs.txt.
- Open the file and paste the categories you want. Ejemplo:
<Directories>
<Dir Category="StaticObjects" Path="assets/static_objects" />
<Dir Category="Entities" Path="assets/entities" />
<Dir Category="Billboards" Path="assets/billboards" />
<Dir Category="Particles" Path="assets/particles" />
<Dir Category="sonidos" Path="assets/sounds" />
</Directories>
- Save the file as lookupdirs.cfg.
WIPMod file
- Ensure you have run LevelEditor.exe at least once.
- Navegar a C:\Users\YOUR USER\Documents\HPL3
- Create a new .txt file called WIPMod.txt.
- Paste your mod’s entry.hpc file location between «» (quotation marks). Ejemplo:
<WIPmod Path="C:\Archivos de programa (x86)\Steam\steamapps\common\Amnesia The Bunker\mods\YOUR MOD\entry.hpc" />
- Save the file as WIPMod.cfg.
You can then delete the unnecessary .txt files.
Eso es todo lo que estamos compartiendo hoy para este Amnesia: El búnker guía. Esta guía fue originalmente creada y escrita por Kiviviki ♪. En caso de que no actualicemos esta guía, puede encontrar la última actualización siguiendo este enlace.