- Titel: VRChat
- Veröffentlichungsdatum:
- Entwickler:
- Herausgeber:
Information about VRChat is still incomplete. Bitte helfen Sie uns dabei, die Details des Spiels auszufüllen Kontaktformular.
This guide will explain the basics (bare minimum) of VRChat and how to get started.
Just a Disclaimer
This guide does not cover every VRChat mechanic/feature. This guide only shows the basics/bare minimum. Just enough for a new player to have a good idea to what they’re stepping into.
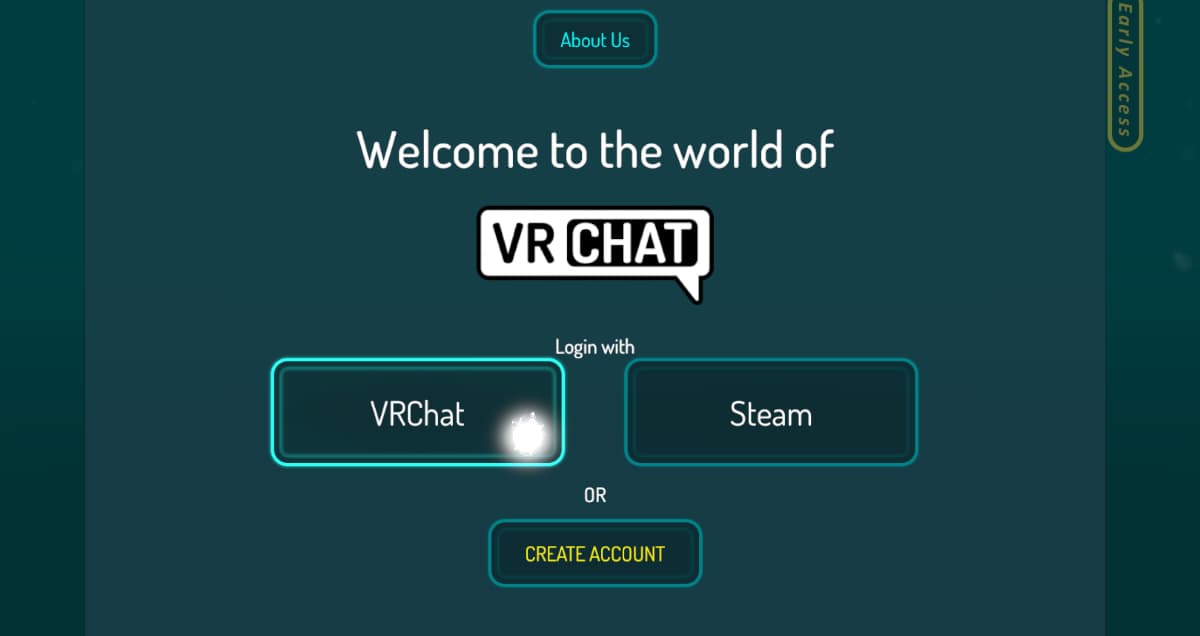
Logging In
To log into VRChat, you may choose to log in with either your Steam account, or a VRChat account. This choice is entirely up to you. But if you wanna try things out first, you may choose to log into a Steam account. You will still have the full VRChat experience, Jedoch, you won’t be able to upload your own content onto VRChat with a Steam account. Und, you’ll only earn half the trust with a Steam account. If you wish to begin with the complete experience, you may log in with/create a VRChat account.
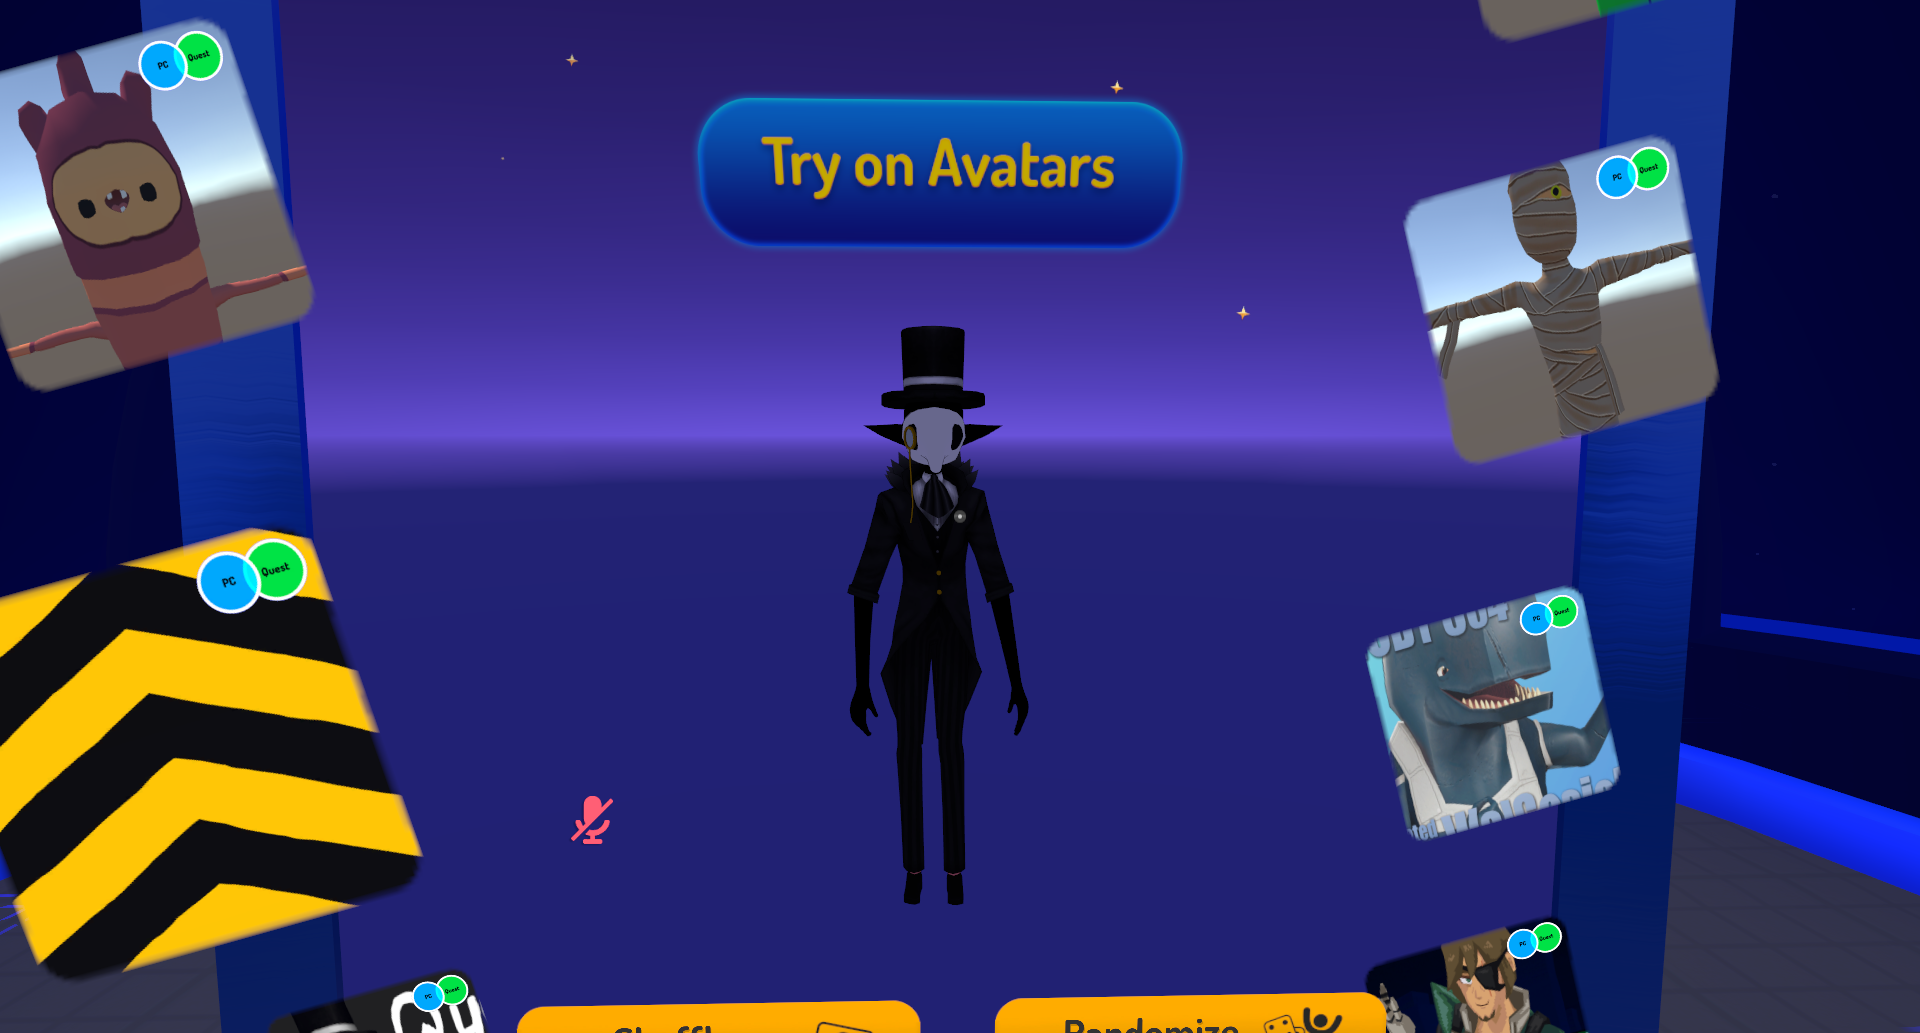
Tutorial World
Upon logging in, you will be greeted to the tutorial world. The tutorial world will choose an avatar for you in the public avatars category by random (Note that you’re not limited to these selections for the whole game.)
Once it has done that, you may continue on by looking down and pressing the „Bereit zu gehen!“ Taste. Sobald das erledigt ist, you will be prompted to move to the circle.
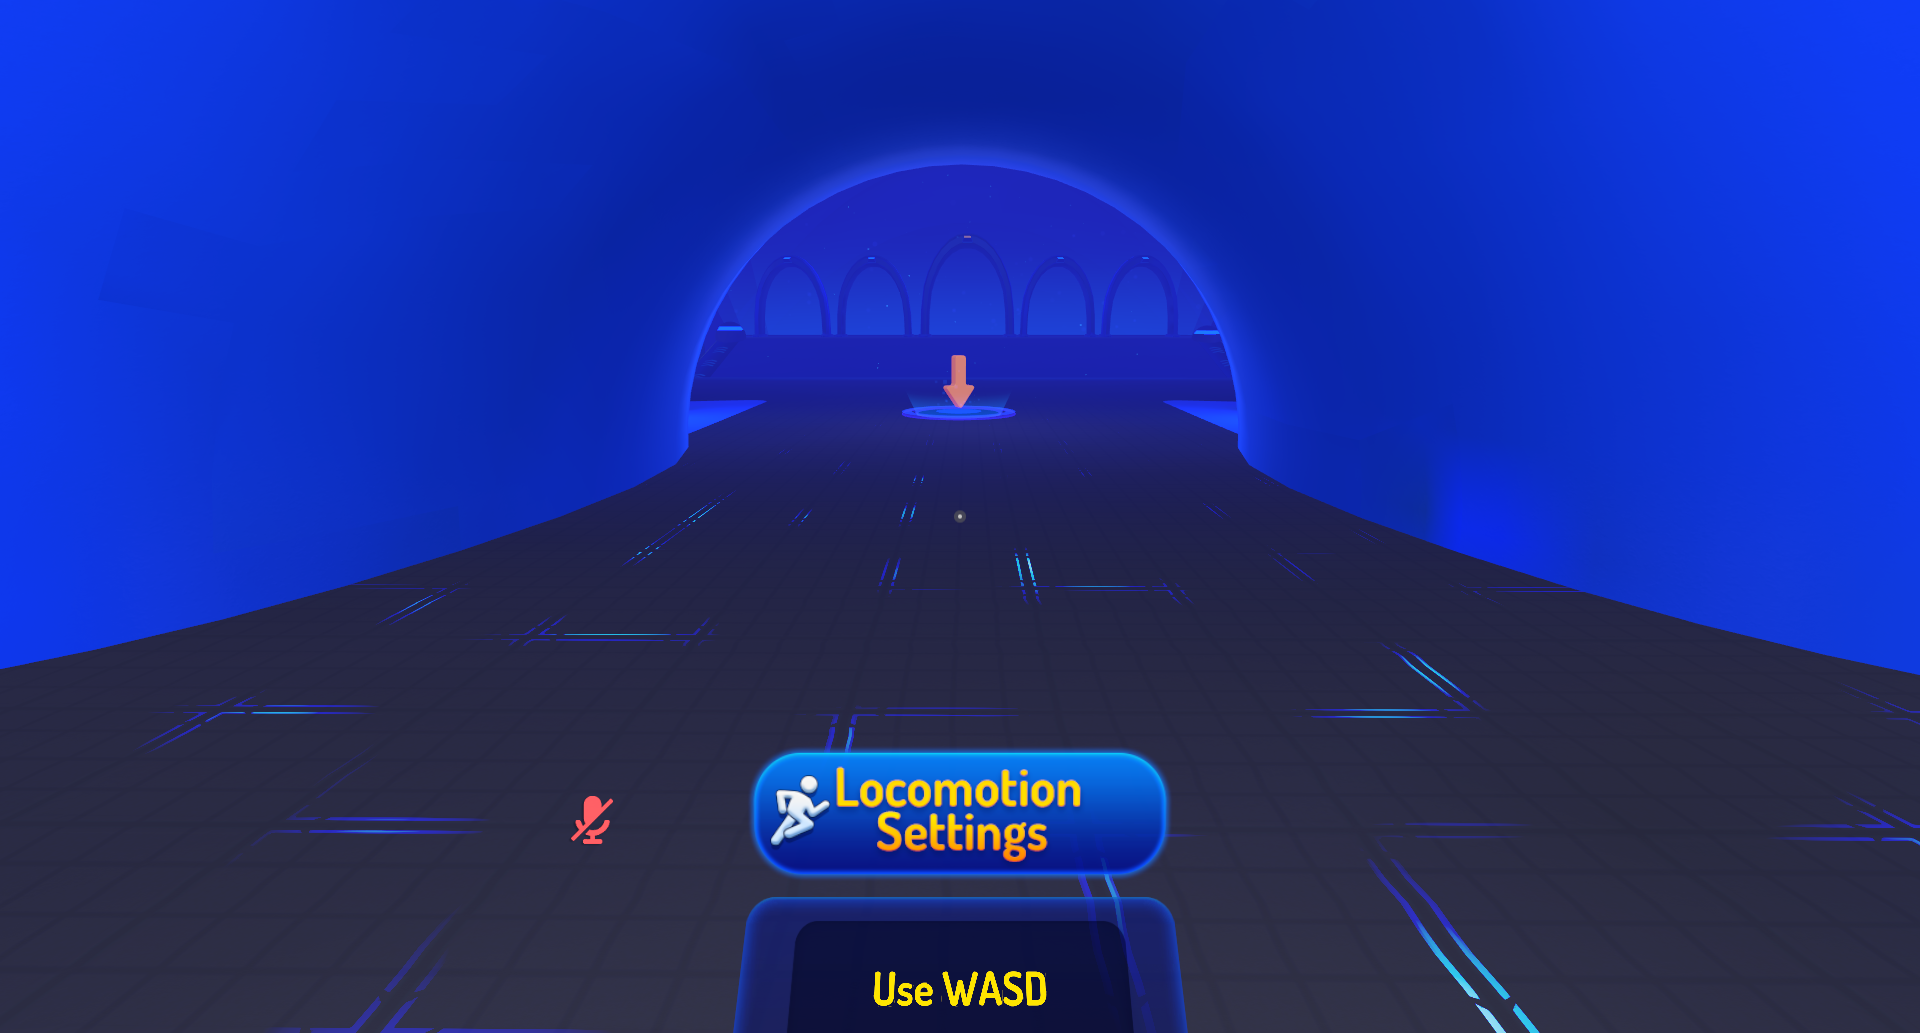
Do that, and the tutorial is complete. Now you may enter one of the portals further on inside of the tutorial world. Für diesen Leitfaden, we’ll be going to the home portal. Hier entlang, we can get comfortable with the menus.

Menus: Knowing Your Options (Sicherheit)
To access your quick menu, press your pause button. Sobald es erledigt ist, you’ll be greeted with the quick menu.
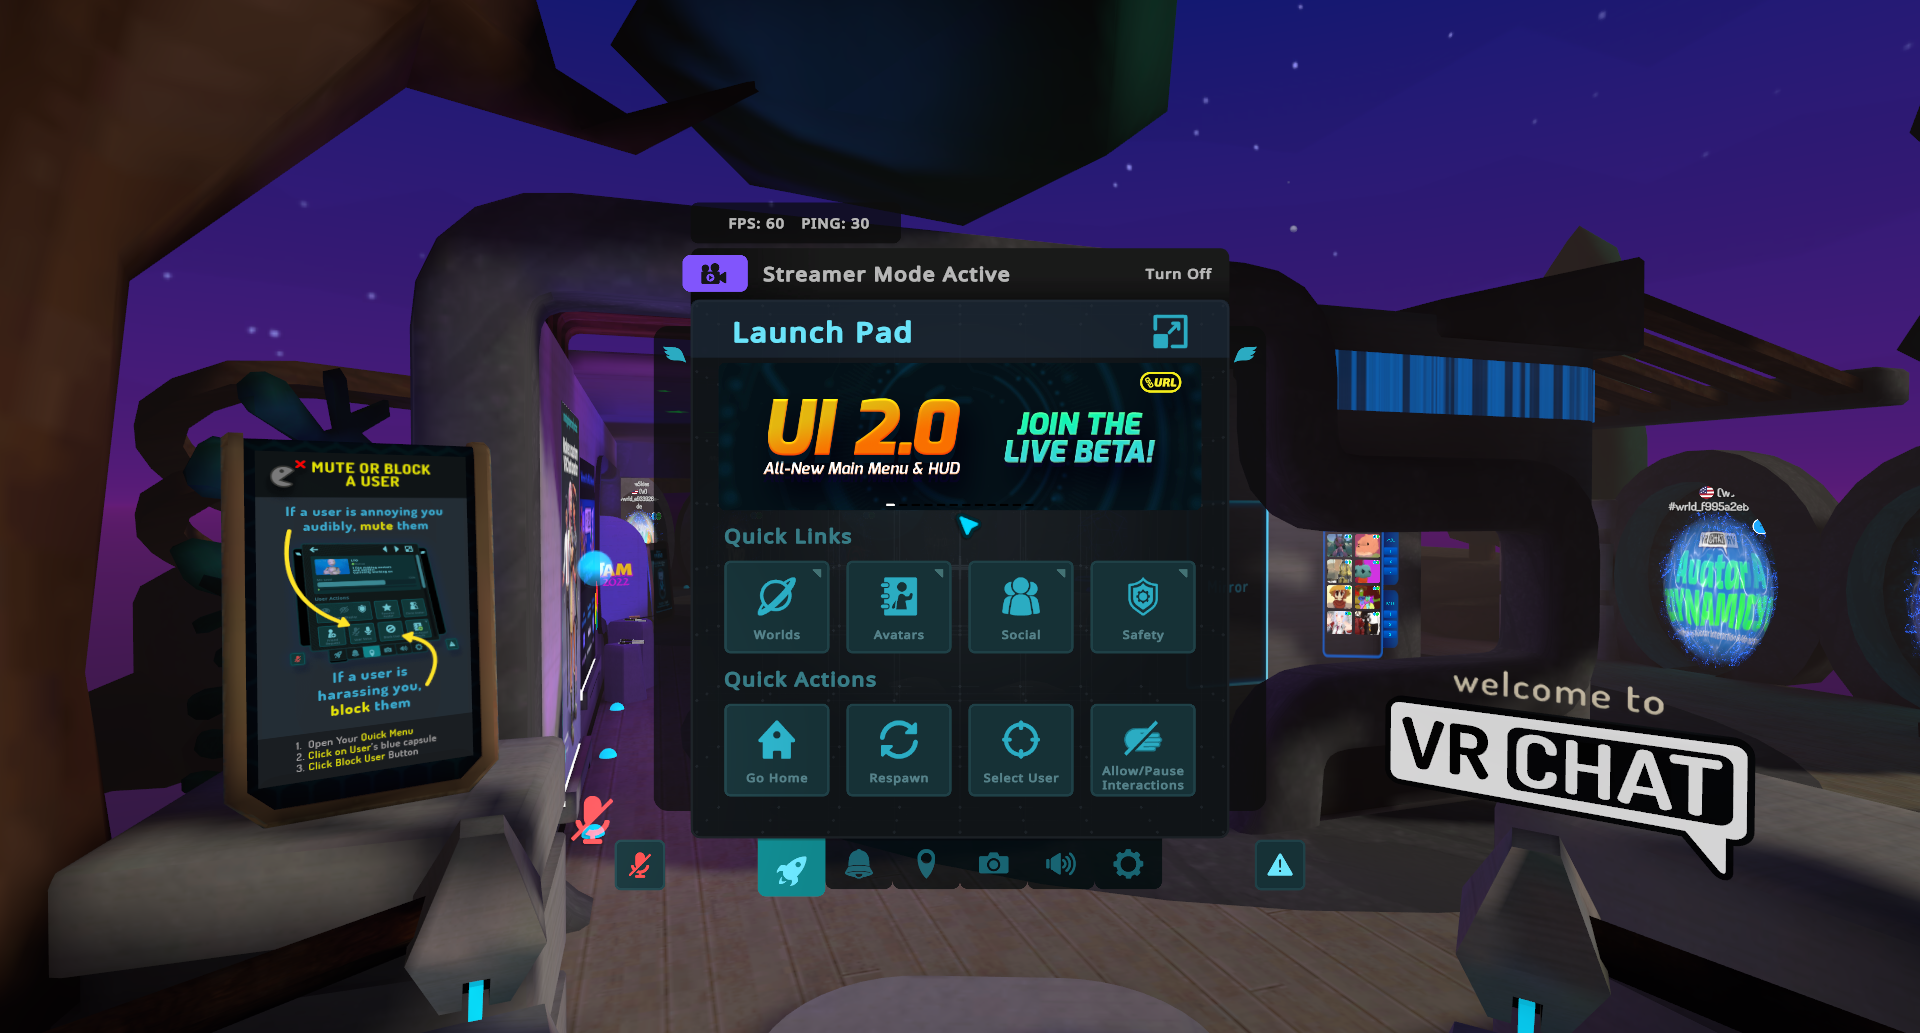
In the quick links tab, Du wirst sehen 4 Optionen. Worlds, Avatars, Sozial, and Safety. The first thing we’ll do is navigate to safety. Once you have navigated to safety, you should be greeted with the safety options.
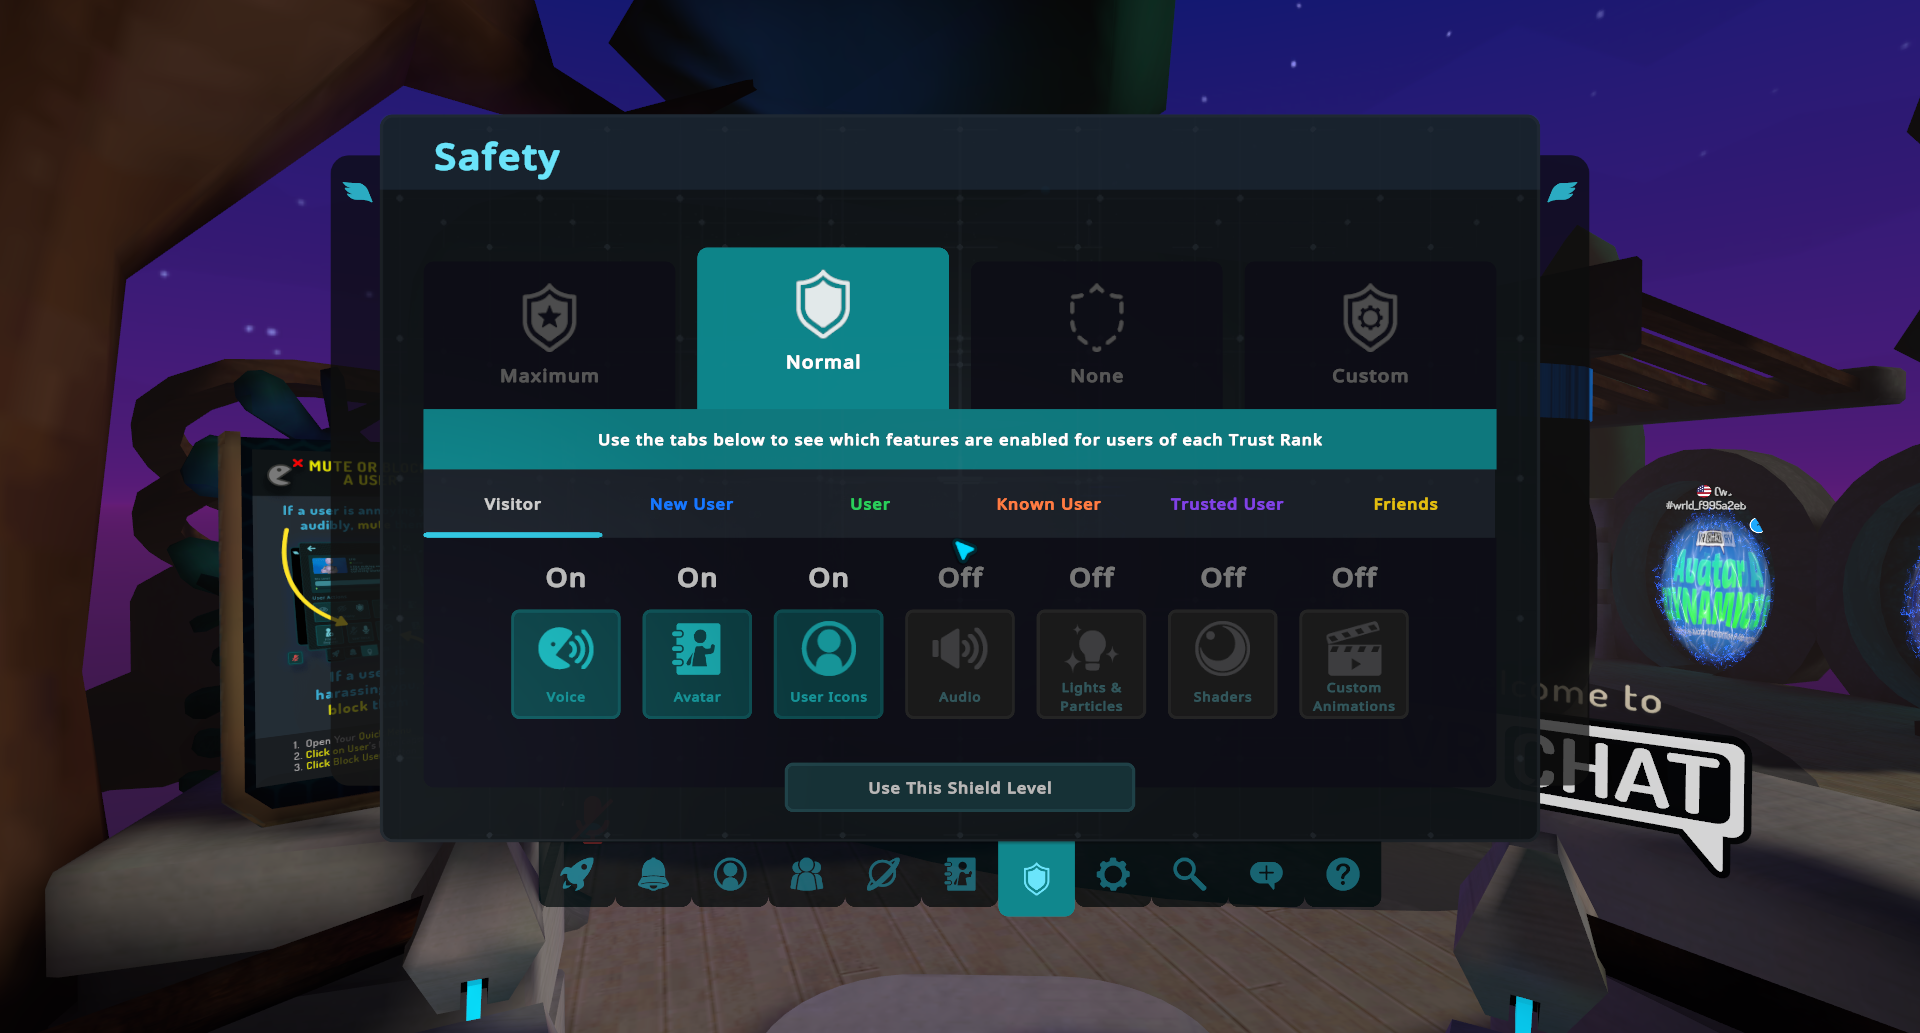
You may choose between 4 Optionen. Maximal, Normal, Keiner, or Custom. You may set these how you wish, but for this guide, maximum will be used. Note that safety settings don’t effect you, they only effect others around you.
Menus: Knowing Your Options (Worlds)
In the quick menu, select the Worlds option. In the big menu, you can select the Planet tab at the bottom. You should be greeted with this screen.
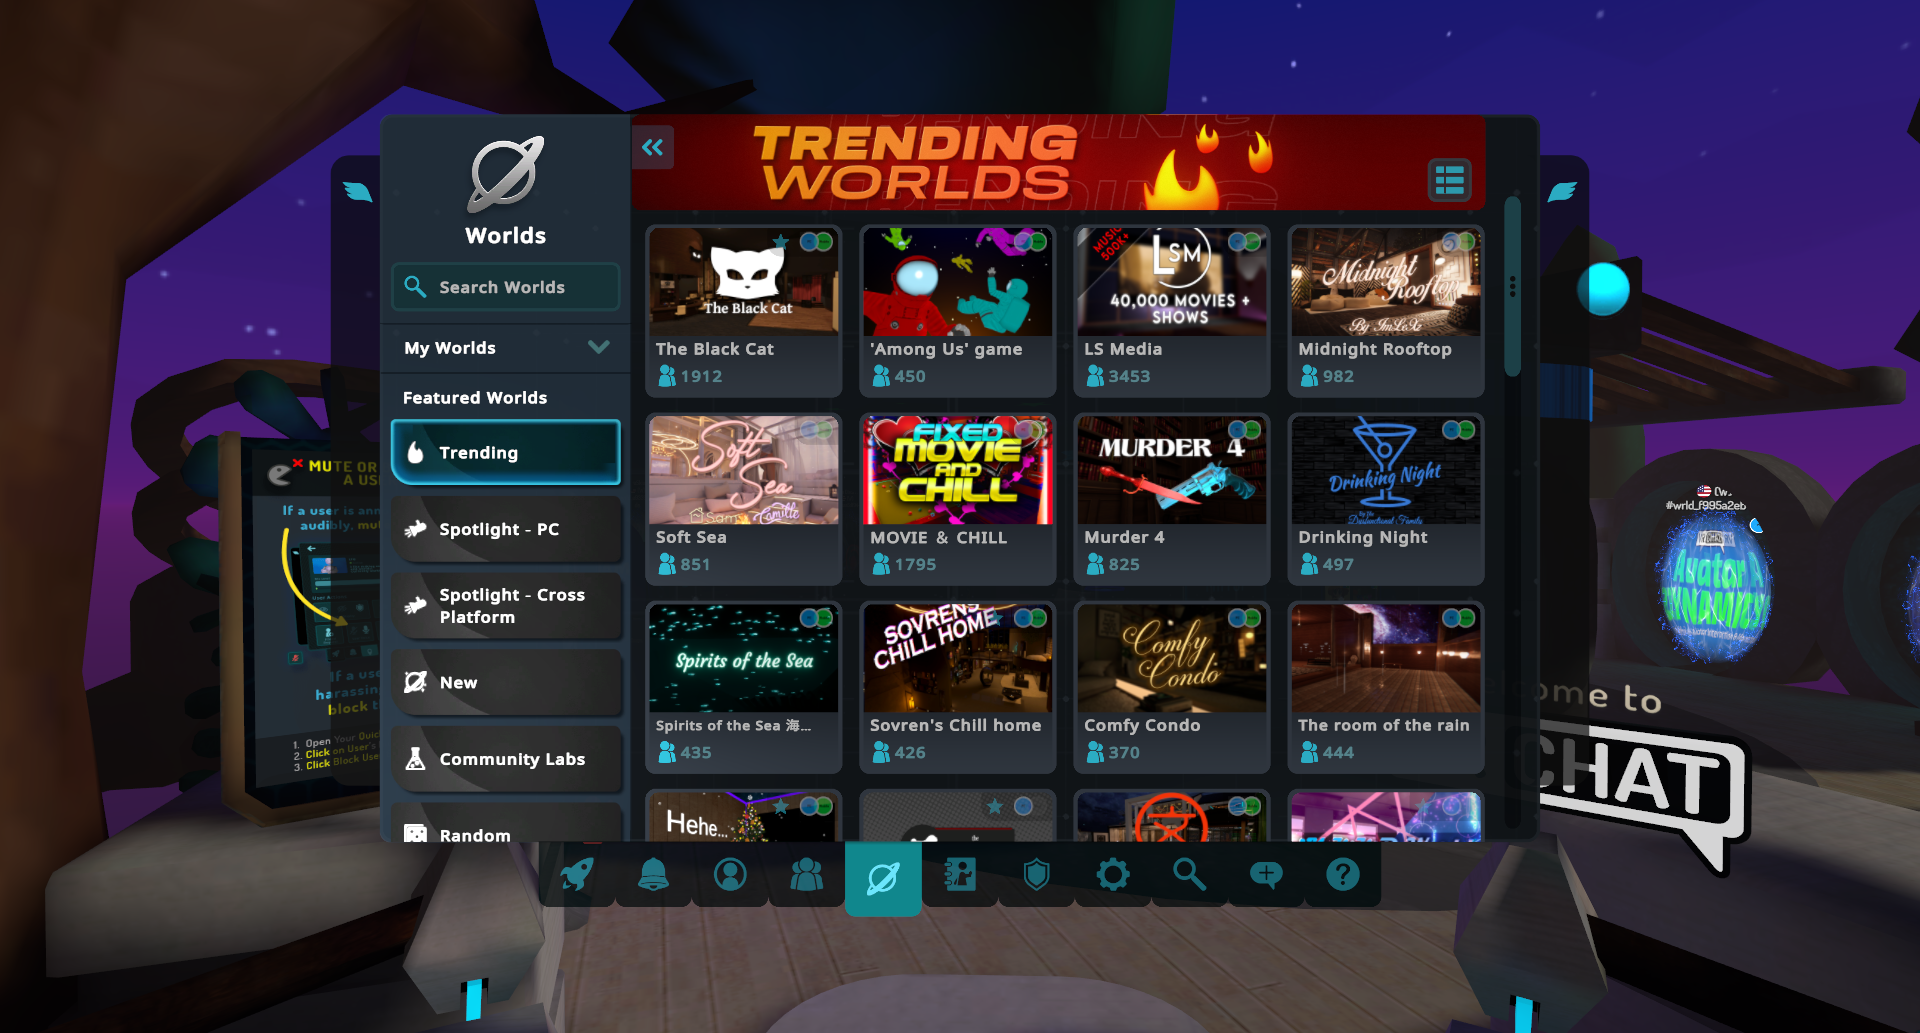
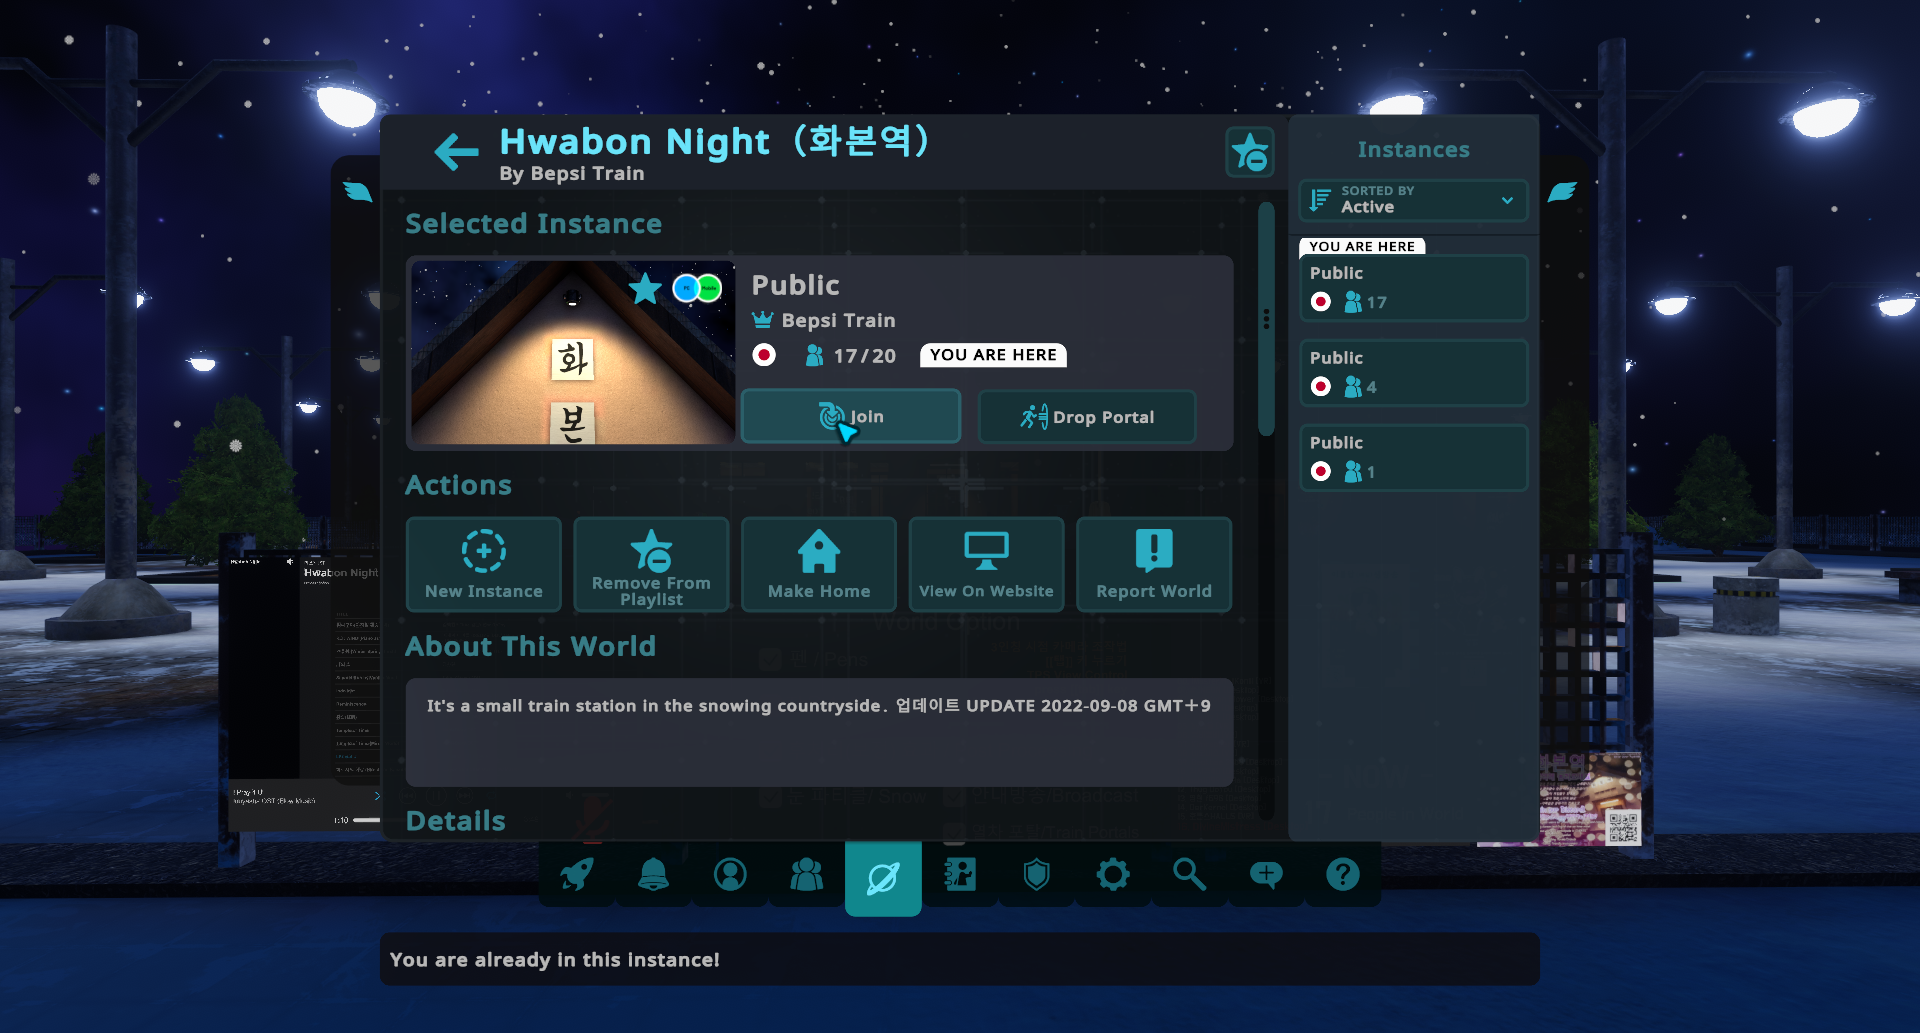
Auf der linken Seite, you can scroll up and down to browse the categories, simply select the category to view it. You may choose a world to join, wenn Sie es wünschen. If you don’t want to join a world, that is fine. In diesem Ratgeber, a world will be joined. To join a world, simply select the world you wish to join, select your instance (Create a new one with the New Instance button if you wish to make your own) and then select Join.
Menus: Knowing Your Options (Avatars)
In the quick menu, Wählen Sie die aus „Avatars“ Taste. If you’re in the big menu, select the icon that appears as a notebook with a silhouette of a person. You should be greeted with something that looks similar to this screen.
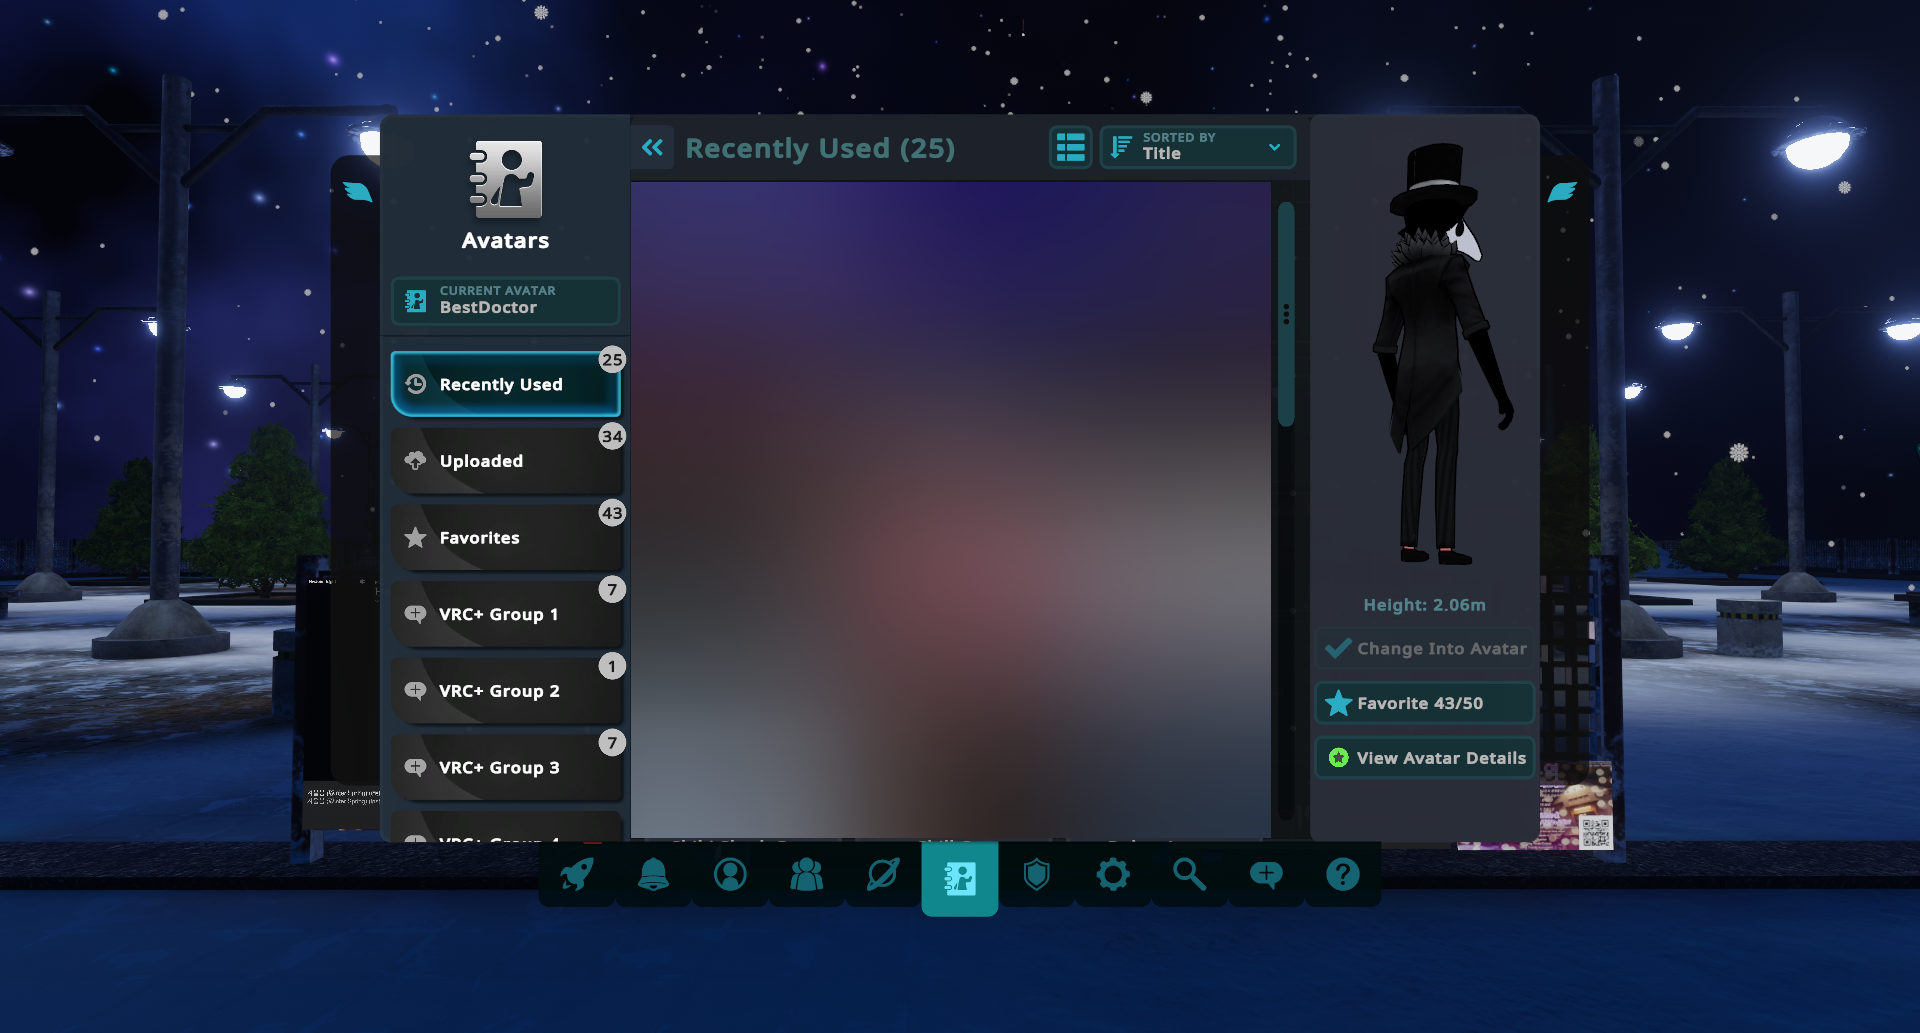
On this screen, you can view your recently used avatars, uploaded avatars, favourite avatars, und mehr. To get more avatars, you may visit avatar worlds, and clone public avatars from other people (if available.) Because this game is cross platform, You may have noticed the blue and green icons on the top right of worlds, and avatar options. These indicate if the avatars are available on the PC platform and/or the Quest platform.

Keep in mind that if both are shown, the content is available on both. If only one is shown, the content is only available to that one specific platform. To view an avatar in greater detail, you may select the avatar in the avatar menu and then select View Avatar Details. Sobald Sie das tun, you will be greeted with a screen that looks like this.
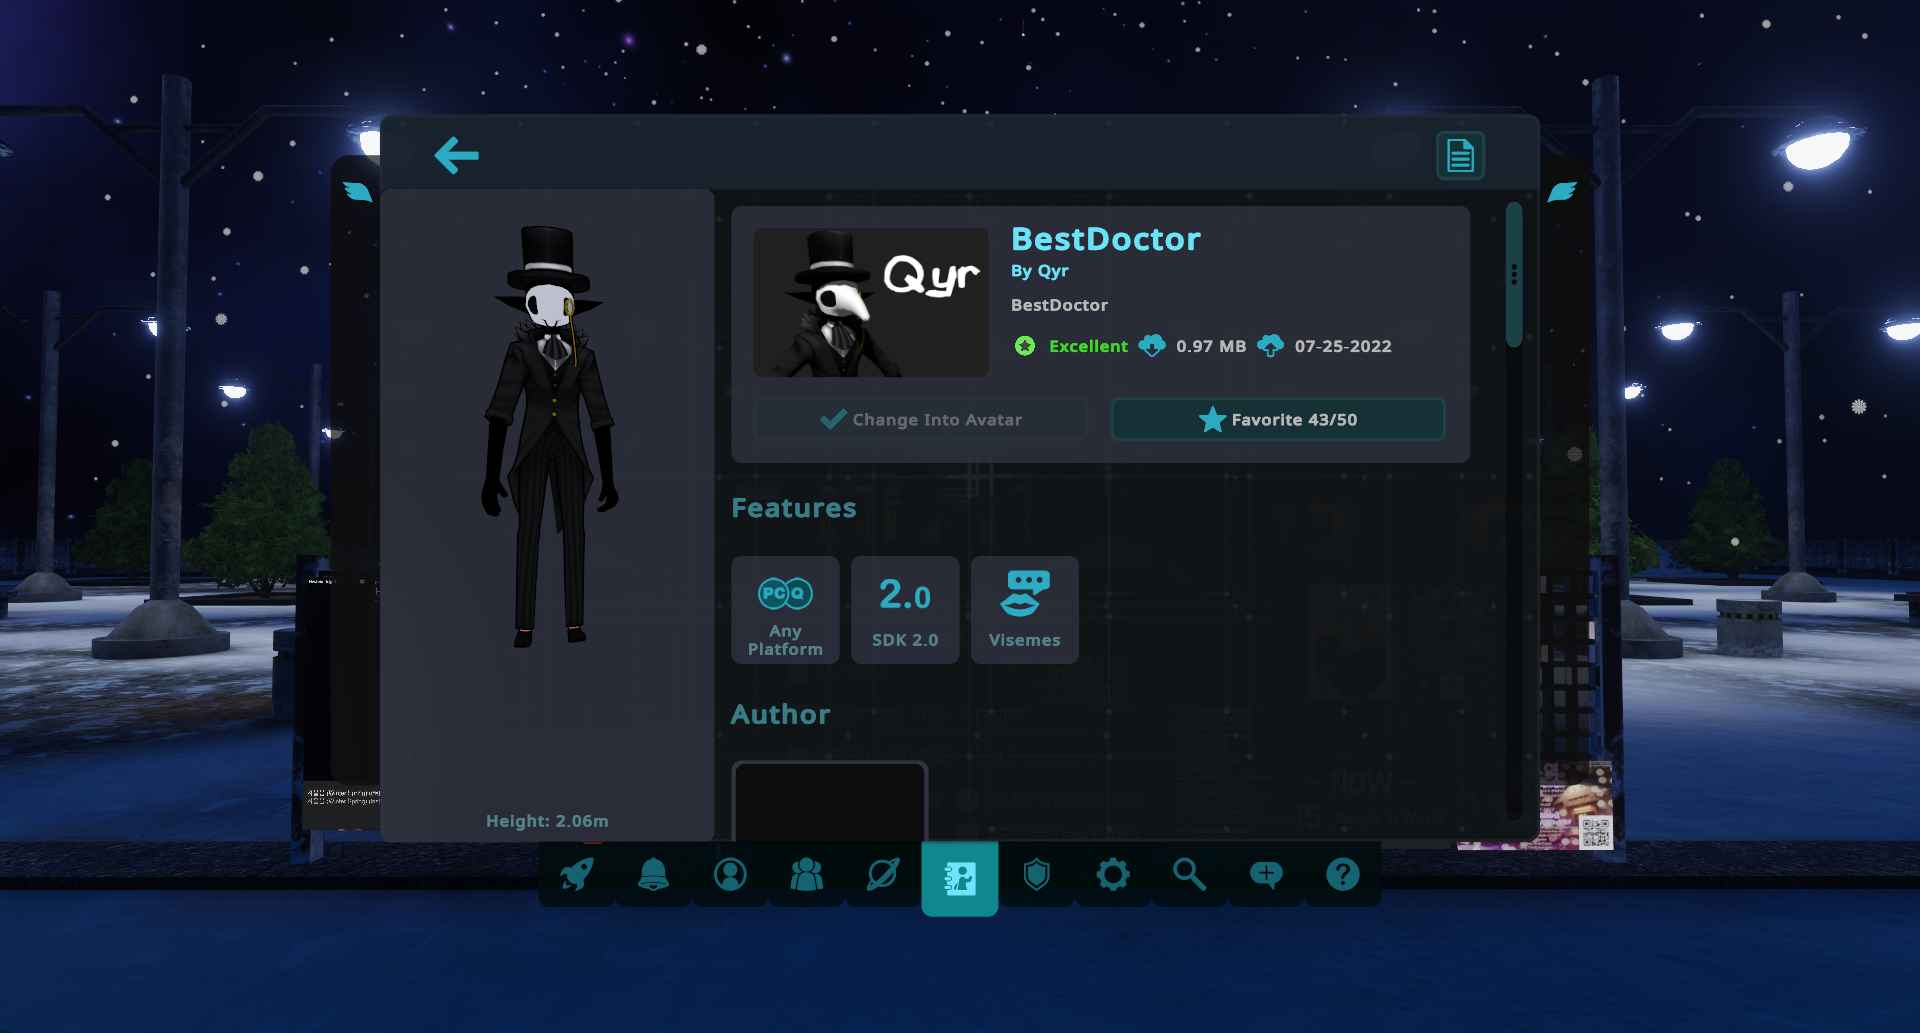
On this screen, you can see how big the avatar is, it’s features, it’s performance, und mehr.
Menus: Knowing Your Options (Sozial)
To view Social, go to the quick menu, and select Social. If you’re on the big menu, select the icon with 3 people on it. Sobald es erledigt ist, you should be greeted with a screen that appears like this.
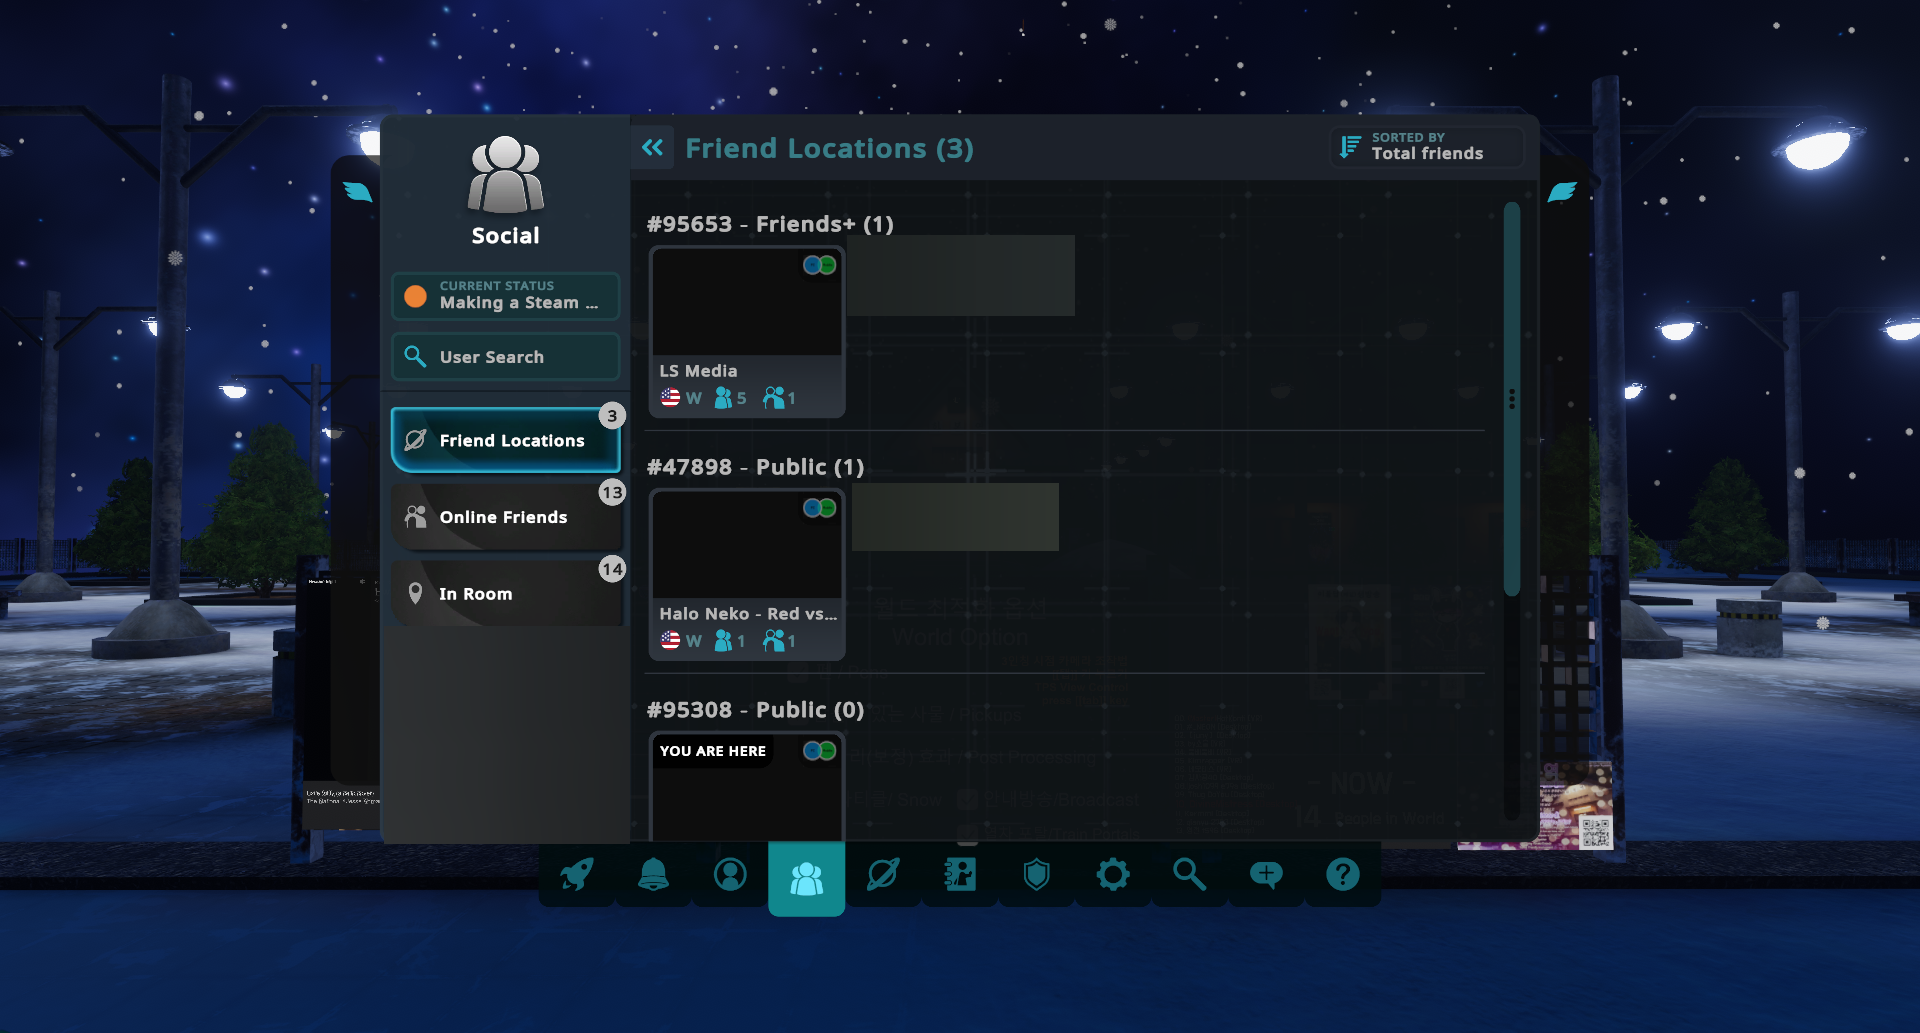
To expand your social menu, make friends! Talk to people, hang out, play games, und Spaß haben. You may also change your status in-game. Um das zu tun, Wählen Sie die aus „Current Status“ option on the top left. Sobald es erledigt ist, you should be greeted with this pop-up.
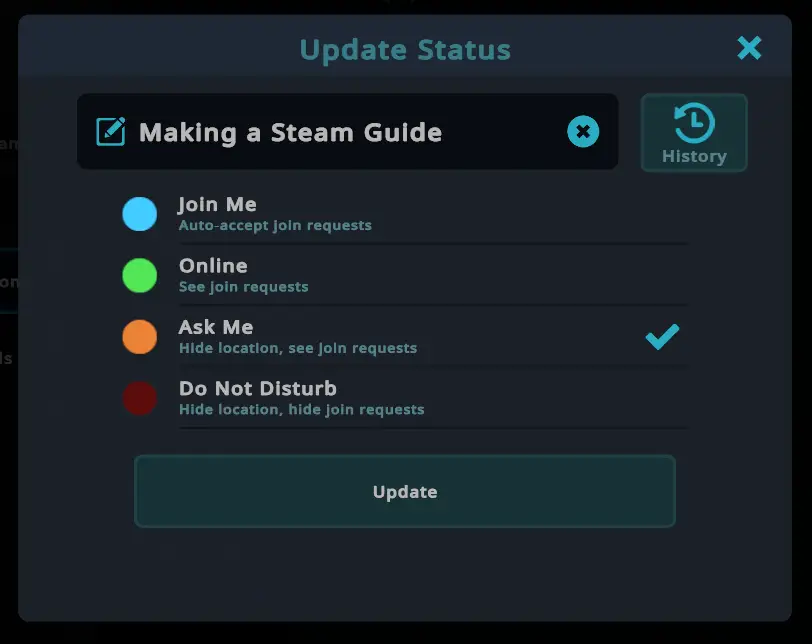
You may customise this how you wish.
Menus: Knowing Your Options (Profil)
To access your profile, go to the big menu, and select the icon that appears as a person in a circle. If done, you should be greeted with a screen similar to this.
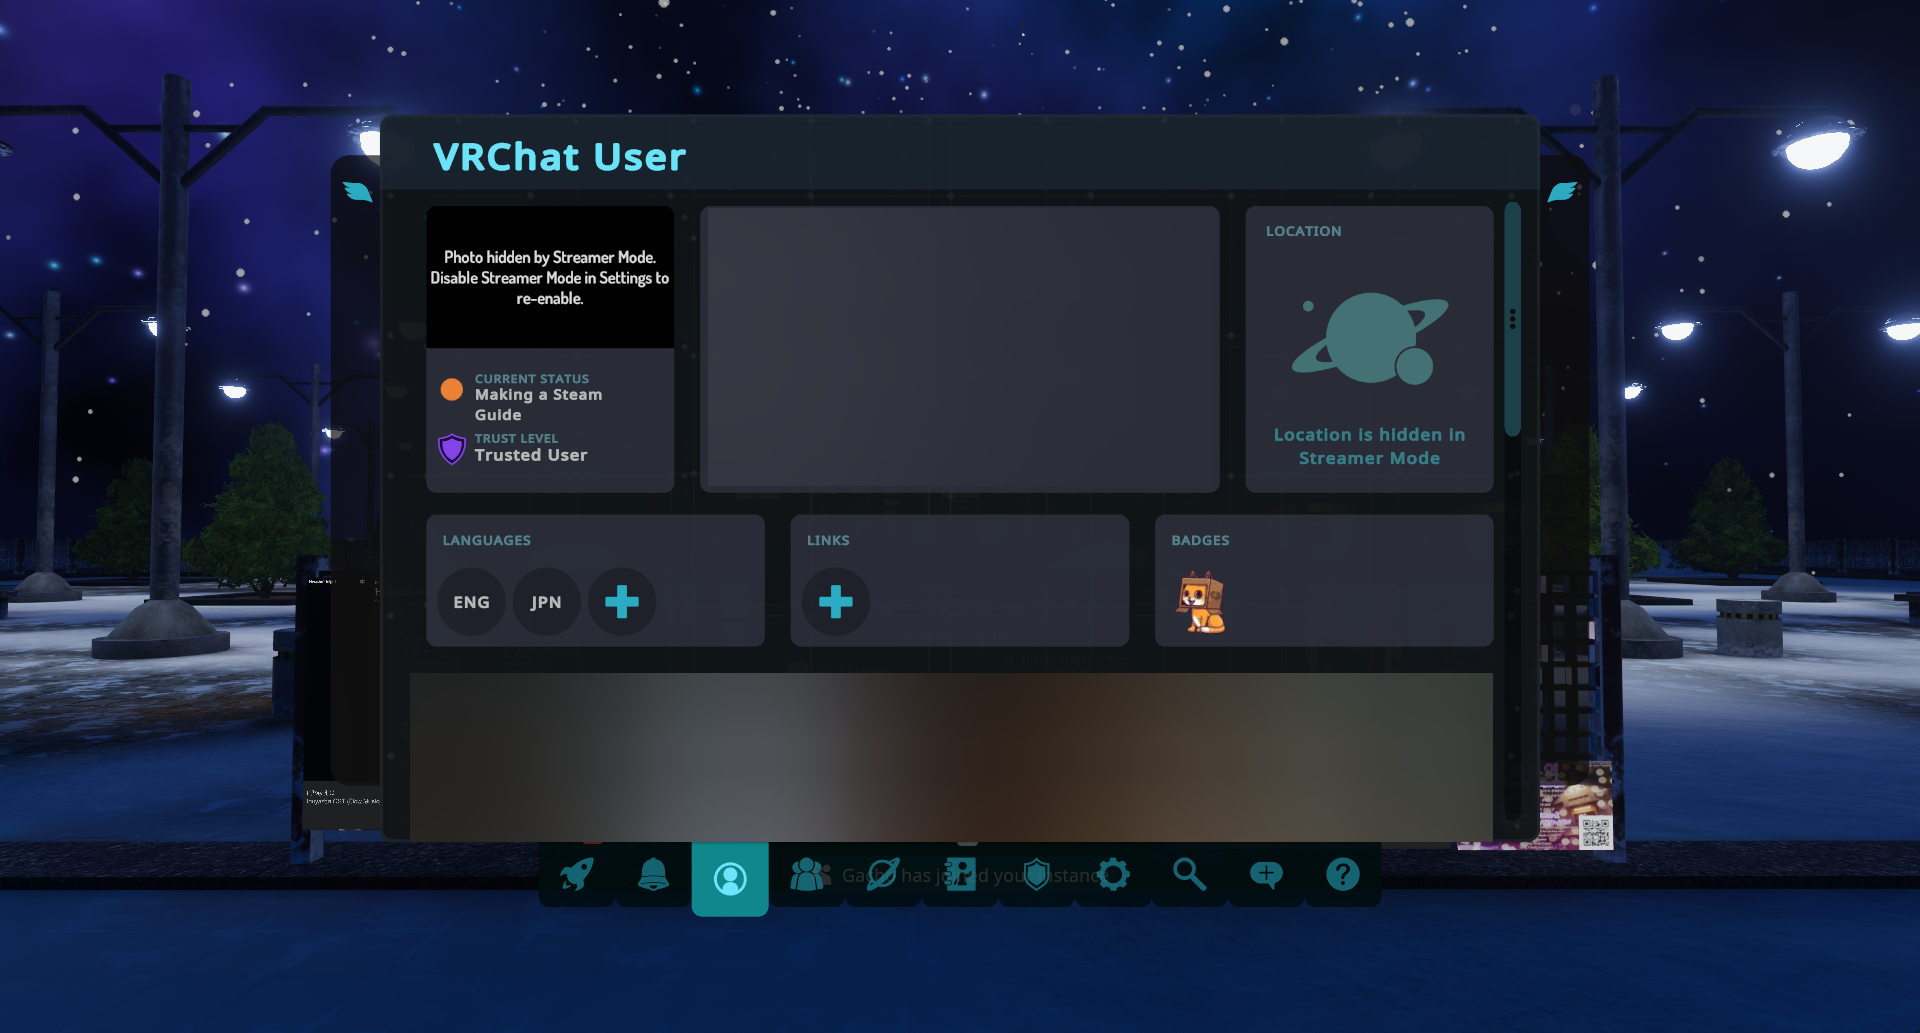
On this screen, you can customise your bio, add links to sites (ideally your websites,) add your languages, usw.
Menus: Knowing Your Options (Einstellungen)
In the quick menu, select the gear tab to be greeted with what I like to call quick settings. This doesn’t show every single setting, but it shows a majority of them.
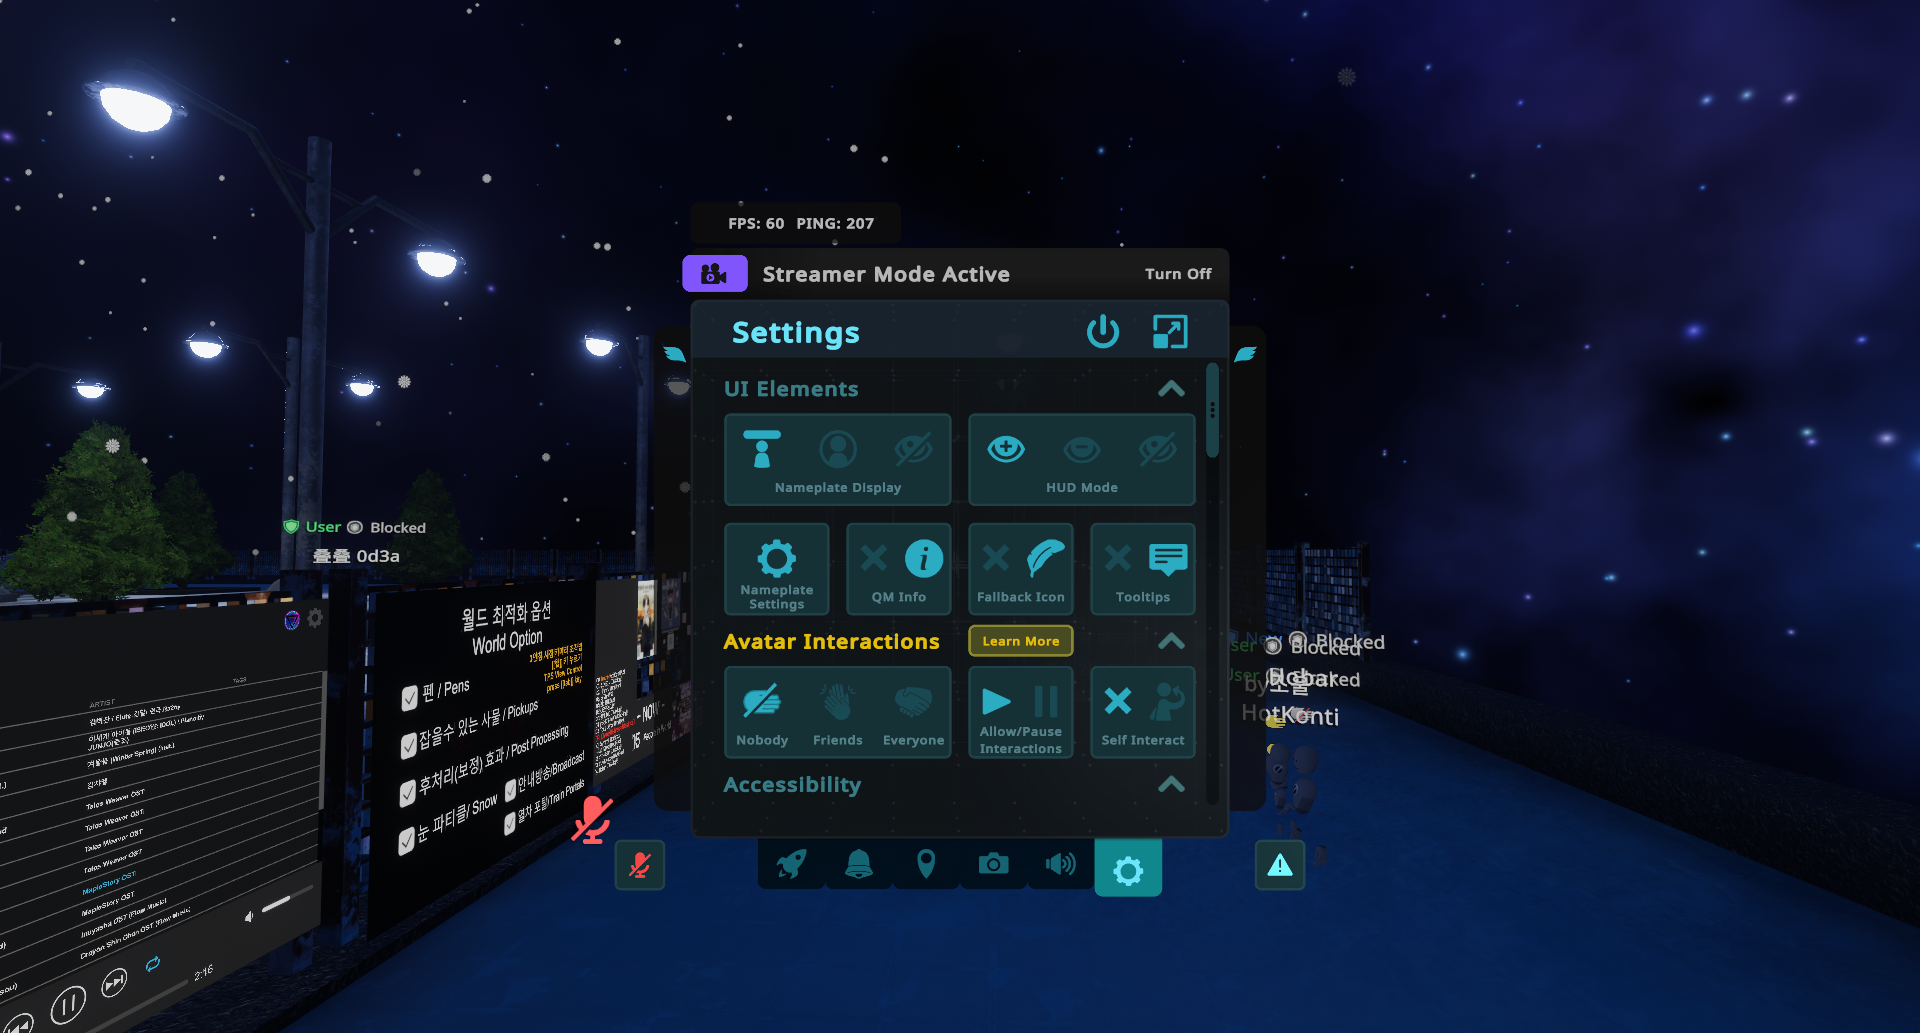
I won’t go through them, as I see most of them to be self explanatory, but you may tinker with them to see what settings are best for you. To go through all of the settings, click the pop-out icon on the top right.
Spieler
There are quite a bit of players in VRChat, and obviously, not all of them are the same. But depending on who you come across, you may either have a good or a bad time. And as you might see, they wear a variety of avatars, some good, some bad, und einige… Questionable. Jedoch, I find it best to keep those questions to yourself as a lot don’t take kindly to simple questions. That doesn’t mean the whole game is like this, there are some good apples out there. I salute you if you have found good apples. Aber, it all depends on why you came on VRChat in the first place.
For all of the things I have missed…
Jetzt, everything was not explained. There are more features to cover, and more to experience. And if you wish to learn more about these features, you may do so by going to the big menu (Go to your quick menu and select the pop-out icon on the top right) and going to the help tab, which appears as a question mark. Wenn es richtig gemacht wird, you should be greeted with a screen that is similar to this.
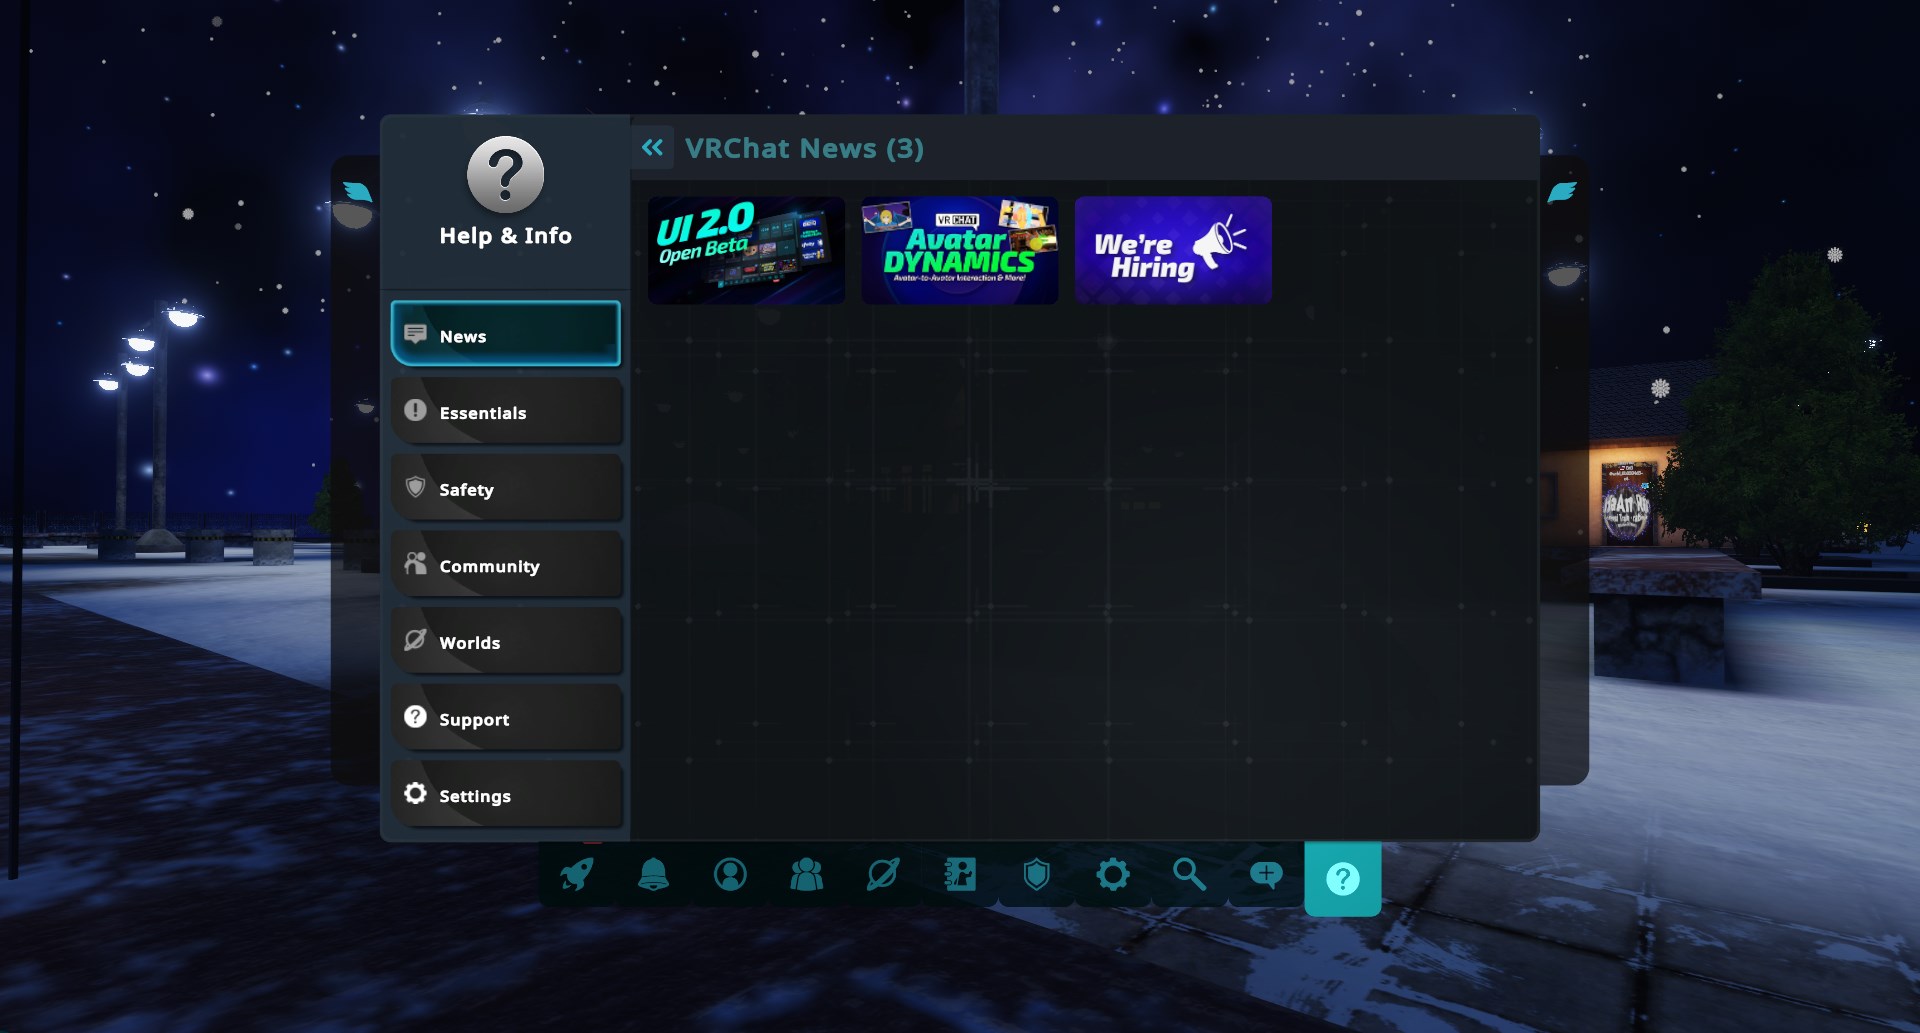
On the help tab, you can select categories depending on what you would like to learn about, and selecting the subject you wish to learn about. This is a useful tab for learning about the features of VRChat. You will find it easy and understand more as you go.
Abschluss
This marks the end of the VRChat basics guide. This guide wasn’t made to cover every single thing you can do in VRChat, but it was made to understand the basics of it. You will learn a lot more as you go on. With this knowledge in mind, you’ll have an easier understanding of the basics of how to navigate your way in the world of VRChat. Vielen Dank fürs Lesen, and have a great day.
Das ist alles, was wir heute dafür teilen VRChat Führung. Dieser Leitfaden wurde ursprünglich erstellt und geschrieben von Tanuki. Für den Fall, dass wir diesen Leitfaden nicht aktualisieren können, Sie können das neueste Update finden, indem Sie diesem folgen Verknüpfung.