- Titel: Tooth and Tail
- Veröffentlichungsdatum:
- Entwickler:
- Herausgeber:
Information about Tooth and Tail is still incomplete. Bitte helfen Sie uns dabei, die Details des Spiels auszufüllen Kontaktformular.
This guide is the complete guide on how to mole rush in the game of Tooth and Tail. It will cover everything from rushing basics to advanced strategies. If you want to level up your cheese game, Sie sind an der richtigen Stelle.
Die Grundlagen
Moles are a proxy unit in Tooth and Tail meaning they are the only warren available to be placed outside of your territory limit. This makes them the ultimate tool for cheese or applying pressure to your enemy. Es gibt 4 other things that make the mole warren unique besides this. The first is its warren will decay over time before eventually destroying itself. This means in the event of needing to sell a warren it will sell for less than you bought it for, making it the only warren of its kind to do so. The second unique thing is a mole will immediately produce upon completing its warren. Other warrens in the game complete, pay for a unit, and then begin to produce the unit. The mole skips the first production step making it able to produce that initial mole much faster. The mole warren is also a single tile anstatt 4 Fliesen. The final thing that makes this unit so special is Kritikschäden! Whenever a mole hits a building it does bonus crit damage. And guess what counts as a building? Building farms!
What is the goal of a mole rush? Also, moles want to use that bonus crit damage to try to destroy or deny building farms. If your opponent doesn’t scout the rush it can result in your opponent losing 60 food and can often win you the game. More likely, your opponent will be forced to sell a building farm before it completes meaning they will have to re-buy it later and wait for the building time all over again. This gives you a Tempo Advantage. What does that mean? It means your farms will complete faster meaning you will start to gain food faster as building farms do not produce food. Having a tempo advantage only means you will have your food faster than them. If you can delay your opponent enough they will not have enough time to stop your ensuing push.
The Offense
Es gibt 5 types of early game mole rushes with the intent of destroying/denying farms. They can be classified into the number of farms you have when you buy a mole warren instead of a new farm e.g. 4 farm mole rush, Die 5 farm mole rush etc. all the way up to an 8 farm mole rush. Mole rushing will fall by the wayside after this because your opponent will have tier 1 warrens to deny mole warrens and farms will be completed.
So what are the best ones! Well some are definitely better than others. They are all viable in their own ways and have different situations to use each one. I will tell you the best situations for each, however the game sense to know instinctively which to do will come with time.
Let’s first start with one that you will almost certainly never use: Die 4 farm rush. The problem with this rush is two fold. Eins, it requires not queuing a farm when you spawn finding your opponents base before you get to 60 Essen. Das tut nicht’t happen consistently enough to ever use it. The second problem, and arguably more important, ist es’s completely useless. It accomplishes the same goal as the 5 farm rush so never use this one and forget you even ever heard of it.
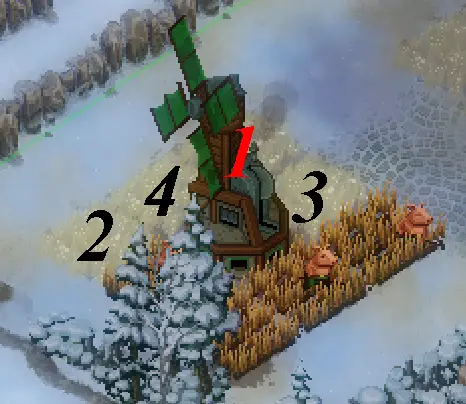
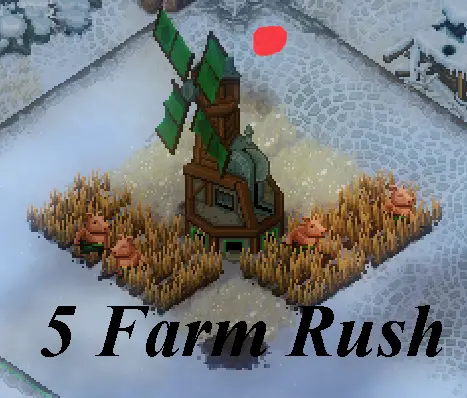
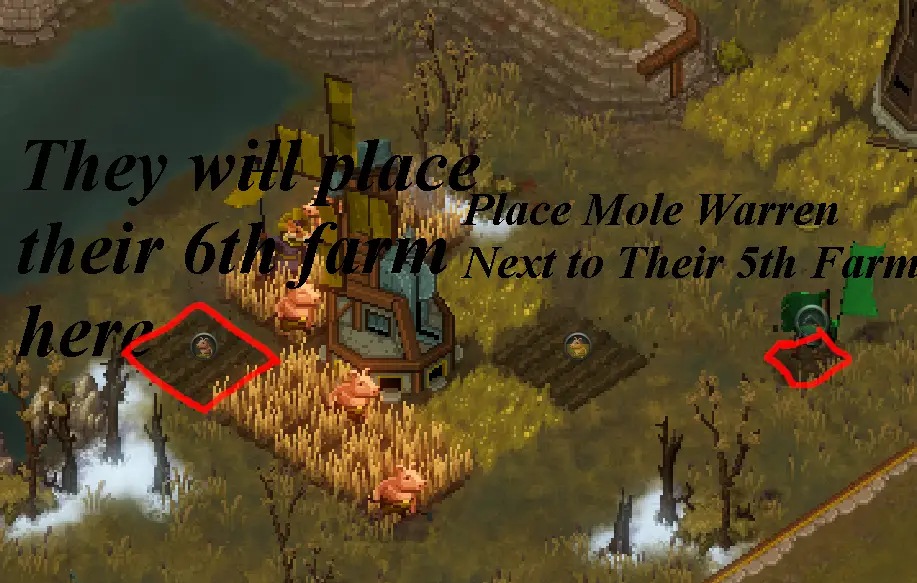
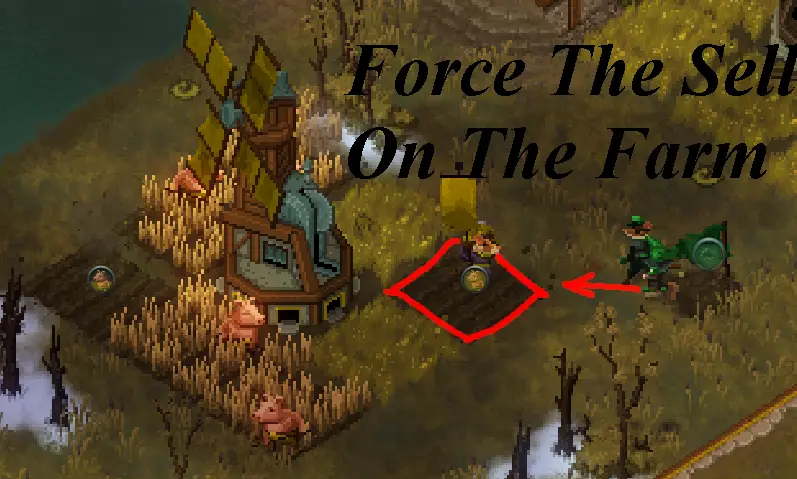
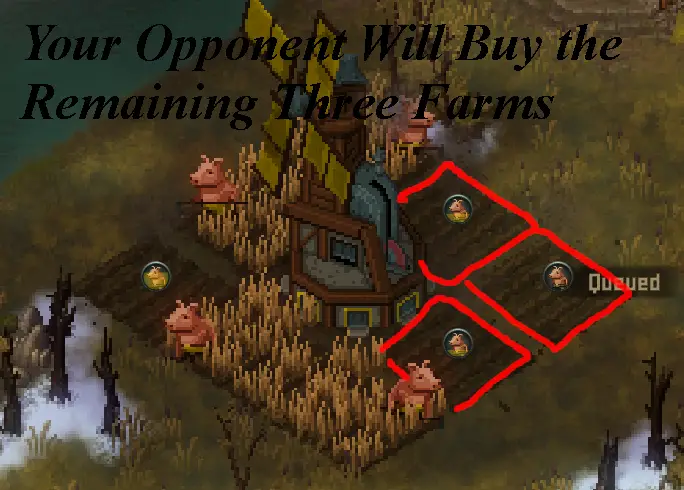
Der 5 farm rush is somewhat situational but can definitely be useful. With good scouting your opponent will probably never fall for this one meaning you will only be able to force the selling of a building farm (z.B. force a sell). This leads us merrily into the First Principle of Mole Rushing! In order to get value you must either destroy a farm oder force the sell of 2 Bauernhöfe. If you simply force the sell of a single farm the benefit is negligible and you’ve only succeeded in revealing one of your units. If you force the sell of one farm, sell your warren, and then burrow home the enemy will have already re-bought that farm before the burrow animation completes. This means you would technically be behind. That is why 5 farm rushes are usually not that good, except for one edge case. I will go over this in greater detail in a later section but for the purpose of value a 5 farm rush is not that good.
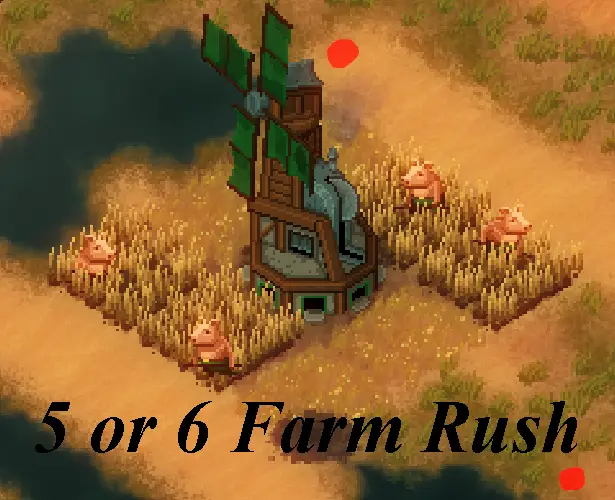
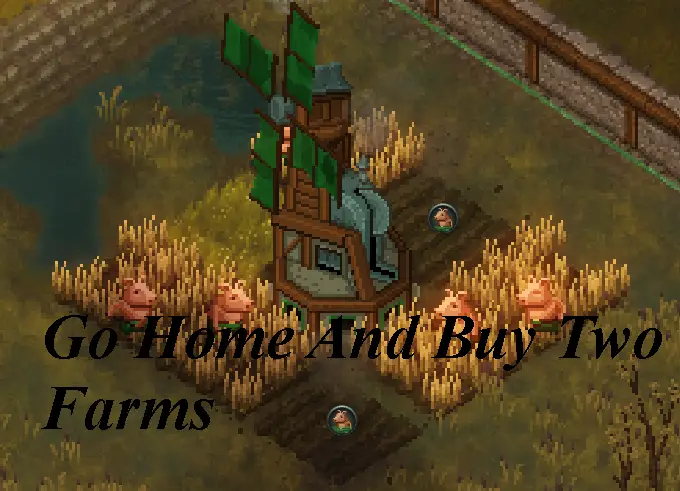
6 farm rushes are the next variant and my personal favorite. You complete the usual scouting cycle and burrow home when you have 44 Essen. When you get home you buy a farm but instead of queuing a 7th farm you go back to their base immediately. If the opponent has placed their farms poorly and 2 are next to each other, and are outside of pig fire range, plop your warren right next to both and them and chuckle to yourself as they are forced to sell. Whenever you are rushing farms make sure to target the one with higher health first. This is incredible tempo value and will leave you in a good position for early aggression. And the part I like so much about the 6 farm rush is that you are under no obligation to commit. If your opponent has placed their farms correctly and they are not close together then you can simply burrow home and pay for your 7th farm on time. Du hast no risk of losing farm timing and have the opportunity to put on immense pressure.
7 farm rushes are another very good option. They have a much higher likelihood of getting a farm snipe because your opponent will be scouting the rest of the map and also it is likely 2 farms will be adjacent. This rush is very similar to the 6 farm rush and will likely be executed similarly. Just try to see if your opponent has, or will be forced to place, their 7th and 8th farm next to one another. The only difference is the opponent will have an extra active pig which may make the rush impossible. The decision is up to personal discretion.
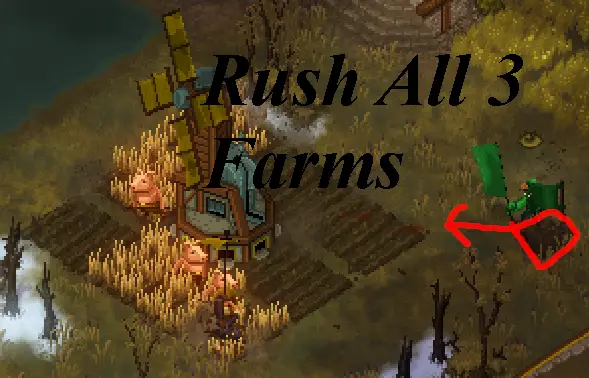
8 Farm rushes do not have the potential to deny 2 Bauernhöfe, unless paired with another earlier mole rush. Daher, this rush is generally referred to as a re-rush. Because an 8 farm rush will never naturally force a double sell you must combine it with the power of an earlier mole rush to get double value! Zum Beispiel, you have delayed a player’s farms with a 6 farm mole rush. You burrow home and buy your own 8 farms and then run back over. They still have a few building farms and you have just enough for another mole. This is when to use a re-rush. You will yet again force the sell of those 2 Bauernhöfe, allowing you an incredible tempo advantage. Never try an 8 farm rush unless you have forced the sell of earlier farms or you have some cheeky high ground you can use to try and destroy a farm.
Just some last minute general tips on identifying when you can or cannot mole rush. When you first find their base do a thorough evaluation of where they queued their 5th farm and where they will be forced to queue their 6th. If they can safely queue 5 but farm 6 Und 7 are next to each other then consider a 6 farm rush, usw. This skill will come with practice especially if others mole rush you a lot. This leads me perfectly into the next section.
The Defense
This is going to be the most lengthy section as defense against the mole rush is incredibly detailed from correct farm placement, to other units that can help defend. The mole rush often comes down to a risky game of chicken with each player desperately trying to get any ounce of value possible. Thus this makes it vital to defend against the rush without delaying your farms as much as possible. If you are nervous and don’t know what to do here is my advice: sell anything at risk. This will put you a little bit behind, however it is much better than losing a farm entirely. With that aside let’s first discuss probably the most effective counter to the mole rush: effective farm placement.
Keep in mind that very few opponents will rush you on 5 farms because there is very little value for them. Just try to keep a count on their food and you shouldn’t have much trouble with this. If you are being threatened by a 5 farm mole rush just sit on top of your building farm, wait until the mole gets very close (not close enough to hit it) and then sell. The minute they sell the mole, instantly re-buy the farm. You will come out on top in 3 Wege. The mole will be shot by pigs and therefore will sell for less. The mole warren will lose a few food worth of value because of decay and you will get your farms up faster anyway. So this makes the 5th farm (the one you queue when you spawn in) sehr wichtig. A good rule of thumb is to break up large groups of squares. If you have a group of 3, put that 5th farm in the middle so the corners come later. This will make it so the rusher will only be able to potentially force a sell on 1 farm at a time later.
Keep terrain in mind, anything that has no room for a mole warren i.e. is too close to alive pigs is safe. Use these spots to put your 6th and 7th farm as they are the most vulnerable.
Always protect your 6th farm because it is likely the one that will be rushed. Separate it as far as possible from your 5th farm. If you do this the opponent will be forced to try a 7 farm rush. In that case your 5th farm is safe and will be up so focus on splitting up the 6th and 7th farm. Sometimes you will get an unlucky spawn and a mole rush will almost certainly come. For example the dreaded FOUR FARM SPAWN. This is when 4 farms in a row spawn which is almost impossible to defend well. If you have this spawn you have a few options. Either accept you will need to sell some farms or, alternativ, consider opening 6 farm single warren. This will make you completely safe from mole rushes, however will put you slightly behind.
What are good units you can bring to help defend rushes? Well the best option is actually mines. If you catch them placing the warren early and believe the warren will not complete for at least 5 seconds place a single mine right next to their warren between the warren and your building pigs. This serves two purposes. It will damage the mole down to 2 health making it virtually useless for sniping pigs. It will also do some splash damage to the mole warren which will actually give the mine user value if the mole rusher decides to detonate the mine. They will usually just sell and go home.
Another option is if you see your opponent standing still about to place their warren then place a mole of your own. This will only work if you place it at the exact same moment as them. If you do this there are 2 important things to do. The minute your mole pops out, rally it onto the opponents mole warren. Do not focus the actual mole! Zweite, go to your own farm and sell it before they can hit it. Then focus back on your own mole and try to get a swing or two in on the opponents warren. When they sell it it will sell for much less value. Afterwards sell your mole and re-buy all your farms.
All Mole Rush Configurations
Authors note: All of the best offense instructions rely on the fact your opponent does the best possible defense. If they do something else and you don’t scout it in time then these wont work. Make sure to practice good scouting and deviate from these instructions if your opponent does as well. If your opponent has deviated from these instructions they have made a mistake and it is up to you to punish it. Keep your eyes open.
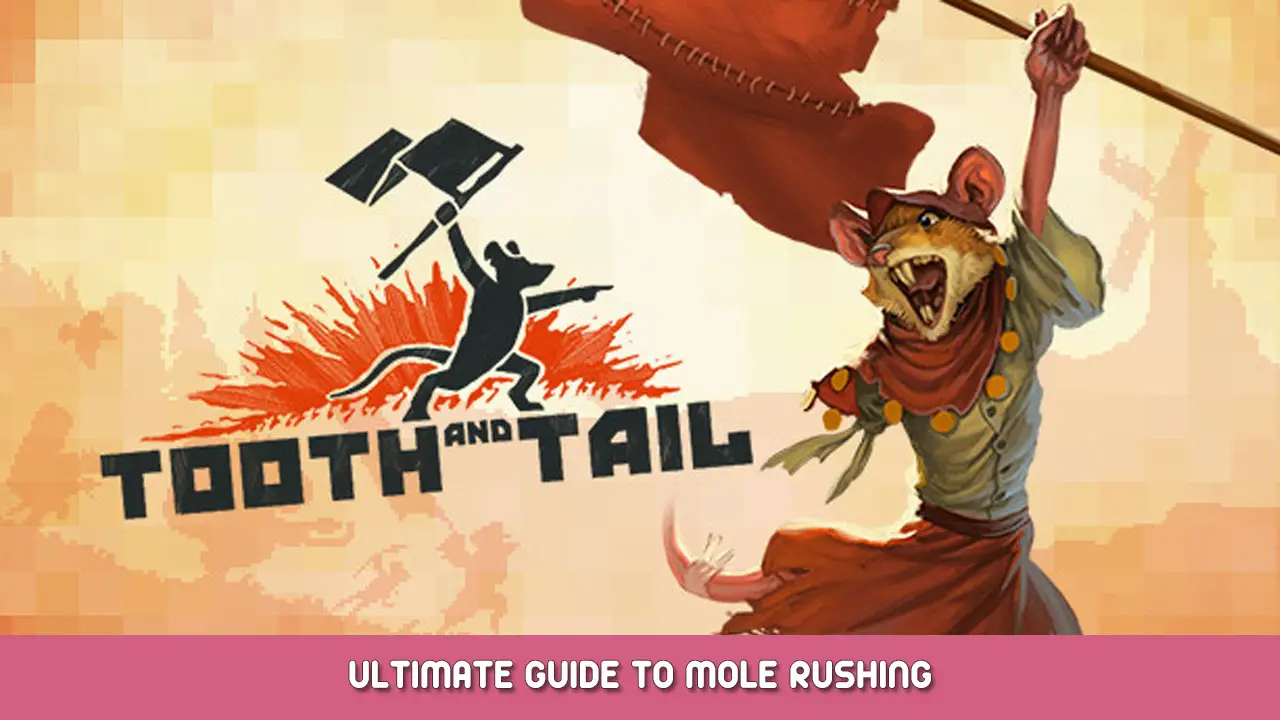
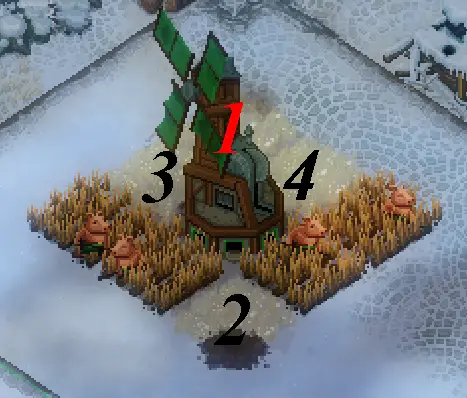
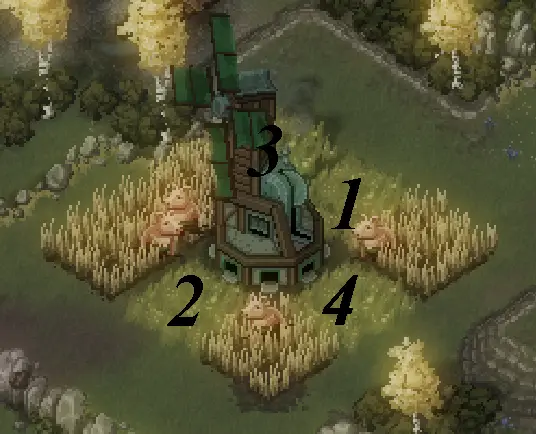
Legende: When I refer to a farm space throughout the duration of the guide I am referring to empty pig slots. The ones that already spawn with pigs are unimportant, only focus on the empty ones.
All red dots on pictures are possible locations for your mole warren to indicate which spot to rush from.
The numbers on the pictures indicate the order in which to queue your farms. If I refer to your 5th farm that would be number 1 on the picture as it is the first farm you queue. The same is true for 6-8 being labelled as 2-4.
Some of the numbers are red, this is not to suggest anything other than making them visually stand out. The black color was getting hidden behind the mill texture.
4 Farms Open
Beste Verteidigung: place 5th on corner, so as to split it 2 Und 1. 6th goes on the farm furthest away from this one. This one sucks because if someone wants to rush you they can always force a double sell. The huge advantage this method has over other methods is it stops a rush that isn’t a 5 farm one. 6 7 Und 8 farm rushes wont work.
Best Offense: do a 5 farm rush. No matter where they put the first 2 farms you can force a double sell. Make sure to start by going for the 5th farm and after the sell start going for the 6th.
3 Und 1 Configuration
Beste Verteidigung: put 5th farm in the middle of the 3 offen. 6th goes on the one by itself. 7th and 8 go on each side of the 5th farm. This will make it so no 2 farms are directly adjacent available to be rushed at any time.
Best Offense: This one is a little complex. Do a 5 farm rush on the first farm your opponent queues. This will force only a single farm sell and will not deny the 6th farm. Once they sell the 5th farm sell your mole and burrow home. Buy your 6th and 7th farm but do not queue an 8th. Then go back to your opponent’s base and re-rush them. You will be able to force a triple sell in the same place as earlier. I will go into this further in a later section.
2 Und 2 Configuration
Beste Verteidigung: Put your 5th farm on the middle farm of one of the 2 Abschnitte. 6th goes on the middle farm of the other set of 2. 7th goes next to the 5th. 8th goes next to the 6th farm.

Best Offense: You’re going to have to do a 5 oder 6 farm rush into a re-rush for this one, exactly the same as the 3 Und 1 configuration. I will go into how to do this further in another section. The picture displays the correct way to 5 oder 6 farm rush using this method, however if you are not comfortable with this advanced method do not rush. You will never get an organic double sell so do not expect to get one.
2 1 Und 1 Configuration
2, 1, Und 1
Beste Verteidigung: 5th farm goes on the middle farm of the 2 empty ones. 6th goes in the furthest away empty space. 7th goes next to your 5th farm. 8th goes in the last empty space that originally spawned alone.
Best Offense: Gleich wie das 3 Und 1 configuration you will need to do a 5 farm rush into a later re-rush. There is more detail on this in a later section. If you are not yet comfortable with this advanced tactic, do not rush this configuration. You will not get an organic double sell.
4 Apart Configuration
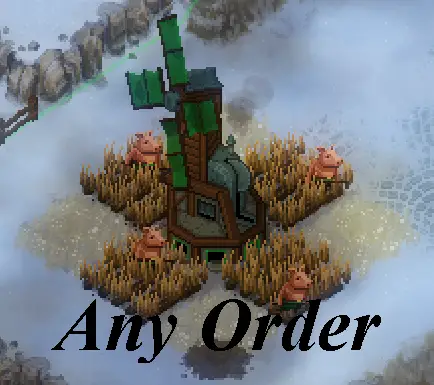
Beste Verteidigung: Any order is fine
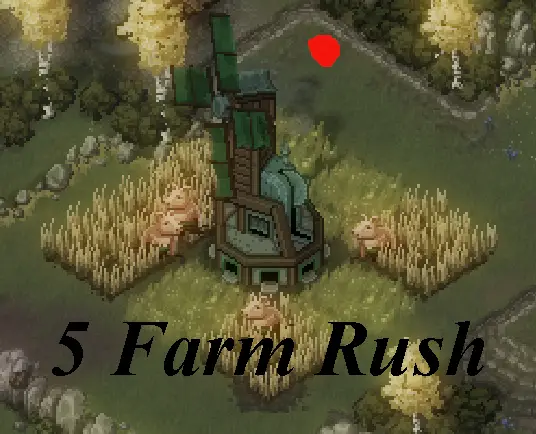
Best Offense: DO NOT RUSH. You will never get value on this configuration. The only exception is if the 4 apart are all on corners and 1 is next to high ground. You are always free to try and rush a farm from high ground because it is possible they don’t notice and you get a free snipe.

Advanced Rushing
This part will cover a new strategy that I like to call the artificial double. It relies on re-rushing farms to get value over and over again. If you do this correctly you will be able to delay your opponents farms indefinitely until they eventually give up and are forced to place a warren.
The artificial double is a rush that will work against the 4 open configuration, Die 3 Und 1 configuration, Die 2 Und 2, und die 2 1 Und 1 configurations. Grundsätzlich, all you need is the opponent to spawn in with 2 empty farms next to each other. Your opponent will know that 2 open spots means mole rush so they will not put 2 farms next to each other without you helping them a little bit. You will perform a (normalerweise) 5 farm rush in order to cancel a single building farm. The opponent will sell it and you will sell as well and go home. You will buy 2 farms and immediately run back over to your opponent. Depending on their farm configuration they will be forced to place their farms in a certain way. Because you allowed their 6th farm to be built, that empty safe space will be filled. They will only have a few spots still open and you are going to rush the exact same 2 farms as before. This will force a sell on 2 farms and delay them yet again. This is the basic premise of the artificial double. Until your opponent places a warren to stop you from mole rushing you could, in der Theorie, rush these same 2 farms forever and macro behind it.
The best possible configurations for this are 4 offen, Und 3 Und 1. In 4 open you will do a 5 farm rush, forcing them to sell back down to 4 Bauernhöfe. If they do not put down a 4 farm safety you can simply rush them again, und wieder.
3 Und 1 is a configuration where your opponent will often feel safe. You cannot rush a 3 Und 1 unless it’s a 5 farm rush which makes the artificial double perfect. Your opponent will place their 5th farm in the middle of the 3 open slots and their 6th in the 1 leer.

Initial Rush
Du wirst 5 farm rush their initial farm and force it to be sold.
The Re-Rush
You will burrow home and buy 2 more farms, but not queuing your 8th farm.
They will re-buy 2 more farms and queue a third. All of these 3 new farms will be grouped together.
Re-Rush Pt. 2
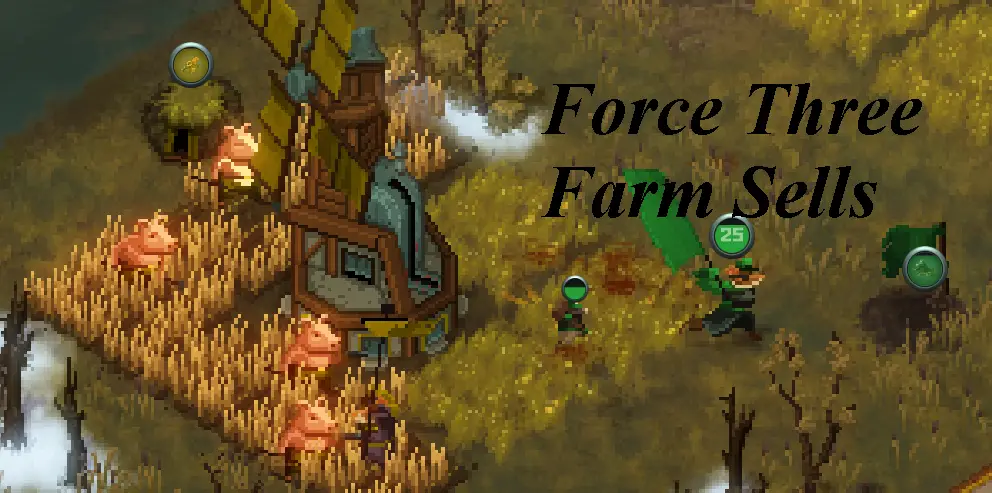
Run back over and when you get 60 food mole rush their 3 building farms.
This will force a triple sell and is probably the best value you can get out of mole rushing.
Re-Rush Pt. 3
Go home, buy your last farm, and buy a tier 1 warren as well so you’re safe from a counter attack.
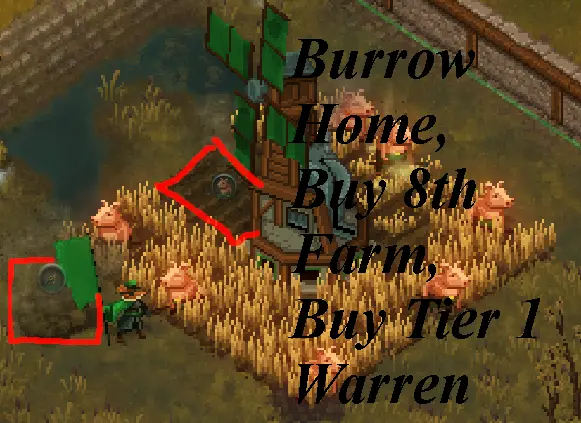
This is a great time to just spam tier 1 and do a push with moles.
This is the demonstration for a 3 Und 1 configuration but it can be done for any 2 farms that spawn empty next to each other. Anytime you see 2 open spots next to each other you can artificially rush it. Just remember to rush the first one they place in that set of 2.
Advanced Counter-Defense
Lassen’s briefly touch on what to do if an opponent is using mines to defend their farms. The opponent will either place the mine next to your mole warren or next to the building farm. If they place it next to your warren you need to make a judgement: will the mole come out before the mine completes? If the mole comes out before the mine, and the mine is on top of the warren, focus on killing the mine. Once your mole kills the mine go for the farm. The timing may be a bit off but your opponent will almost certainly be scared enough to sell the farm anyway. This is huge value because you got 20 food from the mine and forced a sell as well. If the mine is going to complete before your mole comes out and can kill it, the best choice is to simply sell the mole warren, burrow home, and buy all your farms. There is nothing you can do against this mine defense if it is on time and you will almost always lose value.
What if the mine is placed next to the building farm? You have a few more options here and it will often come down to decision making. You need to consider if your mole can run around the mine and still force a sell. Keep in mind mines don’t need to be directly stepped on to detonate, and if that mine goes off on the mole the rush has failed. You can certainly try to walk around the mine but be prepared to sell the warren quickly if it doesn’t work out.
Which configuration of mines would I recommend as the defender? If you catch the rush very early I recommend placing the mine right next to the mole warren, between the warren and your farms. If you catch the rush a little bit late but think you still have time to build a mine, place it next to the farm being rushed. Wenn Sie es nicht tun’Ich habe es nicht 5 seconds don’t place a mine because you will just be throwing food away to the attacker.
Lassen’s talk about counter-moles. Sometimes the defender will see you standing around, ready to place a mole. They will expect the rush and will place a mole warren of their own as soon as you do. At this moment you have 2 options as the attacker. You can either focus the mole on the warren, or focus the building farm first. My recommendation is to first force the sell on the farm and then to sell your mole warren. The defender is going to be trying to focus your mole warren with their own mole and if you can sell this warren before they can hit it you will get a lot of value. If your opponent is alternatively trying to focus your mole with their mole, you have the option to try and attack their mole warren after forcing the sell on the farm. In most cases I would recommend playing it safe and just selling the mole if you are scared of losing too much value.
The proper strategy as a defender when using a counter-mole is to rally your mole onto the enemy’s mole warren and then to go sell your farm. This is assuming the enemy tries to go for your farm instead of going for your mole warren. If your enemy instead decides to ignore your farm and go for only the mole warren, do not sell the farm and only focus fire on the mole warren. The farm is going to be completed very soon, meaning the new pig will shoot the mole warren. Just focus on damaging the mole warren but keep an eye open in case they decide to attack your building farm.
Abschluss
When mole rushing, just be vigilant. Everything can change at the drop of a hat, and you always need to be able to adapt. Wenn Sie es nicht tun’t know exactly what to do, Das’Ist okay! You will learn with practice and eventually become the most annoying mole rusher out there! This cheese strategy will probably draw some salt but don’t be afraid, salt is what mole rushers live off of. So get out there, mole rush every single game that you can, and try to end the game within 45 Sekunden!
Das ist alles, was wir heute dafür teilen Tooth and Tail Führung. Dieser Leitfaden wurde ursprünglich erstellt und geschrieben von UrbaneOlive5. Für den Fall, dass wir diesen Leitfaden nicht aktualisieren können, Sie können das neueste Update finden, indem Sie diesem folgen Verknüpfung.