- Titel: Substance 3D Designer 2022
- Veröffentlichungsdatum:
- Entwickler:
- Herausgeber:
Information about Substance 3D Designer 2022 ist noch unvollständig. Bitte helfen Sie uns dabei, die Details des Spiels auszufüllen Kontaktformular.
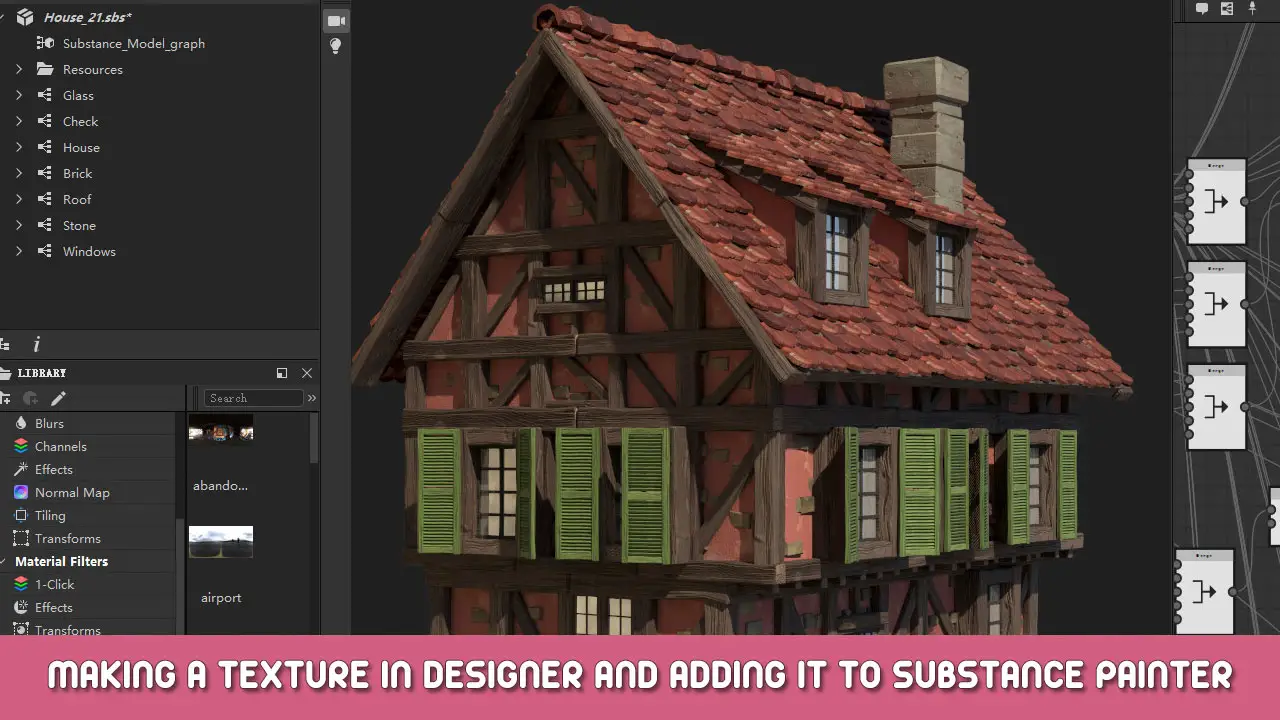
Because the Steam versions of Adobe’s Substance products don’t use the Adobe cloud it can be a little trickier to add the results of your Designer projects into your Painter environment. So I figured… let’s dive into this together!
Editorial
Hi gang!
At the time of writing it’s been 3 days ago since I discovered that Adobe were selling their Substance products on the Steam platform out of all places (!!) and it’s been 2 days ago since I grabbed myself both a Substance Painter and Designer license. In meinem (biased) opinion this can easily become a creative power combo für beliebig 3D artist and/or hobbyist out there.
I’ve only been working with this for several hours and it has already drastically enhanced the way in which I’m working with my 3D environment. Und ja, I am well aware how awfully cheesy this sounds.
Über mich (for a bit of context)I’m a hobbyist 3D designer who got lucky enough to gain access to some professional 3D software environments, this includes the Substance software mentioned above, and I’ve been working with 3D for around 6 years now though only as one of my more serious hobbies.
My tools of trade:
- Daz Studio 4.20: I use D.S. to set up 3D sceneries by placing 3D figures and models and then generating a render from it, either through the 3Delight engine, Filiament engine or Iray. D.S. basically forms the center of my virtual home studio.
- Bryce 7: Bryce is best described as a 3D environment fractal generator. Although dated as heck it’s something I still regulary use to generate clouds, terrains and backdrops.
- ZBrush 2022: ZBrush is a „3D editor“; it allows me to create or modify 3D meshes either by hard surface modelling or through sculpting. This is my big #2 because of „GoZ“; this allows me to easily transfer meshes from Daz Studio into ZBrush and vice versa.
- Photoshop & Premiere Elements 2022: I use P.E. to either fix or further enhance a render as soon as its done. Adobe’s organizer helps me to keep track of all my media files.
- Aurora HDR: Ever since Iray and photorealism became a thing HDRI („High Dynamic Range Images“) has become a standard to more dynamically enhance 3D renders; they can be extremely useful as backdrops. Aurora helps me to apply HDR technology and to enhance my renders. One of its key features is that it can be used as an insert filter within Photoshop Elements which makes it extremely easy to use.
- IrfanView: The swiss army knife for image processing. Need to rescale an image? Need to blurr something out or make it fully unavailable to read? Need to highlight something? This is all you need. Lustige Tatsache: all screenshots in this guide have been processed and/or enhanced by IrfanView. Available free of charge for non-commercial use… so why not use it? 😉
Und natürlich, since this week (time of writing) I’m now also using Substance 3D Painter & Substance 3D Designer to further enhance my workflow. Because I am still very excited about the whole thing I wanted to do something in return for the community, and thus we now have this guide.
About this guideI’m going to be fully honest with you: at the time of writing I still have plenty to learn about Substance Designer, which is why this guide won’t be going too in-depth. Jedoch, as I always try to do with my guides I am going to cover as much as I can in hopes that this can become useful for both fellow newbies as well as veterans alike.
The idea is to provide you with several steps and examples so that you can follow along and see things unfold for yourself. And hopefully learn something in the process as well 😉
Lets get started with Substance Designer!
Substance Designer is a program which we can use to generate both textures and material presets. We do this by combining functional „Blöcke“ which we’ll refer to as Knoten. These nodes provide a wide variety of functions; there are so called generator nodes which can generate shapes, patterns or noise, wir haben atomic nodes which can be used to process or change generated data, function nodes can perform… Also, specific functions and so on…
By adding and connecting these nodes we slowly, but steadily, build up something bigger. Because this is done by taking one small step at a time you’ll always be in full control over your project and thus will be able to customize every single detail as you see fit.
My goal here is to create a circle based grate pattern which we’re going to be using as a texture map within Substance Painter.
So fire up Substance Designer and then create a new Substance Graph by either pressing Control-N, or using the „File => New => Substance graph…“ menu option. Be sure to use the empty template and leave all the options as default. Don’t bother yourself with graphics sizes and all that.
You should now see something like this:
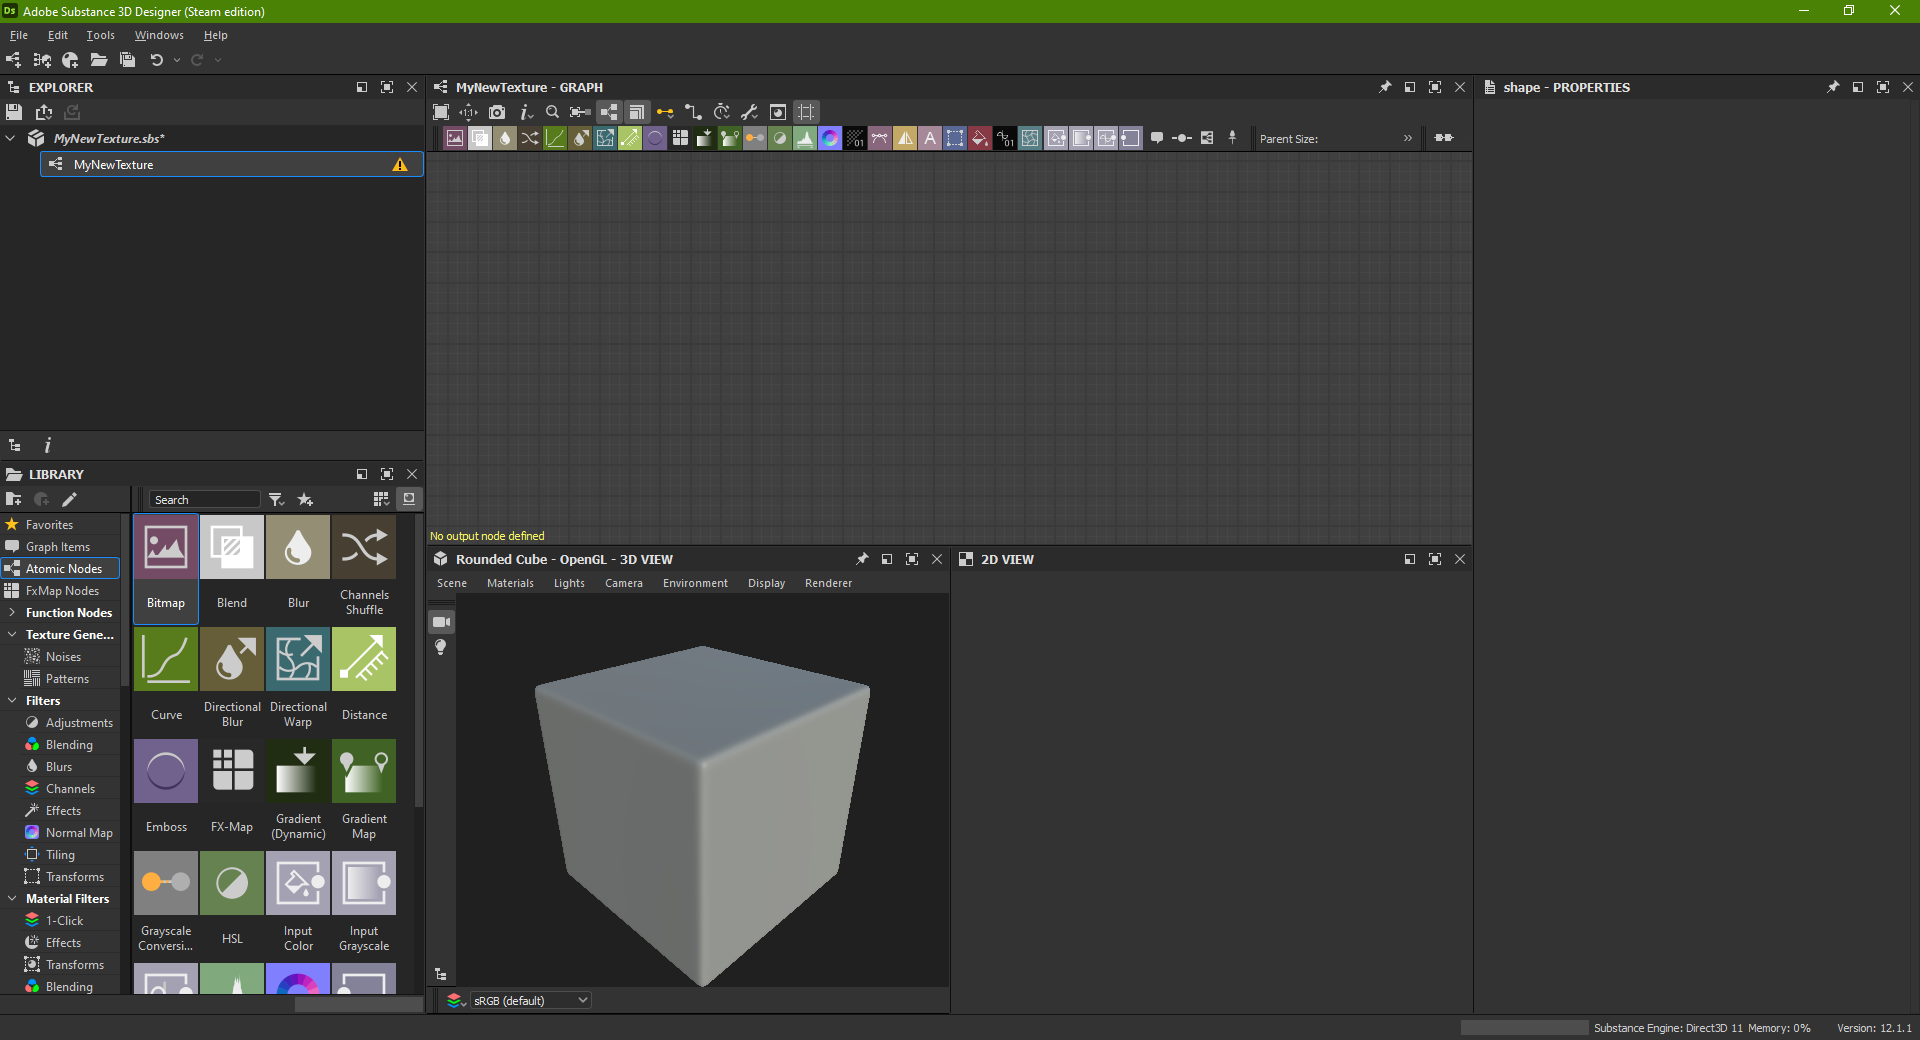
Also, what are we looking at here?
- In the upper left corner we can see the Explorer window; this lists our project, its packages and the graphics that are part of it. You can see a small warning sign here, just ignore that for now.
- Below the Explorer we can find the Library; this is where we can find the nodes which we’ll need to build up our project.
- In the middle of the screen at the top we have the Graph window; this is where we’ll be doing the most of our work. Here we can add, select and connect all the different nodes.
- The bottom half then shows us both a 3D and 2D preview of our project. Because we don’t have anything yet we only see a base mesh without any properties (the white square) and the 2D window is completely empty, Zumindest für den Moment.
- Und zu guter Letzt: the right side of the screen shows us the Properties window. This is where we get to see the node properties as soon as we select one in the Graph window. This will allow us to customize the way the node behaves.
Adding nodesTo get started we’ll need to add some nodes to our project. You can add nodes by either dragging them from the Library and dropping them onto the Graph window, you can also select some of the more commonly used nodes in the tool bar above the Graph window (those colored square icons?) and best of all: if you press the spacebar while having the Graph window selected you’ll get a search box which gives you quick access to all the nodes, just type part of the name and it’ll apply a filter for you.
Let’s start by adding a shape node:

The shape node can be found in the Patterns section under the main Texture Generators category (I marked both above). So either drag and drop it in, or use the search box which I also showcased above.
Once you added the node make sure to click it once to select it, then check the Properties window on the right side of the screen. In specific you should take a closer look at the „Instance Parameters“ Abschnitt: change the pattern to a Disc and turn down the scale to approximately 0,50. You may need to scroll down a bit to find it. I would recommend to collapse the „Attribute“ section for now since we won’t be really using it; this can save up some space.
You should now see a white disc in the 2D preview box.
Jedoch, a solid disc isn’t exactly very useful for a pattern design. Instead I want to create a (hollow) circle and use parts of that for the texture. So we’re going to have to create one ourselves.
Start by duplicating the shape node. While having it selected you can press Control-D, or you can also right click on the node and click the menu option there. You will now end up with an exact copy of the shape node. Place it below the node we already had, then check its Properties and lower the scale by approximately 0,1 (geben oder nehmen).
So now we have 2 white discs: one slightly larger then the other. Let’s do some „Magie“: Add a so called blend node and place it behind the two other nodes. You will find the blend node in the „Atomic node“ category within the Library but it’s also listed in the toolbar of the Graph window: it’s a light gray icon and the second icon from the left on the toolbar. If you hover your mouse over it it should mention „Mischung“.
Once you added the node hover your mouse over it to show its three input connectors: Foreground, Hintergrund Und Opacity. Jetzt… connect the output of our first shape node to the
Hintergrund input of the blend node. You do this by hovering your mouse over the output connector, press the left mouse button and then drag the cable which will appear to the input connector of the blend node after which you release the mouse button. So you basically drag & drop a virtual ‚cable‘ to connect the two nodes.Then do the same thing for our second shape node, this time you’re going to connect it to the Foreground input connector.
Endlich… double click the blend node to select & „aktivieren“ Es, check the properties window and make sure to change the Blending mode to
Subtract. This will make sure that the shape of our smaller disc gets removed from the shape of our original disk, resulting in a circle: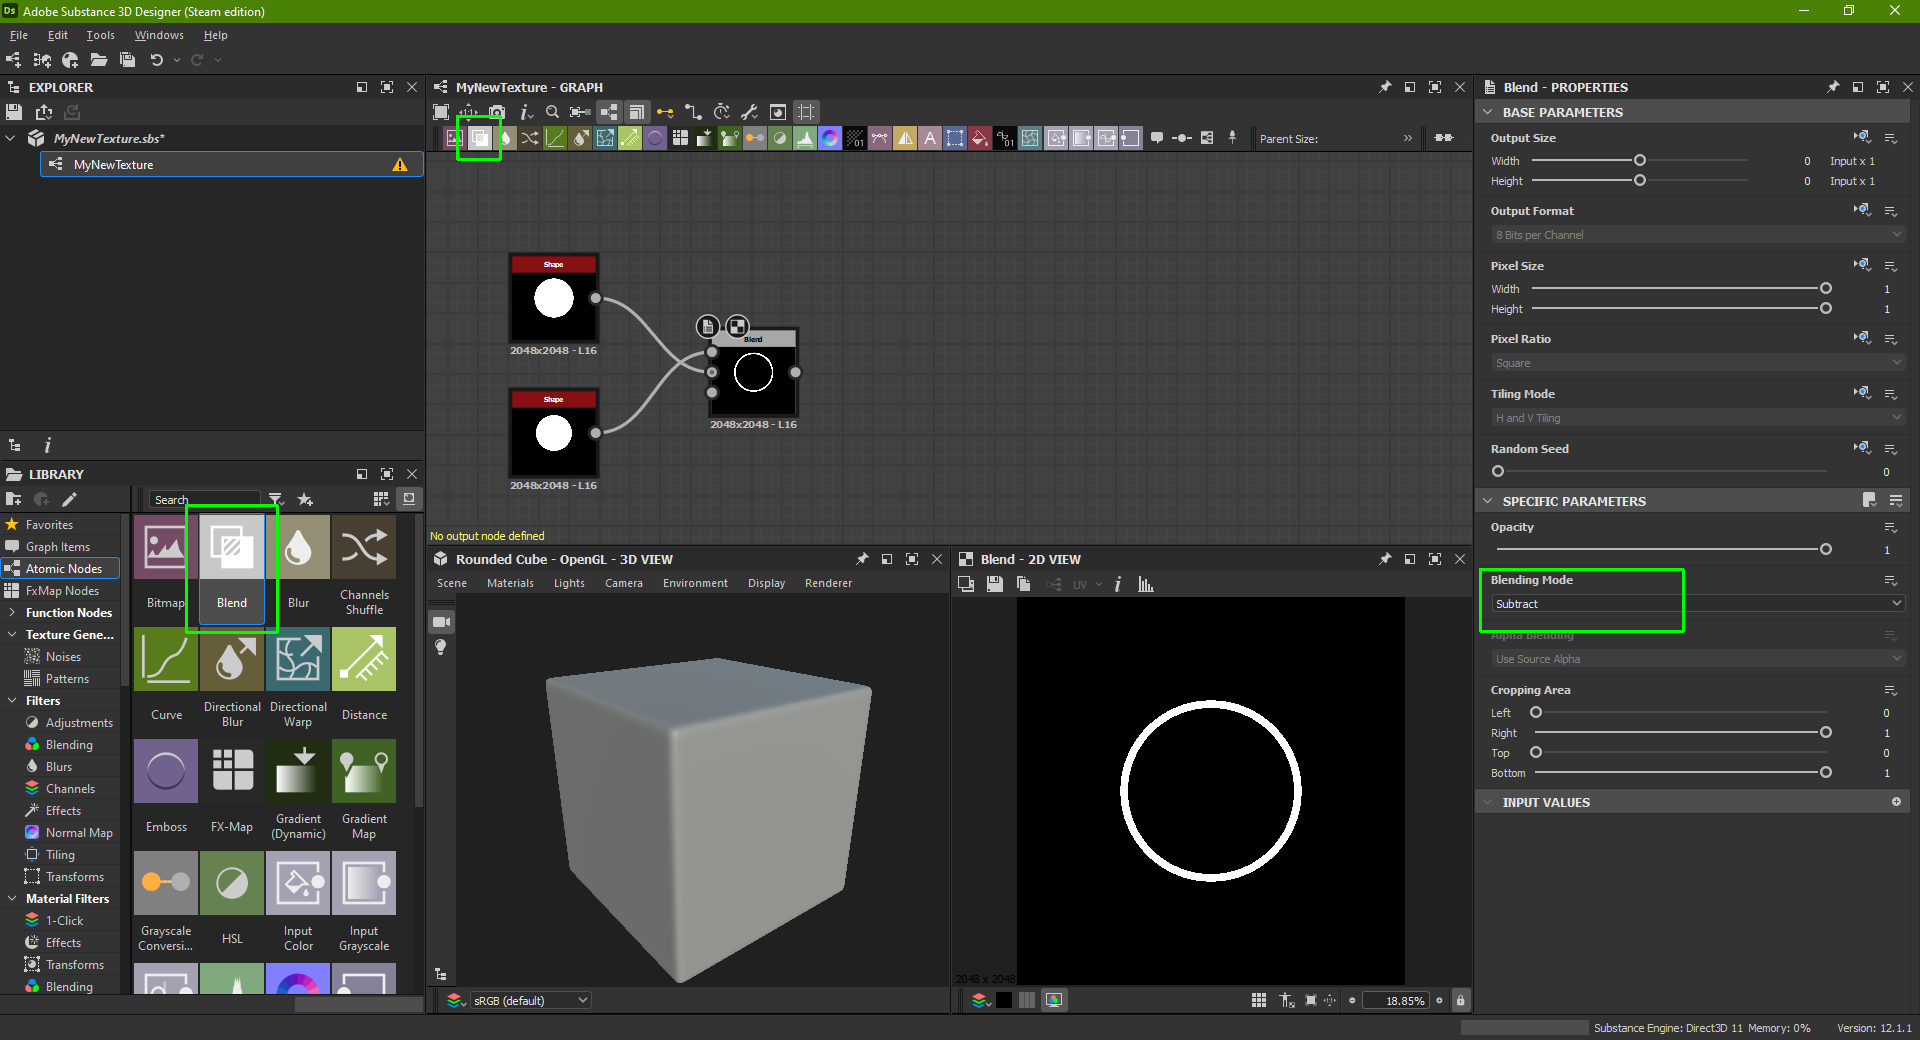
Connecting both shape nodes to the blend node; also check the highlights…If things don’t look good enough for you then don’t worry: select the 2nd (unten) shape node by clicking on it einmal, change its scale and then check to see if this improves the circle. Tatsächlich, I suggest you try out this step anyway even if you are happy with the results so far just to see how easy it actually is to make dynamic adjustments to your project.
Jetzt, I’m pretty sure that some of you may consider this a lot of hassle. Ich meine: why didn’t Adobe just provide us with a circle generator node? Wouldn’t that be a lot easier for us? Also, yah, but the problem with „Einfacher“ is that it usually also implies „less creative“. Not to mention that if we wanted to we could easily add our current project as a „circle generator“ ourselves, aber das würde den Rahmen dieses Leitfadens sprengen.
My point being… If you know that you’ll be using circle shapes more often then all it takes is setting up 3 Knoten, save that project and you can then re-use it any time you need.
Schrägstrich & dash the circle
So now that we have a circle we’re going to grab both halves, and place them with their backs facing each other, so somewhat turning the circle „inside out“.
Start by adding 2 new blend nodes and connect the output of our previous blend node to the Foreground input of both new blend nodes. In the new blend node scroll down the properties until you find the Cropping Area: Stellen Sie die ein Links slider to 0,5 for the first blend node, then change the Rechts slider to 0,5 for the second blend node. You can leave the Blending Mode to the default of „Kopie“.
Now you should have 2 halves of the circle: one in each blend node.
Houston, we now have a problem… eventually we want to bring these two halves together again, but if we add another blend node right now then all we’re going to achieve is getting our original circle back. But that wasn’t the idea… so we’re going to have to move both halves so that they’ll end up in the right place.
Add a Transformation 2D node and place it behind one of the shape nodes. You’ll find it in the Atomic Node category in the Library section, but it’s also available on the Graph toolbar: a blue icon with a square shape that has dotted sides while the corners are shown as solid squares.
Then connect the shape node with the new Transformation node. Select the Transformation node and then change the X Offset so that the open ends of the circle half are moved towards the edge of the preview. You’ll want to set the X Offset to either 0,25 oder -0,25 depending on which half you’re working on.
Now repeat this process for the other half:
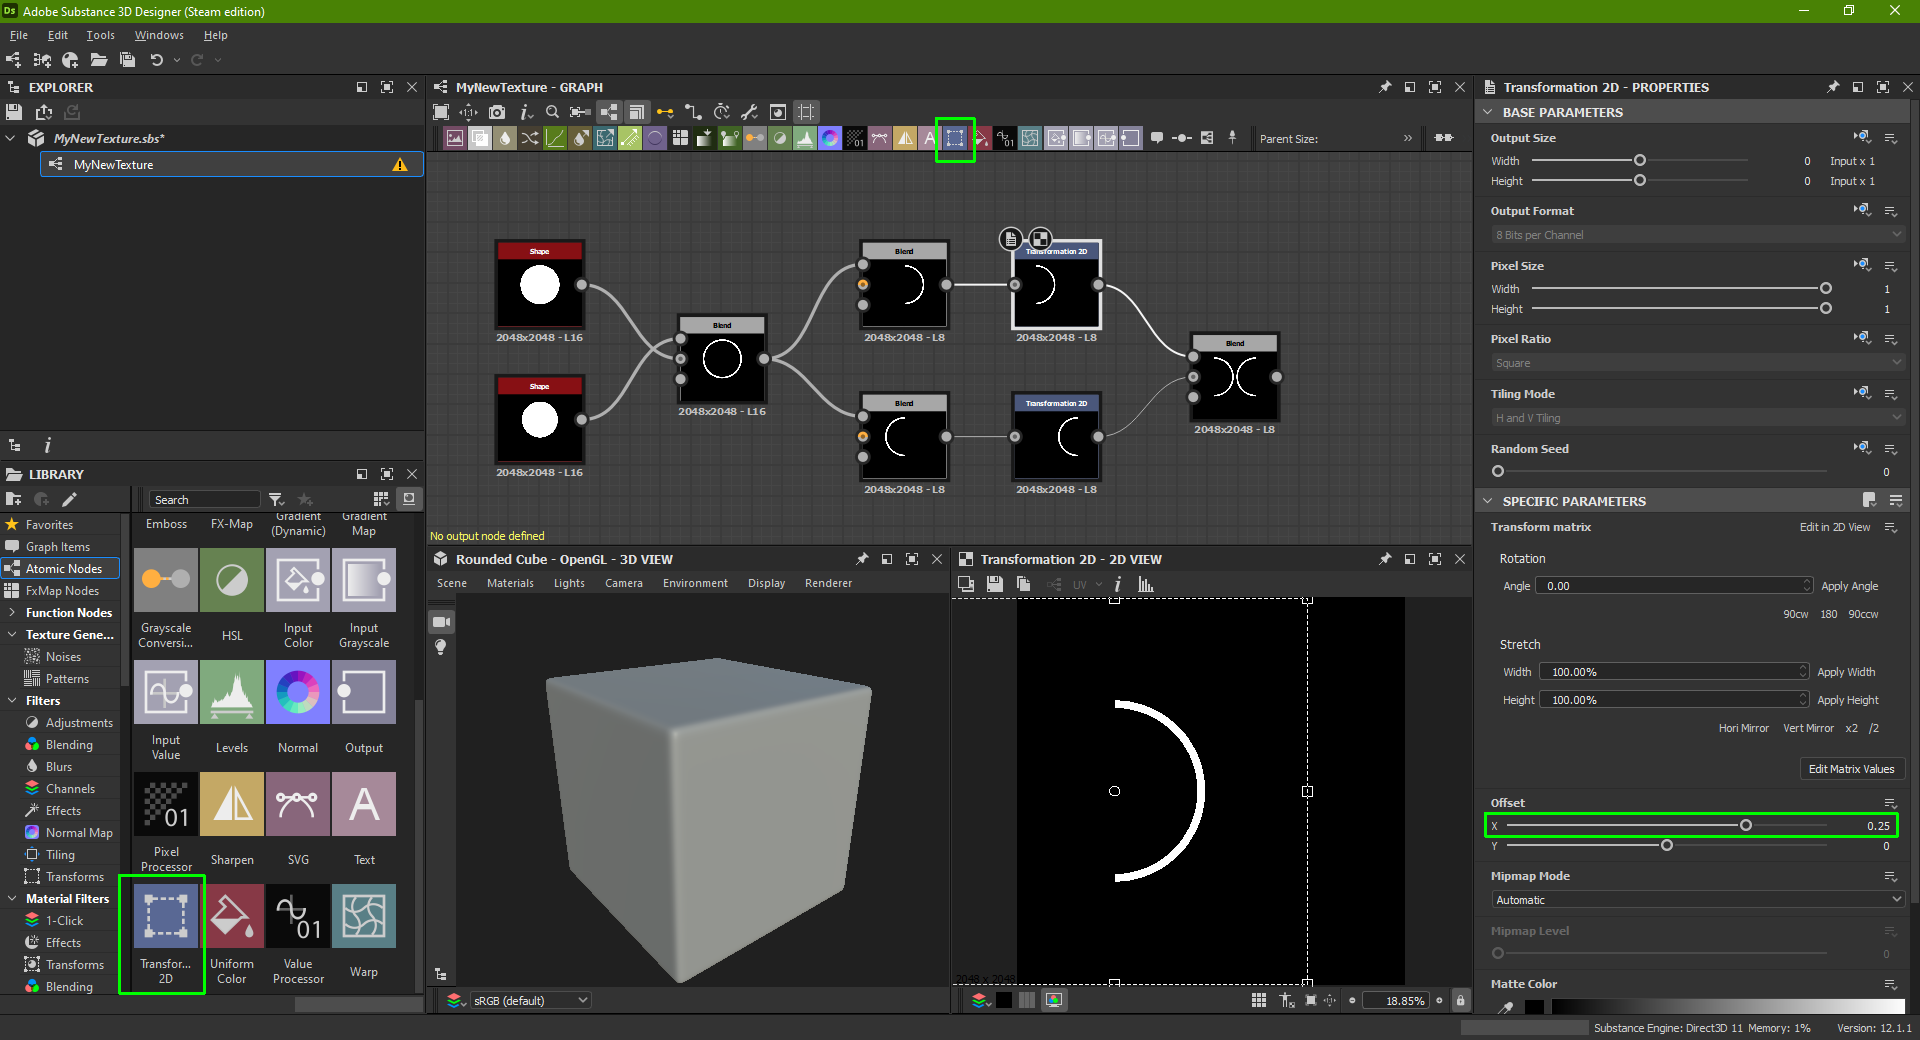
And finally you’ll need to add yet another blend node, change its mode to „Hinzufügen (Linear Dodge)“ and then connect the outputs of both Transformation nodes. You can see my example above. So we now end up with both halves of the circle while their backs face each other thus forming a crude and roundish X shape.
So this is an interesting shape to be used in a texture I think. All we have to do now is add this to a grid of some sorts… guess what? Wir können!
Add a Tile generator, you can find this in the Patterns section underneath the Texture Generators category in the Library. Place the node behind our last blend node and connect the output of the blend node to the Pattern Input 1 of the Tile node.
Select the Tile node, check its properties and change the Pattern to „Image Input“.
Jetzt….
- Finden Sie die ‚Skala‘ slider in the Size section, change this to 2 so that all the halves connect.
- Stellen Sie die ein ‚Scale Random‘ slider to 0,18.
- Change the ‚Scale Random Seed‘ to approx. 393.
- In the Pattern section above change the Rotation to 90, und die ‚Rotation Random‘ Zu 0,8.
- Satz ‚Quincunx Flip‘ zu wahr.
- In the Size section below it change Interstice X to 0,07, Random to 0,04, Interstice Y to 0,07 and its Random to 0,22.
- Finally go back down to Rotation section and change the Degrees to approx. 43, turn it until things look nice enough for you.
Once you’re fully satisfied there’s just one more step: add an Output node and connect the output connector of the Tile generator to the input connector of the output node. OK, that was a weird sentence 😉

Don’t worry if your pattern doesn’t look fully the same: that’s because there are random factors in effect here.If you look at the Explorer section (upper left area) you’ll notice that it now lists the output node as well and on top of that the yellow warning we got earlier is now also gone.
So now we’re ready to add our texture pattern to Substance Painter!
Exporting our texture
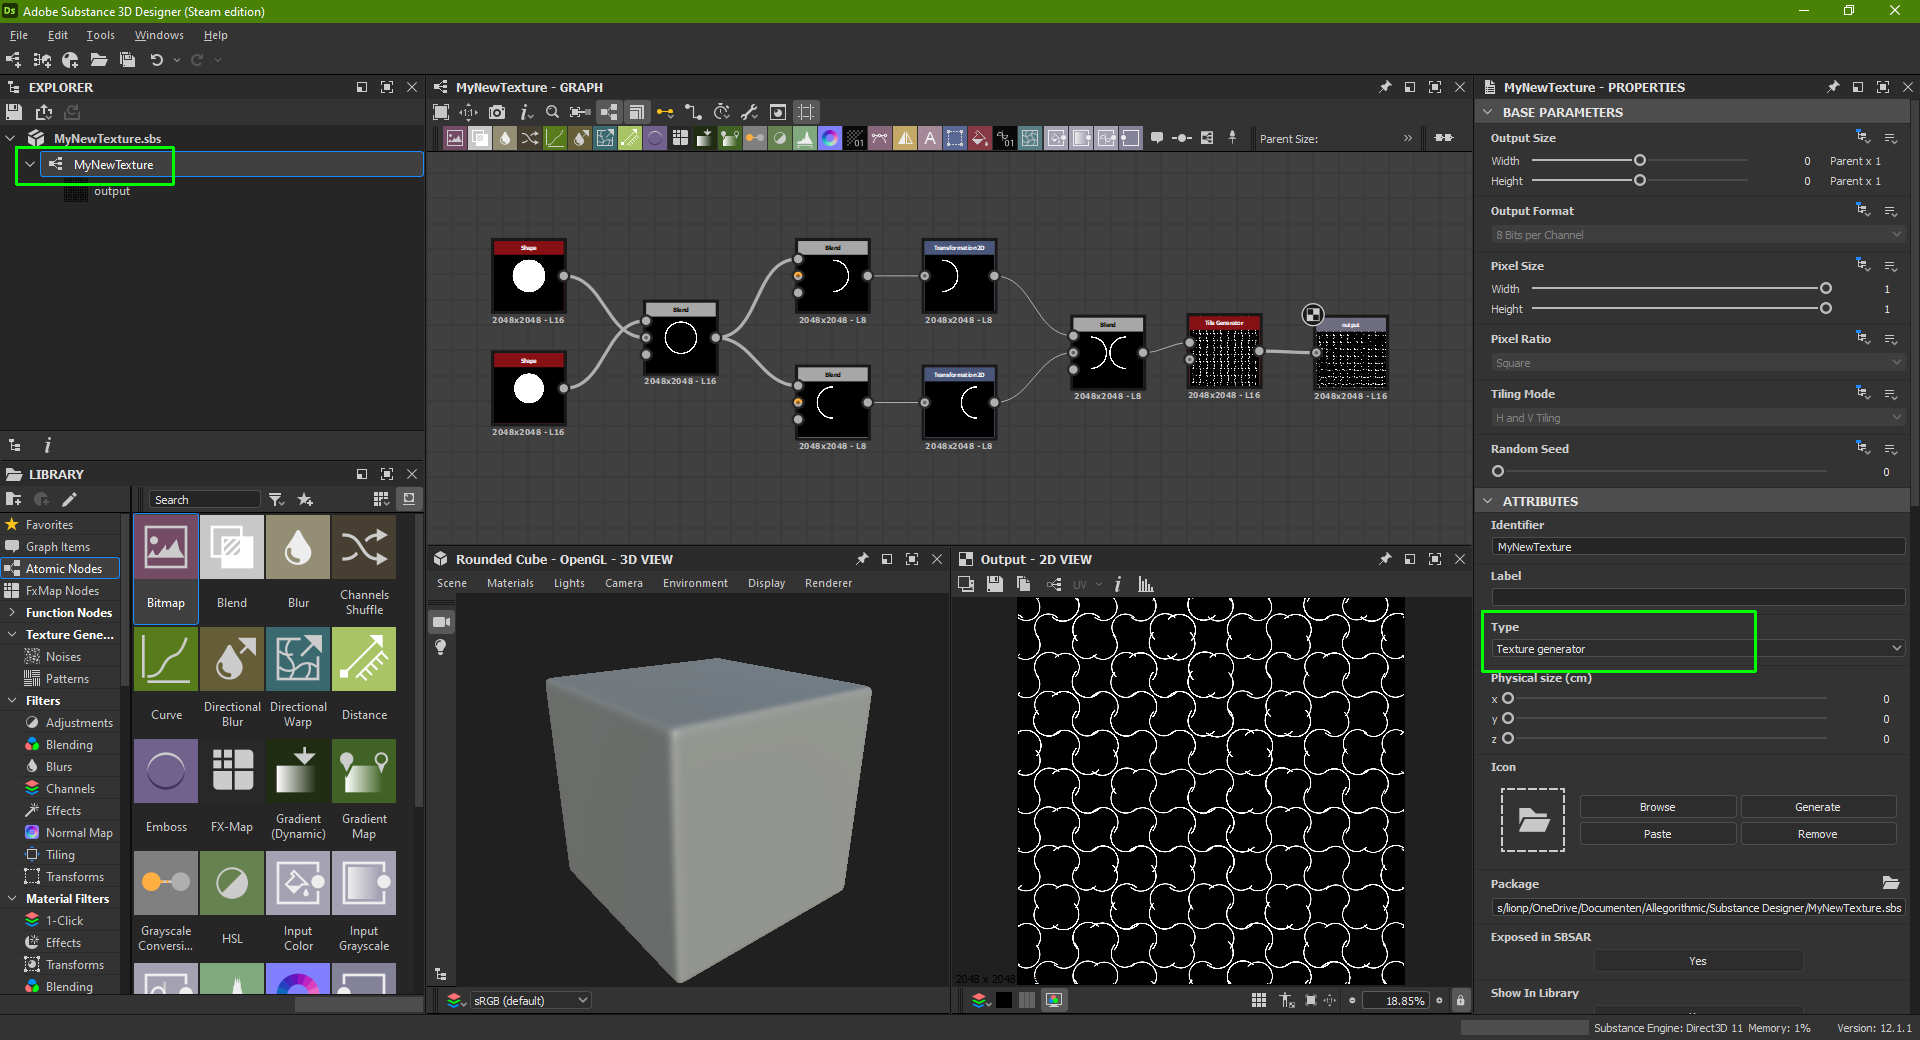
Click on the graph entry in the Explorer section (see my highlight) and then in the Properties window change the Type to
Texture Generator (also highlighted). Dann Rechtsklick on the package entry in the Explorer (it’s the top entry) und klicken Sie dann auf “ Publish .sbsar file….“ wie hier gezeigt: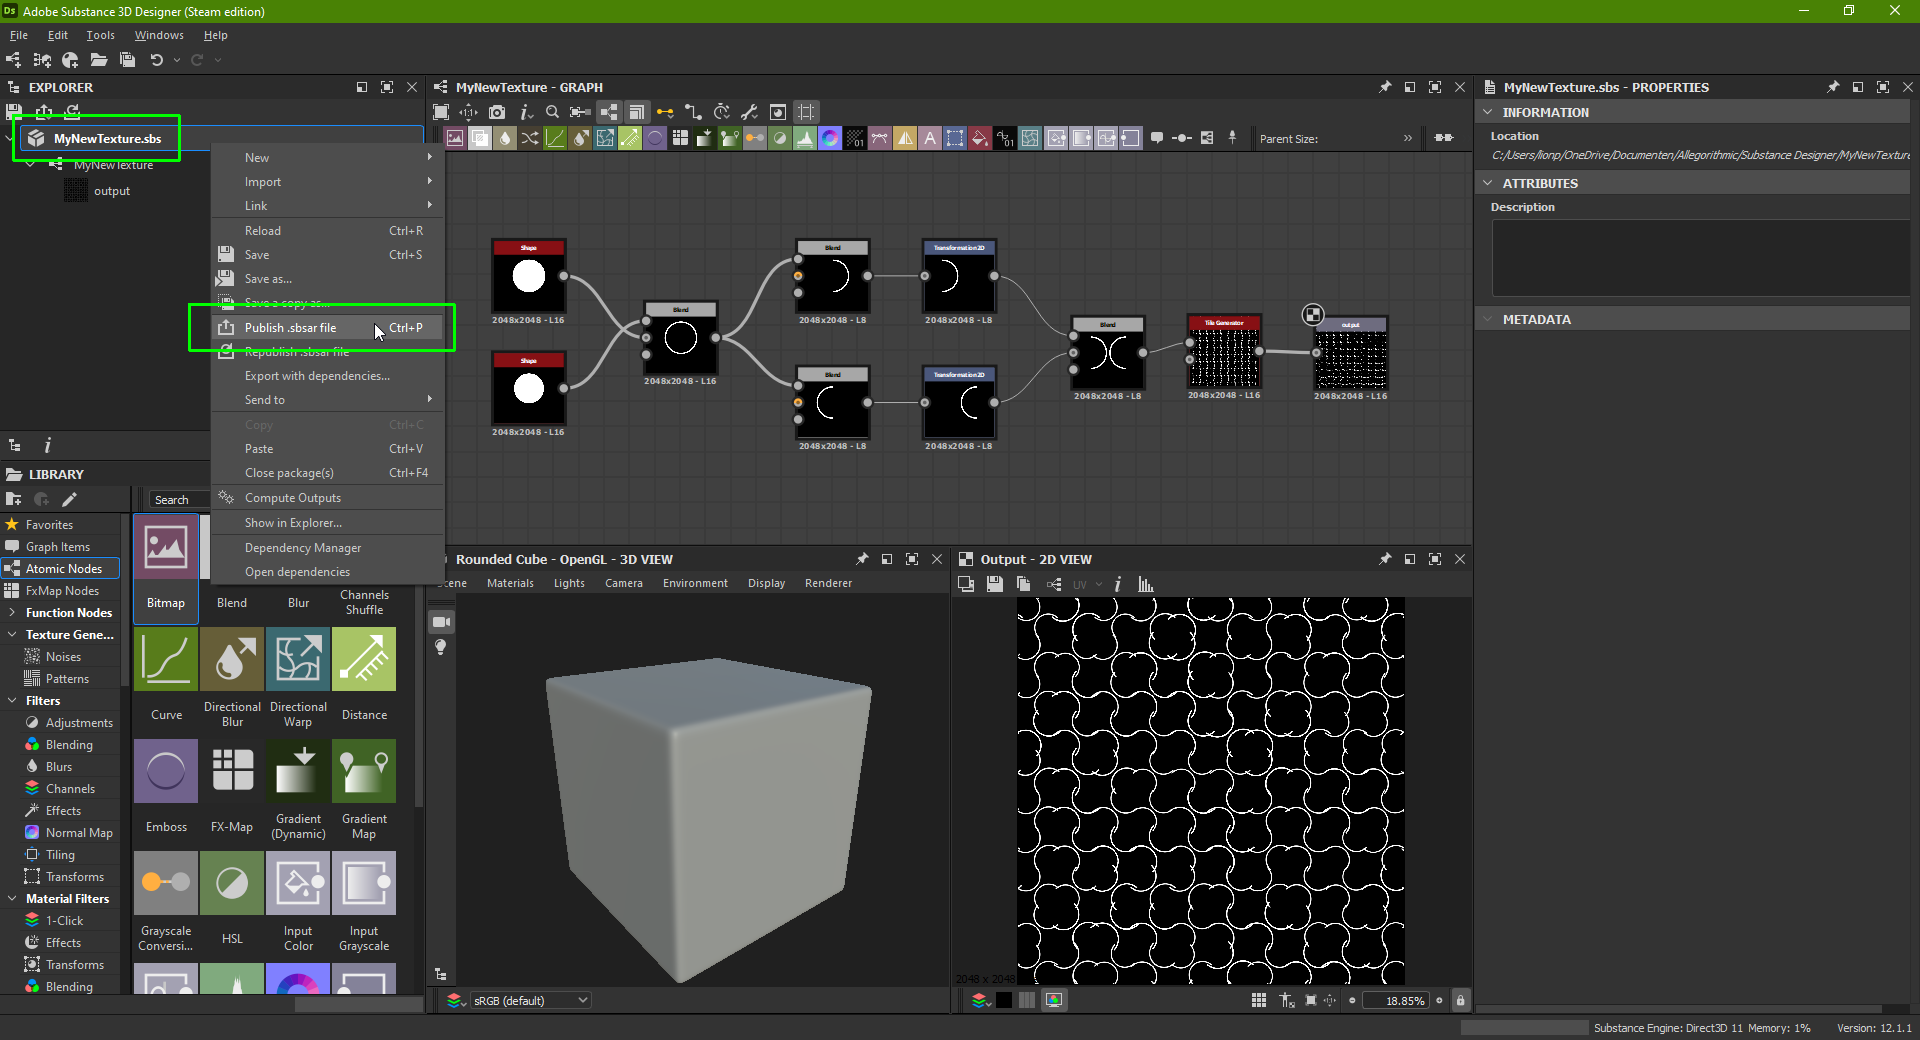
Maybe also fun to know: you can also simply export your texture as an image file so that you can then import the pattern into other programs. Either click the save icon in the 2D preview window, or right click on your graph in the Explorer window and select: „Export outputs as bitmaps…„.
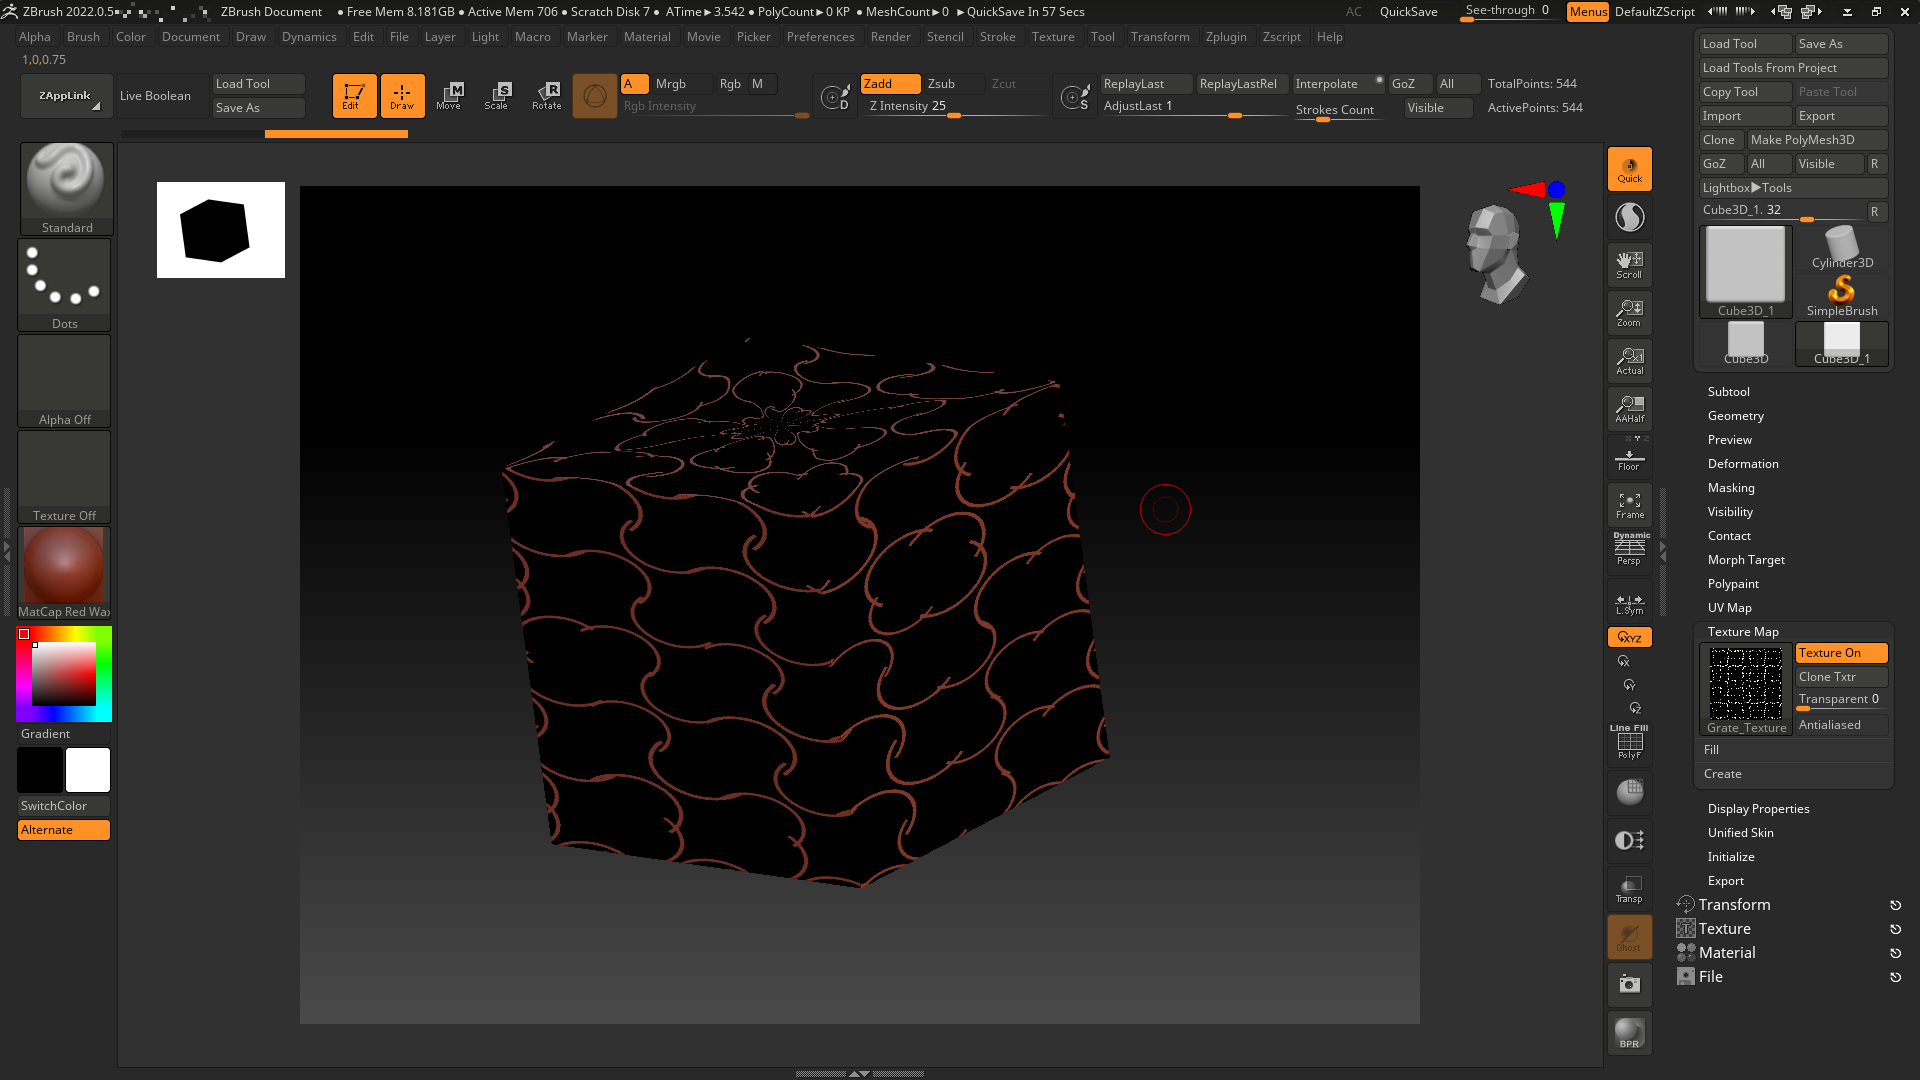
So here I added a 3D cube to ZBrush („3D editor“), then I imported and applied the ‚grate texture‘ which we created earlier. I hope you can agree with me that this definitiv enhances the overall appearance of the cube.
Adding our (exportiert) texture to Substance Painter
And now for the fun part.
The first thing you need to know is where Substance Designer saves its exported data to. You would assume that it uses „My Documents\Adobe“ just like Substance Painter does, but no… The export folder which we’re going to need here is located under: „My Documents\Allegorithmic\Substance Designer“.
Also, fire up Substance Painter and use the „Import Resources“ Option, either from the File menu, or by clicking the small + icon at the bottom of the Assets window:

Benutzen Sie die ‚Add resources‘ option to add the .sbsar file which we just generated. Also make sure to define the location where it should be added to: Die „your_assets“ Bibliothek. When done click on Import.
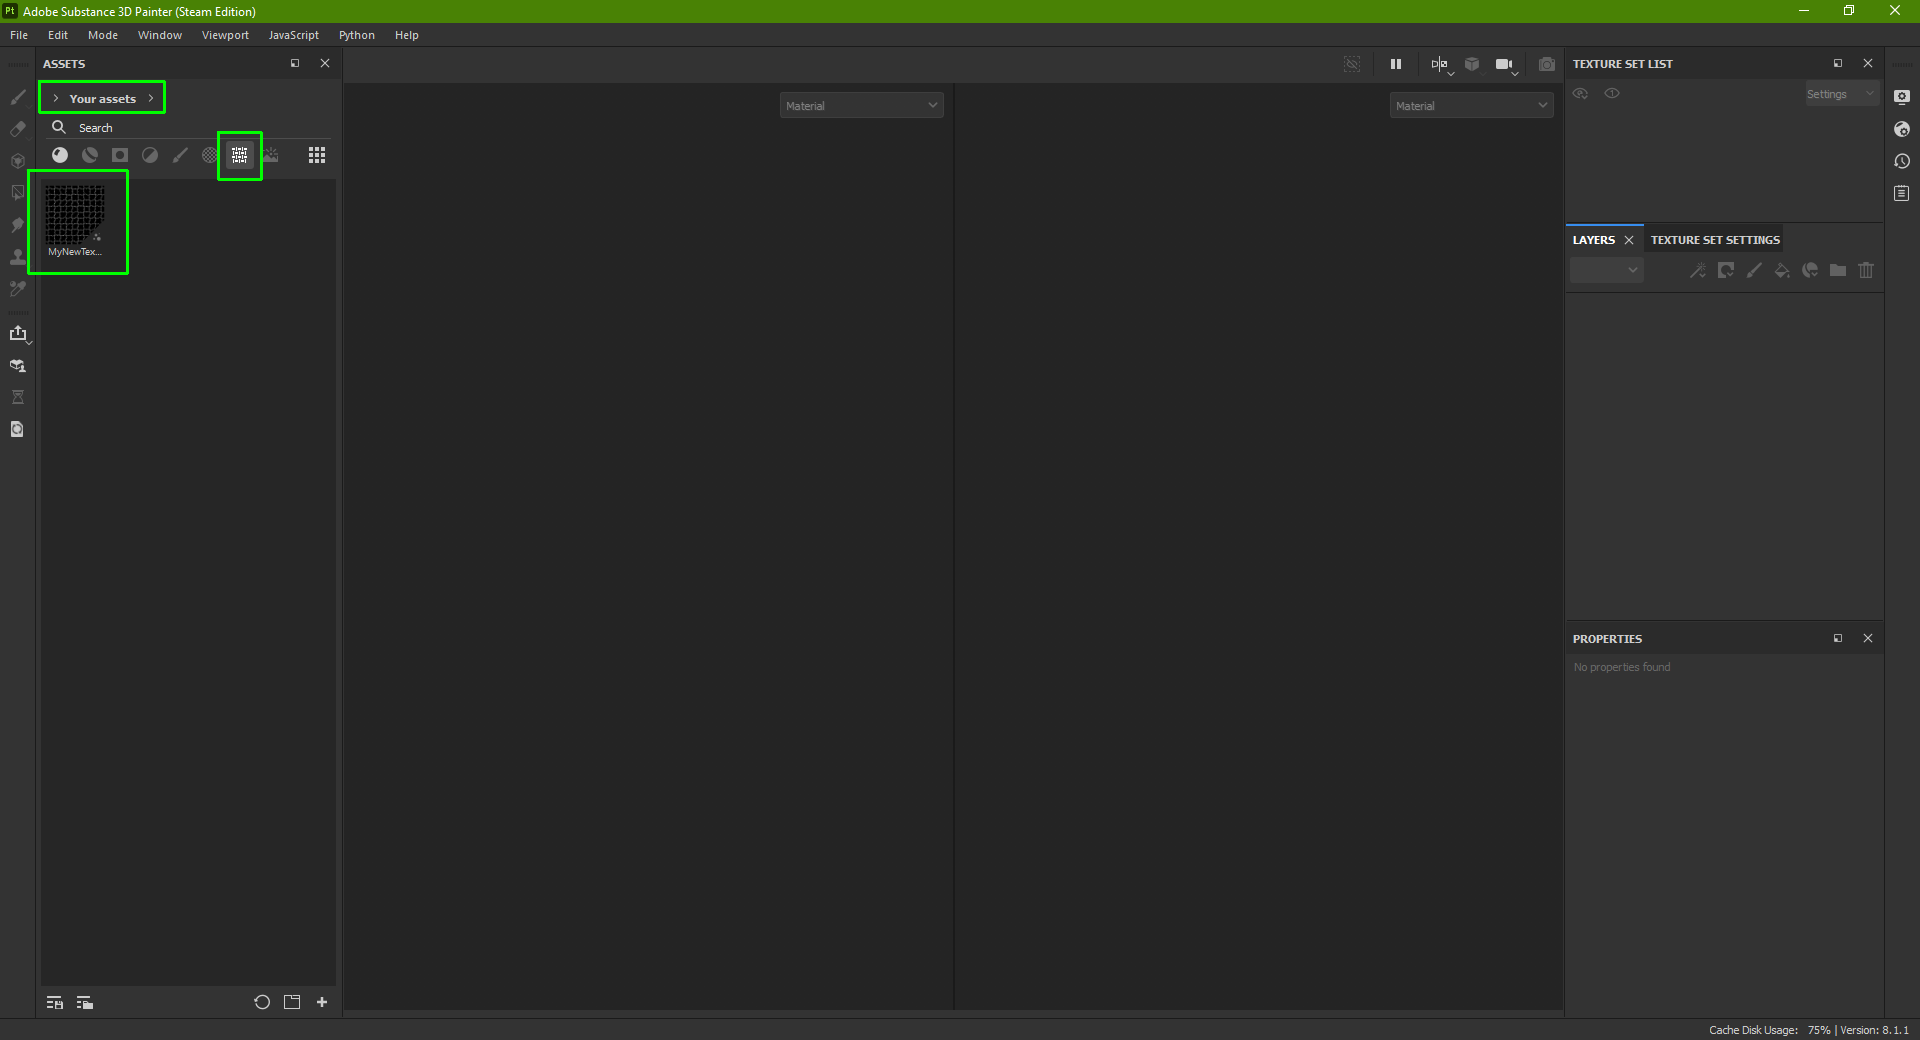
As you can see Substance Painter has added the asset to the textures section and it also created a thumbnail for us. Now you’re ready to use this texture where ever you want. Better yet: in case there’s something missing or you want to apply more changes then all you have to do is make your changes within Substance Designer, re-publish your project and the changes will be automatically picked up by Painter.
Abschließend…
Und da haben Sie es, I hope this was useful for some of you. Because the Steam versions of the Substance software do not use the Adobe cloud they can’t simply sent their output back and forth between programs.
But I hope that you can agree that this doesn’t really matter all that much: once you know where to look it’s quite easy to point one program to the other while using the import feature.
Most of all I hope that you got a good impression of what it’s like to be working with Substance Designer. It may take getting used to but once you got your fingers behind the way things work then it’ll become quite easy to get to the results which you’re after.
Also ja, Danke fürs Lesen, I hope you enjoyed and please leave a comment if you have any questions.
Das ist alles, was wir heute dafür teilen Substance 3D Designer 2022 Führung. Dieser Leitfaden wurde ursprünglich erstellt und geschrieben von ShelLuser. Für den Fall, dass wir diesen Leitfaden nicht aktualisieren können, Sie können das neueste Update finden, indem Sie diesem folgen Verknüpfung.