

- Titel: Sauerstoff nicht enthalten
- Veröffentlichungsdatum:
- Entwickler:
- Herausgeber:
Die Informationen zu „Oxygen Not Included“ sind noch unvollständig. Bitte helfen Sie uns dabei, die Details des Spiels auszufüllen Kontaktformular.
Liquefying Hydrogen is not an easy task and most designs I’ve seen are either too big or too complex. Since I’m not a fan of big and complicated structures, I managed to design a Liquid Hydrogen Room that is as simple and compact as possible. This setup can supply 2 Rockets with ease. Auch, the same layout can be used to build another Liquid Oxygen Room (with different temperature settings).
Überblick
Technisch, liquefying hydrogen is essentially removing heat from hydrogen and deleting it. To make it happen it needs a lot of energy (Strom). So expect to put tons of kJs into this process before you start to successfully liquefied the gas.
Jedoch, if you managed to build a solar farm, you can get that energy for FREE. Auch, the Hydrogen from the electrolyzers is also a renewable resource if you have tamed several Steam Vents. Therefore it is possible to make Liquid Hydrogen totally FREE of cost. Since the operation, itself doesn’t require any dupes labor.
This will require Super Coolant (nothing else would do the job right for Hydrogen) as well as some amount of Thermium or Aluminium for the radiant pipes. Insulation is preferable but Ceramic will do just fine.
Building Layout

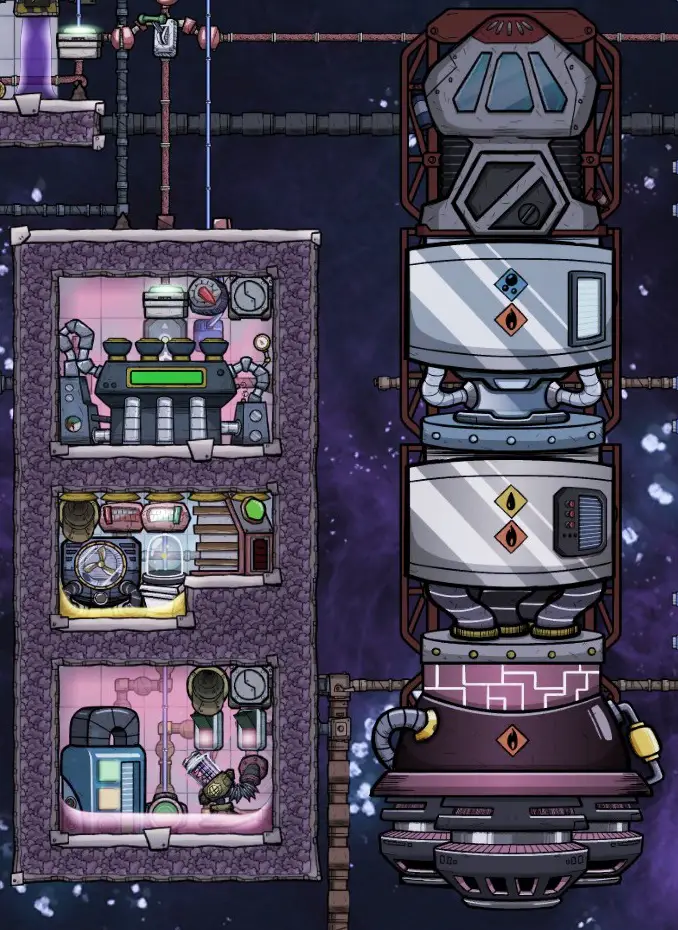
This layout is actually smaller than the smallest possible rocket. Erste, you need to place every building exactly how they are located. All the buildings inside the middle section (Thermo Aquatuner and Smart Battery) need to be built with STEEL (or better material).
Use Granite for the Pedestal for a better Decor effect. Ansonsten, any type of material can be used. Super Coolant needs to be filled inside the Reservoir before setting up the pipes.
(Doesn’t need to be full. Around 500kg should be more than enough. I recommend that you build this in space. Ansonsten, you will have to go through the unnecessary trouble of vacuuming all compartments.
zuletzt, don’t forget to build the drywalls.
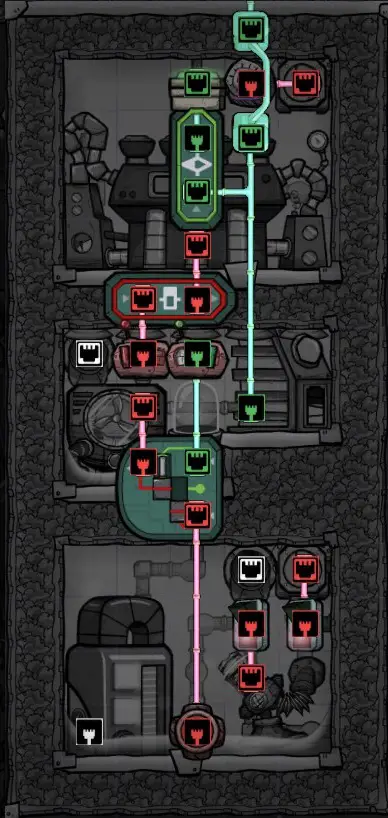
Piping Layout
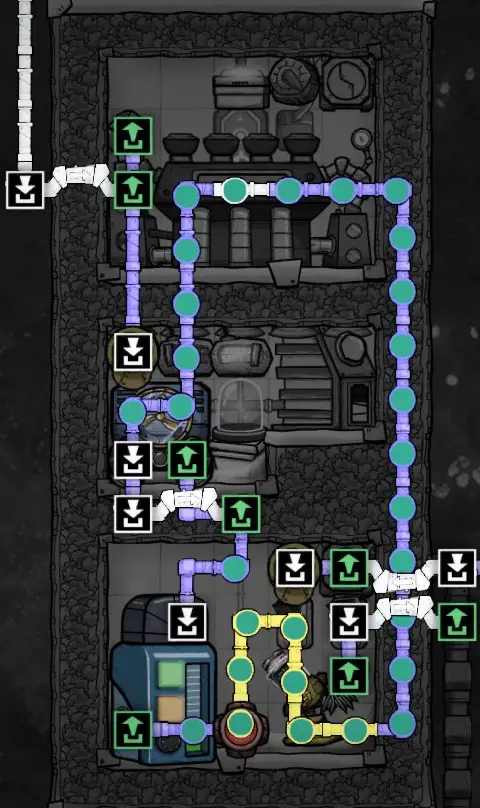
Piping setup should be easy enough but be careful with the types and materials of pipes.
- The Yellow Circled sections need to be Radiant Pipes of Thermium or Aluminium.
- The Blue Circled sections need to be Insulated Pipes of Ceramic or Insulation.
- The White Circled section needs to be a Normal Pipe (Neither Radiant nor Insulated) of any material except Ceramic and Insulation.
For other insulated pipes, use better materials if you have some to spare. Ansonsten, even Igneous Rock will do the job.
No.1 Liquid Bridge is for filling up water and petroleum inside the compartment after the building is constructed. Crude Oil or Super Coolant can be used instead of petroleum.
Can be destroyed afterward.
No.2 Liquid Bridge is for the return of excess Liquid Hydrogen from the Rocket when filling up.
No.3 Liquid Bridge is for the Output line for Liquid Hydrogen to the Rocket.
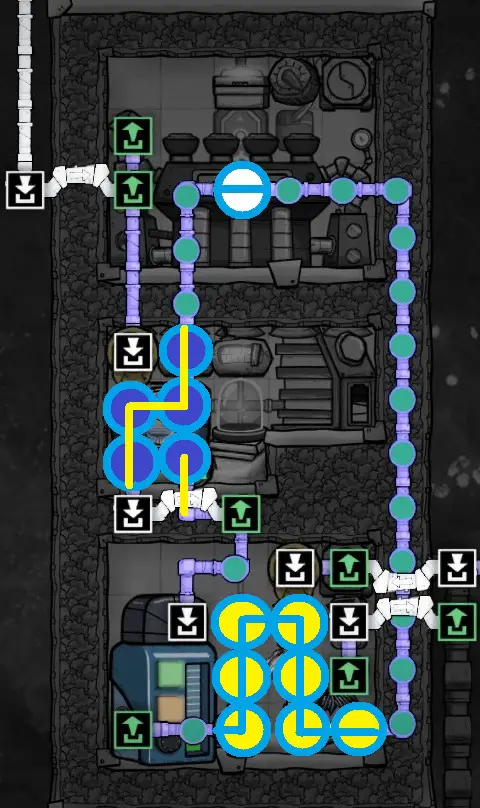
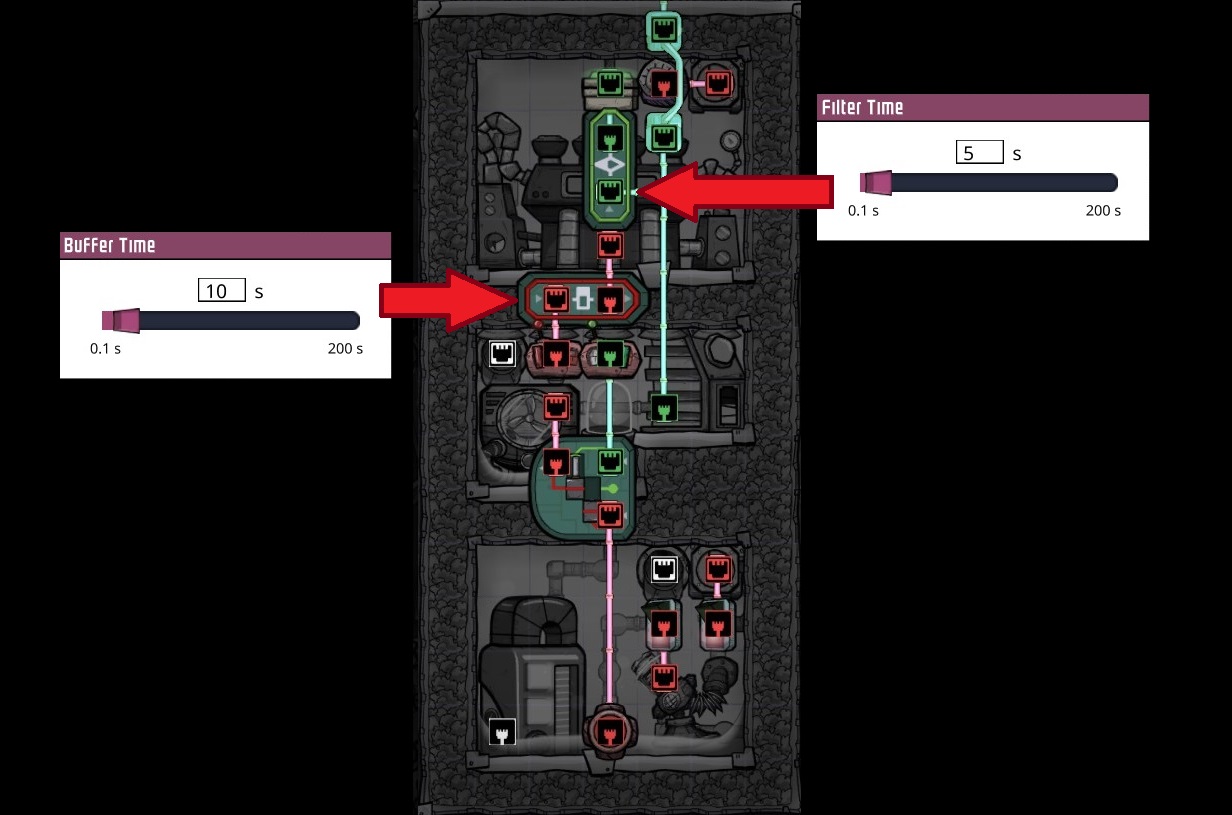
Automation Layout
Ganz einfach, but gets the job done. Build exactly as it is in the diagram.
AND Gate is for safety purposes from overheating Aquatuner and Battery.
The Automation Wire Bridge at the top is to control the Power Switch outside the Room (Can be skipped).
Filter Gate is used to make a slight delay before asking Power Supply.
Buffer Gate is used to run the Steam Turbine more smoothly.
Check my preferred setting in the diagram below.
Sensors and Gates
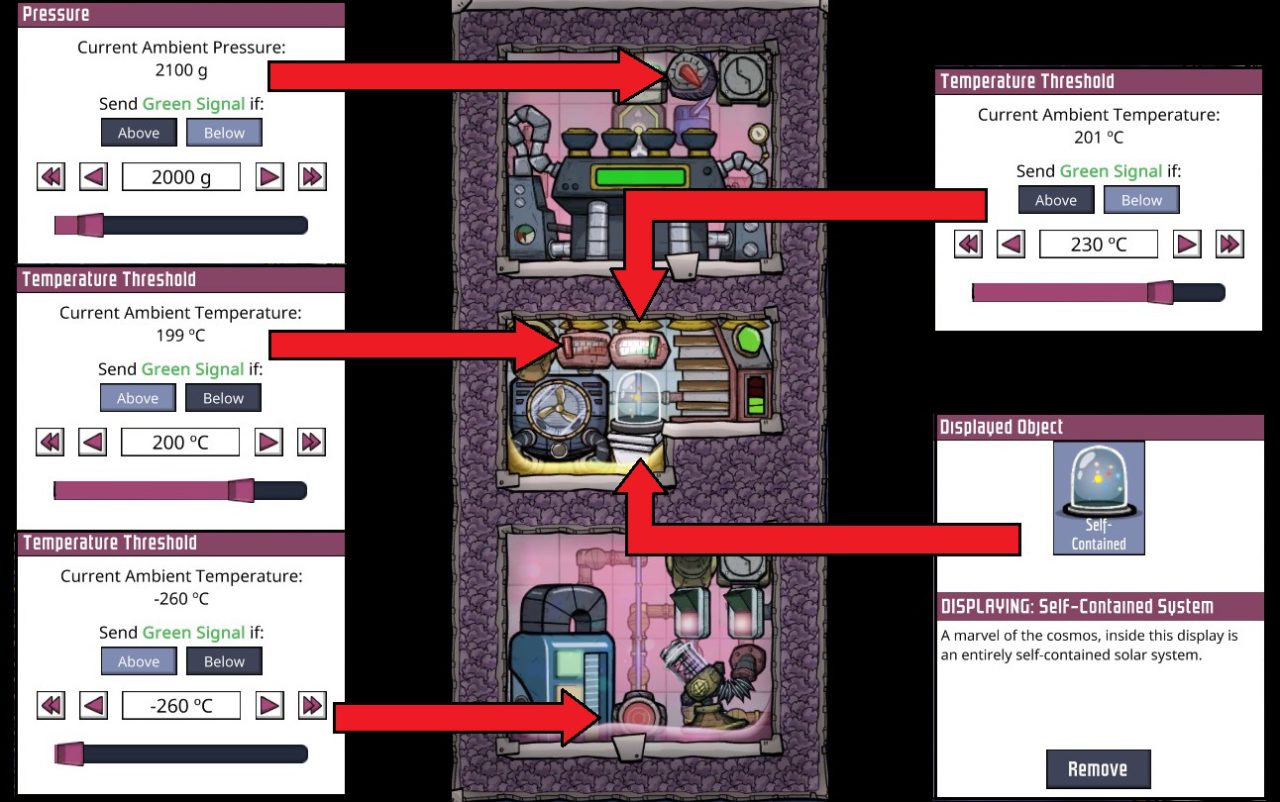
Endlich, we have to set the settings right. Be careful about the values as well as Below/Above signals as they are much more important than a few degrees of the setting.
Am wichtigsten, use the BEST quality artifact as an offering you have for the Space God. You won’t like it if the Space God himself turns his wrath upon your whole space plan and jeopardize the whole balance of your colony. Don’t mess with the Space God.
Walkthrough and Conclusion
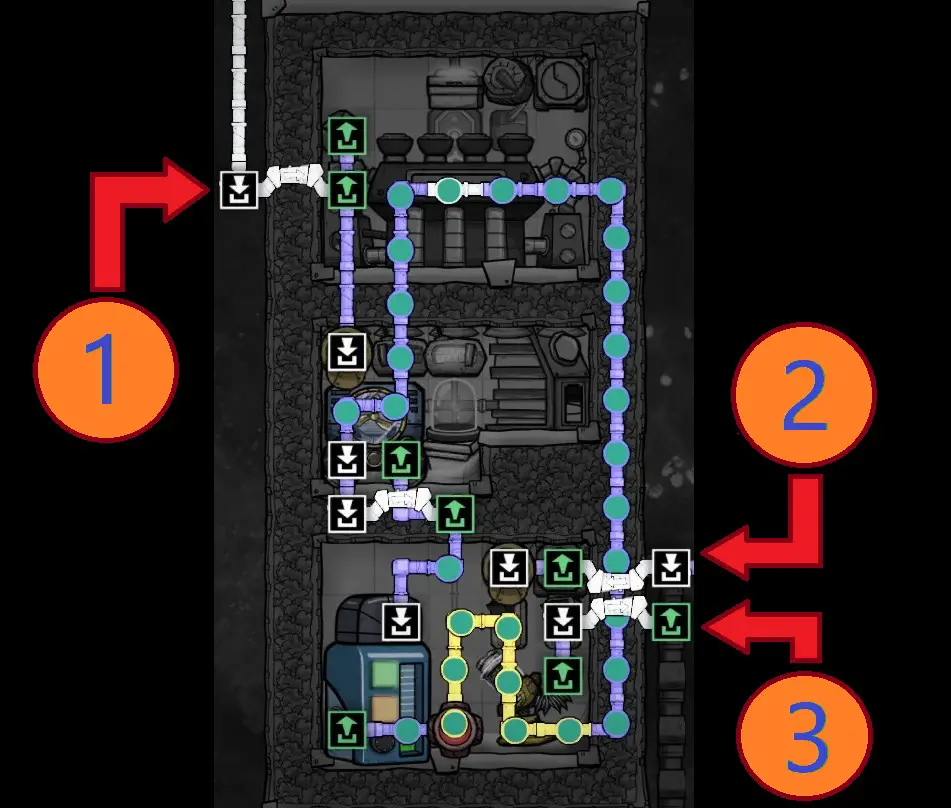
Before you start up the process, the top compartment should be filled with Gas. Can be filled up with Hydrogen easily if the gas pipes were set up exactly as in the previous steps. Jetzt, all you have to do is give a power supply and pump as much Hydrogen gas as you have and wait for a good while. The right Automation Switch is for the Hydrogen gas input and the left is for the Liquid Hydrogen pump.
It’s better to wait until Hydrogen is Liquefied at least a bottom tile so that you won’t have to deal with the transition state between liquid and gas state too much afterwards.
Das ist alles, was wir heute dafür teilen Sauerstoff nicht enthalten Führung. Dieser Leitfaden wurde ursprünglich erstellt und geschrieben von Jackie. Für den Fall, dass wir diesen Leitfaden nicht aktualisieren können, Sie können das neueste Update finden, indem Sie diesem folgen Verknüpfung.