
- Titel: Fights in Tight Spaces
- Veröffentlichungsdatum:
- Entwickler:
- Herausgeber:
Information about Fights in Tight Spaces is still incomplete. Bitte helfen Sie uns dabei, die Details des Spiels auszufüllen Kontaktformular.
Tips for maximizing your score in the Daily Play game mode.
Einführung
Once you’ve beaten the game with each deck, replaying a full five-level campaign to grind for new card unlocks can seem a daunting proposition. Jedoch, with the addition of the „Daily Play“ Spielmodus, players can get their FiTS fix in a roughly one-hour chunk that changes every day.
The Daily Play includes a player ranking based on scores, but the play style that would serve one well in surviving through a full game doesn’t completely work well with how one would earn a high score in the Daily Play. This guide is meant to include my thoughts about how I play to earn higher scores, and hopefully encourage you to get higher scores as well.
Danke fürs Lesen, and happy Fighting!
Wertung
One’s final score after winning a Daily Play run is based on a few different criteria:
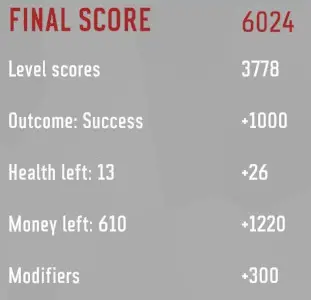
- Total Points Earned in Each Individual Level +
- 1000 for Winning the Daily Play +
- 2 X (Health Remaining at End of Run) +
- 2 X (Money at End of Run) +
- Modifikatoren
Der 1000 and the Modifiers will tend to be static from player to player, as the limited available chances for picking up additional modifiers during the run makes it difficult to try to get more.
Each fight will generally earn you between 200 Und 400 Punkte, with the scores being awarded for:
- Enemies defeated
- Speed of completion
- Health Lost
Let’s assume that you’re aiming to complete the Daily Play, and thus earn that 1000 and the Modifier bonus. Aside from those, your score is most affected by A) getting into fights, B) the amount of health you have left, and c) the amount of money you have left. Also, let’s look at each of them into more detail.
Getting into as many fights as possible will earn you more points! When the path in your Daily Run branches, look into how many fights you can engage in. Im Allgemeinen, I prefer a clearly shown battle over an Event.
After each fight, you will incur a penalty equal to the total amount of health lost. Healing gained through a bonus objective and in-fight healing will override this penalty, so if you lose 12 health in the fight and gain 10 via a briefcase you picked up, you will only have a -2 Strafe.
Jedoch, in addition to the score lost in that individual level’s score, having missing health will also end up giving you a net reduction of 2x the amount lost at the end of the run if it wasn’t healed.
What I mean by this is if I have 40 health and never lose any, at the end of the run I will have earned (40 X 2) = 80 Punkte.
Jedoch, if I lose 20 health in a single fight, even if I never take another hit through the rest of the run my total score will be affected by (20 X 2) + (-20 from that fight’s score) = 20 Punkte. Taking that 20 HP hit ended up losing me 60 points from my potentially highest score!
You might think about mitigating that lost health bonus by visiting clinic spots. Unless you have a particular Modifier you will be spending £40 für 15 Gesundheit. This will reduce your score by a further 50 Punkte: (-80 für die £40 spent, +30 for the health gained).
Having that Modifier (an additional +25 HP healed at clinics) will see you spending £40 for 40HP. This results in no net gain or loss in your end score (-80 points from money, +80 from health).
Jedoch, visiting a clinic usually comes at the cost of passing up the opportunity to get into a fight. Aus diesem Grund, I recommend only ever healing through clinics is you are extremely worried about not being able to survive the run.
This is a simple formula: Points = 2 x Money. Daher, the solution to having a high score through money is to grab as much as you can and minimize spending. I never spend a cent at Gyms unless noted below in the Cards sections.
Plotting Your Path
Earning high scores comes through selecting branches along the Daily Play run that meet these criteria, in dieser Reihenfolge:
1) As many fights as possible
2) As many money bonuses as possible
–2A) Pursue Momentum bonuses through the first branch
3) Skip Clinics / Gyms to avoid spending money
Earning Momentum bonuses early on in favor of money rewards is my preference, as it can influence my card choices later on. Haben 4 oder auch 5 Momentum can drastically increase your lethality and mobility/survivability in fights, which can improve your score bonus by allowing you to finish fights in fewer turns.
Think about the stages you’ll be fighting in, zu. The Fire Escape is quite dangerous to a Daily run, as the chance of encountering enemies that push (shotgunners of all kinds, Chonks, the kicking bikers) are very high during the random missions and can spell instant Game Overs.
I generally try to avoid Event spaces where I can, as often they yield choices that are too risky to attempt. While multiple Events are guaranteed benefits (usually monetary), the chance of gaining a Persistent Injury through some Events is never worth taking. The Event ends up being a wasted stop on your journey if you could have taken a different route instead.
Card Selection
In Daily Plays that allow the „Choose From Three“ card selections and in your level rewards, careful card choice is important. This is something more of an art than a science, so you’ll get a feel for your personal play preferences as you gain experience with the game.
The Daily Play will always guarantee you a movement card from your deck in each hand, even if they’ve all already been placed in your Discard pile. Also, having few good move cards is vastly preferable to having multiple move cards.
Top Picks:
Slip Und Schicht are my favorite movement cards because they allow you to get out of most situations, even when you get backed into an unfavorable position. Shift also counts as an attack against enemies that Dodge, allowing you to get in a hit that turn even if you only play a single attack card against them.
Tauschen is often useful, though it will frequently put you in danger because it forces the enemy to face you afterward. If you can pair this with a way to move the enemy afterward, a good defense, or a second movement to get out of danger, it can be a good card to have.
Im Allgemeinen, at the beginning of a run we can’t guarantee having enough Momentum to use expensive attacks like Spartan Kick oder Flying Punch.
2-Momentum attacks are usually only good when they provide an additional benefit by moving the player/enemy, wie Back Slam, Heavy Strike, Und Roll Throw.
The majority of your attacks will come from 1-Momentum cards, and the RNG of that day’s run will of course determine what’s available. Here are some of my top picks to a good day’s run:
Three Punch Combo Attack
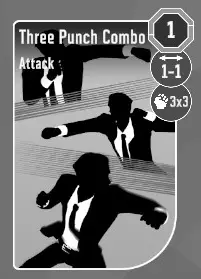
While initially seemingly lackluster, insgesamt 9 damage is worth considering. This card also blows through the Dodge ability of Drunken Master and the Purple Sunglasses Guy. It pairs well with Steel Self, Hidden Blade, Und Schlagring, as the 2x/Bleeding effects will carry over for all three attacks used by this card. Natürlich, any Strength bonuses make this card even better. This card is also a must for any deck seeking to use Combo cards with a requirement >3.
Front -Kick
Allows you to potentially move one space while also pushing the enemy back? Always a good choice. Its little sibling Quick Kick lacks the utility of moving you, does less damage, but costs the same.
Attacks that allow you to move enemies into one anothers‘ way, wie Drücken, Schieben, und die Spin Kicks are also great for knocking enemies out of arenas. Shove is the king here, as its 0-cost lateral movement makes it a great card to use on any enemy aside from those with a spread attack (and those that cannot be moved).
Because I eschew upgrading cards, unless I am forced into the Defensive deck at start I will generally avoid Blocking or Counter cards at start; I would prefer to get out of the enemy’s way instead. Getting an upgraded card with at least 10 Block as a fight reward can be a good choice.
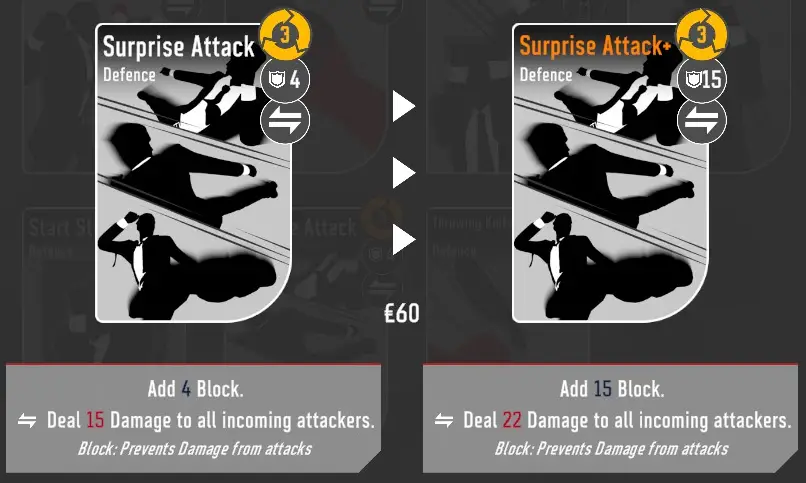
My single exception to my „Never Upgrade“ rule is Überraschungsangriff. Its initial 4 Block makes it nearly worthless, but the upgraded version gives it 15, which makes it worth using even at the end of the Daily run. The counter ability is improved dramatically as well, and being a relatively cheap Combo card means that it often has little to no cost during the turn it gets played. Upgrading it costs the same as it would to remove it from the deck, so it goes from an active drawback to a very good card.
Cards to Avoid
Some cards are so detrimental to your play that merely having them in your deck can be ruinous. If I have any of these in the starting deck, I will go out of my way to spend the 120 points to remove them if I can possibly avoid the money. You’ll notice that these are all Movement cards, as the game can force one of these into your hand as your sole source of movement that turn.
Feel the Burn
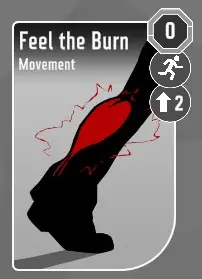
A card that actively hurts you to use. If you’ve read the Health portion of the Scoring section, you can see why I want this card out of the deck as soon as possible.
Umdrehen
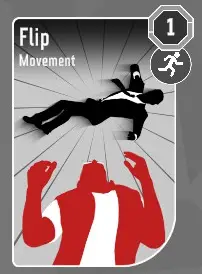
While not all that bad on the surface, this card requires you to move exactly 2 Räume, which often isn’t possible due to enemy arrangements or the layout of the level.
Positioning Move
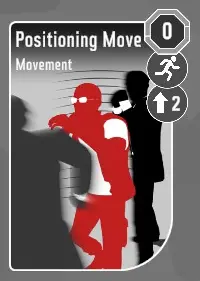
Possibly my most hated card in the game. Getting stuck with this as your sole movement card of the turn means that you cannot do anything to your enemies before moving. At most it’s the waste of a turn, and at worst you get pinned into taking multiple hits as this card has to be played before anything else.
Zusammenfassung / Allgemeine Tipps
Hopefully this has been somewhat illuminating, but I’ll boil my strategy down to the key points:
- Get in as many fights as possible. Fights = Points
- Avoid taking hits. Mobilität > Schaden
- Never spend money.
Whether it’s because of my playstyle or just a general fact of the game, the Mafia Boss (big purple guy, can’t be moved, advances whenever you move, hits for at least 20, Reichweite 1-2, is usually smart enough to avoid moving into enemy attacks) is the bane of my existence. He can be Thrown, but things are always tricky when that enemy shows up.
Sicher, Du könnte play the Run once and then play it again to get a higher score once you’ve seen what you’re up against. That sort of defeats the whole purpose of the Daily Run game mode, and I don’t hold for it… The only exception I’ll make is when a fight drops me into a situation where I die instantly on Turn 1 with no recourse; this appears to only happen to me on the Fire Escape map, which is why I recommend avoiding fighting there when possible or if I don’t have a very mobile/Dodge-heavy deck already.
Das ist alles, was wir heute dafür teilen Fights in Tight Spaces Führung. Dieser Leitfaden wurde ursprünglich erstellt und geschrieben von RB-Mitarbeiter. Für den Fall, dass wir diesen Leitfaden nicht aktualisieren können, Sie können das neueste Update finden, indem Sie diesem folgen Verknüpfung.