This guide will show you how to add a new style for your minimap in Kompanie der Helden 3 using free image editing tools available online.
Einführung
Kompanie der Helden 3 now has official maps with a different look. To create similar maps in an image editor like GIMP (which is free), Befolgen Sie diese Schritte:
Erste, open GIMP and start a new project for your map. You can also use Photoshop if you prefer, but I’ll focus on GIMP for this guide.
As I create the minimap for my map „Segelflugzeug 404,“ I’ll share my approach, which might vary from others‘.
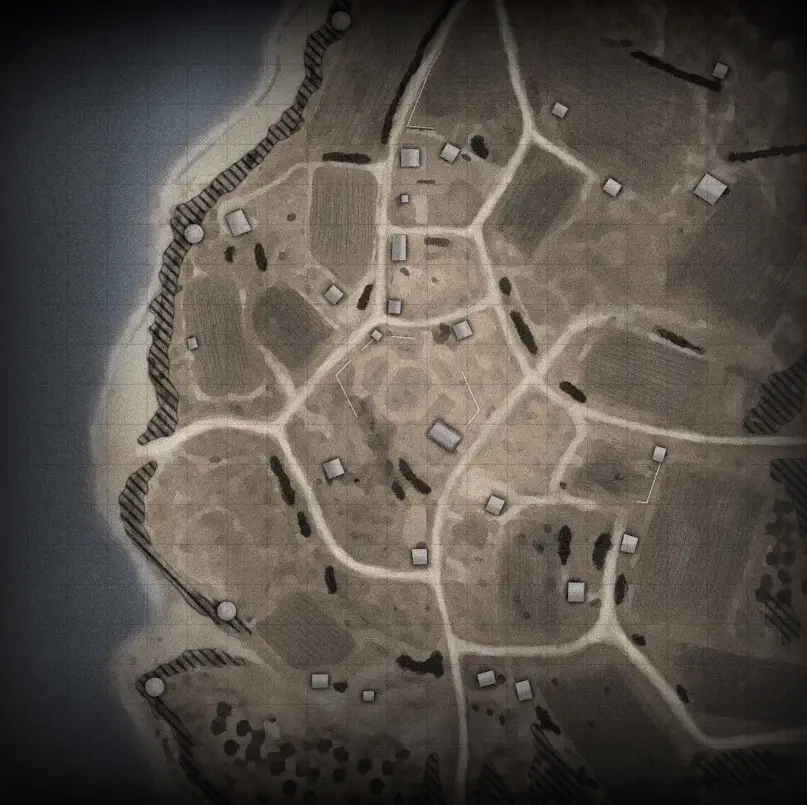
The new style of minimap aims to reduce clutter and make important details more visible at a glance. Backgrounds are faded, emphasizing key features with strong black and white contrasts. Colors are simplified to just one or two tones for land and water areas.
Erste Schritte
After completing your map in the image editor, navigate to the map’s folder and find the generated minimap image file. This file is located in the folder where your project is saved, unter „assets\scenarios\multiplayer\“. It’s a TGA file with the name ending in „_mm_generated“.
Make a copy of this TGA file and move it to a new location to work on it separately. Rename the copied file to match your map’s name, gefolgt von „_mm_handmade.tga“.
Open this copied file in your image editor, such as GIMP. Dann, go to File > Save As and save it in the GIMP file format. Jetzt, you have an editable image with the correct resolution.
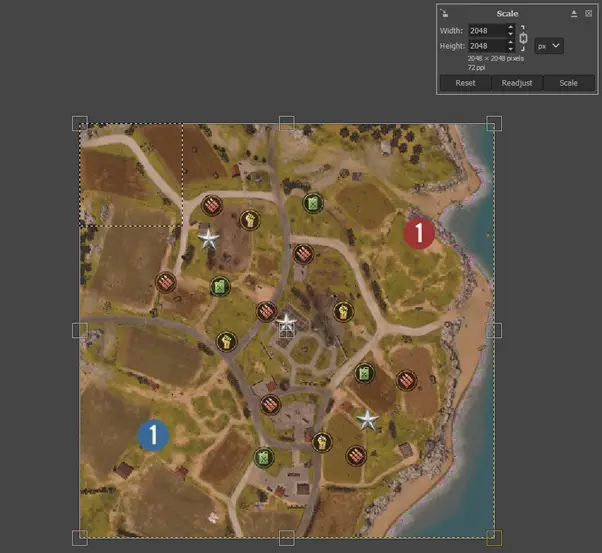
For my map, „Segelflugzeug 404“, I’ll increase the canvas size to 2448×2448 (instead of 2048×2048) before starting. This allows me to adjust the map’s position left or right if needed later. If you choose to do this, remember to crop the final image to the correct size when exporting it.
Lining It Up
To make sure everything is in the right place on the map during gameplay, you need to adjust the size of your minimap image correctly. Here’s how you can do it without anything too difficult:
Erste, build your map so it’s visible in the game. Dann, navigate to it in the menu and take a screenshot from there.
You can use software like ‚Lightshot,‘ the Windows snipping tool, print screen, or the Steam screenshot feature for this step.
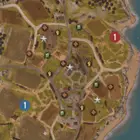
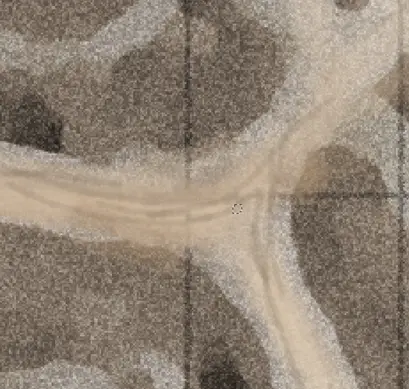
Crop the screenshot exactly to have the entire image shown on the menu. The terrain textures don’t matter at this stage; we’re interested in the icons indicating resources and starting points. These icons serve as landmarks to ensure our final minimap image is scaled correctly. We’ll position our final image under these icons in the final version. By aligning it with these icons, it will also line up in the game. Interessant, the minimap shown in-game isn’t the entire minimap provided; it crops out the bottom right corner slightly.
Nächste, paste this cropped screenshot (just the image) as a new layer in GIMP, a photo editing software.
Resize the screenshot to fill the entire canvas. Don’t worry if it becomes blurry; we only need it for the landmark locations.
If your map appears upside down in the menus compared to what you see in-game, Mach dir keine Sorgen. Just ensure you align your minimap with the resource icons, and it will be okay.
Getting Reference
We want to create a small map picture that looks like the ones we already have. Um dies zu tun, we’ll compare our picture to the ones we have by putting them on different layers and switching back and forth between them. This helps us see if our picture matches the existing ones. A helpful trick is to divide our reference picture in half, so that one side is our reference and the other side is our picture. Hier entlang, we can see any differences between them along the dividing line.

Basic Elements
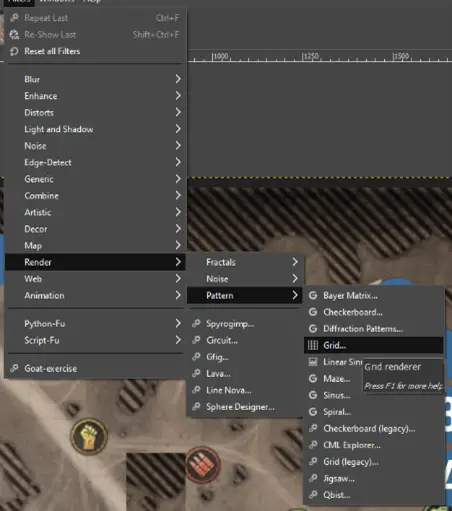
We’re starting by making a grid to match the one in the reference image.
We’ll create a new layer called ‚GRID‘ and in GIMP, we’ll go to Filter>Render>Pattern>Netz.
For our map, we’ll select 120 for both width and height, with a line width and height of 3. We’ll choose a slightly off-black color.
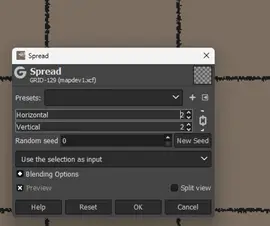
After creating the grid, we might want to make it look a bit rougher than a perfect grid. Um dies zu tun, we can copy the grid and then apply Filter>Lärm>Spread with a value of 2. This will give us a messier grid. We can then paste the original grid back over the new rough grid and adjust the opacity of the pasted grid to about 50%. This gives us a more textured grid. We can also experiment with a bit of blur, but we should be careful not to overdo it.
Nächste, we’ll create another new layer at the back for the background. We’ll fill this layer with a grey/brown color to match the reference. Also, right now, we have a brown blank image with a grid on it, along with some reference images on other layers.
The Big Shortcut
To make the map faster, we can take a picture from the top of your map. Dann, we use some special effects to blend it with the grid and colors. This will give us a basic idea of the terrain like buildings, Wasser, and roads.
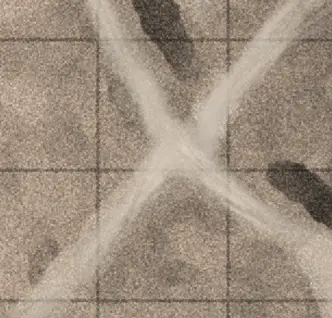
Erste, take a picture of your map from above using the orthographic view. You can do this in the worldbuilder editor by adjusting the view settings. Dann, adjust the size and rotation of the picture so it matches the strategic points, victory points, and starting locations from the original map image we have. Once it lines up, save it as a new layer.
Nächste, use the stamp tool to fill in any empty spaces on the canvas. You can copy areas from one part of the map to another by Ctrl+clicking an area and then clicking another area to paste it. It doesn’t need to be perfect because we’ll add filters later, and this part will barely be visible.

After lining up your image with the reference points for VPs/strategic points, it’s time to add some filters. But before doing this, it’s a good idea to make a backup of the layer. You can duplicate the layer and save it in a new layer group for safety.
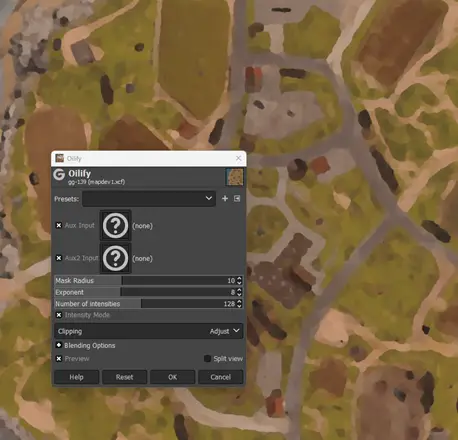
One filter I like to use is under Filter > Artistic > Oilify. You can adjust the values to your liking; Zum Beispiel, I typically use 10, 8, 128. Dann, go to Color > Desaturate > Desaturate. Place the final layer at the back to serve as the background.
Retrieve the old background layer with the color and drag it on top of the new background. Set the color layer to ‚Overlay‘ with an opacity of 85. This will give your map a nice, blended look.

Optimierungen
If your map’s lighting doesn’t match the official reference, you can adjust the background color layer’s color. The official maps often have brightly lit patches. To highlight these areas, add an overlay layer above the color layer and draw white patches. A large blob in the middle covering about half the map works well.
Apply Gaussian Blur from Filter>Verwischen>Gaussian Blur to make the white areas blurry.
Set the layer to 50% opacity and overlay it over the background color layer. You can also adjust brightness using Colours>Layers sliders, but remember to backup layers first in case you need to revert.
Filmkorn
To add texture to our smooth image, let’s start by creating a new layer and filling it entirely with grey. Dann, apply RGB Noise from Filters>Lärm>RGB Noise with values set to 0.4 für alle. Nächste, desaturate the layer using Colour>Desaturate>Desaturate. Set the layer mode to ‚Grain Merge‘ and adjust the opacity to around 0.5. Place this layer on top of all other layers. Endlich, fine-tune the settings until you’re satisfied with the result.
Vignette
To create a subtle vignette effect, start by making a new layer. Dann, select the Gradient tool by clicking and holding on the bucket fill tool. Set the Gradient tool to FG to transparent and choose a slightly off-black color. Click and drag from the edges of the image towards the middle, extending a few grid squares, to create a fade to black around the edges. Adjust the opacity slider of this layer until you achieve a pleasing effect. Avoid making it too dark since the image is already dark.


Impasse
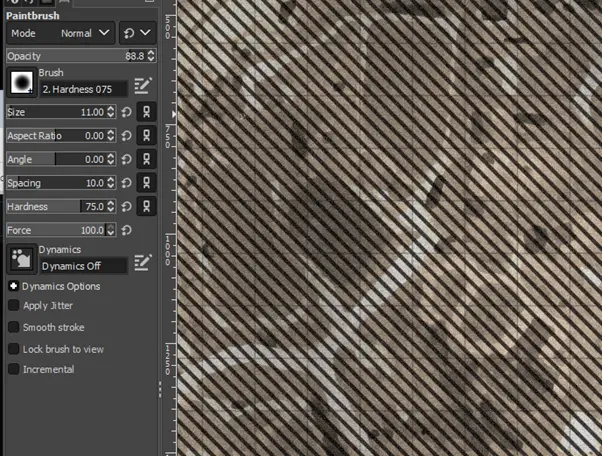
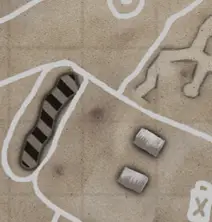
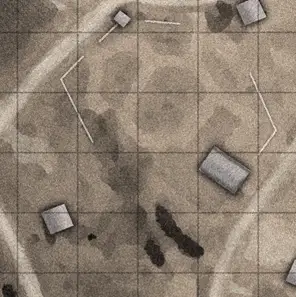
To make areas of impassable terrain stand out on your map, Erste, add a new layer. Dann, draw a large diagonal line using the paintbrush tool set to 11 Breite. Nächste, duplicate this line across the entire map by copying and pasting while holding down the Shift key and using the Arrow keys to maintain consistent spacing. Endlich, fill the entire map with these diagonal stripes to match the spacing seen on the official reference image.
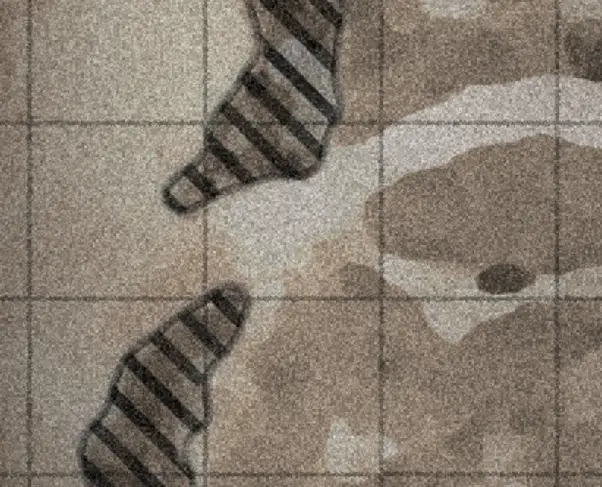
Nächste, you need to right-click on the layer and choose ‚Add Layer Mask‘. Dann, pick black to make everything transparent. A layer mask is like a coloring page: it tells the computer where to show the picture (in white areas) and where to leave it blank (in black areas).
To work on the layer mask, click the box next to the picture preview in the layer menu:

Jetzt, grab a white paintbrush and start drawing where you want the stripes to show. Remember where the obstacles are on the map, but also put some stripes around the edges. You can look at official maps for ideas.
I did a few more things to get the final picture you see. I created a new layer under the stripes and copied the black and white picture from the layer mask onto it. Dann, I set the layer to ‚darken only‘ and flipped the image so it makes dark spots under the stripes. I also added an outline by copying this layer and removing the inside part. This last step isn’t always necessary, and it’s not in the official images.
Einzelheiten
I treat this picture like I treat maps: I first make it work, then I add details slowly. Jetzt, it should look like it’s done, but it’s missing the small things.
Jetzt, we focus on the big stuff: Wasser, Straßen, und Gebäude. I use the paint tool to draw them out.
Straßen
Im Augenblick, the roads aren’t easy to see, and if we make them darker, they might disappear. Also, I’ll make a new layer and use the paintbrush. I pick a white color with a hint of yellow. Erste, I’ll sketch a fuzzy path for the road. Dann, I’ll add darker lines on top. To finish, I’ll use the smudge tool to blend it. zuletzt, I’ll tidy up the edges with the eraser.
Background Image Noise Reduction
If your map’s background screenshot has a lot of tiny details, it might look patchy in black and white. To make your details clearer, we need to reduce this noise. That means getting rid of black spots for craters and white spots for cobblestones, zum Beispiel.
After drawing your roads, use the stamp tool to erase the background roads. The idea is to minimize the detail on the blurry background and let the drawn roads stand out. Sample a blurry, empty area of your background with ctrl+click and paint it over the roads with low opacity. Don’t forget to make a backup layer in case you want to undo any changes.
Farm Lines
To make tilled farms recognizable on your map without making it too busy, we need to simplify them. Hier erfahren Sie, wie:
Create a new layer and use the paintbrush tool to draw thin, dark lines for the tilled fields. Dann, smudge or blur them slightly. Reduce the layer’s opacity to keep it light. Apply a 1-pixel spread effect from the filter > noise menu to soften the edges. This should give the effect of tilled fields without adding too much contrast to the image.

Adjust the opacity of the layer to your liking to make it less prominent. Dann, use the stamp tool to add some messiness to the tilled fields. This will give them a more natural and uneven appearance, like real farmland.

Gebäude
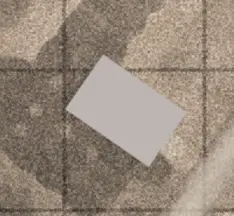
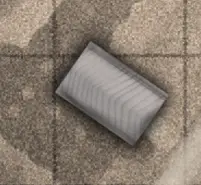
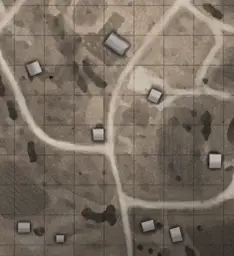
Erste, let’s start by marking all the buildings. We’ll create little boxes for each one using either the box select tool or the lasso tool. Dann, we’ll fill them with a very light grey color. We’ll do this on a new layer. Make sure to include buildings that are out of bounds, as well as any large impassable man-made structures like bunkers and sheds.
Nächste, we’ll add detail to make it look less like random squares. We’ll add a drop-shadow effect by duplicating the layer, inverting it to a dark color, and applying a blur effect. Depending on the type of building, we’ll draw different details on top. Zum Beispiel, for a metal shack, we can add white lines to make it look reflective and an arch-type line to create the impression of a curved roof. We’ll use different layers so we can adjust the opacity as needed.
Jetzt, we can add details to each building. You can do this however you prefer; I usually draw details over the top and then erase around the edges to blend them in.

Repeat this process for all buildings. For most buildings, you can leave them blank. Refer to official maps for guidance. It creates a good effect if you put a shadow on all the buildings. Choose a direction from which the light is coming and make sure the shadows are consistent across all buildings.
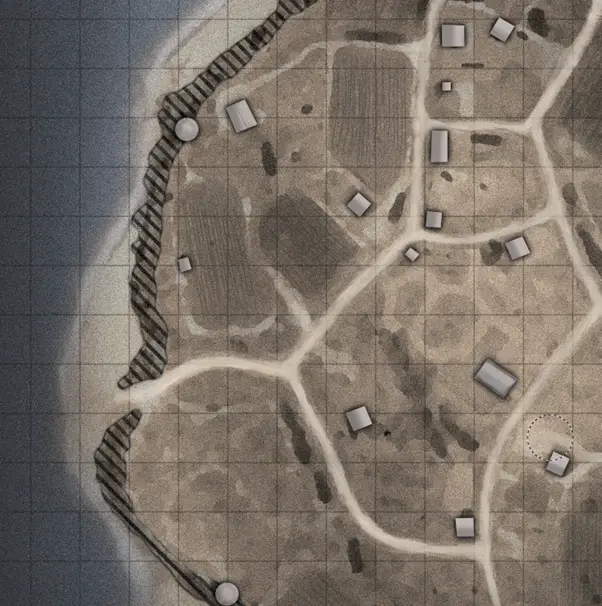
Wasser
The water should be filled with a blue color with the following values: R:30.2, G:32.5, B:35.7 (4d535b). Make sure to fill an area around any water and apply a blur effect. This area should be the only thing with any color besides the brownish tint.
Bei Bedarf, you can add a slightly blurry white line with low opacity along the shore to enhance the appearance. Jedoch, it’s not necessary as the earlier blur will already make the edges fade to white as they blend with the background.
 .
.
Final Bits
To make sure everything looks right in your game, adjust your map accordingly based on the details shown on your map. Highlight hedgerows by painting over them with a black paintbrush, and mark tall walls, especially around the middle area of the map.
To display your minimap image in-game, first crop it to the correct size, like 2048×2048 Pixel, and save it as “mapname_mm_handmade.tga” in your map’s folder, alongside the „_generated.tga“ Datei. After building your map, it will use your custom minimap image. Double-check if everything aligns properly. Wenn nicht, go back to the XCF file in GIMP and make adjustments as needed. If you made the canvas slightly larger, you can adjust elements outside of the minimap area easily.
Sharing your mini map image on the workshop can attract more players to try your map, especially if they see the effort you put into the minimap. You can decorate it with extra elements like territory layouts, Ressourcenstandorte, and player start points according to your preferences. Make it unique and appealing to draw attention!
Das ist alles, was wir heute dafür teilen Kompanie der Helden 3 Führung. Dieser Leitfaden wurde ursprünglich erstellt und geschrieben von Tobeh. Für den Fall, dass wir diesen Leitfaden nicht aktualisieren können, Sie können das neueste Update finden, indem Sie diesem folgen Verknüpfung.