- Titel: BlasterBeat
- Veröffentlichungsdatum:
- Entwickler:
- Herausgeber:
Information about BlasterBeat is still incomplete. Bitte helfen Sie uns dabei, die Details des Spiels auszufüllen Kontaktformular.
This guide will teach you how to add your own special tracks and songs to BlasterBeat using a tool called the Track Editor. With this tool, you can make your own tracks and then let your friends play on them too!
Erste Schritte
To start creating your own tracks, there are a few things you’ll need:
- Music File: You’ll want to have the song you want to use in either WAV or MP3 format. You can find these songs on YouTube and then download them from certain websites.
- Map Preview Image: This is like the picture of your track that you see when you’re choosing which one to play. It should be a square image, and it’s best if it’s 512×512 pixels in size. But if it’s under 1 MB in file size, that’s good enough to use. This limit is because of how you’ll share it on the workshop.
- Song’s BPM: You’ll also need to know the Beats Per Minute (BPM) of your song. You can find this by using our track editor, or you can just search for „your song name“ gefolgt von „BPM“ auf Google.
Creating the Song
Go to the main menu of BlasterBeat and look for the „Track Editor“ Taste. Wenn Sie es finden, a window will pop up showing all the tracks you’ve created. Klicken Sie auf „New Track“ button to start making a new one.
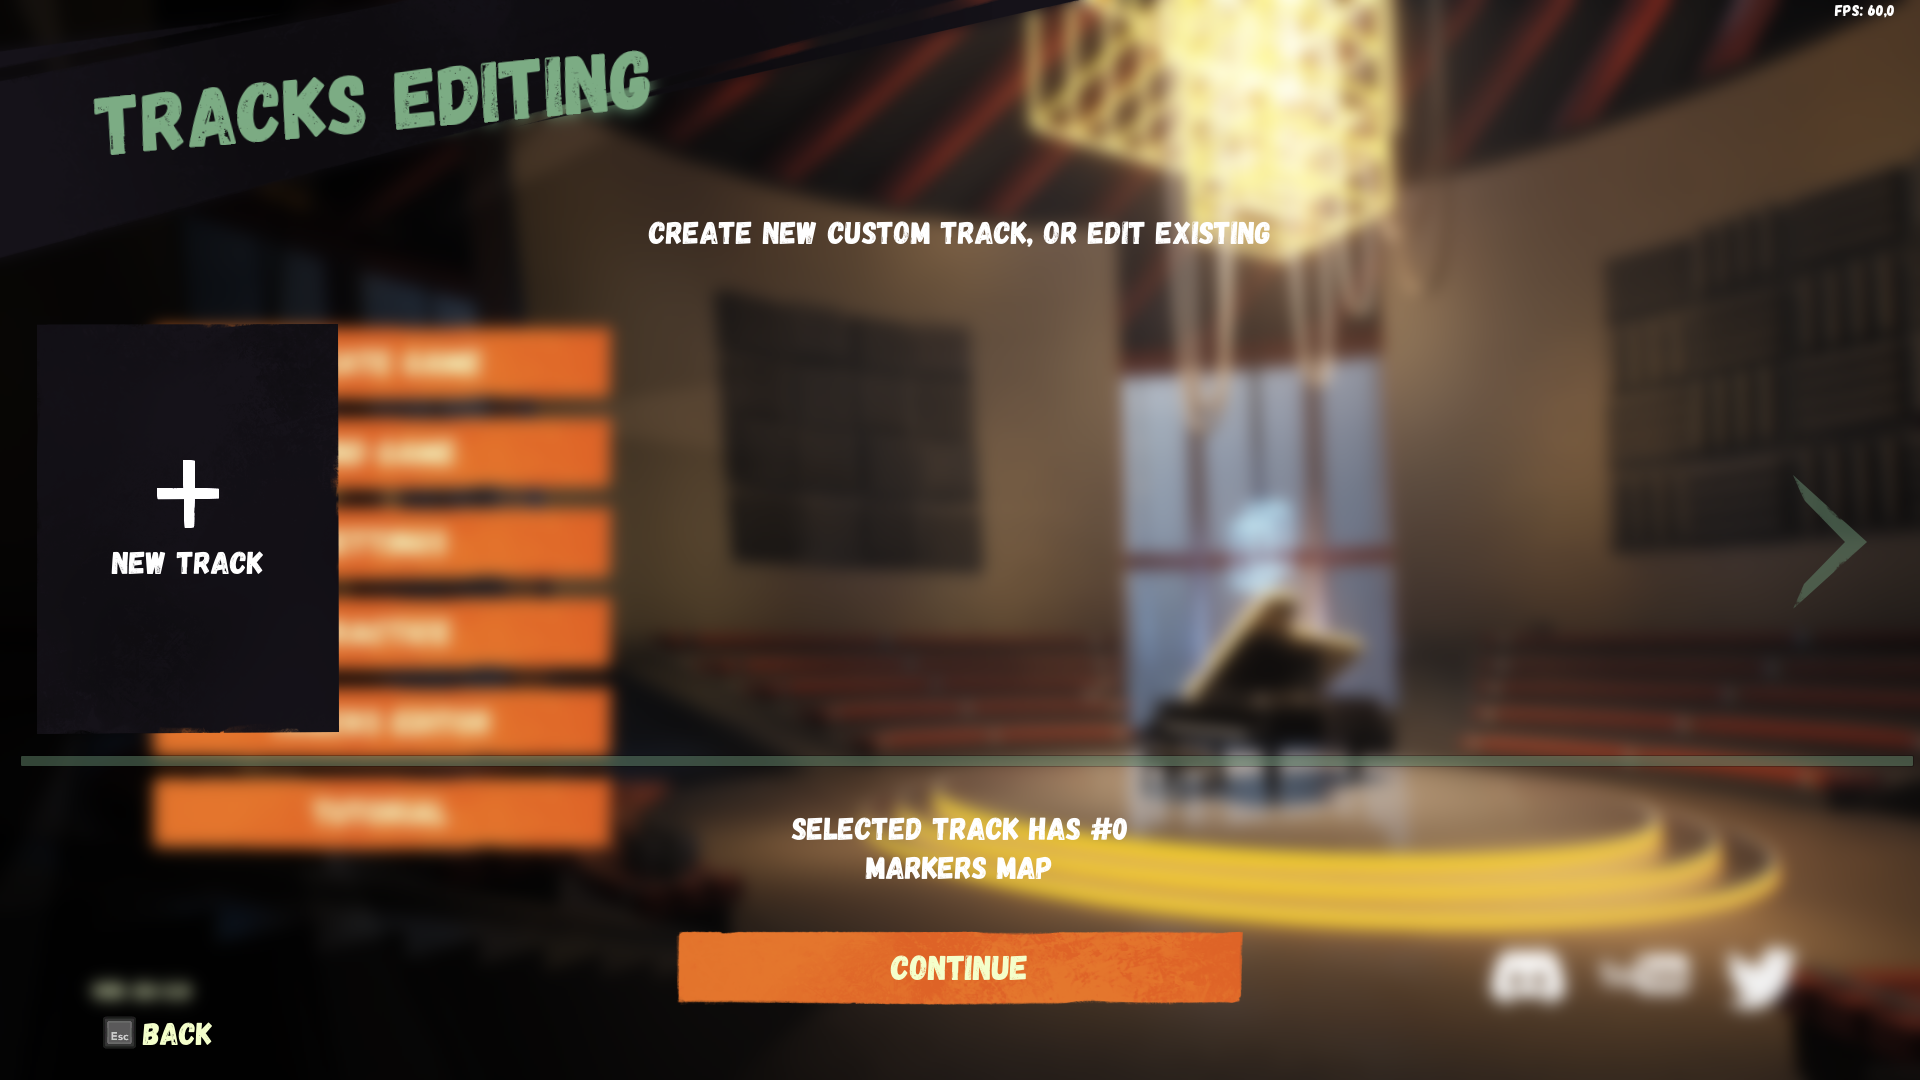
In the next window, you’ll see a „Track Info“ Panel. Hier, you should add the .mp3 or .wav file of the song you want to map. Dann, add a cover image for the track.
Danach, you need to fill in the „Schiene“ Und „Künstler“ Namen. These names will show up when people choose your track in the workshop.
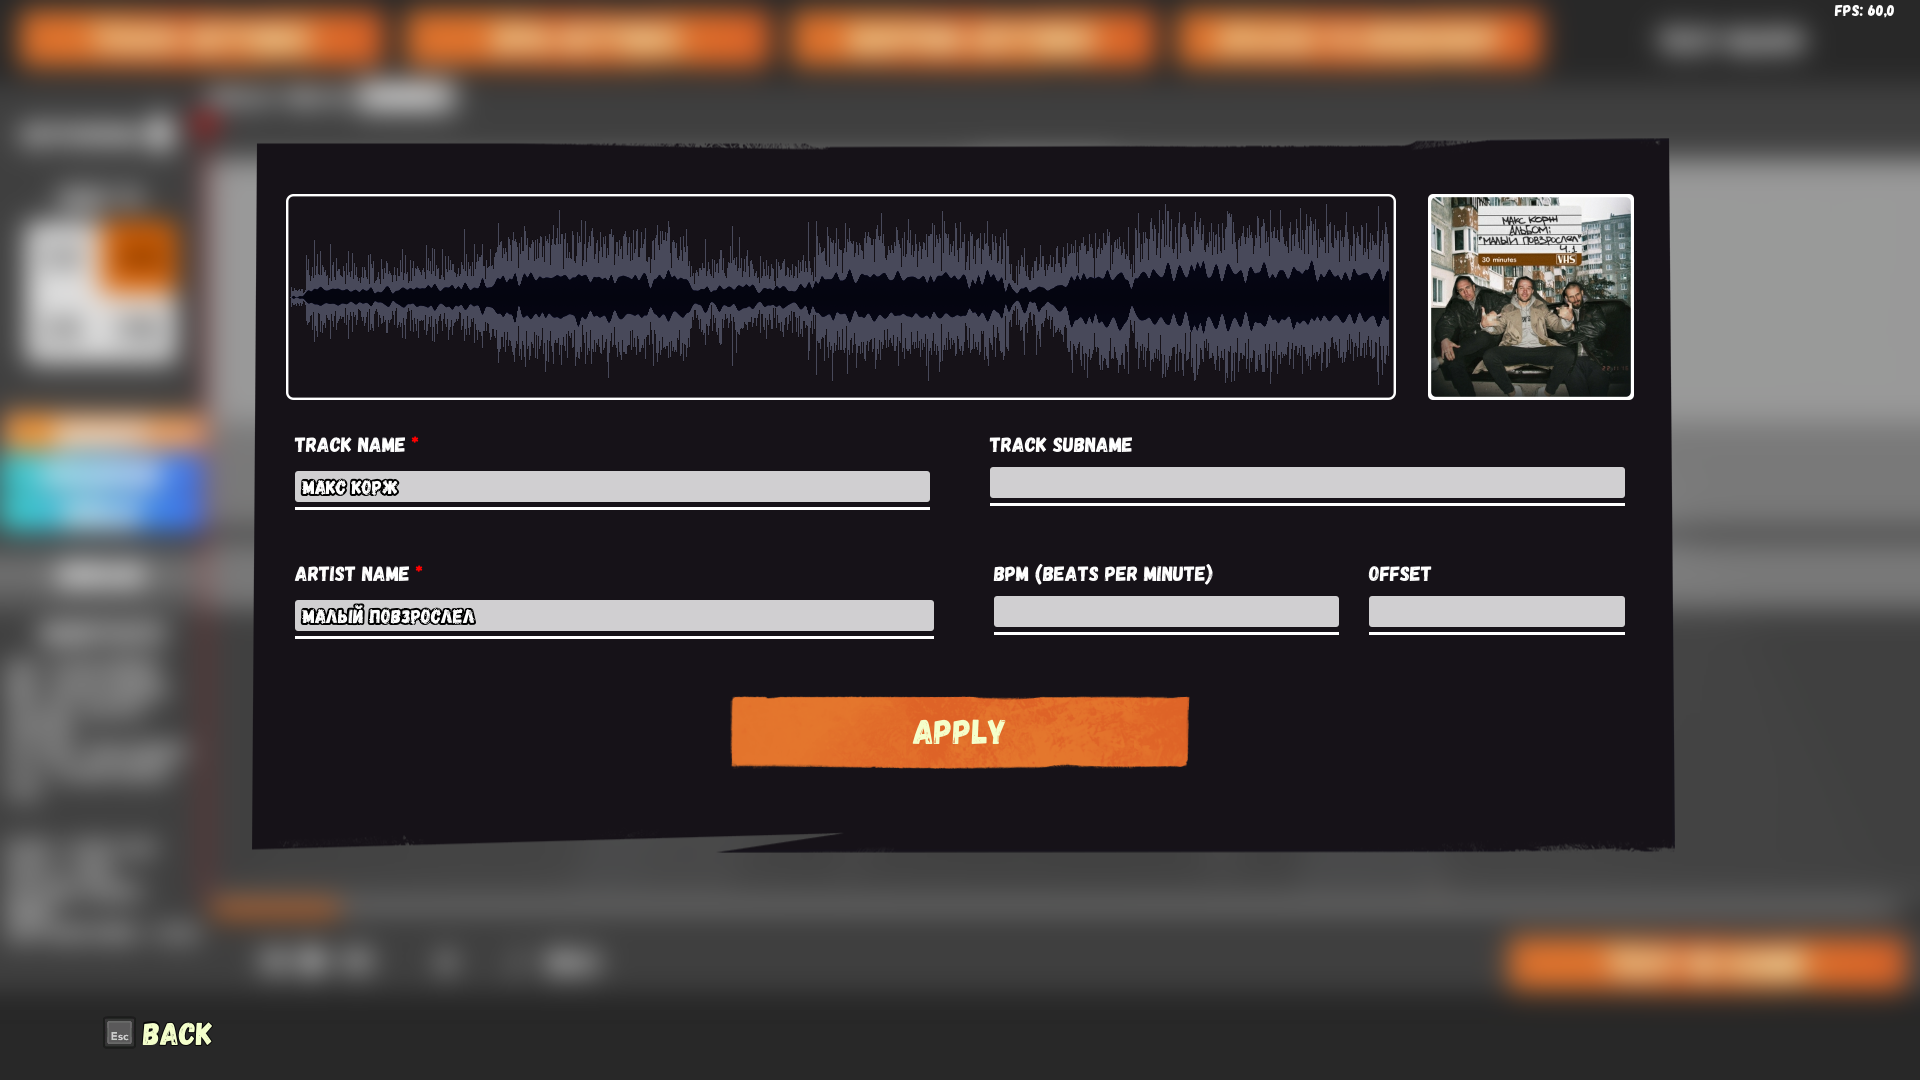
Optional, you can add the track’s BPM (Beats Per Minute) and track offset if you know them. You can find the BPM by Googling the track name along with „BPM.“ If you don’t know these, Es ist okay; you can add them later in the editor using a BPM-finding tool.
Once you’ve filled in all the information, Klicken Sie auf „Anwenden“ Taste. If you want to make changes to the track information later, you can do that by clicking on „Track Setting“ und dann „Update Track Info“ in the track editor.
Editing the song
Das Wichtigste zuerst, you need to check if you are mapping the right song. By pressing Space button, you can play or stop the song.
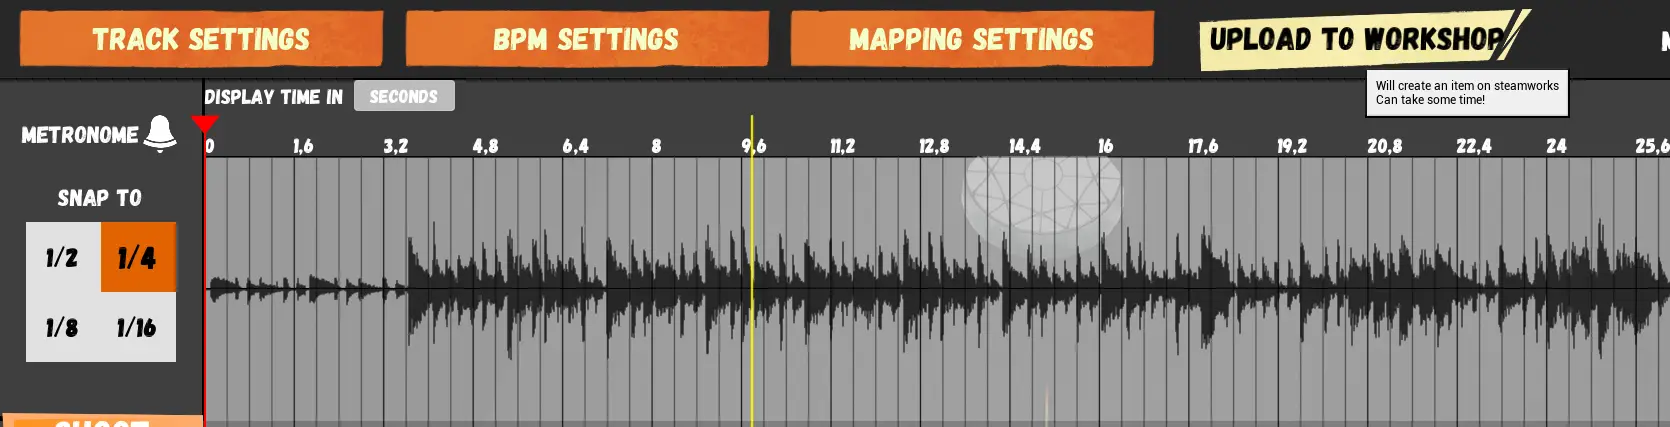
BPM settings
Next thing you need to make sure that the bpm of the current song is match the bpm in the editor. You can calculate it by pressing BPM settings > Find bpm button. You can adjust it in milliseconds if it doesn’t match the song.
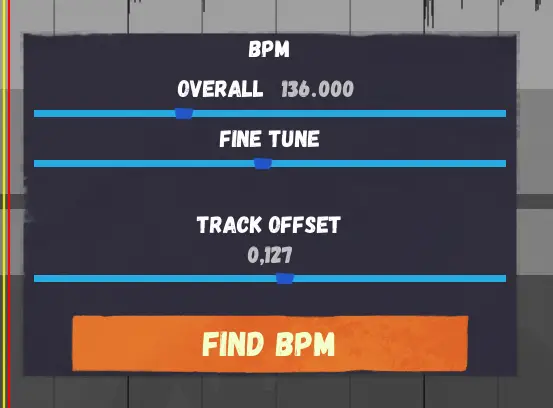
Next you will need to adjust the track offset with the start of the waveform.
Kurzer Tipp: try to match the first peak of the waveform with the grid and then adjust the bpm on the whole song. Check the song in the beginning, middle and end.
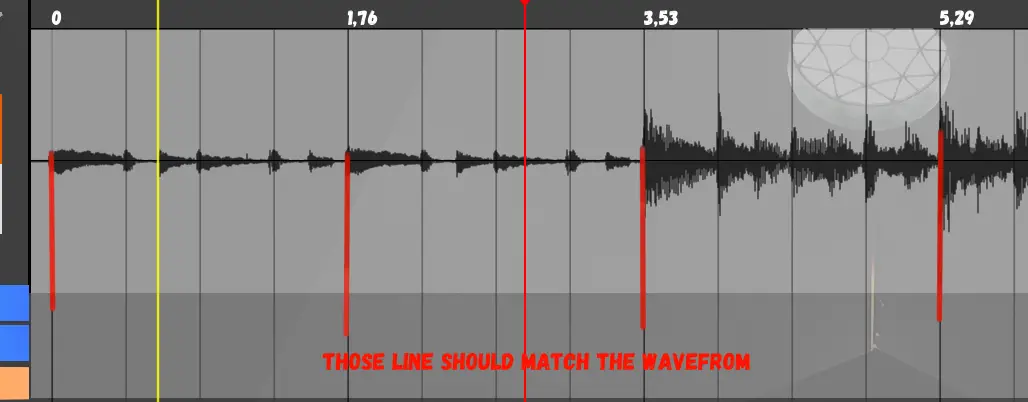
The track should be synced with the metronome sound. You can enable or disable it in the right left corner.
After finding the right bpm don’t forget to Save the track by pressing CTRL+S. Or you can press Track Settings > Save track data.
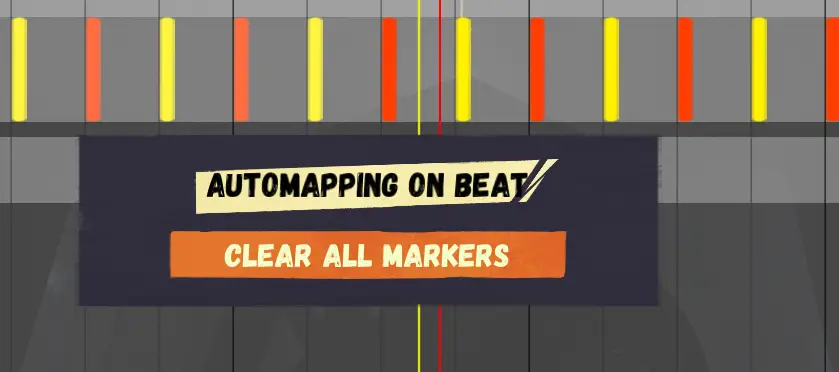
Automapping the song
If the track is using a simple beat you can automatically place the markers on every beat. For that you need to open the Mapping settings button and press Automapping on beat. It will place the markers on every beat with Shot and Charge markers after each other.
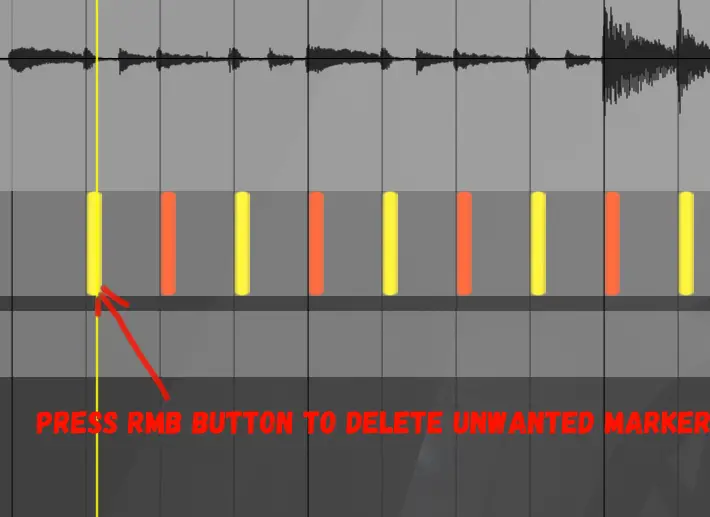
If the markers match the beat – Es’S großartig, now you will only need to delete unwanted markers. You can make it by pressing RMB on markers you want to delete.
If the song looks good for you can check it in game by pressing the Test in game button. Next steps will be editing the track manually or Uploading it to Steam Workshop.
Manual mapping
If you want to make the Map more complex, use the different Shot, Charge and Hold markerks. You can add the markers by pressing LBM on the markers track. Use buttons 1, 2 oder 3 to quickly change marker type. You can press the CTRL with LBM to place multiple markers at once. Or you can drag the markers by pressing ALT plus marker you want to drag.

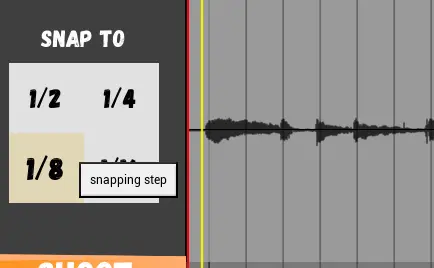
You can change the snapping setting to create 1/8 oder 1/16 Notizen.
Break event
If you want to add the break section to the game you need to click on Break track and place the long marker that will deactivate all markers above and will give players the swords.

Uploading track to steam workshop
After you create and save the track you need to upload it to the steam workshop. You need to press the Upload to Workshop button. And if you wish to update the track later on you will need to click on the same button Update the track.
It will take some time, Normalerweise ungefähr 10 minutes after you pressed the Upload to Workshop button to item appeared in the game Custom tracks playlist. Don’t panic, track will appear soon.
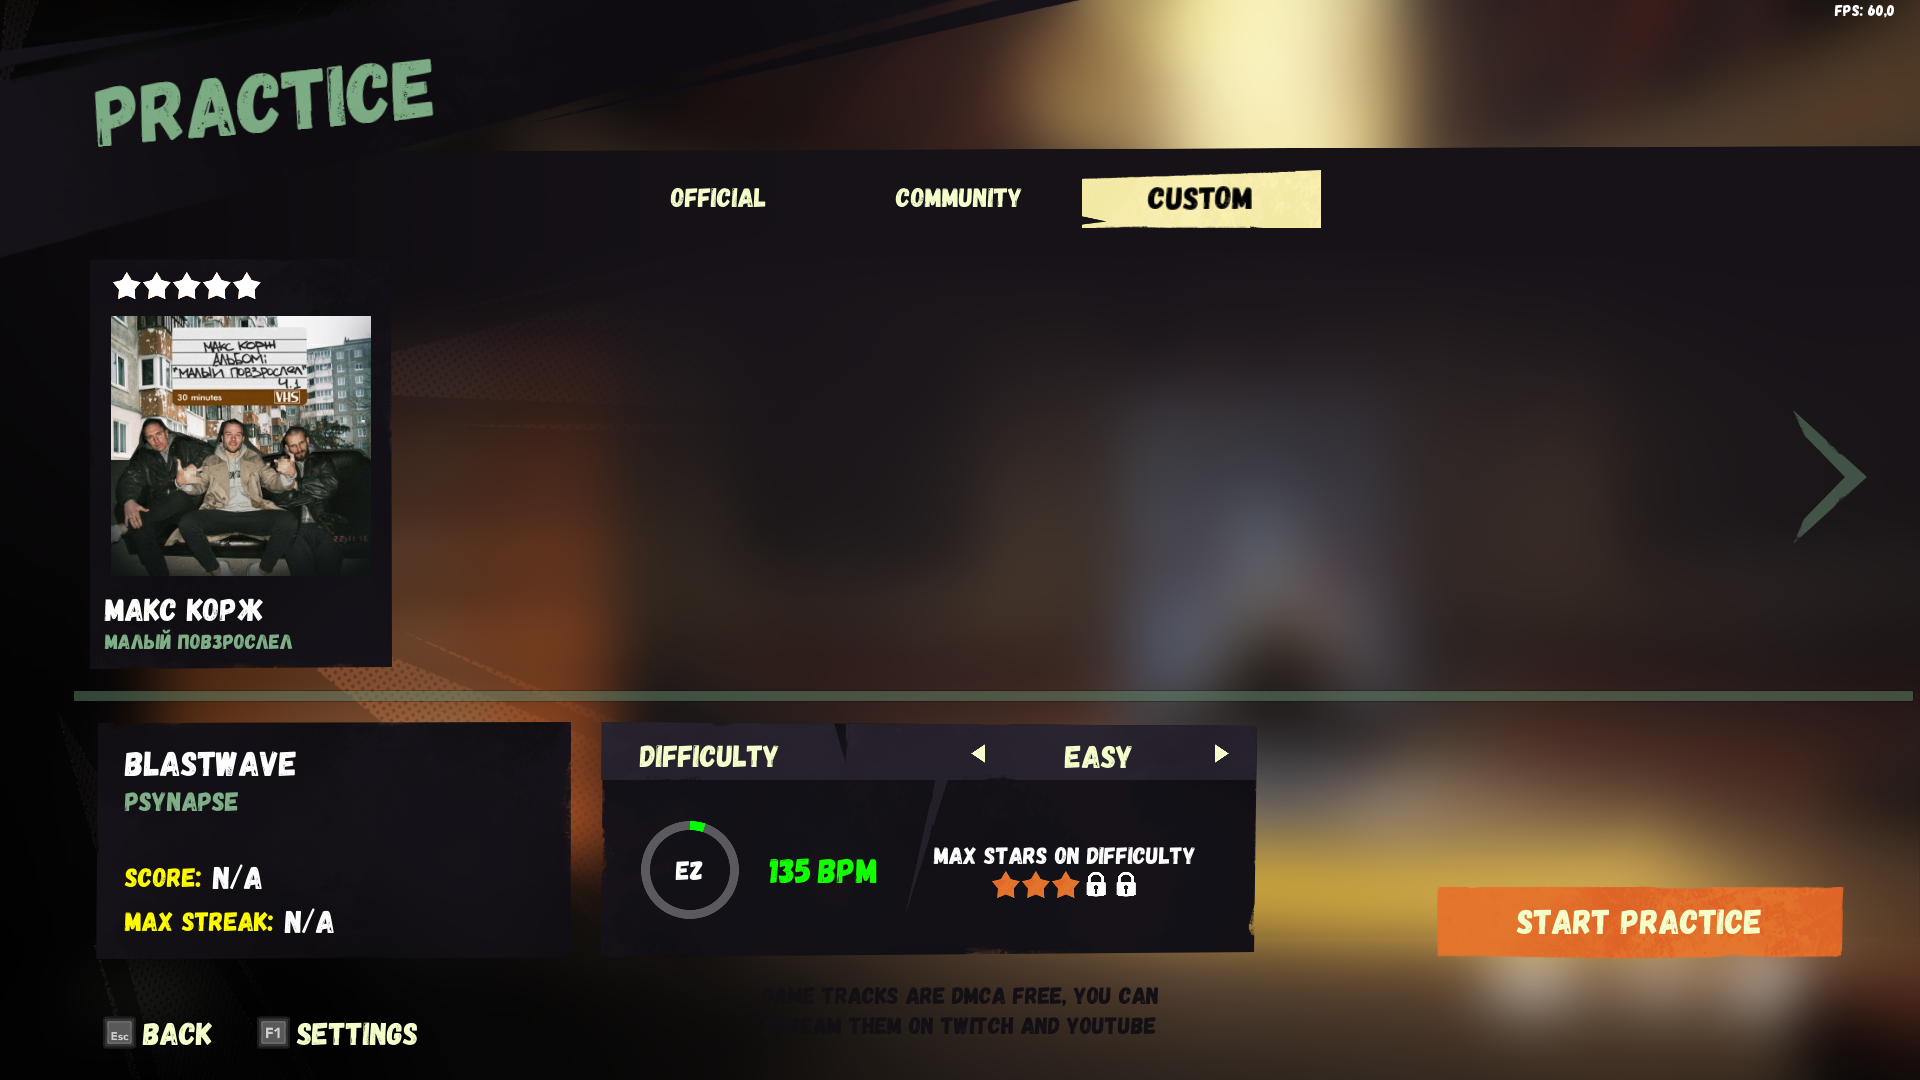
Playing track online or in practice
After successfully uploading the song to the steam workshop (it could take some time to process) you can play it in Practice or in the online Lobby. In the Practice it will appear like that on the Custom tab.
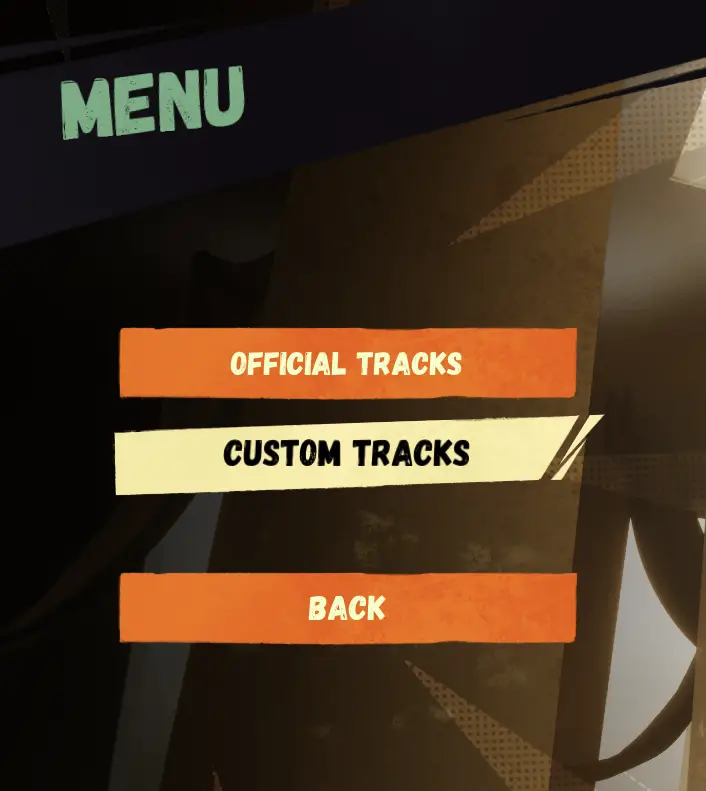
If you wish to play the track in the lobby you will need to create the game as usual but this time with a Custom track button. In the main menu press Create game > Custom tracks.
Next in the lobby, you can add your track to the playlist and play it like a normal track.
Only thing to keep in mind – that you will need to wait for all players to download the track (track download will start automatically).
Current limitations
- Track editor only supports fixed BPM inzwischen.
- Music signature is always 4/4.
- There are no tools for dragging or copy\pasting multiple markers at once.
- Du kannst’t go back from testing track to track editor.
Das ist alles, was wir heute dafür teilen BlasterBeat Führung. Dieser Leitfaden wurde ursprünglich erstellt und geschrieben von Gink69. Für den Fall, dass wir diesen Leitfaden nicht aktualisieren können, Sie können das neueste Update finden, indem Sie diesem folgen Verknüpfung.