
- عنوان: Warhammer: Vermintide 2
- تاريخ الافراج عنه:
- المطور:
- الناشر:
Information about Warhammer: Vermintide 2 لا يزال غير مكتمل. الرجاء مساعدتنا في ملء تفاصيل اللعبة باستخدام هذا نموذج الاتصال.
This guide will teach you how to finish all Necromancer challenges on your own and without using Deeds.
Souleater Staff

Map: Into the Nest
Difficulty: Legend
Objective: Stagger 8 elites simultaneously
For this challenge, you’ll need to enhance your attack speed and stagger power. Utilize the Level 10 Talent, Vanhel’s Danse Macabre, and equip a charm with added attack speed. Having a Ranger Veteran in your group is beneficial due to his Drunken Brawler talent, which grants an attack speed boost. بالإضافة إلى ذلك, the Exhilarating Vapours can give you an extra 8% when the Ranger goes into stealth.
To increase your stagger power, consider using a charm with power vs Skaven or Armored in addition to attack speed. لكن, be cautious not to overpower your weapons as excessive damage might eliminate Stormvermin before staggering the required 8. Aim for a total power vs Skaven and Armored not exceeding 20% if you intend to use a potion of strength.
Both the Warrior Priest and the Grail Knight offer advantages. The former can amplify your stagger power by 25% without increasing your damage, while the latter provides additional power and up to 7% more attack speed with the Virtue of Purity talent. Opt for the concoction trait for the charm, as it combines the effects of the potion of speed and the potion of strength for an adequate duration.
Ensure you eliminate at least the Grail Knight, as their career skill might unintentionally kill some of the necessary enemies. Equip your bots with weapons featuring low armor piercing damage to avoid them stealing your kills. When engaging the patrol, aim to strike as many distinct Stormvermin as possible, ideally targeting both ends of the patrol, as the Souleater Staff’s projectile only jumps to nearby foes. Attacking from the side grants you the opportunity to hit more enemies simultaneously than attacking from the front.

Map: Almost any map
Difficulty: Any difficulty
You can do this at any time.
To stop your bots from taking your kills, you can modify your gear to be strong against Chaos and Armored enemies. أيضًا, equip your bots with weapons that have low armor-piercing damage. When choosing careers for your bots, go for ones that don’t easily kill elites, although it’s not mandatory.
The secondary attack of the Souleater Staff can quickly build up overcharge, so be sure to release your skeletons every third spell (or the fourth with Thermal Equalizer) to vent your overcharge.
Ensorcelled Reaper

Map: Any map
Difficulty: Any difficulty
You can do this at any time in between.
There’s not much more to add, except that you can aim better for the enemies’ heads with your first light attack.

Map: الحفرة
Difficulty: Legend
To increase your chances of hitting 15 enemies with one swing, you need to go to a specific spot in The Pit. Progress through the map until you spot a ladder leading to the second area.
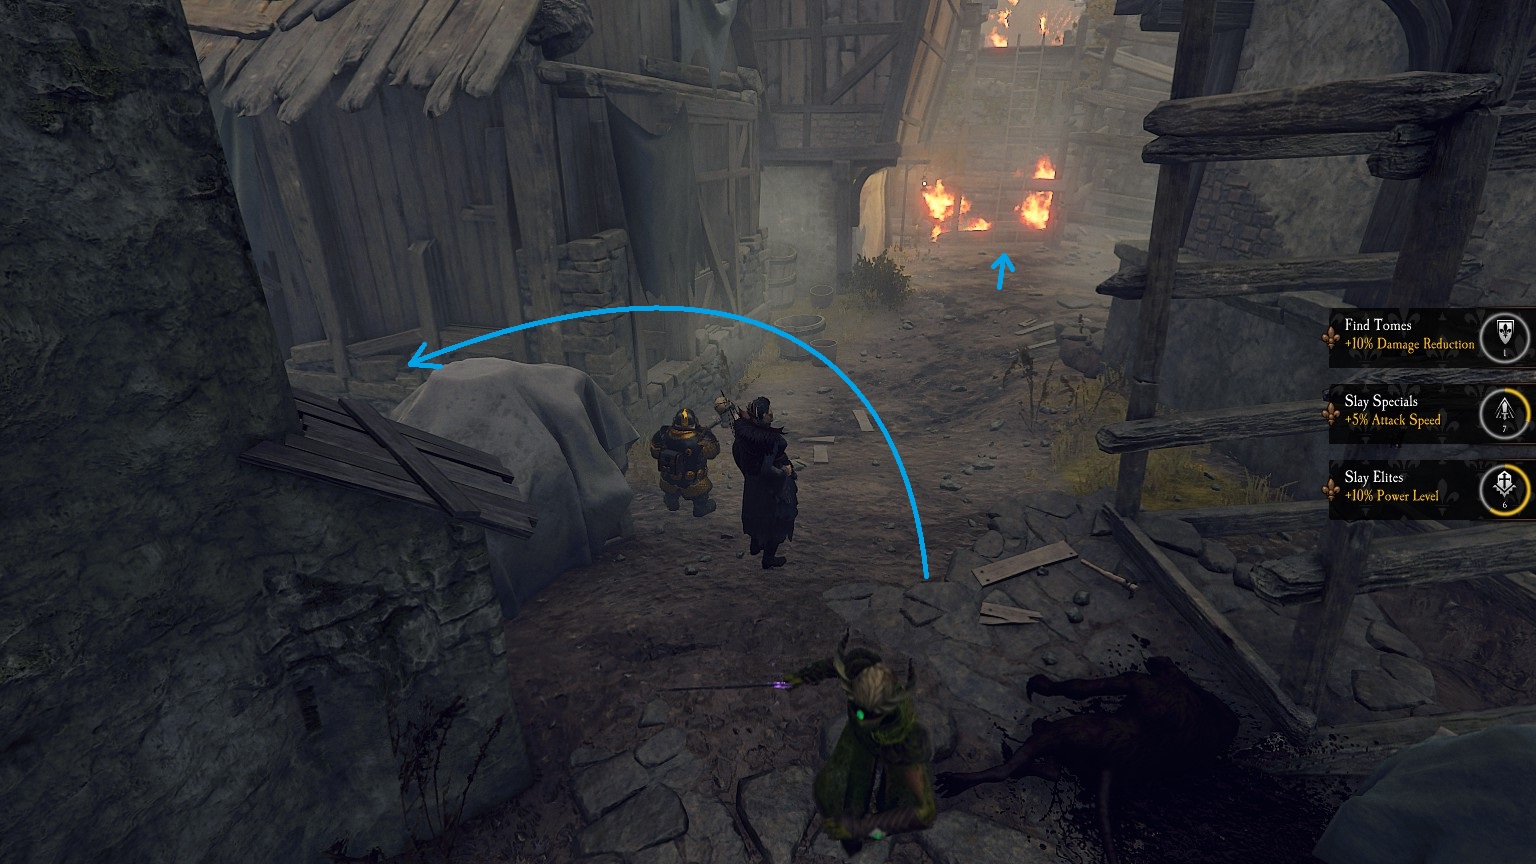
Instead of going up the ladder, head left and jump over the crates. Let your bots get defeated by enemies or use your ranged attacks. Many enemies will gather in front of you at a safe distance, and you can hit them with a few heavy attacks from your Reaper. Be cautious of numerous specials around you.
You can easily dodge attacks from Ratling Gunners, Warpfire Throwers, and Packmasters behind the crates. لكن, a Globadier can throw gas globes over them, and Gutter Runners can leap from the top of the building across the street and should be dealt with immediately. A Globadier can also toss gas globes through the gap between the two houses behind you.
After completing the challenge, climb the ladder and proceed to the next area where your bots are waiting to be rescued. Only Slaverats will appear in the hordes, and you can cleave through them without needing the Reaping talent.
الهياكل العظمية

Map: Any map
Difficulty: Any difficulty
You can do this at any time in between. Just command your skeletons to attack an elite with your Icon of Death.

Map: Tower of Treachery
Difficulty: Legend
After Sofia’s monologue, no random hordes or specials will appear except those spawned by destroying the wards. You can craft more than enough potions of concentration at the alchemy table, making the Tower of Treachery the best mission for this challenge.
You’ll need the level 30 talent Army Of The Dead and a charm with a decanter. You’ll make use of one of the Chaos patrols in the tower for this. Bring one bot that can quickly eliminate armored enemies or a bot that can withstand a lot of damage, such as the Ironbreaker. The choice of the other two bots is up to you.
Eliminate the other two bots from a safe distance from the patrol, leaving the first one unharmed so that he doesn’t get revived too early. Shoot the last one but only enough to down him, not kill him.
Consume the potion of concentration and summon as many skeletons as possible, then swiftly move to the patrol. Direct your skeletons to defend near the patrol and observe them absorbing all the damage from the Chaos Warriors. If done correctly, you should achieve the goal on the first attempt. Remember that your skeletons will leave their position if you move too far away, and the enemies will attack you instead if you stay too close.
After completing the challenge, revive your last bot before he bleeds out and take out the patrol together. If one of the other bots dropped a potion of concentration upon their death, you can use it to create another wall of bones to assist you with the rest of the Chaos patrol.

Map: Any map
Difficulty: Any difficulty
This can be done alongside Wall of Bone. Drink a potion of concentration with the decanter trait on a charm and keep summoning (the level 30 talent Army Of The Dead is required for this).

Map: Any map
Difficulty: Recruit
Your skeletons must be active for only 95% of the time during your run, so you can briefly have fewer than 4 skeletons without starting over, but you still need to summon more quickly afterward.
The Level 30 talent Dread Seneschal will give them 50% more health, and the Level 25 talent Spirit Leech restores 15% of your cooldown bar so you can resummon the skeletons more quickly. أ 10% cooldown reduction on your trinket is also recommended.
Summon your skeleton right away and carry a staff that can easily take out specials, as a Warpfire Thrower and a Blightstormer can wipe out most of your skeletons at once.

Map: Into the Nest
Difficulty: Legend
To make your skeletons hit 60 enemies in 2 ثواني, you need to gather as many enemies as possible in a confined space. You’ll need the Dread Seneschal talent again because if you order them to attack, ال 3 skeletons will charge into the horde and hit many enemies simultaneously, unlike a mass of normal skeletons.
The mission Into the Nest is best for gathering an entire horde in one place. Only the equipment and the career of the bot are important for this challenge. Take an Ironbreaker with block cost reduction and stamina on the weapon, block cost reduction and health on the necklace, and stamina recovery on the trinket with you. Eliminate the other two bots right at the start.
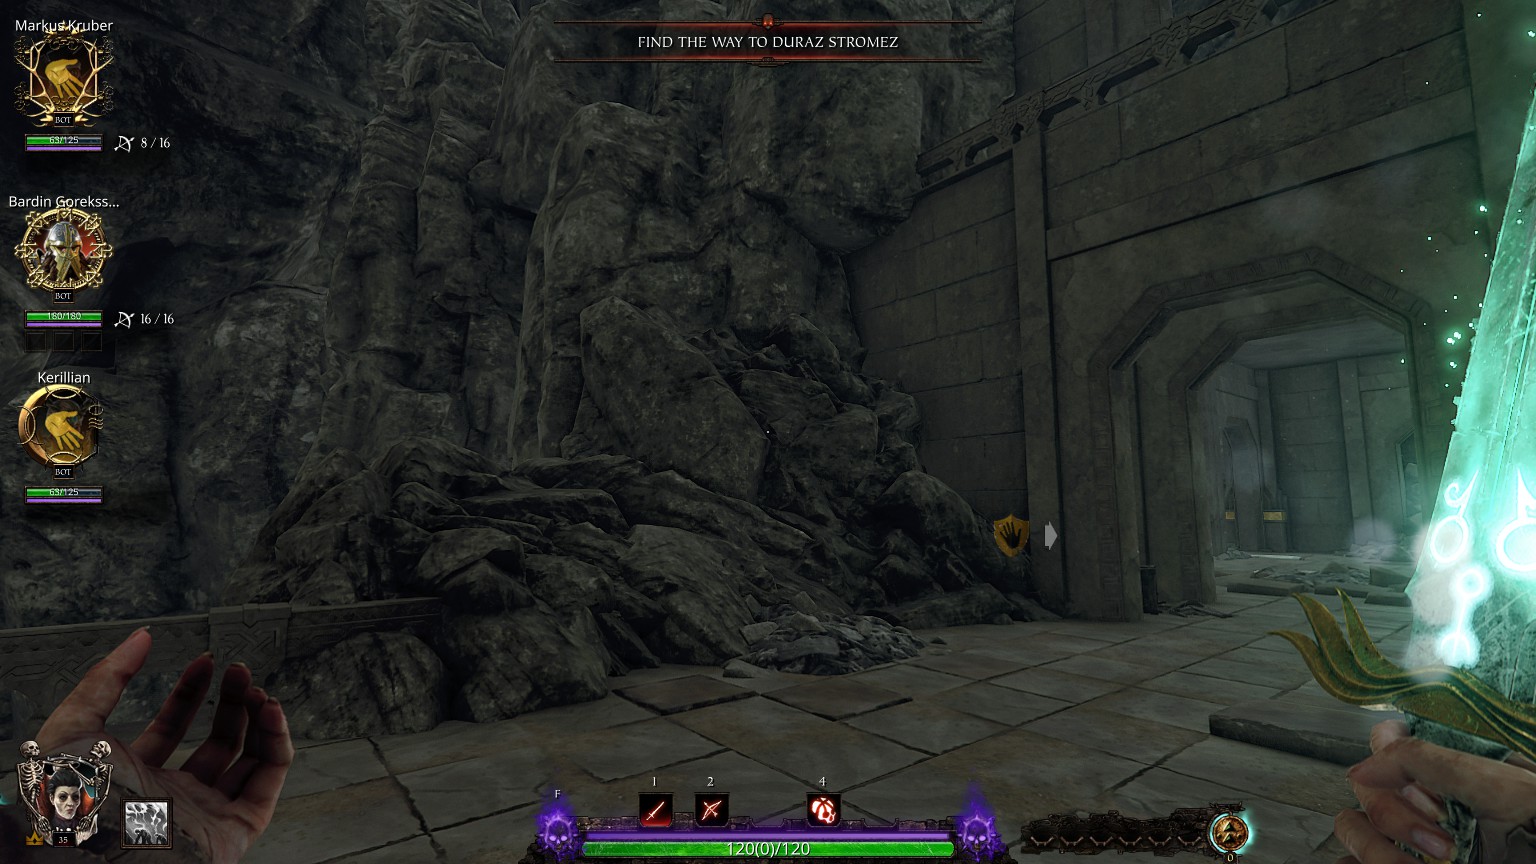
After going down the stairs and before the first dropdown, turn around, and you’ll see a cliff you need to climb. Stand on the right side of the cliff and wait for a horde to arrive, and your Ironbreaker will act as a decoy.
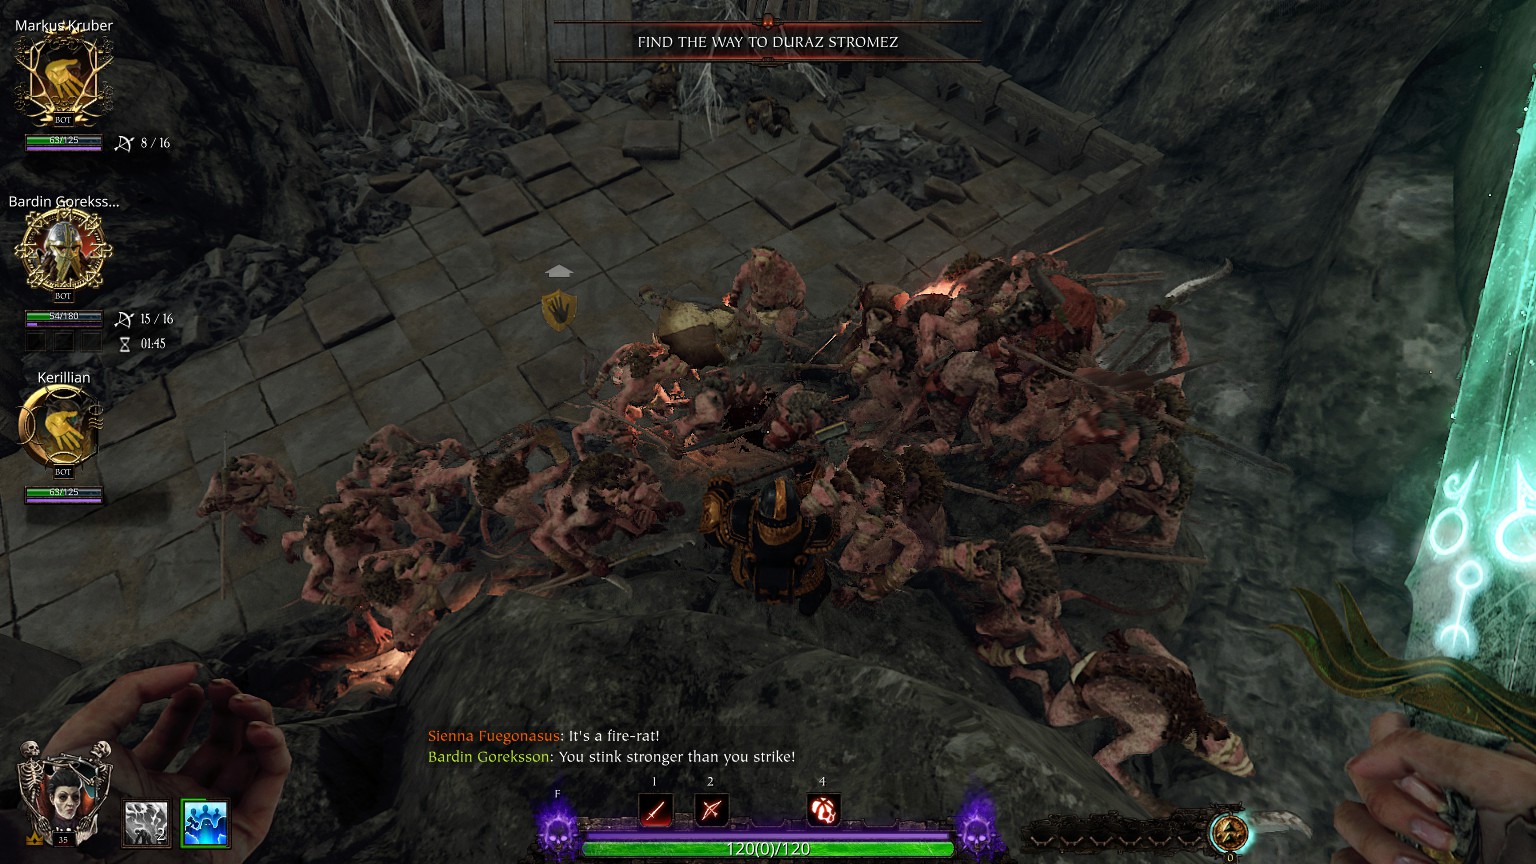
Move to the left side near the wall so that the Skaven lurking behind also come in, but only after the first enemies attack him, so the bot stays at the edge on the far right. After enough enemies have gathered together, summon your skeletons, give them a few seconds to emerge from the ground, and order them to charge into the pile of ratmen.
Malediction Of Nagash

Map: Any map
Difficulty: Any difficulty
You can do this at any time in between. With the Level 30 talent Barrow Blades, your skeletons can ignite enemies, so you don’t need to apply the malediction effect yourself. Just let your skeletons hit the enemies, and they’ll do the work.

Map: Any map
Difficulty: Any difficulty
You can do this at any time in between. Only the light attack can ignite enemies. To speed up the challenge, use your staff against hordes, and the projectile will jump to other enemies.

Map: Any map
Difficulty: Any difficulty
You can do this at any time in between. To kill many burning enemies with melee attacks, you’ll need a weapon that can easily ignite enemies and has good crowd control, like the Flame Sword. Use the heavy attack repeatedly against hordes, and you should complete this challenge quickly.
Missions

Map: All Helmgart
Difficulty: Any difficulty
This challenge doesn’t require a specific difficulty. If you want to do this challenge first, skip the mission Into the Nest because you will need this map for other challenges. You will receive the frame even if you haven’t purchased the cosmetic upgrade.

Map: Any map
Difficulty: Any difficulty
It is recommended to do this as the last challenge because it has no special requirements other than completing the missions as a Necromancer.
Other Challenges

Map: Tower of Treachery
Difficulty: Any difficulty
To generate massive overcharge quickly, you need to maximize your attack speed. For this challenge, you will need a charm with attack speed and decanter as a trait, the Level 10 talent Vanhel’s Danse Macabre, a Coruscation or Beam Staff without Thermal Equalizer, a Ranger Veteran with the Drunken Bawler talent, and optionally, a Grail Knight with the Virtue of Purity talent for an additional 7% سرعة الهجوم.
At the alchemy table, you can create an endless supply of speed potions while you kill specials for the Grail Knight’s quest and have a chance to get ale from the Ranger Veteran. Summon your skeletons, drink the potion of speed, and spam primary attacks with your Coruscation Staff or secondary attacks with your Beam Staff as quickly as possible.
Don’t forget to vent your overcharge by releasing your skeletons when you reach 80-90% of your overcharge bar because the more it increases, the more your attack speed is reduced. You don’t need to drink another potion because with decanter, the duration of a single potion is enough. You also don’t need to target any skeletons to release them; just attack, switch to your Icon of Death, اضغط ص, and switch back. Ale, potions, and skeletons are infinite, so you can try as many times as needed.

Map: Any map
Difficulty: Any difficulty
This challenge can be done alongside Overcharged because you’re already creating and venting overcharge.
تهانينا
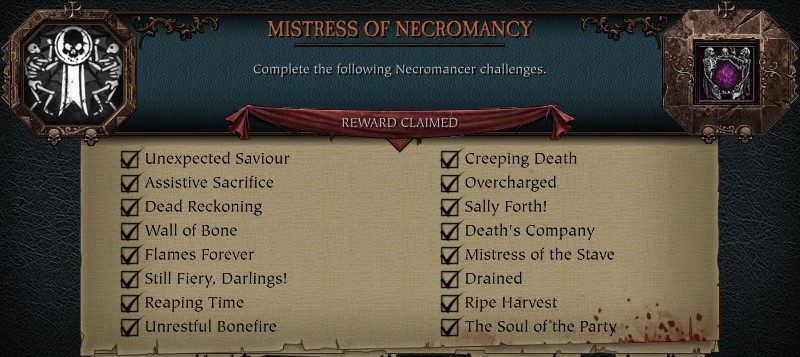
You’ve successfully completed all the Necromancer challenges and earned a cool frame as a reward, even if you didn’t purchase the cosmetic upgrade. I hope this guide has made the challenges a bit easier for you.
هذا كل ما نشاركه اليوم من أجل هذا Warhammer: Vermintide 2 مرشد. تم إنشاء هذا الدليل وكتابته في الأصل بواسطة Saizo19_. في حالة فشلنا في تحديث هذا الدليل, يمكنك العثور على آخر تحديث باتباع هذا وصلة.