In this guide for Symphony of War: The Nephilim Saga, you won’t just find a basic template for building your army. بدلاً من, it delves into the intricacies of why and how you should construct your forces.
By grasping the underlying mechanics, you’ll gain insight into the common errors present in popular army setups. This understanding will empower you to adapt and tailor your own army compositions with greater flexibility.
مقدمة
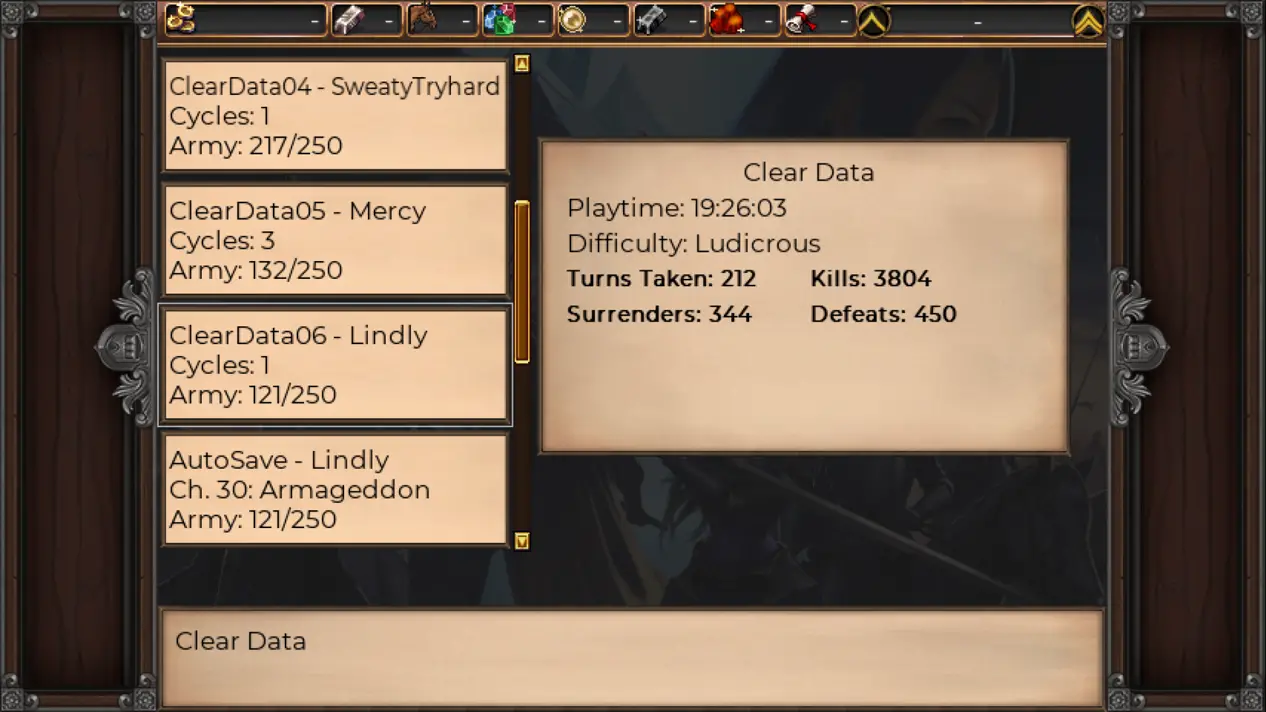
The aim of this guide is to equip you with the knowledge to assemble an army capable of effortlessly conquering NG ludicrous difficulty, all while accommodating your preferred playstyle.
By following these strategies, you’ll be able to demonstrate a solid understanding of advanced army-building techniques. While there’s always room for refinement, mastering these methods transformed the once-daunting challenge of clearing NG ludicrous into a manageable feat.
Volley Mechanic (VERY Important)
In Symphony of War melee combat, the flow of attack waves follows a structured pattern. On one side, when a squad initiates an attack, units of the same type coordinate to select their targets and execute their attacks simultaneously, forming what we refer to as a volley.
تبعًا, units of the next type proceed to unleash the subsequent volley until all units within the squad have attacked once. This sequence constitutes a round. Following this, the defender responds with their own round of attacks, and the cycle continues in alternating fashion.
The order of volleys in melee combat is as follows (credits to Xyranius and Advil_PM on Discord):
- Pre-battle effects (على سبيل المثال, Oracle and Everlasting Potion)
- Guns in the front row
- Guns in the mid row
- Guns in the back row
- Magic and dragons
- Ranged units (including Ranger’s first attack with a crossbow)
- Light melee and samurai
- Heavy melee
- Risen
- Healers
During a volley, all participants first designate their targets before executing their attacks simultaneously.
لذا, why does this matter?
When facing a triangular formation enemy squad with a nine-champion squad of your own, all nine units might waste their initial attack on the singular frontline enemy. This occurs because target selection only occurs before the commencement of each volley, not during.
To mitigate this issue, it’s advisable to ensure that your squad comprises units belonging to different volleys or possess varied target selection methods. This way, your units will distribute their attacks more effectively or at least evaluate their targets before engaging.
مثال 1: Multiple volleys
Consider a squad composition consisting of 2 mages, 3 heavy units, و 2 light units. This configuration proves to be exceptionally potent, capable of dispatching most enemy units in a single player phase. بشكل ملحوظ, you don’t necessarily require all nine members, advantageous traits, أو top-tier artifacts to achieve this feat even on ludicrous difficulty.
مثال 2: different target selection
In this scenario, let’s examine a squad with varying target selection methods:
- Volley 1: 4 frontline attackers, 2 backstabbers, 1 unit with guile (or any versatile unit).
- Volley 2: 5 frontline attackers, 1 backstabber, 1 unit with guile.
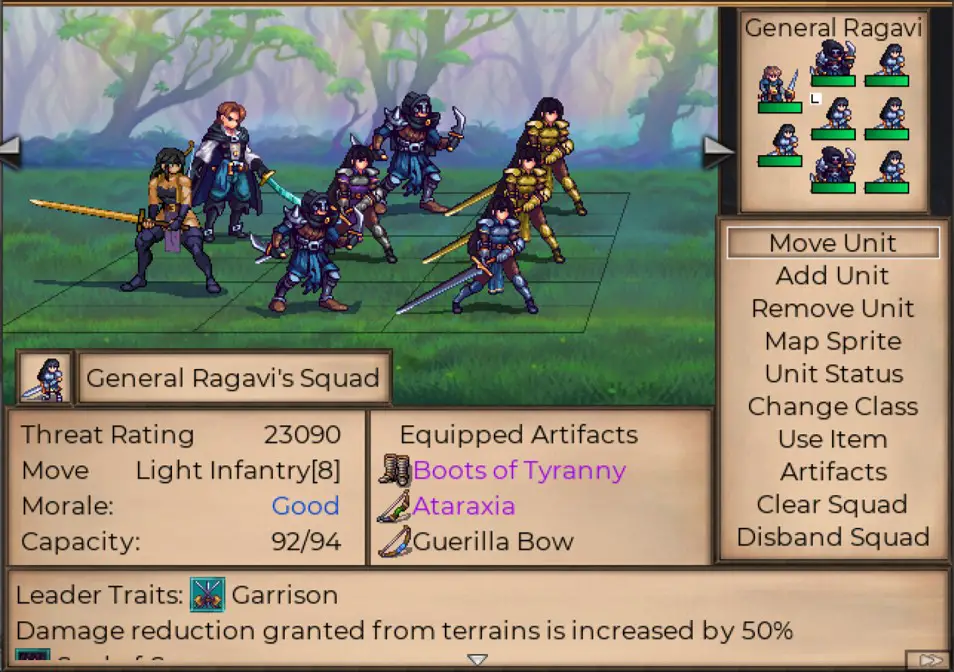
Although this squad may not be considered formidable, as assassins primarily excel on offense and General Ragavi serves as a predominantly defensive leader, it outperforms a pure Swordmaster General Ragavi squad or a pure Assassin Kuroda squad. By substituting one or two Swordmasters with heavy infantry, this composition transforms into a highly effective squad, despite the majority of units being part of the light volley.
مثال 3: ماذا لا تفعل
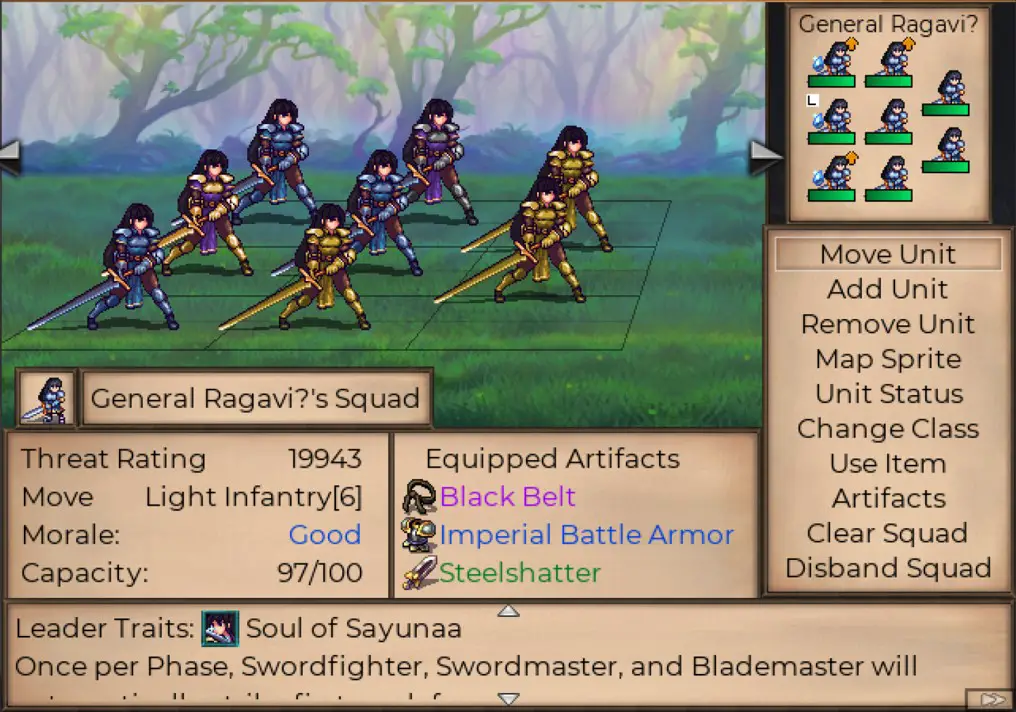
Avoid assembling a squad that fails to eliminate a three-row enemy squad unless luck favors you with additional actions. Each volley can only target enemy units not obstructed by others in front, leaving both the mid and back rows of the enemy squad untouched after the initial volley. This configuration represents a squandering of one of the most overpowered leaders in the game and significant resources invested in Swordmasters.
Rounds: Primarily Significant for Ambushes
In Symphony of War, each unit can partake in one or two rounds, contingent upon their unit type. Most units are capable of participating in two rounds, except for mages, unupgraded gunners, cannons, and the majority of healers, which are limited to one round.
بشكل ملحوظ, Stefen stands out as an exception with three attacks once he acquires a shiny new sword, showcasing his special capabilities.
Following the participation of every unit in the attacking squad in one of the volleys, the round concludes, initiating the defending squad’s round. This alternation follows a round-robin style.
Units endowed with “extra action” may obtain a third attack and engage in an additional round. Traits such as Executioner, Desperation, possessing high morale, or being named Sybil may confer this “extra action.”
In instances where a light squad commences their turn in an ambush tile (before moving) and executes an attack while standing in said ambush tile (after moving), the attack qualifies as an ambush. During an ambush, the defender forfeits their first round. هكذا, the attacker enjoys two rounds before the defender takes one round.
You can identify ambush tiles by pressing F to cycle through different highlights or simply by observing which tiles exhibit a dark tinge when selecting a light squad.
Basics: Movement Types
The section regarding squad movement types closely mirrors information available in the in-game tutorial, so I’ll skip over it.
In Symphony of War, each squad possesses a movement type, categorized as follows:
- Heavy Infantry: Represents the baseline movement type.
- Light Infantry: Gains +1 movement and possesses the ability to ambush.
- Heavy Cavalry: Benefits from +2 movement and can move after taking an action.
- Light Cavalry: Enjoys +3 movement and can both ambush and move after taking an action.
The game calculates the total number of units with light and heavy types within the squad and assigns the movement type (light or heavy) corresponding to the majority. In the event of an equal number, the squad defaults to the heavy movement type.
بصورة مماثلة, the game tallies the number of units with infantry and cavalry types within the squad and designates the movement type (infantry or cavalry) based on the majority. If the count is equal, the squad adopts the light movement type.
It’s worth noting that each cat unit is equivalent to three light infantries in terms of calculation.

Let’s consider an example squad composition:
- 3 light infantry
- 2 light cavalry
- 2 heavy infantry
- 1 heavy cavalry
أولاً, we determine the dominant movement type based on the count of infantry and cavalry units:
- Infantry count: 4 (2 heavy infantry + 2 light infantry)
- Cavalry count: 4 (2 heavy cavalry + 2 light cavalry)
Since the infantry count matches the cavalry count, the squad adopts the heavy infantry movement type.
التالي, we ascertain the primary movement type based on the count of light and heavy units:
- Light unit count: 5 (3 light infantry + 2 light cavalry)
- Heavy unit count: 3 (2 heavy infantry + 1 heavy cavalry)
As the light unit count exceeds the heavy unit count, the squad adopts the light movement type.
لذلك, the squad’s movement type is determined to be light infantry. (ملحوظة: This example squad is not recommended for actual use; it serves purely as an illustration.)
بالإضافة إلى ذلك, the game introduces a special unit type:
- الطيران: Gains +1 movement and ignores terrain.
To qualify for the flying movement type, the squad must have equal or more dragon riders and no cannons or cavalry units included.
Squad Types Overview
Not all squads serve the same purpose. Let’s delve into different types of squads you might consider for your army, along with their resource requirements and intended usage. More detailed information can be found in subsequent sections.
- Resource Allocation: Each squad varies in its resource demands, including iron, magic gem, obsidian, sun stone, horse, and pyrocite.
- Leadership (LDR) Needs: This indicates how much Leadership (LDR) the leader needs to be effective. It reflects the importance of the leader in capturing objectives and seizing arena opportunities.
- Stat Dependency: This refers to how reliant the squad units are on their individual stats. It factors in the necessity for artifact and trait investments to enhance their performance.
The heavy/light/ranged squad distinctions are based on enemy compositions, where adversaries tend to field predominantly one type of unit due to limited squad diversity among AI opponents.
Juggernaut Squads
- موارد: A lot
- Leadership (LDR): A bunch
- Stats: Through the roof
Juggernaut squads are built to obliterate foes in one swift move during the player’s turn. They can take hits from entire enemy squads without breaking a sweat, all while dishing out substantial damage even when defending.
They might seem overpowered, and that’s because they absolutely are. لكن, their strength comes with a hefty price tag.
Melee Killer Squads
- Resource: Moderate to Low
- Leadership (LDR): Medium to High
- Stats: Moderate
These squads excel at swiftly eliminating enemies during the player’s turn, capable of taking down foes with a single strike. They can endure attacks from weakened enemy squads during the opponent’s turn while maintaining their formation, but they’re vulnerable to collapse when facing a full enemy squad onslaught.
Dragon Squads
- Resource: واسطة
- Leadership (LDR): قليل
- Stats: Moderate
Dragon squads possess the ability to disregard terrain obstacles, making them adept at dispatching light or ranged enemy squads. لكن, they struggle against heavy squads. Their primary function lies in eliminating ranged adversaries positioned behind walls.
During the mid-game, Dragon squads wield considerable power due to their low LDR requirement. They can even compete somewhat with melee killer squads in eliminating heavy squads. لكن, their effectiveness diminishes as other squads amass sufficient LDR to enhance their capabilities.
Cannon Squads
- Resource: Considerable
- Leadership (LDR): Low to Medium
- Stats: قليل
Cannon squads offer high effectiveness with relatively low investment. They excel at swiftly eliminating light and ranged enemy squads while also putting a dent in heavy squads. لكن, they pose little threat to dragon squads and are vulnerable to enemy attacks.
Healer Squads
- Resource: Moderate to Low
- Leadership (LDR): قليل
- Stats: قليل
These squads are incredibly cost-effective, providing essential support by maintaining the health of other squads.
Tank Squads
- Resource: واسطة
- Experience (Exp): قليل
- Artifact: واسطة
Tank squads are simply designed to endure. Their primary role is to prolong their survival on the battlefield.
Bait Squads
- Resource: لا أحد
- Leadership (LDR): لا أحد
- Stats: لا أحد
Bait squads serve the purpose of drawing enemy fire, with their low threat level enticing AI opponents to target them.
Archer Meme Squad
- Resource: واسطة
- Leadership (LDR): عالي
- Stats: Outrageous
Considered a humorous endeavor, the Archer Meme Squad comprises entirely of archers. While capable of dealing significant damage, this strategy demands excessive investment in both traits and artifacts, making it impractical in most scenarios.
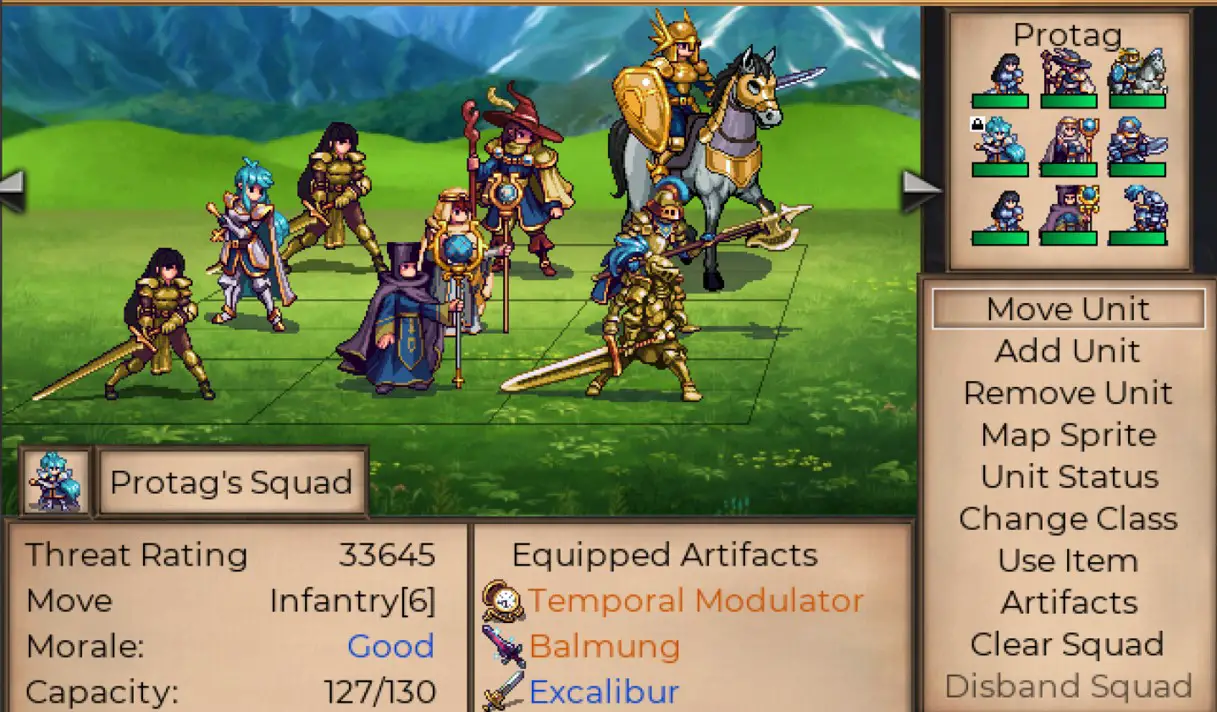
Juggernaut Squad
مثال
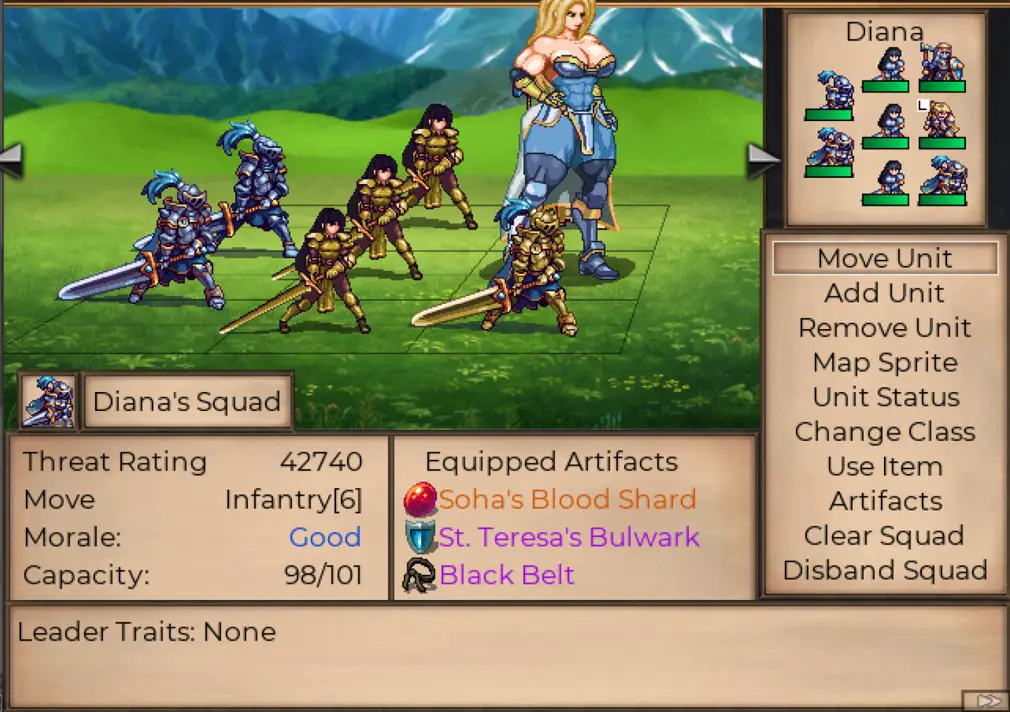
يكلف:
- Resource: عالي
- LDR: عالي
- Stats: عالي
تعبير:
Front:
- 3 heavy units are essential due to frontline damage. Priority on Bloodlust trait, though other defensive traits like Resolve, Bodyguard, or Barrier are also effective.
منتصف:
- Prefer light units, with at most 1 mage/healer. Avoid oracles.
خلف:
- 2 ل 3 light/heavy units.
Artifacts:
Best:
- Soha’s Blood Shard
- St. Teresa’s Bulwark
- Black Belt
- Temporal Modulator
- Balmung
- Everlasting Potion
Good:
- Artifacts with high strength and/or armor.
Role: These units require significant investment and serve as the vanguard. They lead the charge, attracting enemy squads, and weakening or eliminating them on the counterattack.
Positioning: Advance aggressively to draw enemy fire, ensuring this squad is the primary target. Avoid overly dangerous enemy squads.
General Concerns: Emphasize extreme durability and effectiveness despite magic fatigue. Focus on increasing damage output as this squad engages frequently. Limit their numbers and deploy strategically, especially against heavy melee cavalry.
Detailed Build:
Frontline:
- Prioritize champion/zweihanders for their high damage output with Guardian trait. Paladins/sentinels are acceptable alternatives, focusing on tankiness.
Light Damage Dealers:
- Swordmasters, Stefan, Narima, General Ragavi are preferred. Assassins are ineffective, while ranged units lack damage output.
Sustain:
- Prioritize Soha’s Blood Shard, Bloodlust, and Everlasting Potion for consistent HP regeneration despite magic fatigue. Adapt if limited by unique items.
Healer:
- Consider a healer to prevent casualties from focused enemy attacks, but focus on sustaining the squad rather than healing.
بركه:
- Initially useful for damage before transitioning to non-magic reliant units. Oracle offers general protection but may not be essential for this squad.
Mother of All Juggernaut Squad:
- Equip Soha’s Blood Shard, St. Teresa’s Diadem, and Skull of Rowdain for unparalleled damage output. Maintain fearful morale to counteract morale penalties. Beware of reduced MAG from St. Teresa’s Diadem, which may endanger light units.
Other Units:
- Centurion (back row), Valkyrie (back row), and potentially Gunners (mid row) can enhance the squad’s effectiveness.
Melee Killer Squads
مثال
يكلف:
- Resource: Low-Medium
- LDR: Medium-High
- Stats: واسطة
تعبير:
Front:
- 2-3 heavy units, prioritizing durability as frontline damage is significant.
منتصف:
- Any damage dealers or support units.
خلف:
- Any non-mage/healer units.
Artifacts:
Best:
- Items that increase capacity.
Good:
- Items that enhance damage output.
مقبول:
- Any other artifacts.
Role: These squads serve as primary offensive units, aiming to eliminate or severely weaken enemy squads on the player phase. They can withstand some attacks from weakened enemies but struggle against full-strength squads.
Positioning: Advance cautiously alongside other melee killer squads, ensuring they remain out of reach of full enemy melee squads after taking action.
General Concerns: Emphasize damage output for effective offense. Movement types like heavy cavalry, light infantry, or heavy infantry are preferred.
Detailed Build:
Frontline:
- Optimal units include champions, centurions, zweihanders, knights, valkyries, and paladins for their damage potential or ability to fulfill healer roles while dealing damage.
Midline:
- Suitable units include mages, healers, gunners, oracles, and light units like swordmasters or assassins, providing versatility and protection.
Backline:
- Heavy or light units and gunners are viable. Avoid exposing mages to direct attacks but prioritize defense less than with juggernaut squads.
Vital Considerations:
- Ensure multiple volleys or target selection types for sufficient damage output and survivability against full or nearly full enemy squads.
- Champions, centurions, zweihanders, mages (especially fire mages), swordmasters, and assassins are top damage dealers. Prioritize these units.
- Limit reliance on healer squads, maintaining a balance with offensive units such as templars, valkyries, or paladins.
- Avoid building melee killer squads with only 1 frontline unit, as even weakened squads pose a threat without additional support.
- If applying traits, prioritize offensive traits for damage dealers and defensive traits for frontline units.
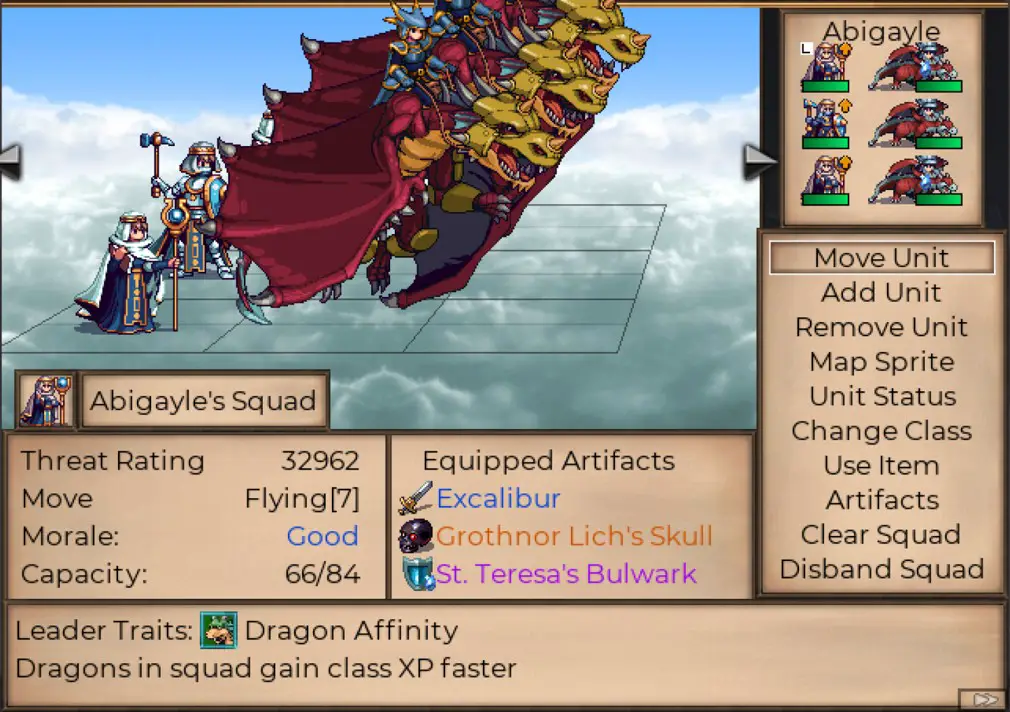
Dragon Squads
مثال
يكلف:
- Resource: واسطة
- LDR: قليل
- Stats: واسطة
تعبير:
- 3 Dragons
- 3 Infantry/Mages/Healers
Artifacts:
Best:
- Items enhancing MAG, STR, or ARM stats.
Role: These squads specialize in assassination, bypassing terrain to target vulnerable enemies like cannons/archers on walls. They’re also adept at navigating blocked areas or chokepoints obstructed by enemies.
Positioning: Similar to melee killer squads, avoid direct engagement with full melee enemy squads while carrying out assassinations on walls or other strategic locations.
General Concerns:
- Dragons deal significant AOE damage but may struggle to one-shot heavy squads.
- They lack the tankiness of heavy units and lack a mid-row to protect healers from backstabs, rendering them vulnerable.
- Despite their midgame dominance, they diminish in effectiveness later due to their limited capacity and falling off against heavier enemy squads.
Detailed Build:
- Avoid horses as they change movement type to infantry, negating the advantage of flight.
- Choose between a heavy infantry tank (على سبيل المثال, paladin, champion, zweihander) or a squishier support unit to back the dragons.
- Paladin is preferred for its healing abilities, while champions/zweihanders excel in dealing damage to enemy frontlines.
- Templars provide valuable support for dragon squads, mitigating damage and enhancing survivability.
- Sirens are excellent mage backlines due to their AOE debuffs, particularly effective against melee enemy squads.
- Swordmasters are ideal for physical DPS backlines, excelling in eliminating enemy frontlines.
- Avoid assassins as dragons typically handle non-heavy units effectively.
- Aim for a maximum of 3 dragon squads, مع 1-2 being preferred, as their mobility is most beneficial when targeting specific, unreachable enemies.
هذا كل ما نشاركه اليوم من أجل هذا Symphony of War: The Nephilim Saga مرشد. تم إنشاء هذا الدليل وكتابته في الأصل بواسطة abaoabao2010. في حالة فشلنا في تحديث هذا الدليل, يمكنك العثور على آخر تحديث باتباع هذا وصلة.