- عنوان: Supraland Six Inches Under
- تاريخ الافراج عنه:
- المطور:
- الناشر:
Information about Supraland Six Inches Under is still incomplete. الرجاء مساعدتنا في ملء تفاصيل اللعبة باستخدام هذا نموذج الاتصال.
This guide will be showing you where to find the chests in Supraland Six Inches Under. There’s a total of 140 chests in the game and obtaining all of these chests will unlock the Supraland Six Inches Under achievement called “All the chests“. To make chest hunting easier, we highly advise getting the Chest Locator achievement first.
Chest #1
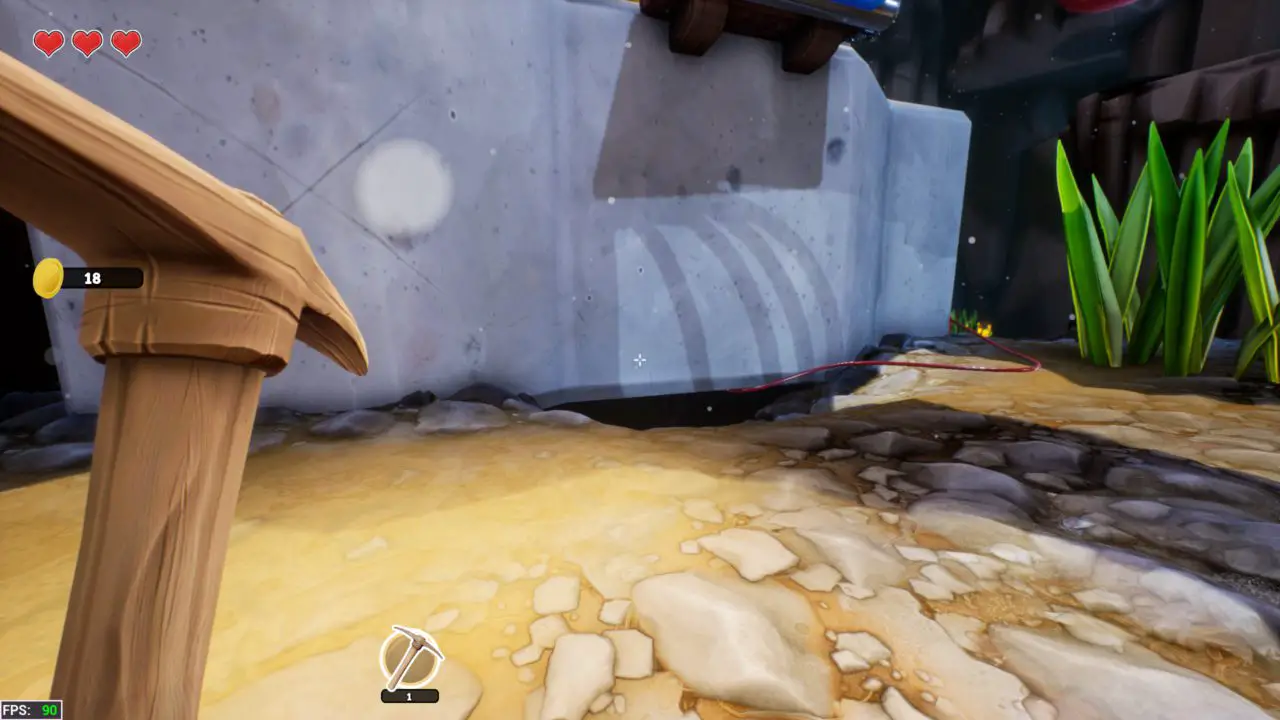
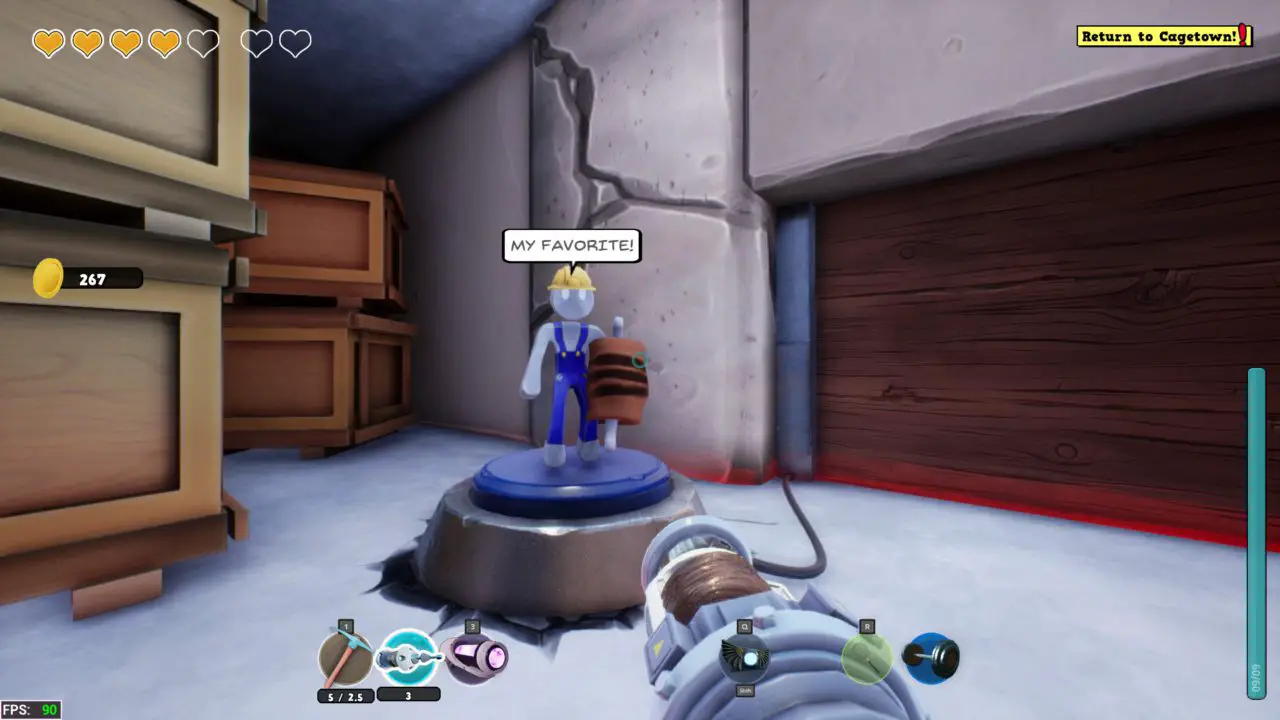
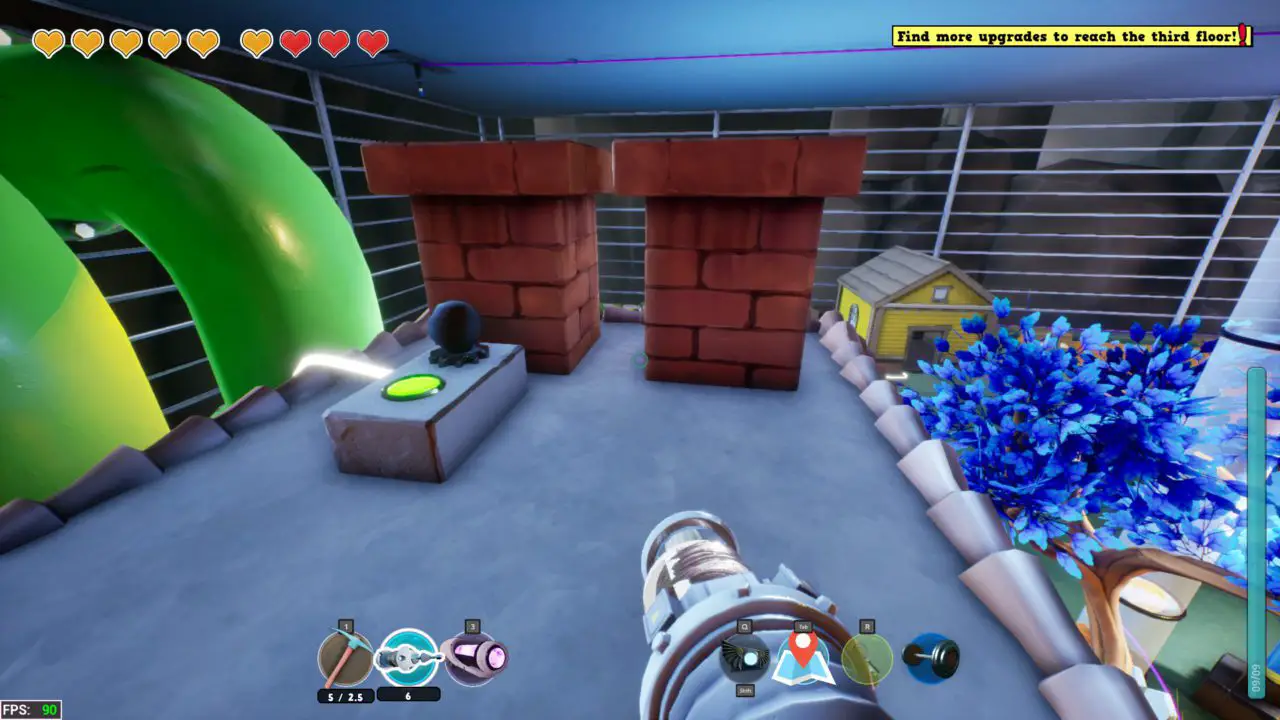
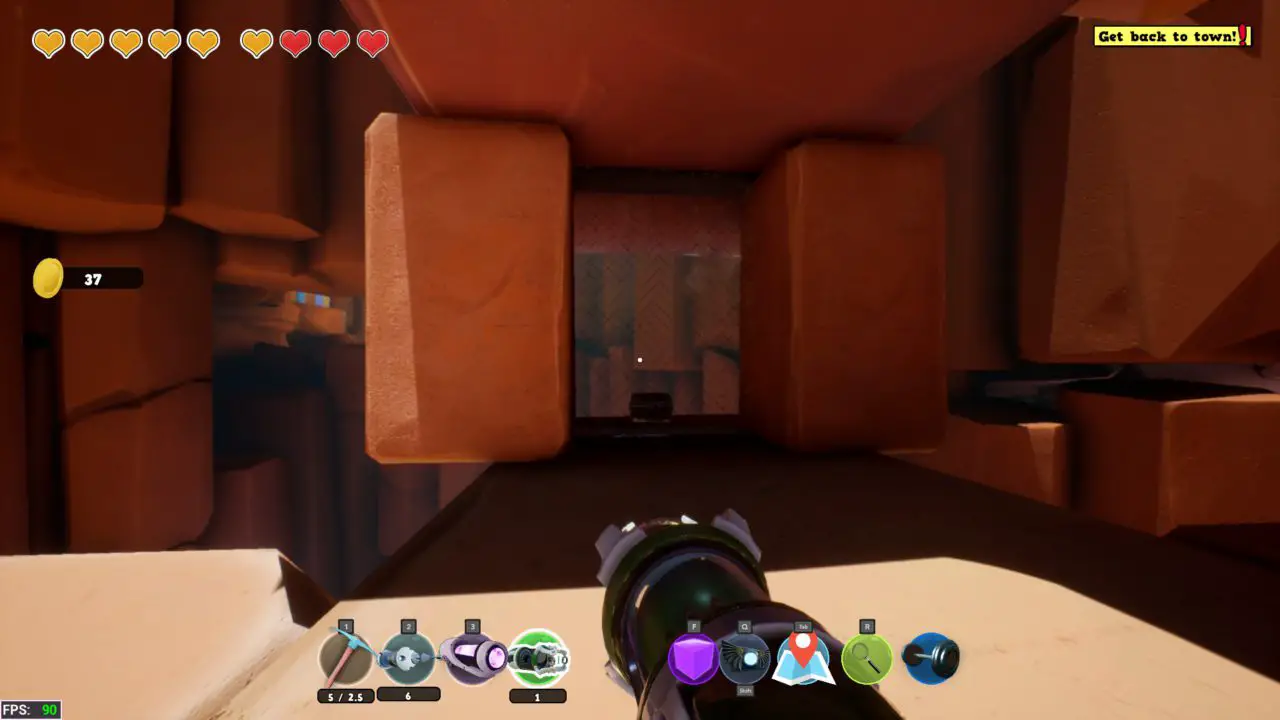
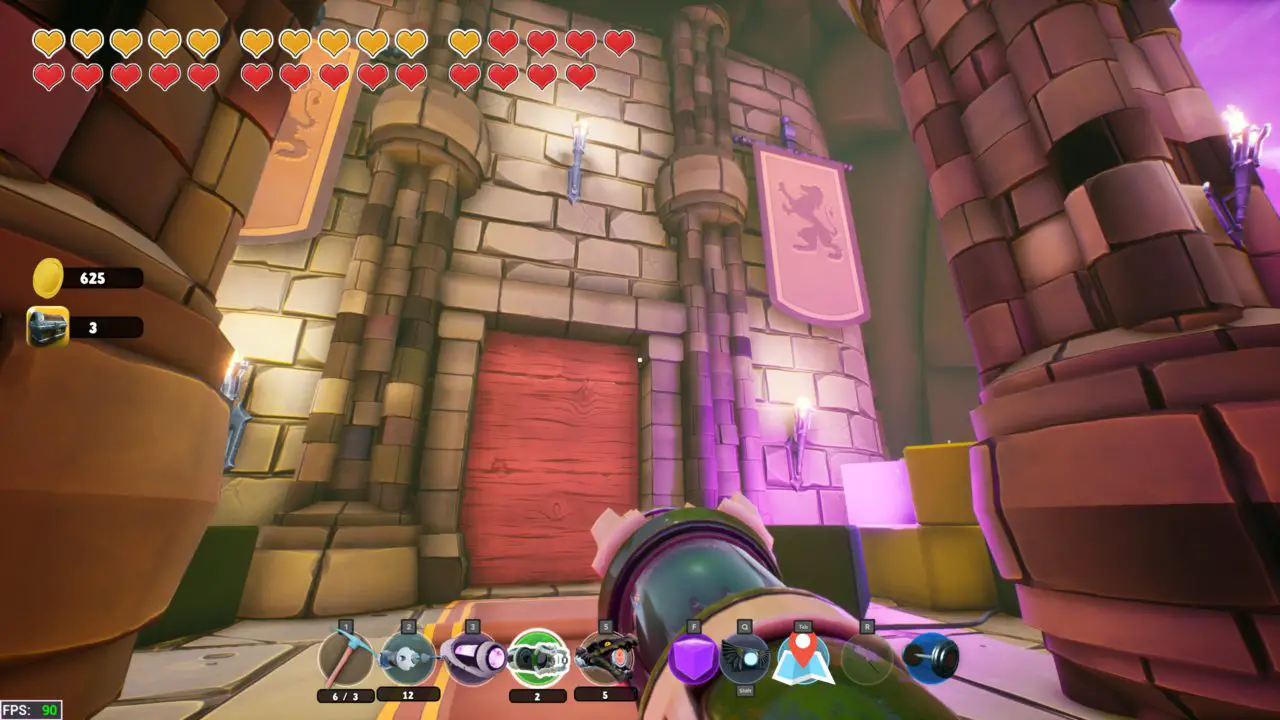
After the Rakening has occurred and the title has flashed on screen we are now able to truly explore and get this guide on the road. Start by exploring around and collecting your coins!
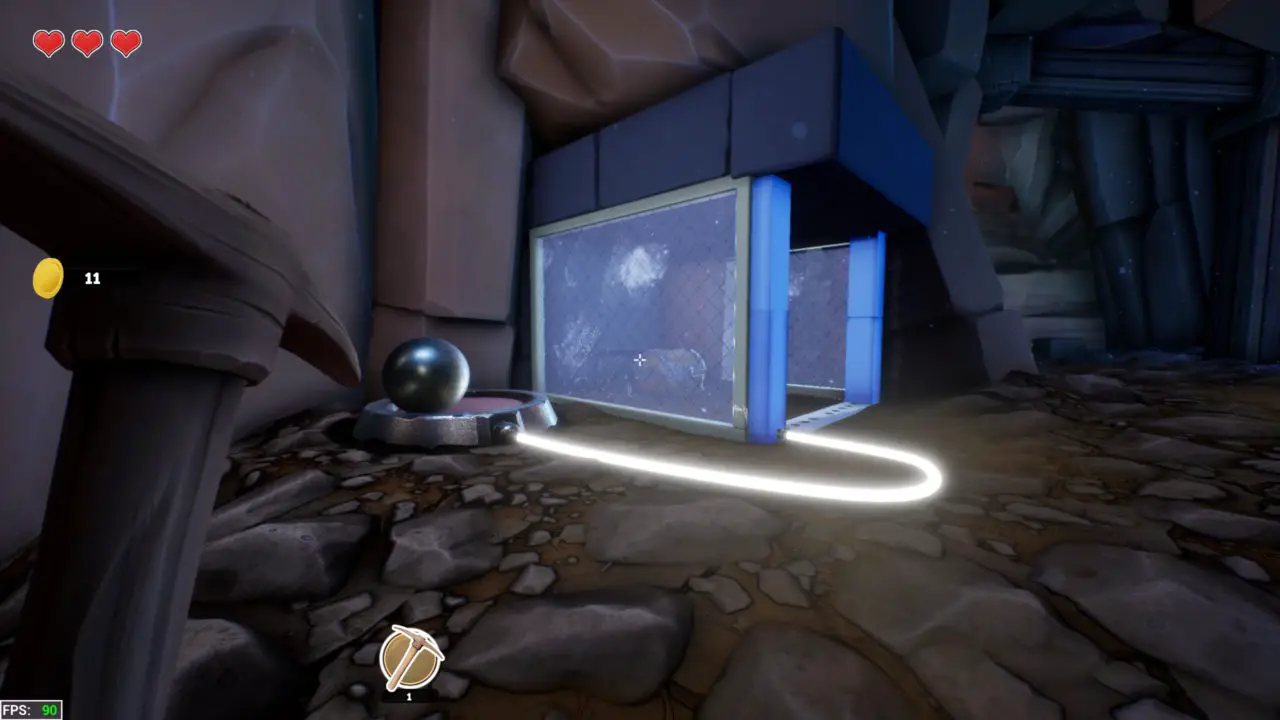
By grabbing the metal ball beside the trader and placing it on the pressure plate, the first chest can be accessed.
Chest #2
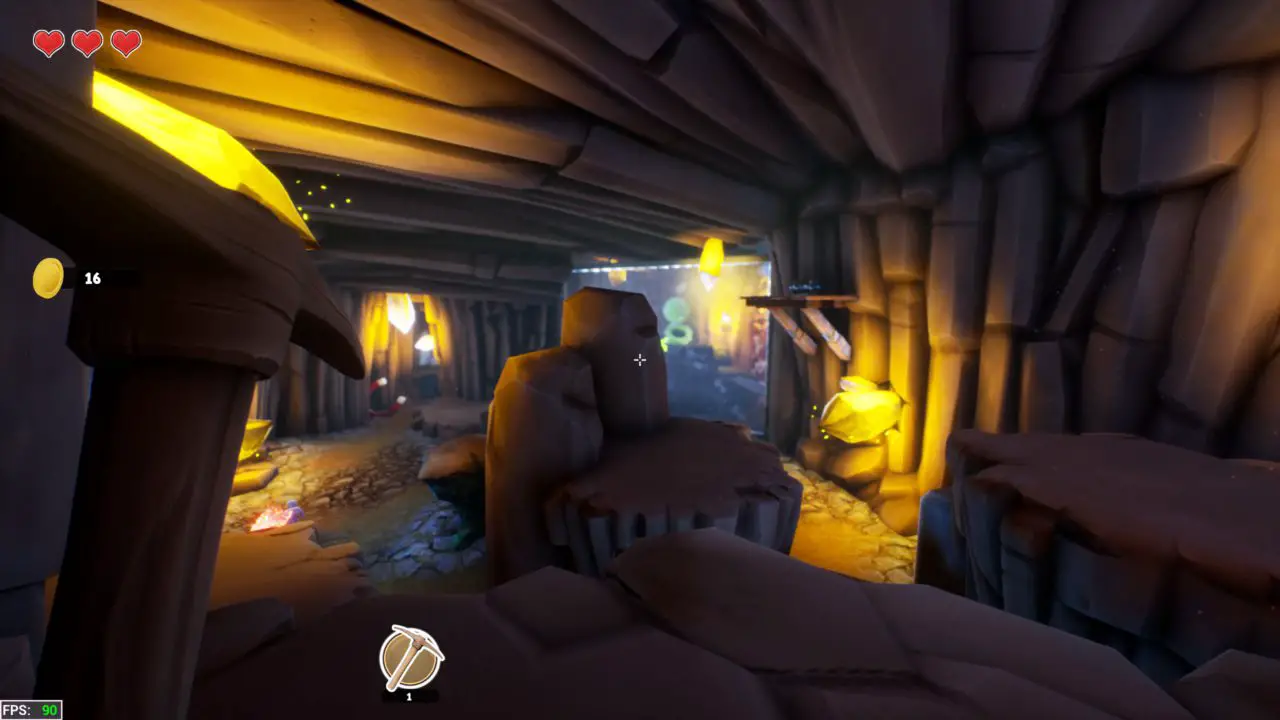
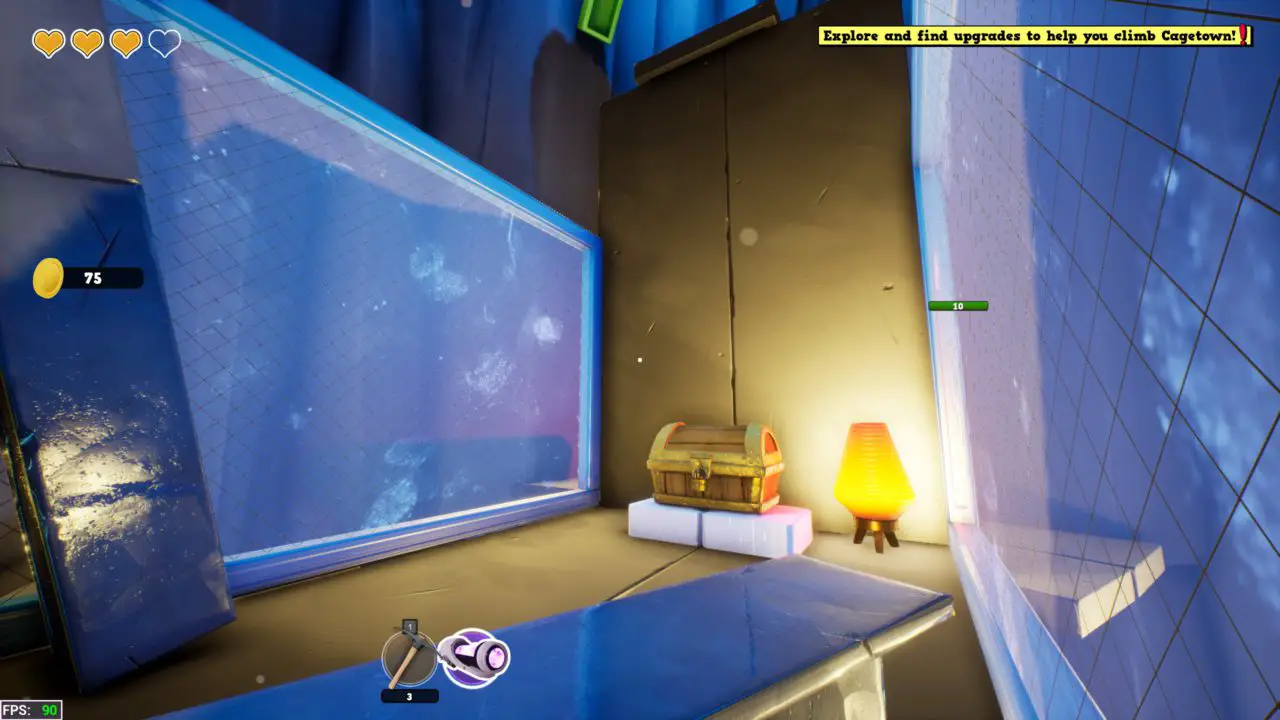
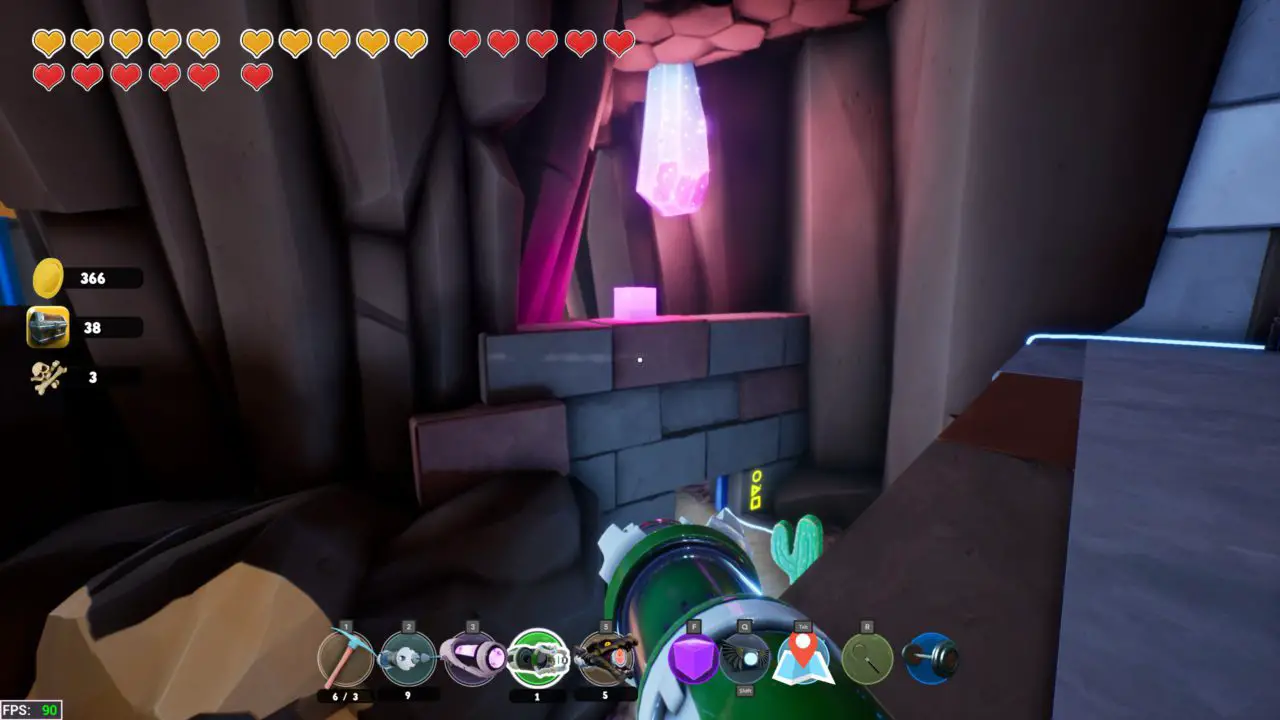
In the first room off to the right from the trader, you will find the chest in an obvious crack in the wall seen under the yellow crystal.

Chest #3
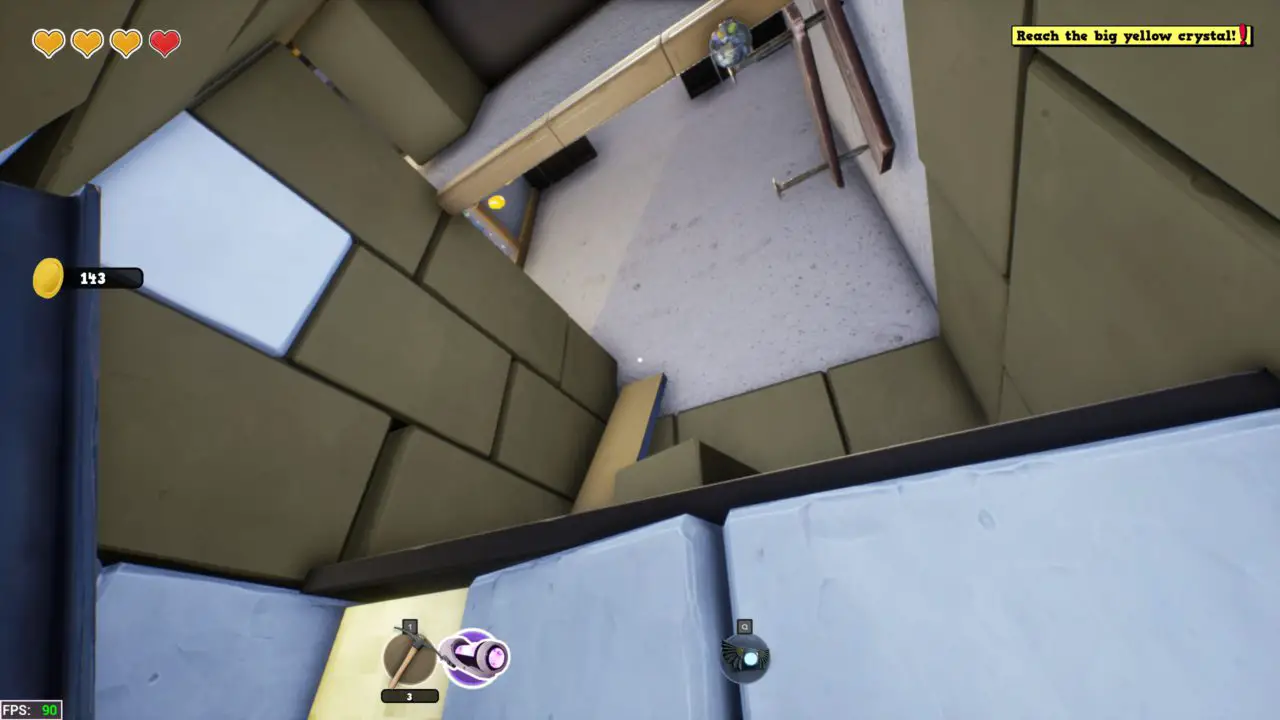
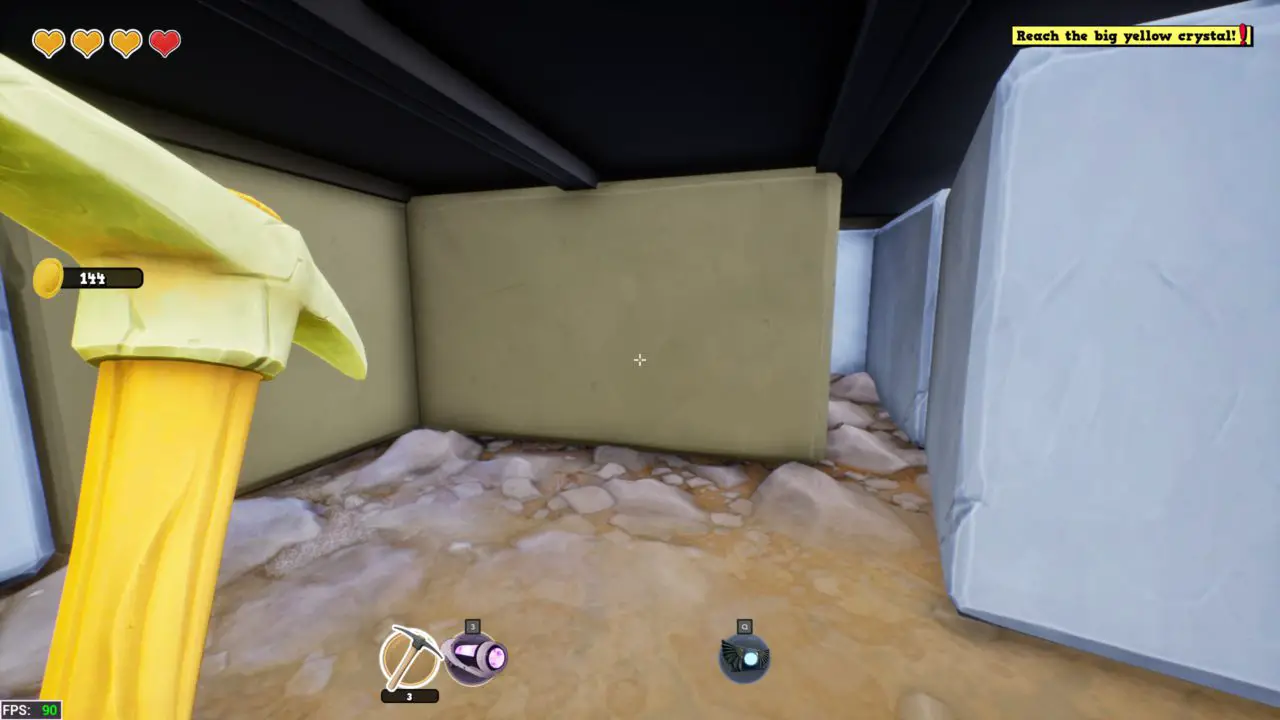
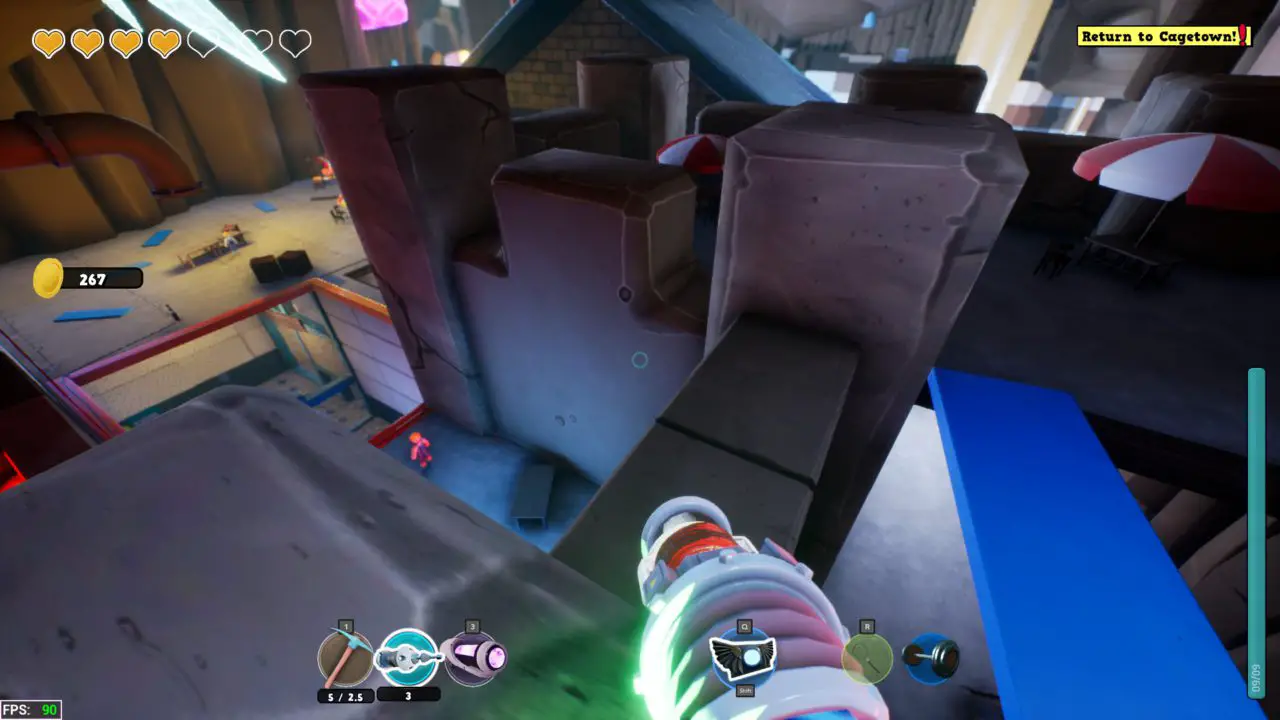
Start by getting the ability to jump higher. make you way up the rocks to be above the last chest. jump from the ledge i am on to the rocks across, and then across to the chest.
Chest #4
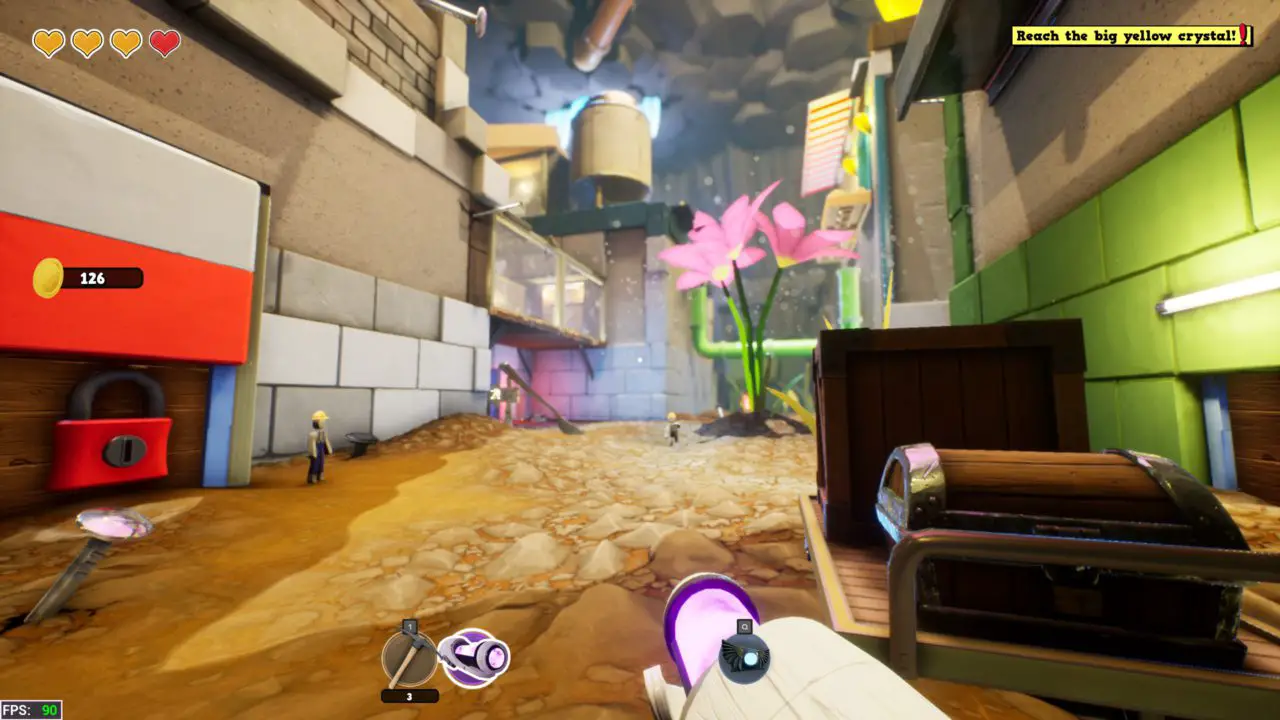
Using your newfound ability to bend your knees you can crouch walk under the big rock in the central area by the trader.
Walk around until you find this white stone wall that has a large gap visible. Chest #4 is access by walking underneath the white slab ahead.
Chest #5
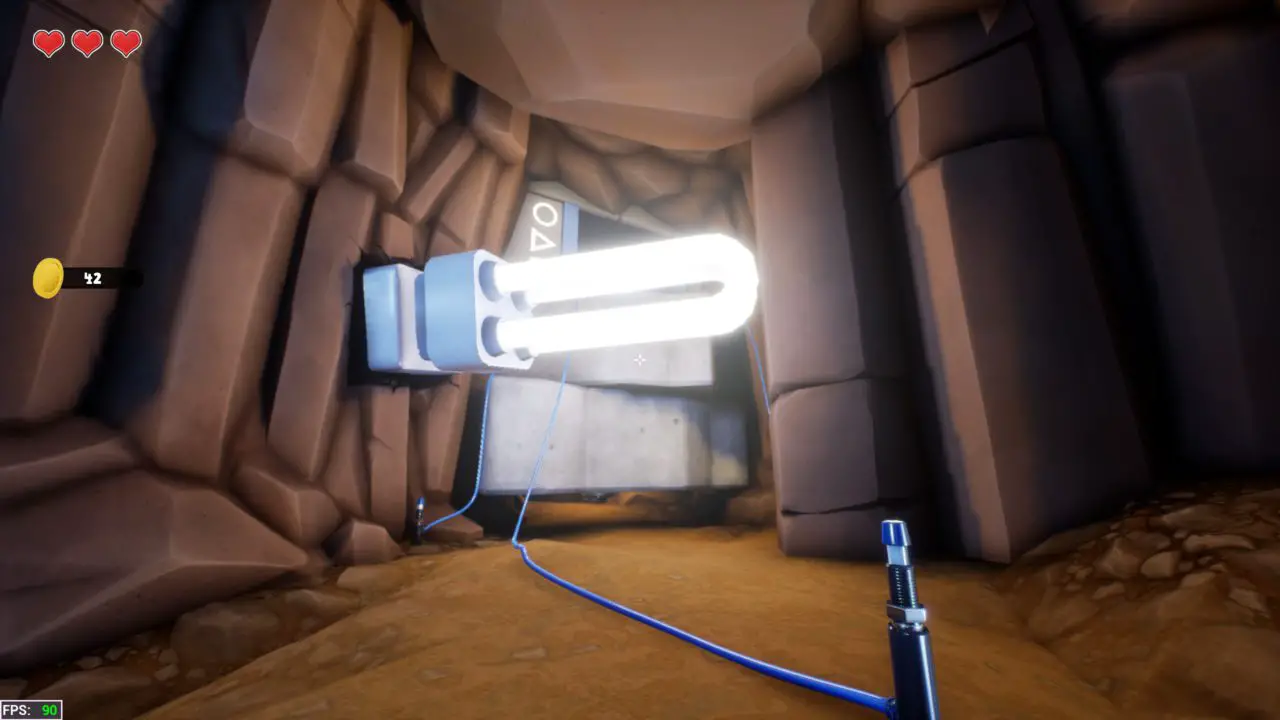
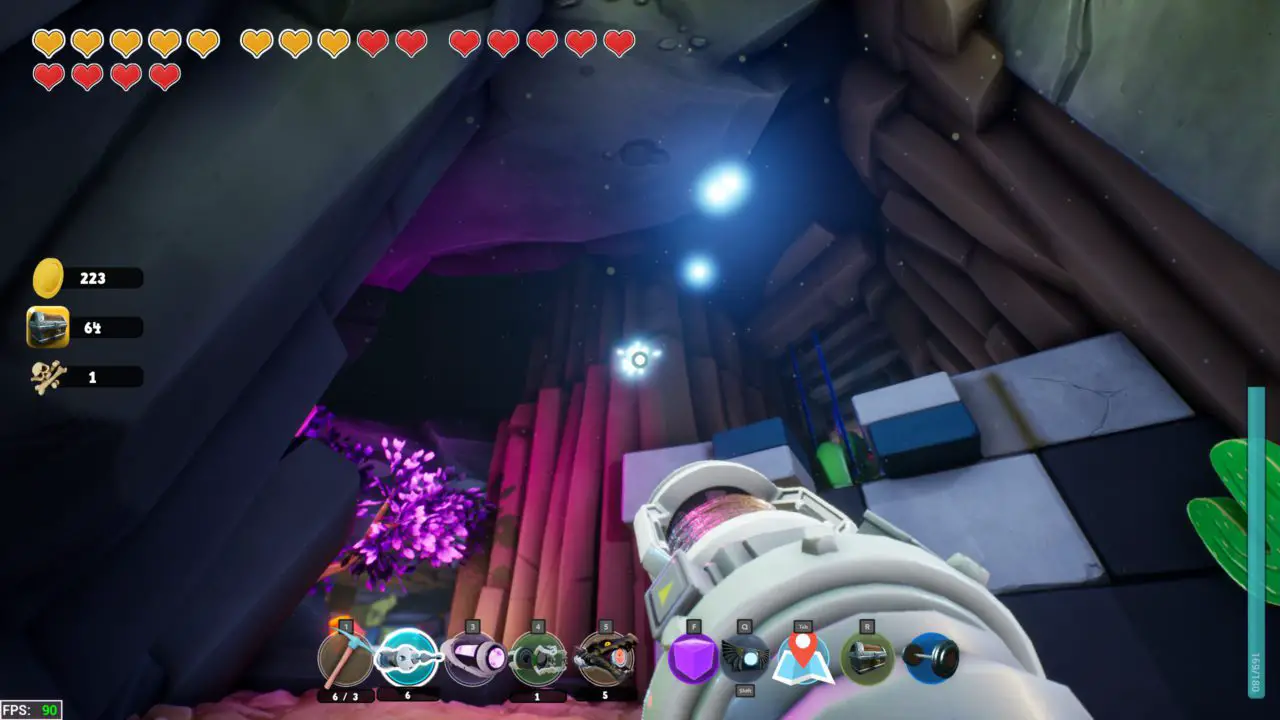
While still in the same area as the last chest, press the button in the same order as shown above, which is Circle Triangle, Square (anyone else thinks of Squid Game?). The door will now be opened. Parkour up the rocks and jump across the light bulbs shown.
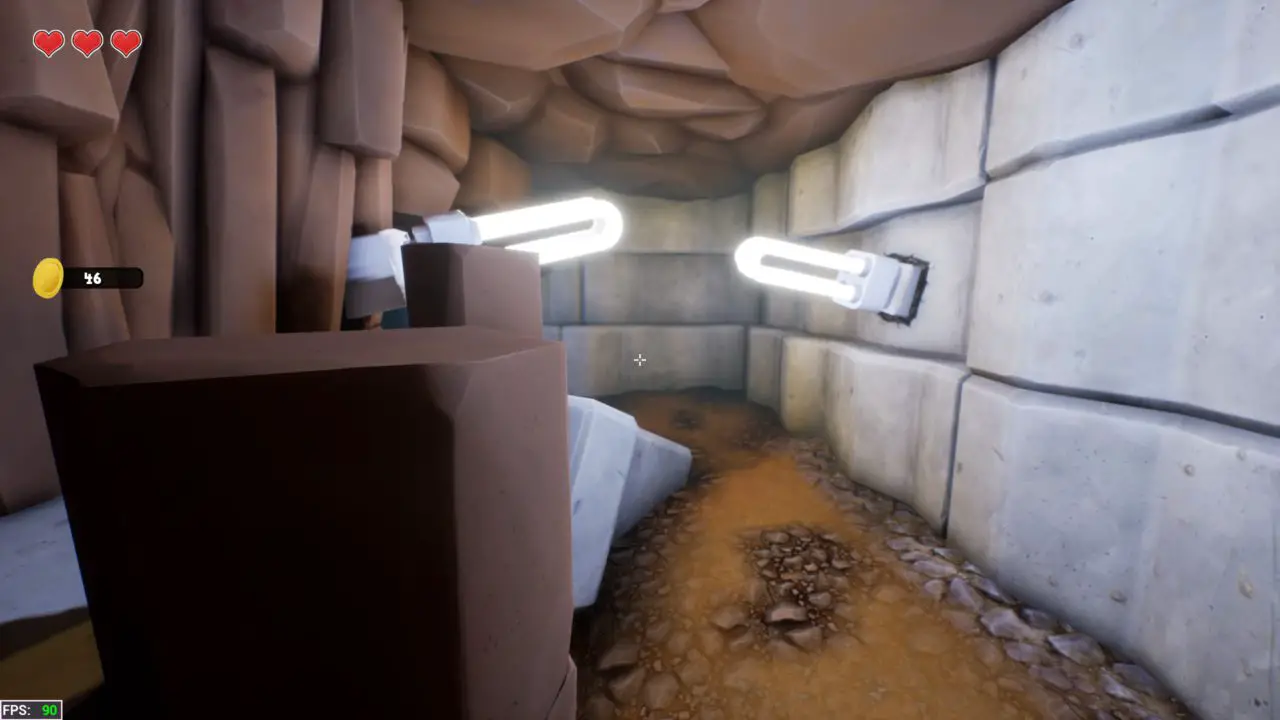
Then walk along the ledge wall and jump to the final light bulb to access the room we just unlocked to find Chest #5.
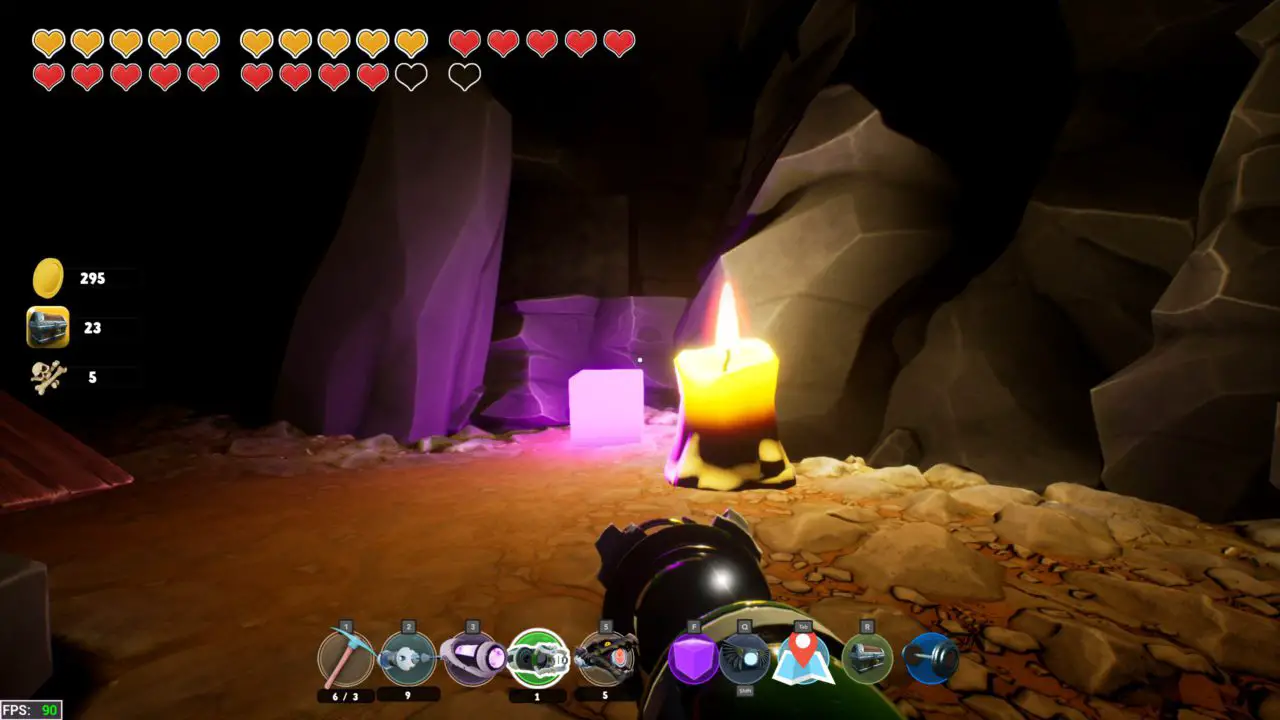
Chest #6
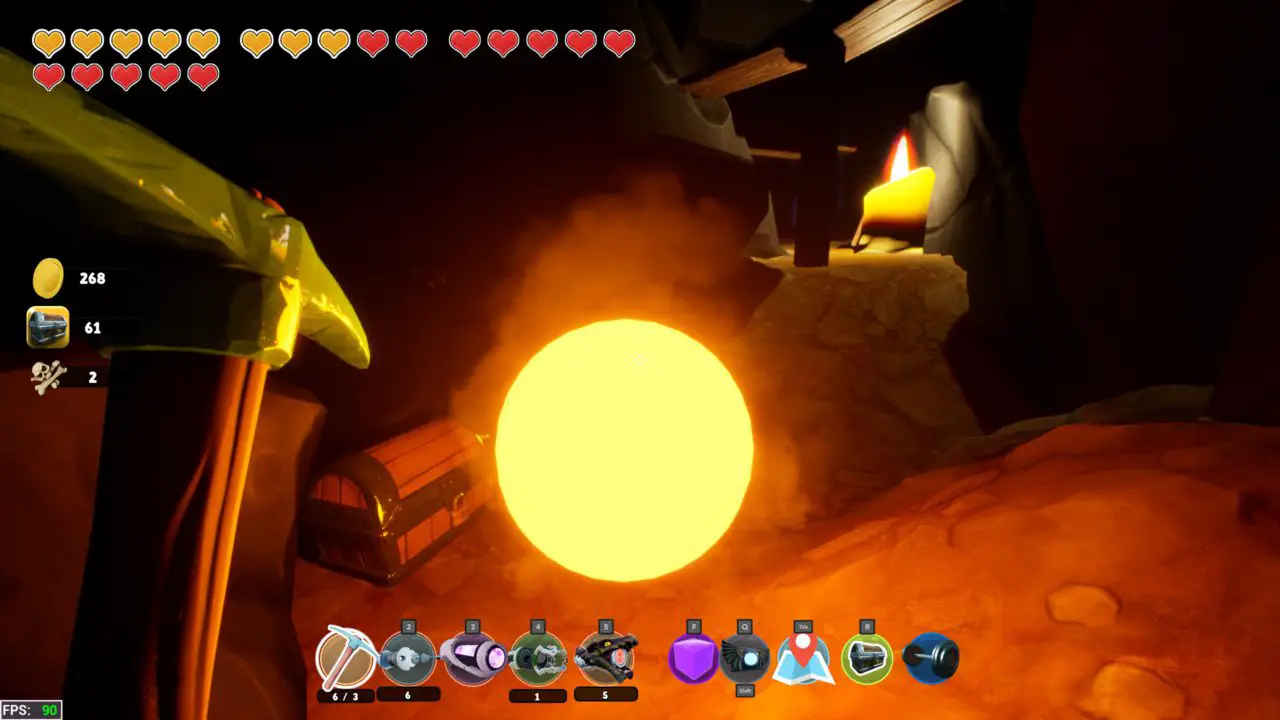
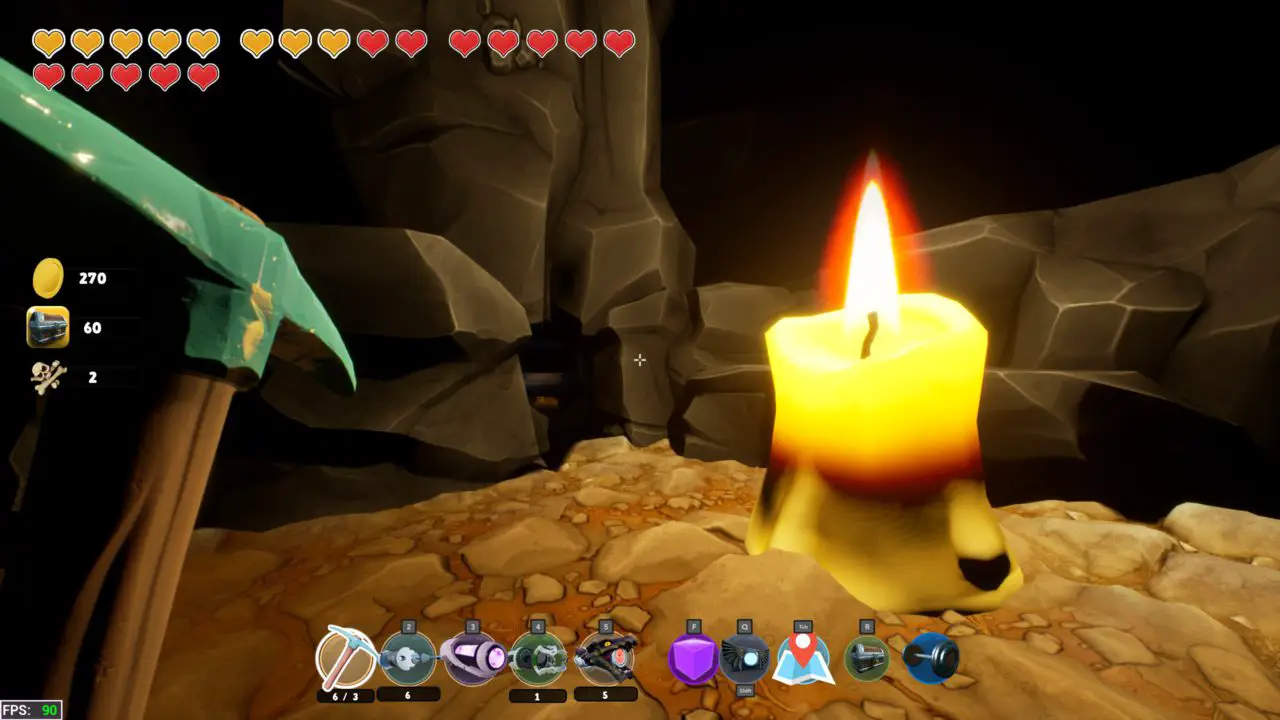
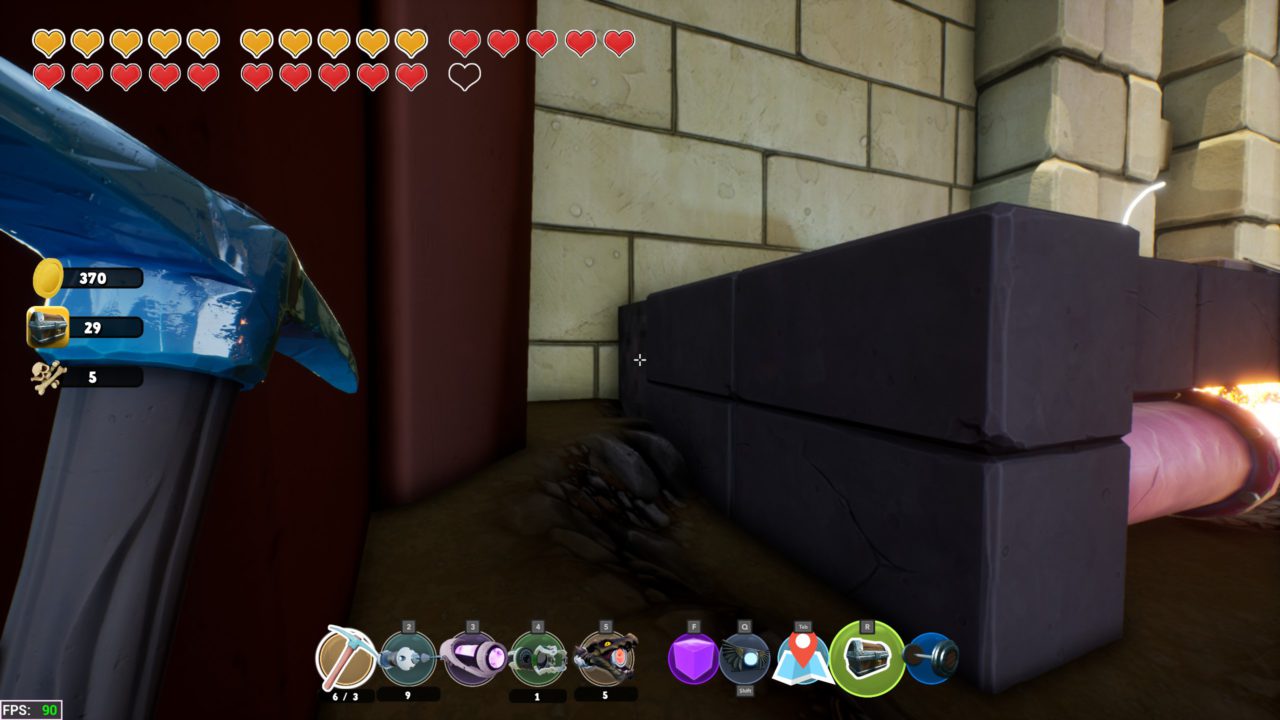
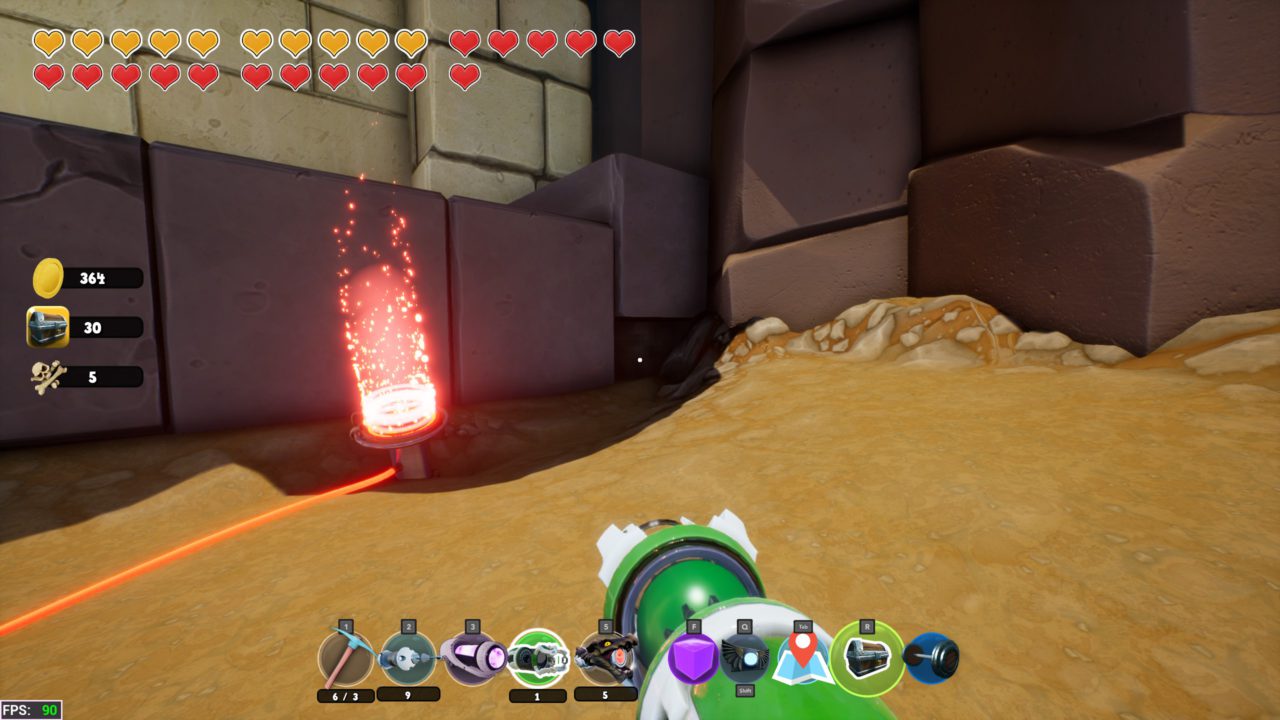
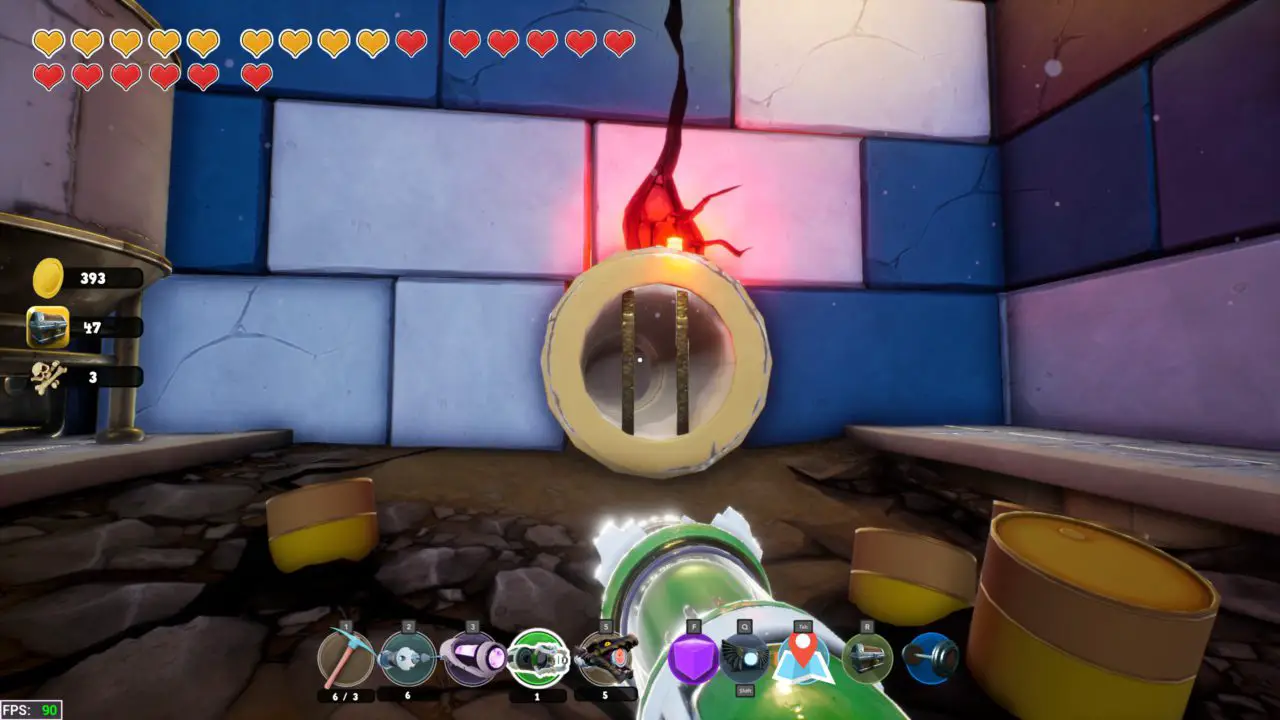
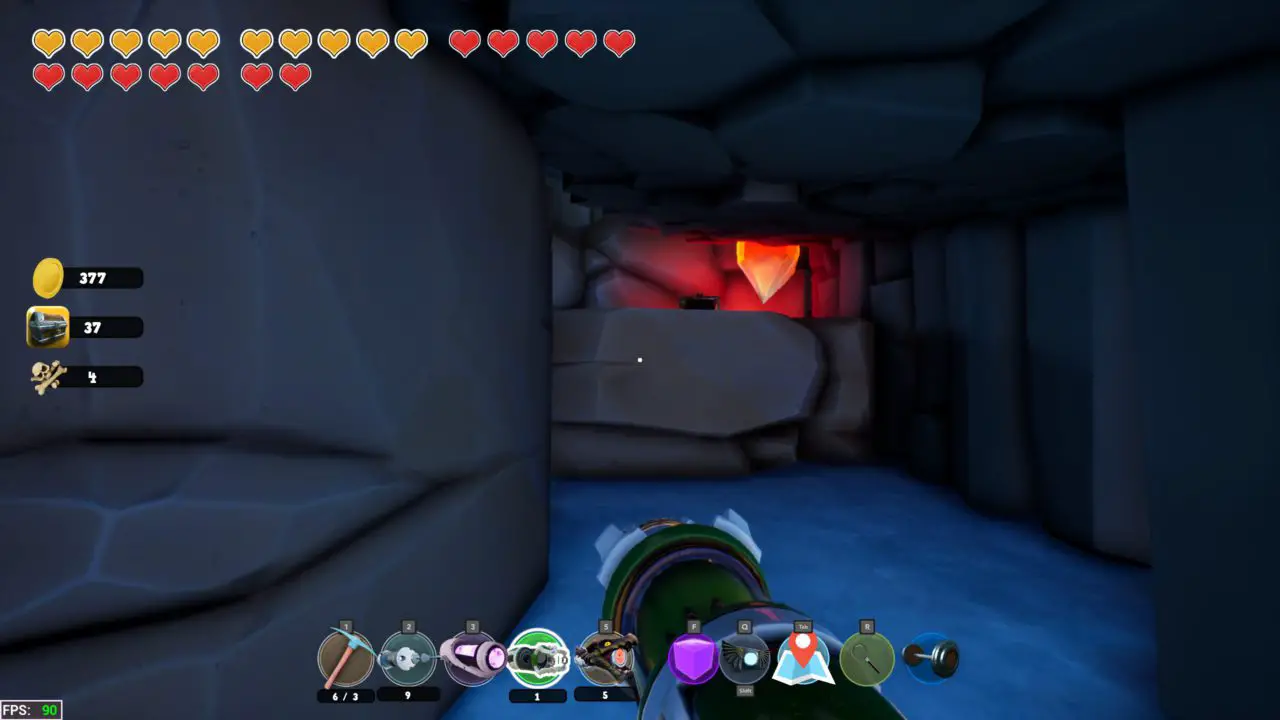
After lighting the first candle with the red-hot nickle ball in the dark area continue forward and you will find a chest as shown below.
Chest #7
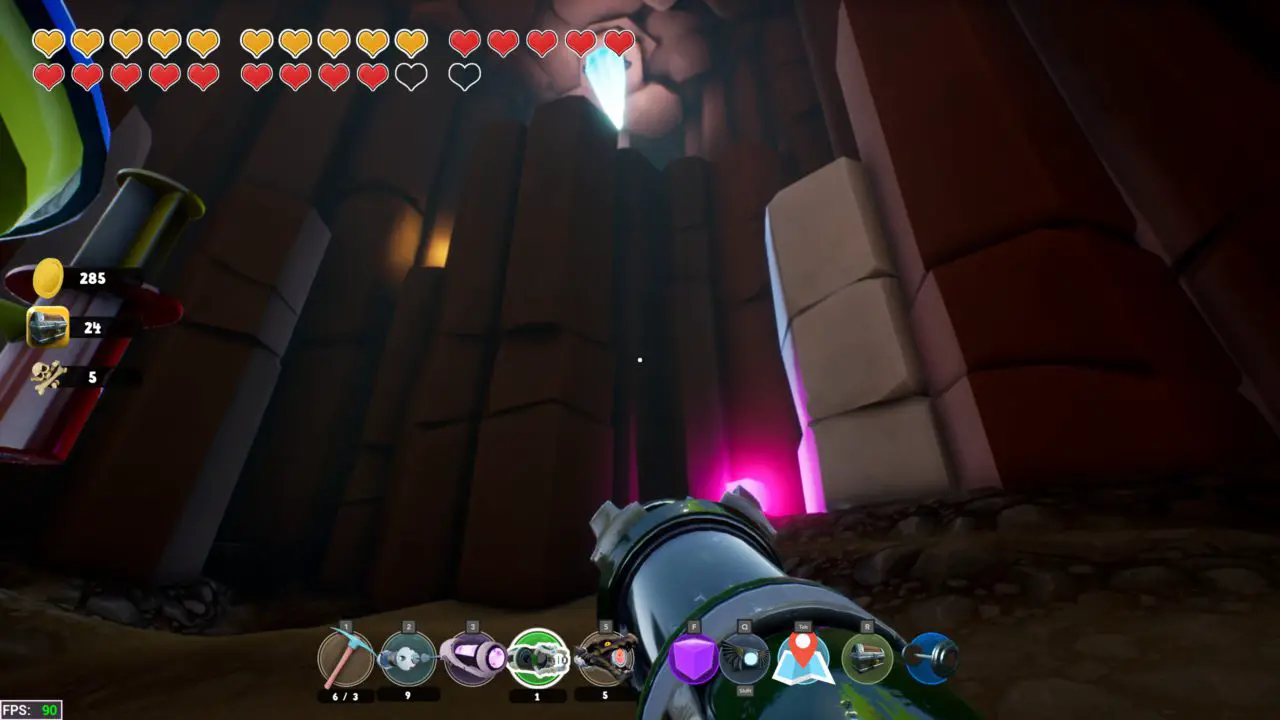
Go back into the dark and go to the middle candle. Immediately beside it is a breakable wall that is hiding a chest.
Chest #8
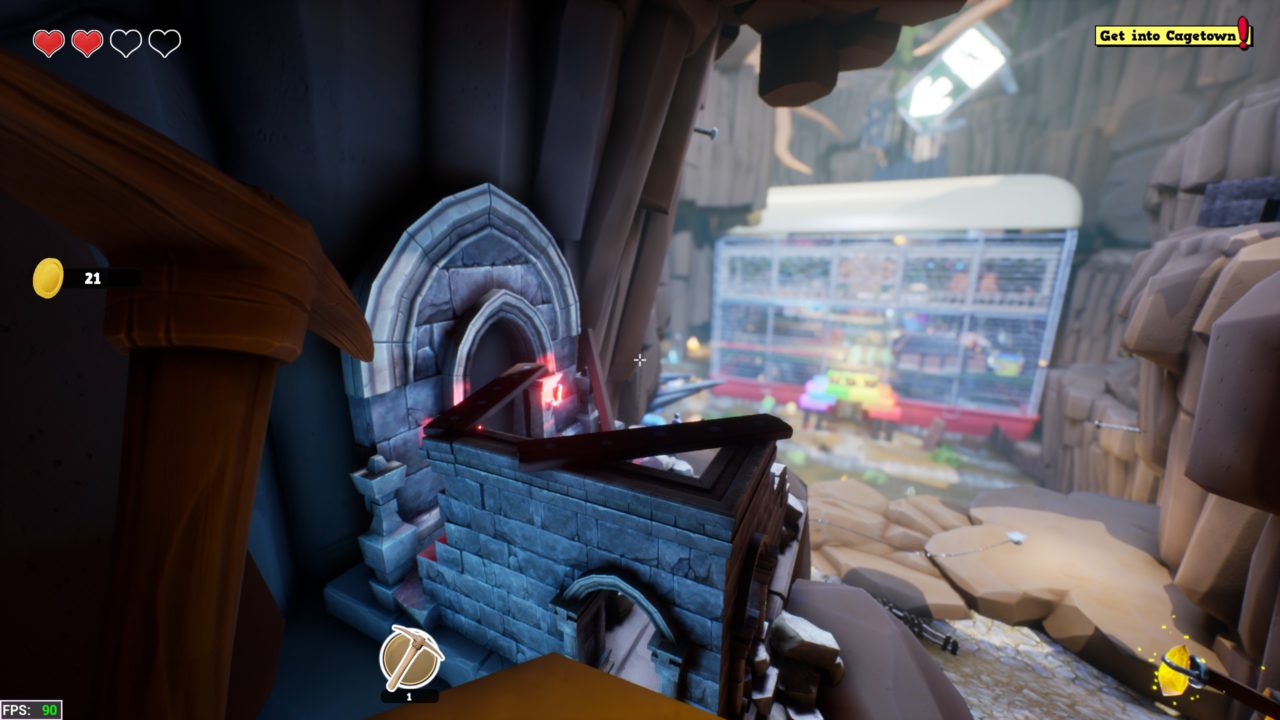
After your first Boss fight (can we really call it that?) you are introduced to Cage Town. Off to your left is some ruins, inside will be a chest.
أيضًا, in a crack even further off to the left than the ruins is a gold vein that is easy to miss. Unofficial Secret!
Chest #9
This one is a mandatory one. Now that you have the stone pickaxe and have entered the well in the center of town you will open this one to get the force gun (something something something may the force be with you).
Chest #10
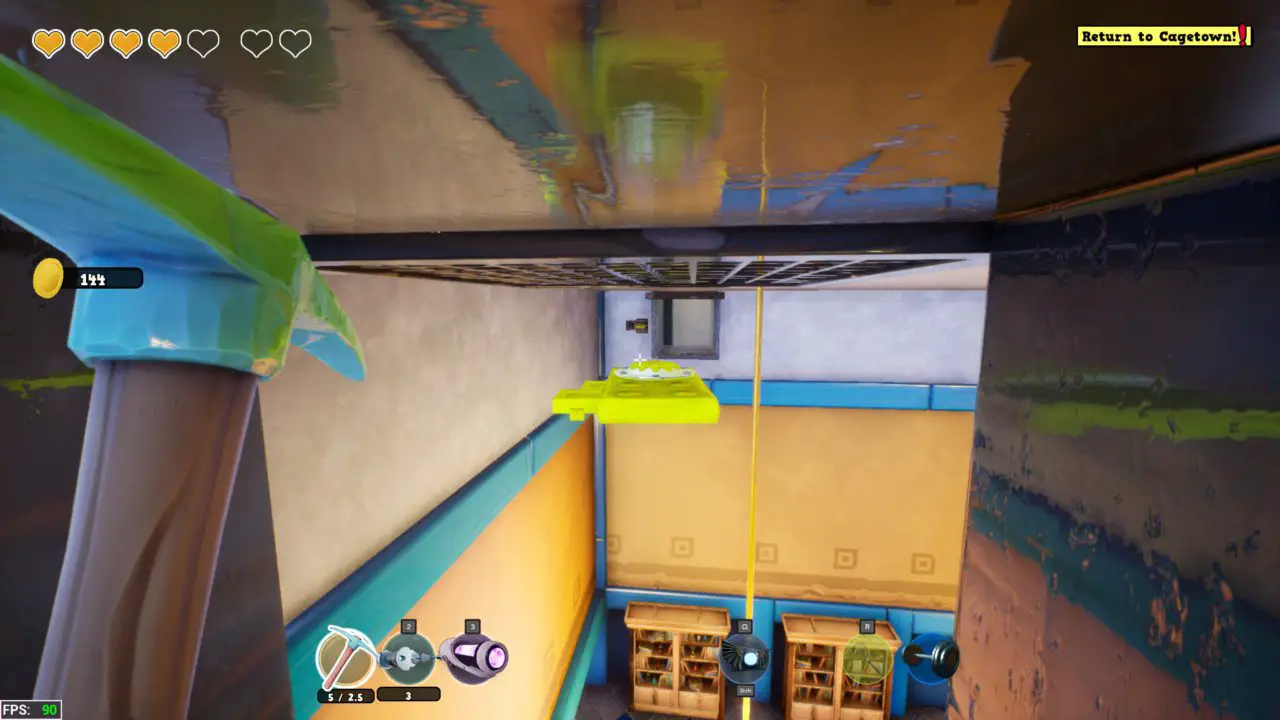
Immediately after getting the force gun create a bridge to this platform for a chest.
Chest #11
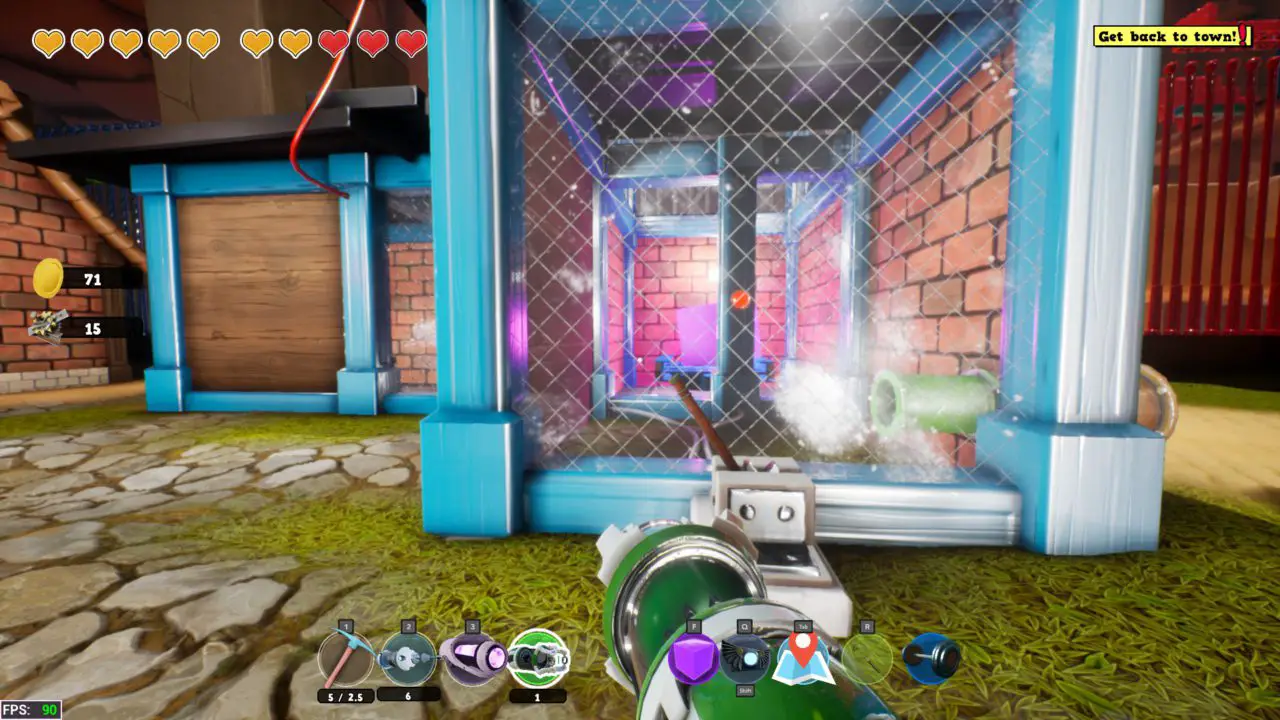
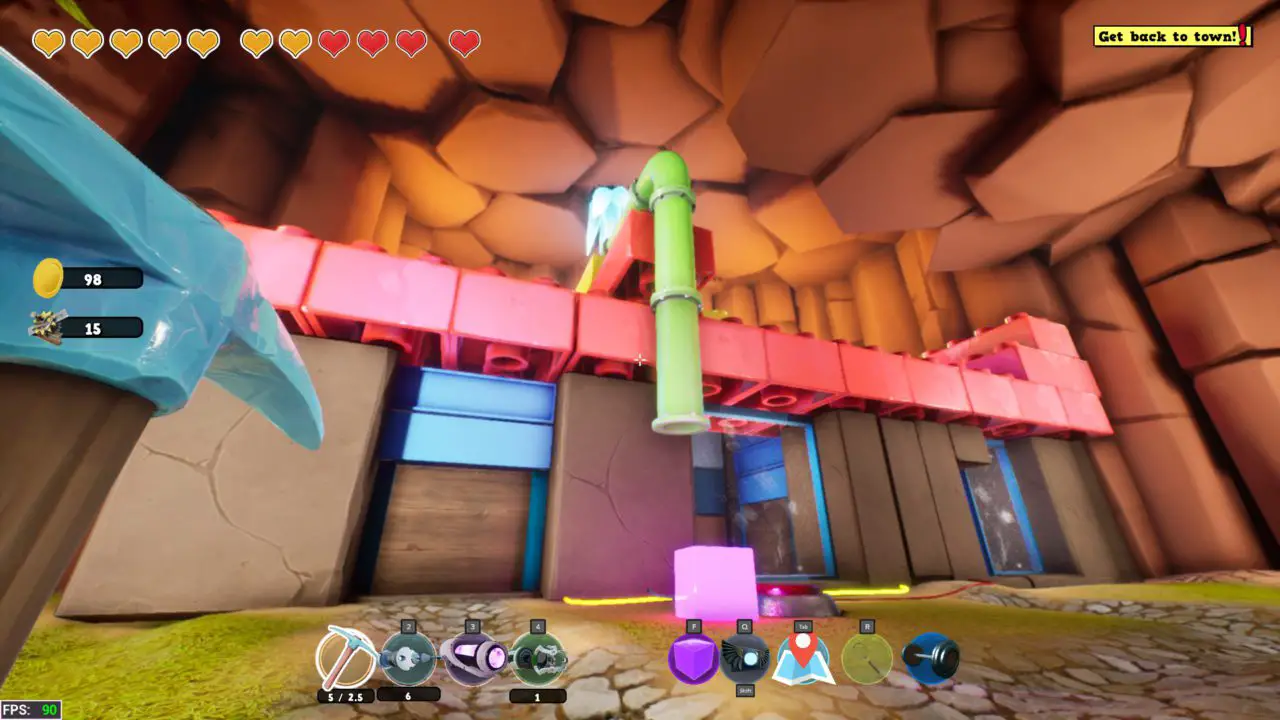
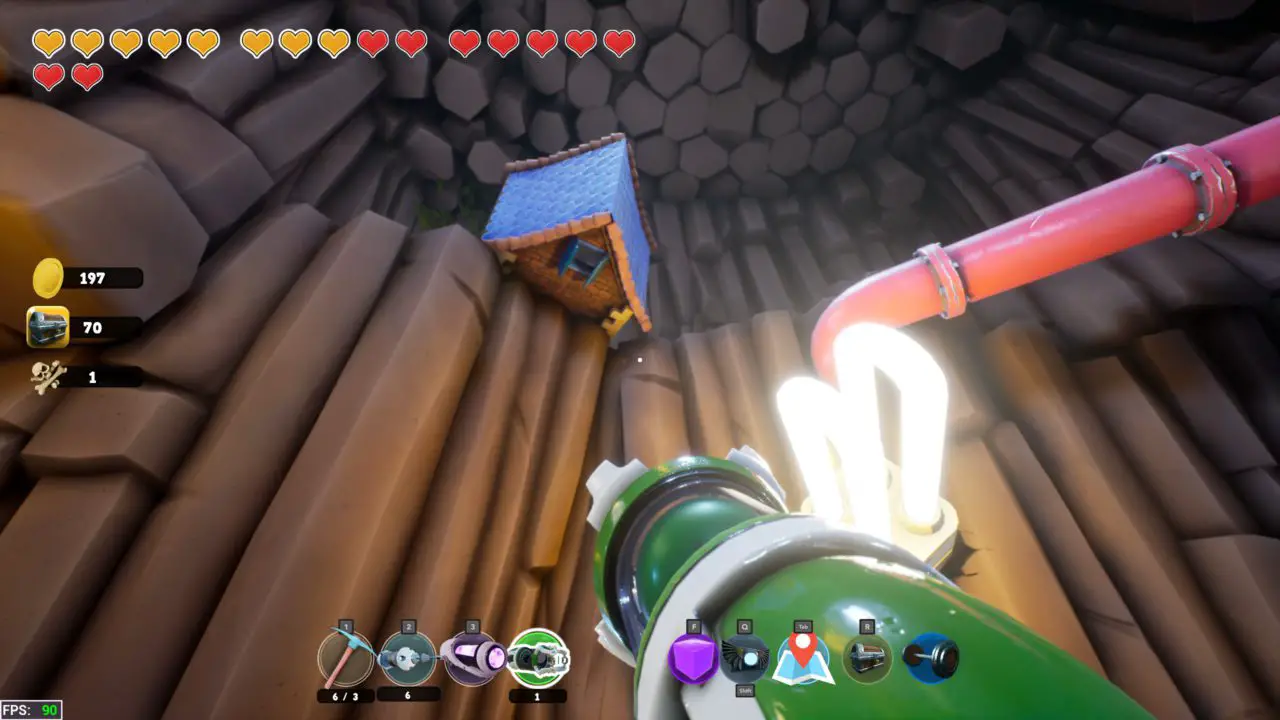
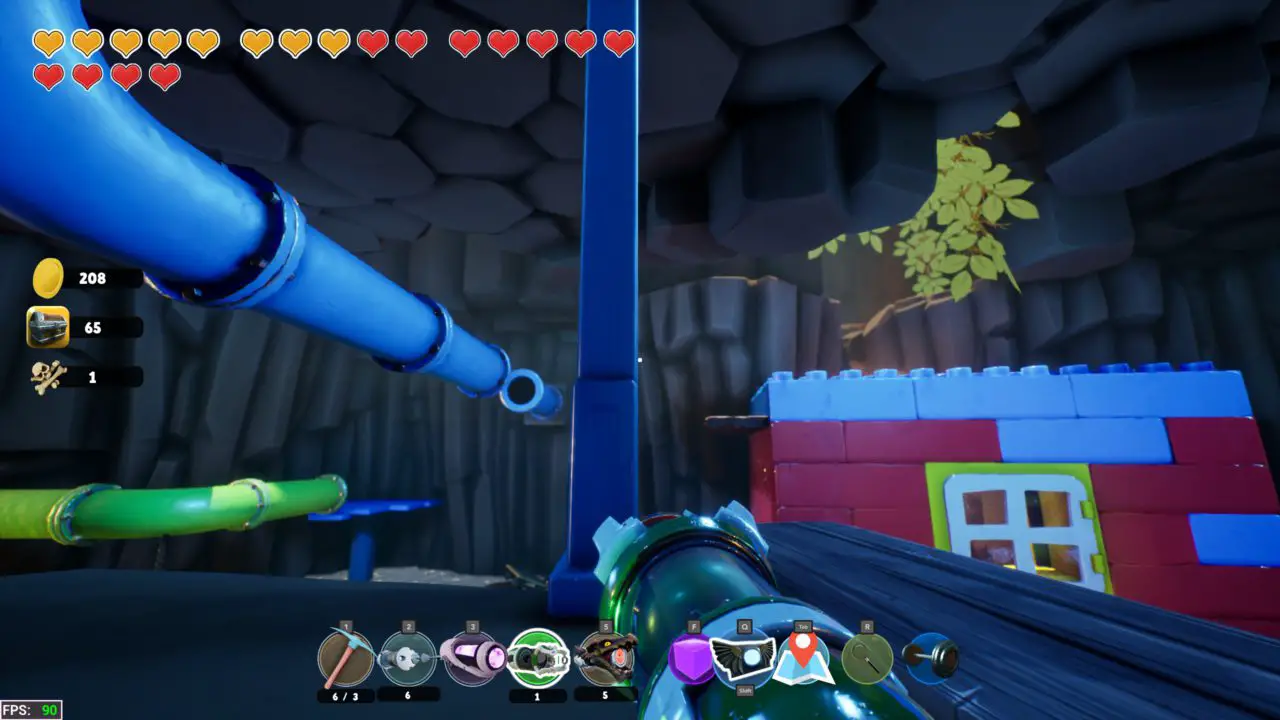
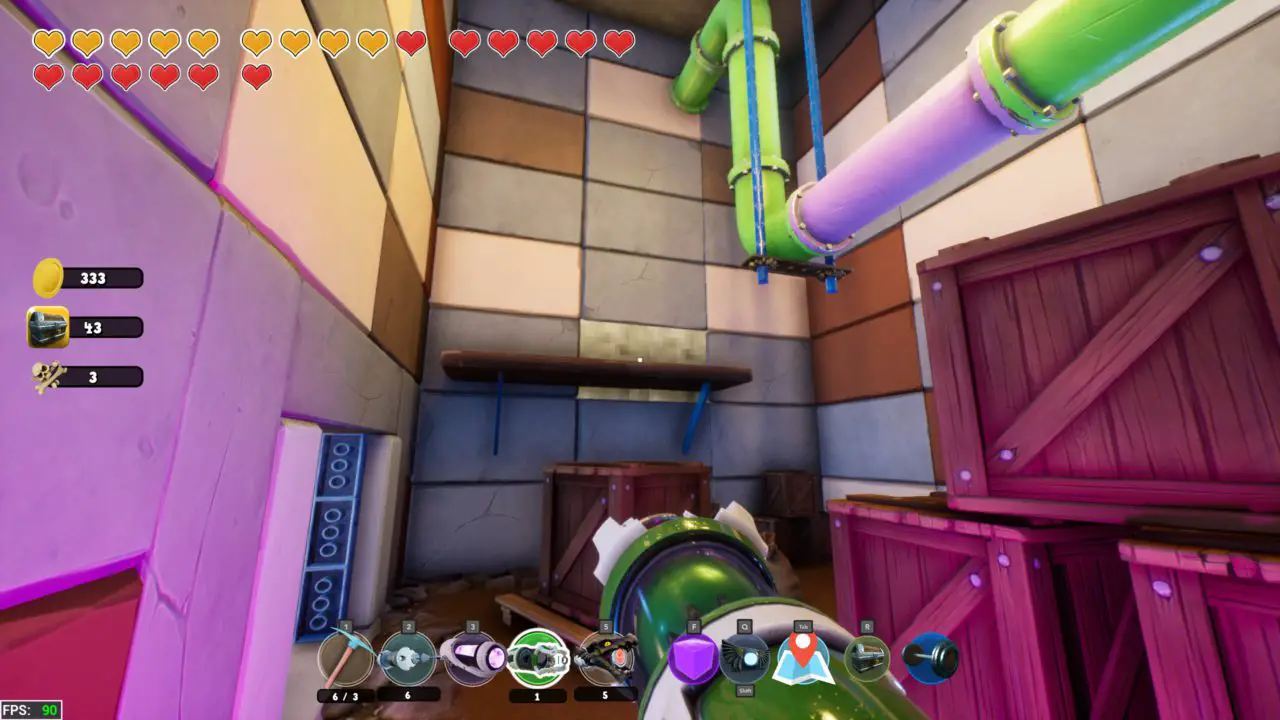
Using a force beam, get on top of the main green pipe building. Head to the left side of the roof and you will see a metal shack below where a chest is located.
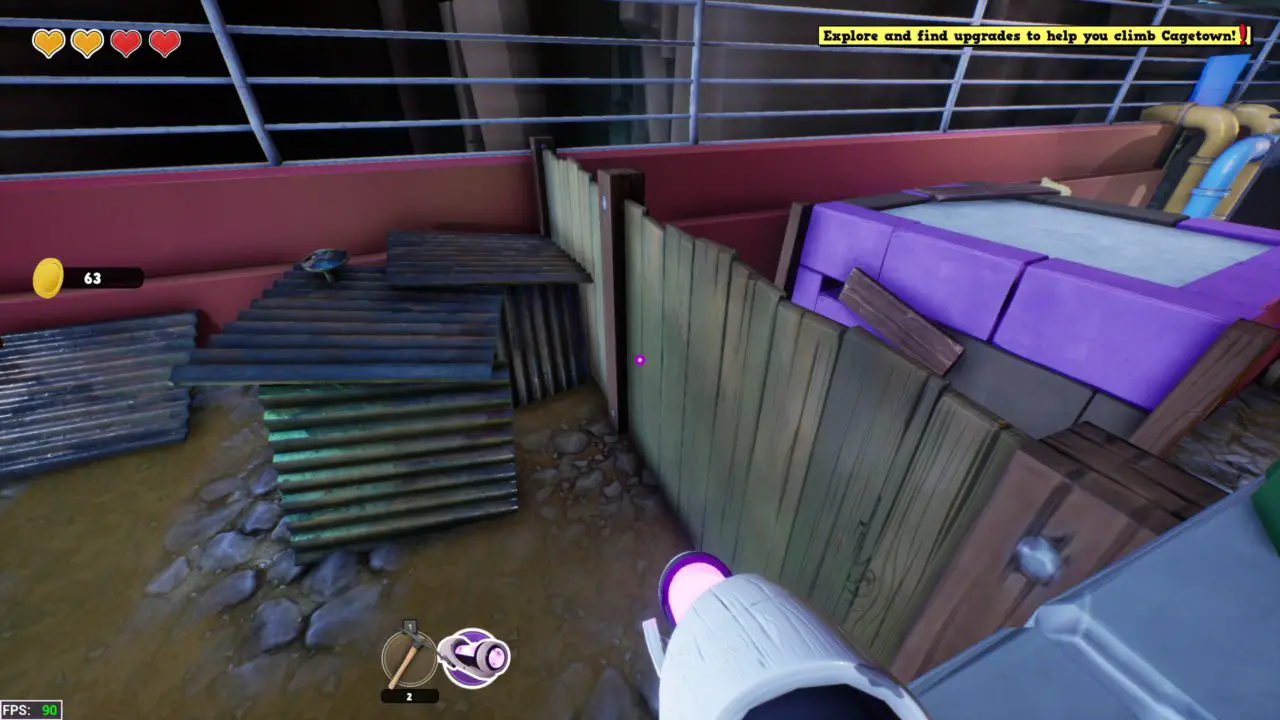
Chest #12
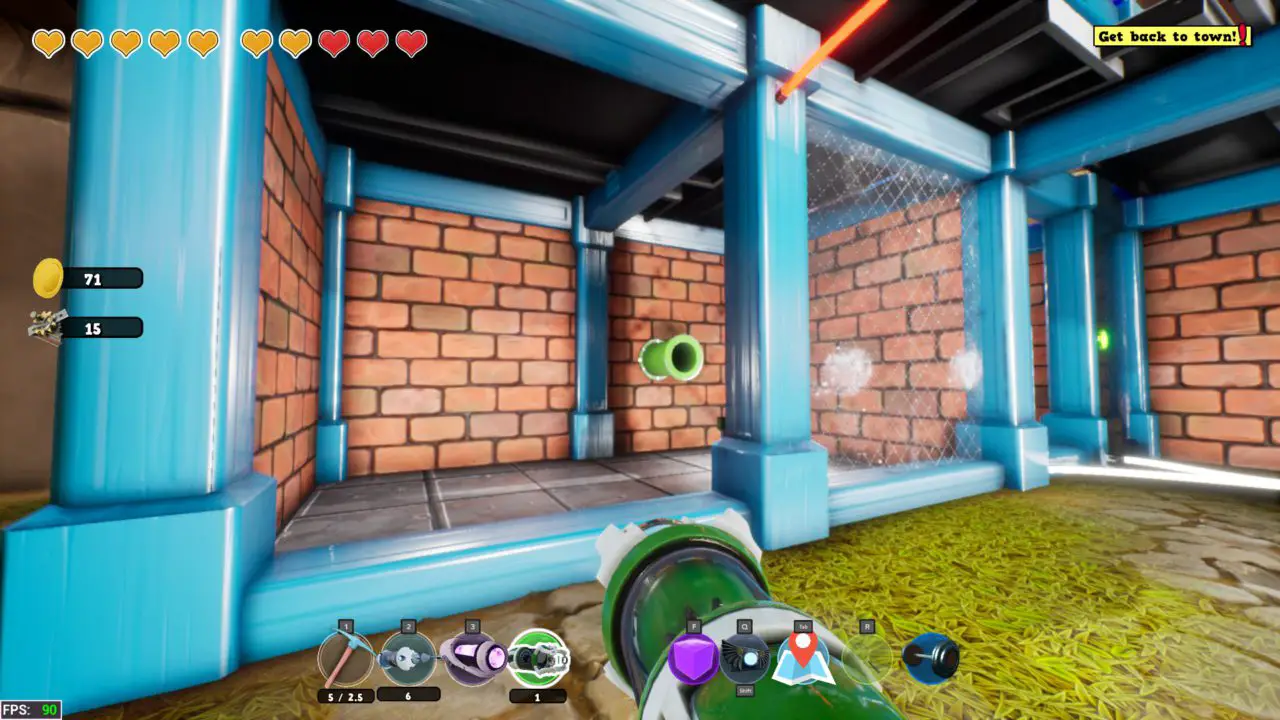
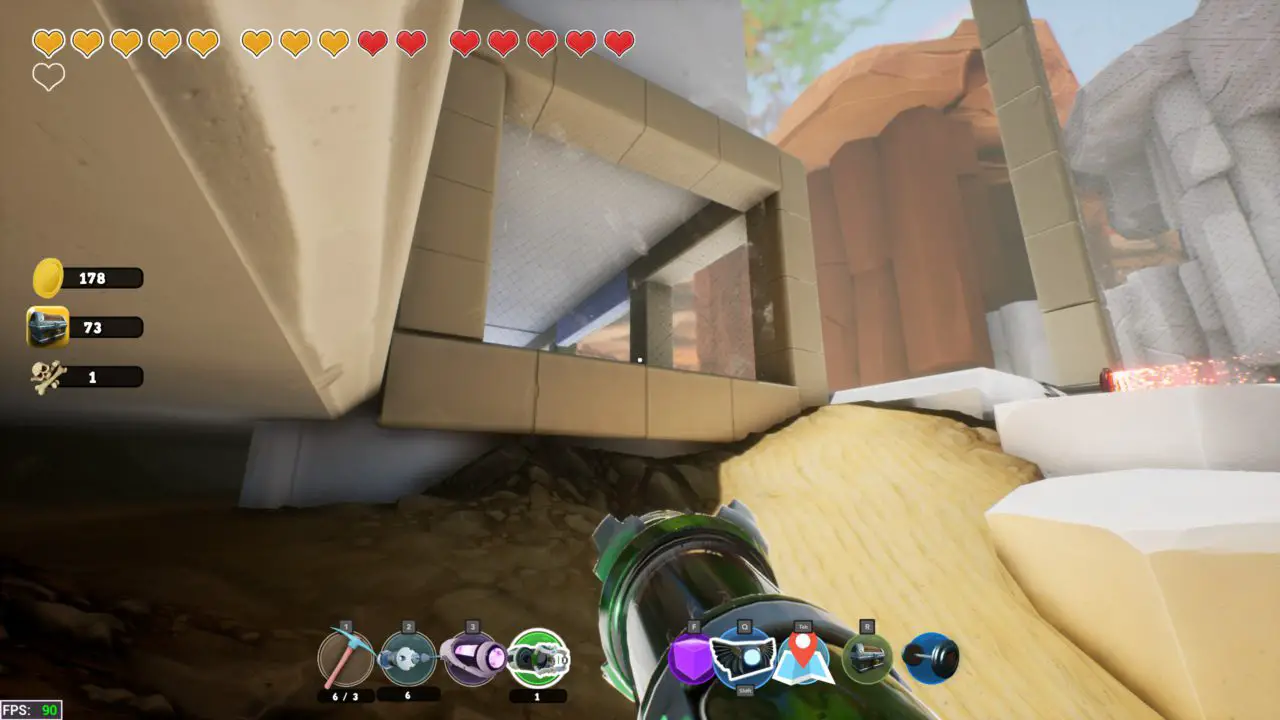
Just before using a force beam to get over the wall to the Industrial Area, make a sharp left after walking behind the wooden track pieces used to get over the wall.
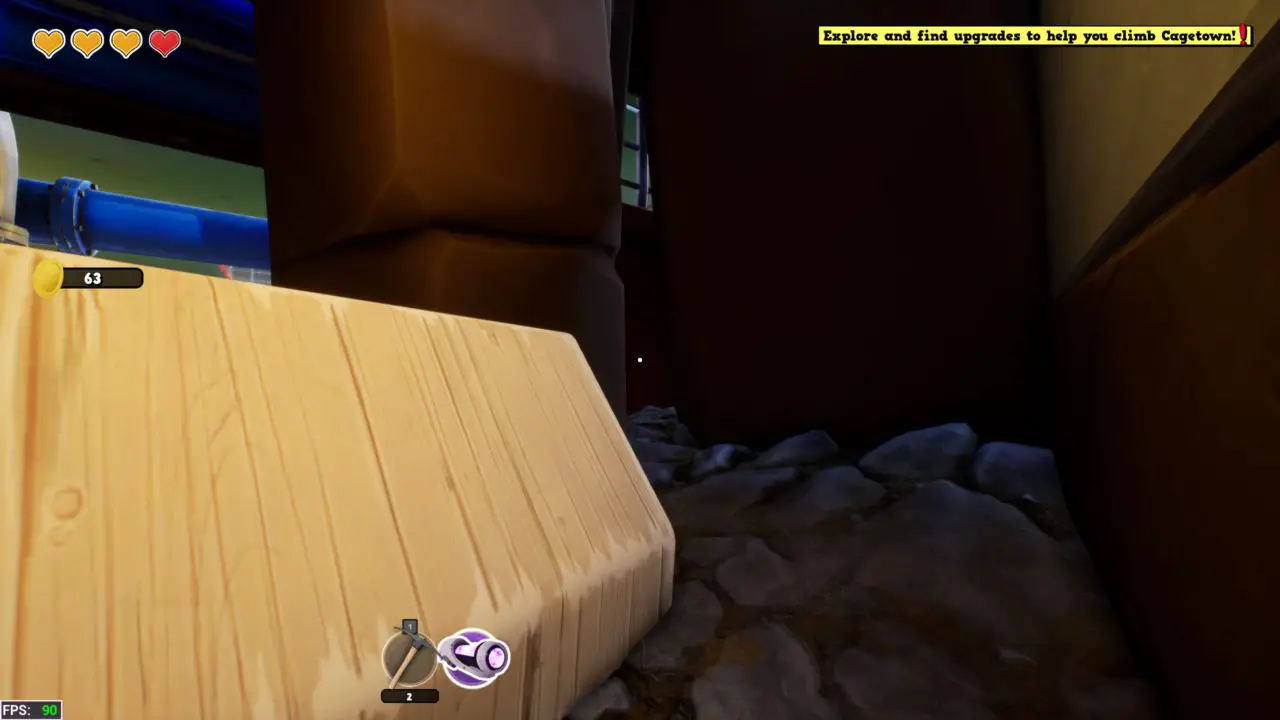
Follow this path and you will find your chest.
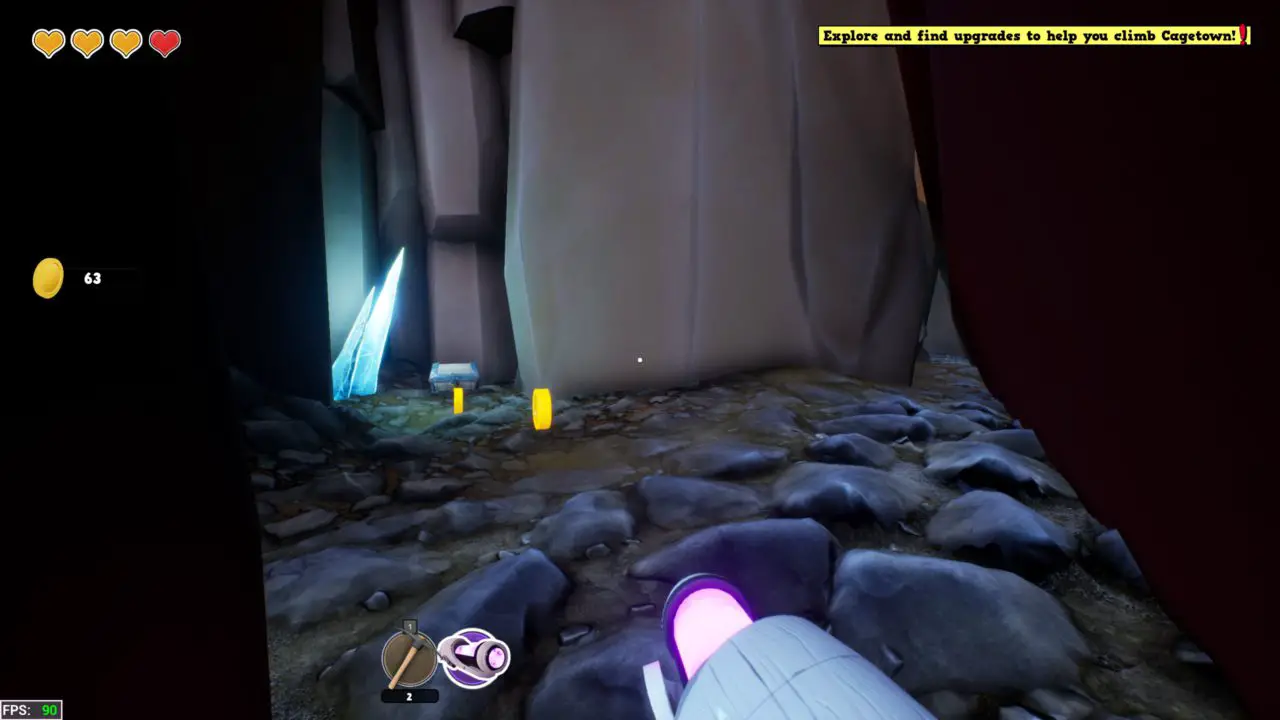
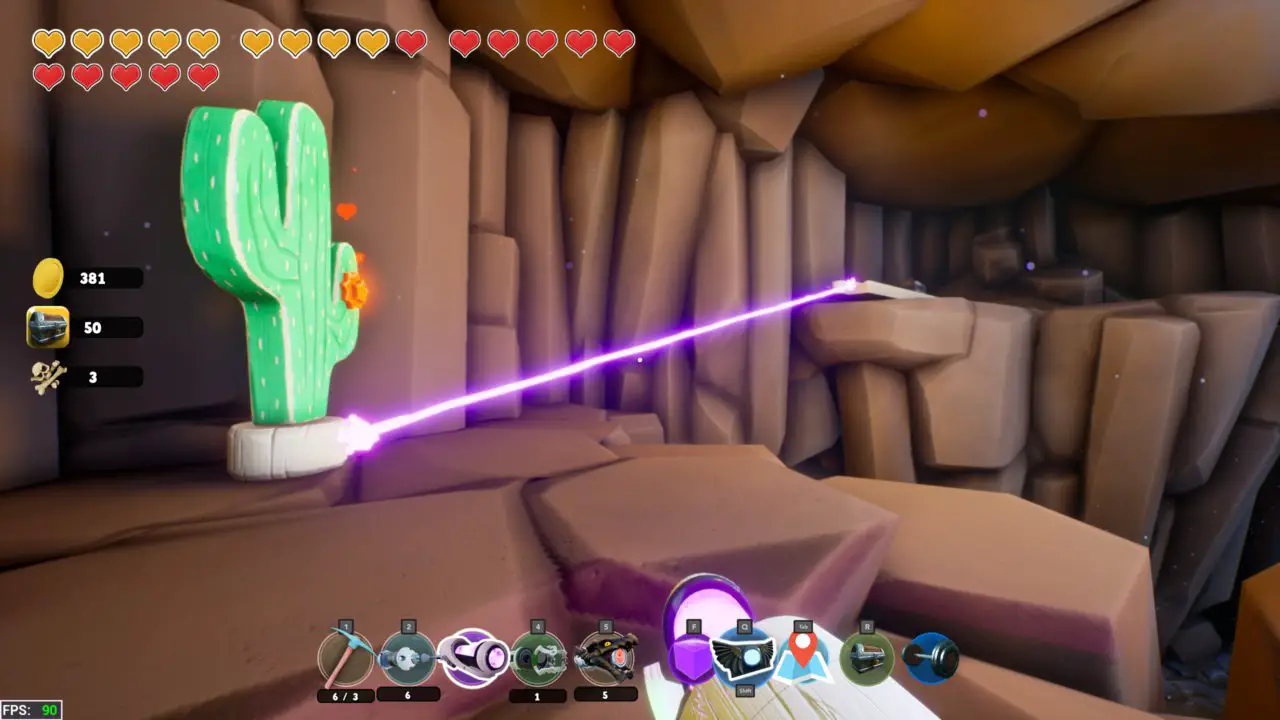
Chest #13
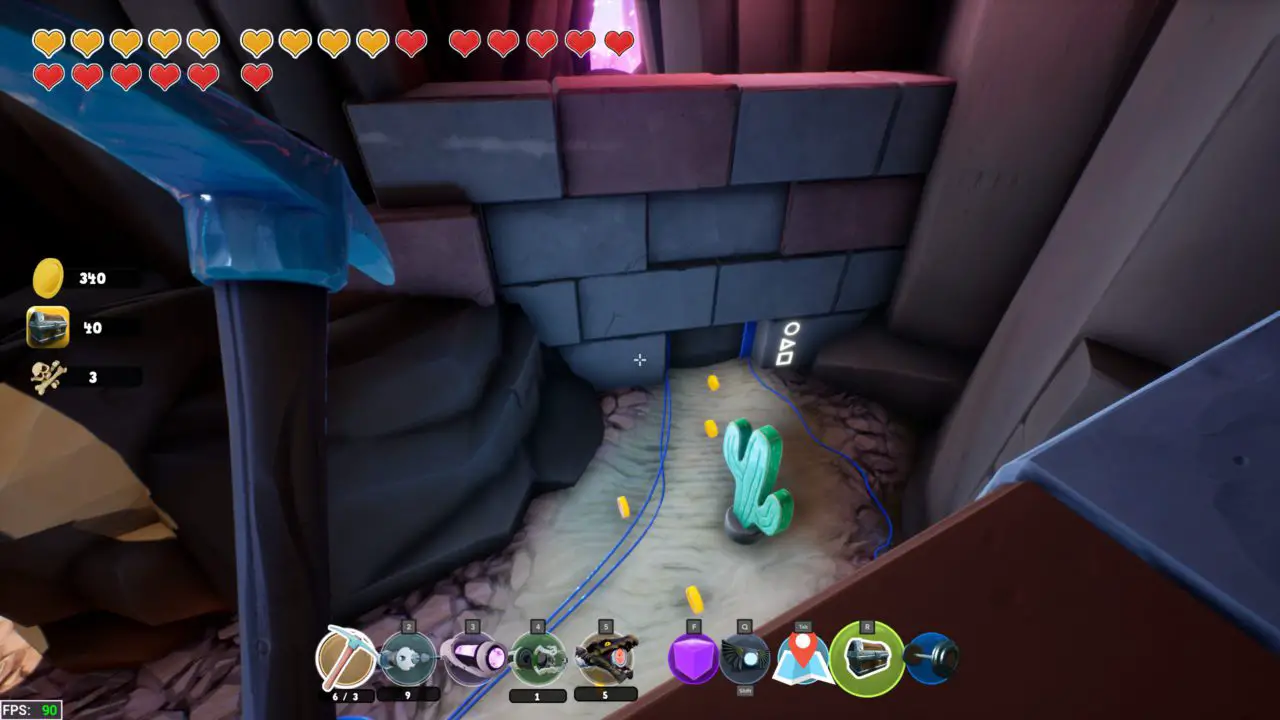
Up by the gate with the two blue bars, use a force beam to connect the cactus and the wood by the chest, and then walk across.
Chest #14
Another unmissable chest, this one contains the gravity belt (you feel any lighter yet?).
Chest #15
This one is located beside the red lock in the industrial area.
Chest #16
Directions for the next few chests can get a bit hairy, so I apologize in advance. After yanking yourself over the glass wall using the force beams pull, there is a breakable wall a shade different than the other rocks. Break it and you will find a coin.
Along the right wall will be a crack, walk through it and find your next chest.

Chest #17 & 18
With this chest you get a better magnetic belt, hooray!
Behind this chest is a space between the bricks, go into the secret area there and break the rocks to reveal another chest.
Chest #19
Backtrack to the previous room where there are three floating coins, use the new magnetic boost to launch yourself up and get them. There is a ledge beside the coins, land there and then just jump across to the chest.
Chest #20
Head back to the first room that you were able to get into, and stand on top of the rock where Chest #16 is located. Use your magnetic belt to launch you into the small area to the left of the divider that has yellow light coming from it.
Chest #21
Just by beating him in the race he will unlock a door where a chest is located.
Chest #22
Use the med-station by the entrance to this area to launch yourself onto the top of the radio show building. Then simply jump in to get this chest.
Chest #23
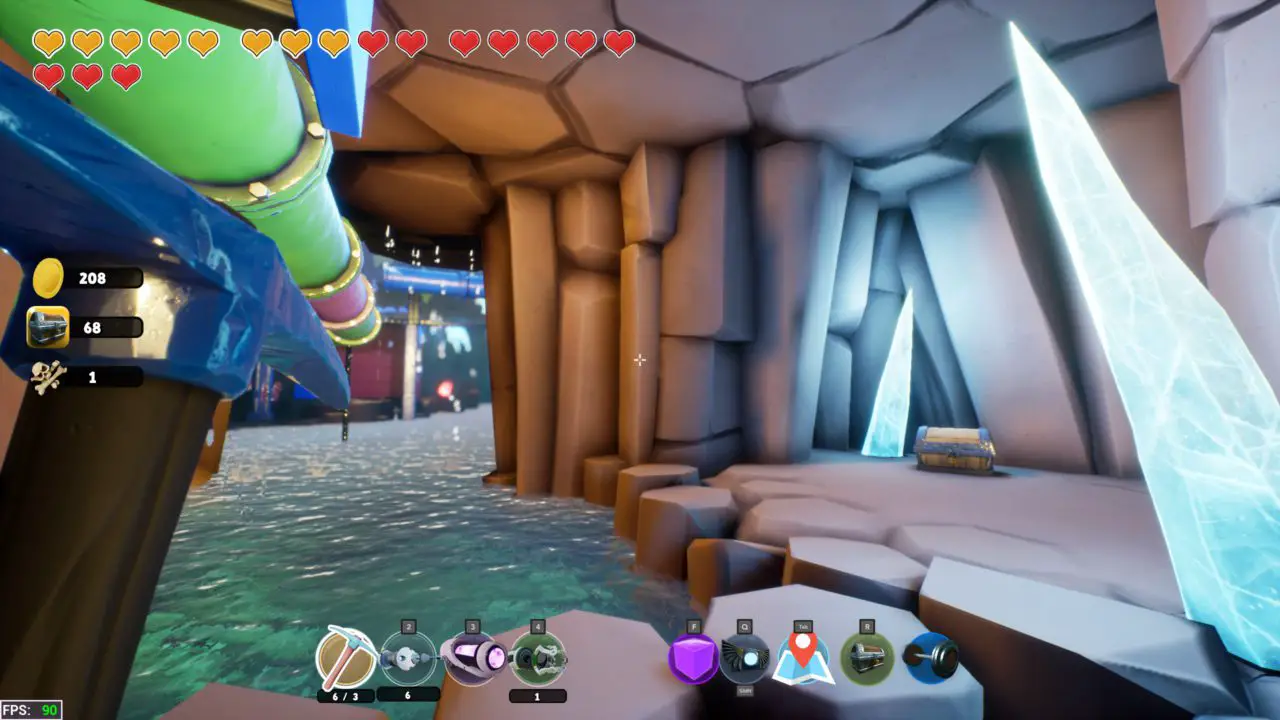
Immediately after getting the Valve Detector on the top of the tallest building, go to the ledge shown and fall down to get the next chest seen in the bottom left.
Chest #24
From the last chest, fall down onto a rock ledge below, seen on the right of the valveless pipe. A chest will be inside.
Chest #25
From the location of the previous chest jump to the roof that is at the same level as the rock ledge. Break away the rock to find another chest.
Chest #26
From the top of the building with a large burger on its look at the back of it towards these rocks.
Once you get near there is a tunnel, go inside it for a chest.
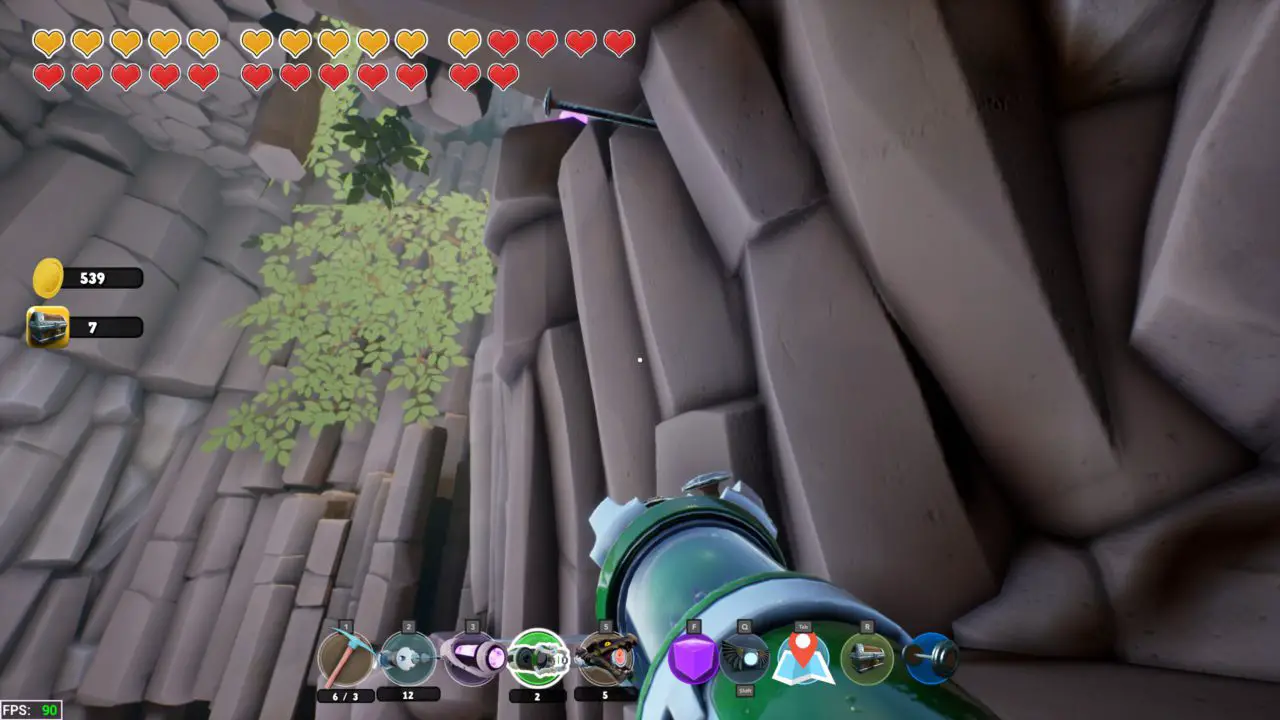
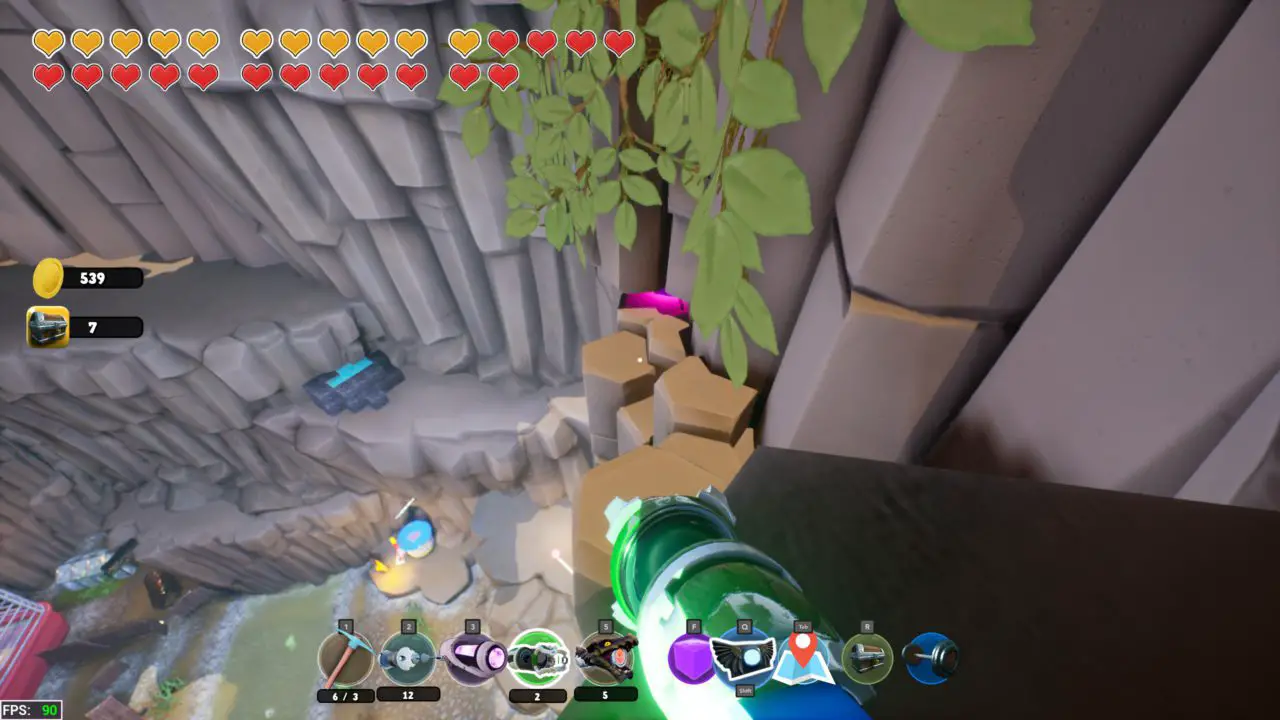
Chest #27
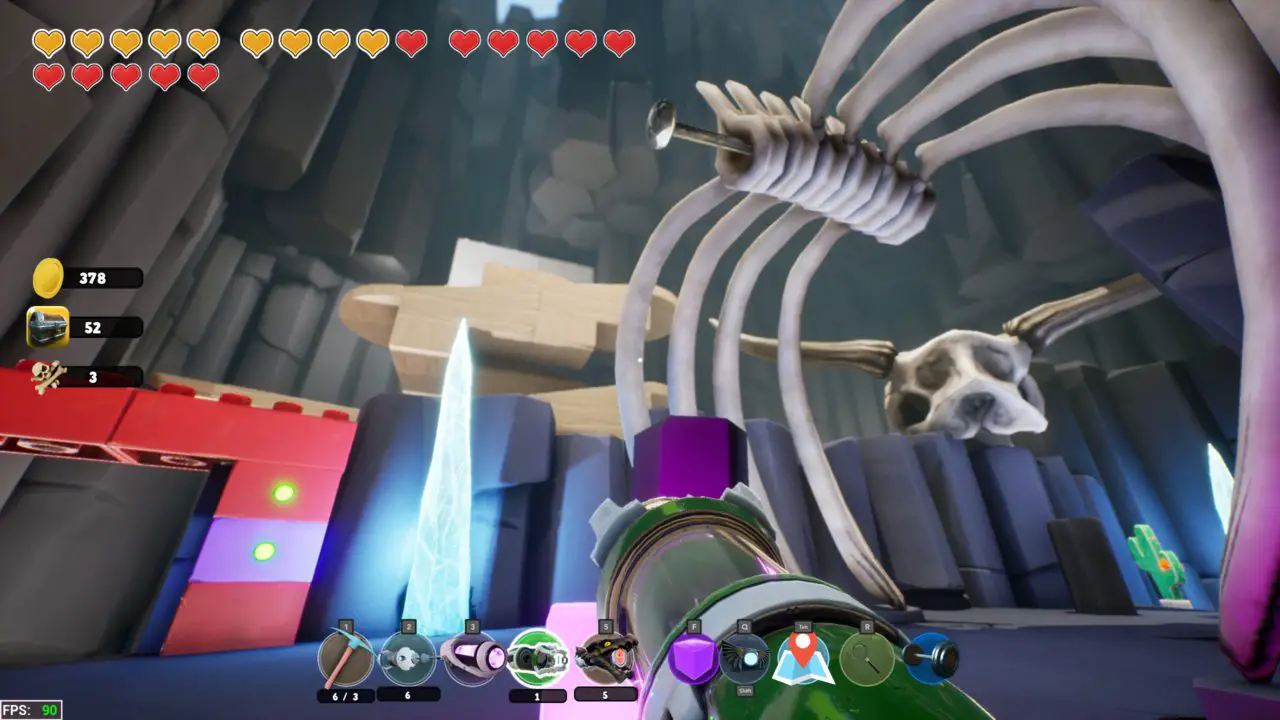
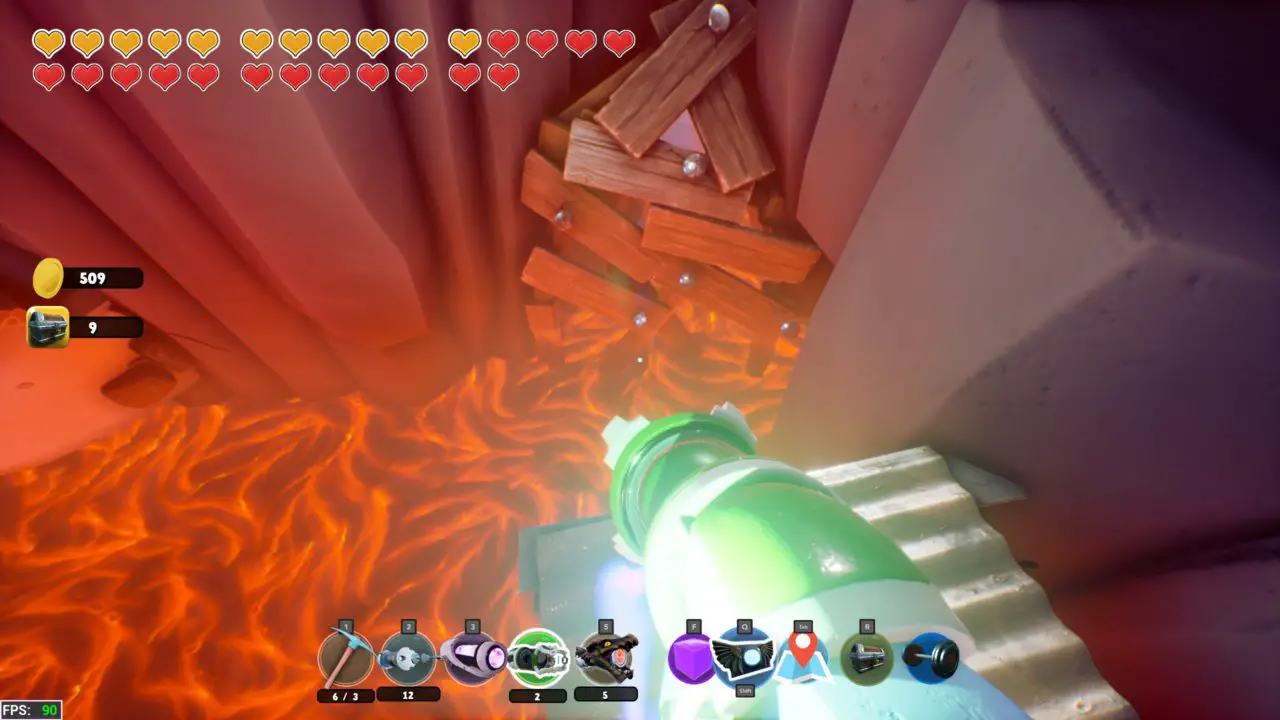
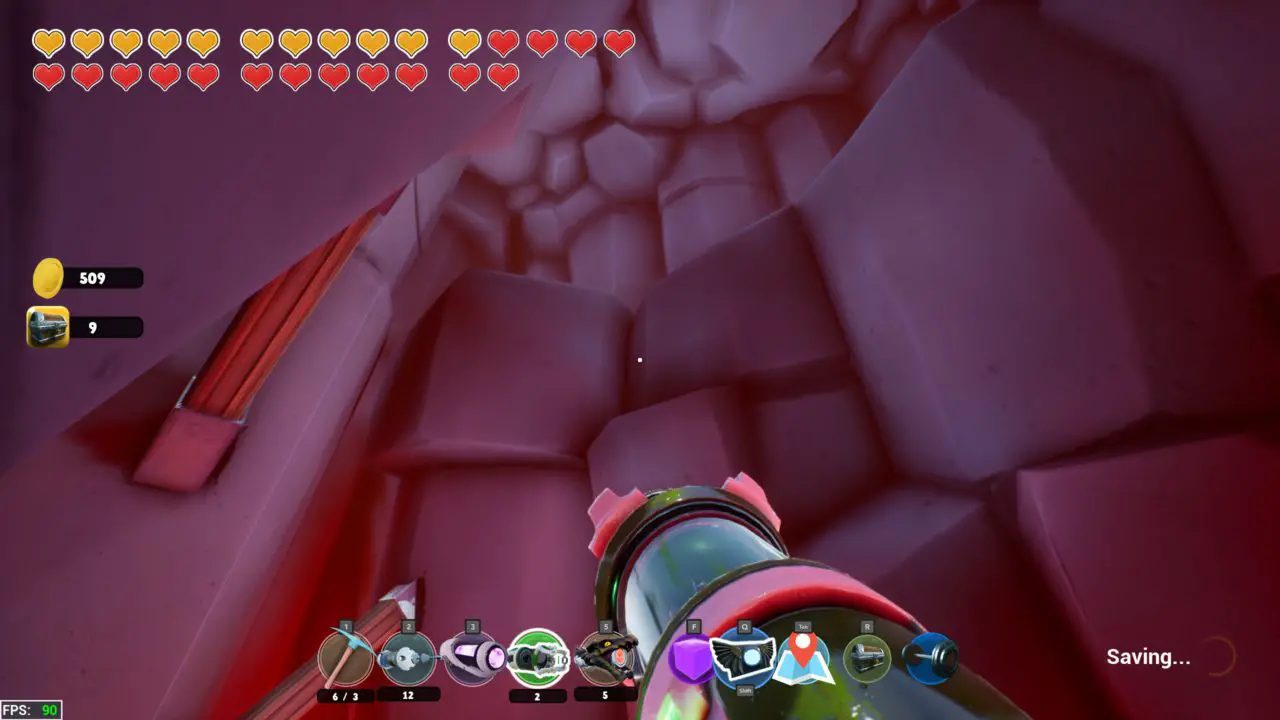
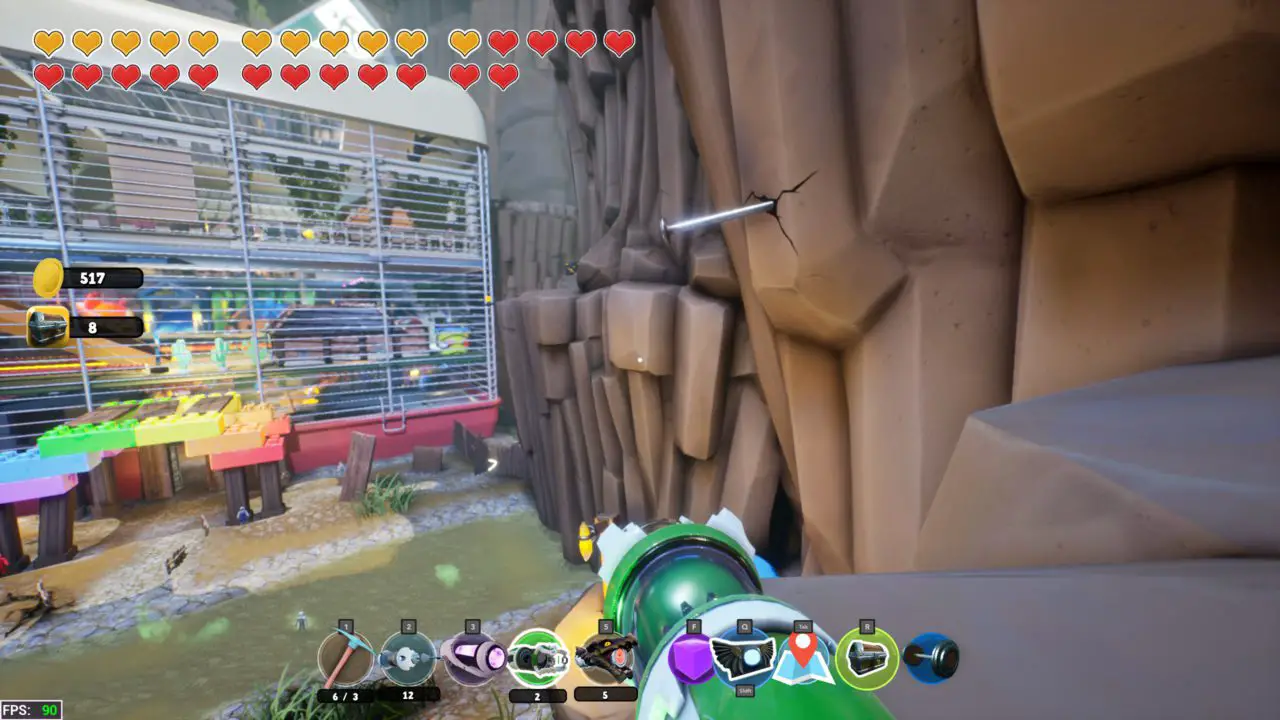
Right after you feed the monster and get the red key, there is a ledge just below that. Fall onto it and you will see this nail.
Go behind it and you will see a small crack with some coins on the ground. Once you have dropped down, turn around to see a small opening just below where I am aiming, crawl inside to find the chest.
Chest #28
After turning on all the valves in the Industrial Area the worker will give you a chest with a reward for all your hard work.
Chest #29
This mandatory chest gives you the ability to throw your pickaxe like a boomerang (does this make it a pickerang?)
Chest #30
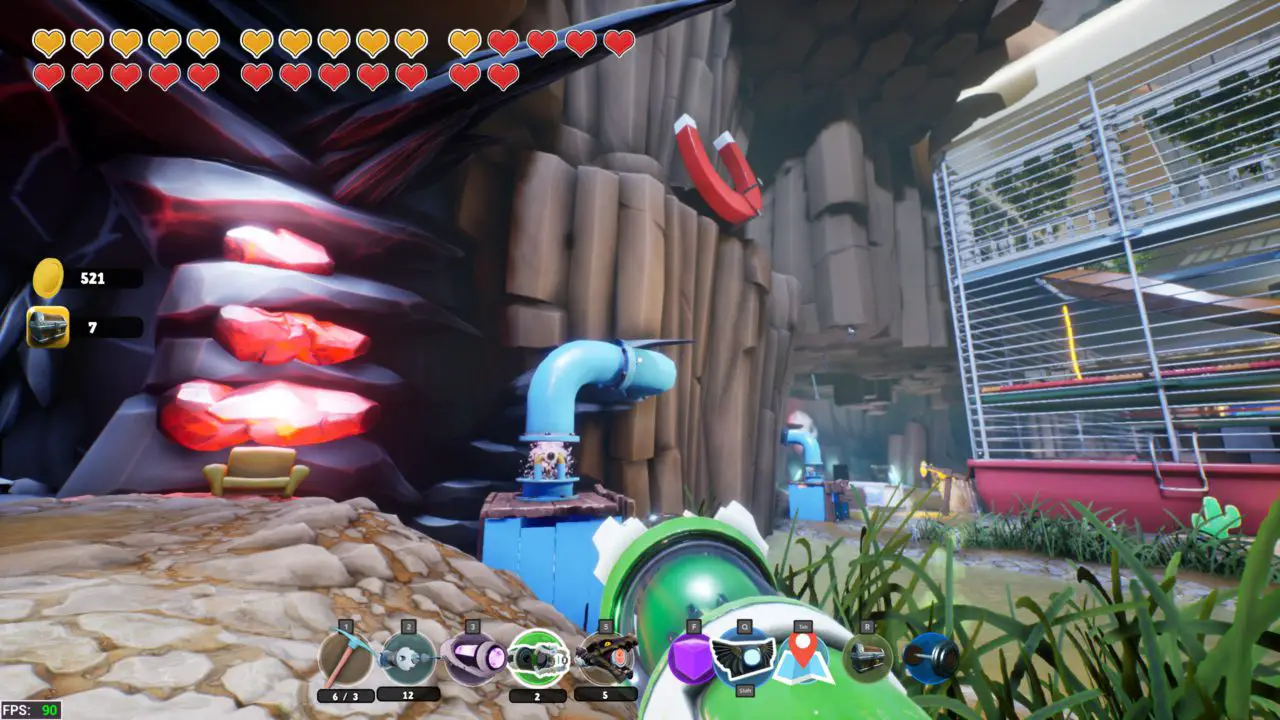
On the way back to Cage Town you will see this switch in a box up on the wall. Go to the blue led by the chest (There will be a closed-door) and launch yourself up at the switch. After a few tries your belt will catch the switch and you can open it.

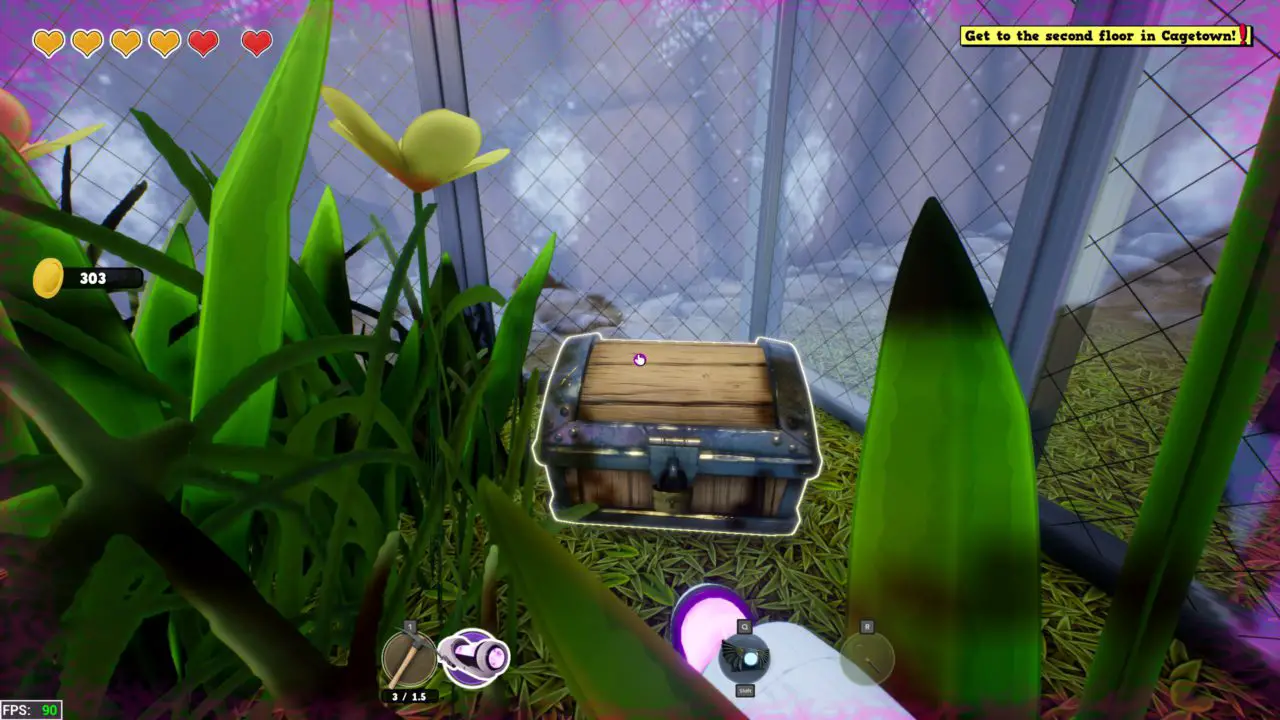
Chest #31
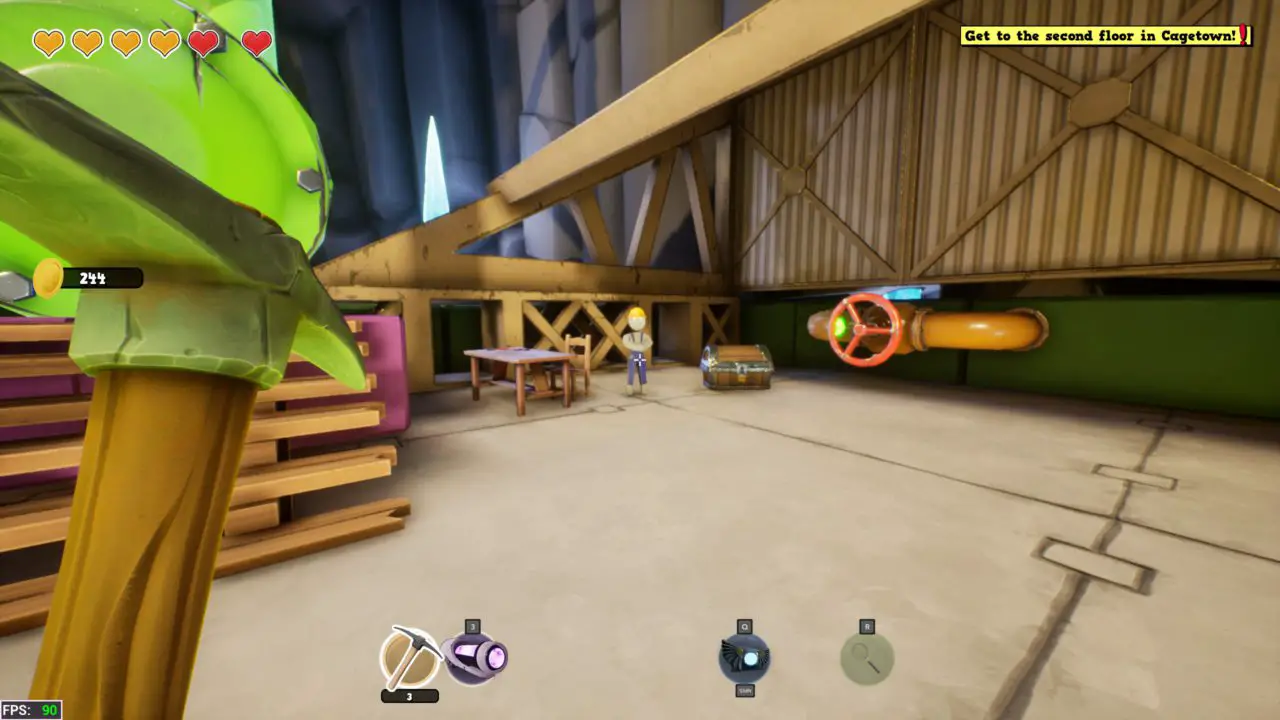
It’s just in the back of the greenhouse. You got this.
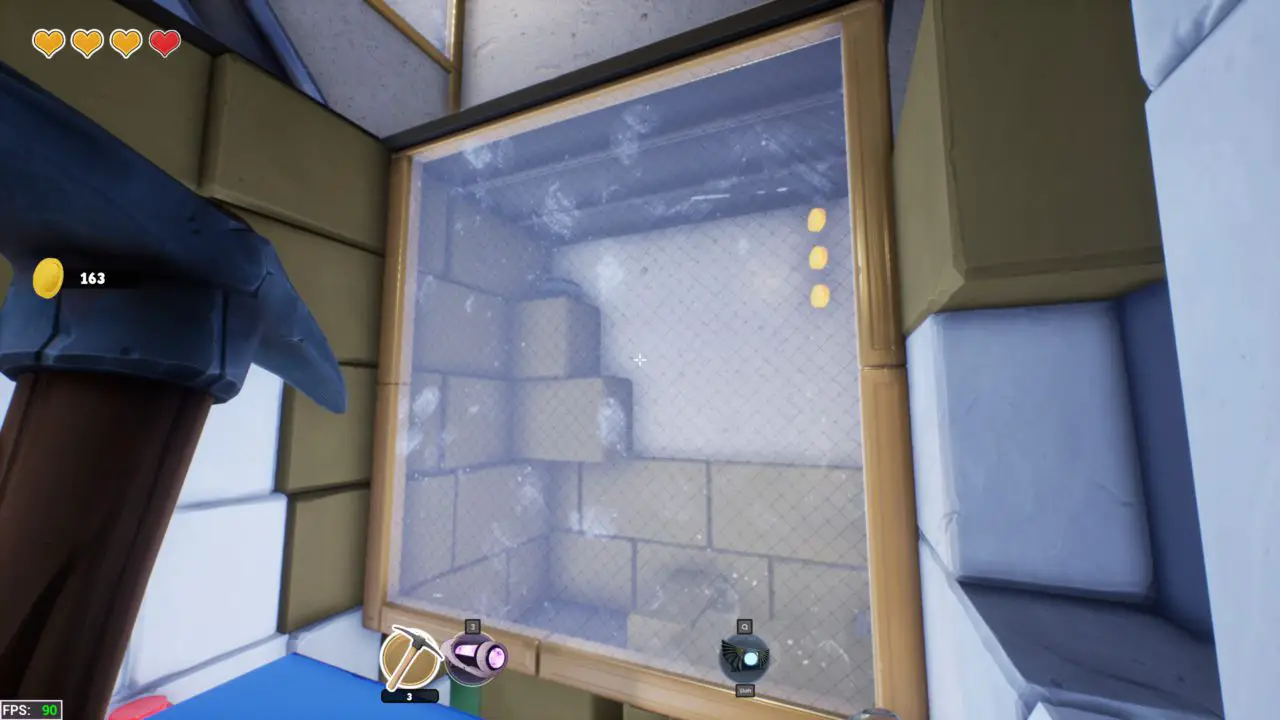
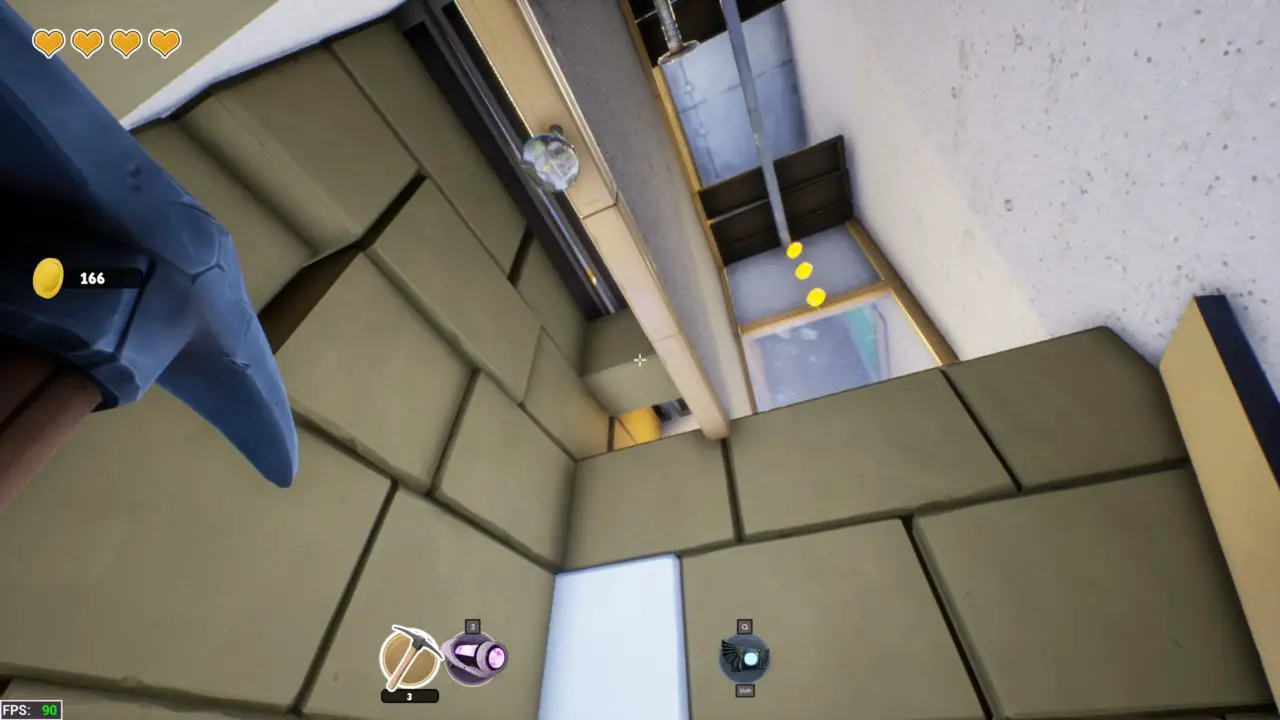
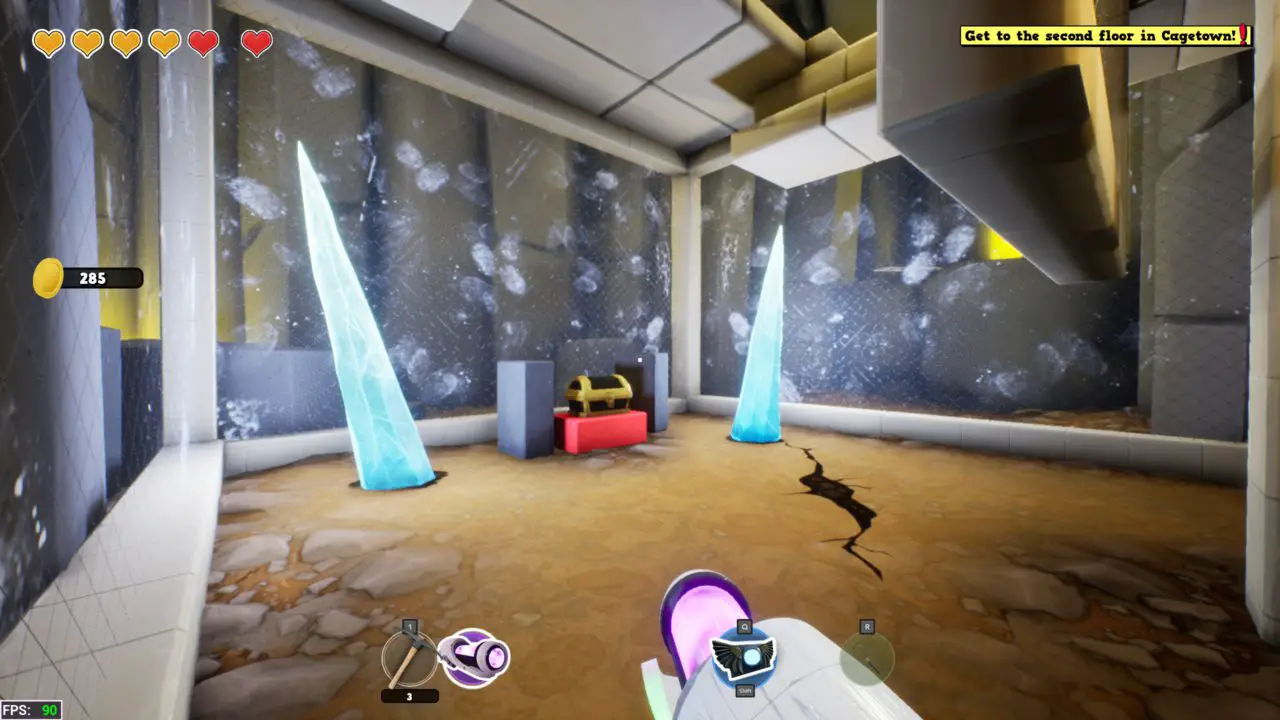
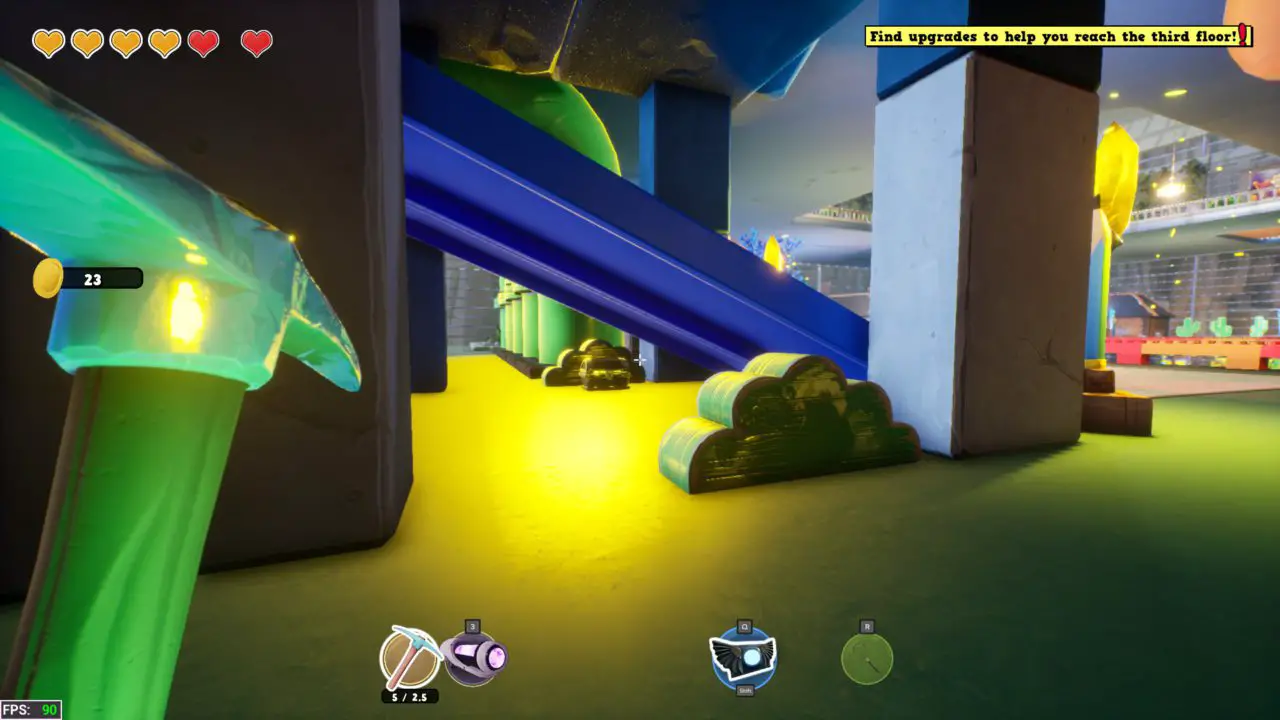
Chest #32
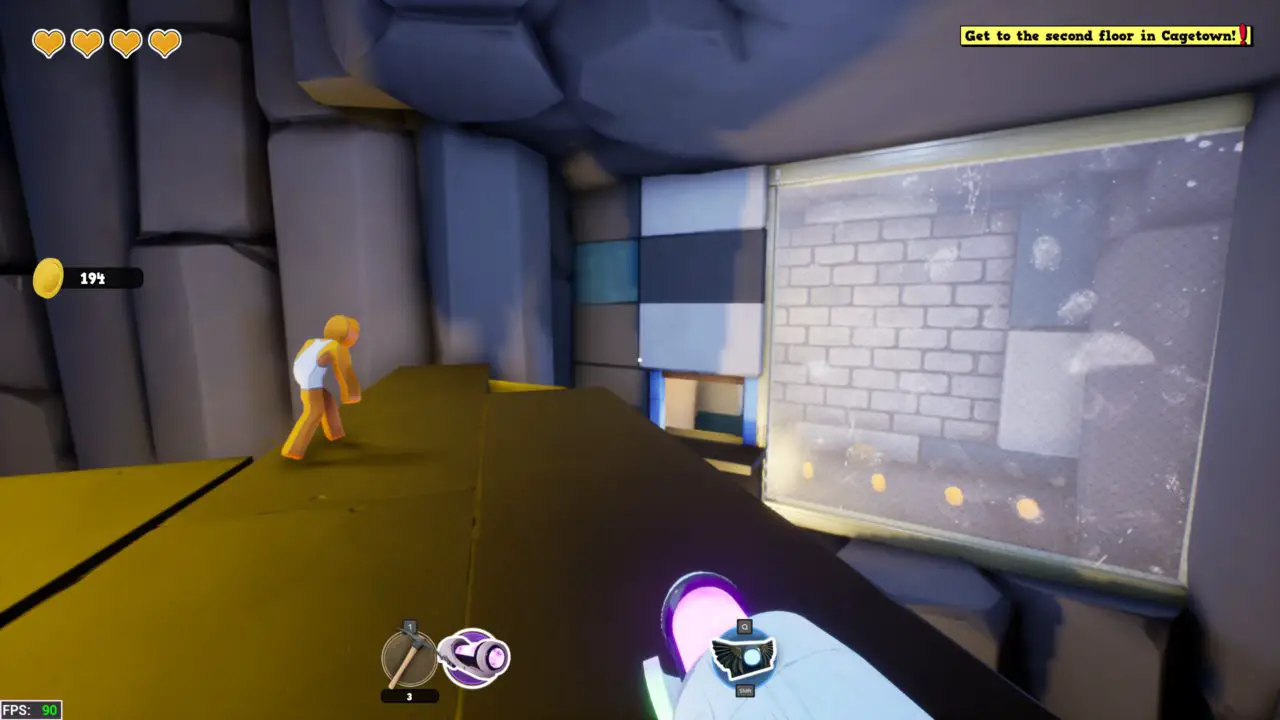
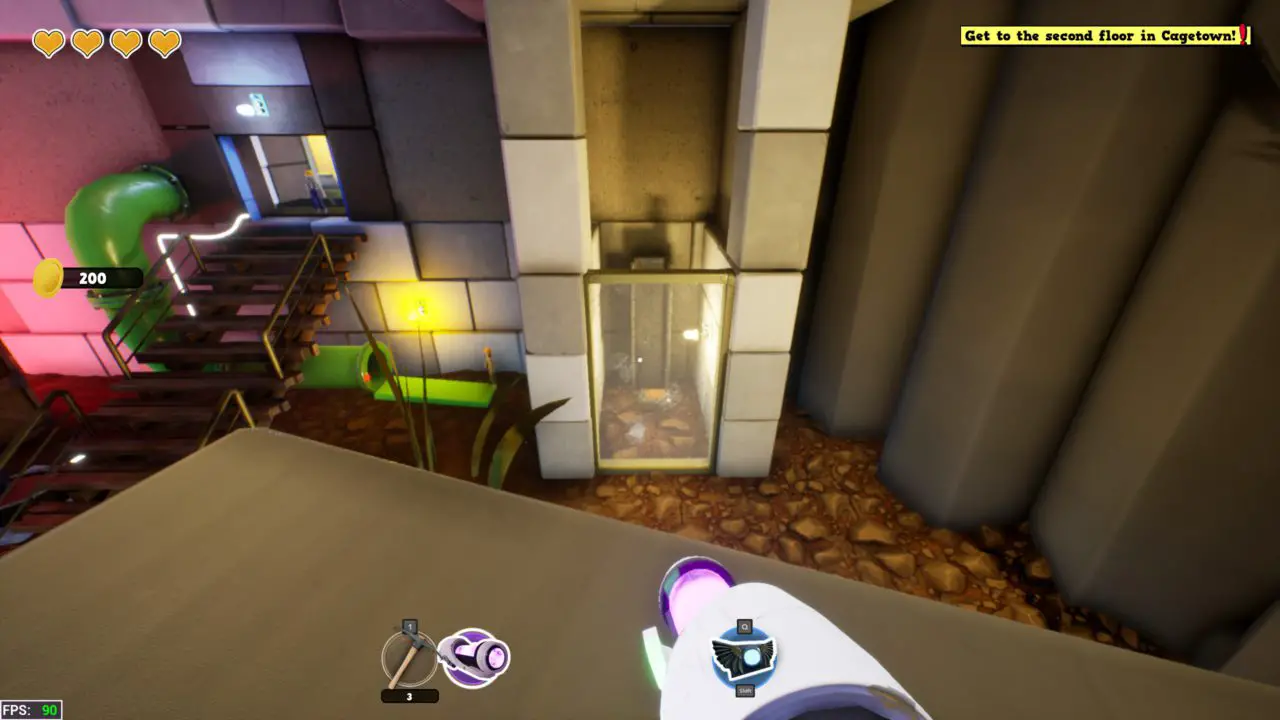
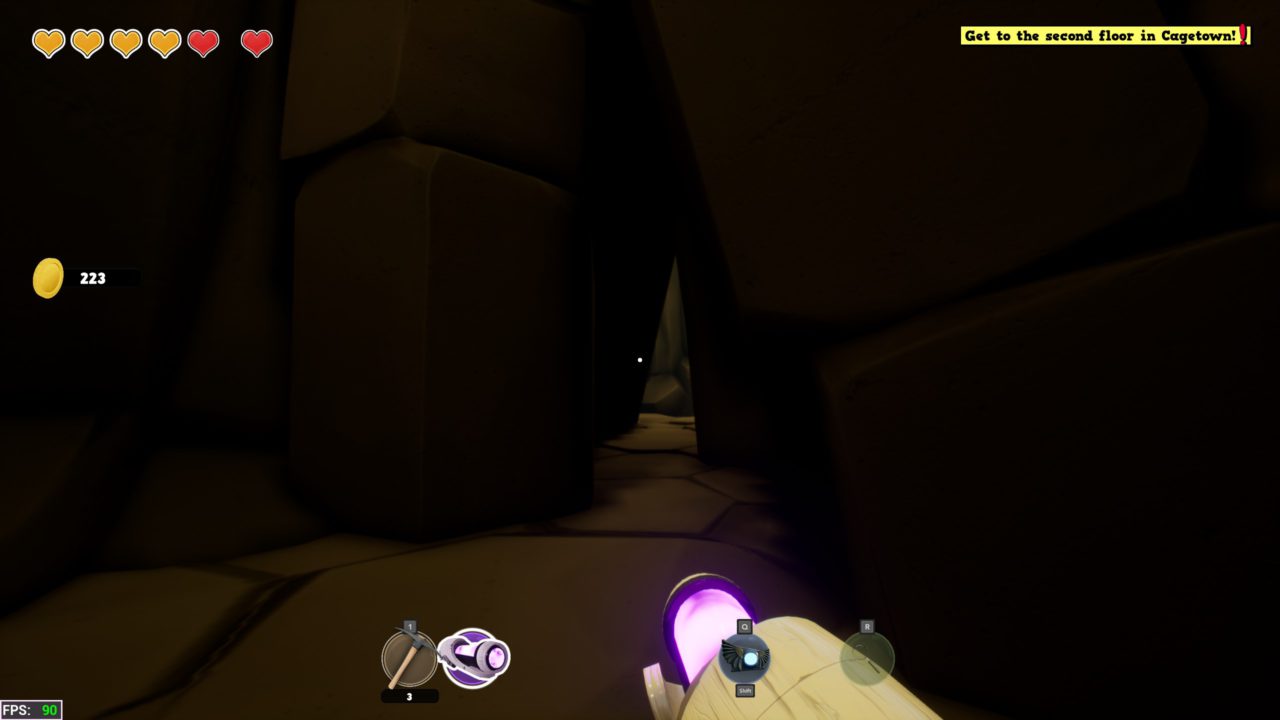
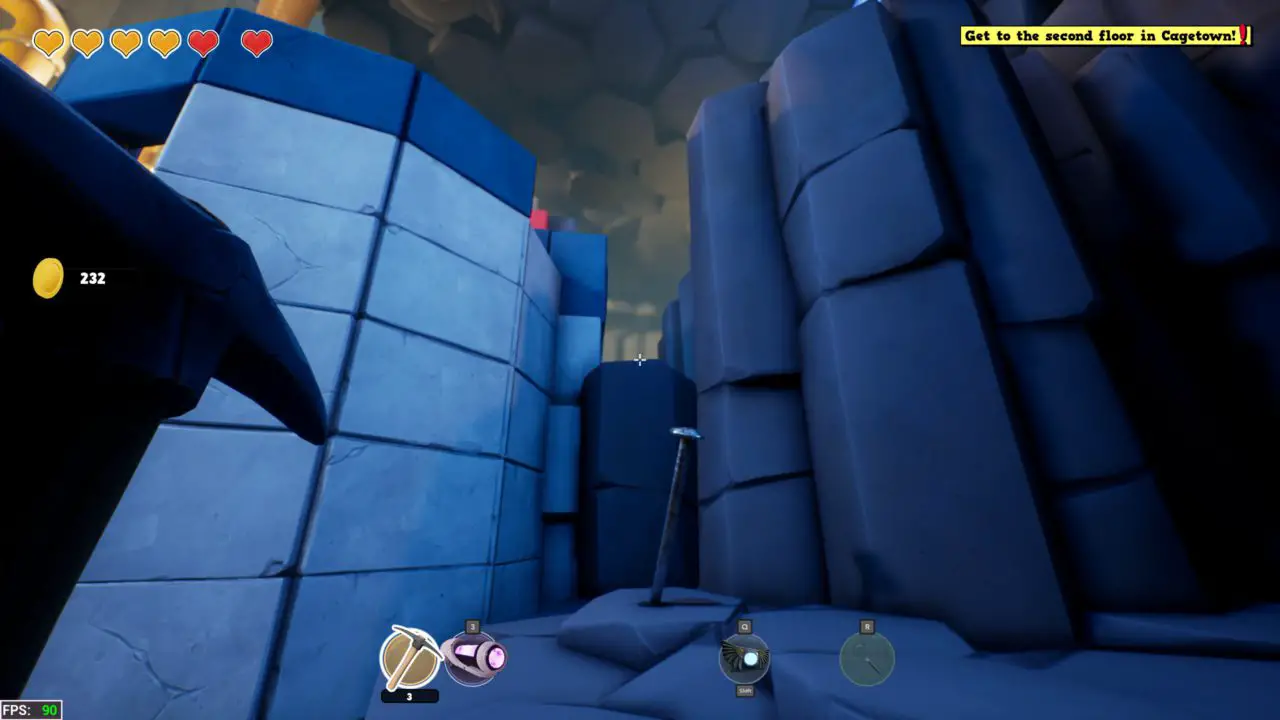
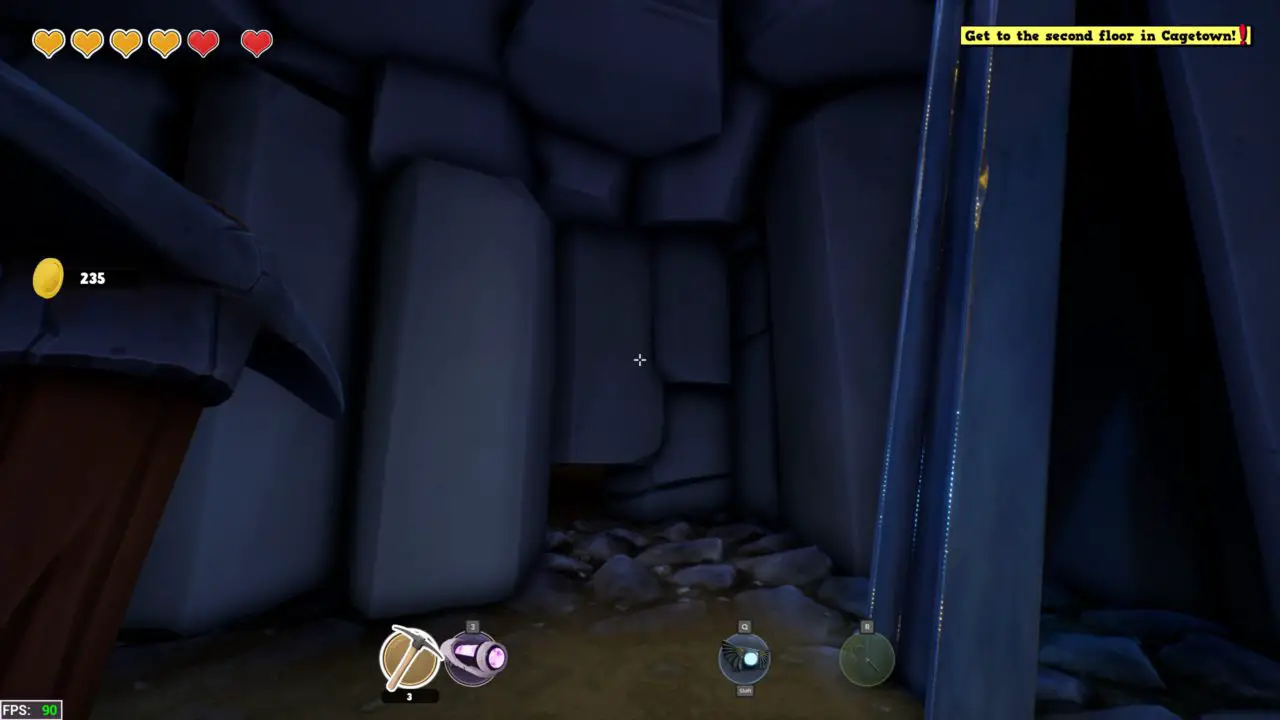
You should now have access to the second floor of Cage Town. This chest can be found underneath the ramp to the Bank District.
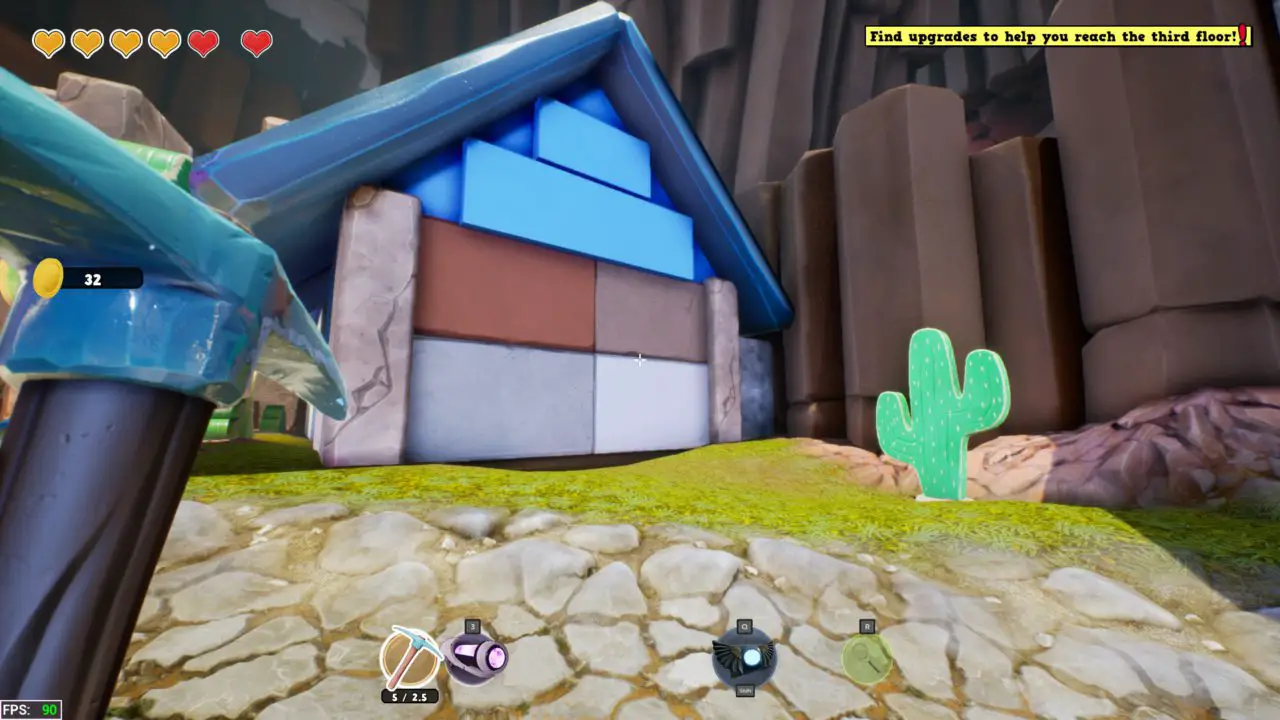
Chest #33
Welcome to the Bank District! Behind the house of the creepy monster, you can find a chest behind that rock wall.
Chest #34
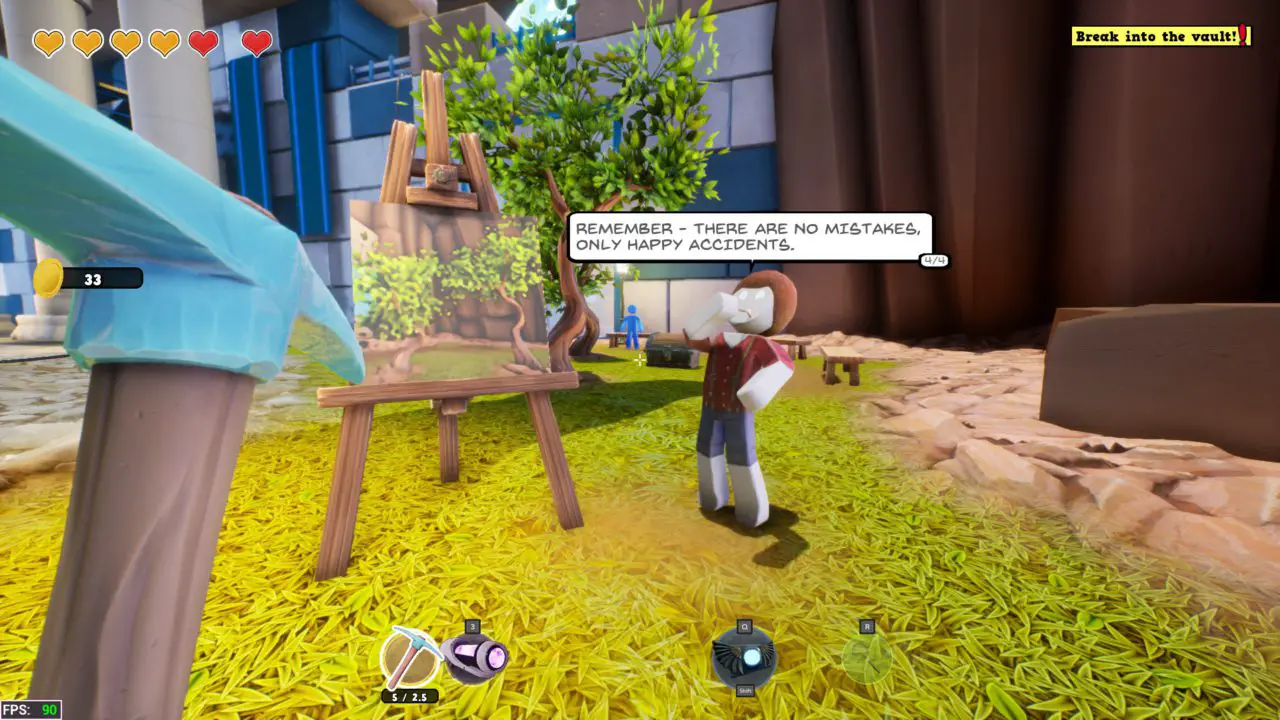
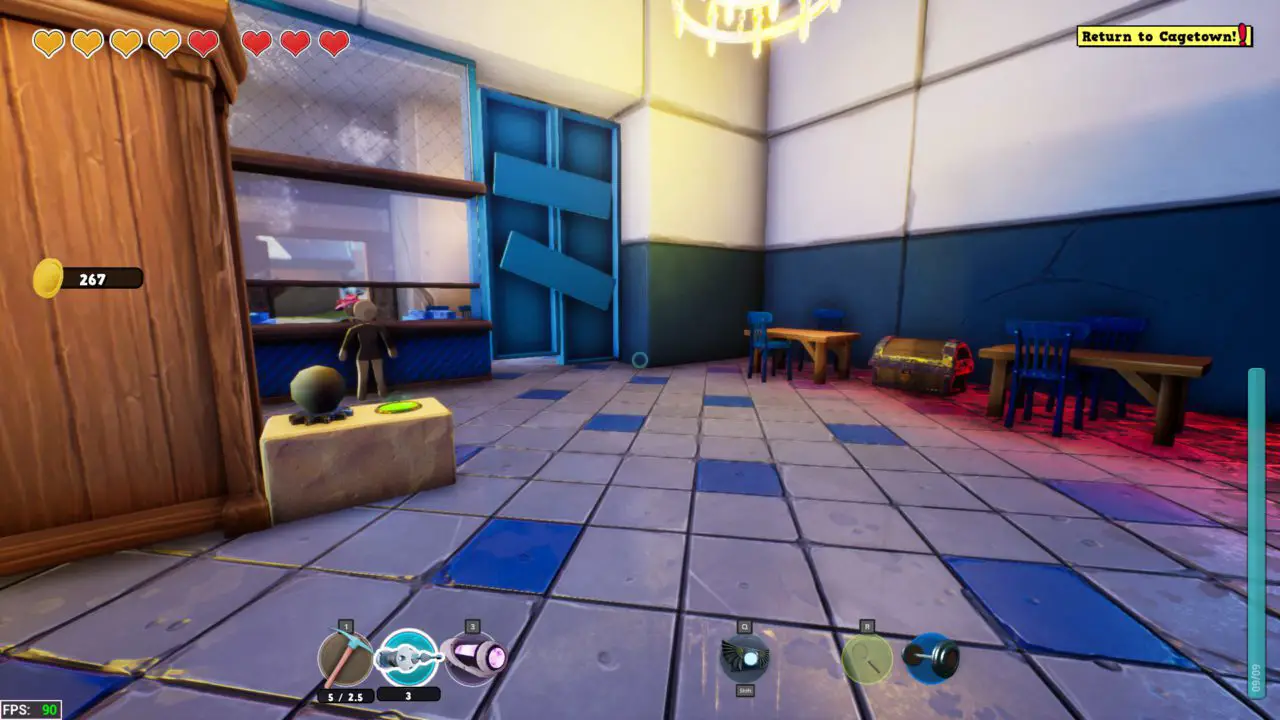
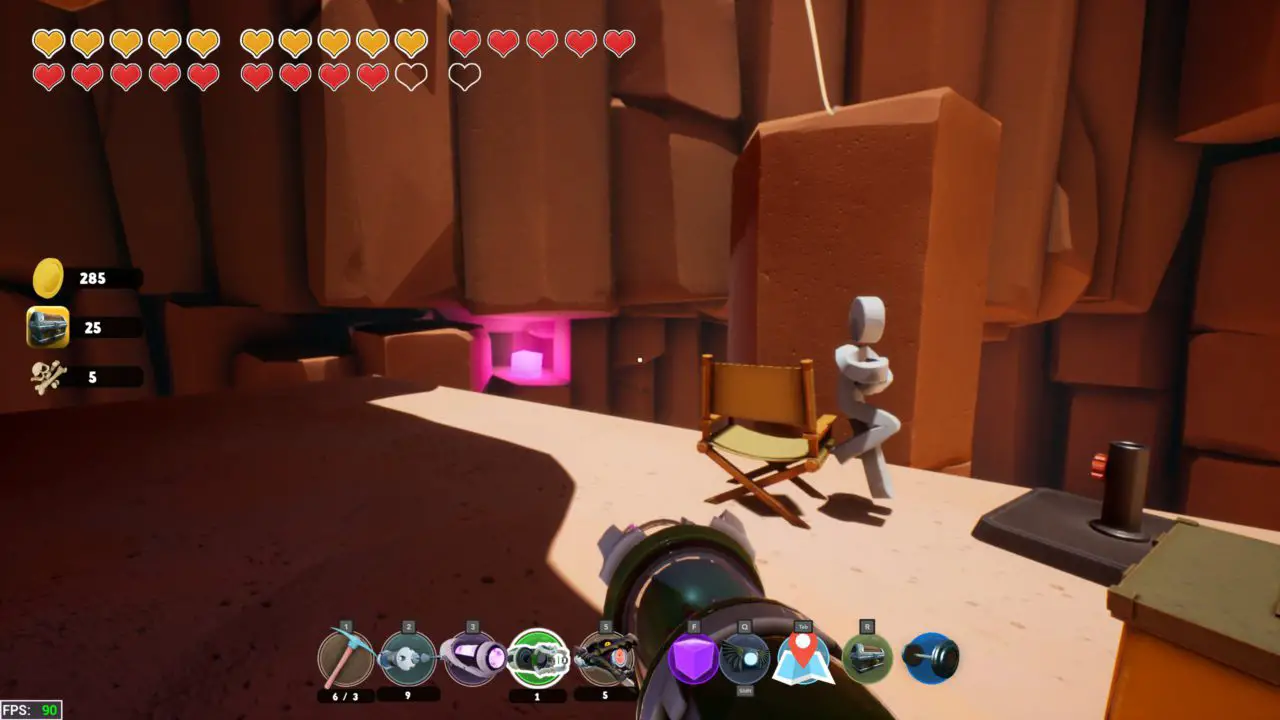
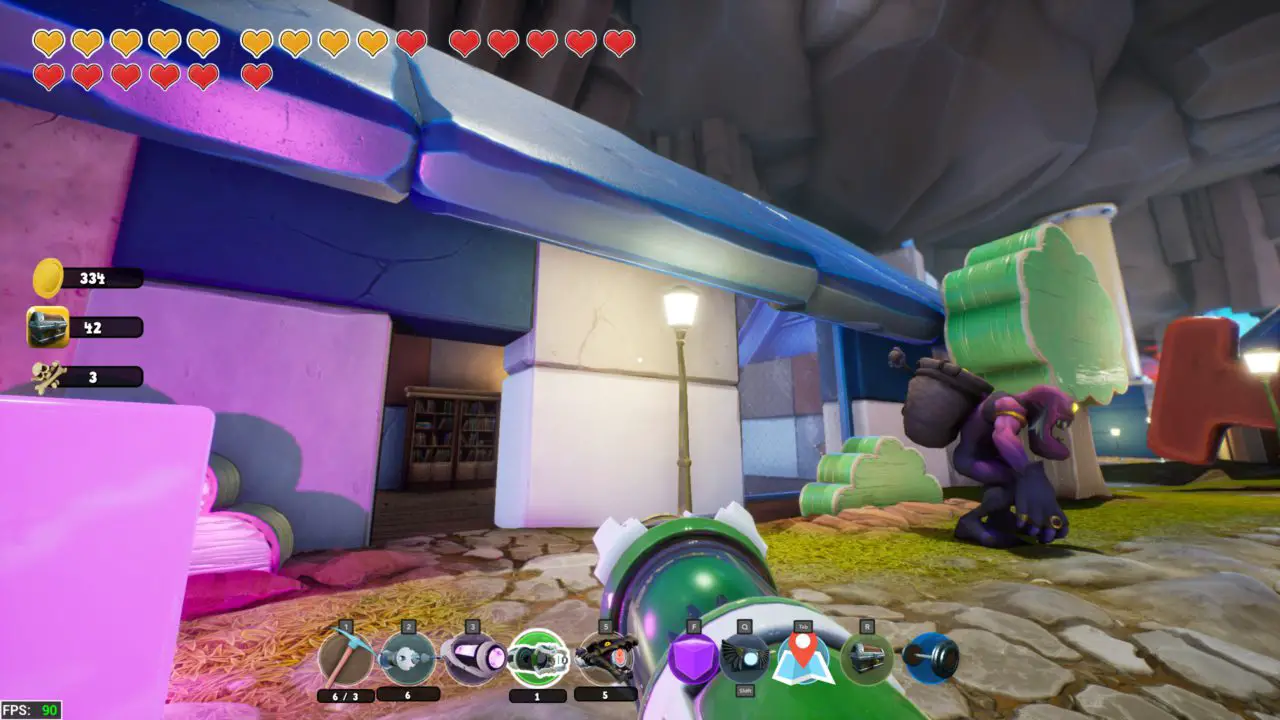
Talk to Bob Ross until he finishes his painting and a chest will appear! رائع, look at those happy little trees!
Chest #35
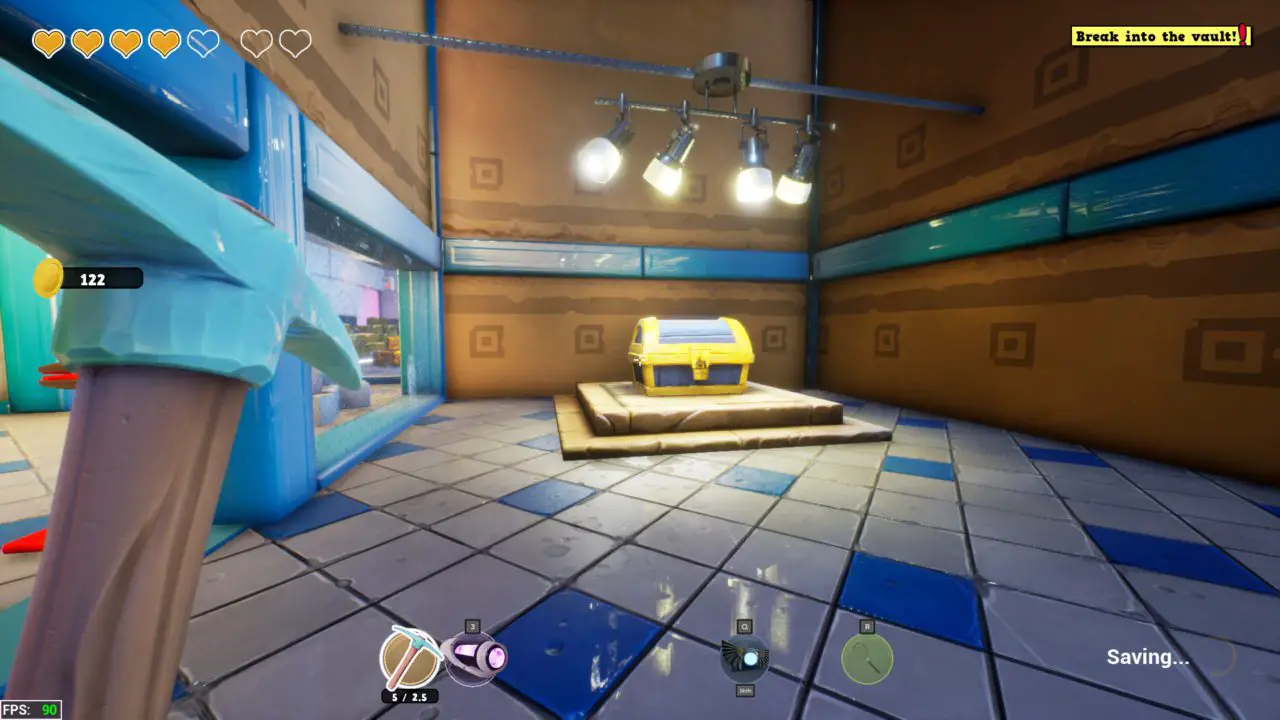
You sure picked the wrong bank to rob, who only has 1 gold coin in chest? You can’t miss this one.
Chest #36
مرة أخرى, you can’t miss this one, it has the zapper!
Chest #37
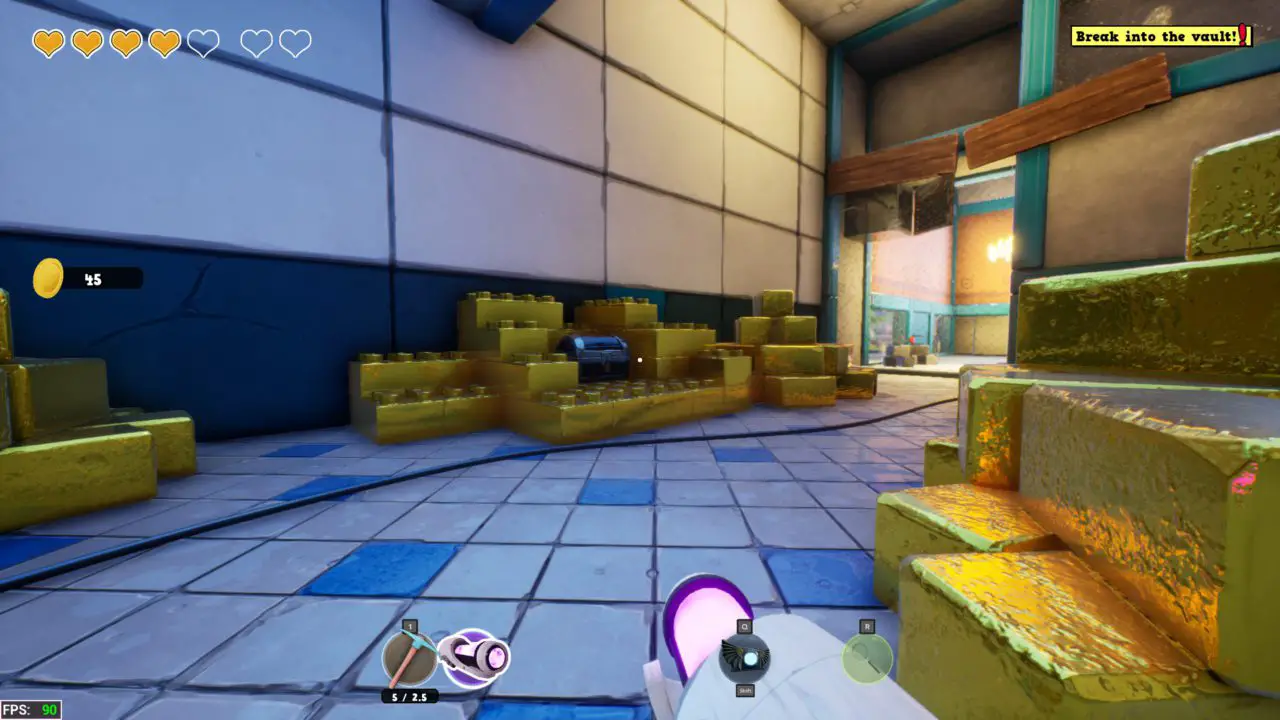
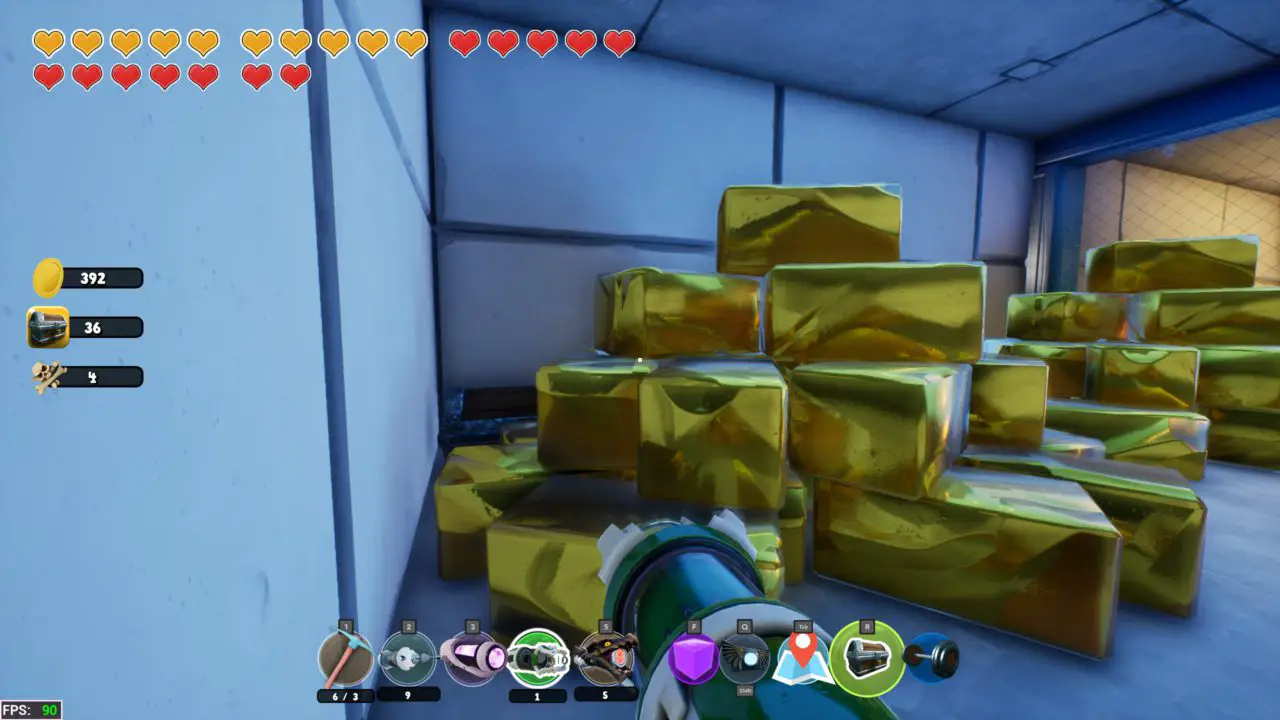
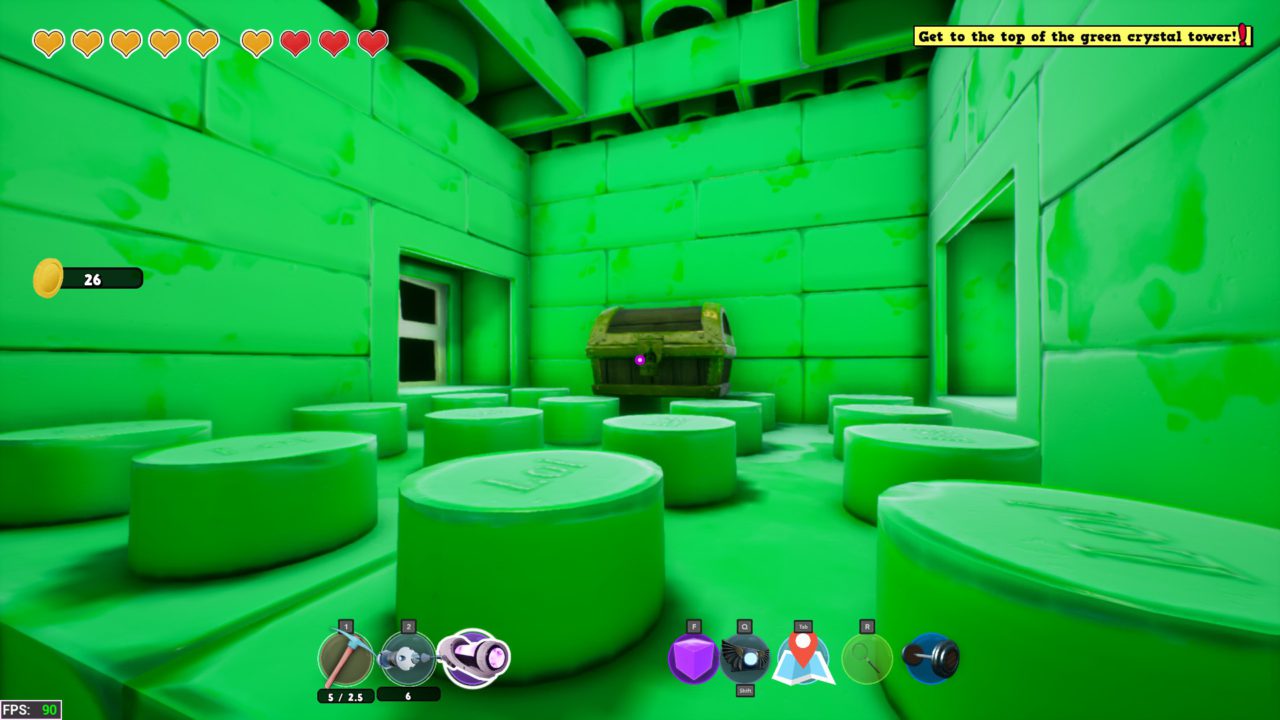
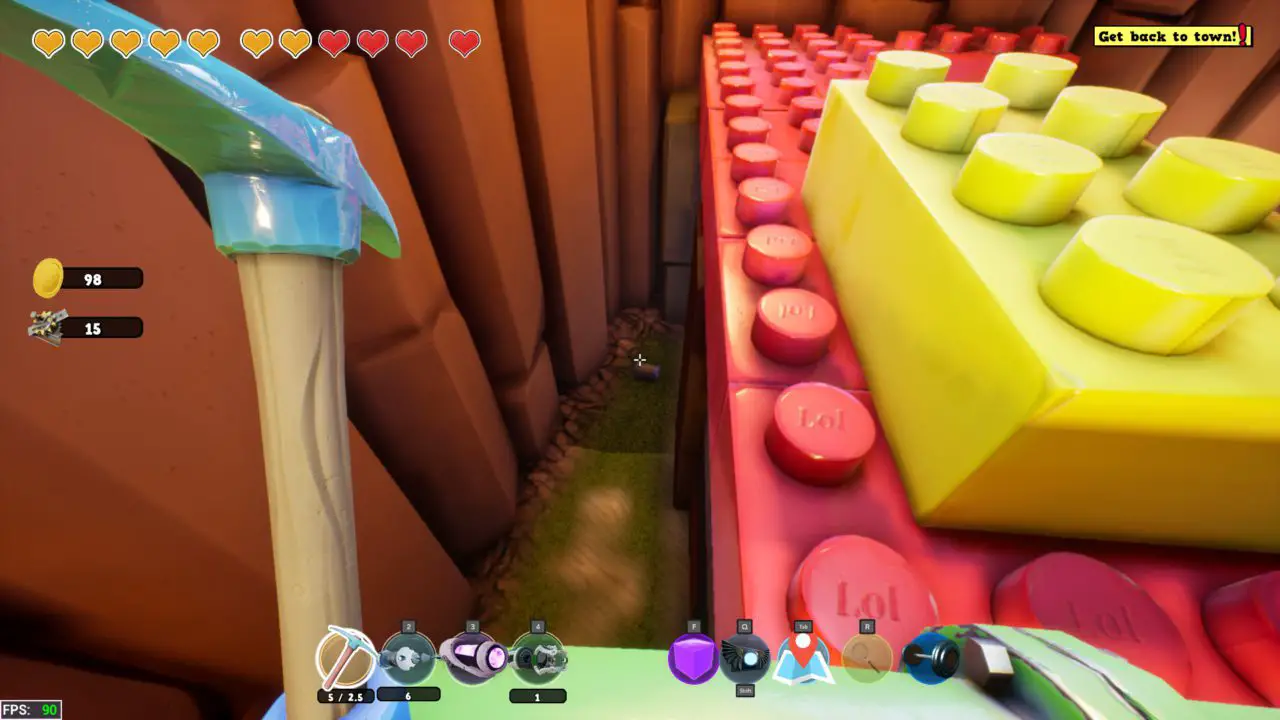
Once you head into the ventilation shaft use your magbelt to scale the yellow pipe. This leads to a room filled with coins, much more like what a bank should have. Behind the pile of “ذهب” blocks on your right is a chest.
Chest #38
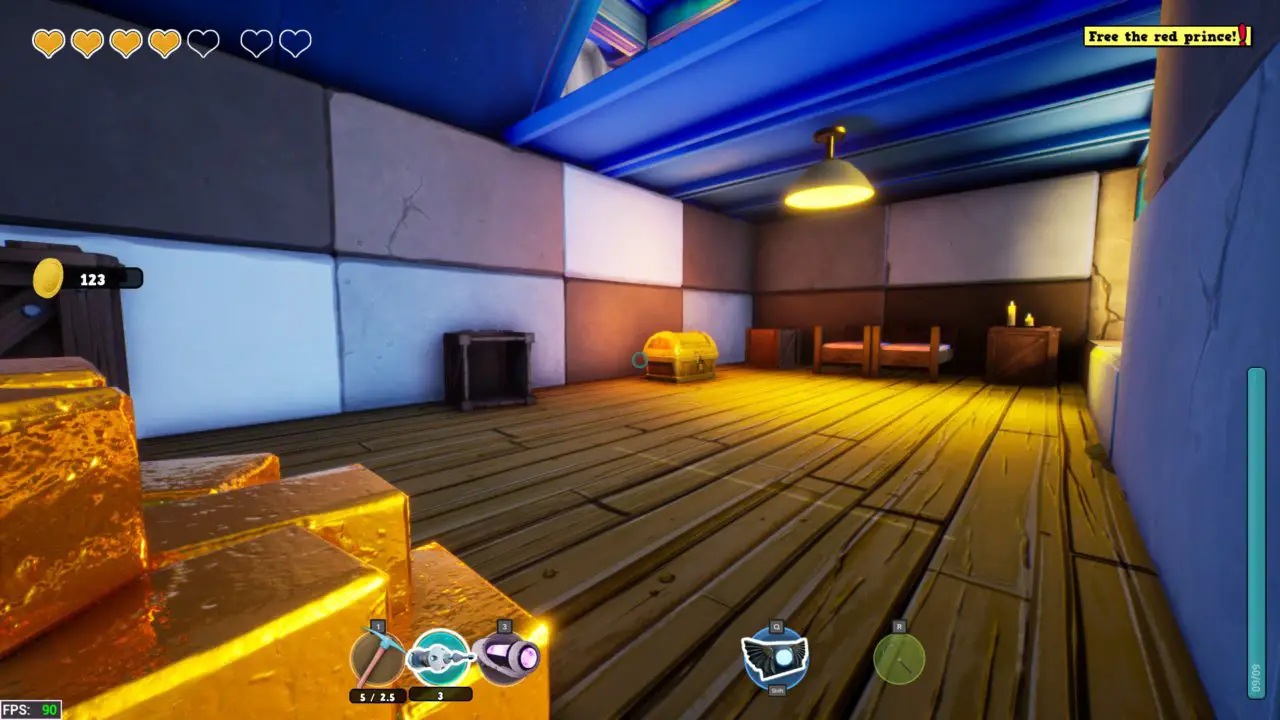
مرة أخرى, مرة أخرى, you can’t miss this one! Once you get out of jail get on the balcony immediately above you by launching off of the rain pipe you used earlier. Inside this building is the gold module!
Chest #39
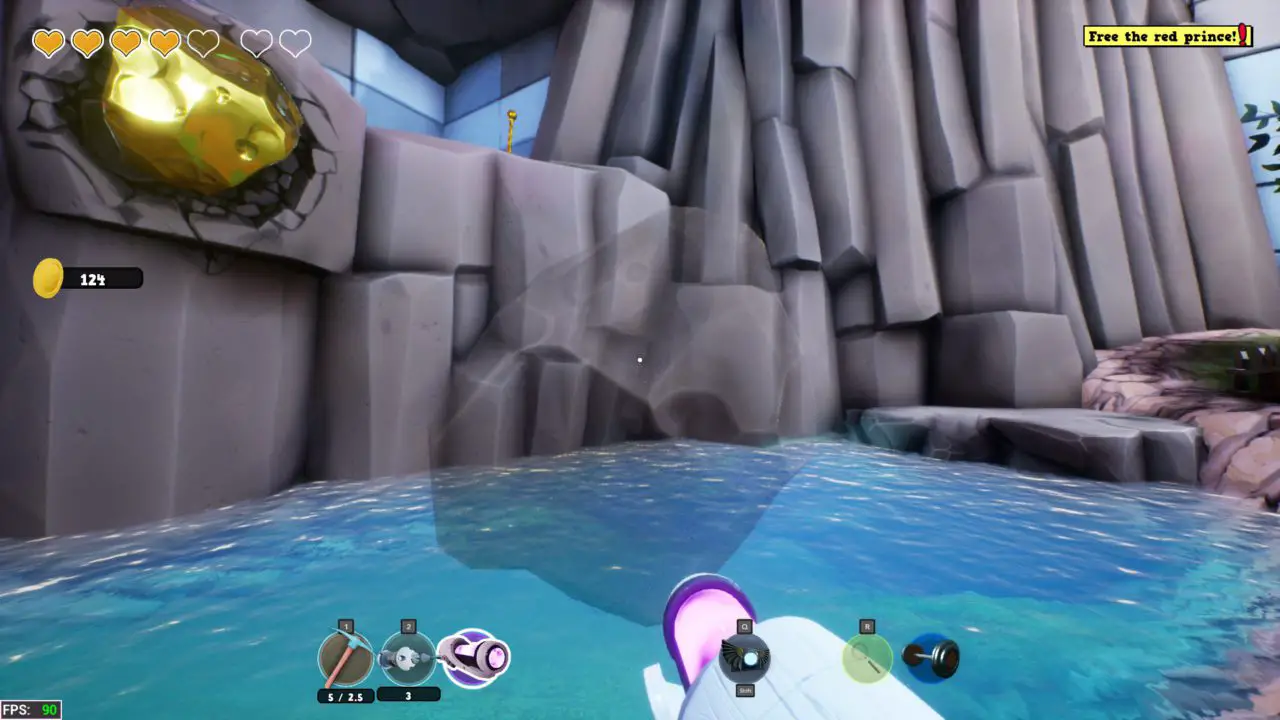
Now that you are strong, pick up the big rock in the middle of the clearing. Carry it while swimming down into the pond and you will find a tunnel that leads to a chest behind some rock.
Chest #40
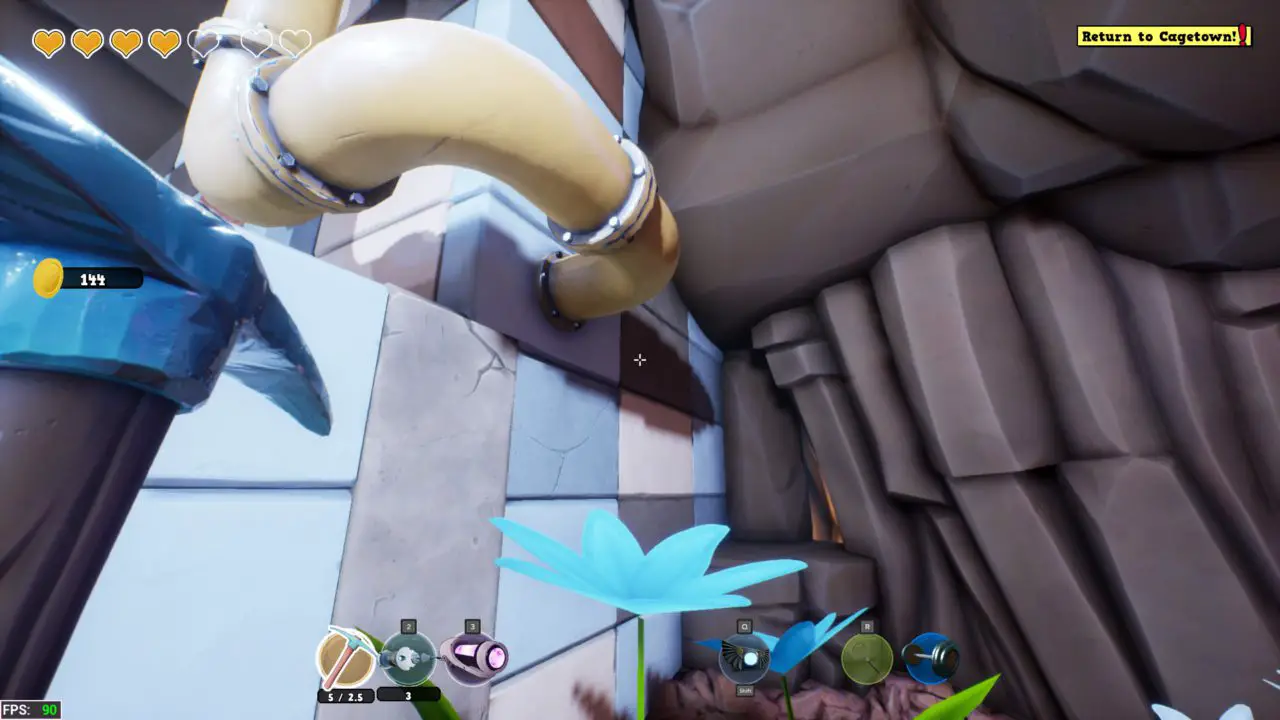
In the same area behind the jail use the pipe that against the side of the building to launch yourself into the little cave seen on the left.
Chest #41
Break back into the bank and go back up the air vents as you did earlier to get the speaker. bring a yellow-painted keycard with you and scan it at the card reader across from you. This room will lead you to a chest, just keep your chin up and you will find it.
Chest #42
Get back on top of the bank at the back, you will see a large opening in the floor marked with a blue board. Someone is trapped in there and needs some food! Bring him a cooked piece of meat and he will lead you to a chest! Do good onto others and they will give you chests.
Chest #43
Go to the front area of the bank where people are lining up. Shock the rod behind the clerk and it will open the door behind, allowing you access to a chest.
Chest #44
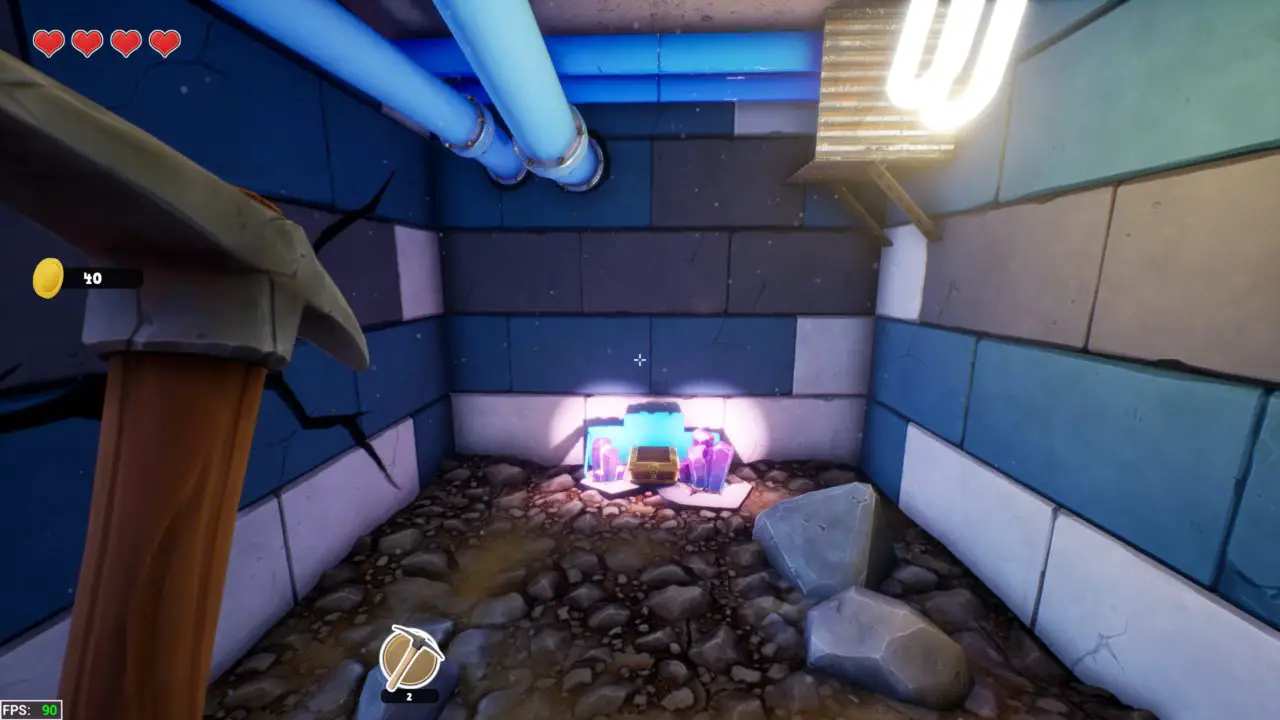
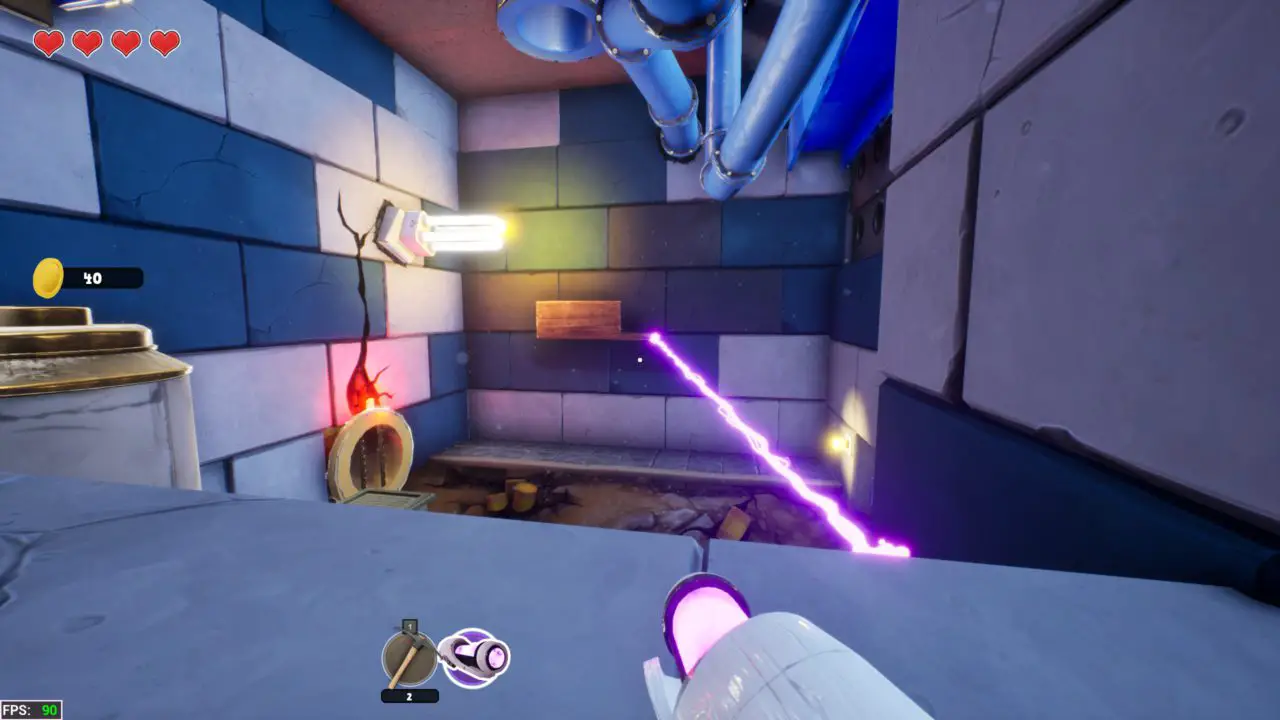
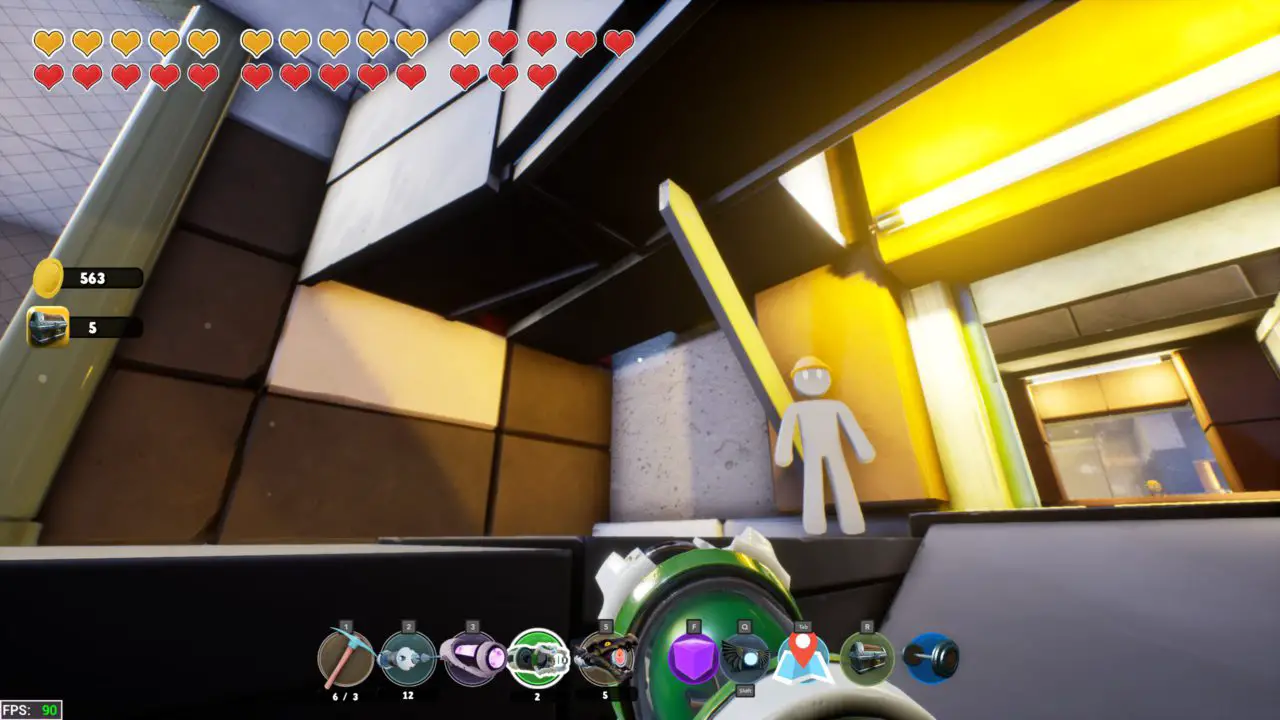
In the room with all of the laser tripwires that you had to pass through earlier, there is a secret area with a chest up on a blue platform.

Chest #45
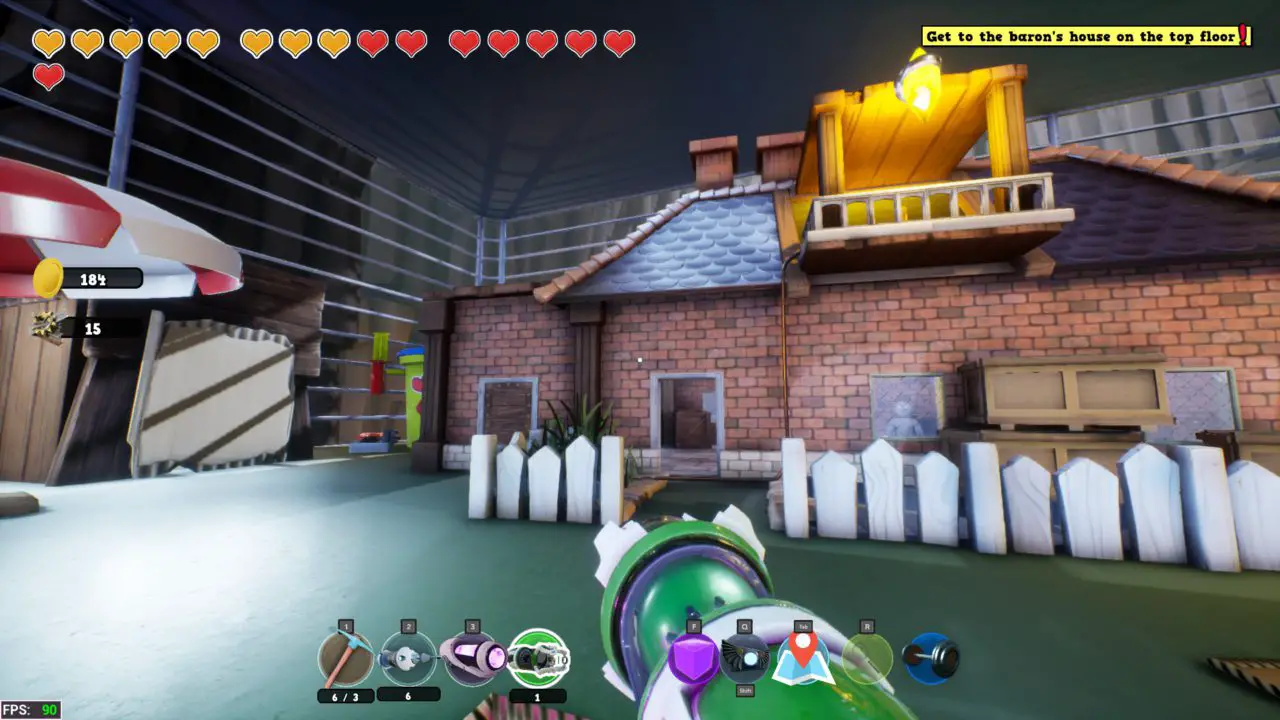
Now that we are back in Cage Town you can get on the roof of the building beside the ramp to the bank district in order to open this yellow house with a chest inside.
Chest #46
There is a chest inside this building blocked behind some obsidian which you SHOULD be able to break by now, إذا لم يكن كذلك, come back once you have the diamond pickaxe.

Chest #47
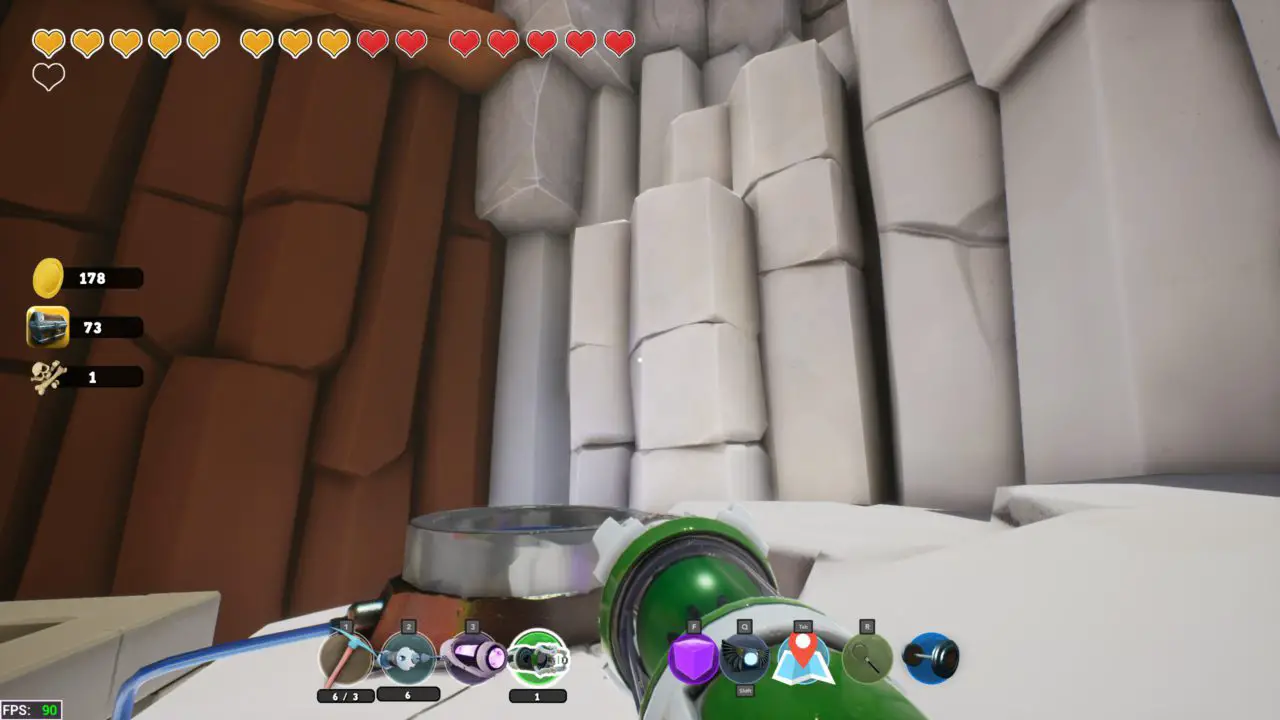
Once you get past all the enemies on the way to the beach head to the building with the constant fire and go behind it to find a breakable block covering a chest.
Chest #48
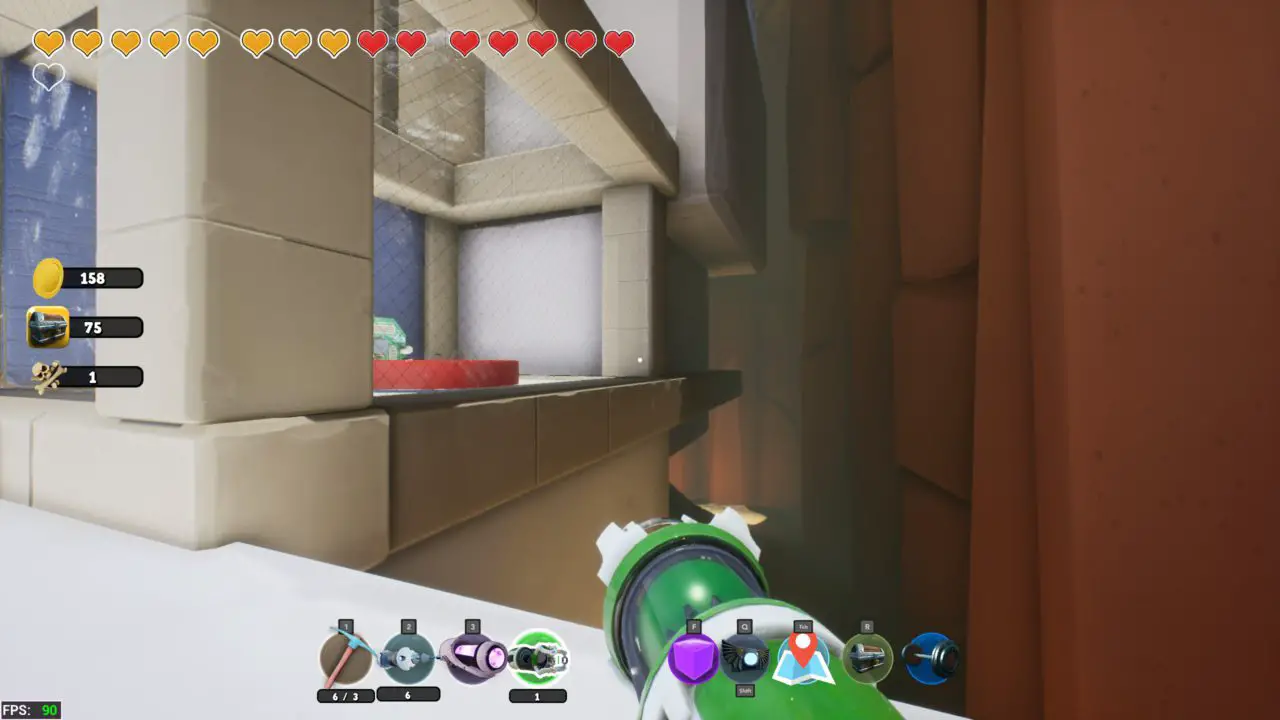
Behind the red launch pad, there is a breakable wall that leads to a secret area.
Chest #49
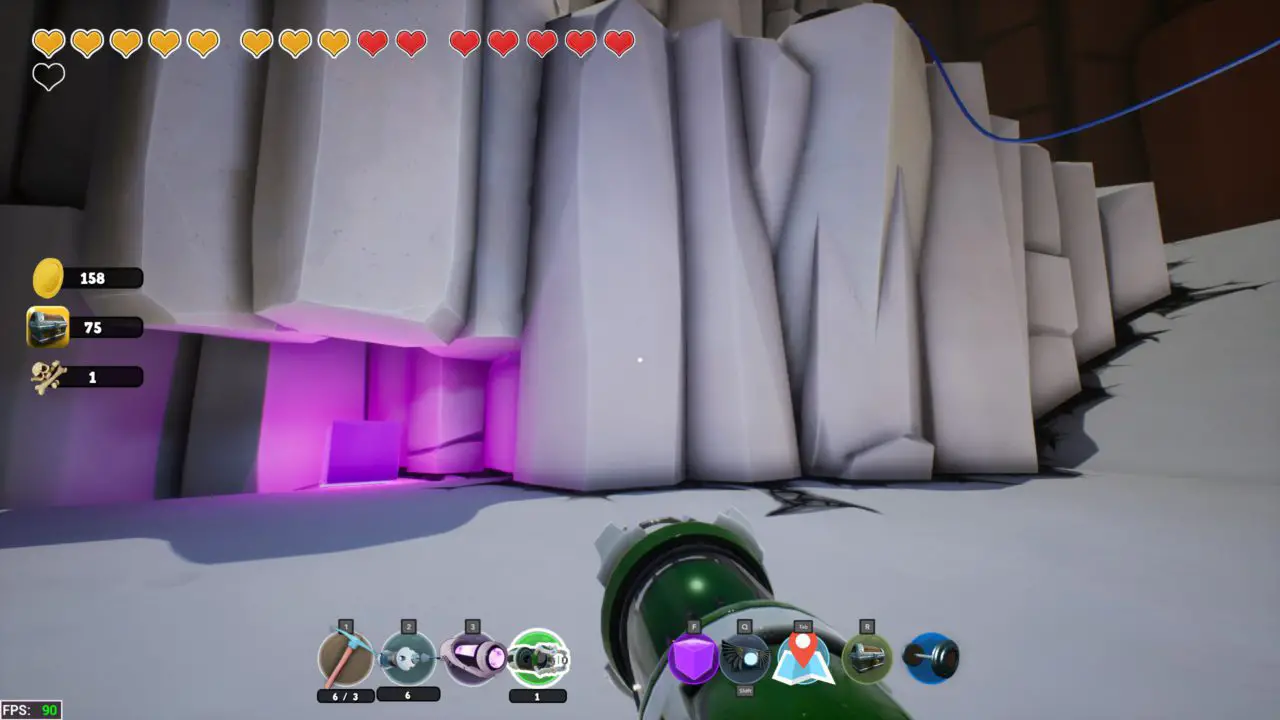
Besides the only white pillar, below where the battery spawner, there is a crack that you can crouch under to find a secret area with a chest.
Chest #50
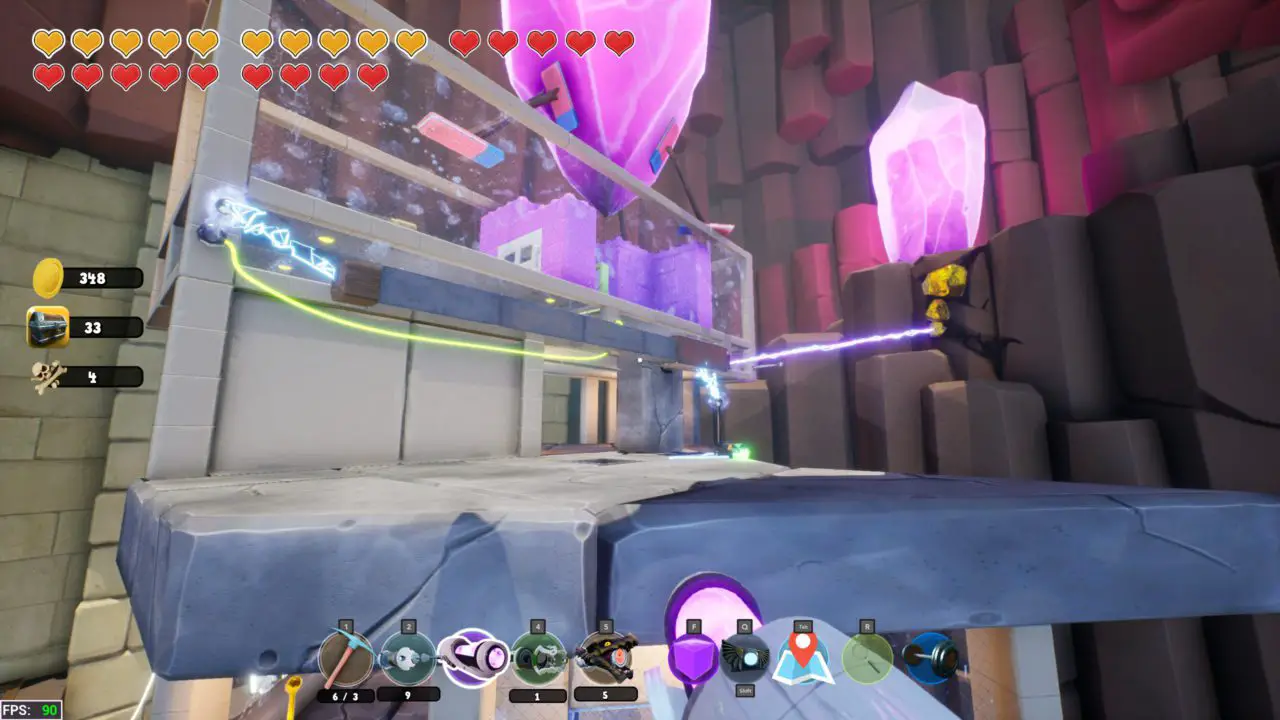
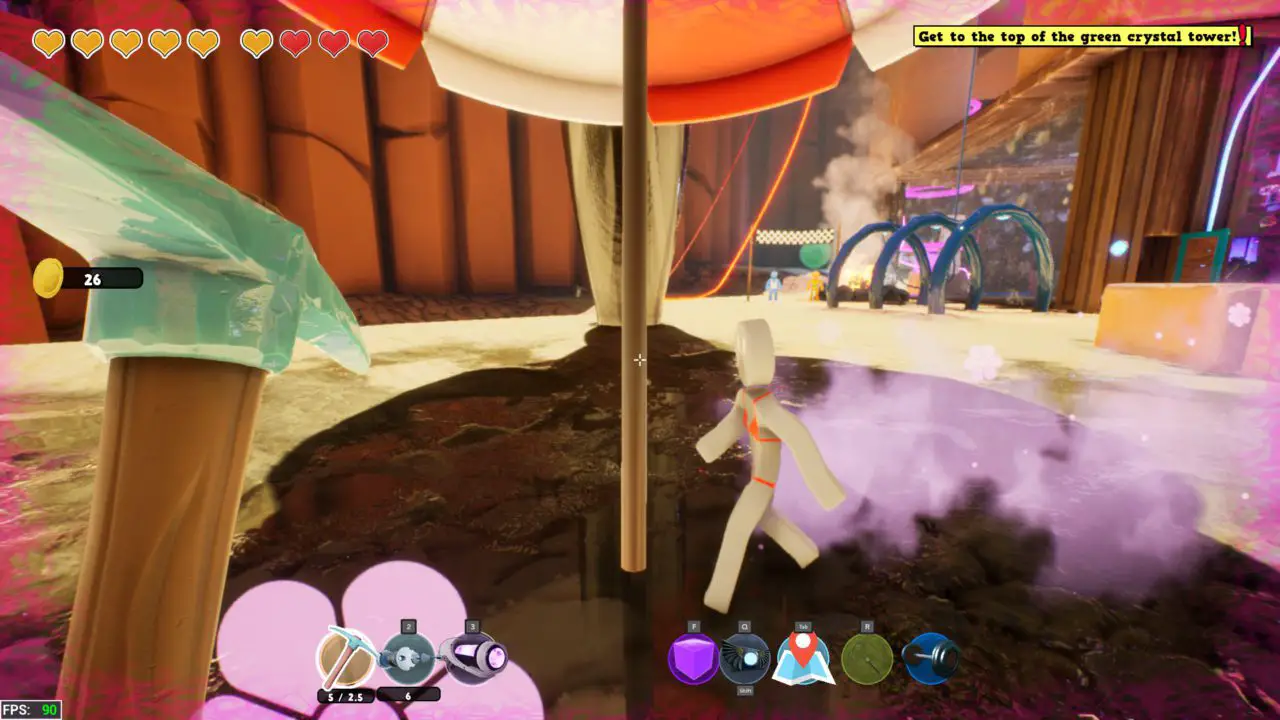
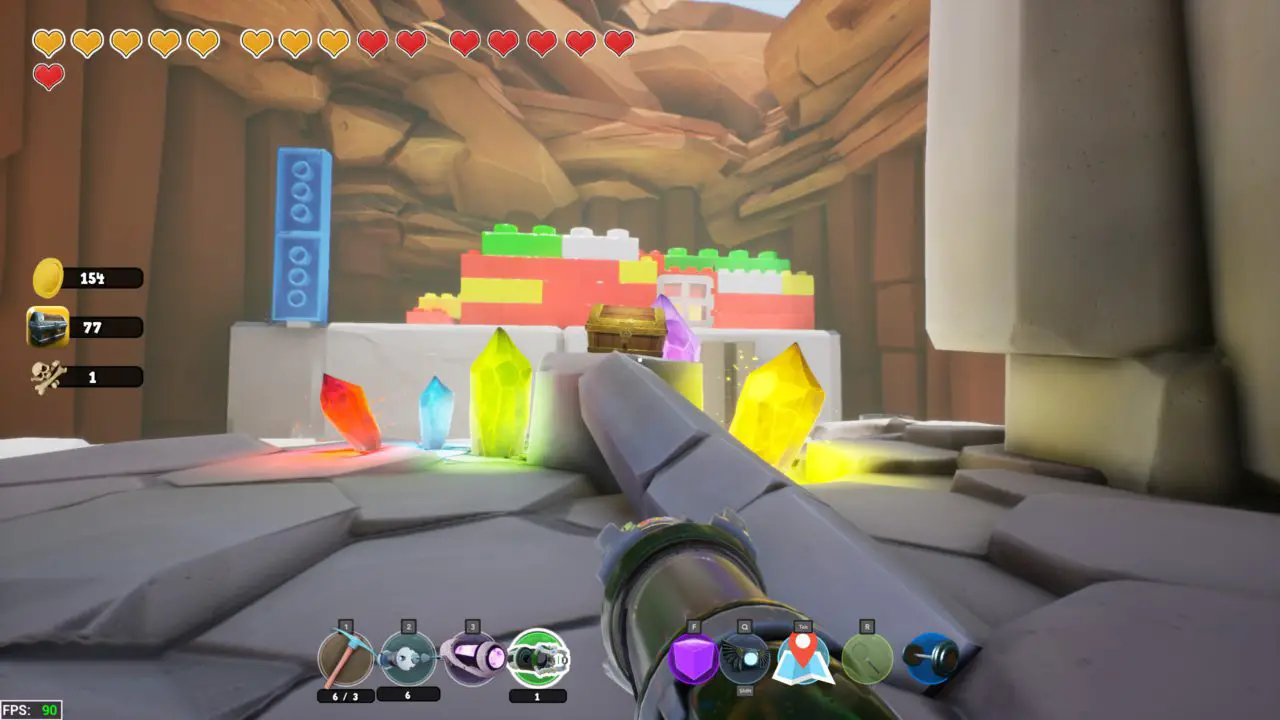
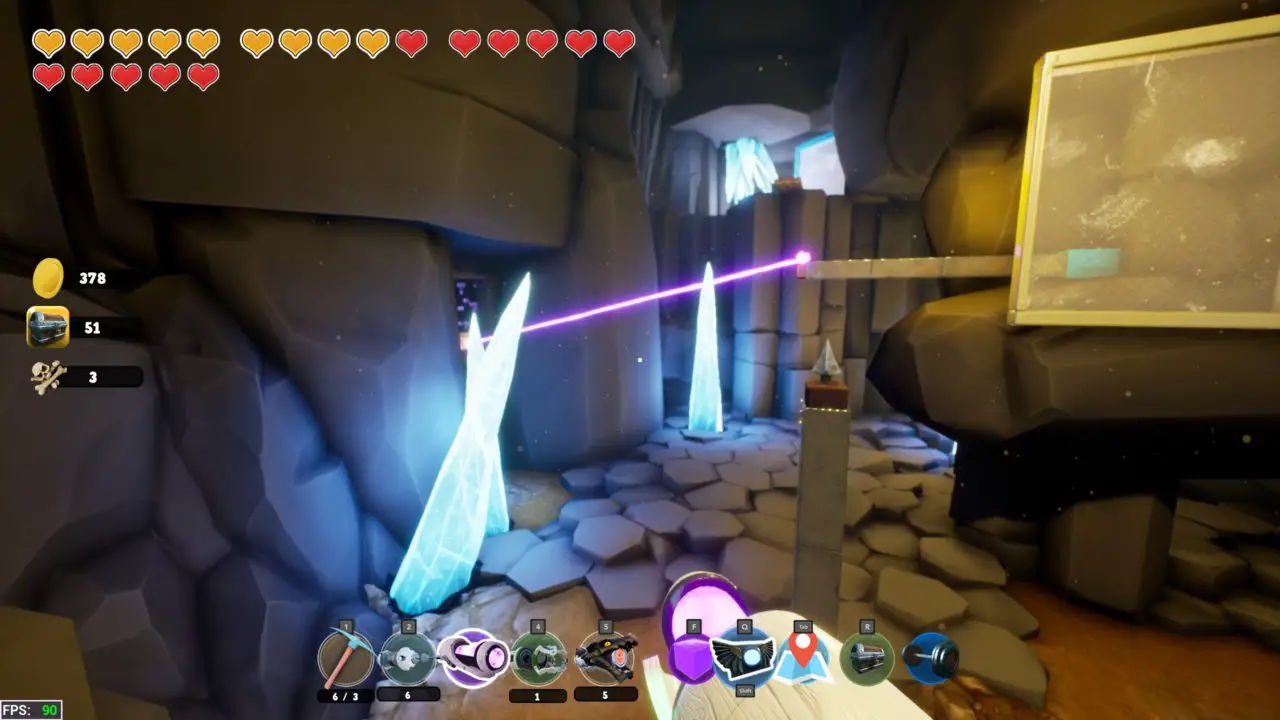
Continue on towards the beach area until you get to the big tower. Make your way up the tower and get past the first puzzle. I saw a lot of people on Reddit say that they got stumped on this next puzzle so I will include its solution. Put the battery in its spot and pull the bar away from the gold rocks. Connect a force beam on the far side to the gold on the rocks and proceed inside. Once you are at the purple door pull the force beam to get into the next section. Launch yourself upwards and crawl through the short tunnel until you get to the chest that has the force cube in it.
Chest #51
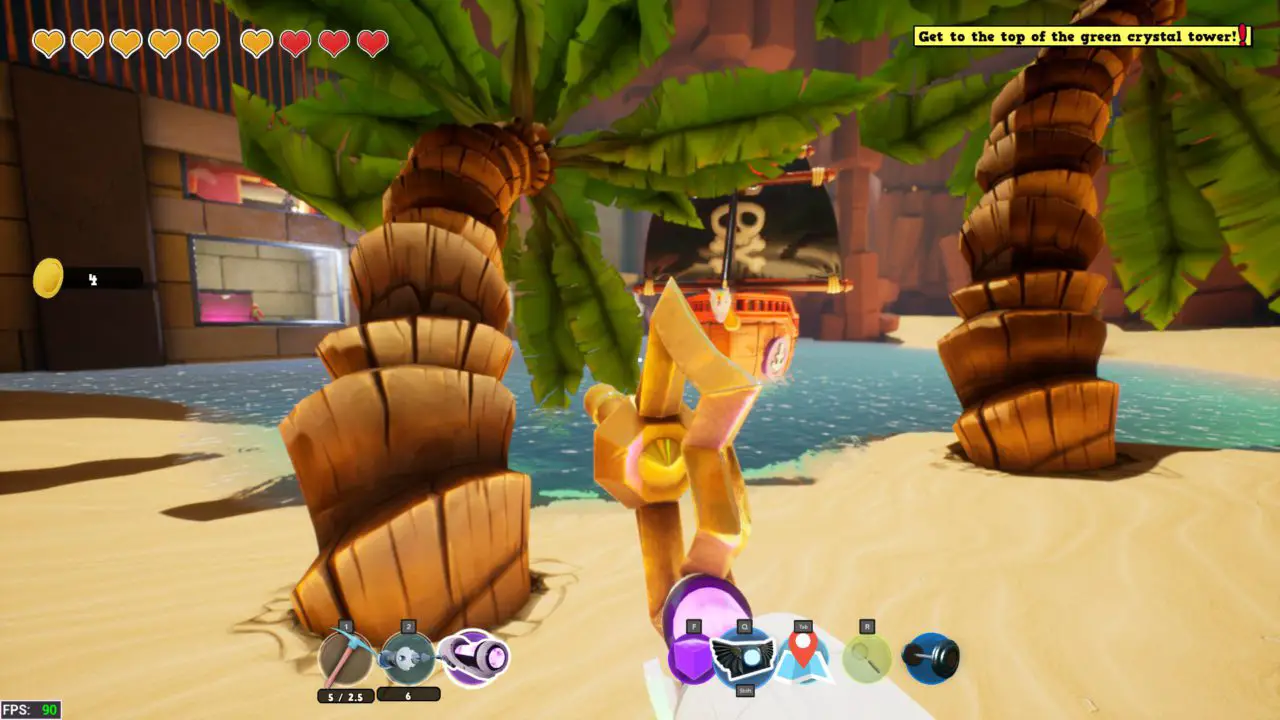
Sink underneath the pirate ship and have your magbelt on, it will grab the key for you. Find the left palm tree and then jump from it onto the pirate ship. Behind the lock on the ship is a big pirate’s chest. Wasn’t that invigARRRRRating?
Chest #52
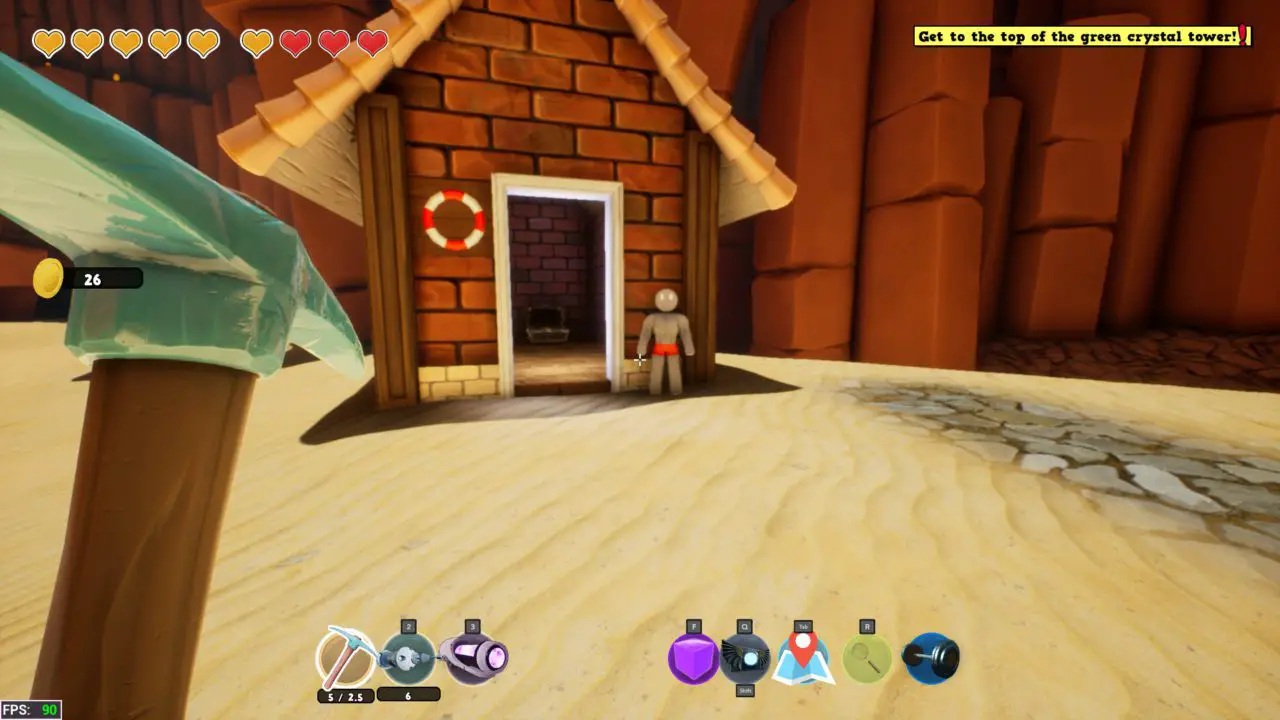
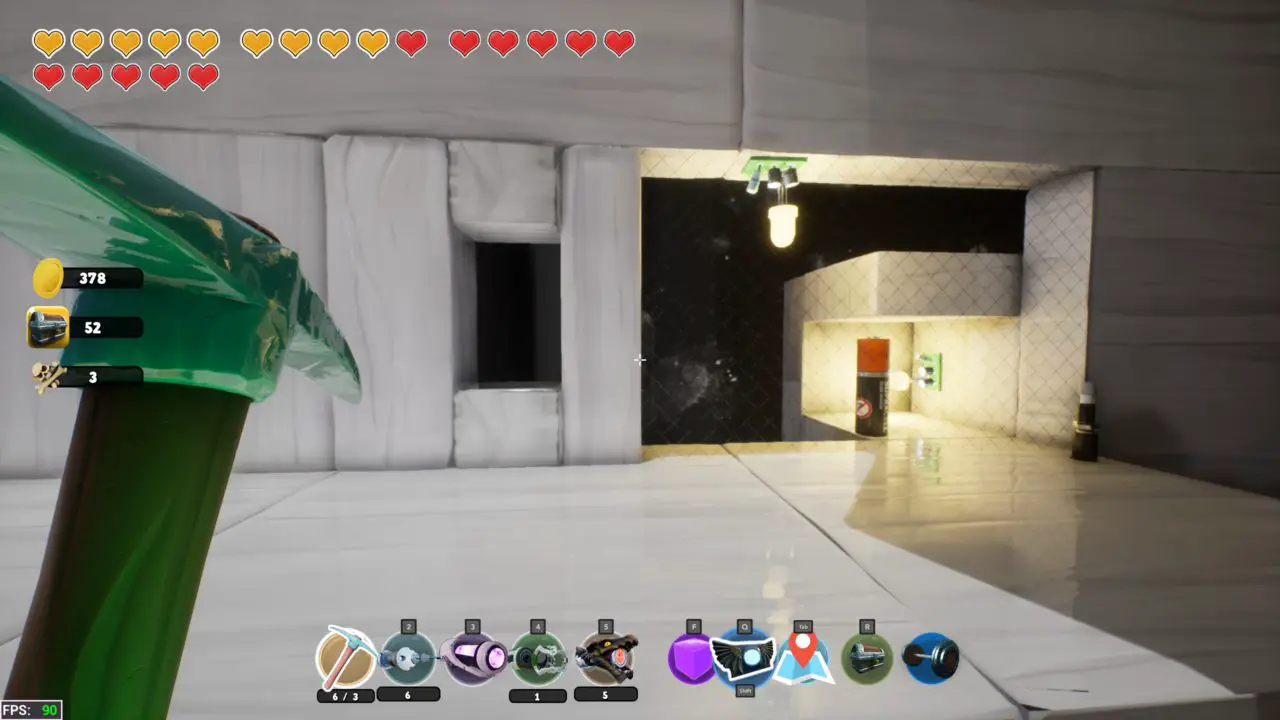
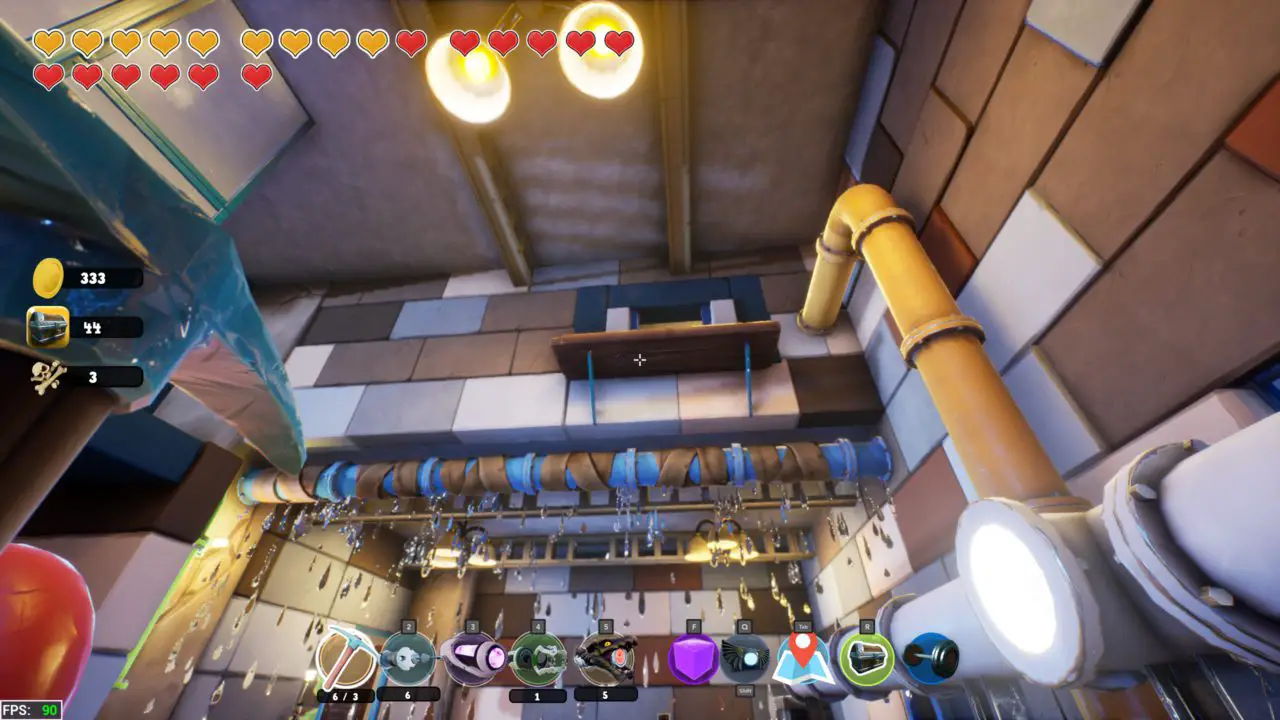
Much like how you got past the last guard, all you need to do is block the rain coming down from the shower head with some sort of device that is usually used to stop its user from getting wet. But what could that be…
Chest #53
This chest has one of the most important tools for you to get 100% انتهاء. Your life from here on out gets a lot easier during exploration.
Chest #54
From the same place that you get the teleportation gun, look out back. You are going to be crossing that void so get ready. Place your teleport orb in the green ring, and place a force beam as shown. stand on the stop of the beam and when you pull on the beam, القفز, and you will carry all your momentum, which will get you across.
Chest #55
Right below where we launched ourselves to get tot he last chest the following chest can be seen behind some glass. Turn your magbelt on and either fall from above or jump around the sides and you will catch the big magnet that is there out of sight.
Chest #56
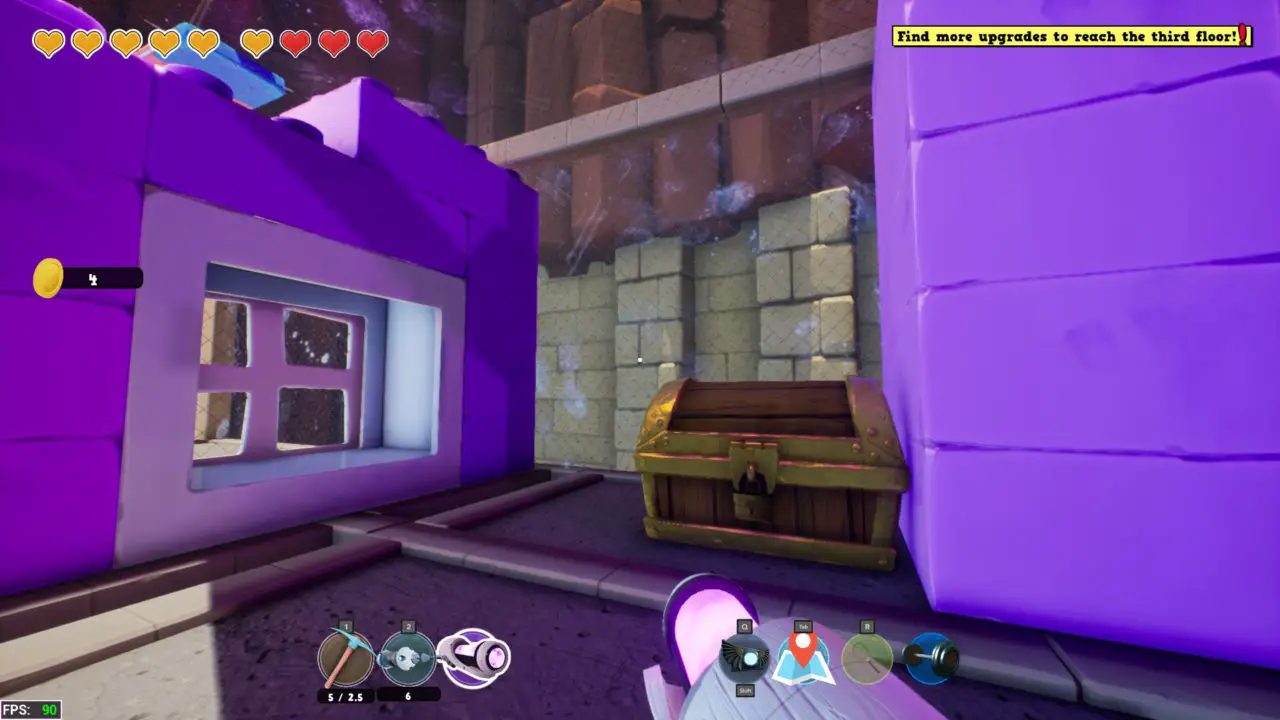
Go to the second level of the main tower and jump the gap to get to the rocks with the force cube on them which has a secret area with a chest.
Chest #57
مرة أخرى, drop down from that area to be in front of the currently closed green pipe. Off to the left, marked by my force cube, is a path that leads to a crack. Shoot your orb through the crack to access this secret area.
Chest #58
Where the force cube is initially covered by breakable rock. Place a force brick down on the pad and shoot a teleport orb at the life guard. He will kick it so hard that it will fly through the rings and will be in the chest room. Just teleport to the orb and you will have access to the chest.
Chest #59
Return to the lifeguard hut that had the chest in it, behind it you will see this large raised ramp, just place a force cube on the pad and collect your chest.
Chest #60 & 61
Go back down the ramp until you hit the end where there is a metal bar. Use your magbelt to stick to it and move your force cub off the platform. The ramp will rise up and there will be two chests located up here. Launch yourself to the left, where the force cube is, and then the right to get both chests and secret areas. You can use the rock where i was standing in the picture to get at the one on the left a little easier.
Chest #63
From the metal grate look up the left out above the door we entered this is from. There is a metallic nail you can use to launch up to the roof of that building revealing a chest.

Chest #64
The next chest is by the locked door with the blue lock (I already removed the lock at this time, hence why the door is open already). Use the teleport gun to get up the ledge up and to the left. The chest will be under a fallen pillar.
Chest #65
In the exact same starting place as the last chest look underneath the staircase. There is a gap between the edge of the wall and the side of the stairs.
Chest #66
Start by opening the door with the switch and shooting a teleport orb inside. Close the door with the switch and teleport inside. Place a Force Cube on the hovering pad and shoot your teleport orb through the small pipe to get back outside. أخيراً, flip the switch once more and the door on the left will open. Shoot your teleport orb into the pipe in this room and the chest will be on the other side.
Chest #67
This is another time trial one where the code is Circle Triangle Square. Start by shooting a teleport orb into the first room and place a force cube down onto the pad. The outer door will close and then you can teleport inside, note the triangle button in this room.
Get into the next section and shoot a teleport orb into the same room. Put another force cube down to get ride of the last one and the next section will open with the Circle button. Now this is the part that will have to be done fast. Press the circle button, teleport to the orb you previously dropped, press that button and run to the right around the back of the building, up a ramp and press the last button. The door to the chest will then open.
Chest #68
Use the magbelt to scale the building using the green pipe. Behind the building is a chest.
Chest #69
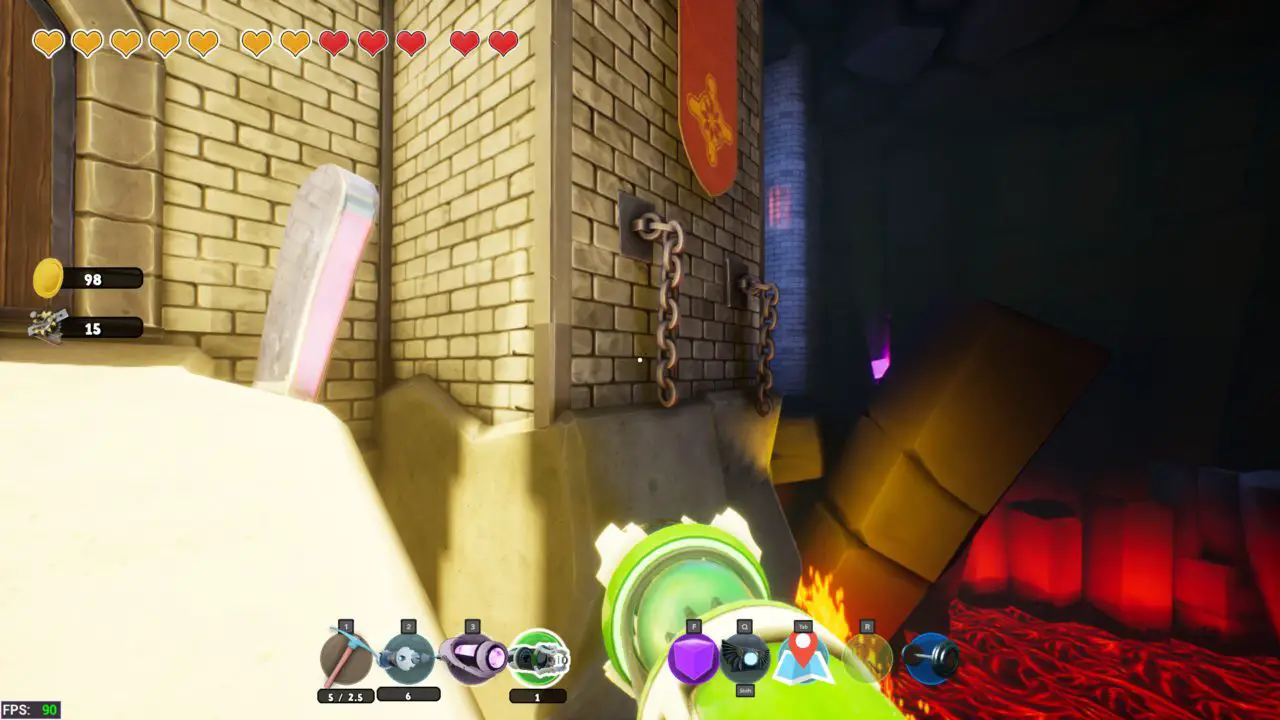
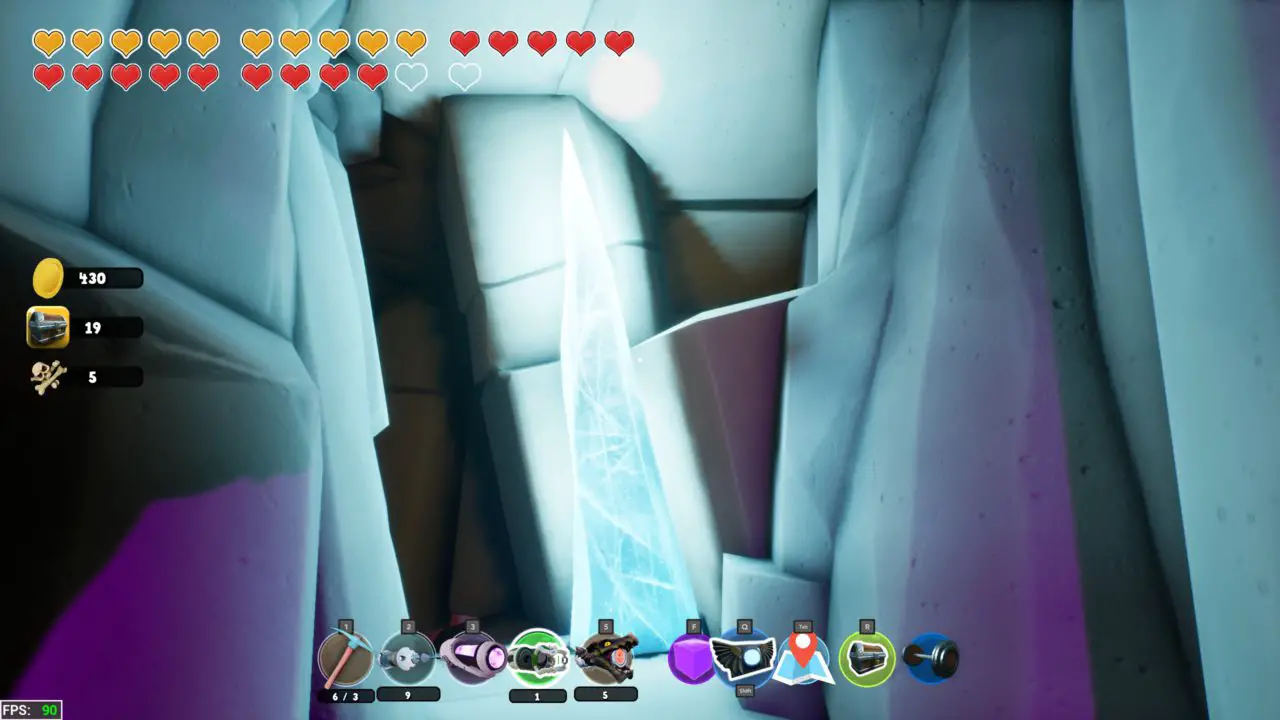
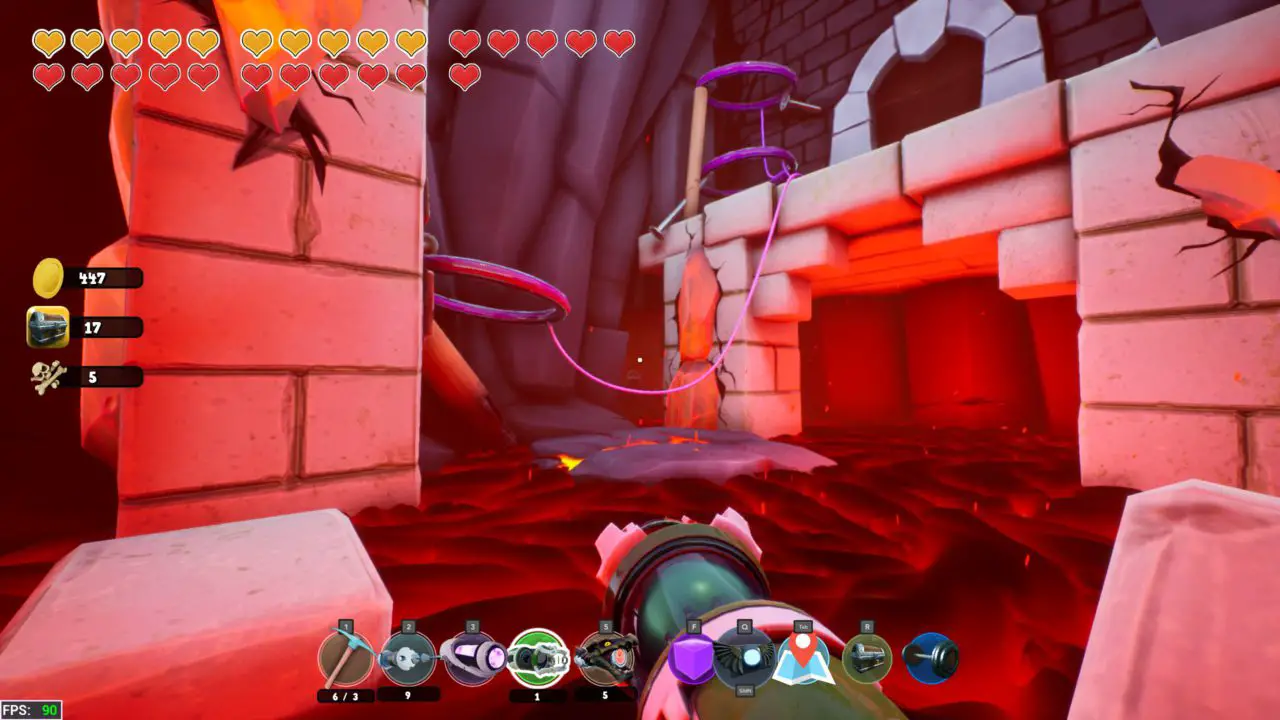
Once you cross the lava to the large castle go to the right to a small crack in the rocks, marked by my force cube. Use the magbelt to launch between the large metal chains in order to get there and back.
Chest #70
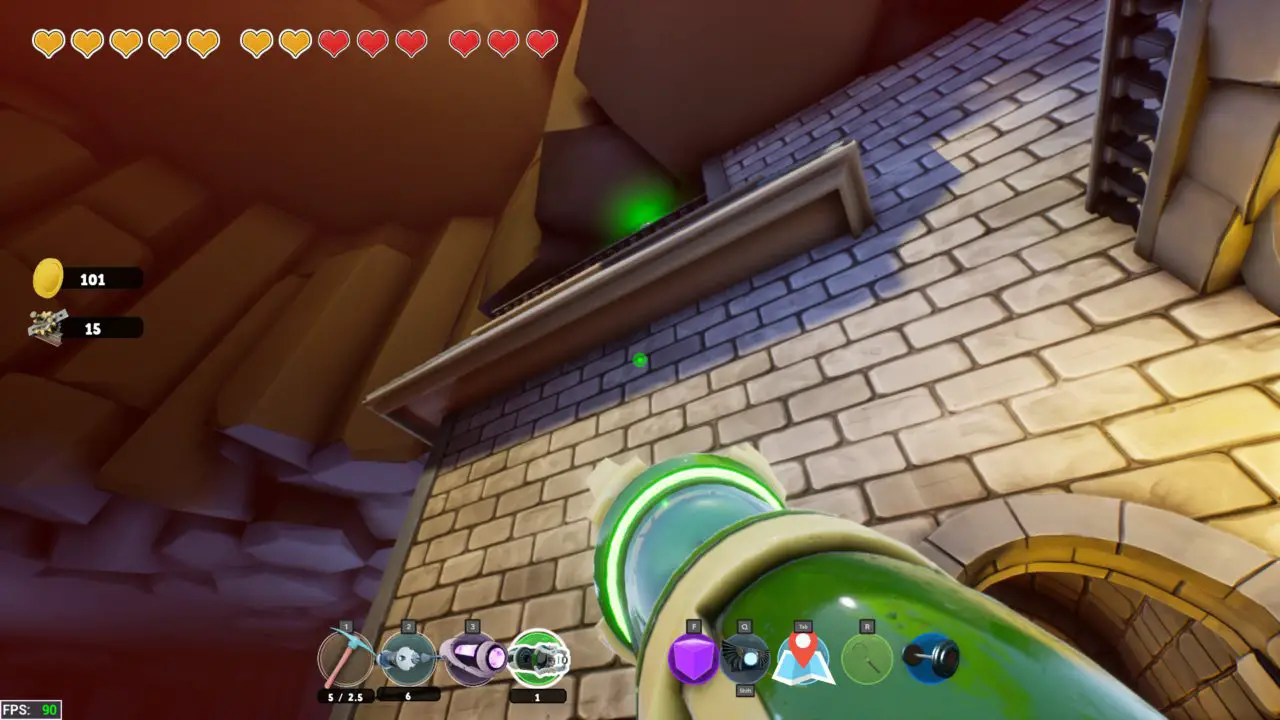
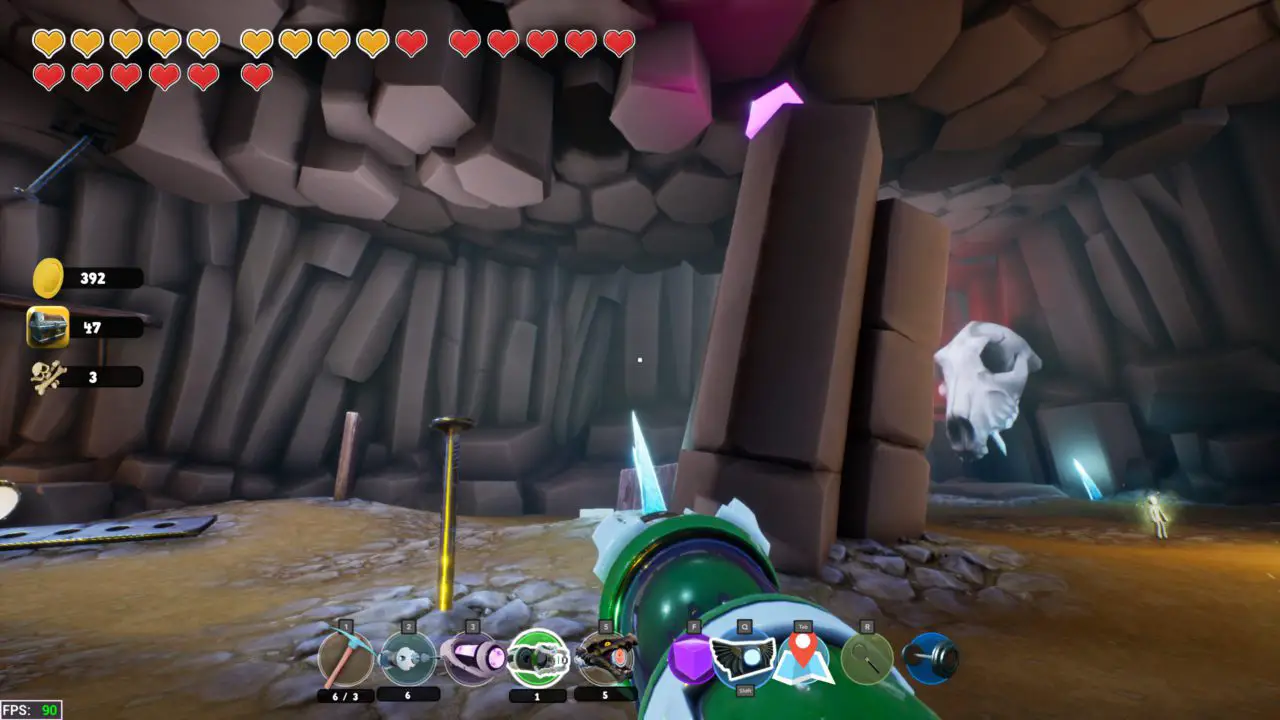
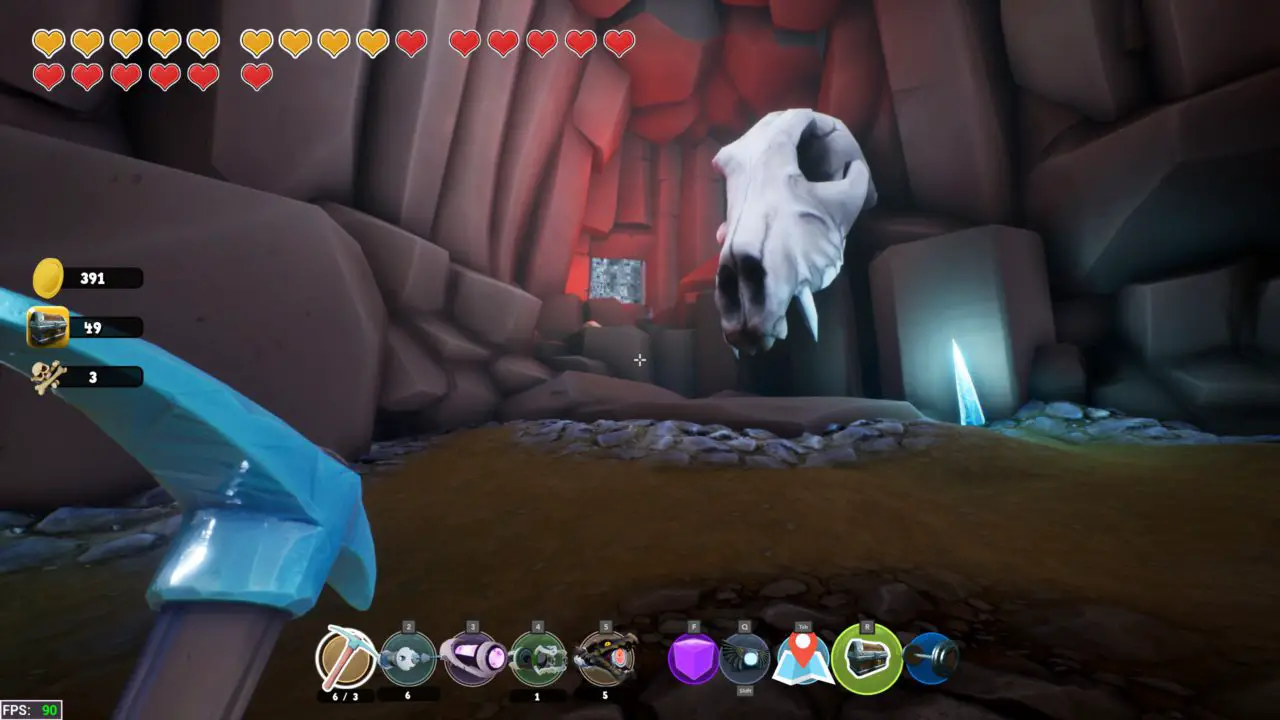
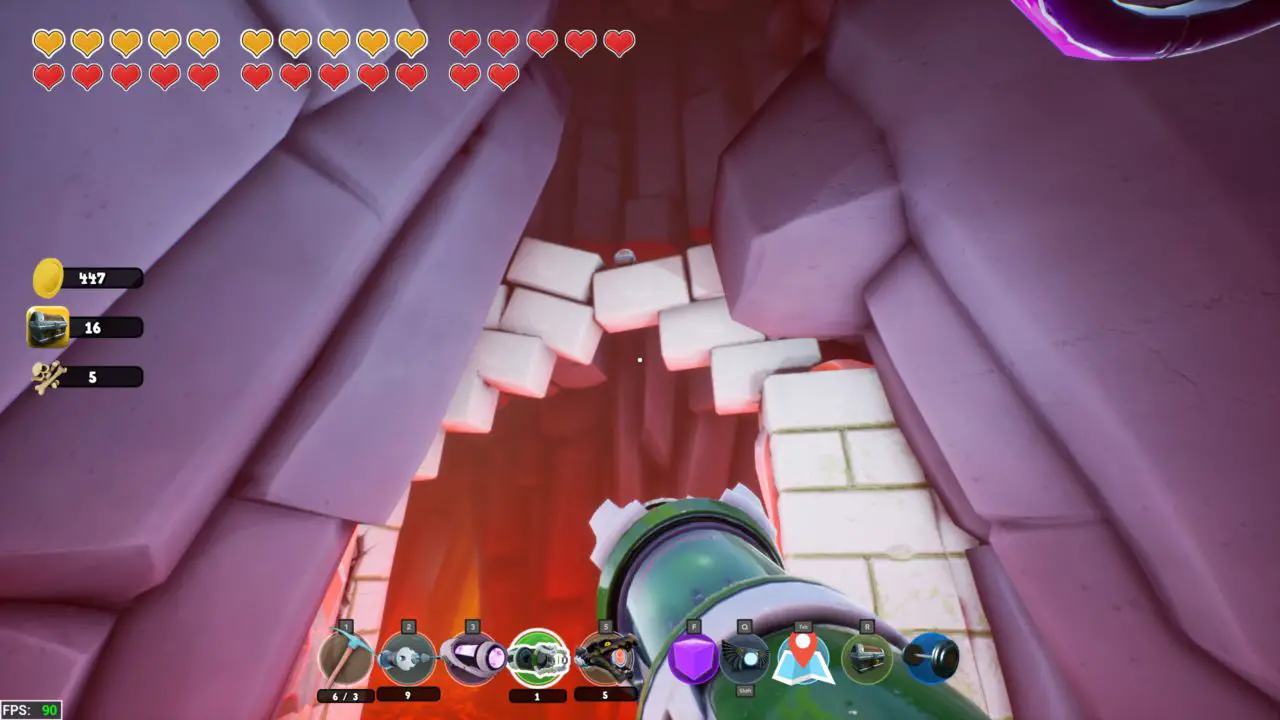
From the same starting point as the last look up to the small gap between the castle’s roof and the rock ceiling. Take advantage of the reverse gravity from the “OHMMMMMMM’s” to launch your teleport orb up there as seen. Once up there you will need to teleport again through a hole in the rocks. The chest is just around the corner after this.
Chest #72
Leave Cage Town and head right around the side of the Cage. A white key can be seen up above, highlighted by blue in the image. Using the Magbelt to launch from the yellow crystal seen on the right and grab the key. This can take a few attempts. You could also try to throw your pick axe at it. Once the key is in hand, head back into cage town and head to the back of the house immediately on your left, and insert the key. Enter the house to find the chest.
Chest #73
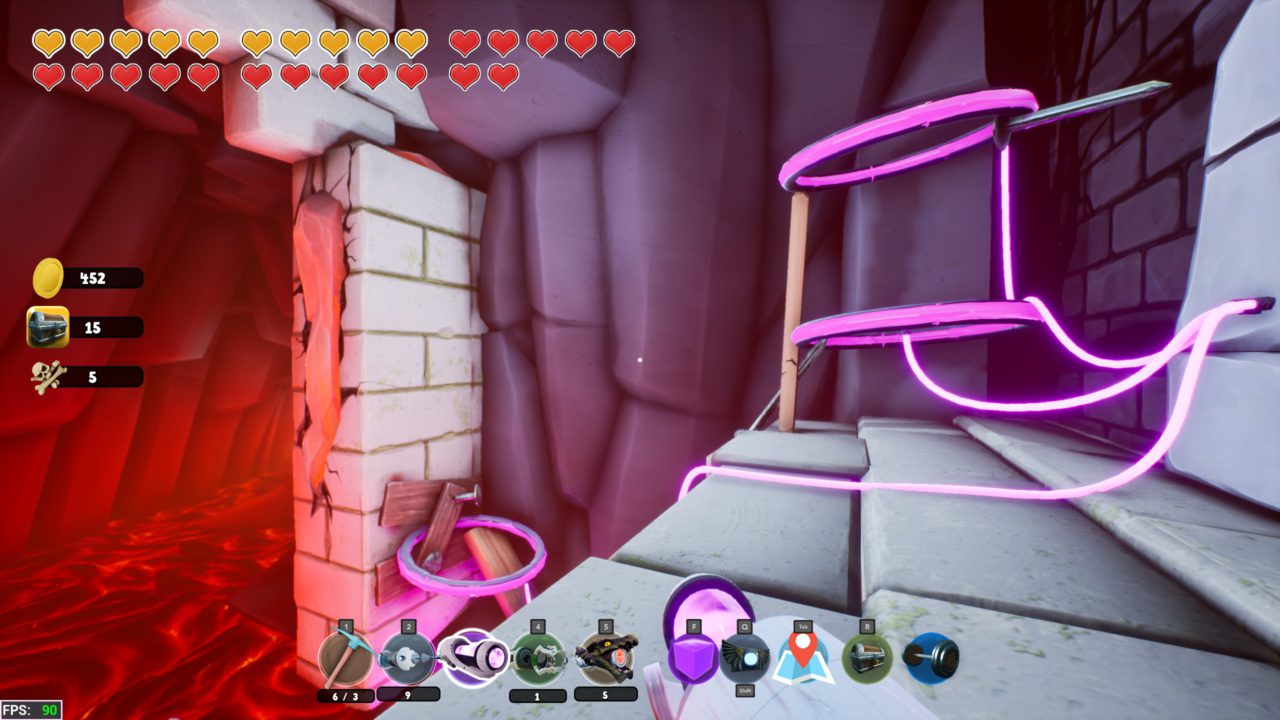
From where we just were use the nail to propel yourself across the gap to the chest.
Chest #74
Jump back down the well in the center of town and head right to the very back using your magbelt. The chest is in the top right corner of the room.
Chest #75
Go back to the area where you fall down, and shoot a teleport orb through the barred orange pipe. Go through and shoot another teleport orb through the metal bars to access the chest.
Chest #76
On the second story of Cage Town, attached the house that had the obsidian in the doorway, get onto the balcony and place a force cube on the pad to unlock the side door where a chest is located.
Chest #77
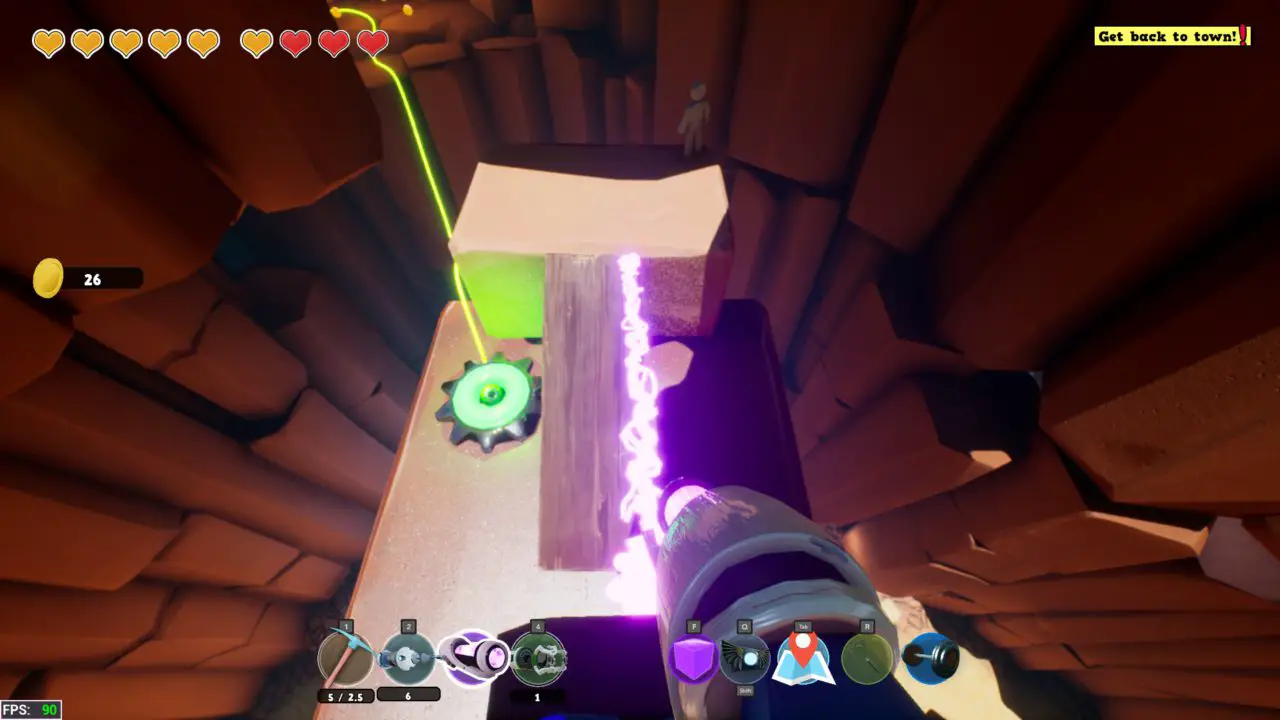
This one is super important when it comes to finding ones that you have previously missed. Walking through the new city you will find a large area made of white stone columns. Solve this easy puzzle and power up the coil as seen. Shoot a teleport orb at the coil to fold it there while you go and stand on the button to bring out the bridge. Once you cross the bridge simply follow the path and you will find this chest.
Chest #78
Walk down from the last chest and bust open the rocks. Shoot a teleportation orb into the hole above to find the chest.
Chest #79
From the same spot jump on the edge beside the glass and follow it along with all the way around and you will find the chest.
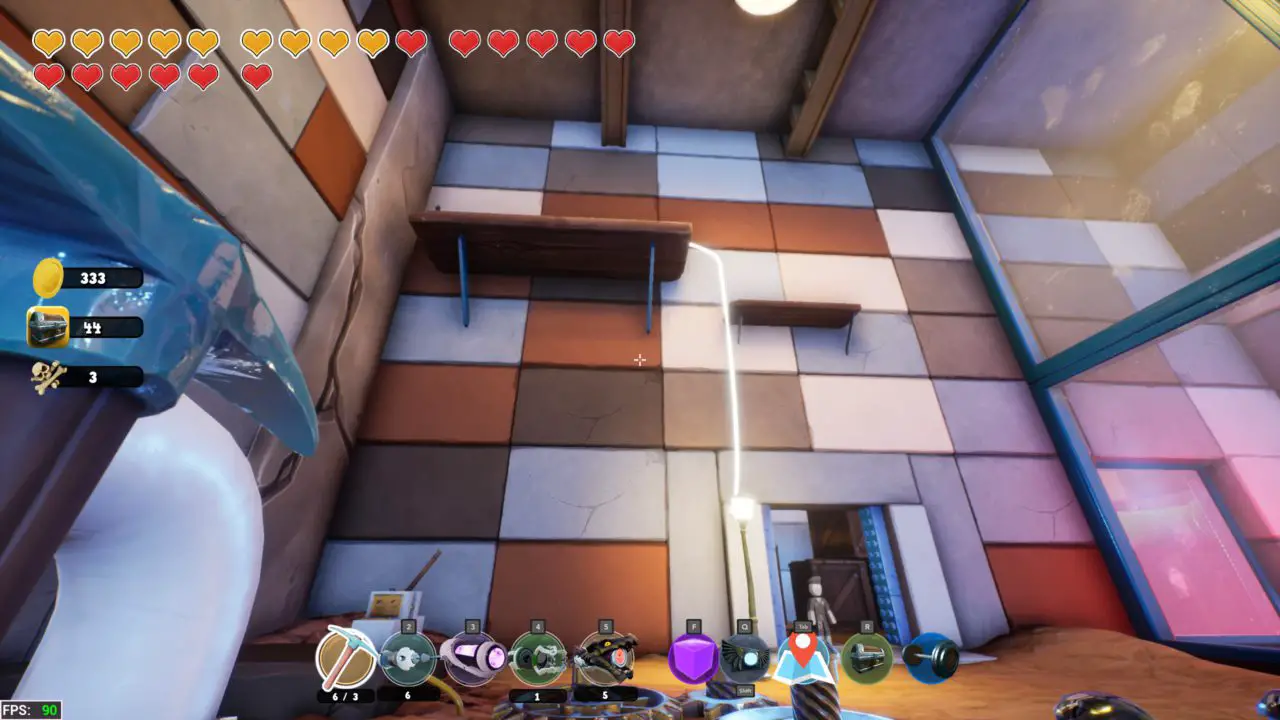
Chest #80
Use the Magbelt to launch yourself off of the button up and onto the rock with the help of the teleport orb. Jump up a few more rocks and you will find the chest.
Chest #81
On the hill back up to the lava tea pot there is a crawl space, enter and there will be a breakable wall roughly halfway down with your chest.
Chest #82
This one can seem hard but it really isn’t. Turn on the coil, and shoot the teleport orb into the bounce pad, the orb will arc around the corner and enter the cave and the magnet will hold it in place so you can teleport to it.
Chest #83
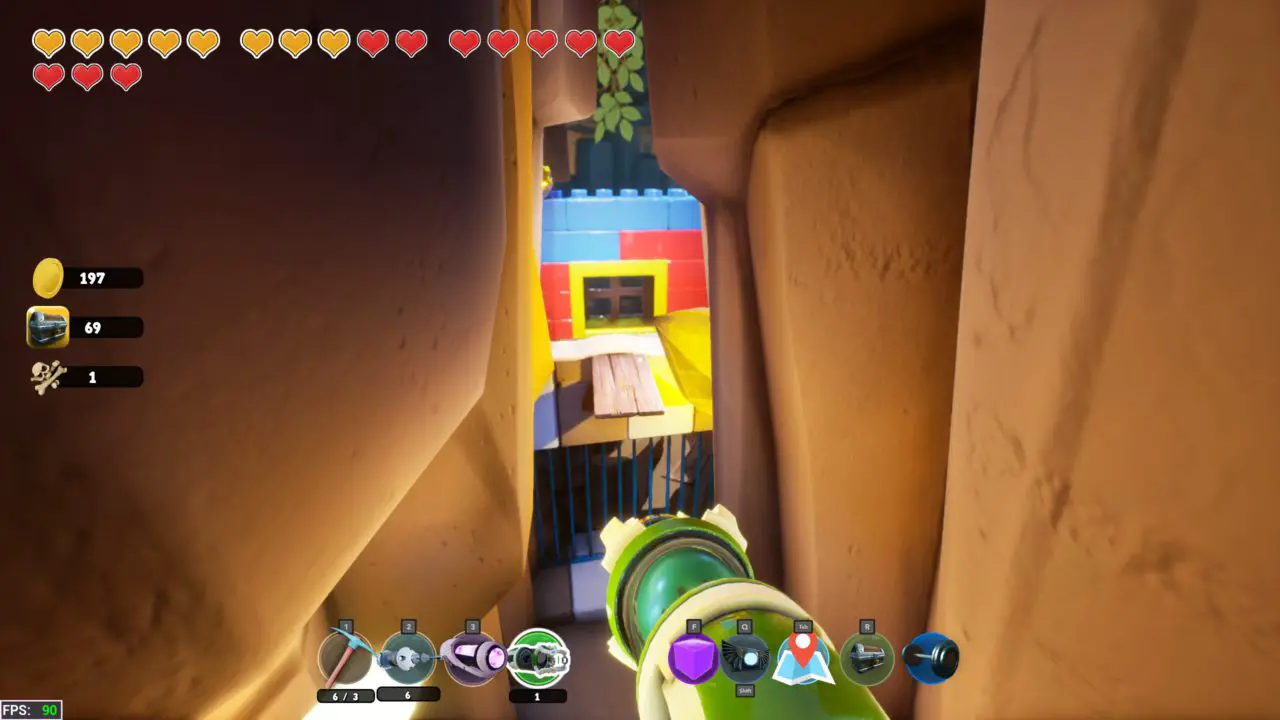
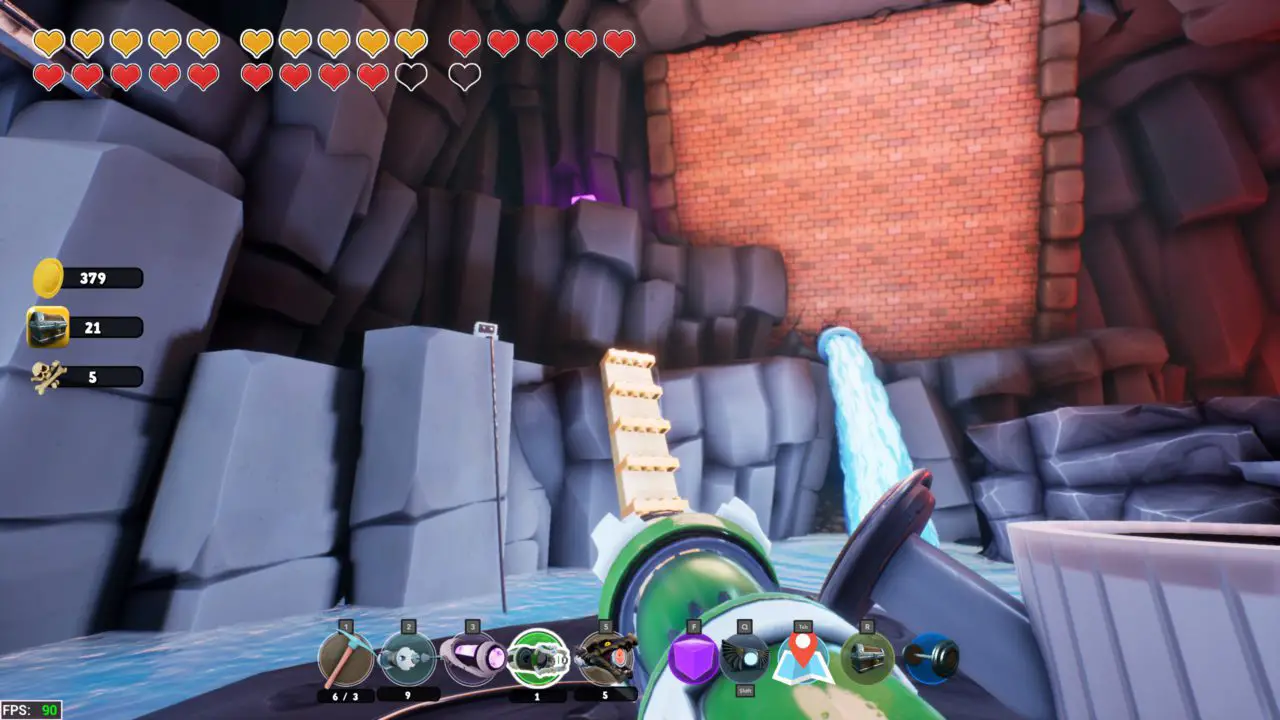
We will now head back to the start of the game to collect all the things that got left behind. Starting with the chest we walked past at the very start of the game. Bouncing on the force beams will allow you to quickly climb up and get the chest.
Chest #84
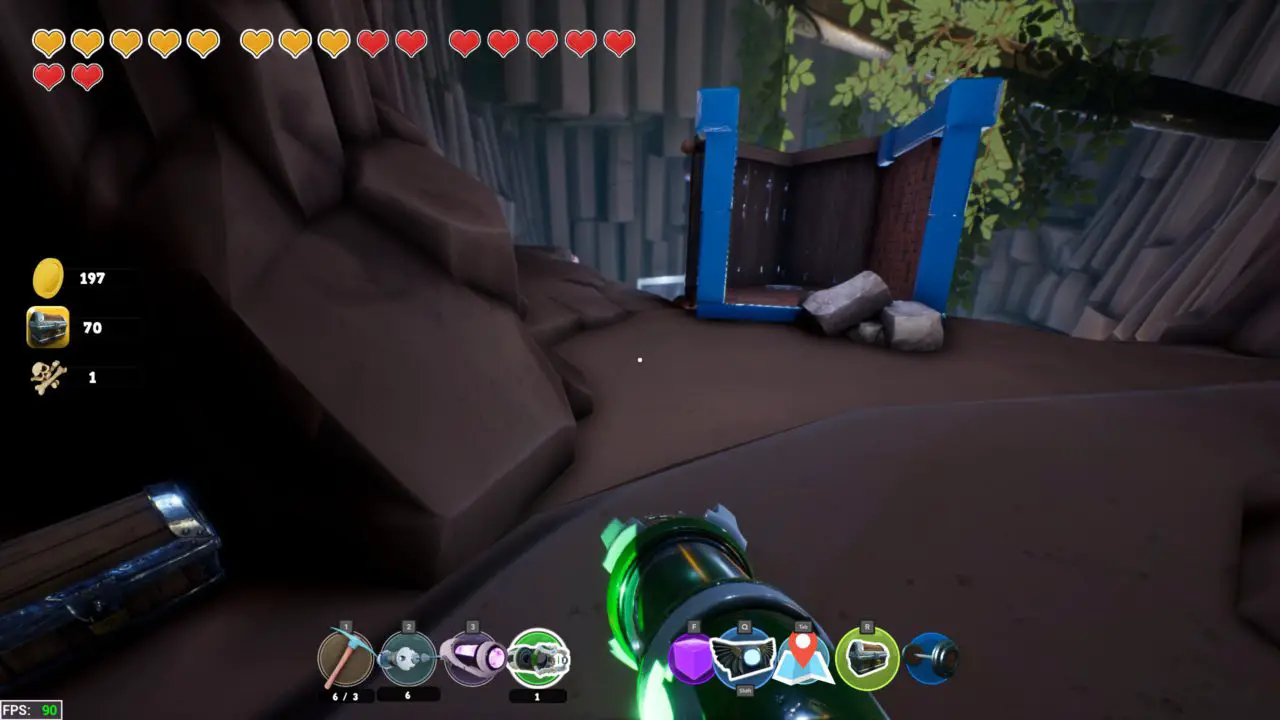
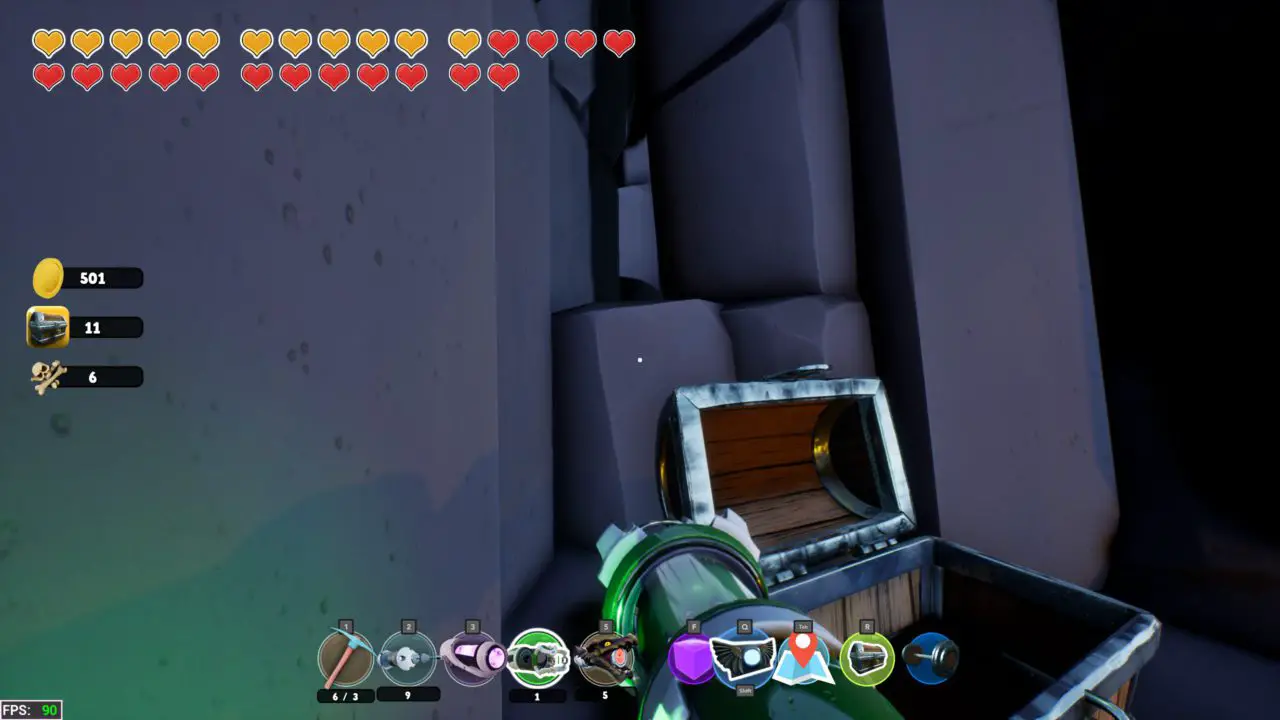
Look up in the starting area, the next chest is behind the tipped over house
Chest #85
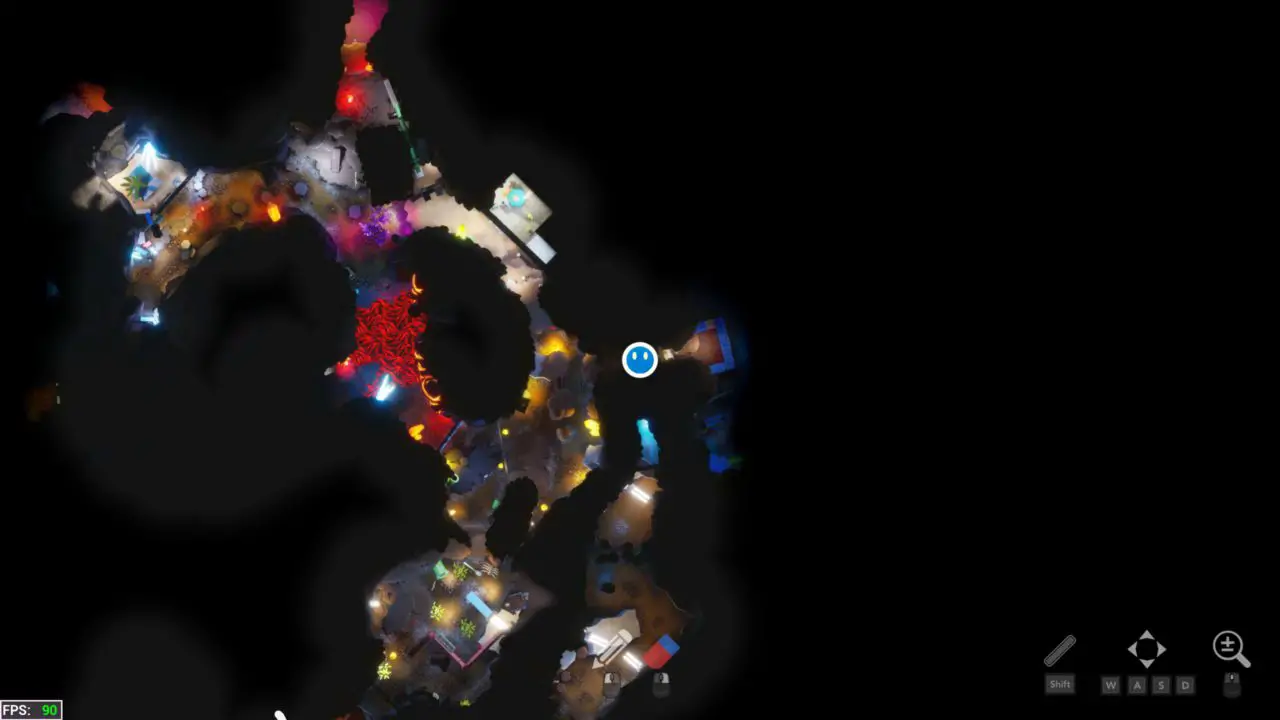
The next area that we will clear out is this one, found on the map here. The first chest is right at the entrance.
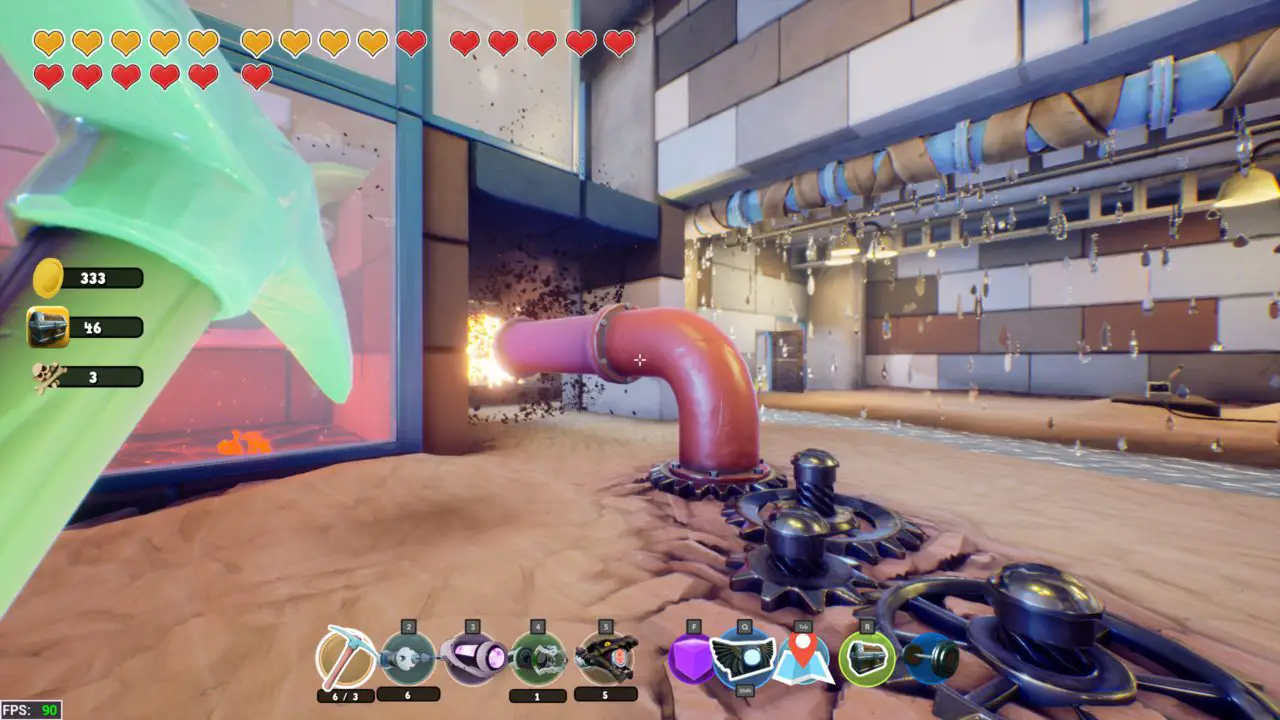
Chest #86
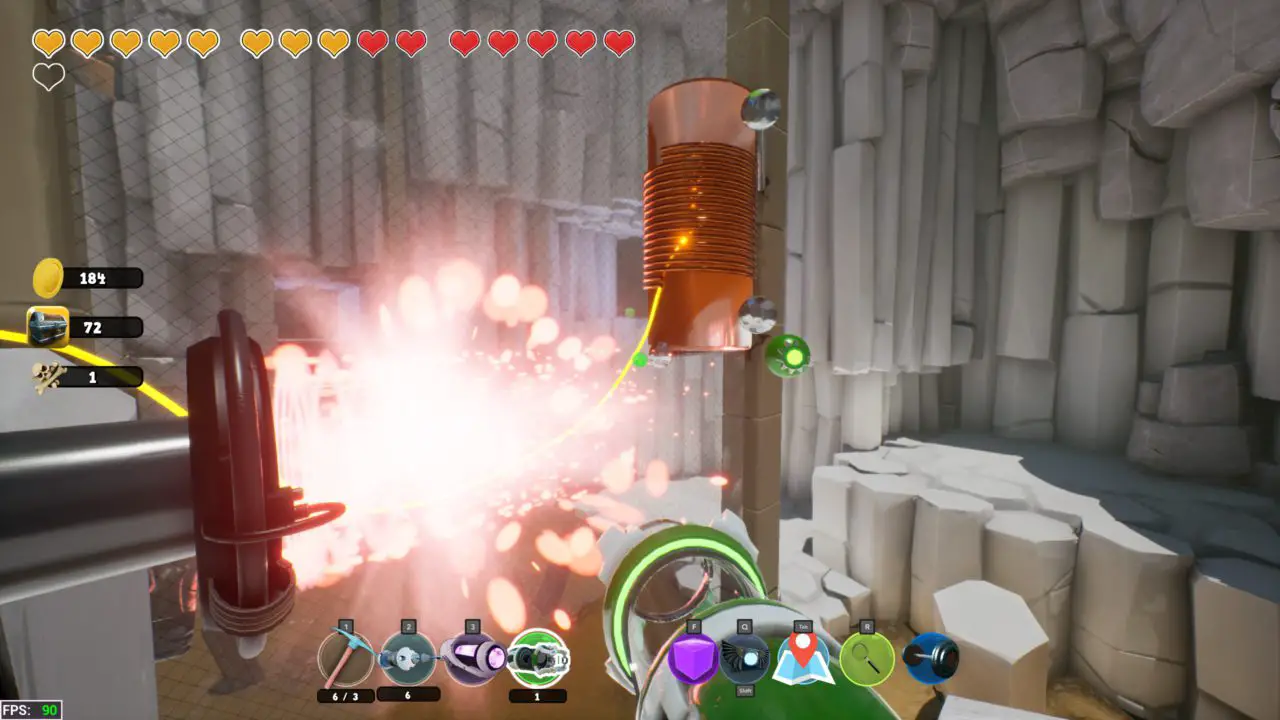
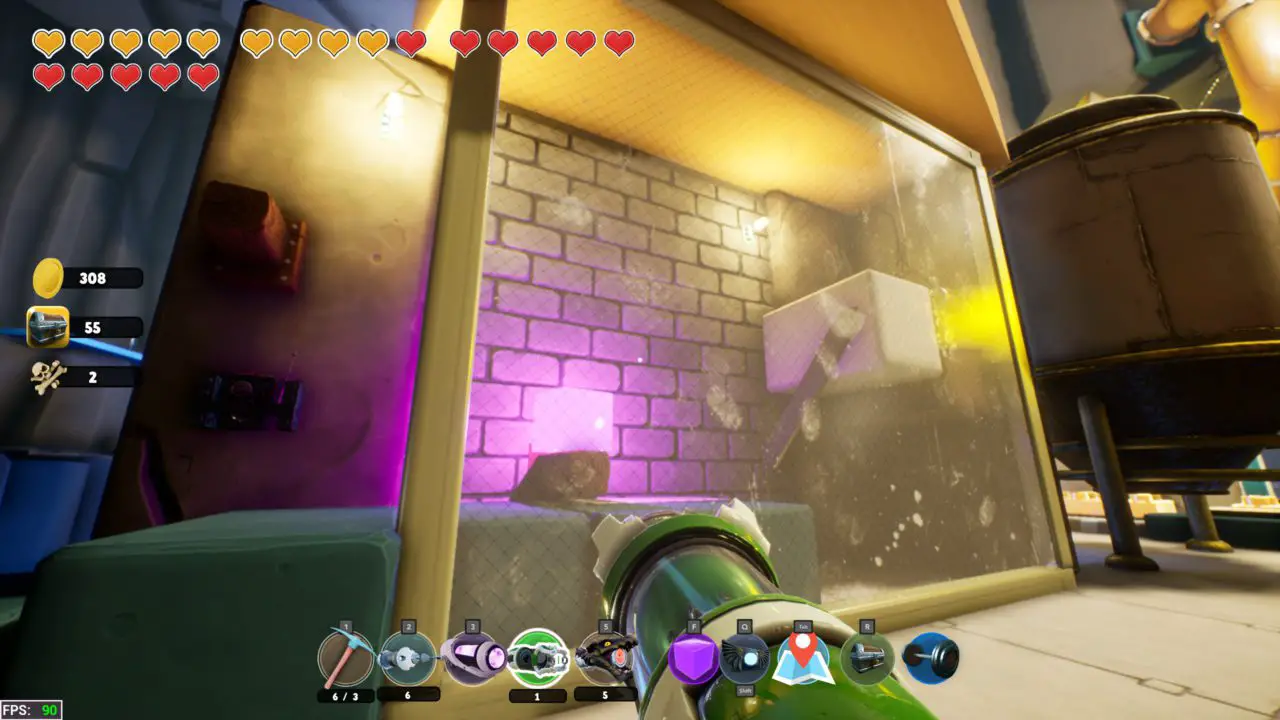
Use a red-hot nickel ball to burn away the cardboard by using the pink pipe to complete the green pipe on the left.
Chest #87
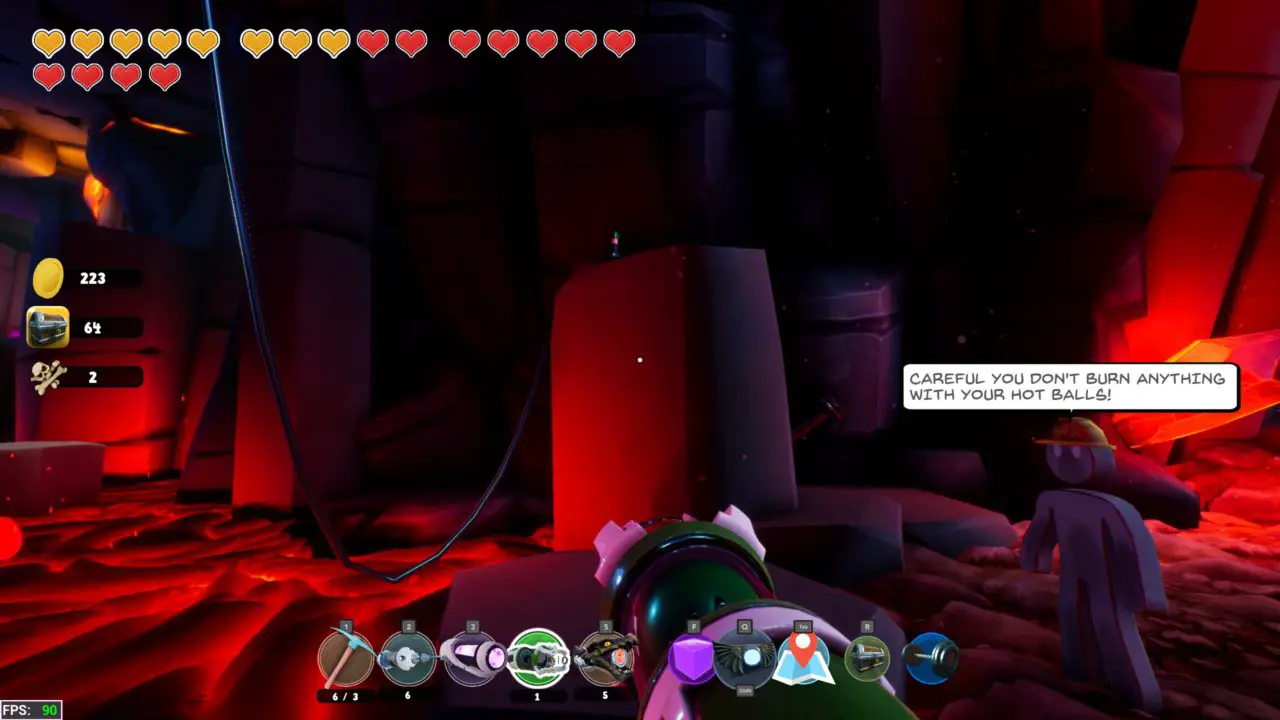
By the lava pit in this area use the metal bits to launch yourself up into the hole in the ceiling to find your chest.
Chest #88
The next chest can be accessed by taking the pink pipe from earlier to allow for the red-hot nickel ball to burn the cardboard giving us access to the main chest in the area.
Chest #89
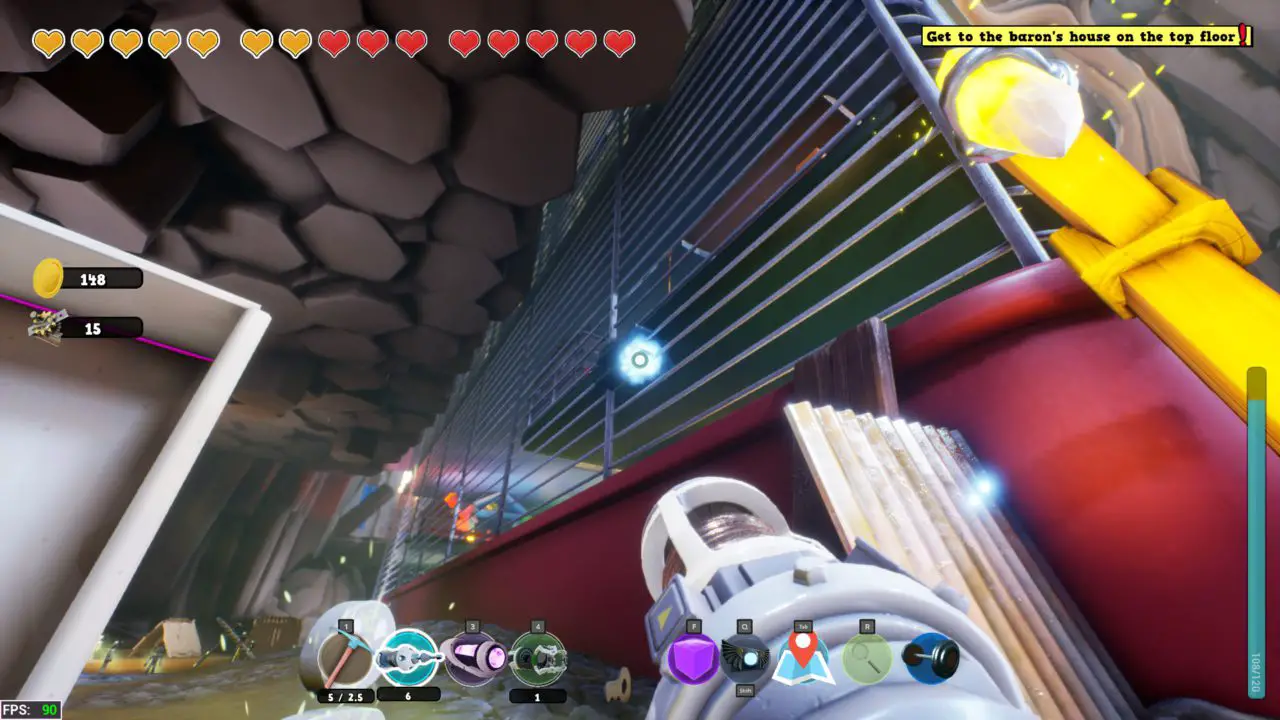
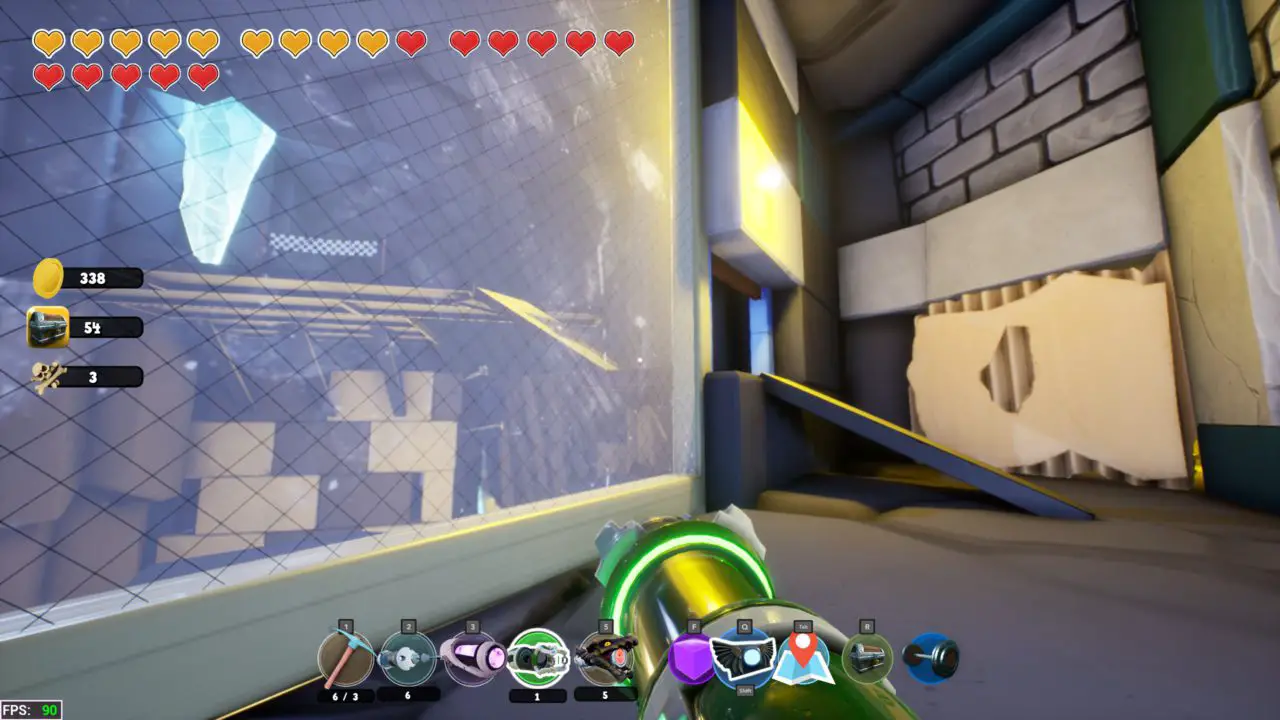
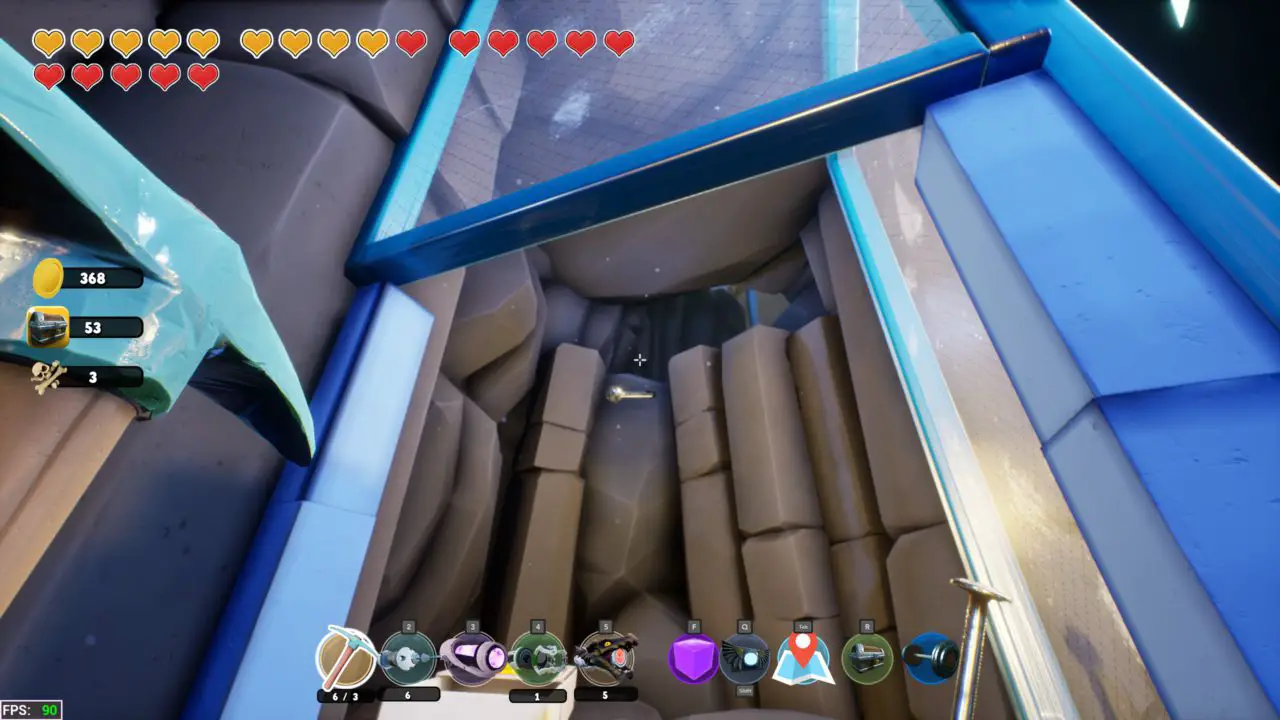
Above where we entered this area is another chest. It can be accessed by launching off the blue pipes as shown in the photo on the left to go over the blue glass wall and then across to the area
Chest #90
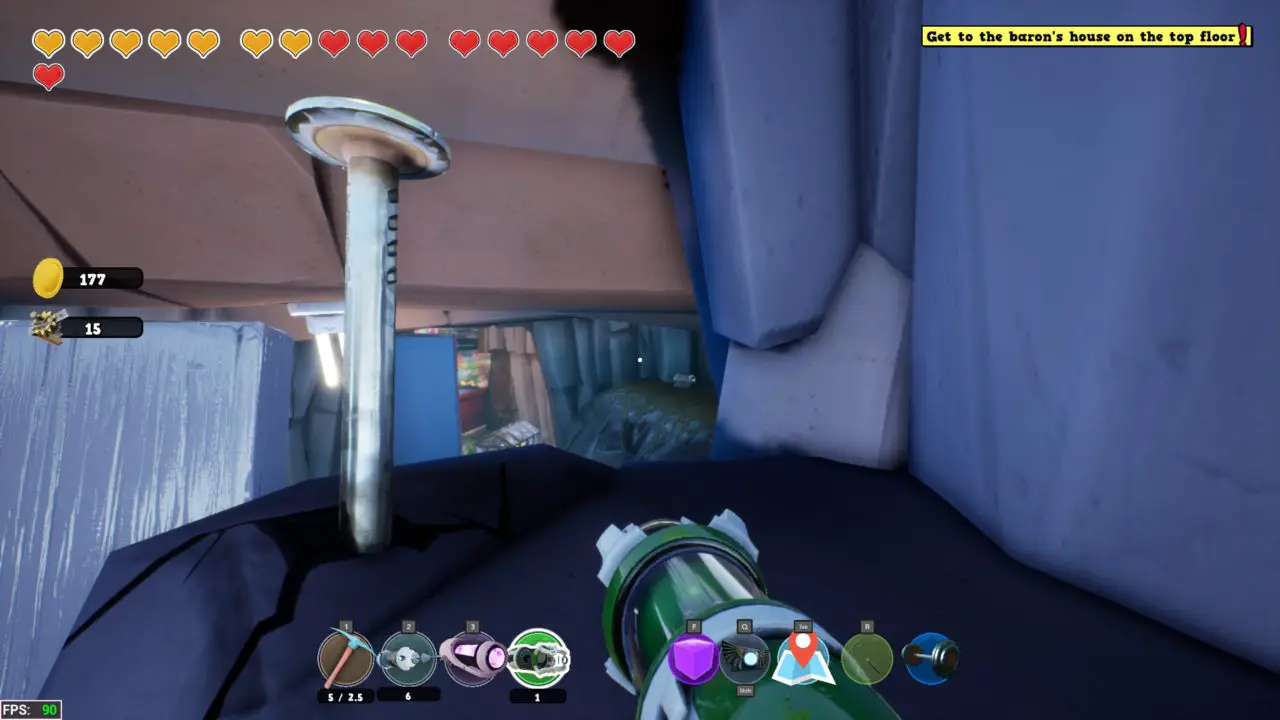
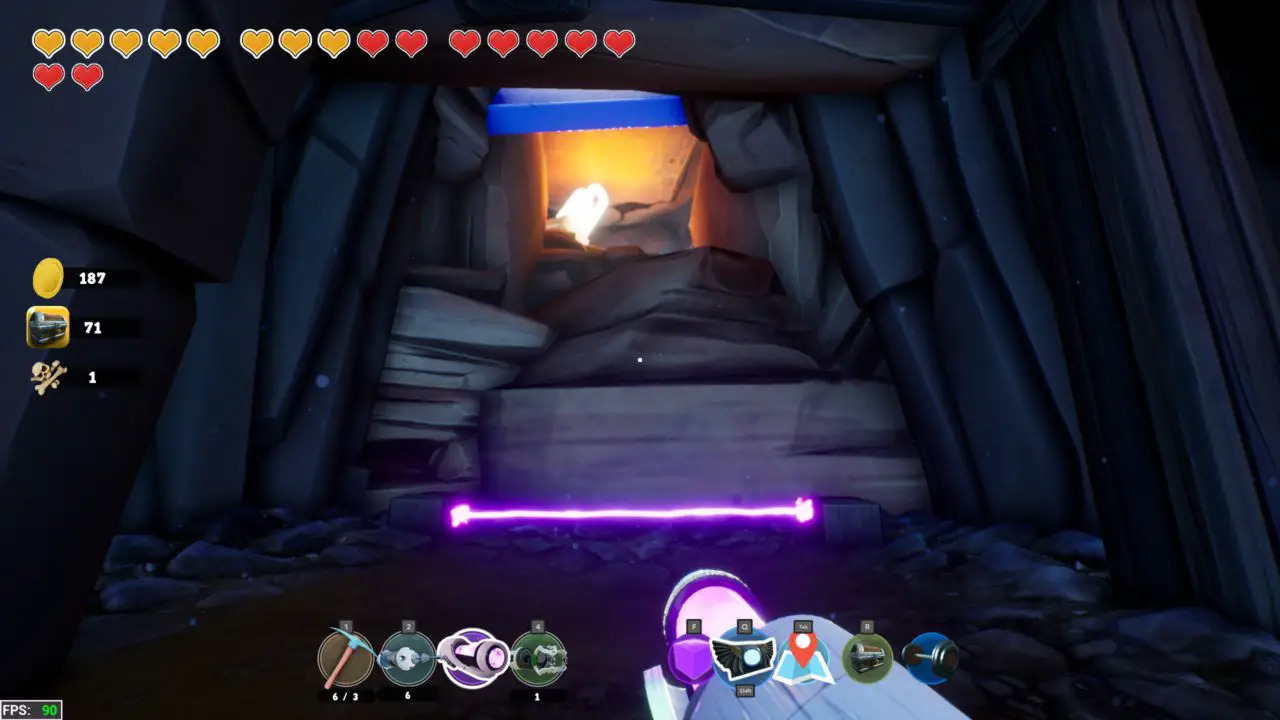
In order to get this chest place a teleport orb in front of the door and go across the lava to hit the button on the rock. Once it has been pressed teleport back and walk in the room.
Chest #91
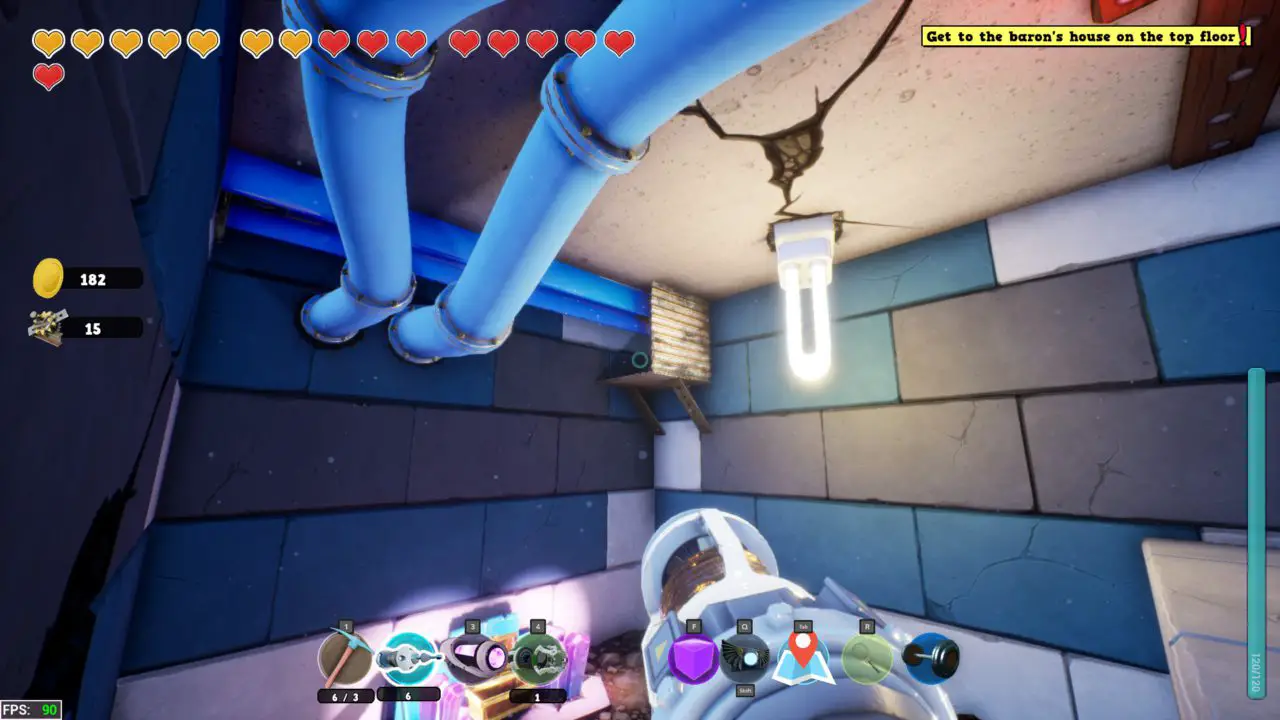
Jump on the stones that you pulled down with the gold force beam to access this chest.
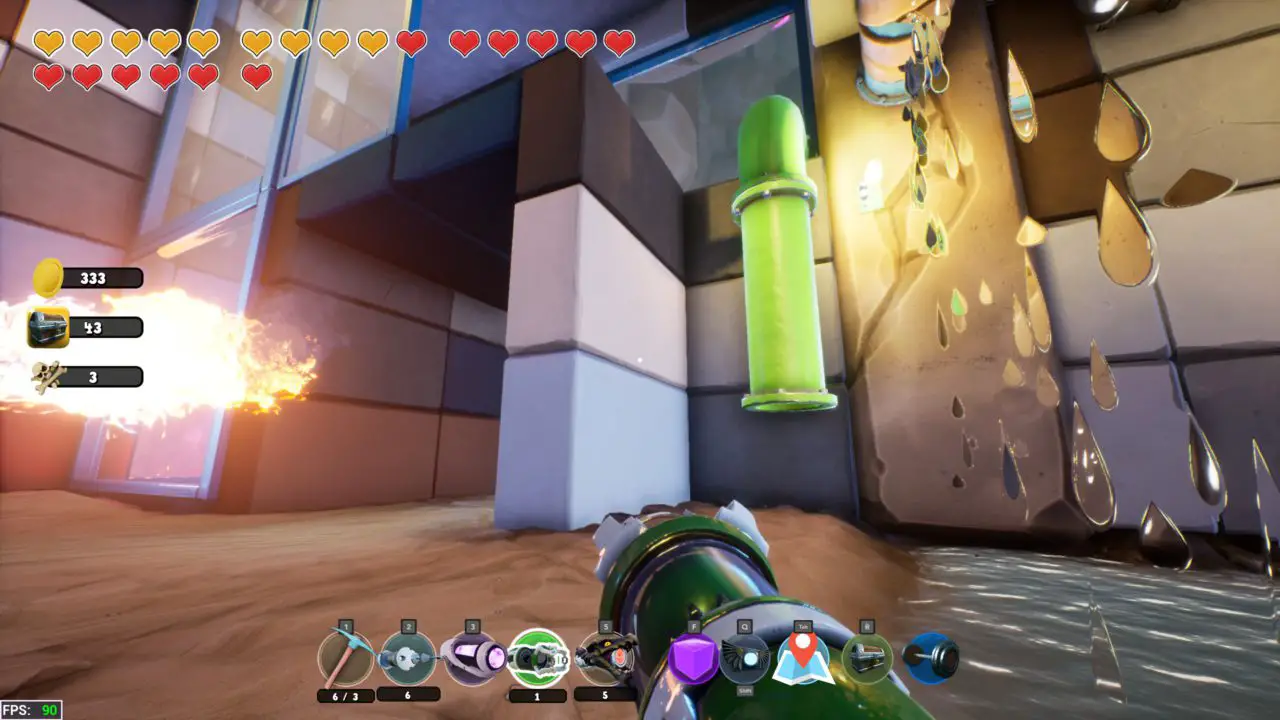
Chest #92
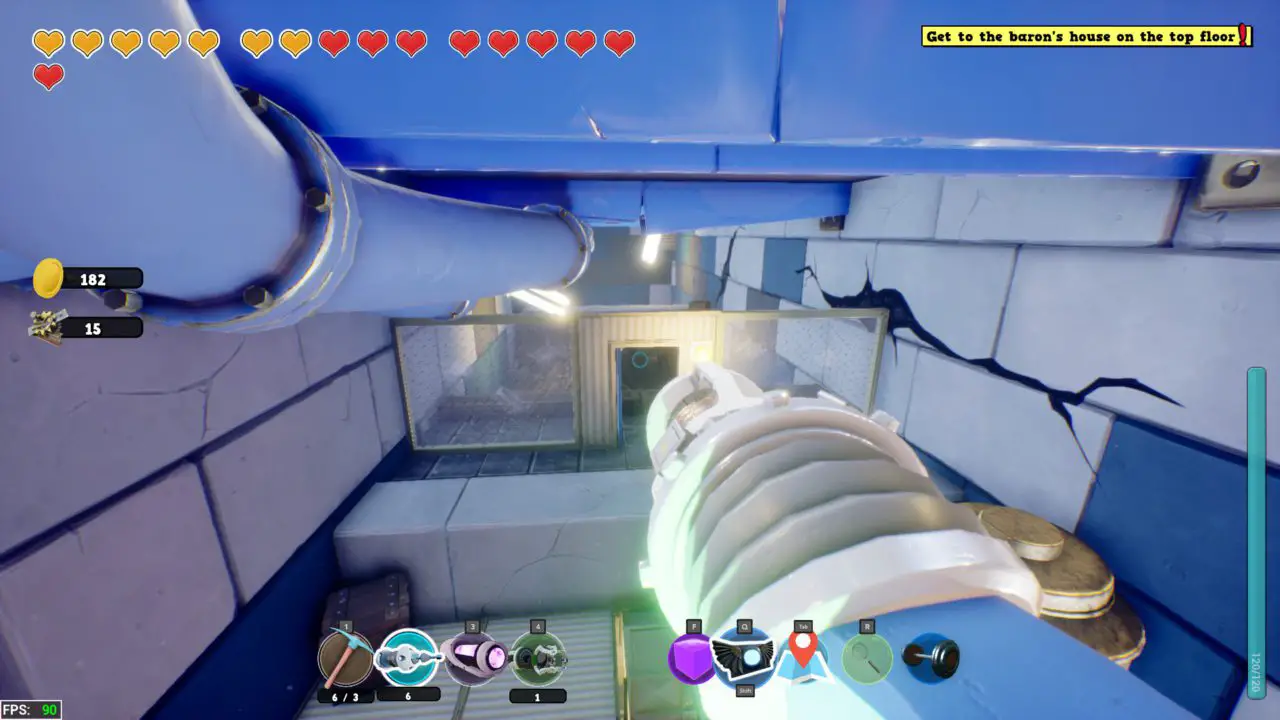
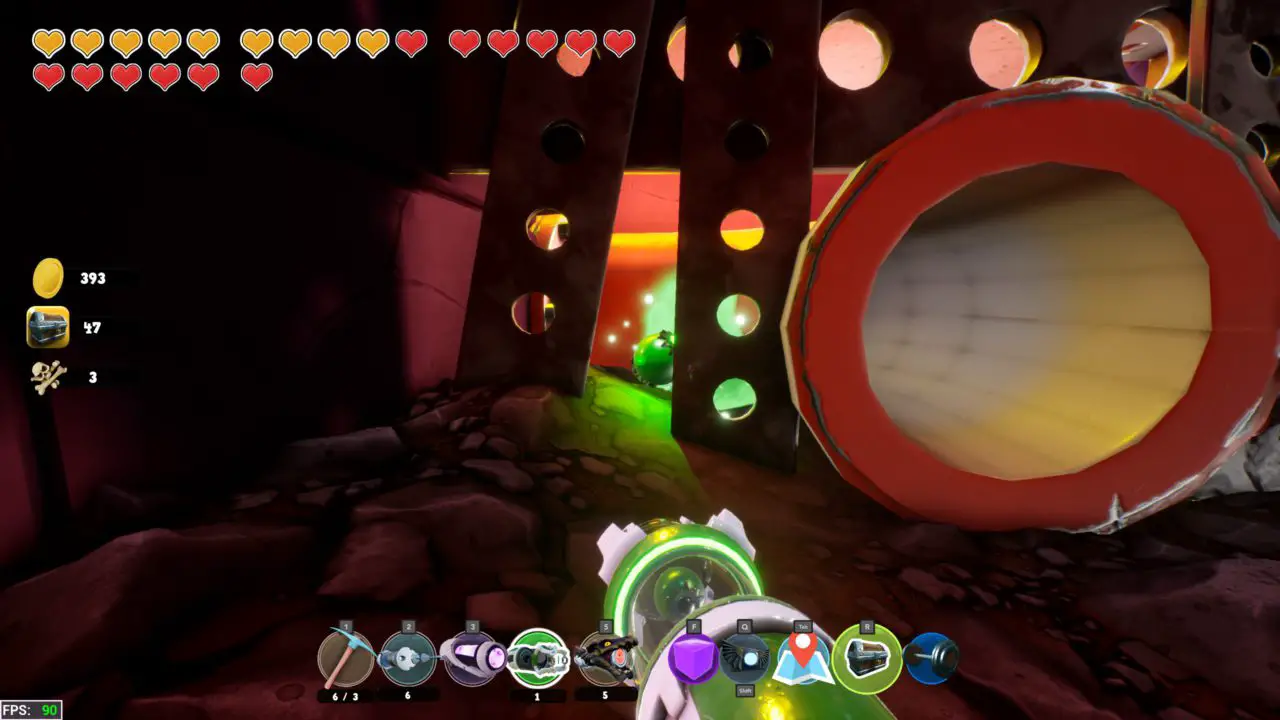
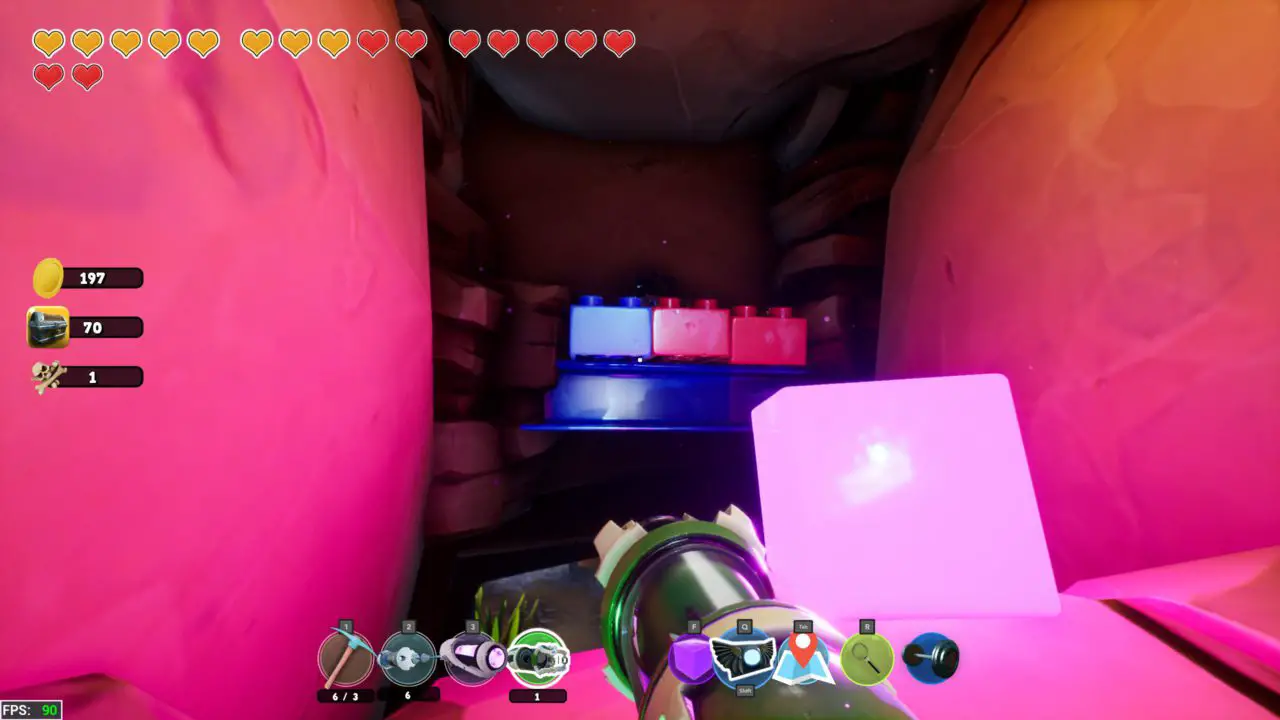
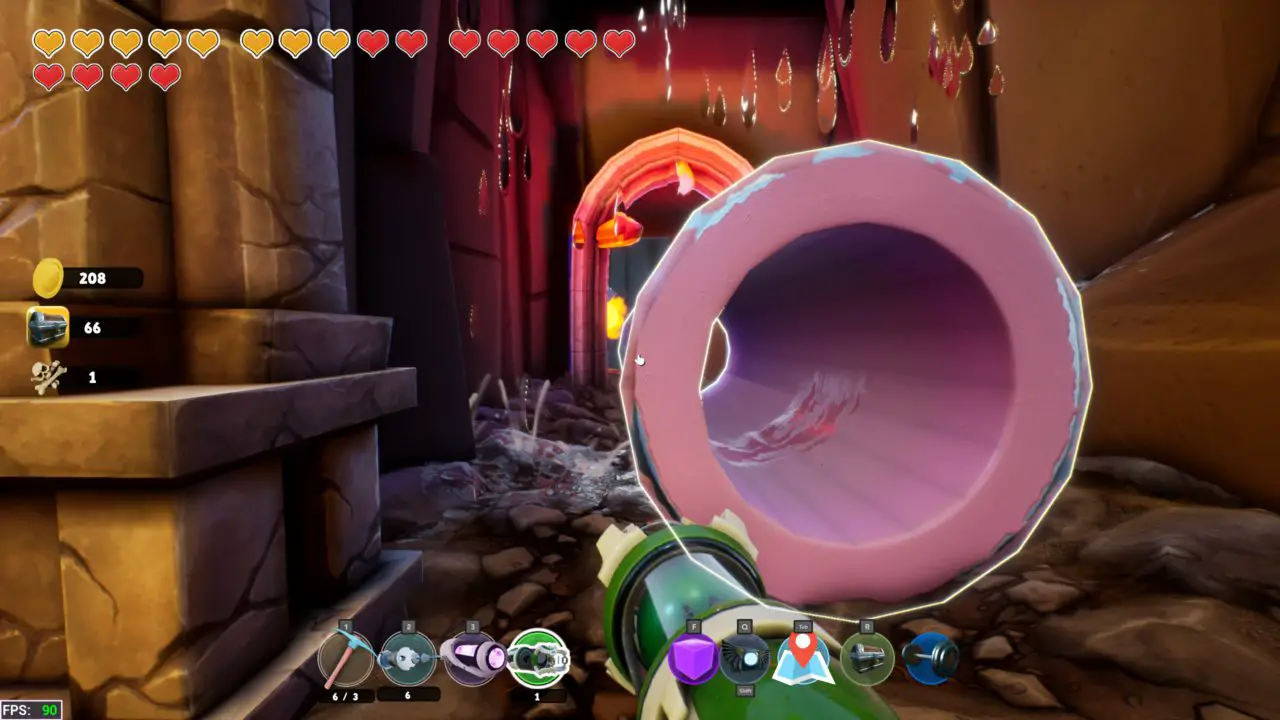
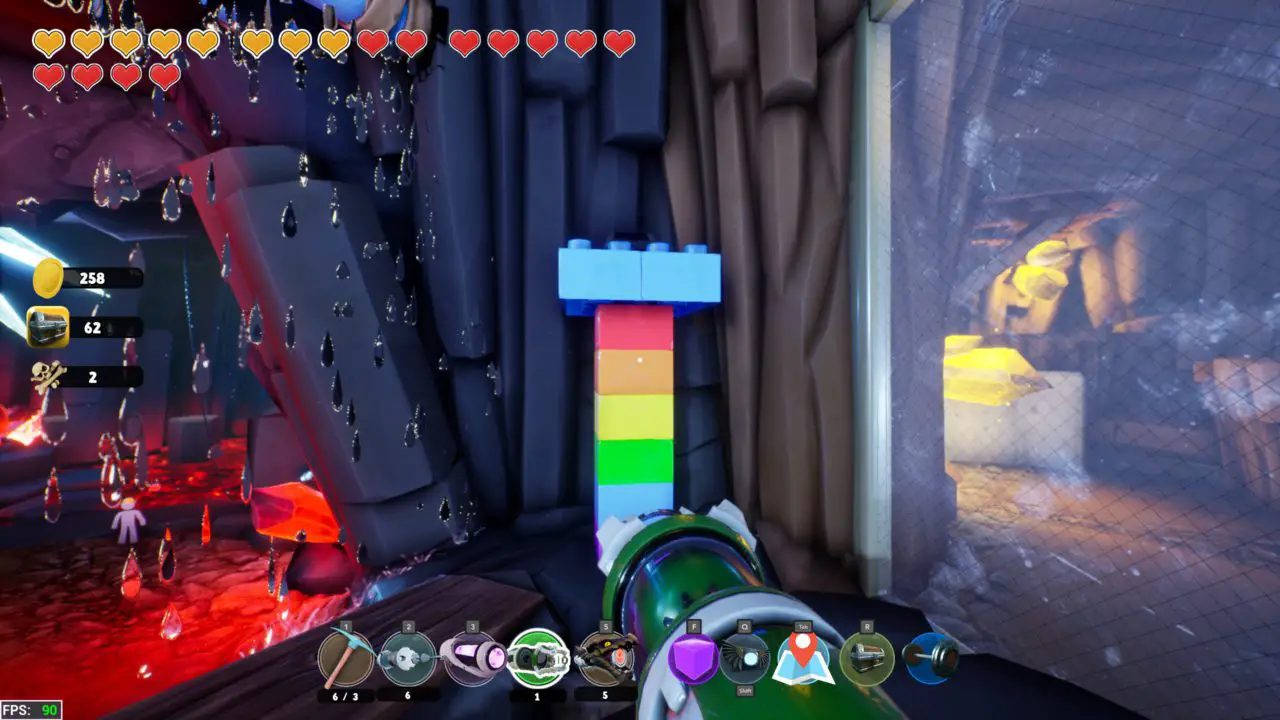
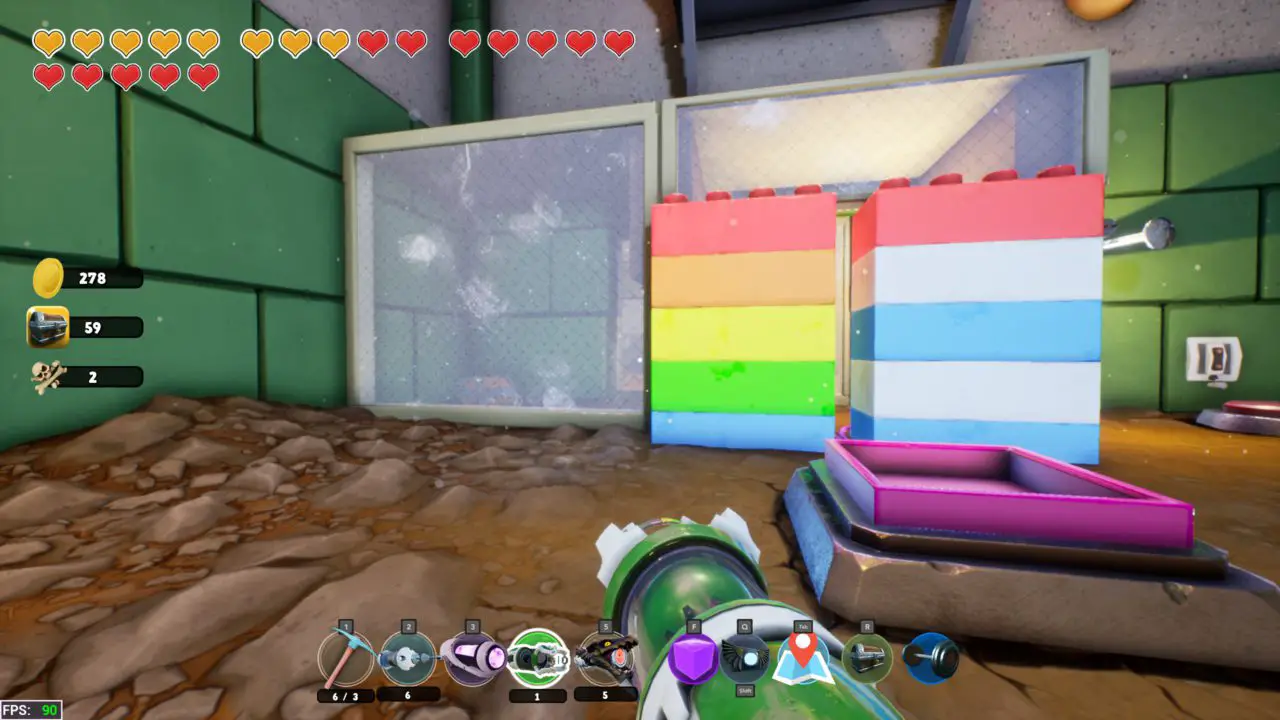
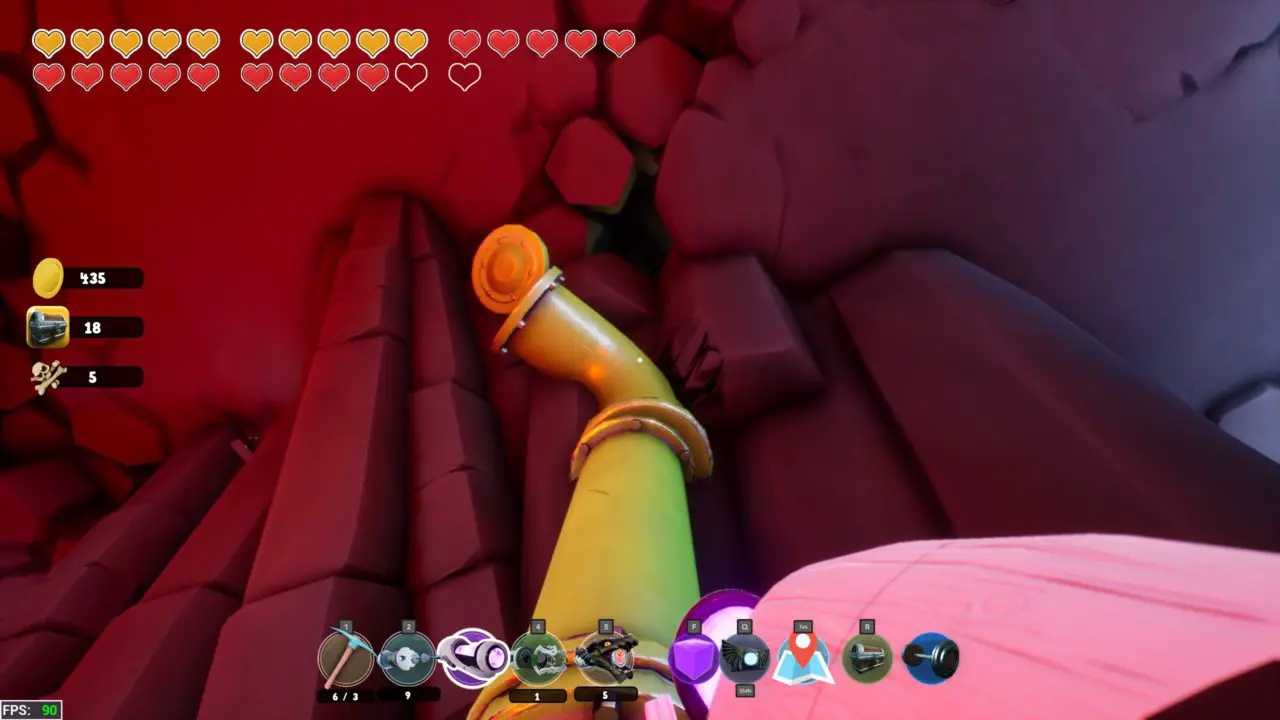
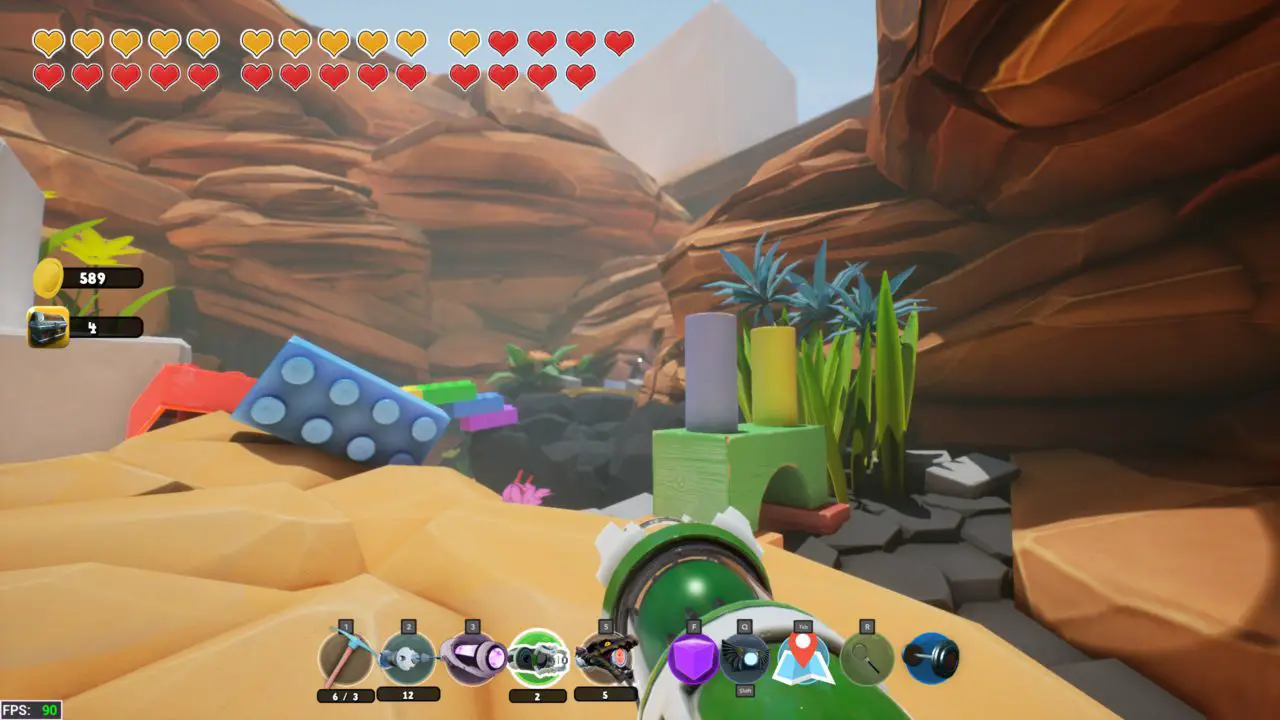
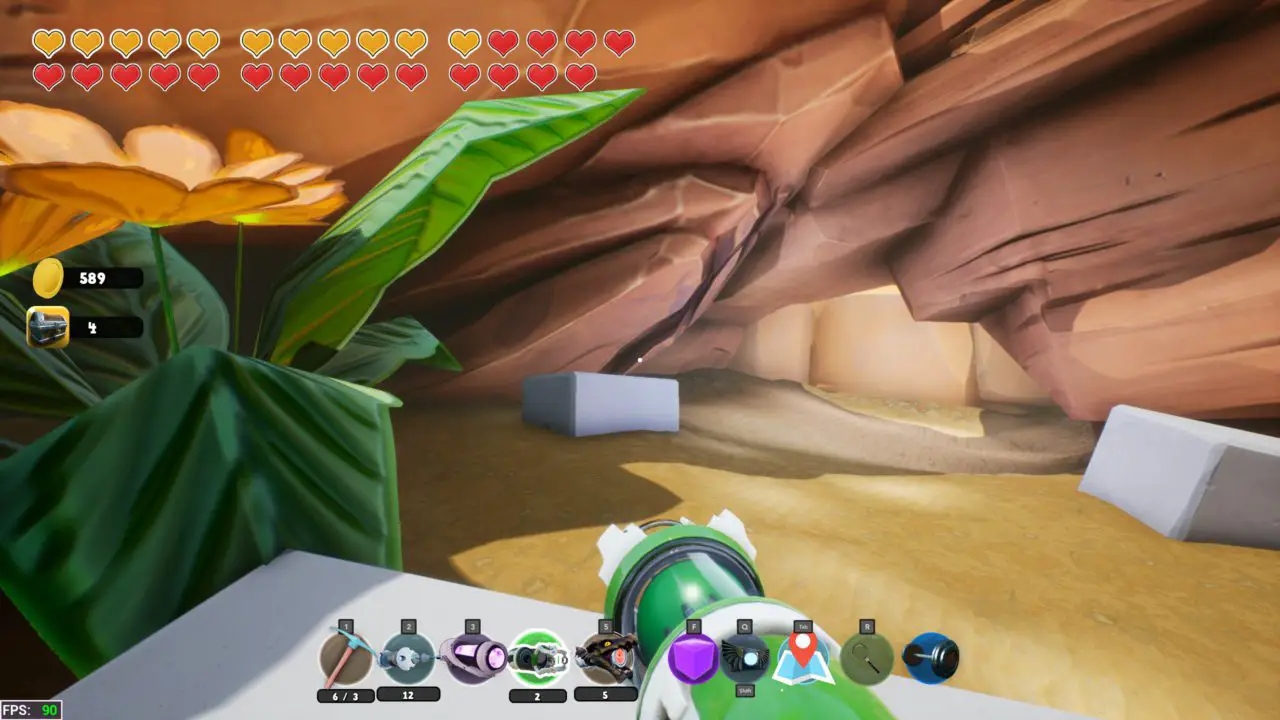
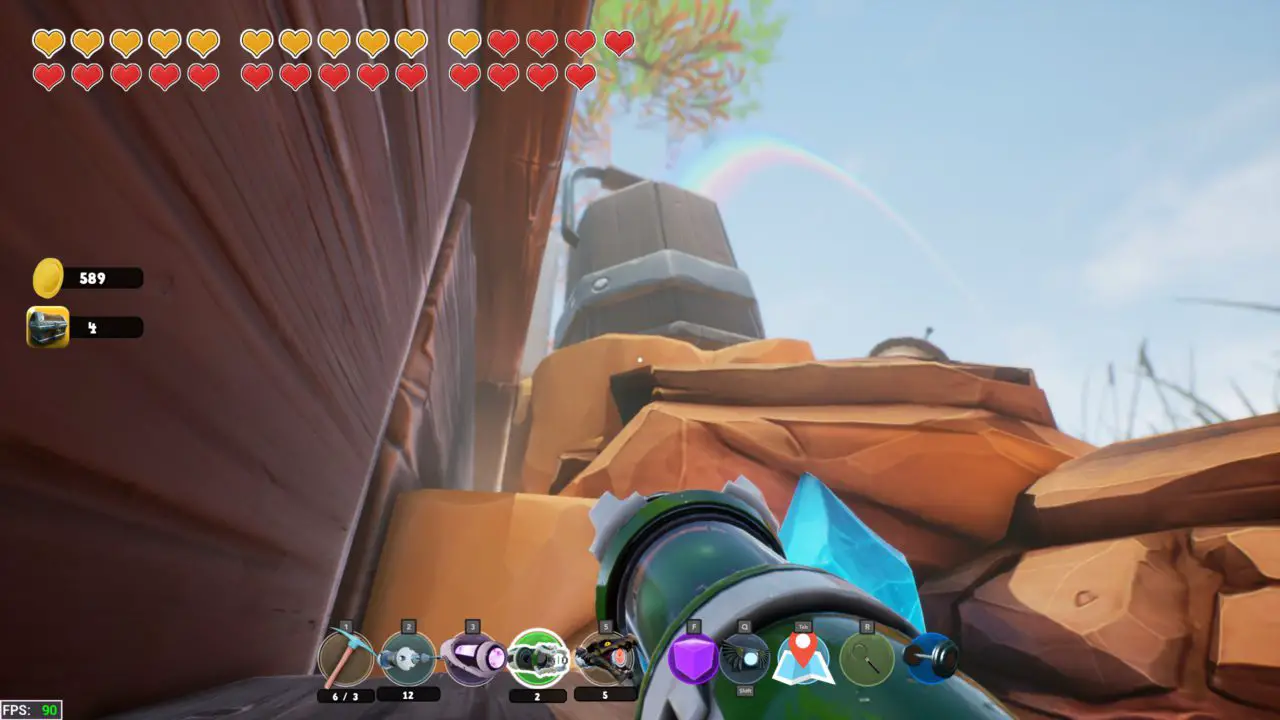
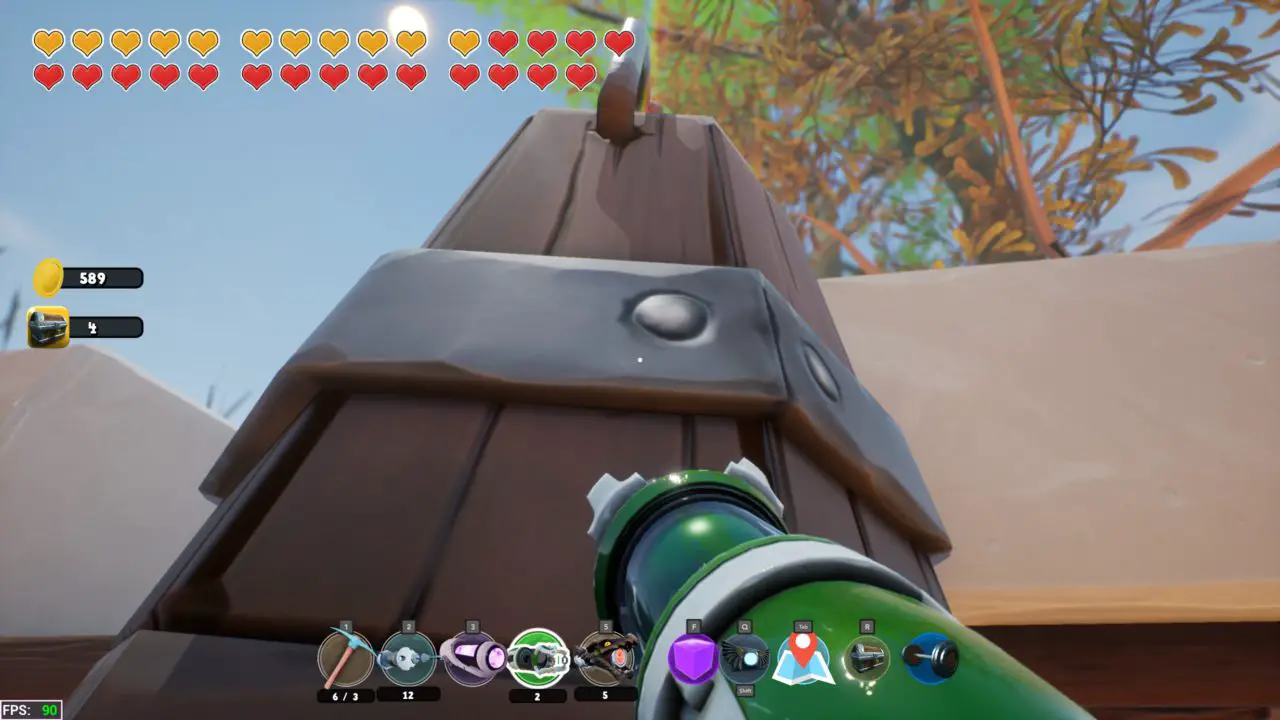
This is the rainbow one that we passed a lot earlier in the game. Just get in the green pipe and after popping out the other side shoot your teleport orb to get on top.
Chest #93
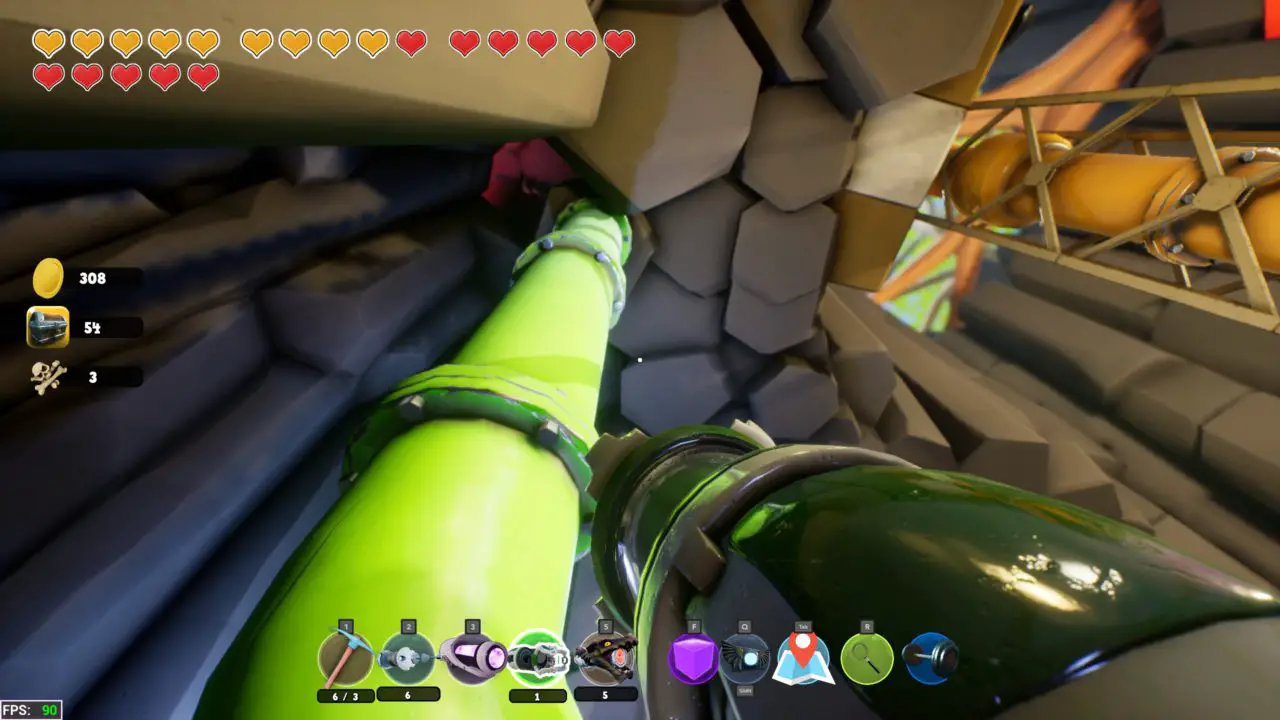
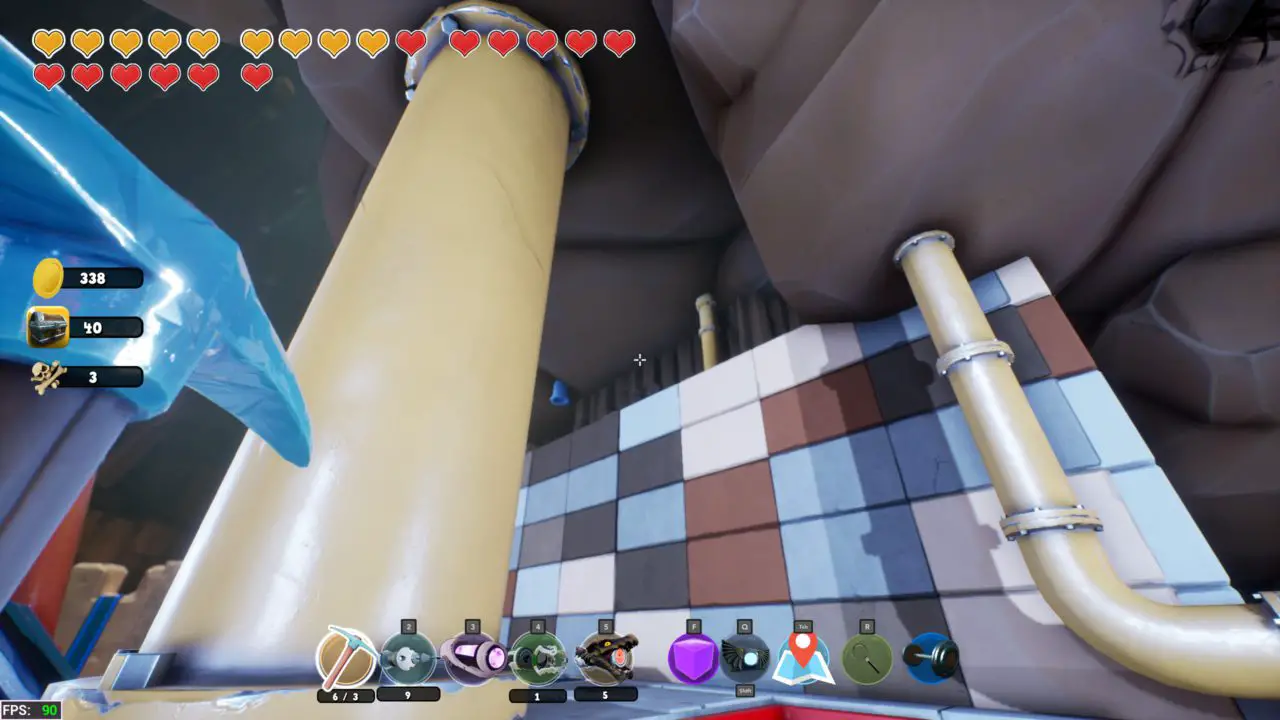
Next let’s go back to the industrial area. Use the main pipe from the hub and scale that main pipe all the way up to that red glowing area and you will find a chest.
Chest #94
From the same building that the pipe comes in on, at the bottom floor is a simple puzzle with a force cube in order to get it.
Chest #95
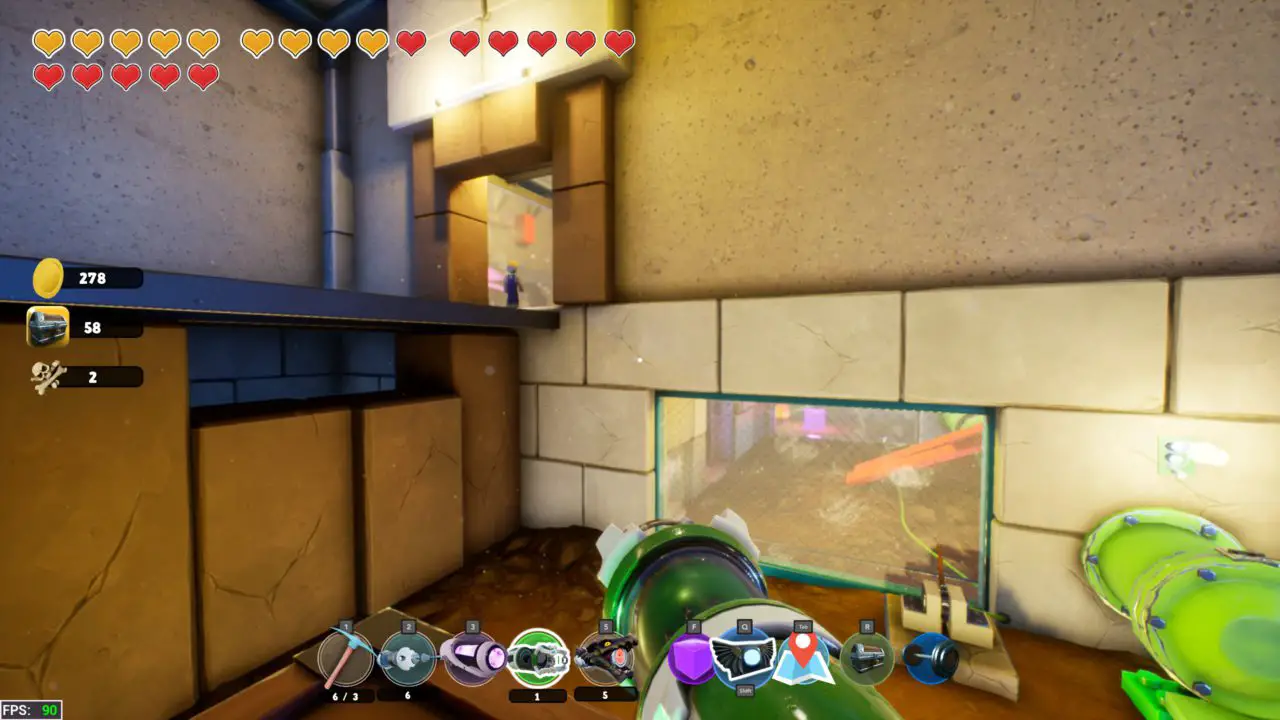
Across from that building diagonally, the one where you had to put a box on the wall to tell the NPC it was break time, you will see a gap between the top platform and the stone. Jump and shoot your teleport ball into the room behind to find the chest.
Chest #96
At the opposite side of the same building, where you needed to get the missing piece for the valve is a chest that you can get by shooting your teleport orb into the hole just under the LED on the wall. To get the output a force cube on the ground and shoot a teleport orb upwards while standing on it with your magbelt on.

Chest #97
On the roof of that same building, there is another chest, accessed by using a force cube to stand on for extra height and shooting a teleport orb up to the higher area.
Chest #98
Return the chest that the runner unlocked after losing the race. Use your flame gun to shoot the cardboard, revealing the chest.
Chest #99
Leaving Industrial town through the main gate and taking the path to the left up the nails. You will need to re-complete part of the old puzzle to continue by.
Once past it continue up to where the chest is.
Chest #100
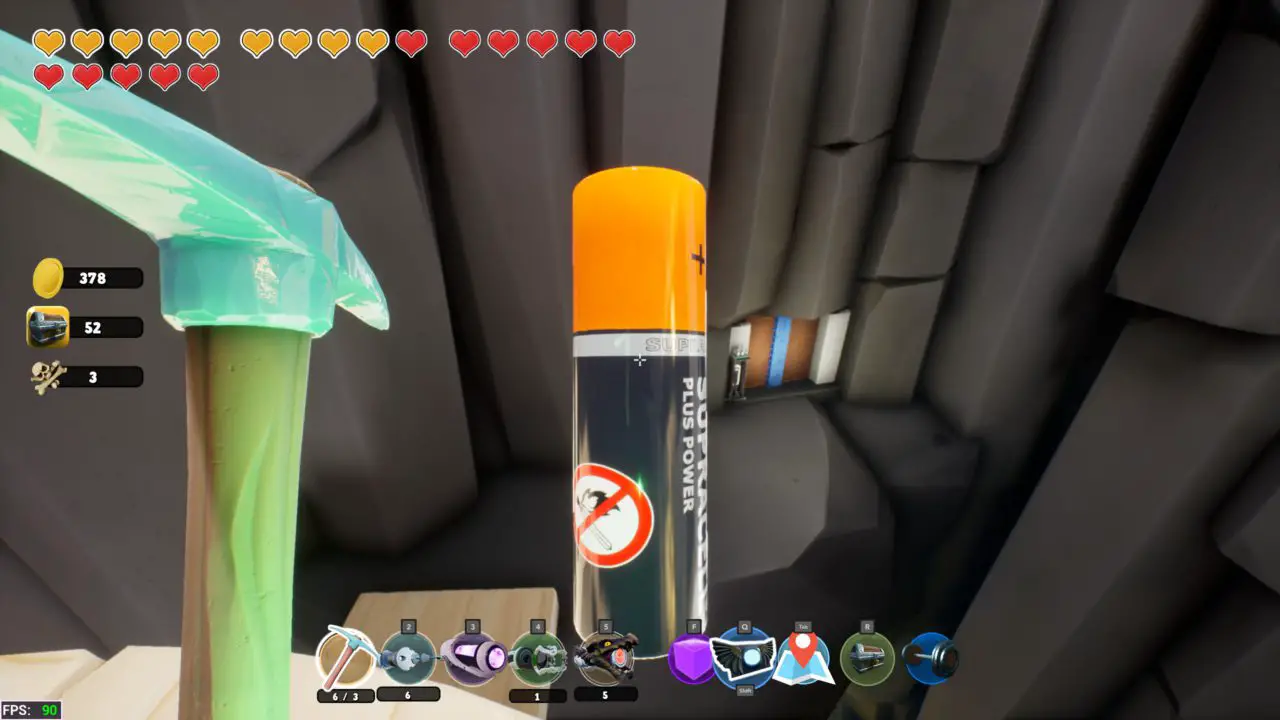
From the same area, you will get up onto the rock and get up to the nail and launch up towards the tall wooden tower and climb up.
Once you are on top there will be a rock blocking the battery. Jump around the left side and throw your pickaxe to break it. Climb back up and grab the battery and bring it down to the door, where there will be a chest.
Chest #101
Fall down the hole by the building from the last chest to get back down to the area that leads to the industrial area. Use a force beam to create a pathway to get to the obsidian blocks and break them to get to the chest.
Chest #102
In the Worshippers of the Eternal Light’s camp there is a chest, currently marked with a force cube, that can be accessed by using a combination of launching yourself using the nail on the left and teleport orb.
Chest #103
Break down the door of the cave next to the Worshippers of the Eternal Flame’s campsite and get ready for a fight (at this point in the game you will breeze through this combat). Beating all three waves will open the door to a chest room, and will also give you an achievement.
Chest #104
This chest will require getting into the house in the center of the bank district that has a white key in the window. Shoot a shock through the open window at the receiver to open the first door. التالي, use the health station to dye a blank keycard as shown. Once in the back room with the key use the magbelt to launch yourself into the attic room.

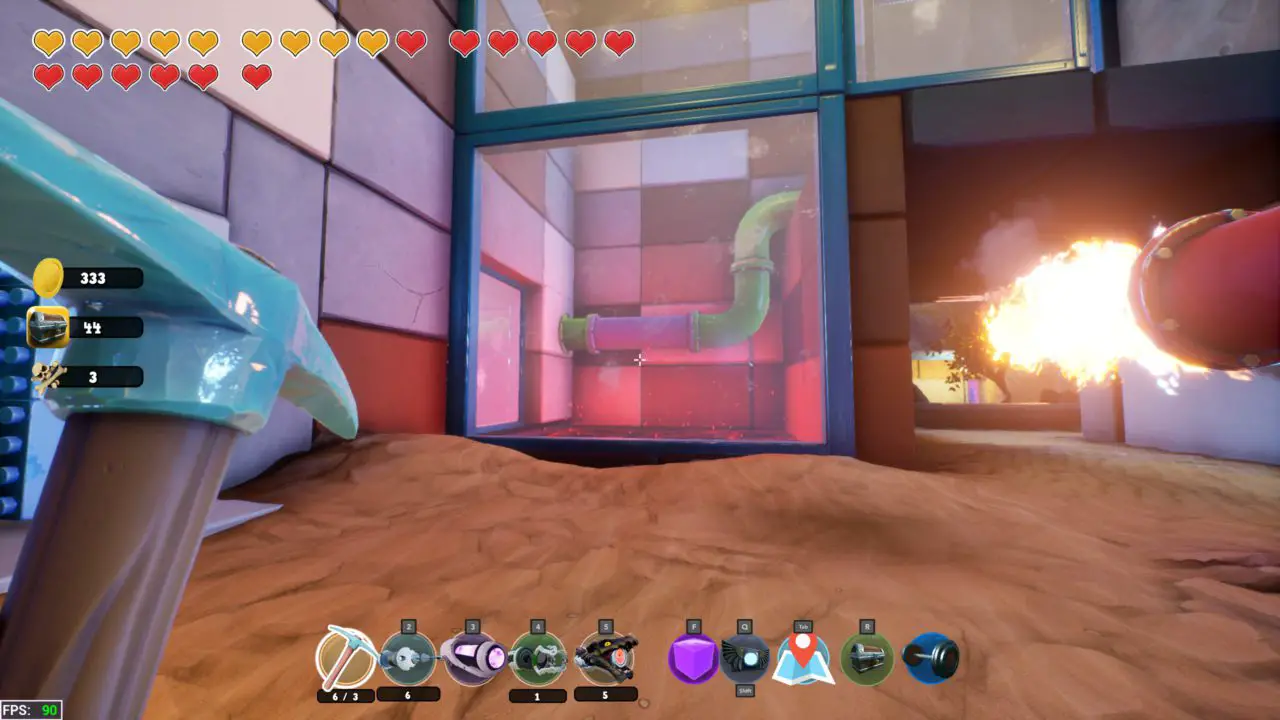
Chest #105
Now that you have the white key and unlocked the door to the building with the colorer launch yourself up the pipes to the room above the area to get the pink pipe. Attach it to the red pipe spewing flames so that it points towards the cardboard wall, giving access to the chest.
Chest #106
Start by moving the pink pipe to span the lava pit seen in the picture. ثم, shoot your teleport orb up into the pipe to access the secret room and chest.
Chest #107
أولاً, we will need access to the bank vault, this can be done by vaulting your way up to the door button. Once inside look up to your left where there is a breakable wall. The chest is in the room hidden behind.
Chest #108
Now that the gold-crazed monster has let you into his house, you are able to access this chest.
Chest #109
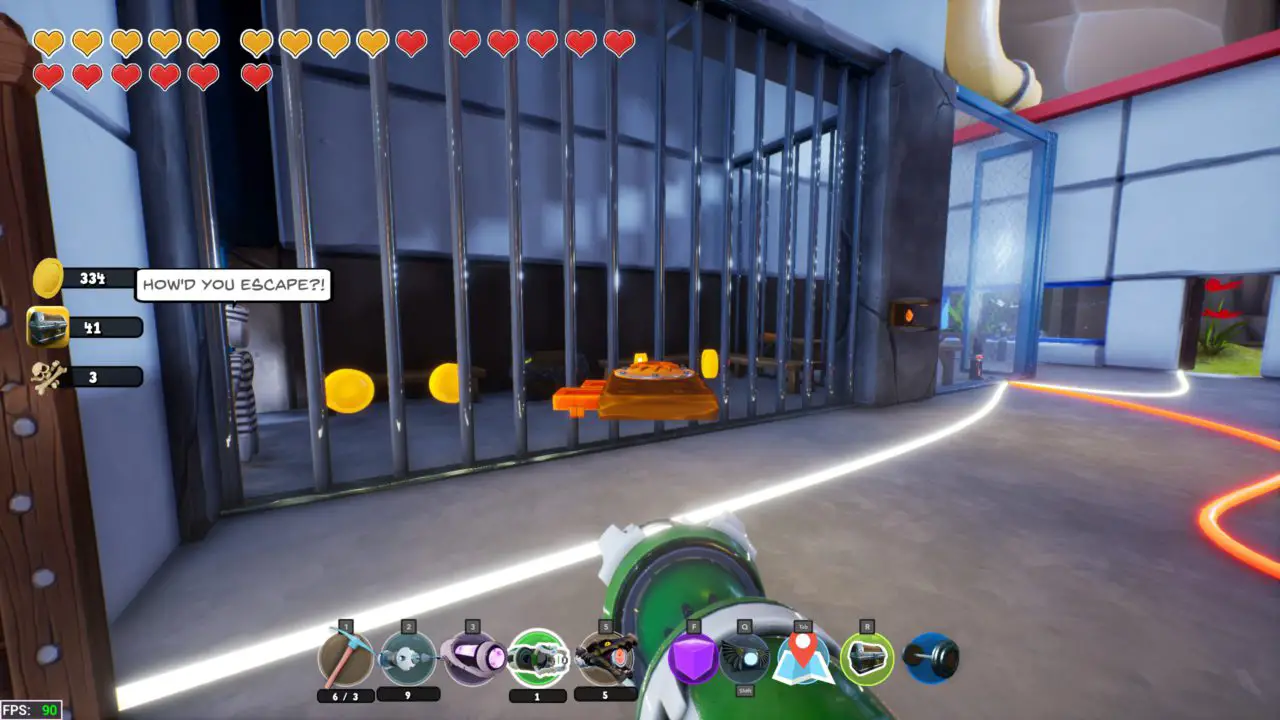
Head to the jail where there is a chest trapped behind bars. It requires an orange keycard to open and can be gained by taking a keycard and a carrot to the colourer and dying a keycard orange.
Chest #110
From the top of the jail launch yourself up onto the roof. This is another chest that requires you to be speedy as it is a time trial. There are three buttons which need to pressed in the order of Circle Triangle Square. Use your magbelt to launch yourself around as if you try just running you will not be fast enough. Once the combo is pressed fast enough you can get your chest.
Chest #111
Above the time trial chest room is a secret area with a chest. Use your magbelt to launch yourself over the wall to get it.
Chest #112
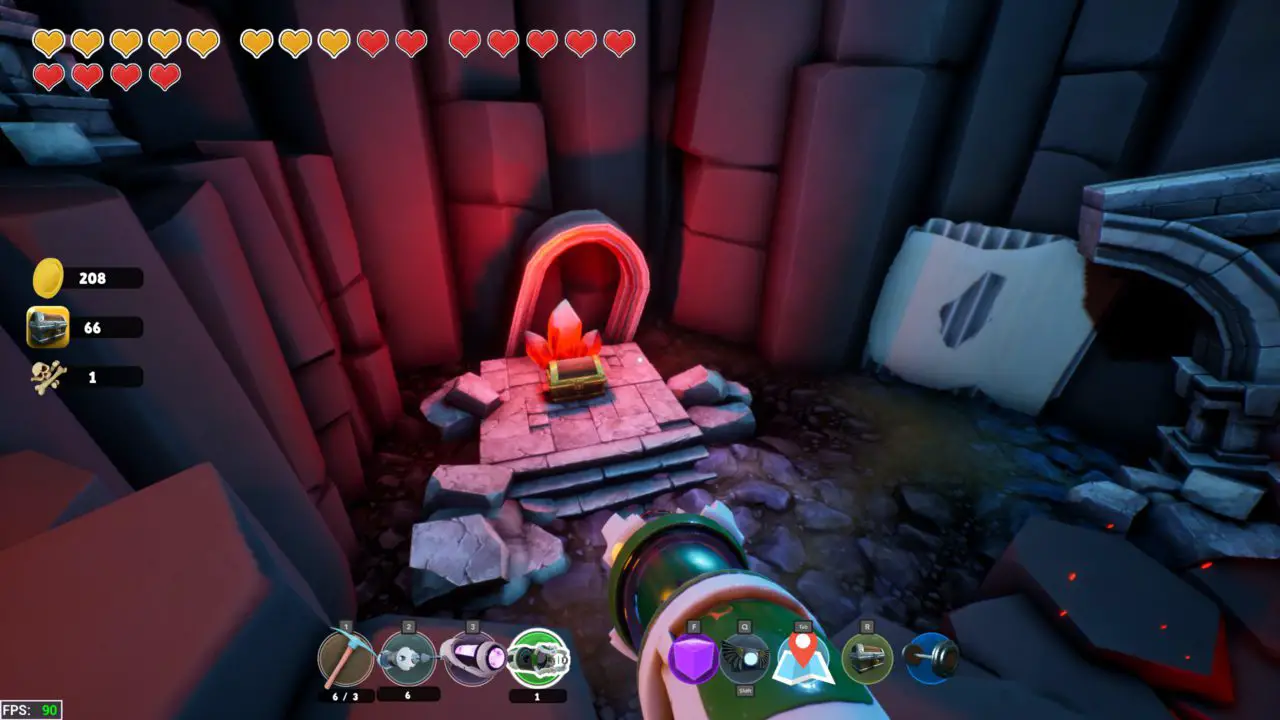
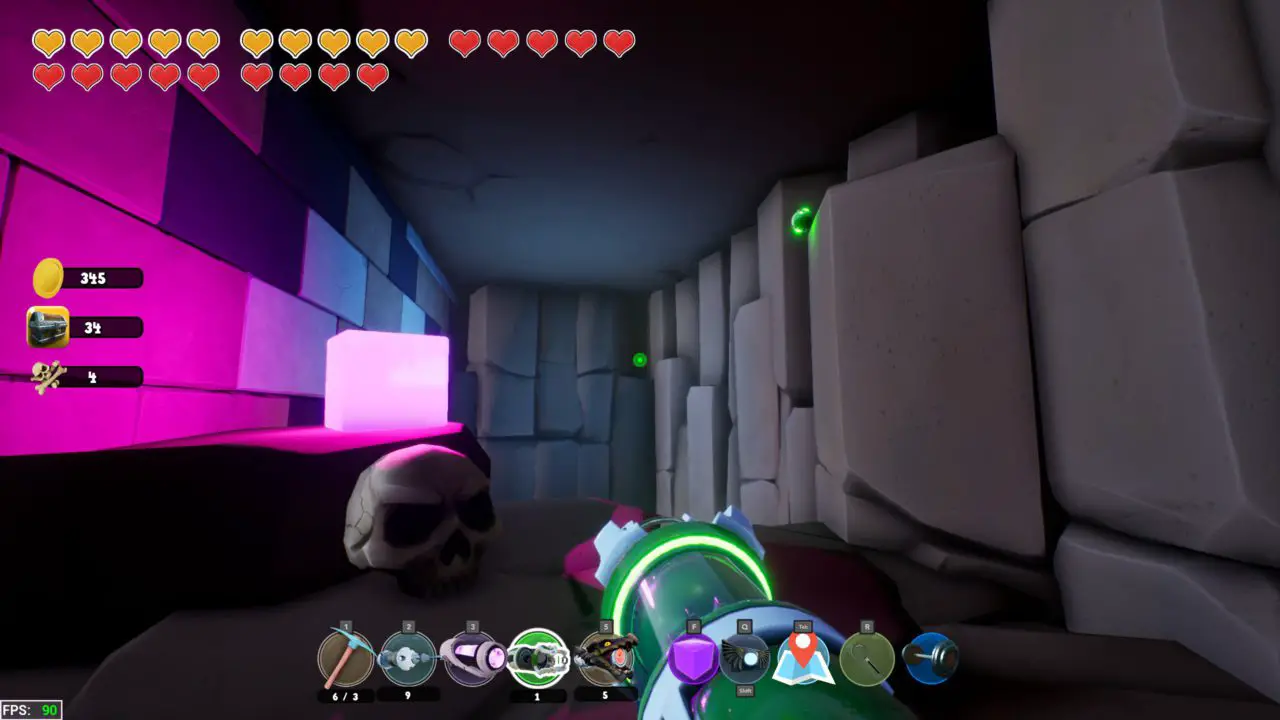
Above where the square button is, is a crack in the rock that you can fit through. Go through it and jump the gap and go around the corner to the right. Once There will be a chest that is beside the red crystal.
Chest #113
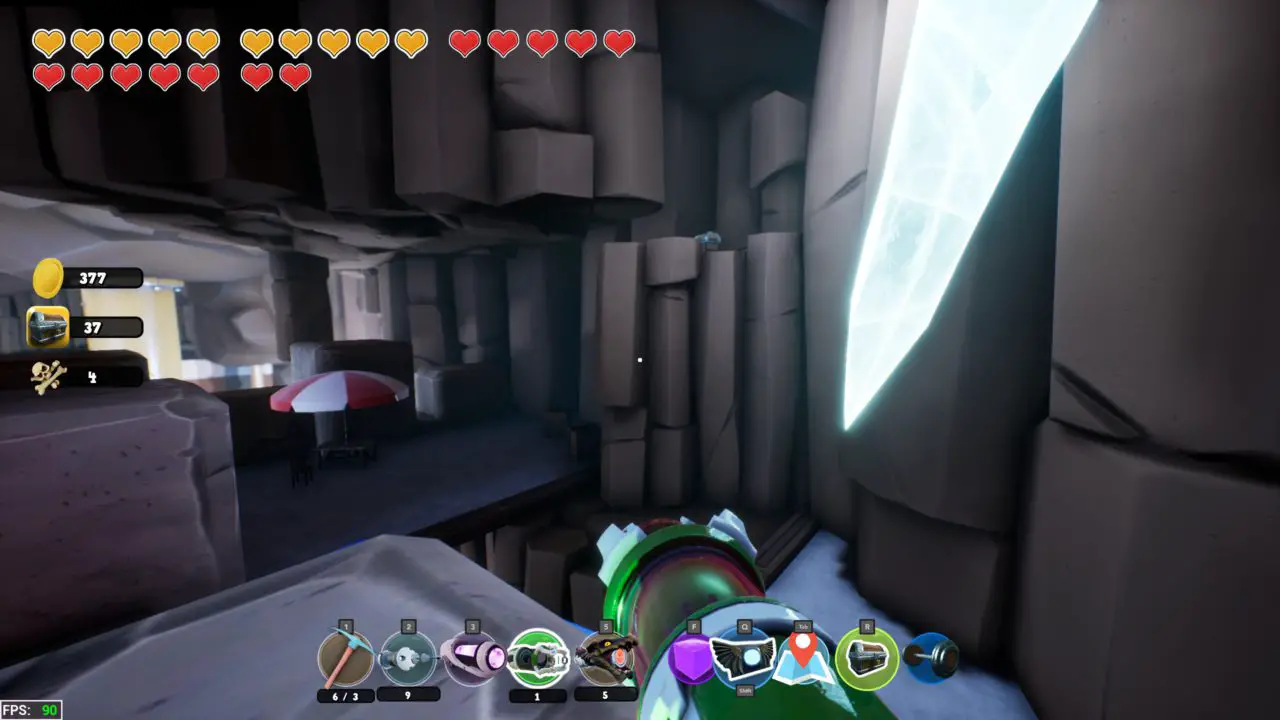
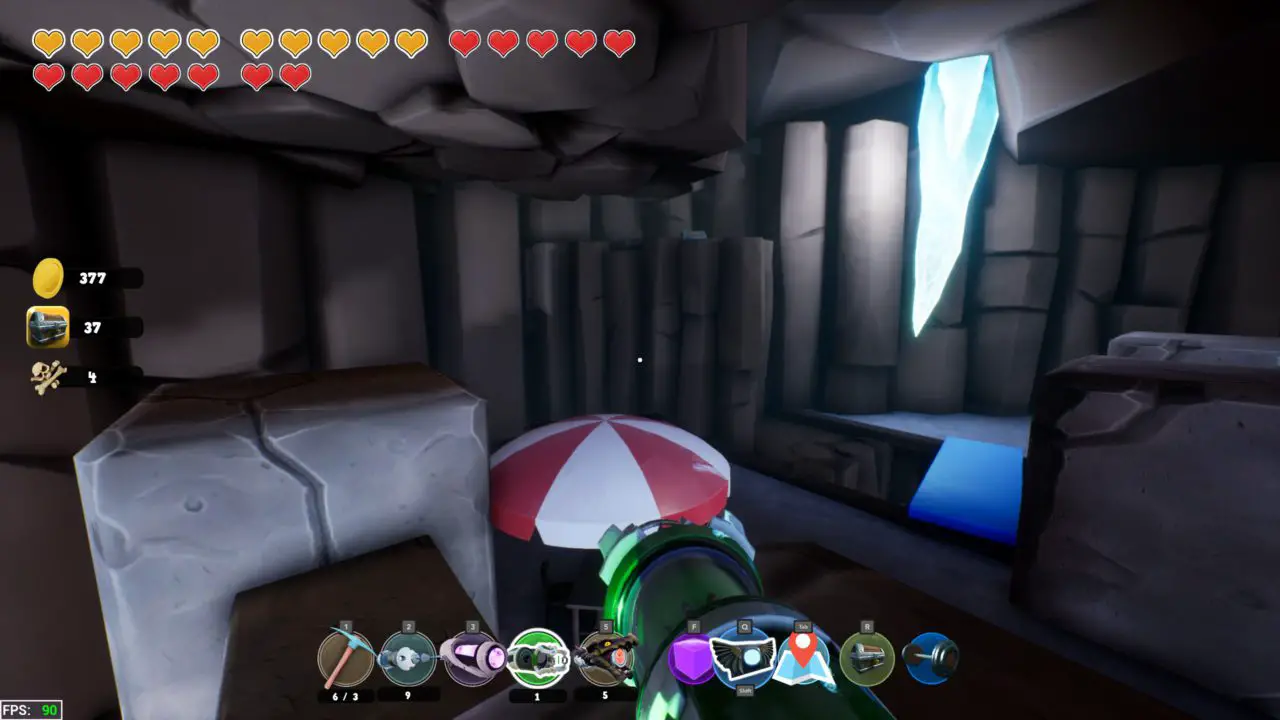
Head to the roof of the bank and get to the area above the lava pit. There is a chest visible on the top of the rocks just out of reach. Use the picnic umbrellas to bounce you close enough to teleport orb the rest of the way. This is done by jumping and then crouching mid air to slam down and bounce higher.
Chest #114
Head back to the beach area on foot (don’t take the pipe). In the room that drops down where you had fought the big skeleton place a force cube on the left rock and jump across and shoot your teleport orb up on the ledge. There you will find a secret area with a chest.
Chest #115
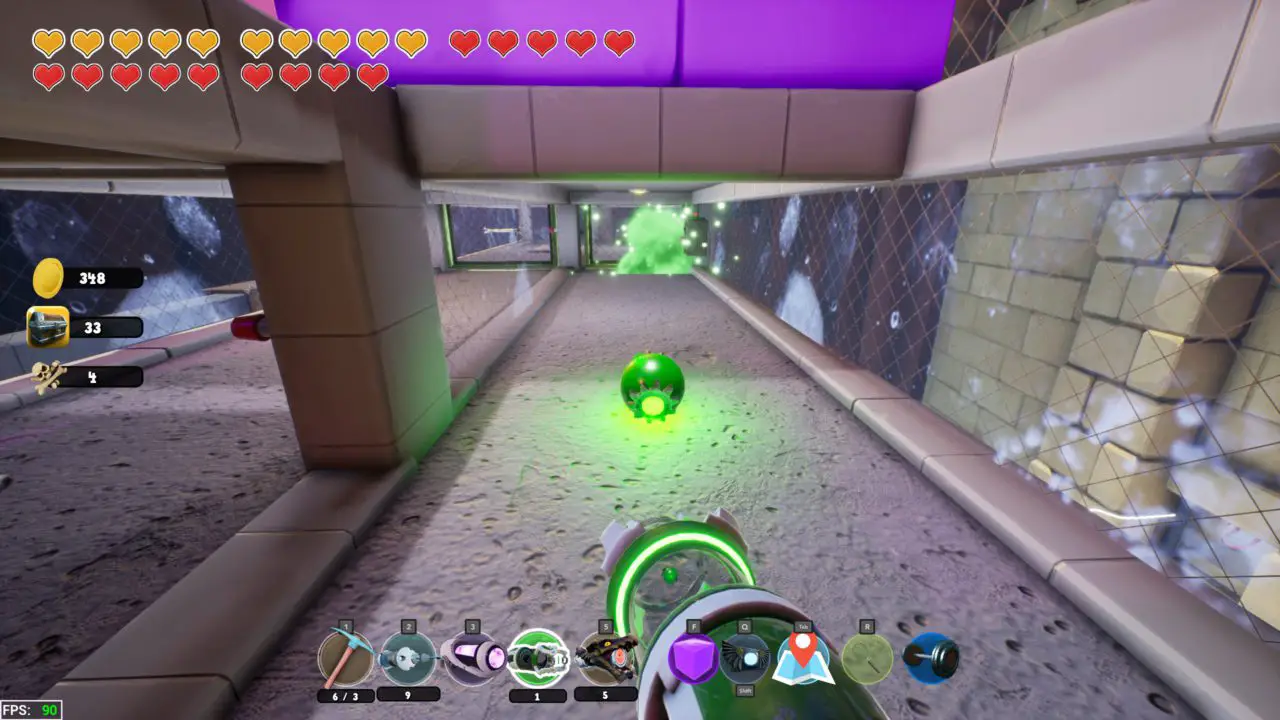
Make your way back up the tower where you got the force cube, you have done this puzzle before so no hand holding. Get past the purple door and stand at the back wall facing the chest and shoot your teleport ball so it is rolling towards the closed green door. Run to the button in the left hall and press the button just before the orb gets there so it can roll inside, then simply teleport inside to get the chest.
Chest #116
Don’t leave this area yet, بدلاً من, go back up to where the force cube was obtained. Place down a force cube against the wall with the door and shoot a teleport orb over the wall in order to get to the chest.

Chest #117
Get behind the big pink crystal that is where the gold pile you were using earlier. Up on the rocks is a secret area with a chest.
Chest #118
Head into the beach area and head to the back near the pipe to the hub. To the right is a crack that is blocked with a breakable wall. Behind it is a cardboard wall that you can use your flame gun on. There will be a three wave fight after this that once you beat will reward you with a chest.
Chest #119
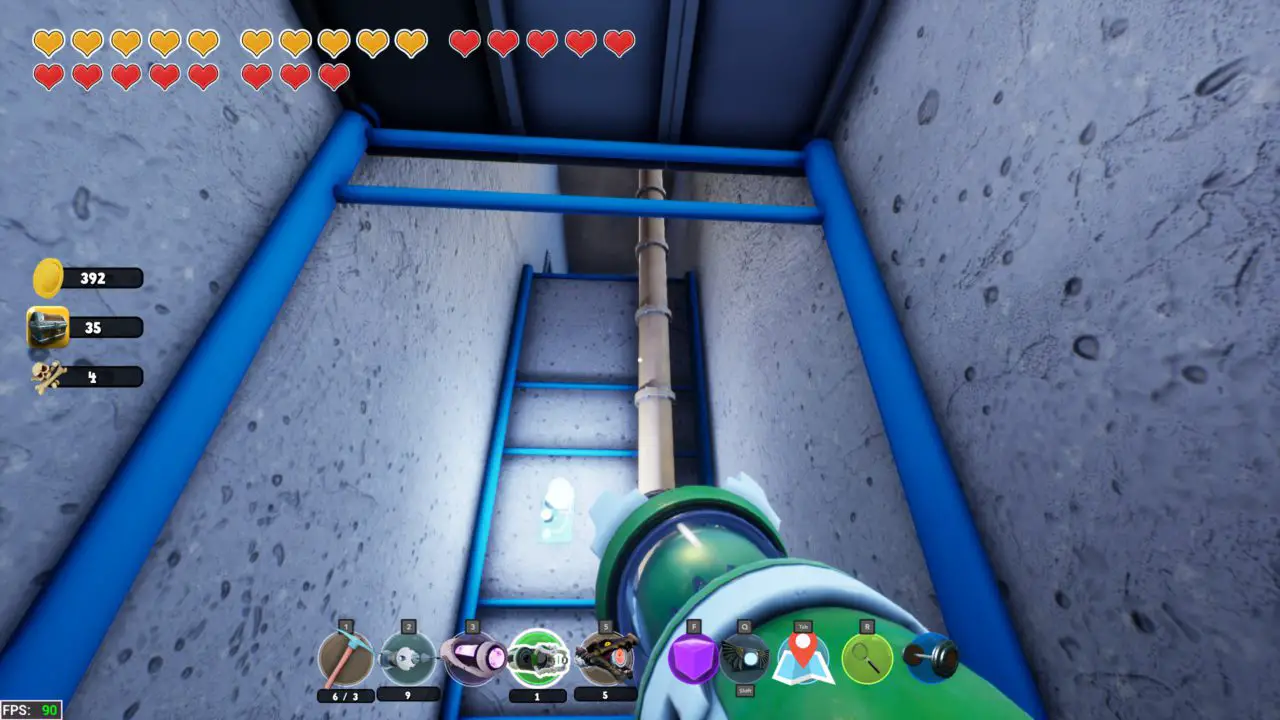
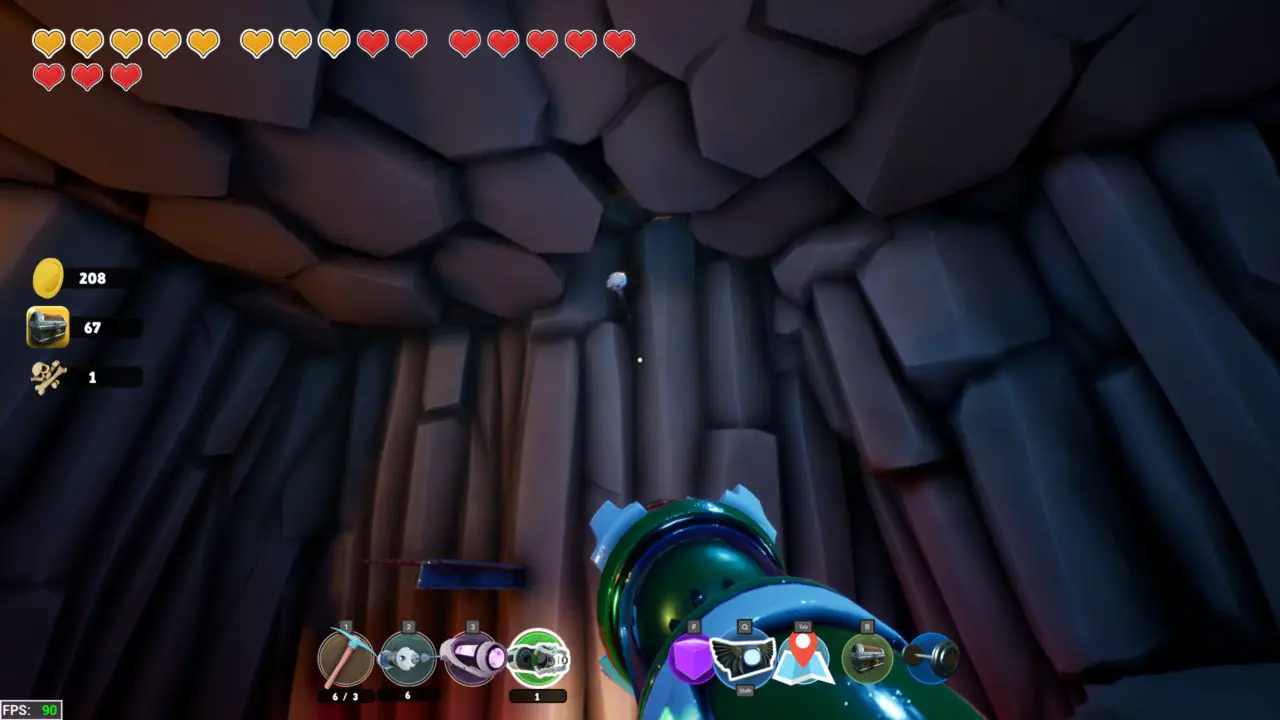
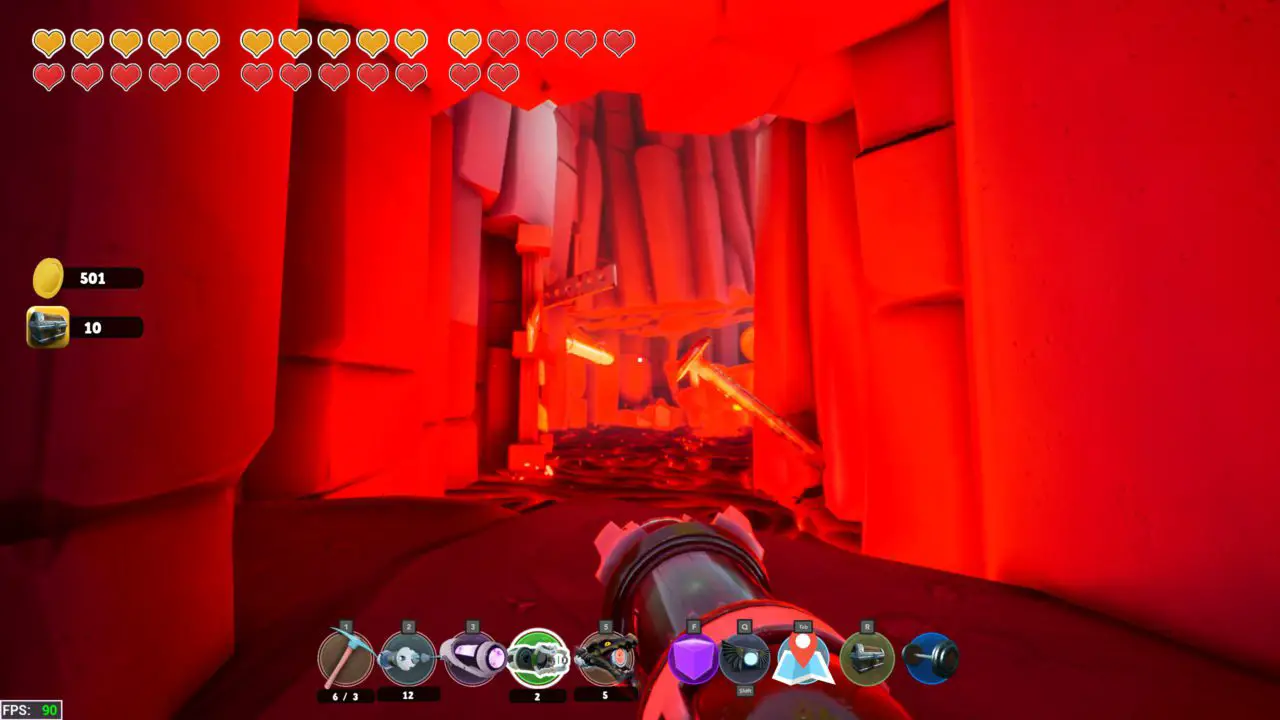
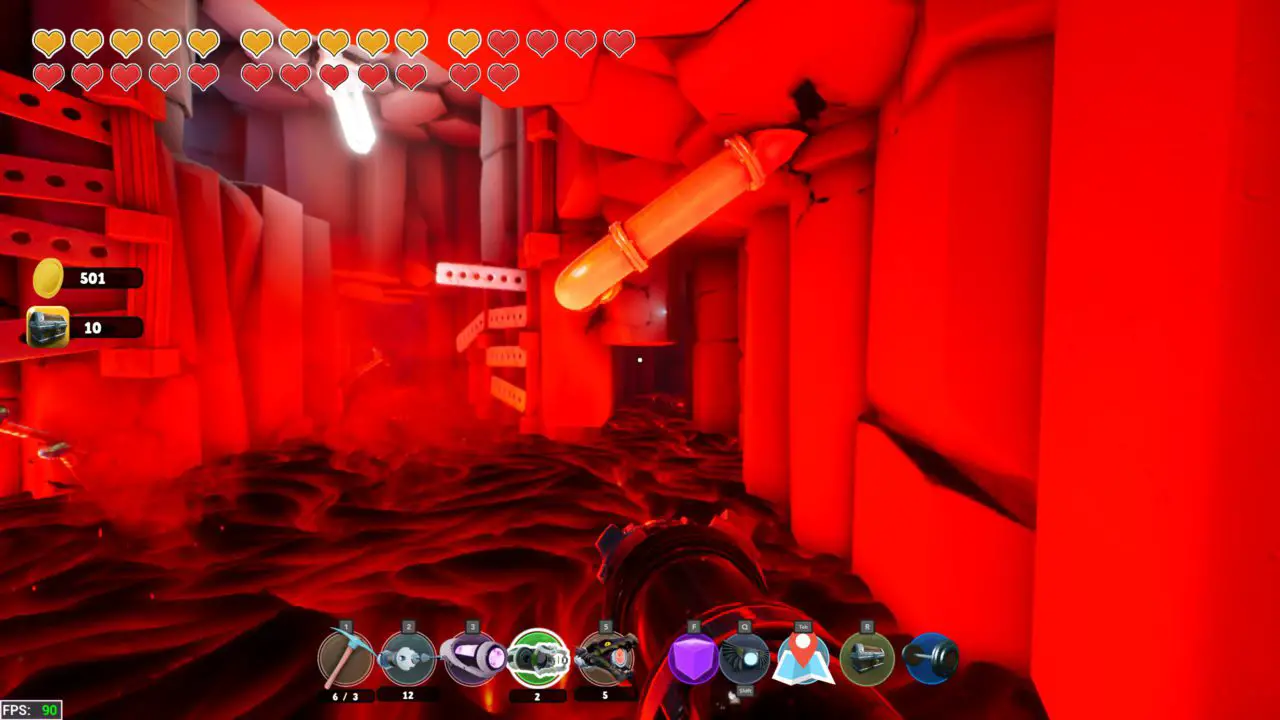
Return to the dark area that you lit with candles near the starting area in the mines. Near the last candle is a ledge that has a rock wall that can be broken. There are multiple layers but at this point you can get through all of them. Drop down to the pipe that is underneath the overlook on the left.
Once you go down the pipe break the wall and go to the other side and grab one of the large rocks. this will weigh you down when you jump into the water beside you. Sink to the bottom and get your chest.
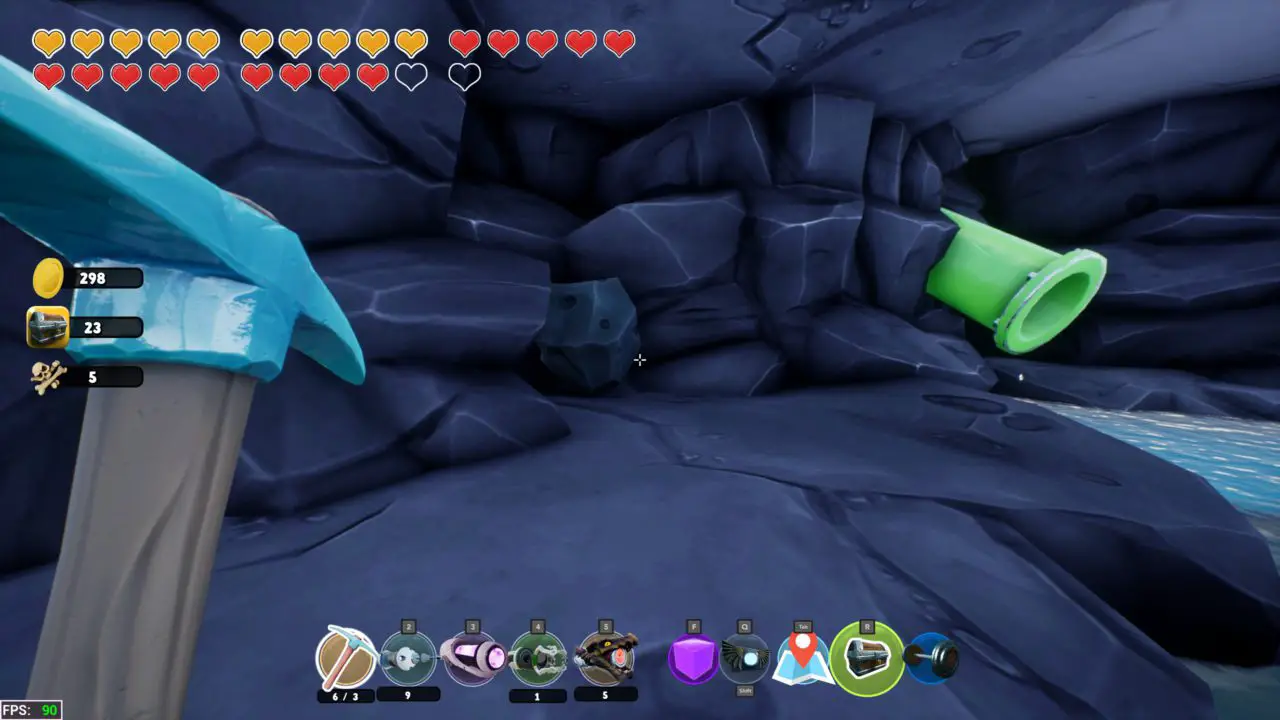
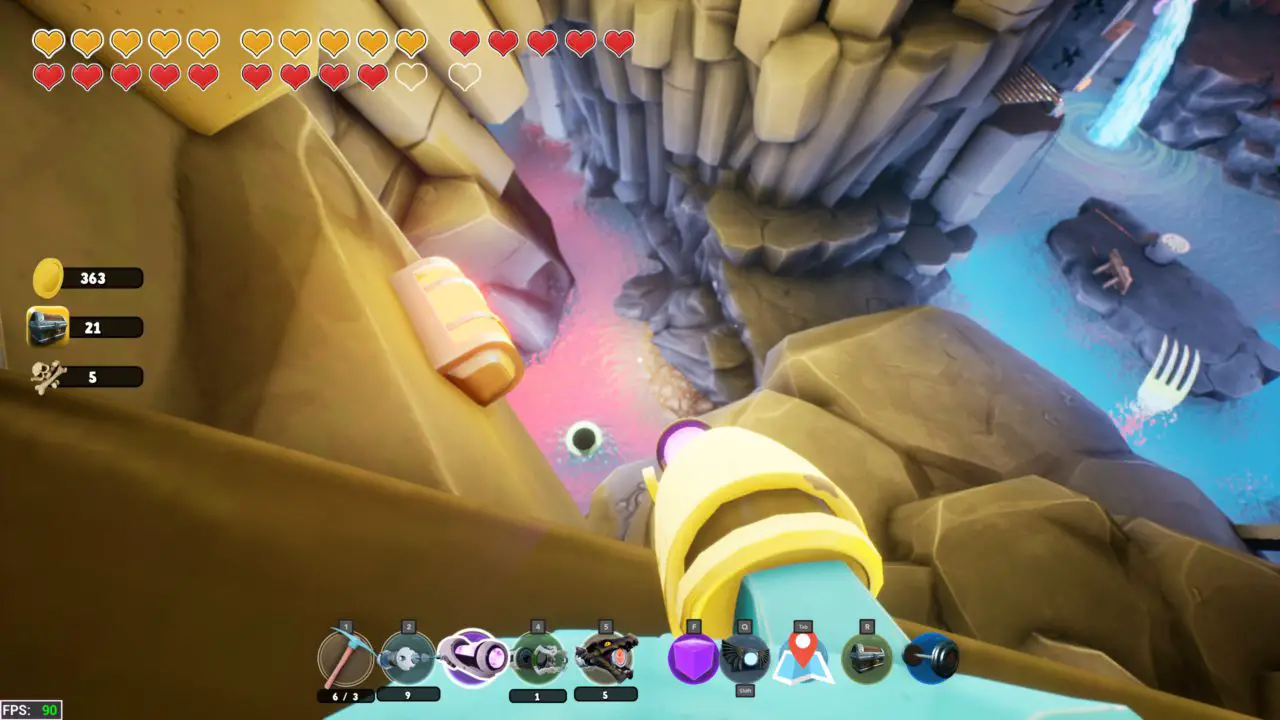
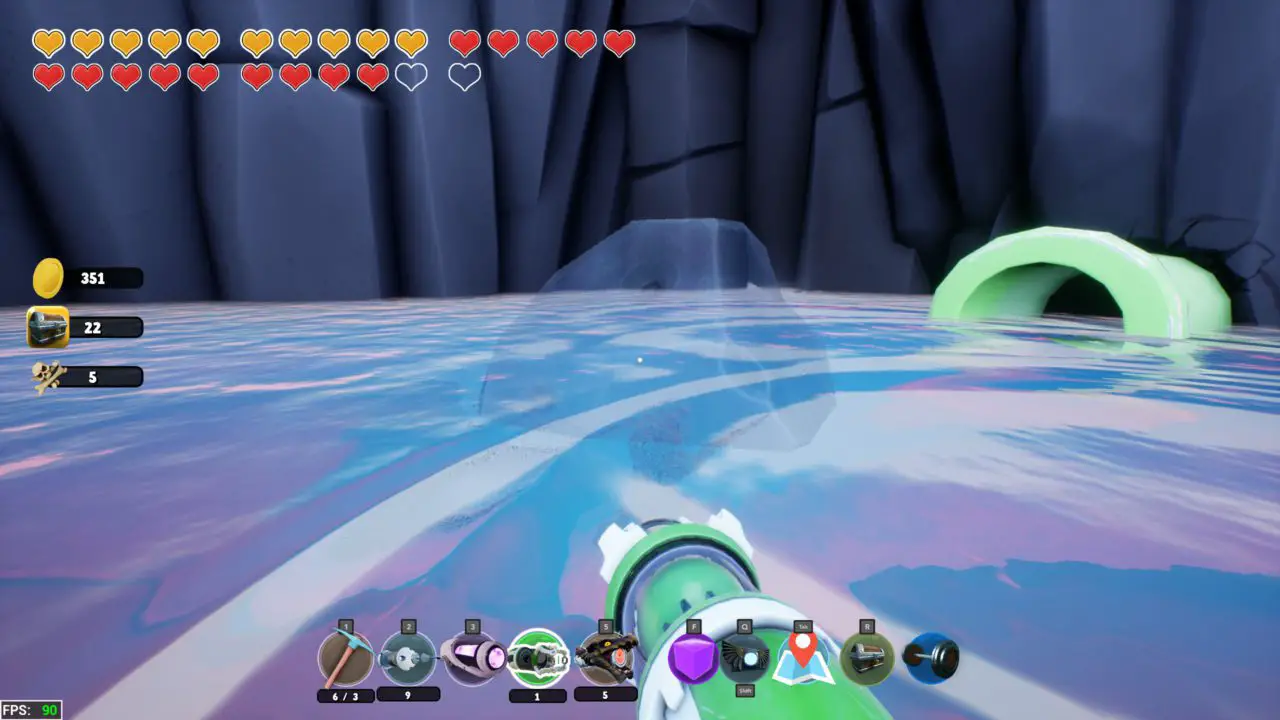
Chest #120
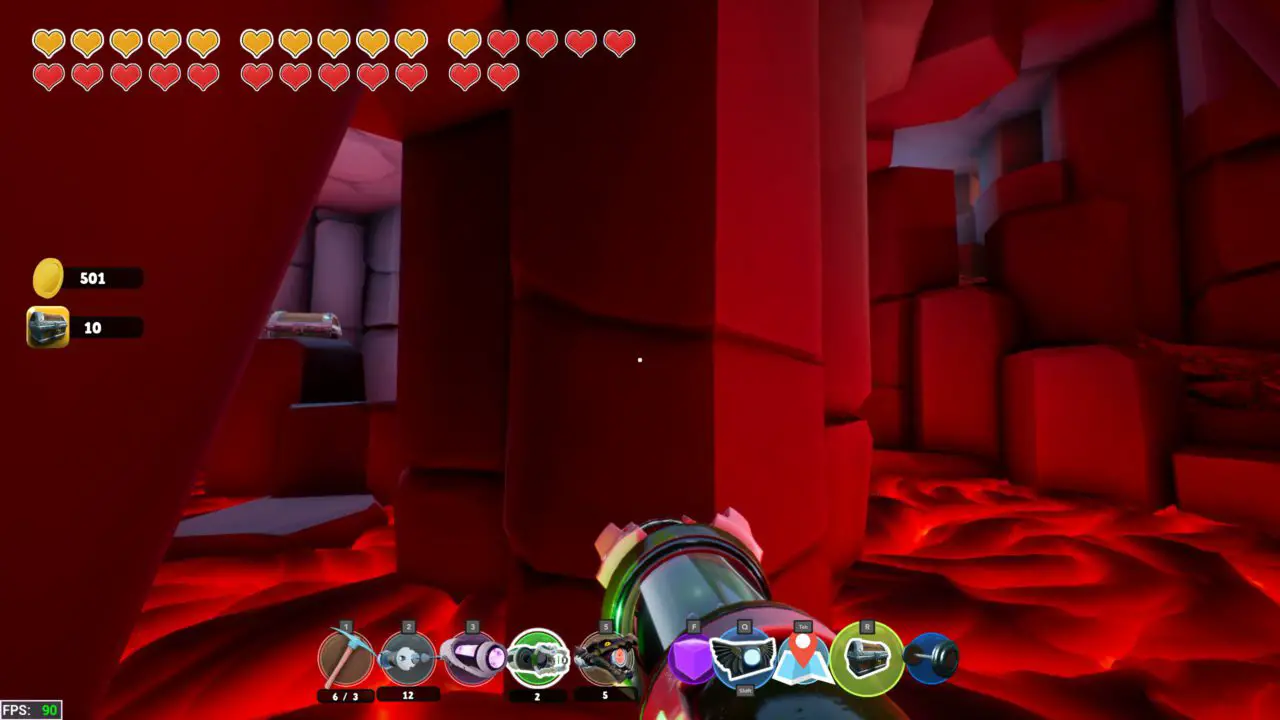
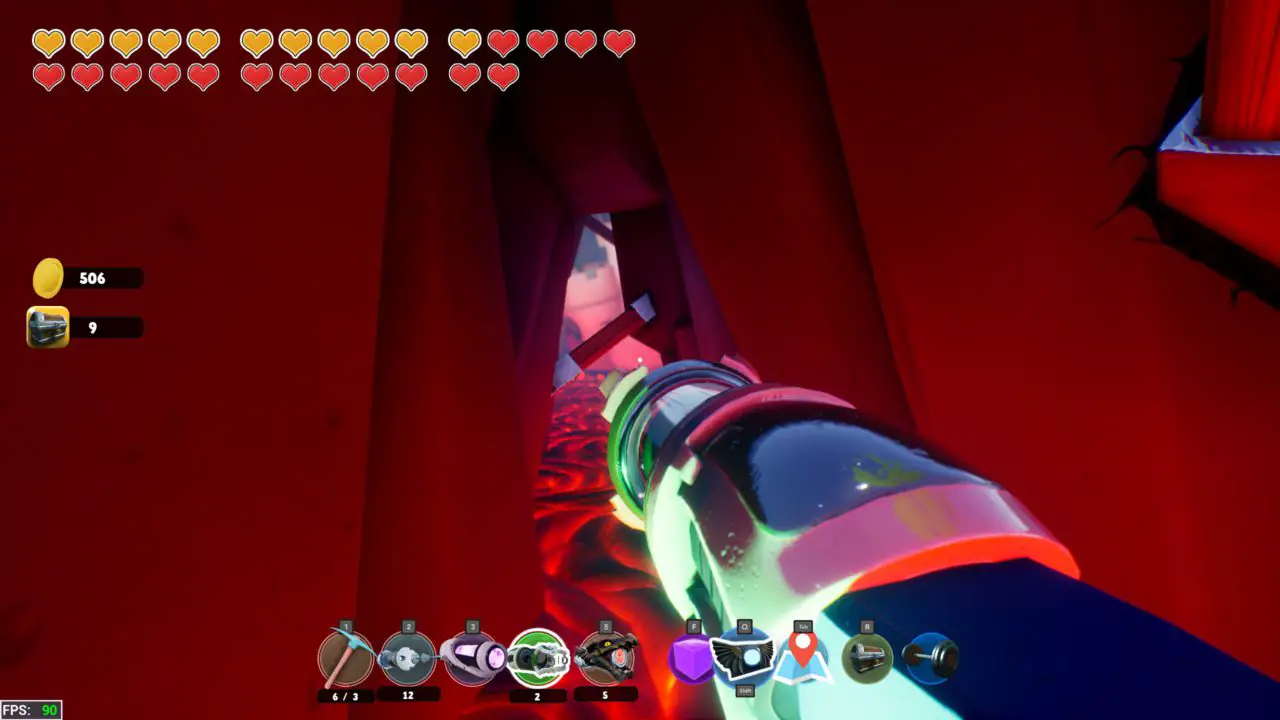
Take one of the big rocks you just used and go through the green pipe. There is another underwater area beside where you will come out and go down there to get the chest.
Chest #121
Head to the little island with a currently off jump pad and break the rocks to climb the ladder. Make your way up to the ledge where the force cube is and get the chest.
Chest #122
Behind this chest is another secret area accessed by shooting your teleport orb through the crack and into the room behind.
Chest #123
While in this secret area with the crystal with coins around it look up to the right. Get onto the ledge marked with a force cube in order to get the secret area with a chest.
Chest #124
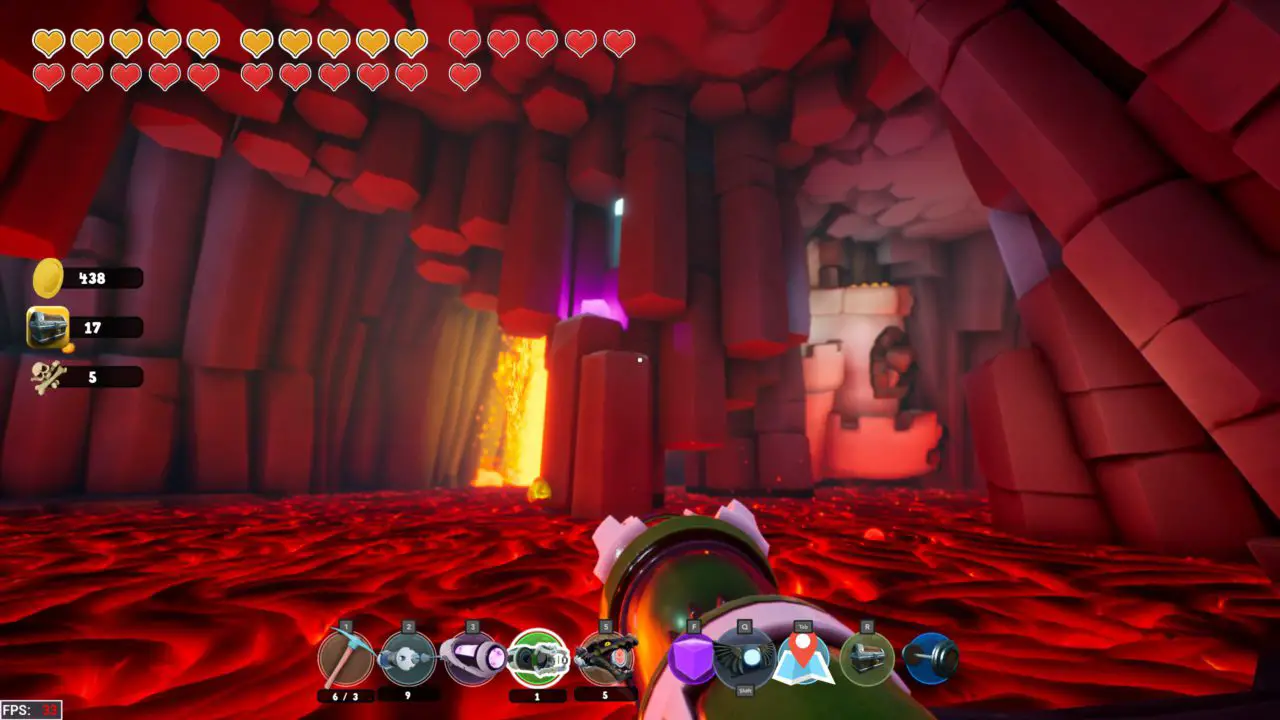
Head towards the lava area and launch your way up the green pipe with your magbelt and get in the hole up to the right. Getting to this area will give you a secret, and if you go up to the right of the crystal there will be another secret area with a chest.
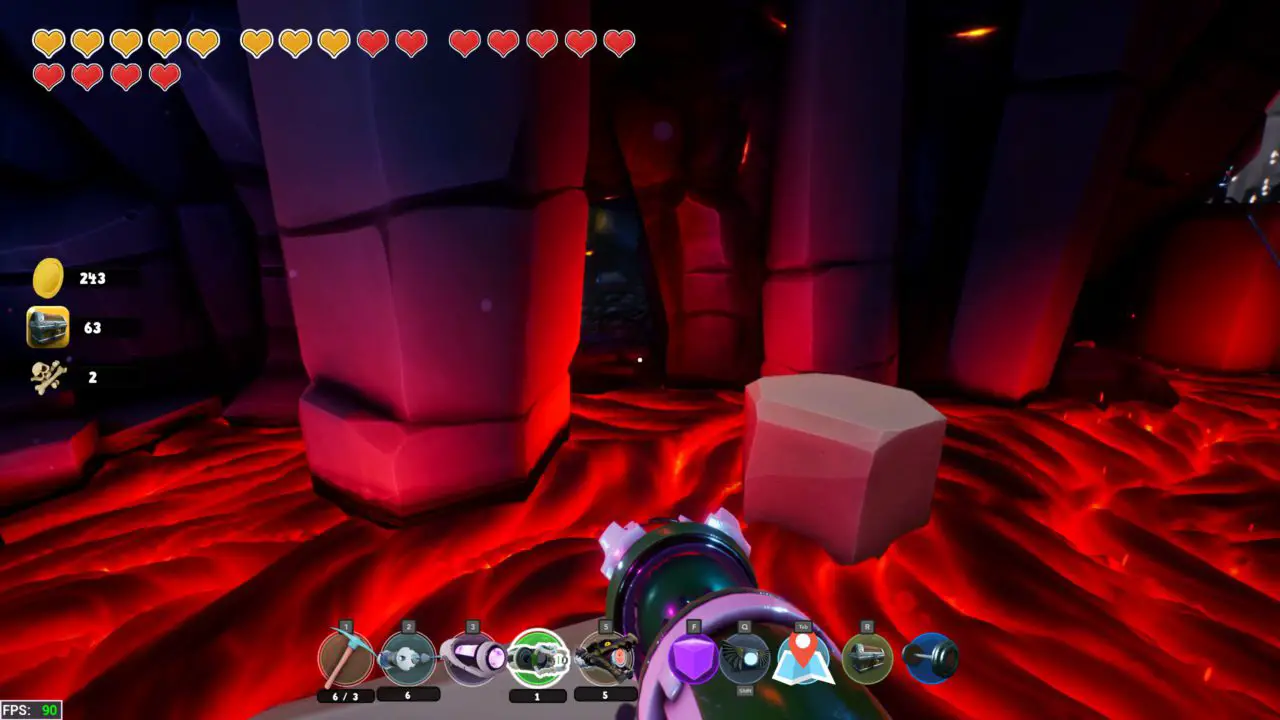
Chest #125
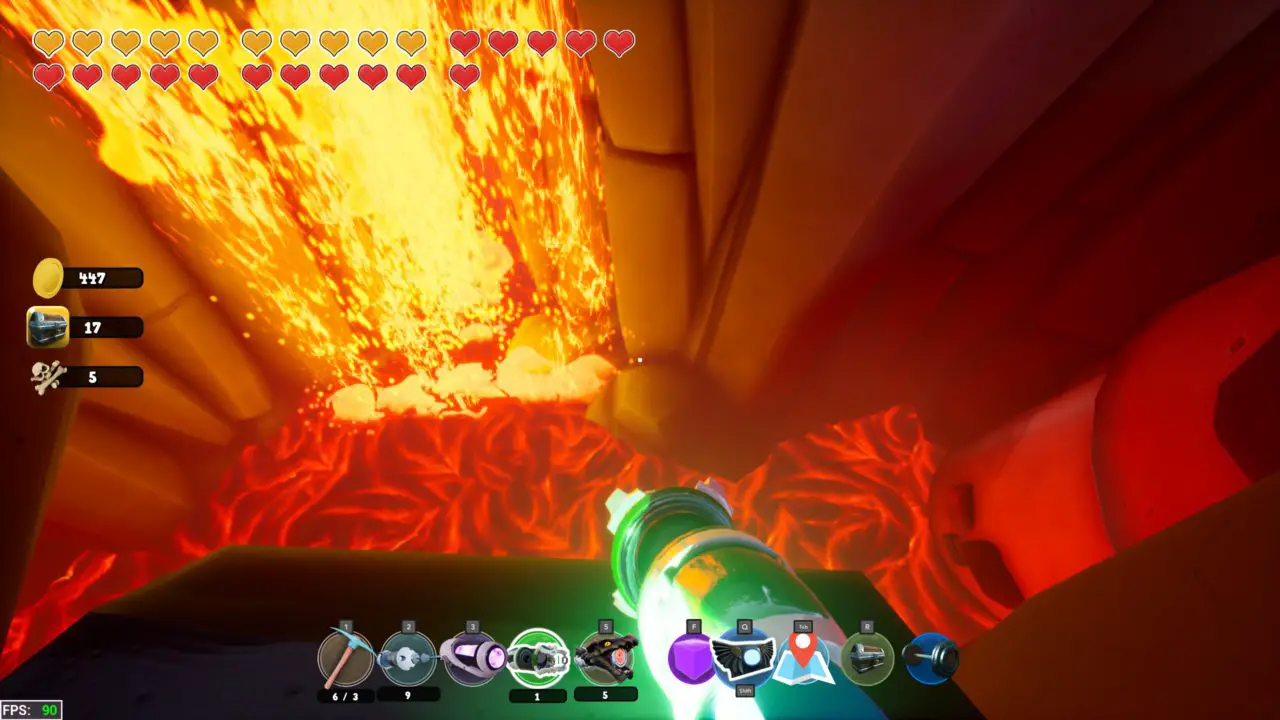
Use a force cube as a platform on the lava and get a bit closer to the hanging pillars with gold so you can pull them down. Climb up them to find to get to a secret area with a chest.
Chest #126
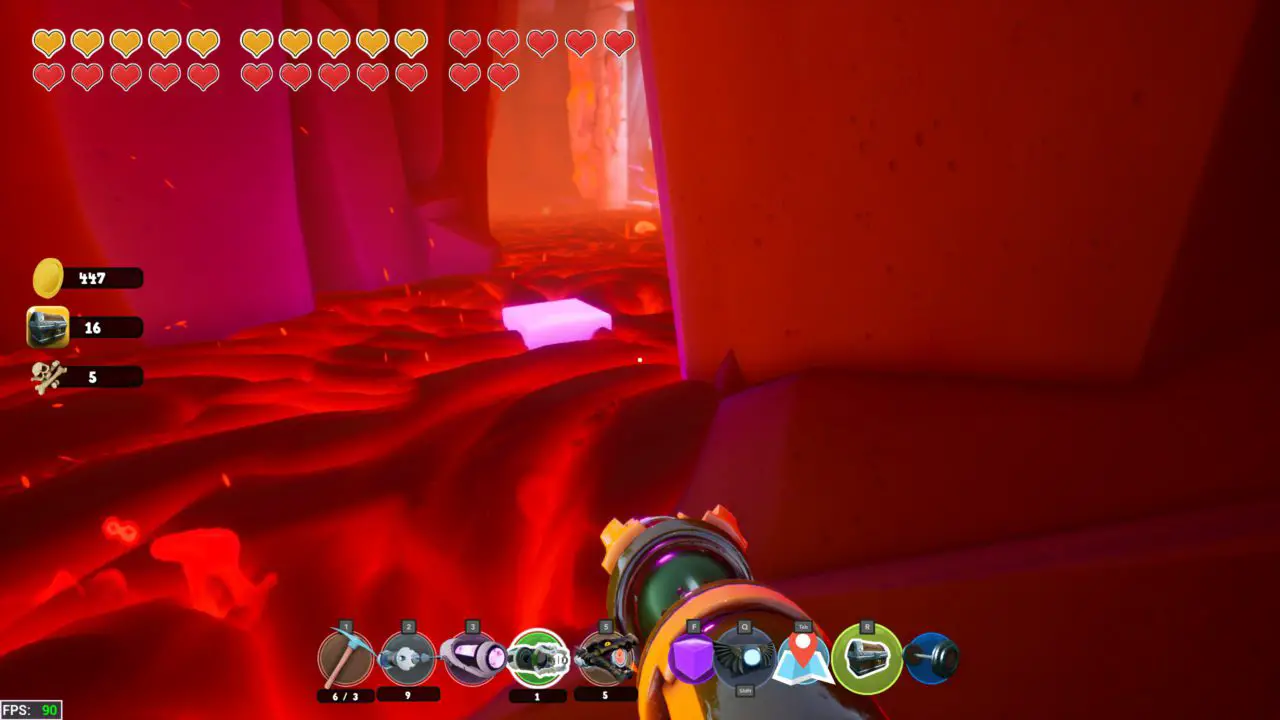
From the last chest look toward the lava-waterfall (which sounds like an oxymoron) and jump down to the rock in front. Hug the walls and jump from stone to stone to get past the falls and make it to the building. I used a force cube as a middle point when getting around the big rock jutting out. The first chest will be under the building as seen in the picture.
Chest #127
From the door of the building we just got to look up to see your chest. Use the metal near the door to launch up to the chest.
Chest #128 & 129
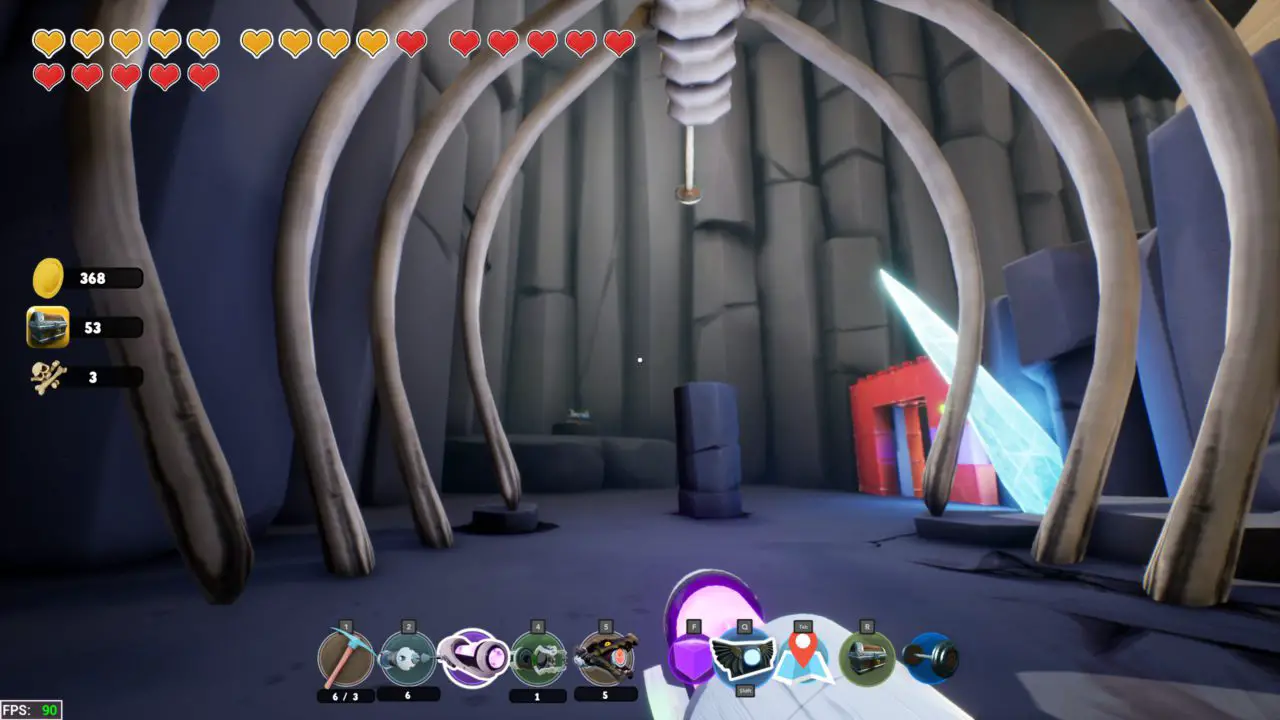
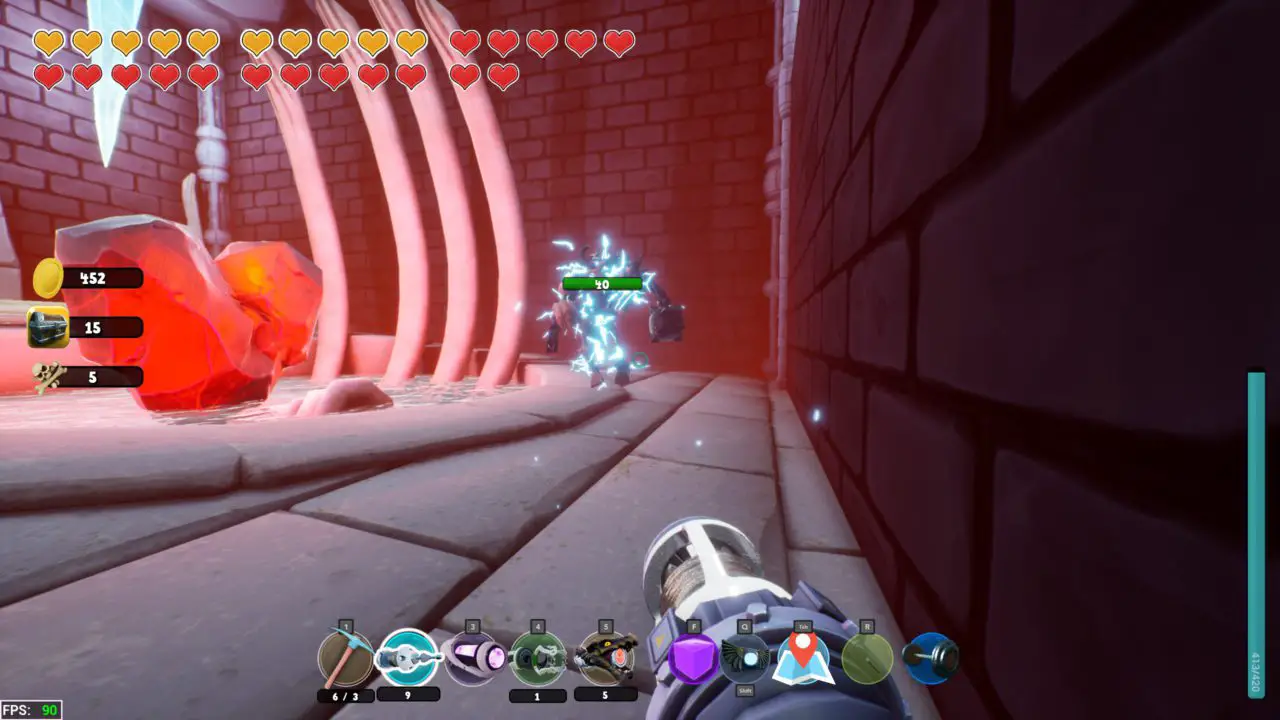
To get past the gate this will require you to have your force cube fall through all three rings in quick succession. This can take multiple tries to get right, but stand underneath the double and place it in the middle of the upper ring. Once you let it go, jump quickly to the other single one and place it as you are falling. Once you are inside hit the heart with your pickaxe. A swath of enemies will spawn, get rid of all enemies on the first floor BUT a single 40HP skeleton. Get him to come to the wall leading to the second level and launch yourself off of him with the magbelt to get up.
Once you are on the second level kill the 2 enemies on it if you haven’t already. Pull down one of the shield skeletons with your force gun by tugging on their shield. ثم, connect his shield to one of the skeletons that are still on the top level. Walk up the force beam and kill all the enemies on this top level. Press the button to turn on the jump pad and then kill all remaining enemies in the room. Now you can take the jump pad up and get your prizes! Feel free to head back to Cage Town and get your final upgrade for the teleport gun (It is super helpful).
Chest #130
From the gate of the last bone pile go back towards the lava waterfall and where the force cube is marks an area that you can jump up and find a secret chest.

Chest #131
This chest requires that you get a battery and a matchstick. The matchstick is located over in the room you had to dive under to get to, and the battery is with the guy who got you the achievement Too Hot. Bring these back and place them where they need to go. Rotate the jump pad so that it faces the lava area. Use two large rocks, located near the base of the green pipe facing the lava area, and place them on the pressure plates to close the gate and make the water levels rise.
Water should now be shooting onto the lava, allowing you to mine down and collect the chest underneath the now obsidian rock.
Chest #132
Head back to the area that we found in Secret #5. Get onto the opposite side of the room and magbelt along the yellow pipe. On your right will be an opening which leads to a secret area with a chest.
Chest #133
Continue along this main tunnel and magbelt between the beams and then launch yourself at the large barricade of wood and metal. Hovering low against the lava you can get by to a secret area and chest behind.
Chest #134
Head back to the open area out front of Cage Town and go up the right ledge shown. Magbelt across the gap and stay against the right wall until you find a breakable wall that contains a secret area and a chest.
Chest #135
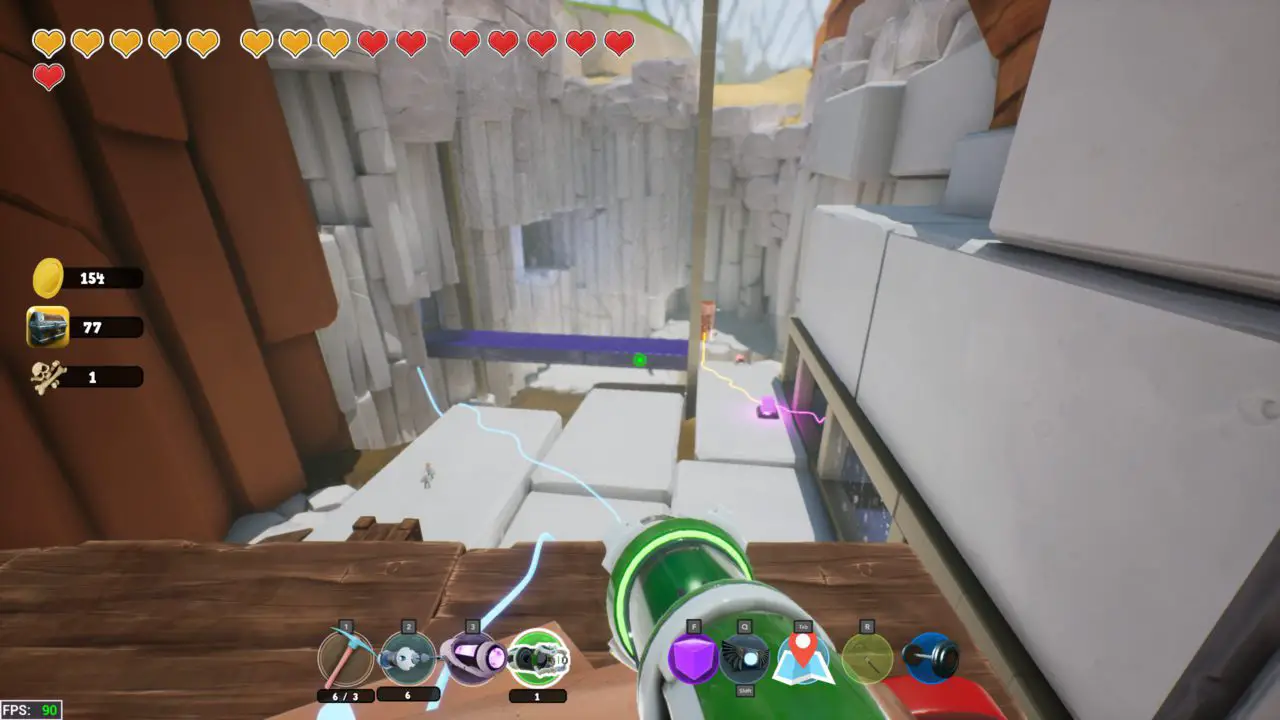
This chest requires a good amount of parkour to get up to. Start at the blue pipe as shown and launch yourself up to the magnet. Once you there launch yourself up further and follow the nails. You will get to a large gap with a wooden board sticking out. You will need the upgraded teleportation gun to make this shot across while running and jumping.

Now that you have crossed keep using the magbelt on the nails and keep going up and along the rocks. Once you get to the point where there are rocks below go to the crack were the force cube is and drop down to the next secret area with the chest.
Chest #136
In the entryway to the area around Cage Town, where you first see the town from, there is a secret area with a chest that is up and to the left of the leaking pipe.
Chest #137
Head back to the first puzzle room in the industrial area. It was inaccessible earlier as you need the teleportation gun upgrade to get it (as far as I can tell). Shoot it up in that crack in the top of that wall.
Chest #138
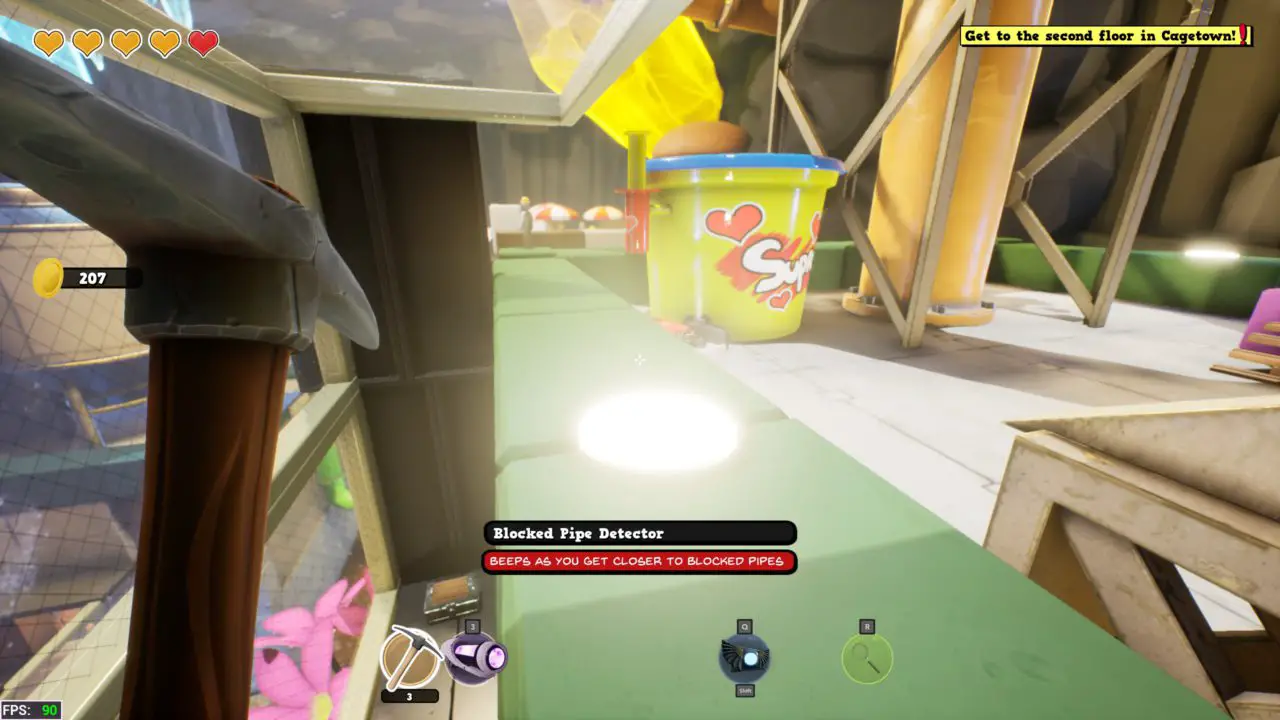
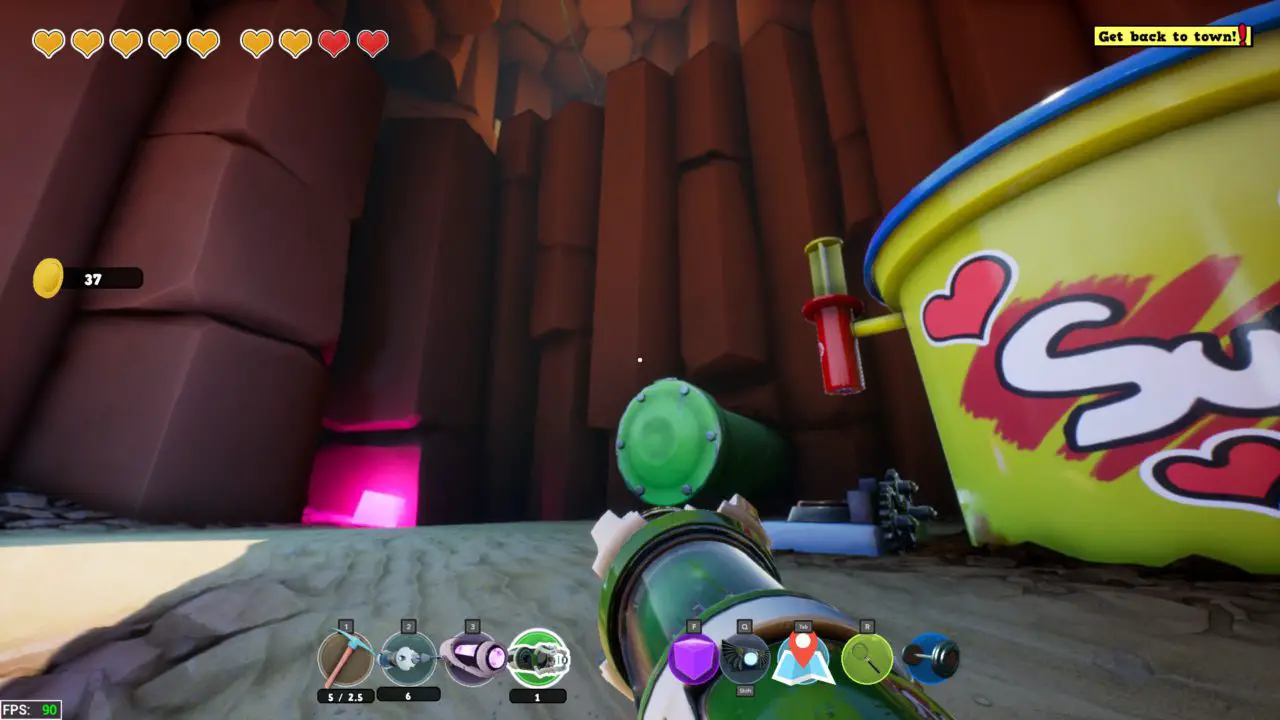
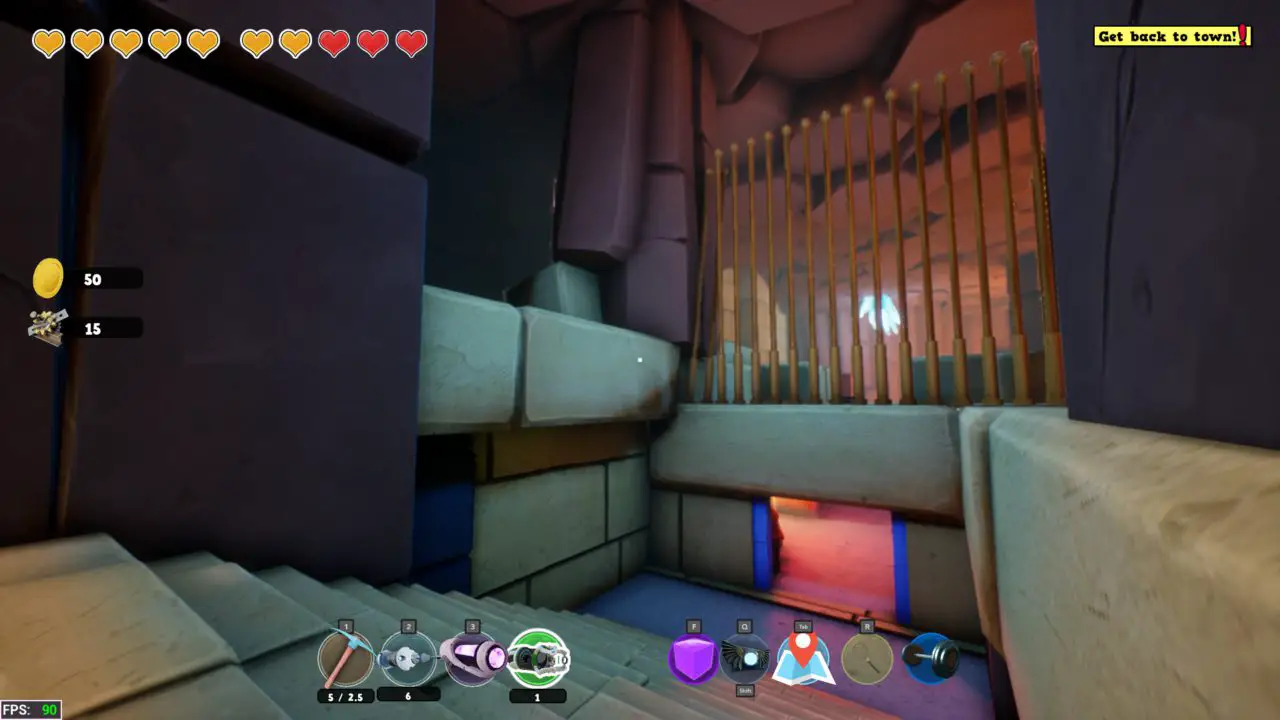
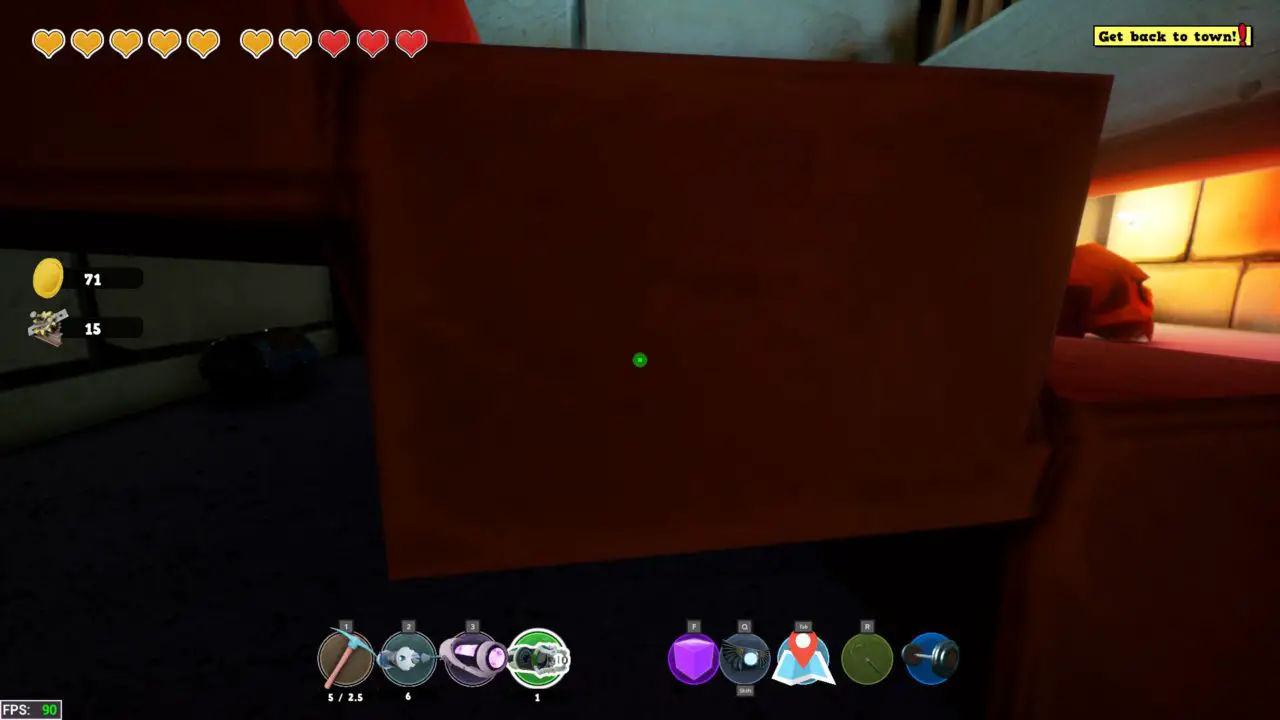
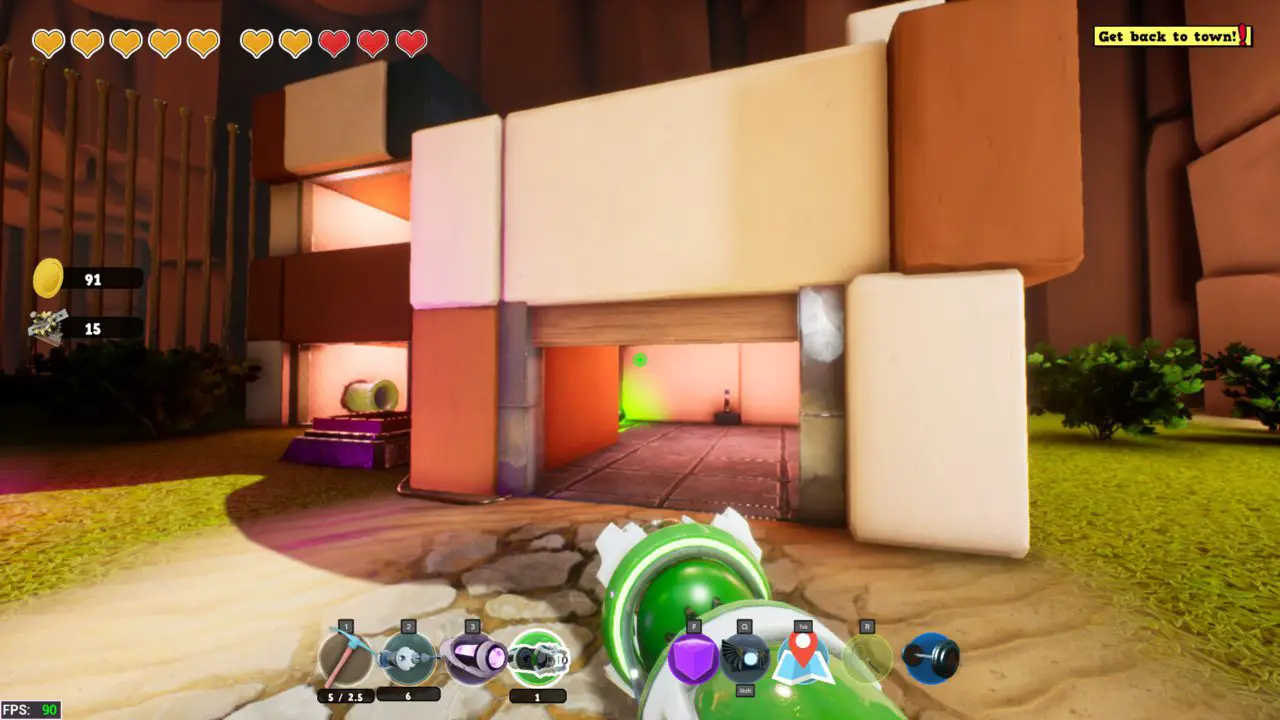
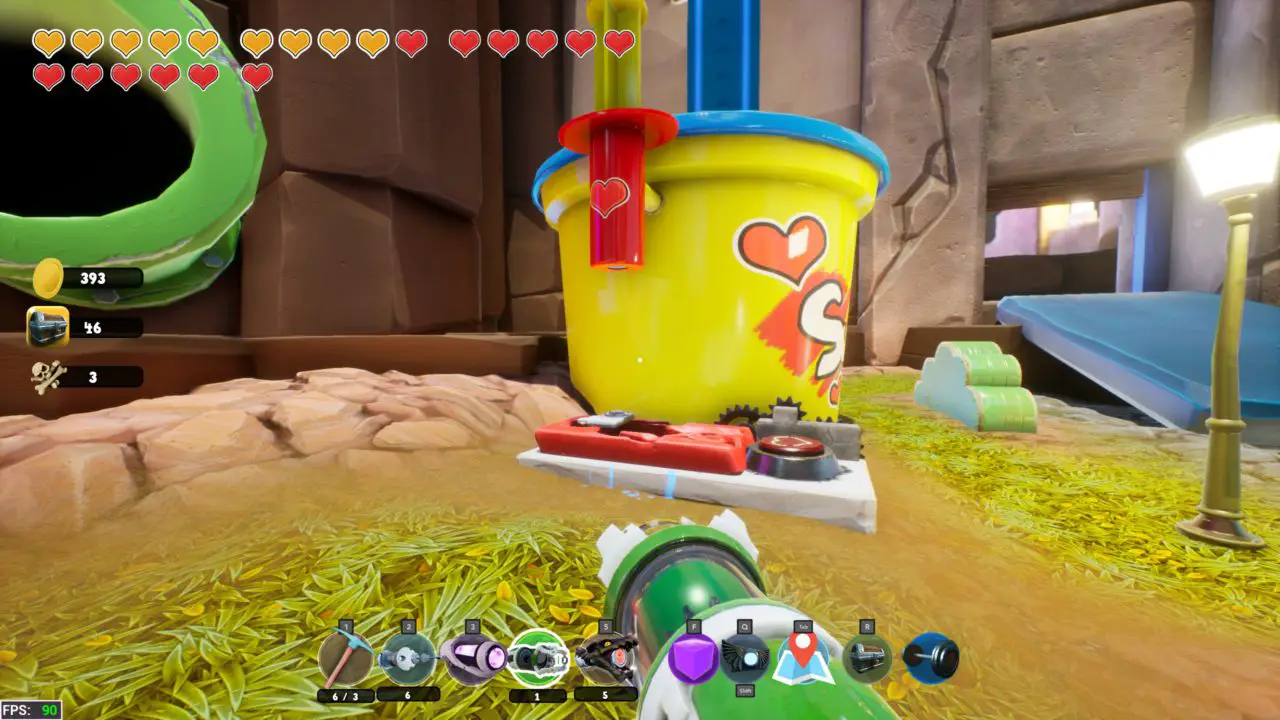
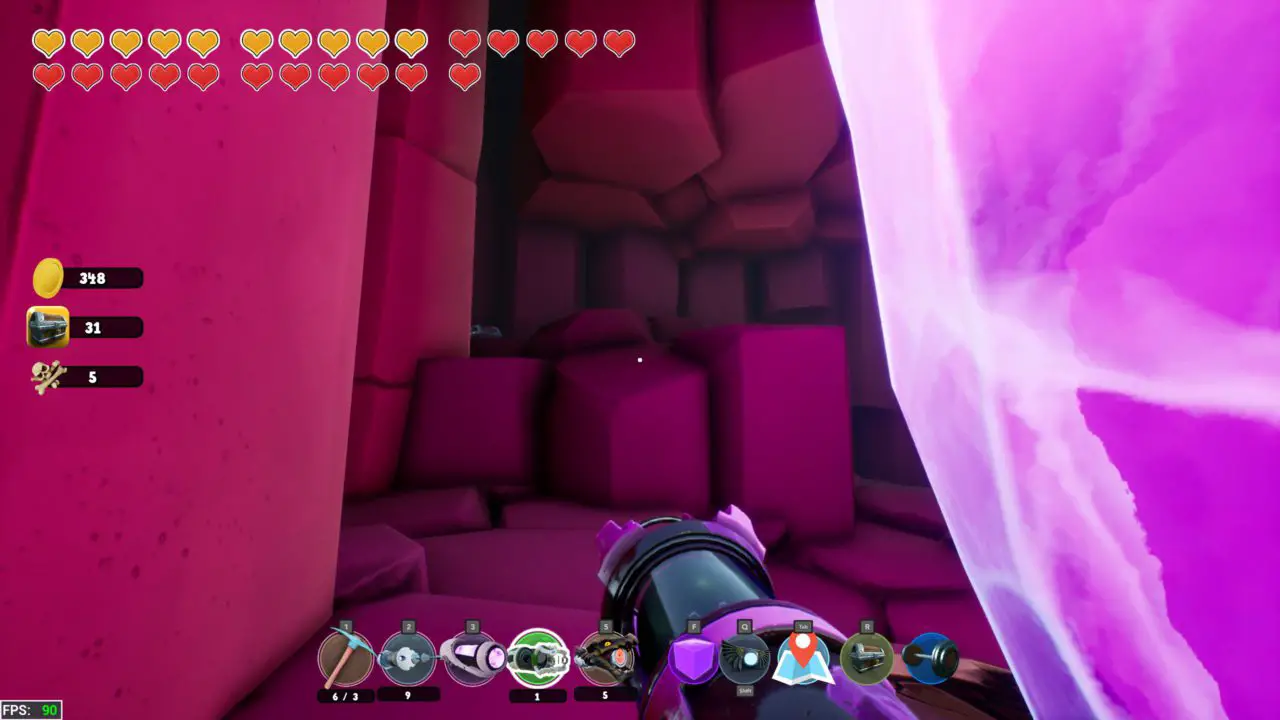
تهاني, you are now headed to the last area in the map. Afterwards you will have 100% في اللعبة. Take the boss pipe in the central hub and go up the sand dunes and collect all the random coins (ولم لا؟?). Make your way back towards the town and head over towards the orange flowers. Once at the orange flowers go up all the ledges with the teleportation gun.
Up on the right is a large bucket. Make your way up the rocks using your tools until you get right up to it. You will want to scale the side with the handle on it, as both it, and the ring around the bottom is metal and can be launched from. You will find the chest at the bottom of the bucket.
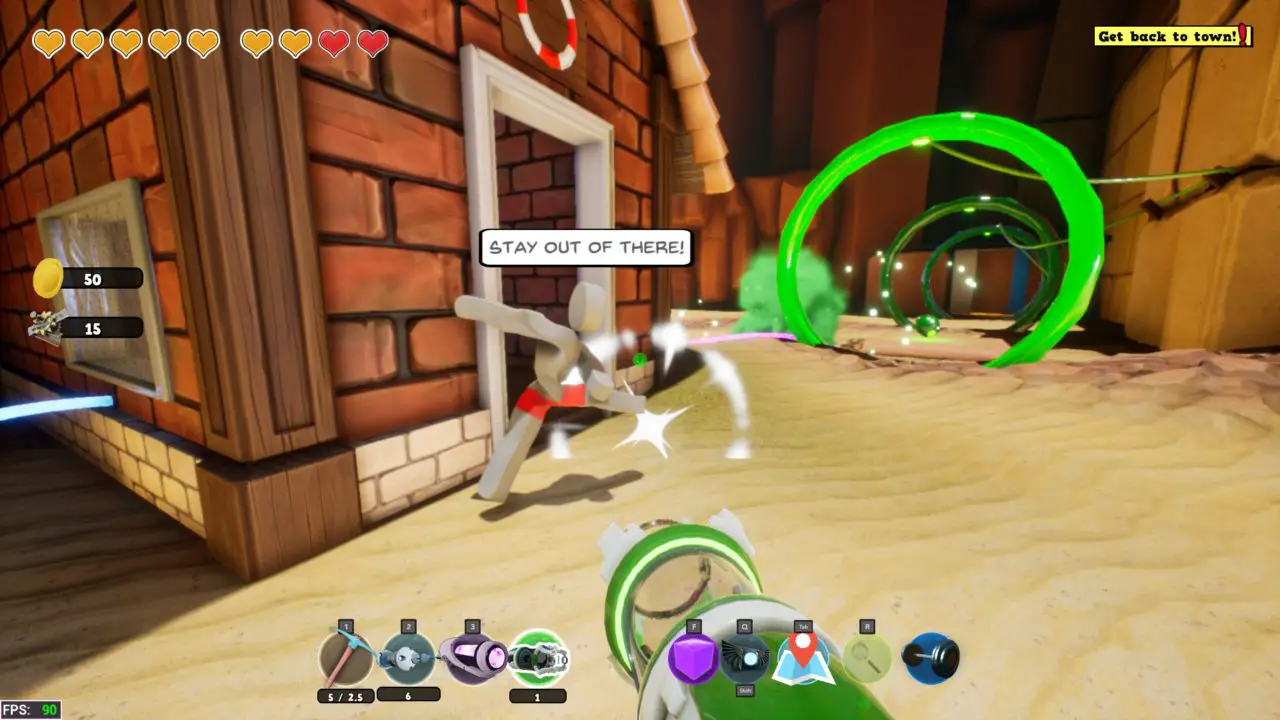
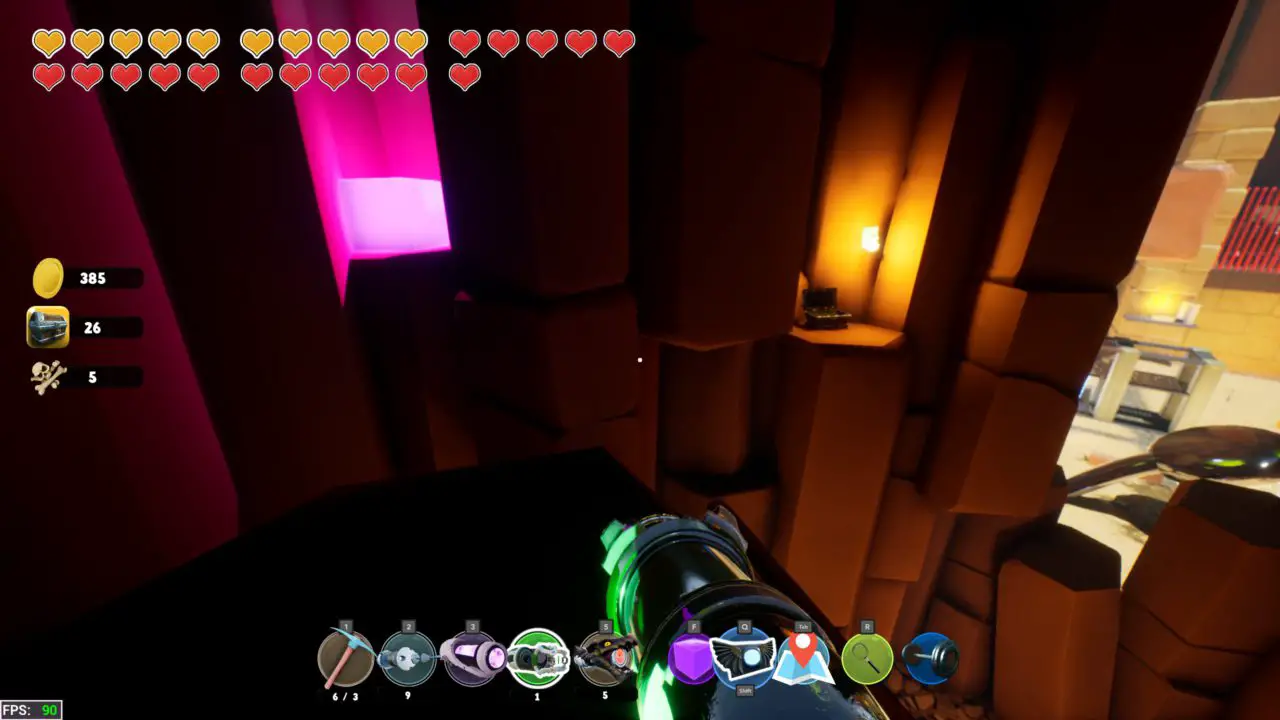
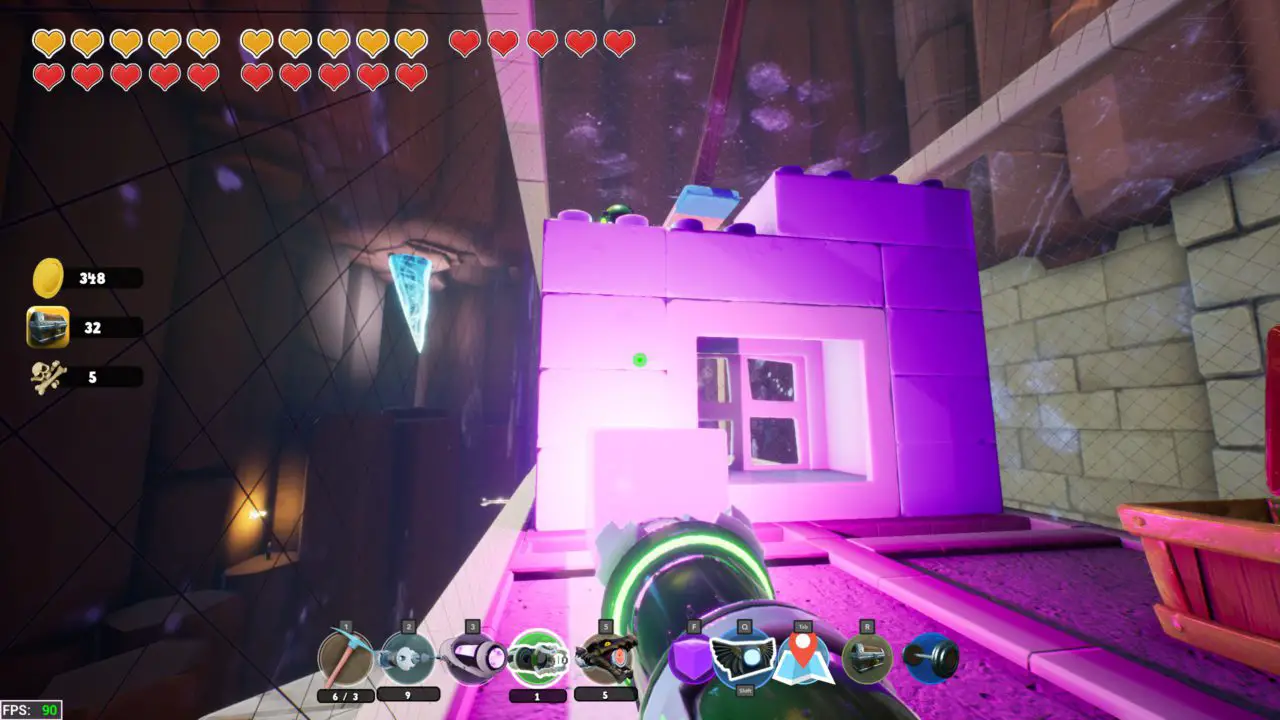
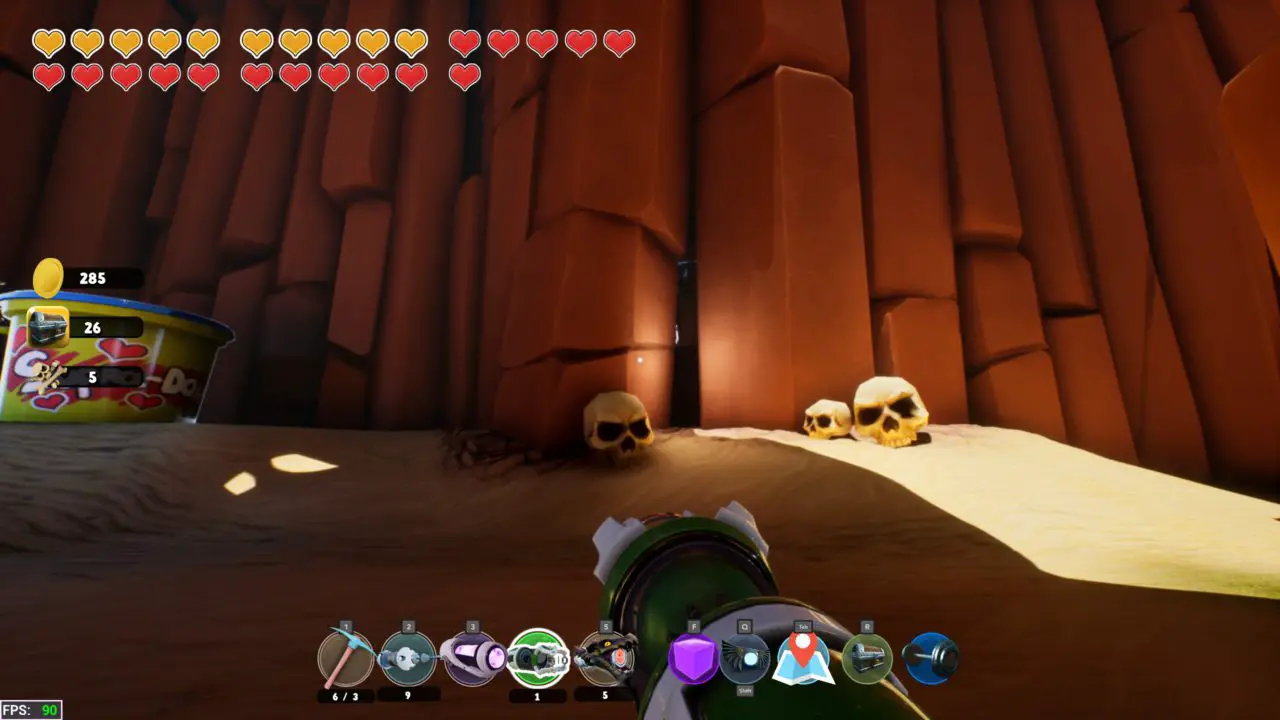
Chest #139
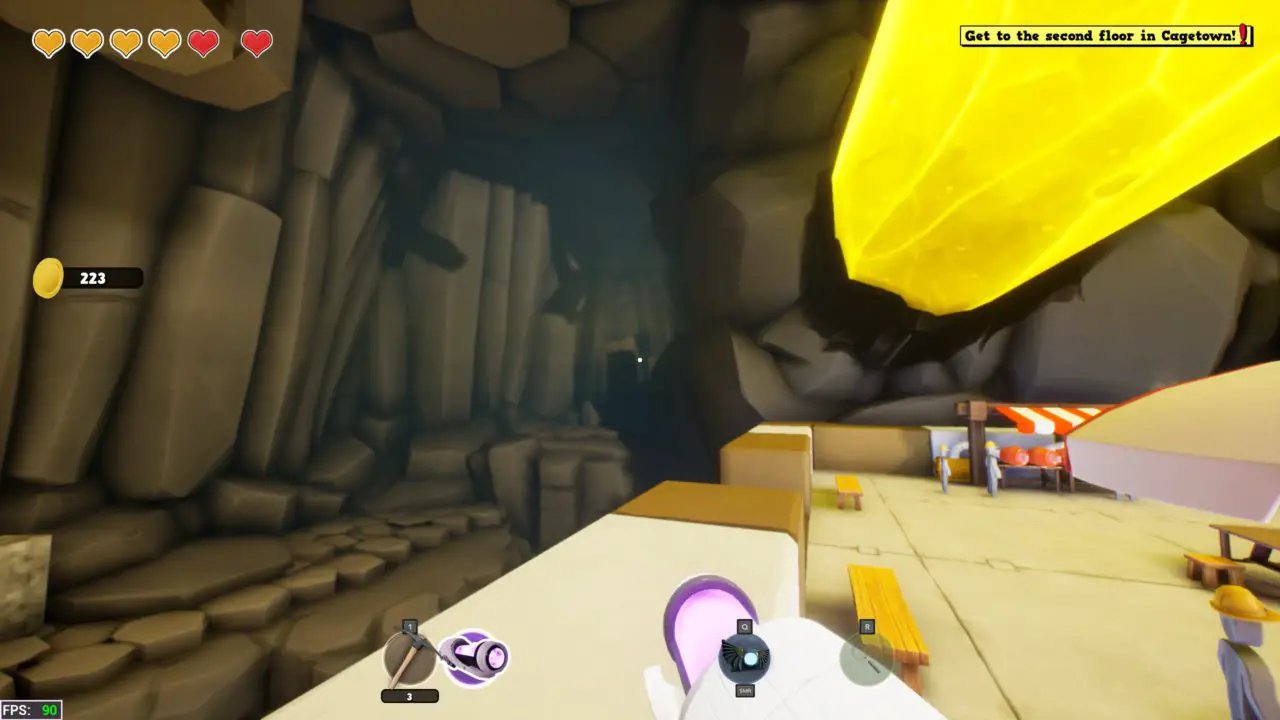
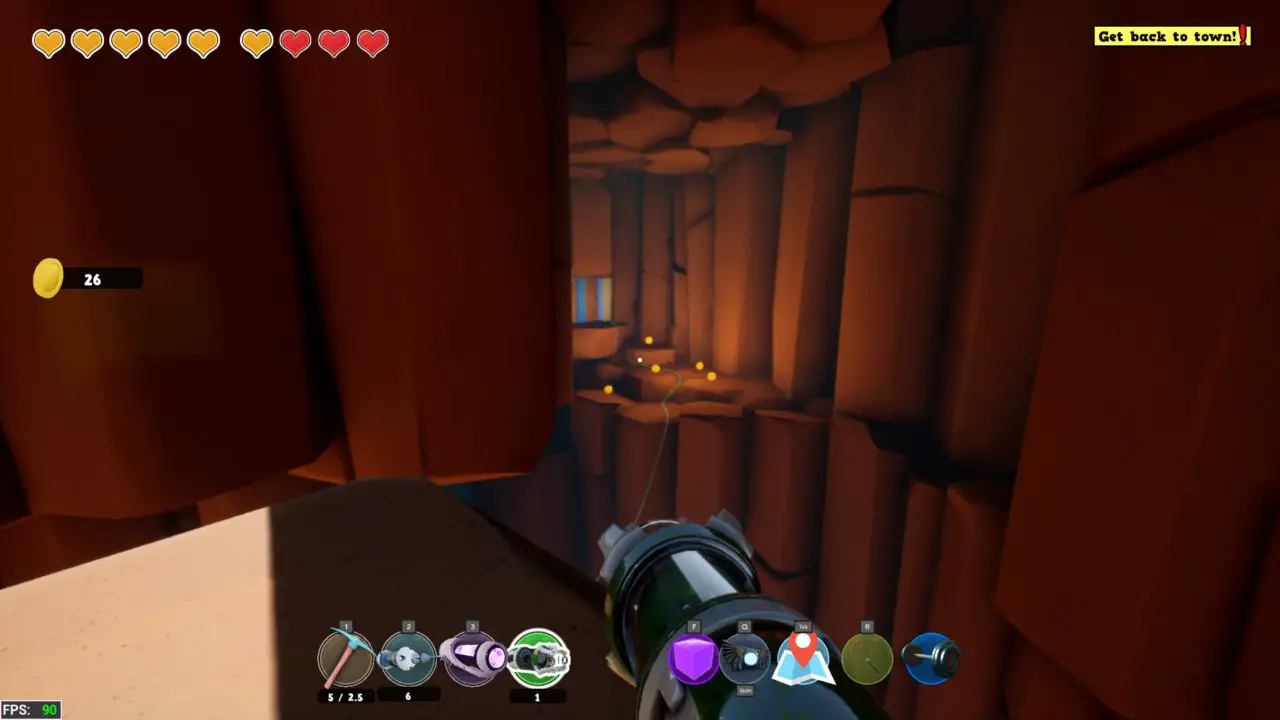
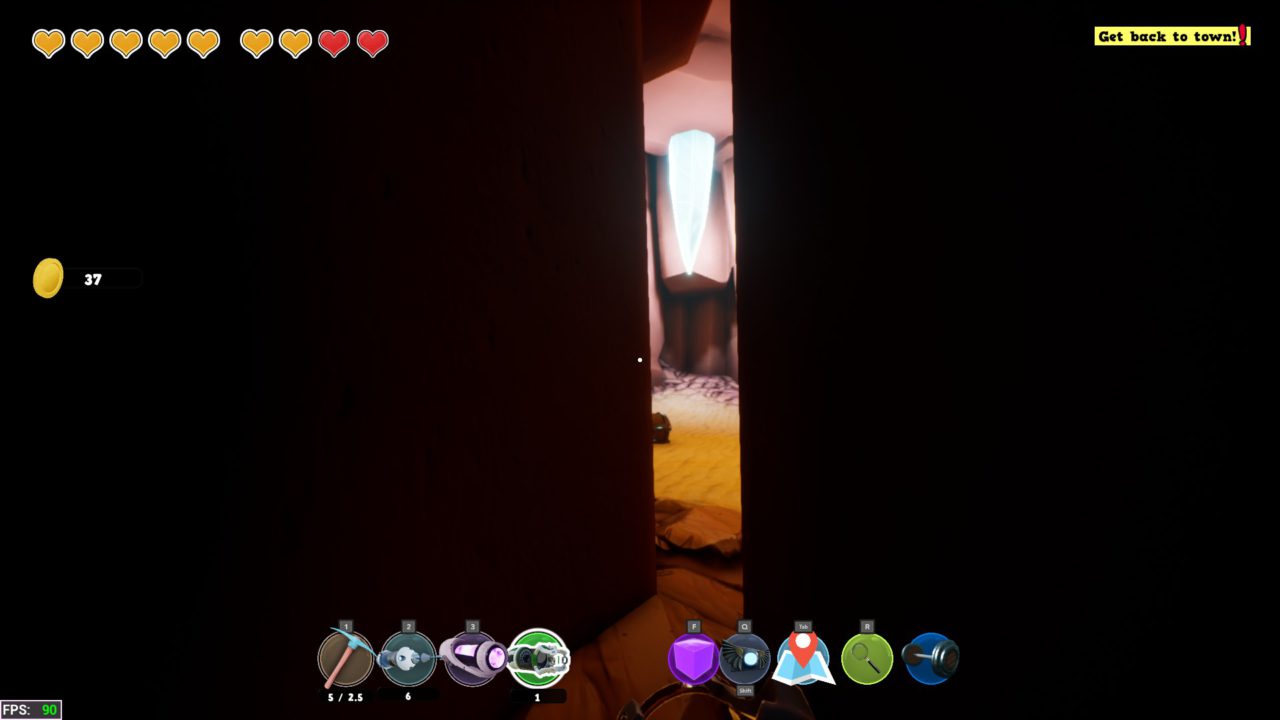
You cant really miss this one, but its in the tunnel before having to go up the mine shaft after opening the green pipe.

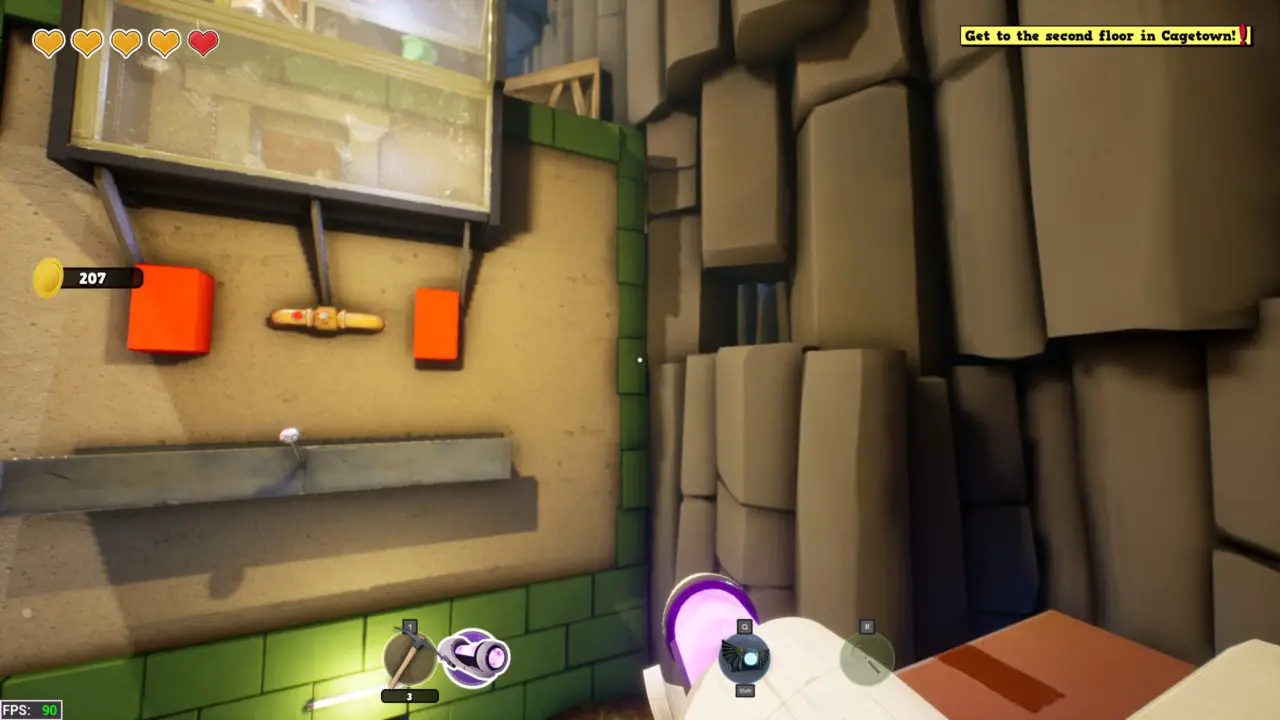
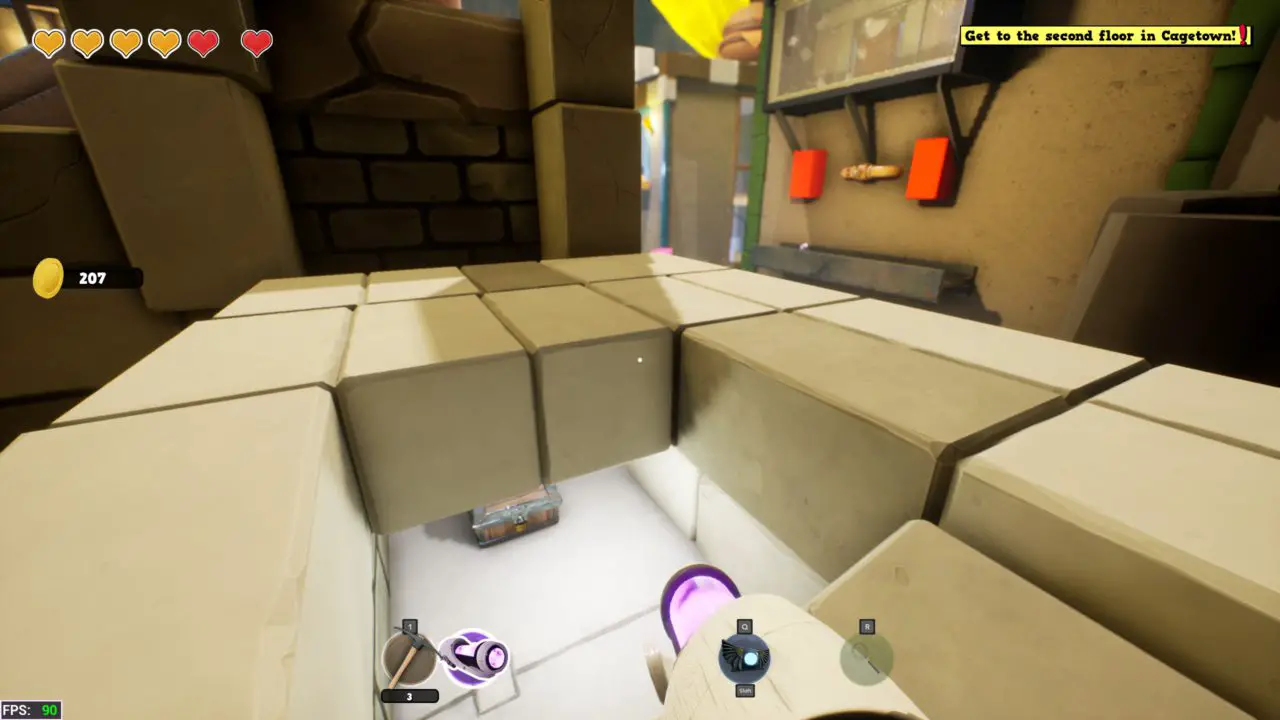
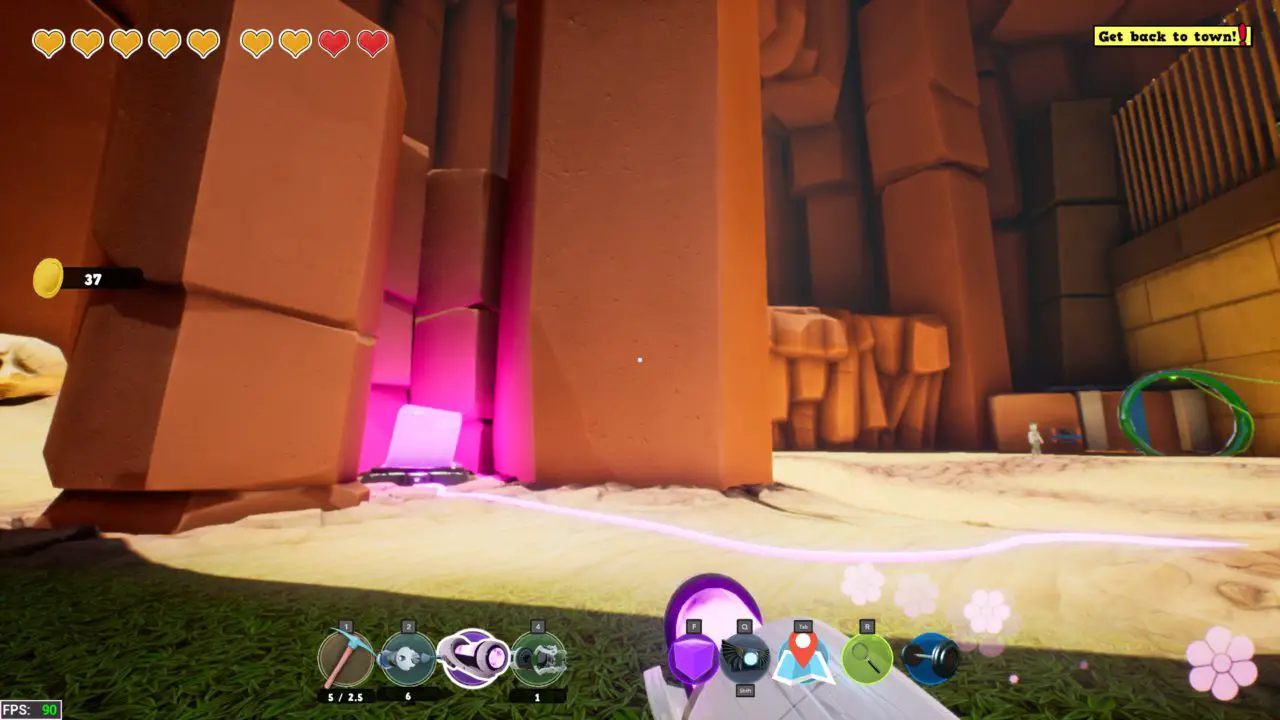
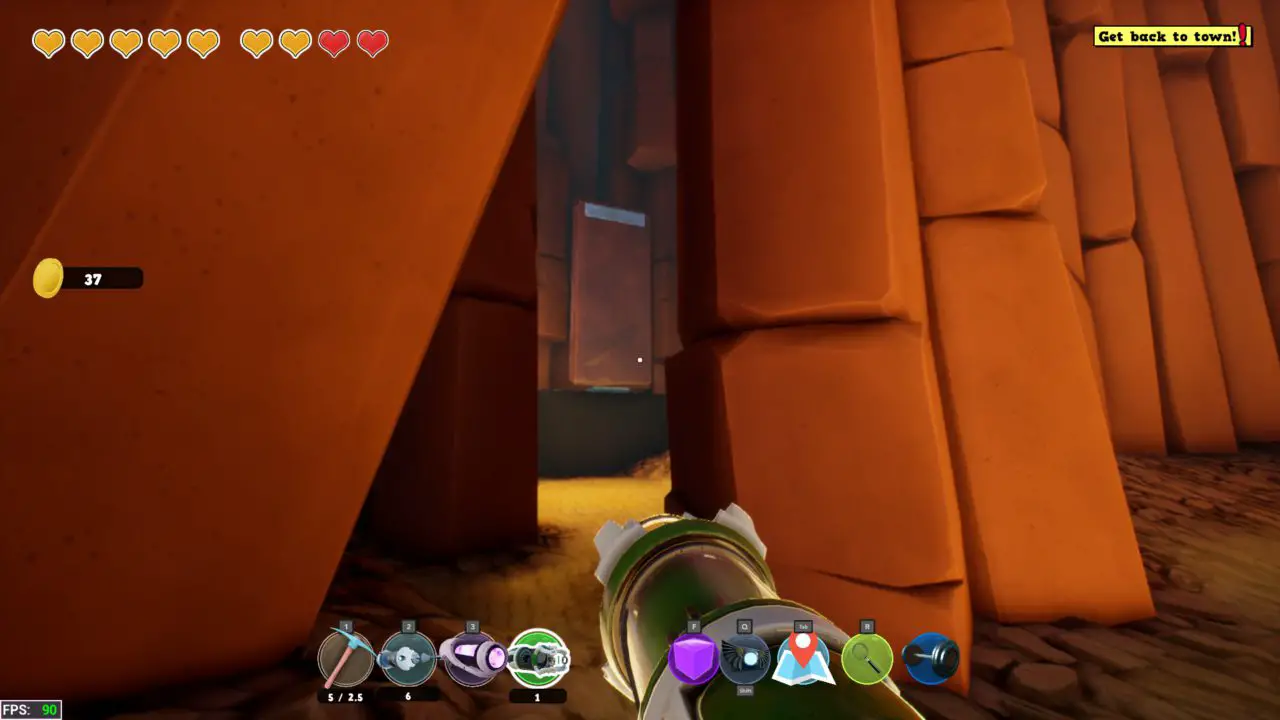
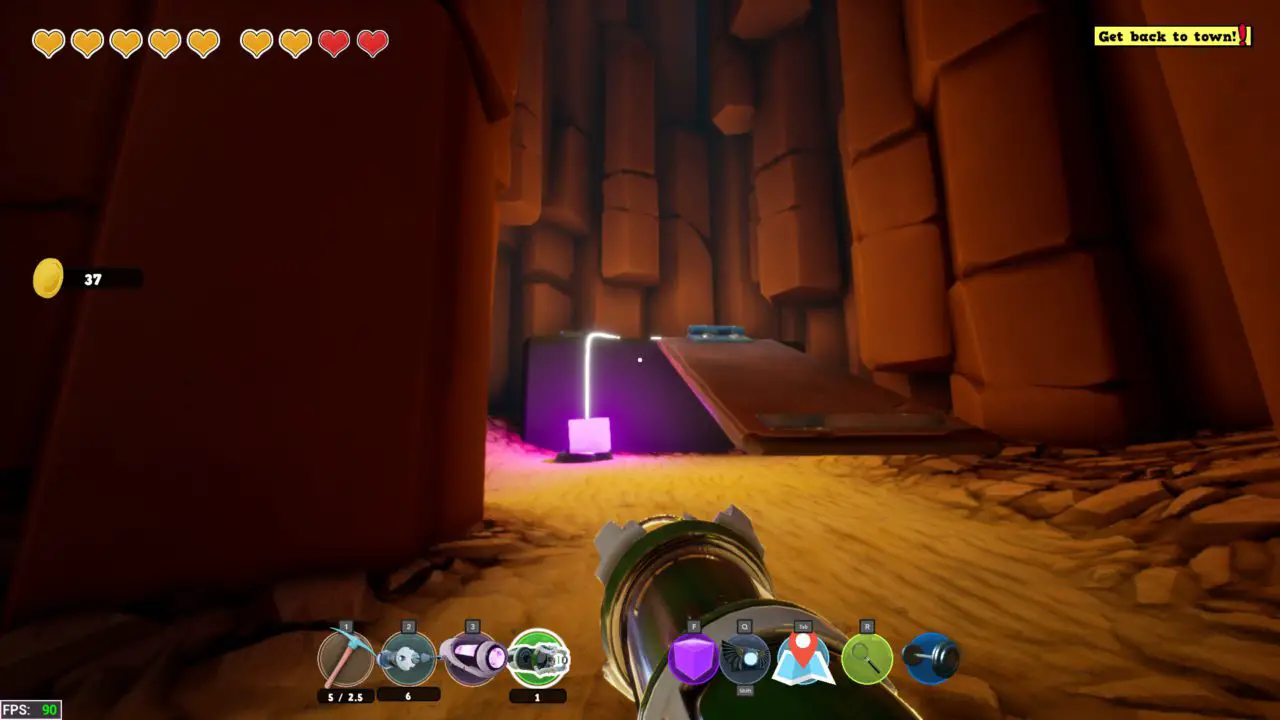
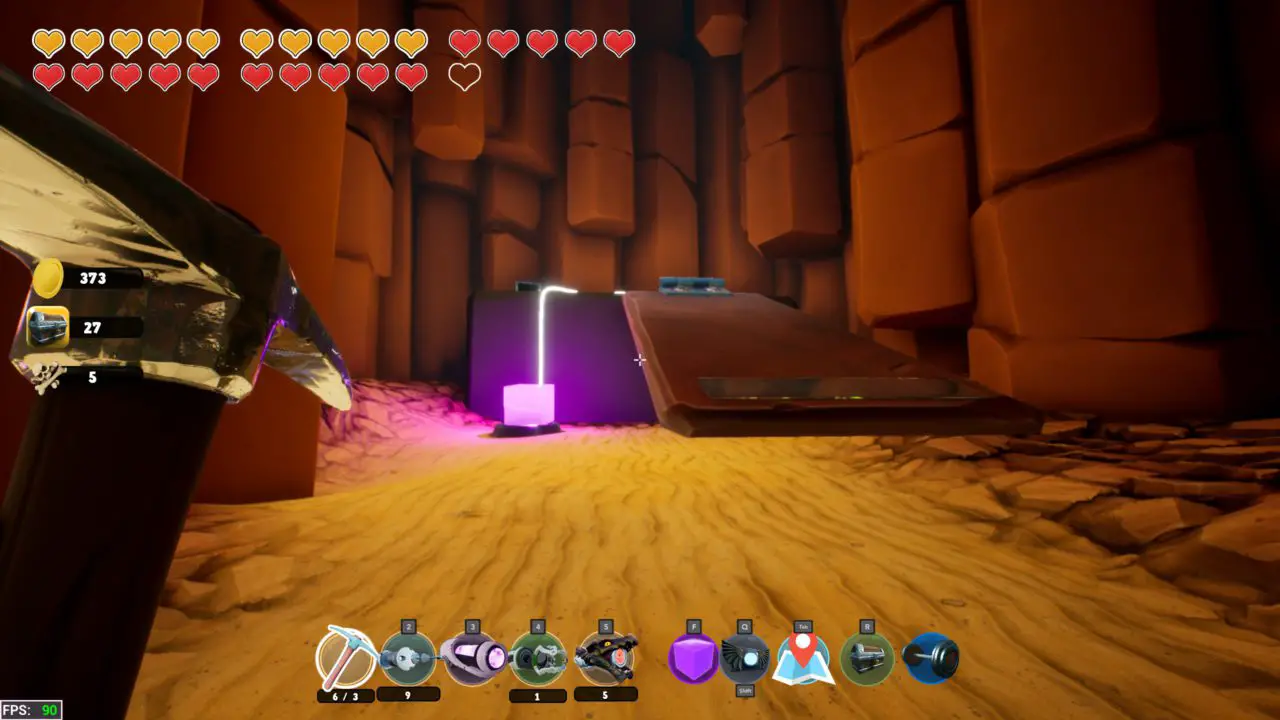
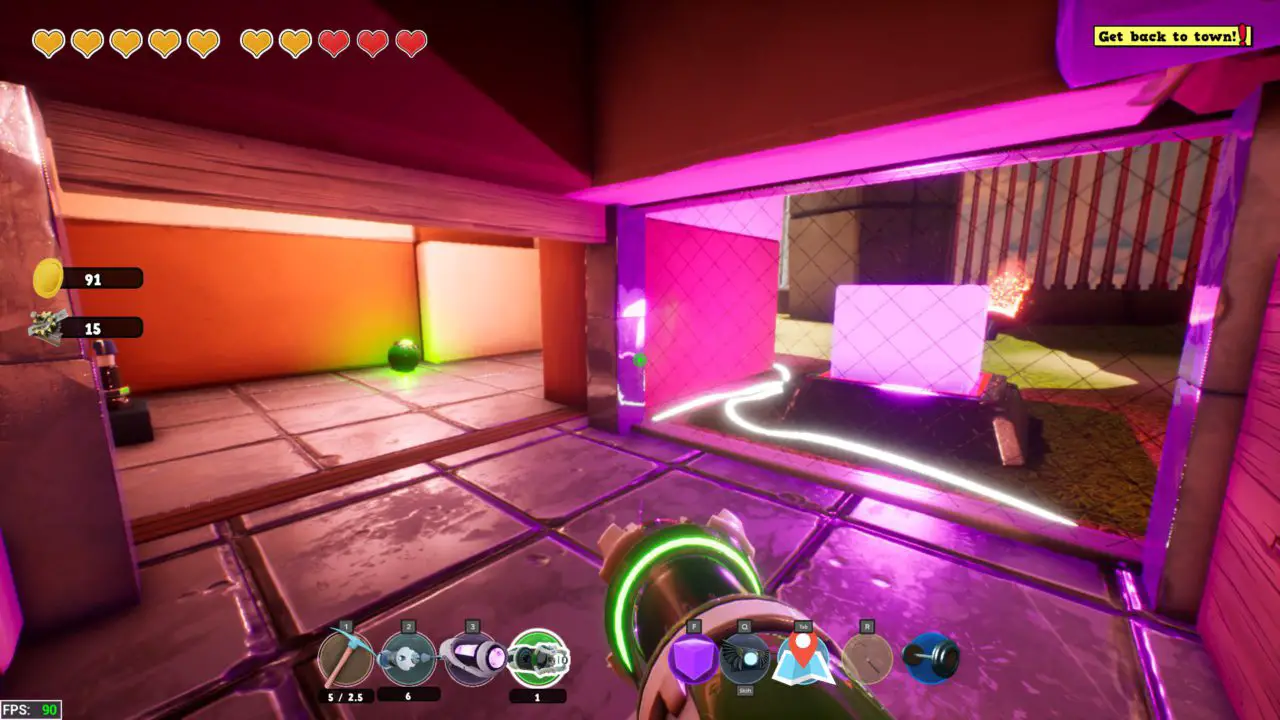
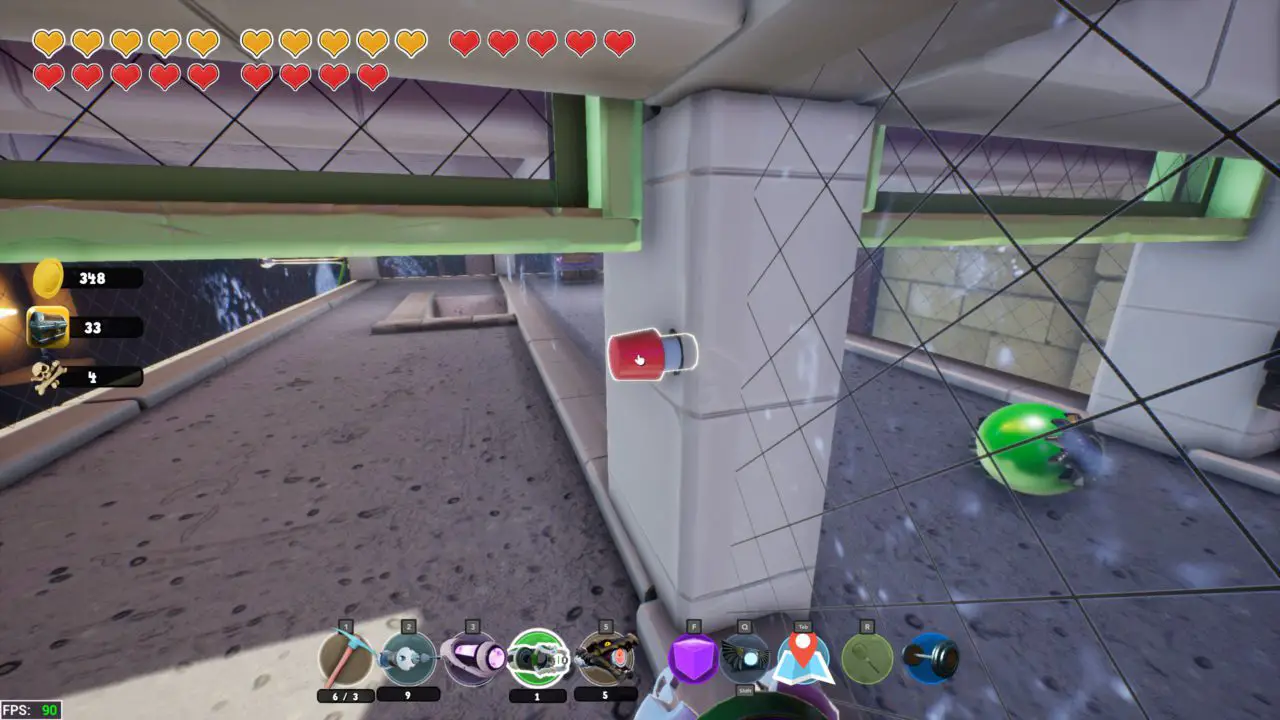
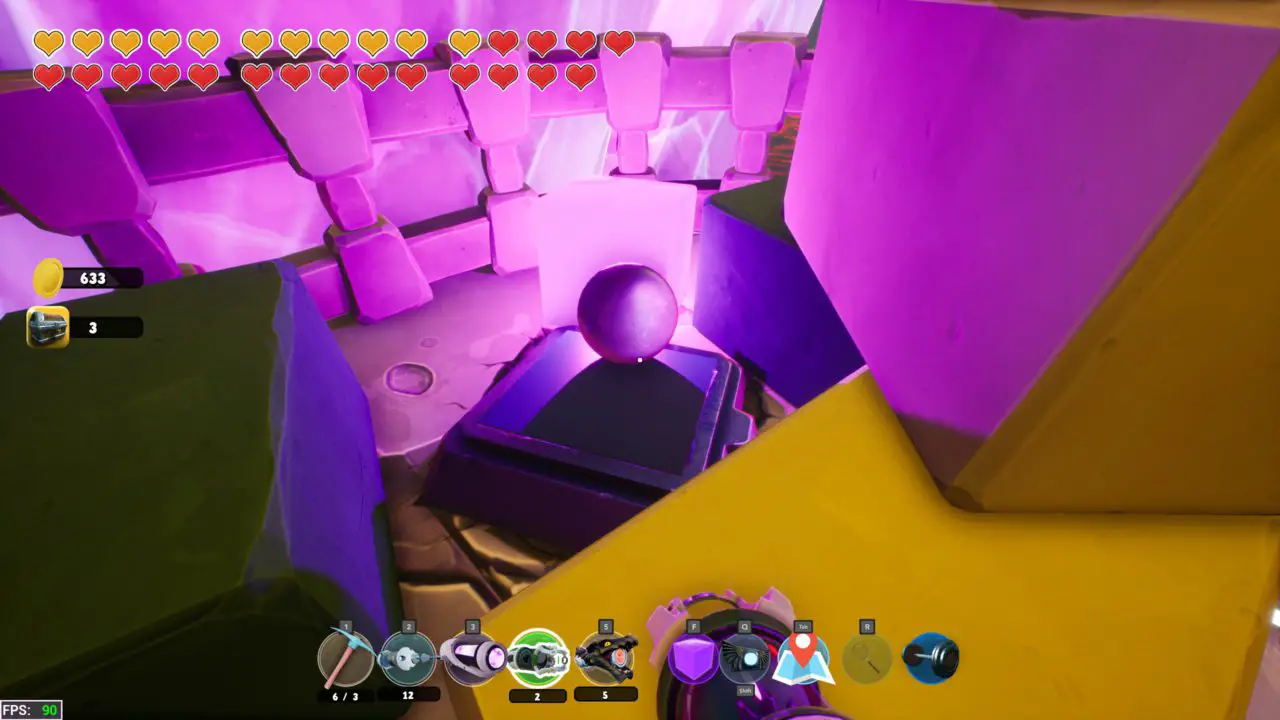
Chest #140
Across from the last trophy is a door that can open. Get the metal ball and place it on the pressure plate on the right of the door. You can place a force cube beside it so the ball doesn’t roll off.
هذا كل ما نشاركه اليوم من أجل هذا Supraland Six Inches Under مرشد. تم إنشاء هذا الدليل وكتابته في الأصل بواسطة Zaazaboo. في حالة فشلنا في تحديث هذا الدليل, يمكنك العثور على آخر تحديث باتباع هذا وصلة.
Great work but seems to be missin 62 و 71. One of which is coincidentally the chest I am missing…
what mineshaft at the chest number 139?
Hello , j ai 143 coffres a trouver , grâce à votre soluce j en est trouver 140 , merci , j en est trouver un autre (+1) mais les 2 dernier sont impossible à évaluer pour avoir mon succès
Comment avoir le coffre 70 sans la gravité ?
With the new update there are 142 chests that is required for the achievement. I have the chest detector and I scoured every inch of the map but it no longer beeps. This game sucks!