This guide will show you how to kick off well and strategize to move up the levels. Your ultimate goals are to hit tier 4 for launching an Exo ship for a Science Victory or acquiring Battle Cruisers and Nukes to ensure a successful Military Victory.
Settling Your Main Planet
The tutorial is great for learning the basics in your initial playthroughs. Especially in the early game, it’s crucial to start on a green world. When settling, aim to be near clay deposits and establish two brick smelters for each clay mine. If you find an area with two clay mines, consider building five smelters and mining the additional clays, as you’ll need plenty of bricks. As you progress, add more smelters near more distant clay sources.
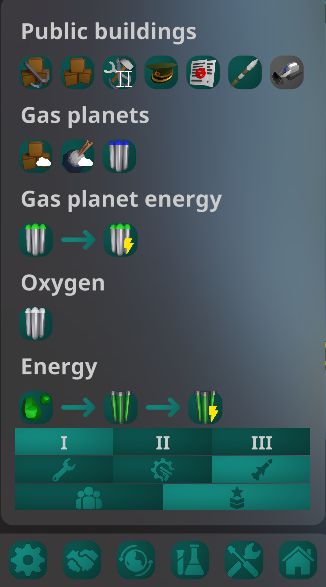
الآن, let’s delve into settling and moving through Tier 1. Once the Spaceport is in place and clay production has begun, plan where to position your Residences, farms, and production buildings. Ensure there’s enough space for 60-70 Residences built next to each other. These Residences should also be adjacent to all Public Buildings that serve as happiness “Factors” for each tier. It’s crucial that these Factors reach 100% and are maintained to achieve the maximum population for each tier. Advancing to the next tier happens when you reach the maximum population on the current tier.
Tier 1 (Residence (RES) sizes 1-10)
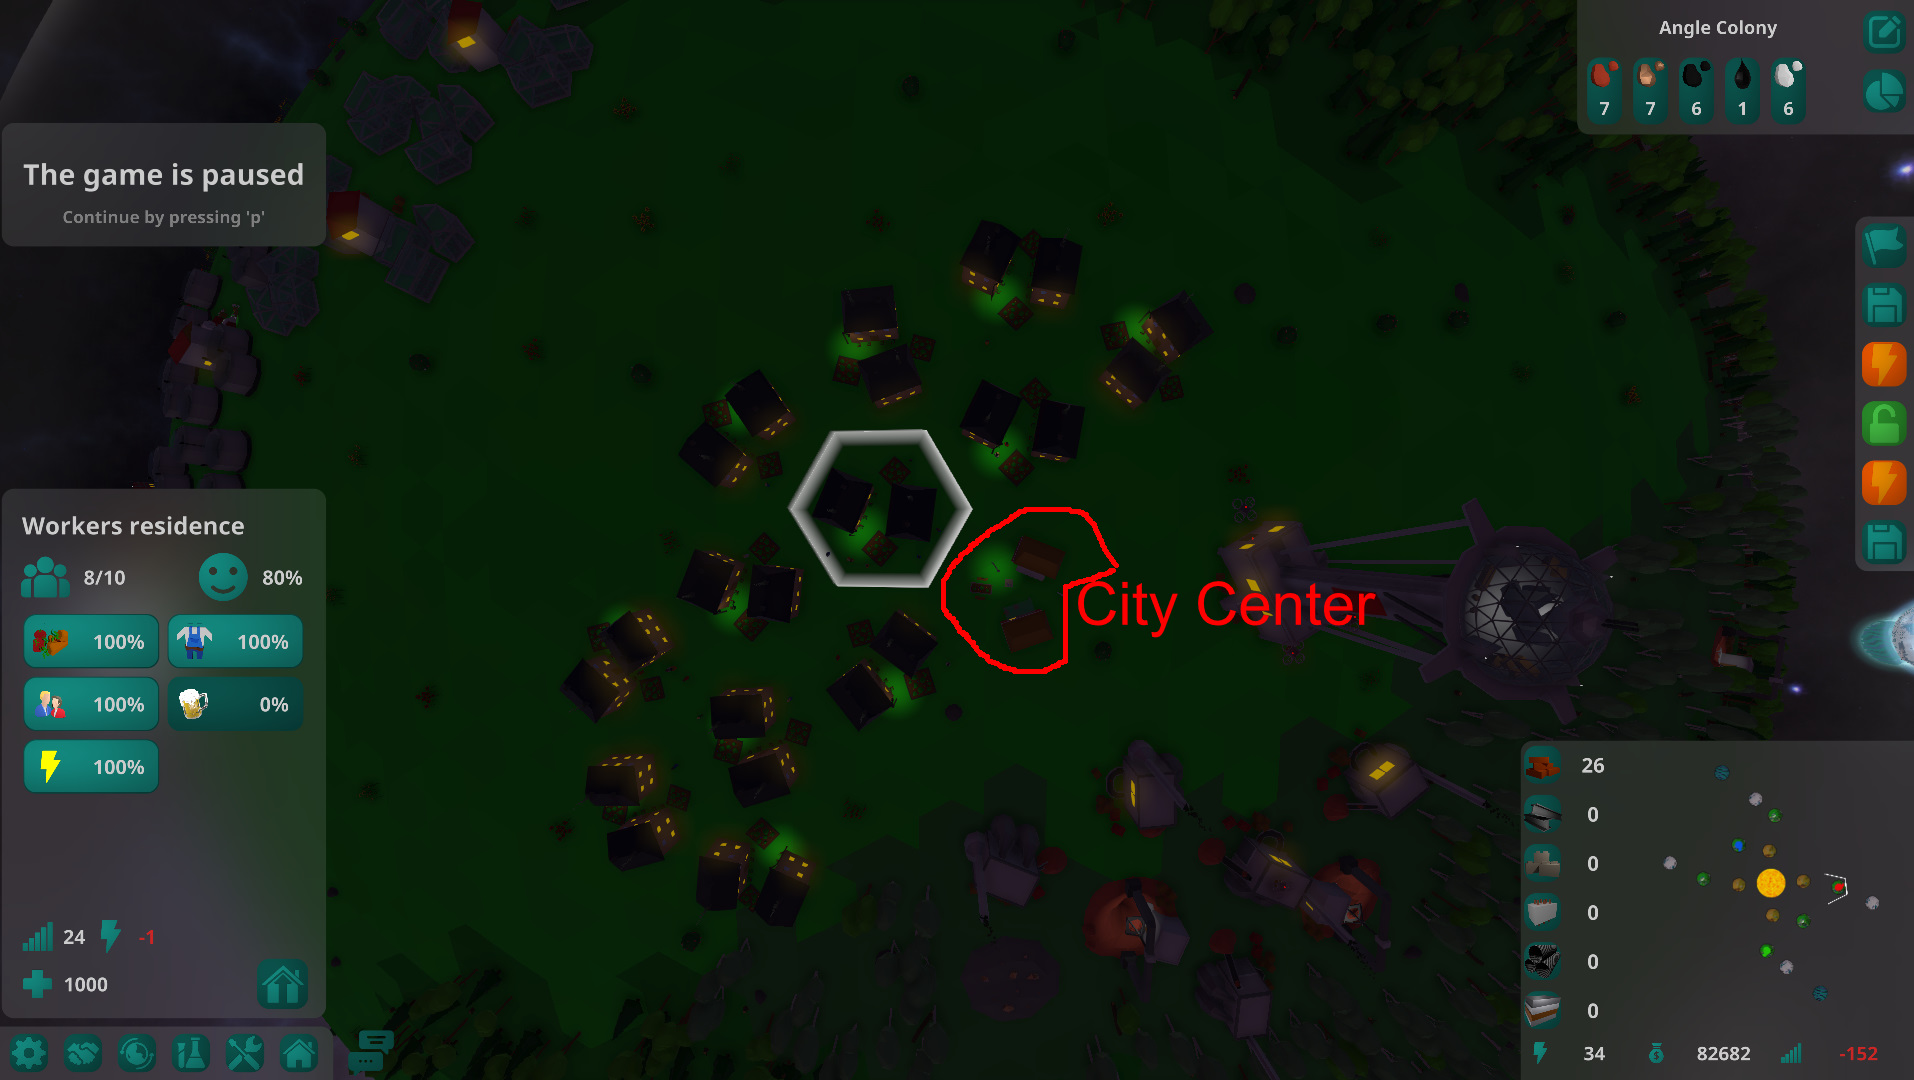
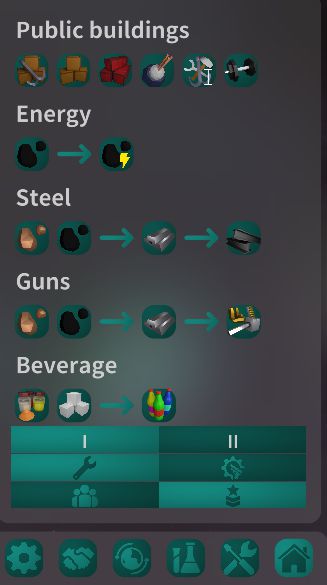
In Tier 1, advancing to the next tier requires meeting 5 Factors. بدءًا, placing City Center (CC), Energy, and Vegetables gives you 60%. المتبقي 2 Factors, Work Wear (72) and the Pub (100), have size requirements. Achieving this involves careful planning. You’ll need 12 Residences at 60% to reach the 72 mark, أو 14-18 Residences if you’re at 60% أو 80%. Since more Residences are needed in the next tier, aiming for 18 quickly is advisable. The CC displays your RES count, so ensure Auto Upgrade is activated to move your RES to the next tier.
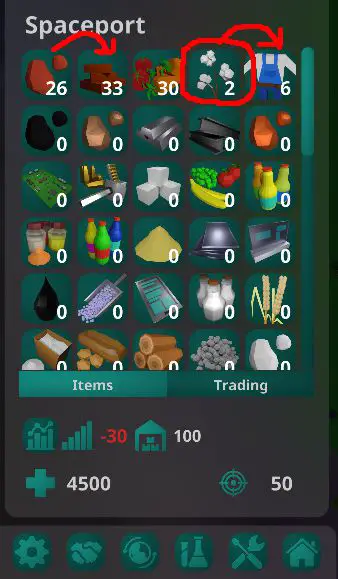
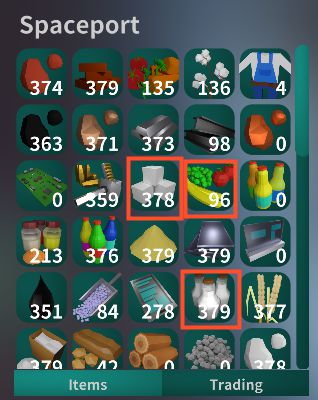
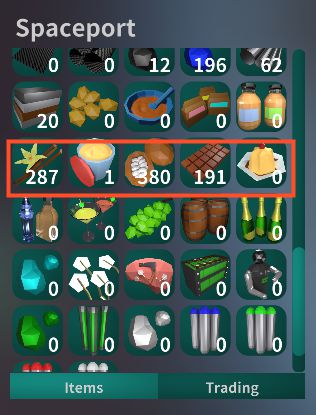
In the image above, Tier 1 is almost complete. A bit more population is needed before adding the Pub, a Public Building that must be constructed adjacent to the residences. بعد هذا, a short waiting period leads to Tier 2. If any Factor doesn’t reach 100%, check the Spaceport to see if a component is running low. على سبيل المثال, in the provided example, I added another cotton farm after noticing only 2 on hand. While it’s clear here, it becomes more complex as the product and components list grows later on.
أخيرا, there is no research on Tier 1.
First Major Decision – Tier 2 (T2)
Deciding on your Victory type is crucial early on, shaping how you build your empire. There are two paths to Victory: Science, achieved by launching the Exo Spaceship, and Military, accomplished through conquest. The research trees and builds differ based on your chosen path.
For RES growth, there are now 9 Factors, مع 5 from Tier 1 in place, giving you 55%. Every level advancement decreases this percentage, impacting your economy. Continuously monitor happiness levels to maintain a balanced economy. Regardless of your chosen path, you can immediately work on 1 Factor in either direction, reaching 66% happiness. The remaining factors require 300 و 400 Tier 2 people to build, meaning you need 24 RES to reach 300 و 32 RES for 400.
Reaching 300 RES is crucial as it unlocks the Small Spaceshipyard, allowing the construction of additional ships. Iron and Coal become available, essential for starting your Steelworks. Steel and Bricks are now vital for most builds, including the construction of your new Colony. To expedite copper acquisition for T2 and T3 builds, colonize a Desert planet, requiring 10 bricks, 5 steel, and copper. The Military path necessitates Oil, commonly found on Green planets.
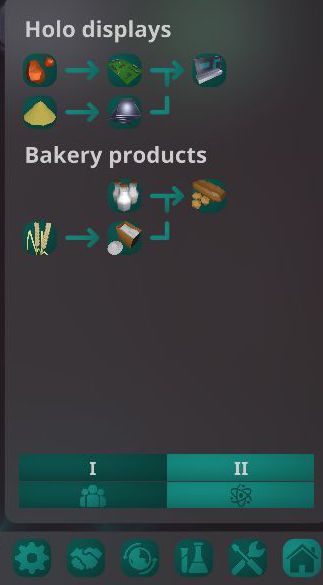
T2 Science Path (مقاس 11-20)
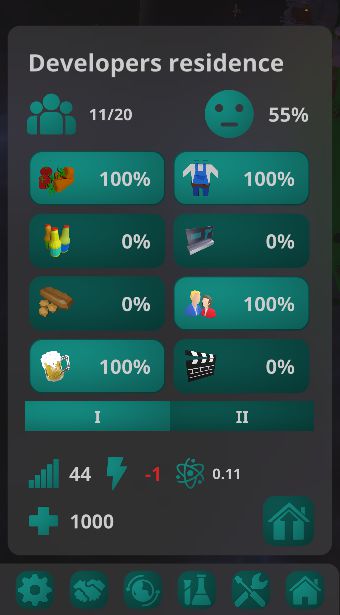
Developers Residence
9 Factors
CC, WW, Veg, Pub & Energy = 55% (+11% for each additional factor)
- Fruit Juice
- Holo Displays (need 300 and Copper from Colony)
- Bakery (need 400)
- Cinema (need 400) – Public Building
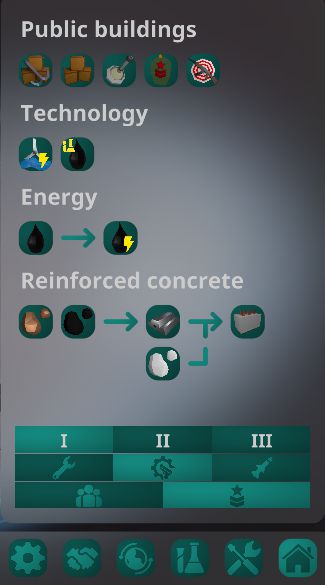
T2 Science Builds
T2 Military Path (مقاس 11-20)
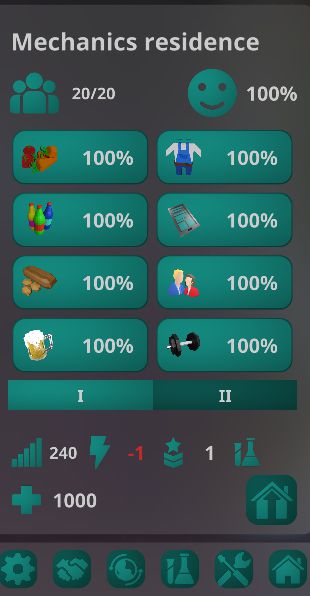
Mechanics Developments
9 Factors
CC, WW, Veg, Pub, Energy = 55% (+11% for each additional factor)
- Soft Drinks
- Smartphones Displays (need 300 and Oil, plus Copper from Colony)
- Bakery (need 400)
- Gym (need 400) – Public Building
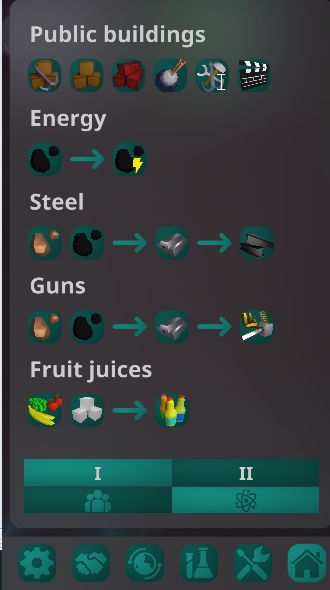
T2 Military Builds
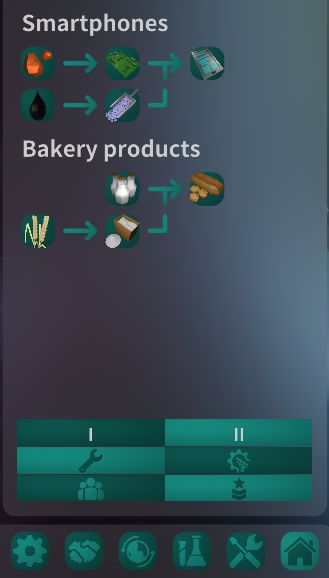
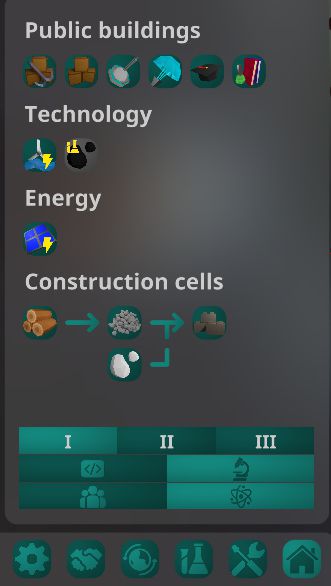
Please note that initially, your build choices are grouped under a single tab labeled either Science or Military when you are on T2. لكن, as you progress to T3, it transforms into a nested menu with Science and Military tabs, each having specific icons for different tier levels. The T1 builds are found under “شائع,” and the first page of each tier will feature Public Buildings on the top line.
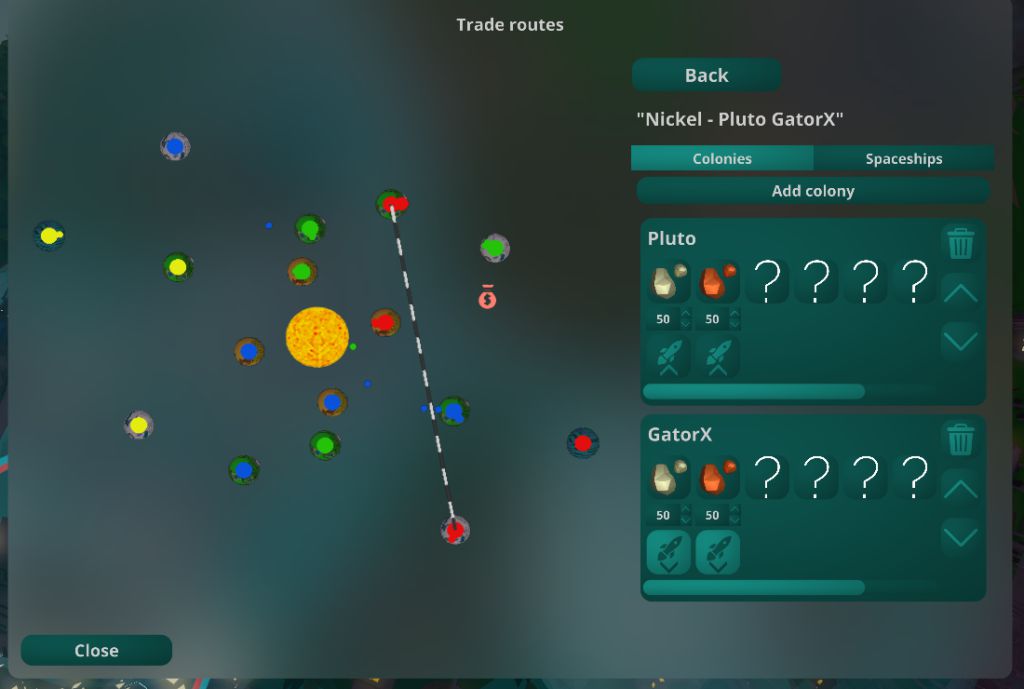
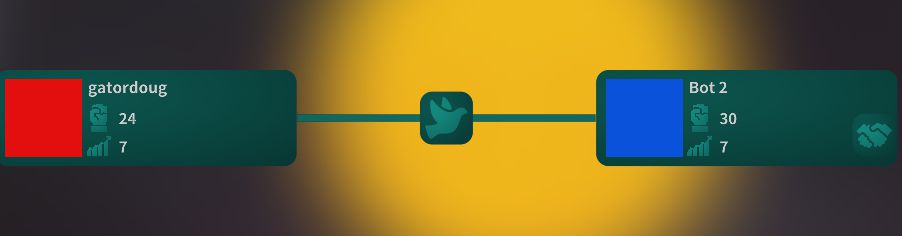
To make copper available, set up a trade route from the Desert planet back to your home base. Be cautious with trade routes as they are slot-dependent, and ensure correct load and unload selections. As your Spaceport fills, add Depots to boost inventory capacity. Utilize the Spaceport to identify slowdowns in components affecting happiness Factors. You can’t advance to T3 until all factors reach 100%, and RES has grown to size 20. Use the Diplomacy button to gauge if you’re keeping pace with the AI. If not building ships, the AI might have a higher score, so close the gap to avoid potential attacks.
Expanding Your Empire – Tier 3 (T3)
عند هذه النقطة, expanding your borders is crucial. Colonize an Ice planet to acquire Nickel, and if Military is your focus, secure Titanium and Cobalt for T4 builds. If Military is your goal, lay the groundwork for claiming a Gas planet in T4. Initiate the construction of defenses on your planet and colonies, and safeguard your trade routes with escorts. AI attacks may occur if you’re falling behind, so check the Diplomacy button. Strengthen your defense by adding Flaks, Lasers, and Shields near your Spaceports and around your planet. Focus on protecting only the Spaceports on your colonies.
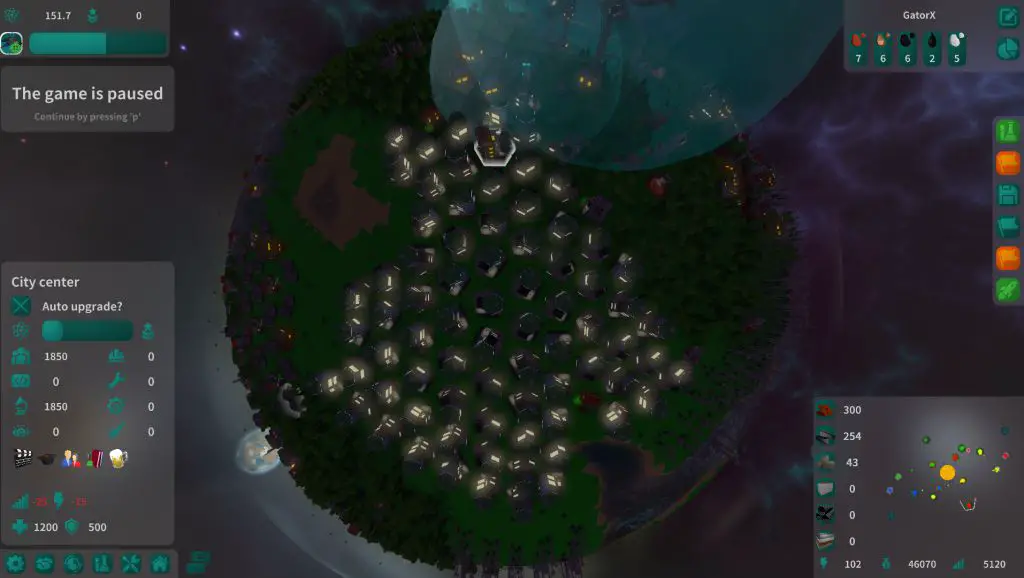
لكن, prioritize growing your home world for now, aiming for more percentages. Resume adding more RES to counter the drop in happiness from 100% ل 64% in the upgraded RES, impacting your economy. T3 introduces 14 Factors, some starting at 500 T3 RES, while the last one requires 1600 RES. To reach 1600, aim for 70 RES at 78%, slightly fewer if managing 85% happiness. Connecting the RES line to the main group counts them as connected, emphasizing the need for a separate area for RES. More RES will be required in T4; in the provided image, there are about 75 RES.
T3 Science Path (مقاس 21-30)
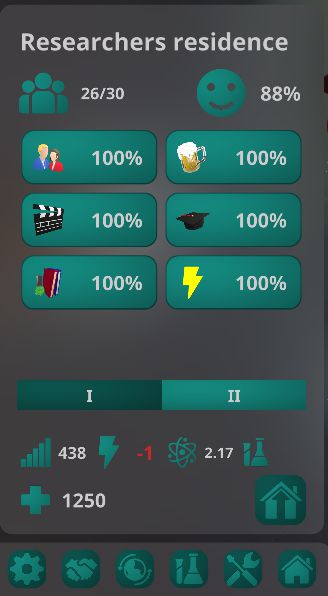
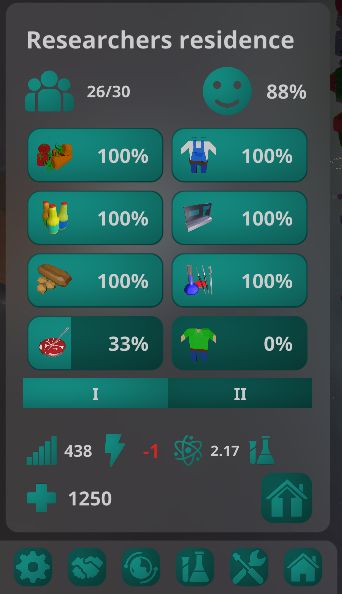
Researchers Residence
14 Factors
9 from T2 = 64% (+7% for each additional factor)
- Cultivated Meats (needs 1000)
- Laboratory Instruments (needs 500 & Nickel from Colony)
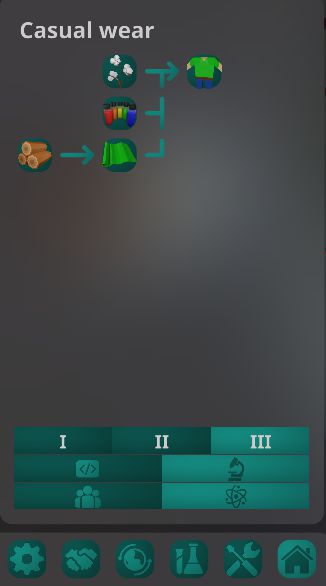
- Casual Wear (needs 1300)
- Laboratory (needs 1600) – Public Building
- Science University (needs 750) – Public Building
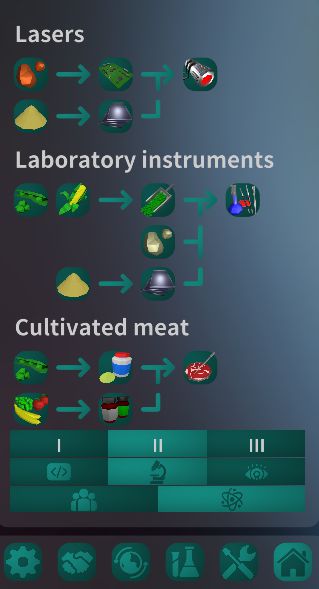
T3 Science Builds
T3 Military Path (مقاس 21-30)
Military Technicians Residence
14 Factors
9 from T2 = 64% (+7% for each additional factor)
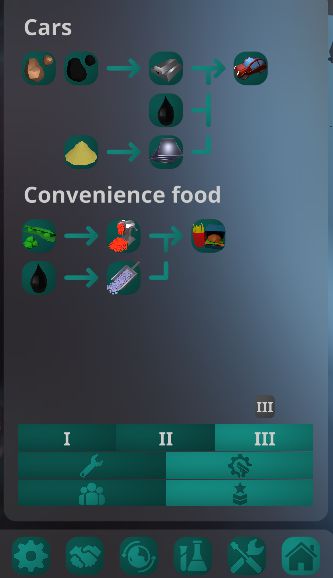
- Convenience Food (needs 1000 & زيت)
- Cars (needs 500 & زيت)
- Suits (needs 1300)
- Shooting Range (needs 1600) – Public Building
- الأكاديمية العسكرية (needs 750) – Public Building


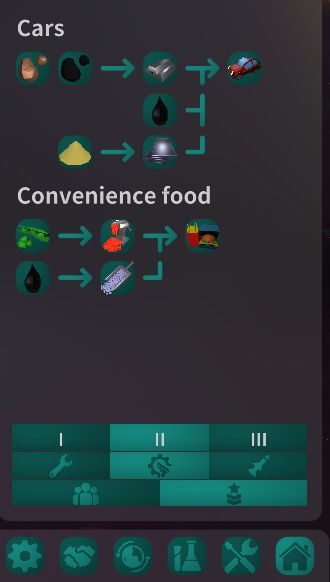
T3 Military Builds

A crucial note: Ship names are limited and repeat, but you can rename them (recent updates expanded the name list). Renaming makes setting up trade routes easier, eliminating duplicate names. For escorting a ship, select the desired escort, then right-click on the ship to be escorted. A green circle should appear on the target ship, and you can add multiple escort ships. بالإضافة إلى ذلك, selecting a group of ships by drawing a box creates a “fleet,” allowing one set of orders for efficiency.
In this tier, using the Spaceport to monitor slowdowns and bottlenecks in happiness levels is vital. With numerous farms and production buildings, tracking them all is challenging, but the Spaceport can reveal why Holo Displays are not at 100%. Maintaining a balanced economy and saving credits is crucial since T4 builds are expensive, and your economy can easily be disrupted.
Engineering a Vision for Victory – Tier 4 (T4)
In the current state of the game, this marks the final tier. The introduction of the Large Spaceship Yard (requiring 300 T4 RES) allows players to utilize bigger ships. Settling the Gas planet becomes possible, but since there are typically only a few Gas planets in the game, claiming one quickly and defending it is crucial, especially for Military paths. While not necessary for the Science path (no Nukes), claiming it prevents opponents from doing so.
War is likely underway in the solar system, so be prepared. Ensure your planet and colony defenses are in place. More trade routes are necessary at this stage, but avoid sending any ship out unescorted. Focus on your push toward final victory.
مع 19 T4 Factors and a starting happiness of 73%, builds and large ships are expensive in this tier, demanding careful credit and balance management. Factor requirements range from 500 ل 2000, but you only need to add a few more RES from the 70 you had on T3.
T4 Science Path (مقاس 31-40)
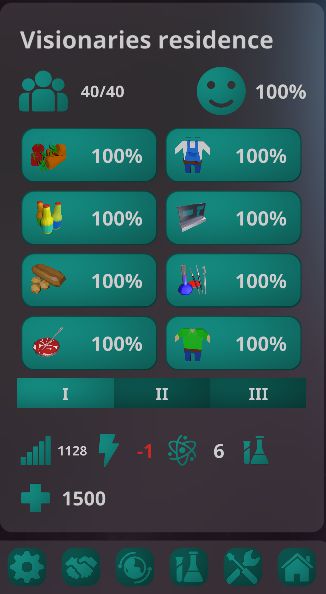
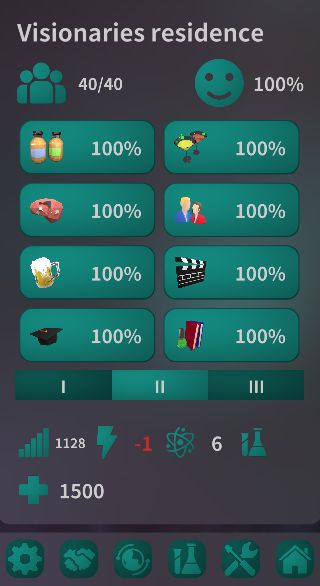
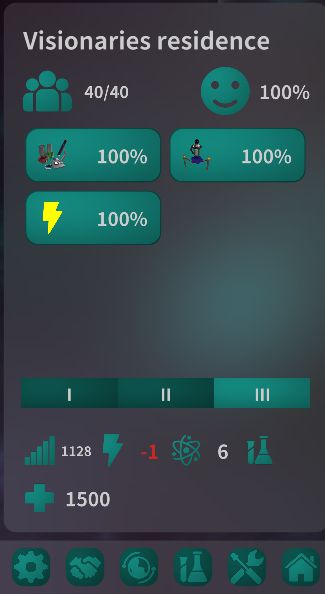
Visionaries Residence
19 Factors
14 from T3 = 73% (+5 أو 6% for each additional factor)
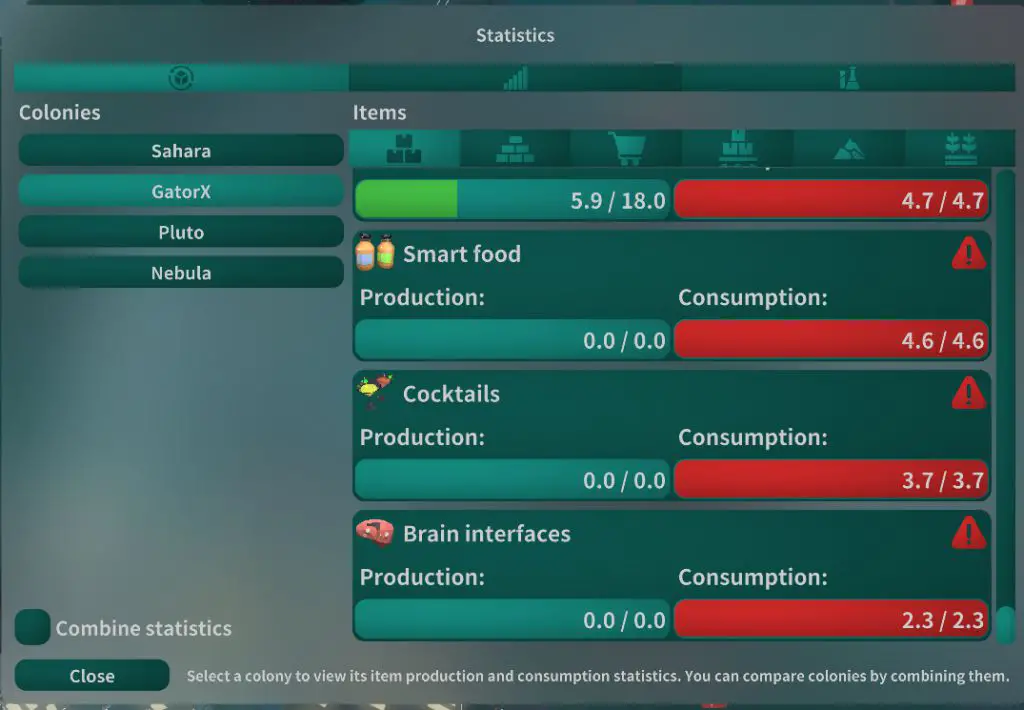
- Smart Food (needs 500)
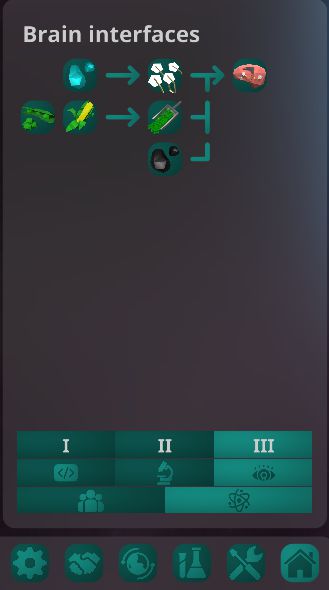
- Brain Interfaces (need 2000)
- Cocktails (need 1200)
- Research Center (needs 850) – Public Building
- Technology Fair (needs 1750) – Public Building
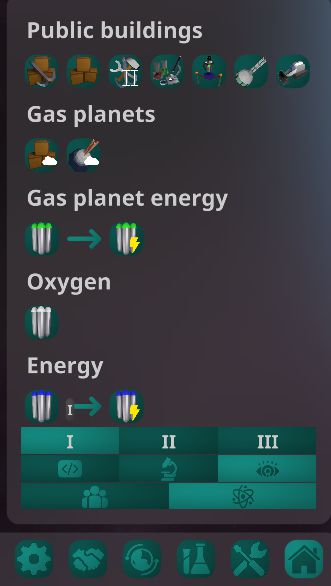
T4 Science Builds
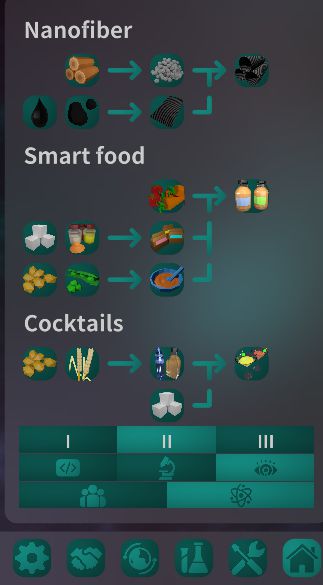
Swiftly getting Nano Fibers up is essential. They require Oil and Coal, which may need to be imported from your colonies to ensure a steady supply for the machines. بشكل ملحوظ, four out of the five T4 factors hinge on the availability of Nano Fibers.
T4 Military Path (مقاس 31-40)
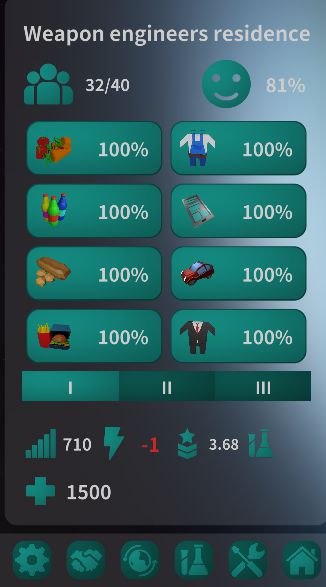
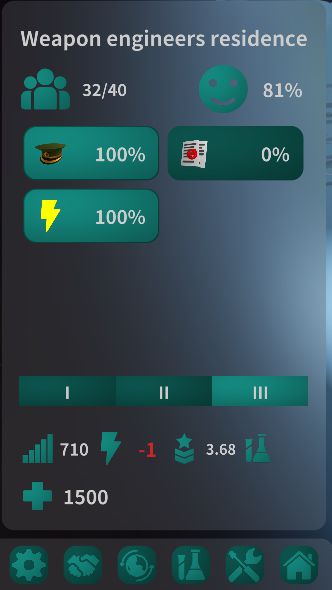
Weapons Engineers Residence
19 Factors
14 from T3 = 73% (+5 أو 6% for each additional factor)
- Desserts (needs 500)
- Household Robots (needs 2000)
- الشمبانيا (needs 1200)
- Ministry of Defence (needs 850) – Public Building
- Secret Weapon Laboratory (needs 1750) – Public Building
T4 Military Builds
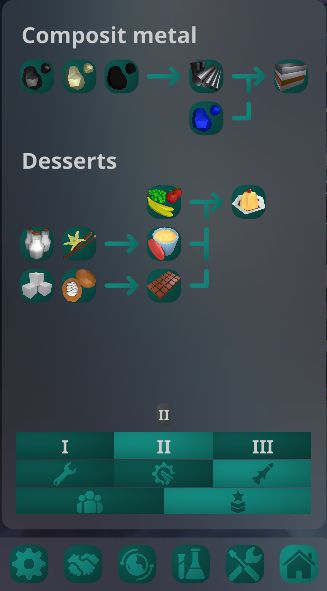
Promptly establishing Composite Metals production is crucial. They require Titanium, Nickel, and Cobalt, all of which come from colonies. بالإضافة إلى ذلك, هيدروجين, Helium, اليورانيوم, and Plutonium are needed for Interplanetary Rockets, Lasers, and Nukes.
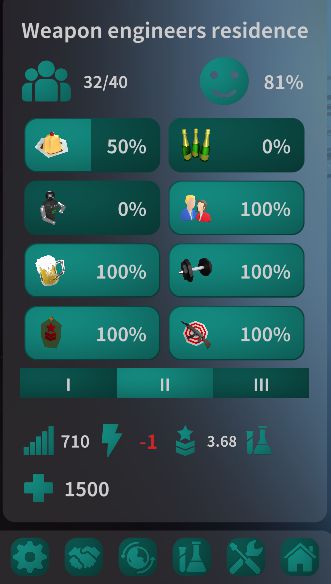
Observing the RES picture for the Weapon Engineers in the second image, Deserts are only at 50%. Utilizing the Spaceport reveals that the bottleneck lies with the Pudding component. Although there are enough ingredients, adding another Pudding Factory is necessary to address this constraint.
You can also use the “ن” key to open a Statistics window which can help show you your Consumption rates.
We are the Champions
Time to secure your victory. By now everything should be in place, if not already in motion.
Science Victory
To construct the Exo Spaceship, تحتاج 2000 T4 RES. It demands 1000 bottles of Oxygen, so add Depots until your Spaceport is sufficiently large to hold the required 1000 bottles. The construction process takes 10 دقائق, with two stages: Prep Expedition and Start Expedition. The Prep stage lasts 3 minutes and incurs a 5000 credit upkeep, so ensure you have enough funds. Following this, initiate the ship’s journey out of the solar system. As the Exo has no weapons, it’s advisable to escort it during its departure. Enjoy watching your ship soar toward victory.

Military Victory
The victory condition involving Battle Cruisers doesn’t have to wait until Tier 4 to begin, but the Large Spaceship Yard unlocks these powerful ships. Battle Cruisers are formidable, making them a significant asset in fleet battles. The AI tends to heavily garrison their main planets, while colonies are usually more lightly guarded. To take control, you must defeat all garrisons on a planet and then capture the Spaceport. The elimination of opponents occurs when they have no planets left.
If you’re not currently at war, use the Diplomacy screen to declare war on your opponents. Regularly monitor this screen to gauge your strength and assess your opponents’ status. Even if you’re behind other players, a well-defended planet means you shouldn’t worry. As long as you have the resources to build a fleet, victory is still within reach. لذا, go forth and conquer.
Still Struggling
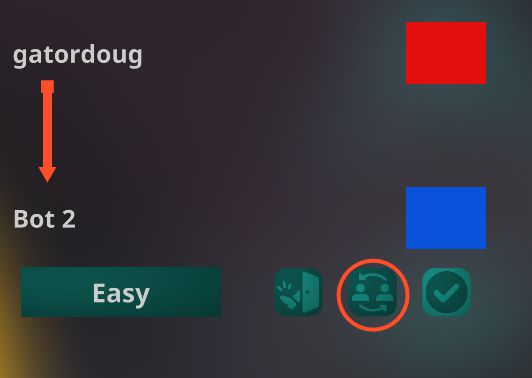
The game has a nice feature that lets you swap places with an opponent. This will let you see how they have setup their planet. It is especially nice to use in the mid game time frame when you find yourself lagging way behind.
That concludes my first guide for any game. Please post any additions, suggestions, or corrections.
هذا كل ما نشاركه اليوم من أجل هذا Planet S مرشد. تم إنشاء هذا الدليل وكتابته في الأصل بواسطة gatordoug. في حالة فشلنا في تحديث هذا الدليل, يمكنك العثور على آخر تحديث باتباع هذا وصلة.
Спасибо большое за данный подробный гайд , он хорош когда хочется быстрее победить , как мне кажется) Но в основном , я вижу что многие просто наслаждаются игрой и не хотят ее завершать)) Но за гайд и точные подсчеты спасибо)