
This page covers the step-by-step process of how to properly set up a dedicated server using SteamCMD for Palworld. We also have a guide on how to setup a server using Azure that you can find هنا.
Server requirements
حالياً, Palworld doesn’t have specified server requirements, but it’s suggested to have the following at a minimum.
- نظام التشغيل: ويندوز 10/11, Server 2016/2019/2022 & 64-قليل
- وحدة المعالجة المركزية: Quad Core processor
- كبش: Up to 4GB memory
- تخزين: 12GB disk space
Download and Install Steam CMD
- Get the SteamCMD for Windows using this وصلة.
- Make a new folder on your computer for SteamCMD.
- Put the downloaded .zip file into that folder and unzip it.
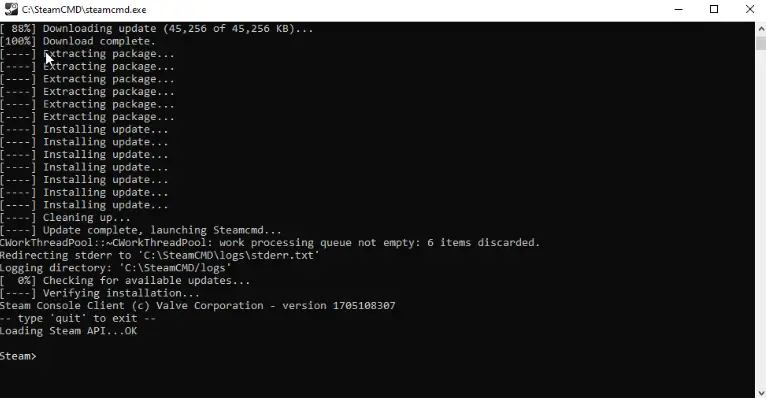
- Open the folder and find the steamcmd.exe file. Double-click on it to run. You should see something like this as a result:
Creating a start.bat file for the server
Open notepad and copy everything from below and paste it into the notepad.
@echo off
echo Checking for updates...
steamcmd.exe +login anonymous +app_update 2394010 +quit

echo Launching server
cd .\steamapps\common\PalServer
start PalServer.exe -ServerName="ENTER YOUR SERVER NAME HERE" -port=8211 -players=32 -log -nosteam -useperfthreads -NoAsyncLoadingThread -UseMultithreadForDS EpicApp=PalServer
You can rename your server by changing the word “ServerName.” If you don’t want your server to show up in the public server list, you can delete “EpicApp=PalServer.”
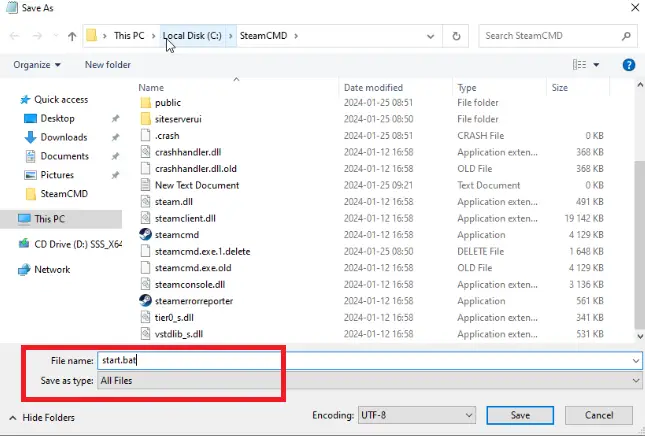
اذهب الى ملف > Save as. Ensure you name the file start.bat and save it as type All Files. Look at the image below for reference. Save the file wherever you want; you’ll use it to launch the server.
Launch the start.bat file to generate your server files. A black window will appear; لا تقلق, this is normal. Keep it open for 3-5 دقائق, then close it. There are more setup steps before your server becomes operational, so follow the upcoming instructions.
If you face problems opening the start.bat file due to C++ RunTime errors, you can resolve it by downloading all the Visual C++ Redistributable Runtimes in one package using this download link.
Server Configuration
اذهب الى steamapps\common\PalServer and access the file DefaultPalWorldSettings.ini with Notepad. Copy everything from (and including) [/script/pal.palgameworldsettings] to the end of the file. Refer to the image below:

اذهب الى Pal\Saved\Config\WindowsServer and open PalWorldSettings.ini using Notepad. Paste everything you copied (as shown in the image above) into this file. You must edit PublicIP=”” by entering your public IP address inside the quotation marks. If you don’t know your public IP address, you can find it by visiting this site or searching “What is my IP address?” on Google. The attribute should look like this: PublicIP=”83.253.33.215″
While not mandatory, you may want to customize these attributes:
- ServerName: Changes your server’s name.
- ServerDescription: Alters your server’s description.
- AdminPassword: Adjusts the Admin password.
- ServerPassword: Sets the password to join your server; leave blank for no password.
- RCONEnabled: Enables/disables RCON. Learn more about it هنا.
After you finish making changes to this document, be sure to save it by clicking on ملف > يحفظ. بمجرد الانتهاء من ذلك, your server will be up and running, and you can start it by running the start.bat ملف. If you ever need to shut down the server, ببساطة اكتب /shutdown in the command prompt. لكن, before you complete the process, don’t forget to do some port forwarding to make the server reachable from outside your network. Follow the steps provided in the Portforwarding section for guidance on how to do this.
Port Forwarding
لتبدأ, the initial step involves accessing your router’s web interface. Achieve this by opening your web browser and entering your router’s IP address in the search field. If you’re unsure about your router’s IP address, you can find it easily by opening the Command Prompt on your computer and typing ipconfig. Look for the IP address listed under Default Gateway; this is your router’s IP address, and you should enter it into your web browser.

Moving on, the following step is to determine the model of your router, which is typically displayed in the router’s web interface. إذا لم يكن كذلك, you can physically check the router to find its model. After identifying the model, visit this website and choose your specific router model. Follow the provided instructions on how to open the ports on your particular router, as this process varies between different router models. You will need to open ports for both TCP and UDP, specifically for 8211, 27015, 27016, و 25575.
If you encounter any difficulties or have questions about your port forwarding, feel free to leave a comment within this guide. بالإضافة إلى ذلك, send me a friend request, and I’ll assist you to the best of my ability.
Joining the Dedicated Server
- Confirm that you’ve successfully opened all your ports following the guidelines in the Portforwarding section and that the start.bat file is currently active.
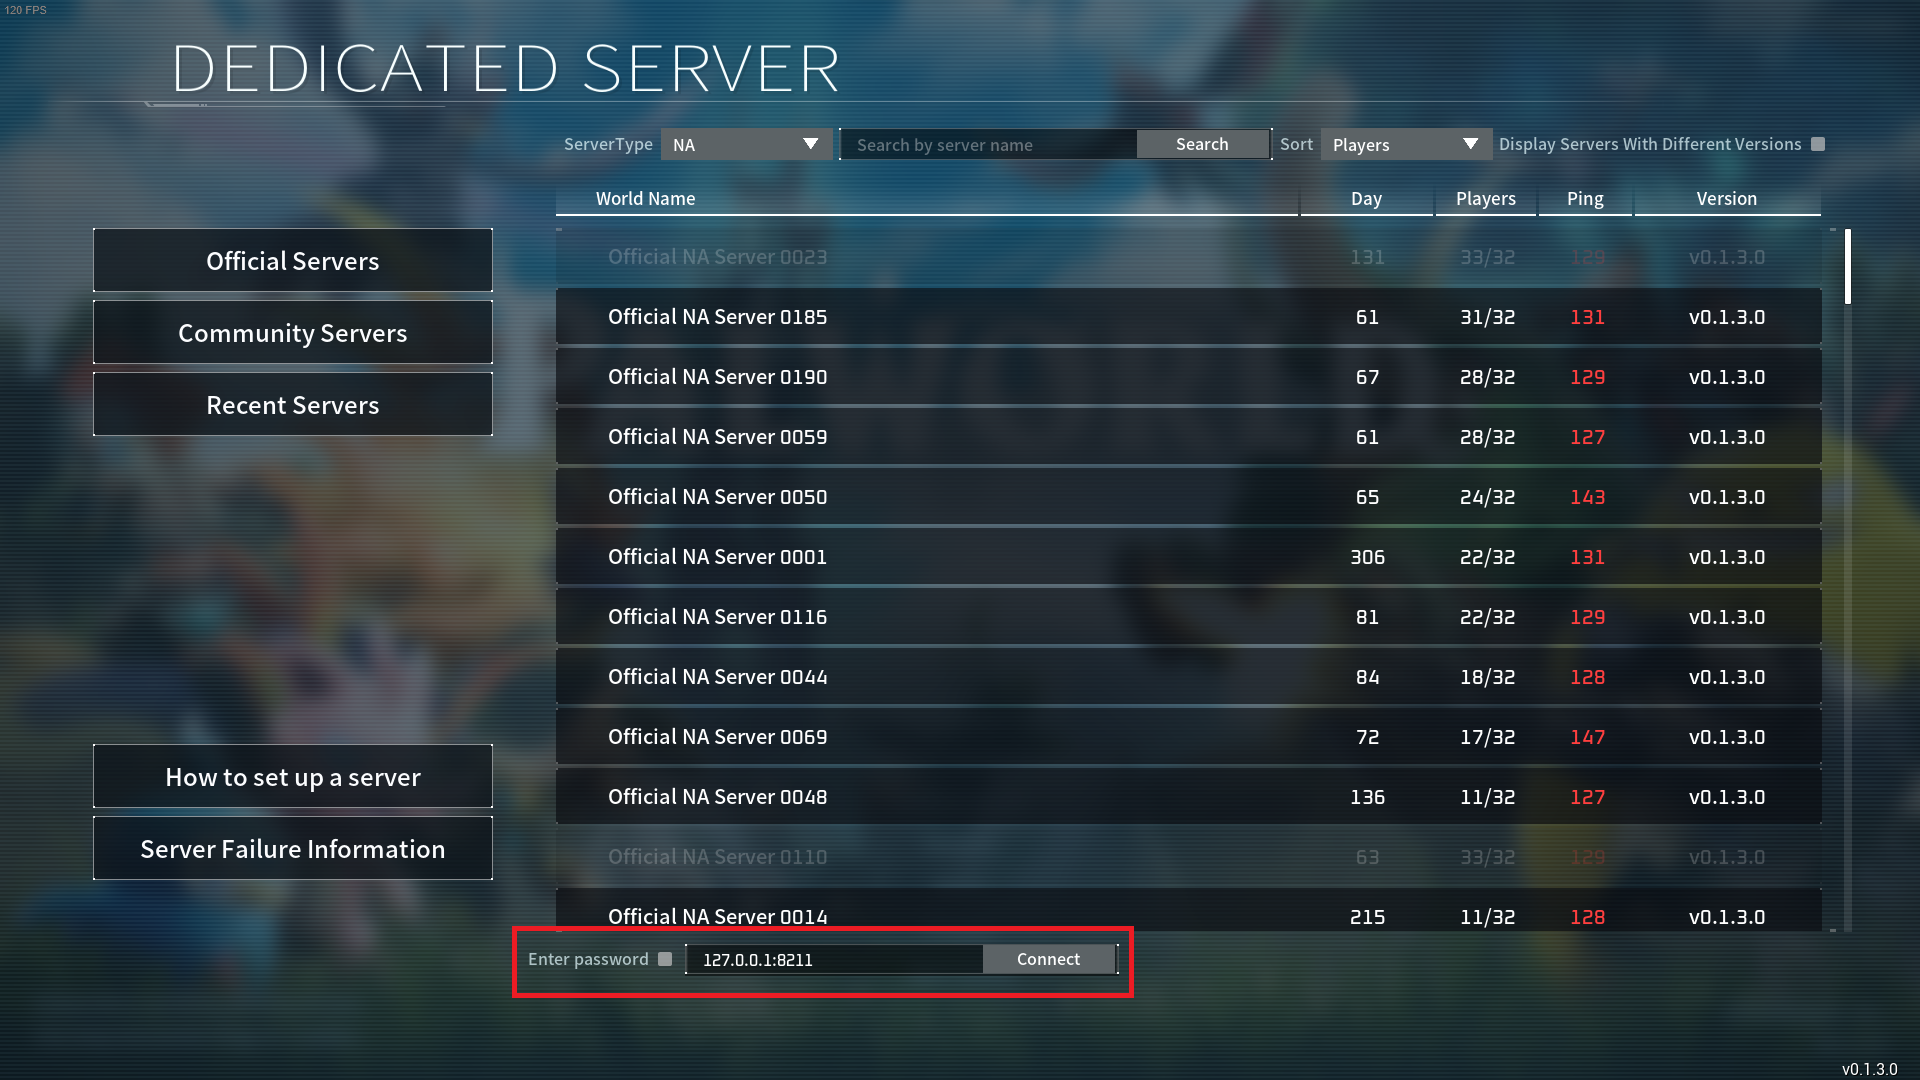
- يفتح Palworld وحدد Join Multiplayer Game. At the lower part of the screen, input the IP address. هنا, enter your Public IP address followed by :8211. The outcome should resemble this: 83.253.33.215:8211. This is the IP address other players will use to connect.
التعليمات
س: Do I need to have purchased Palworld in order to set up a server?
أ: لا, you don’t need to buy Palworld to set up the server following these steps.
س: How do I shut down my server?
أ: Simply type /shutdown in the server’s command prompt.
س: Do I need to open any ports on my computer?
أ: على العموم, لا. لكن, if you are hosting on a Windows Server OS, you will need to create Inbound Rules and Outbound Rules for the specific ports. Details on how to do this can be found under the Portforwarding section in this guide.
هذا كل ما نشاركه اليوم من أجل هذا Palworld مرشد. تم إنشاء هذا الدليل وكتابته في الأصل بواسطة AbbeLabben. في حالة فشلنا في تحديث هذا الدليل, يمكنك العثور على آخر تحديث باتباع هذا وصلة.