- عنوان: Monster Bash HD
- تاريخ الافراج عنه:
- المطور:
- الناشر:
Information about Monster Bash HD is still incomplete. الرجاء مساعدتنا في ملء تفاصيل اللعبة باستخدام هذا نموذج الاتصال.
This text guide will walk you through the “In One Piece” achievement for Monster Bash HD, including several reliable jump references in text and image form.
Pre(ر)amble
Welcome to my guide on walking you through In One Piece for Monster Bash HD. Your goal is to finish Episode 1 مستوى 6 while taking no damage whatsoever. It’s a reference to the level hint regarding the original’s bonus to finishing with taking no damage, now turned into a full achievement. There is a reason this is one of the least unlocked achievements in MBHD, however like most levels we can break this down methodically into segments while using jump references at certain points.
My goal is to take the thought of unpredictable enemies and obnoxious spike hitboxes and turn that into consistent strategies that are repeatable. فضلاً عن ذلك, there is a companion video linked at the end of the guide as well.
Feel free to play on any difficulty level, other than Nightmare (unless bragging rights or going for max points and able to collect all hearts at full HP). Easy through Hard have no enemy/trap placement differences in any Monster Bash level except for the secret level of Episode 2, which steps up enemies per each difficulty.
The Zombie Threat and Quick Tips
While it sounds good that the basic Zombie is the main enemy in this level, it’s not actually ideal. They may die in 3 hits, but their heads become just as deadly once liberated. Not only do they roll fast, the physics on them can cause them to move unpredictably, such as bouncing out of a spot they appeared stuck in, or bouncing upwards despite being on level ground similar to a grounder in Baseball (e.g. Johnny crouches to shoot it, it bounces up over his shots and strikes him – time to restart).
It is best to try and destroy any detached heads ASAP once the zombie dies; shoot two shots to “prime” هو - هي, then shoot two more shots at neck level. Even if it rolls in the opposite direction, it will still exist and more often than not come right back at you when you’re not ready. You can take a look at your points (On Easy: 100 for killing the zombie, another 100 for the head) or see how much gore appears to be splattering to confirm the full kill.
Overall we need to keep in mind:
- Ignore anything other than freeing pets and self-preservation
- Practice execution in segments before tackling the level in full
- Destroy zombies fully and not let heads run away
- Utilize panning the camera up and down – helps immensely with checking semi-blind jumps or viewing positions of enemies normally offscreen
Enemies will appear bolded and re-encountered enemies (knifehands and cannons) will be in italics.
The Saw and Zombie Gauntlet
Grab the Boulder power-up and blast the skulls blocking the way across. Watch for the knifehand and shoe that will be appearing on-screen, as you’ll be sent into the spikes if it hits you here. After it passes, run along behind it and watch for the crawling hand but you can shoot it midair before it starts moving. Wait for the shoe to knock you over the spike pit. Aim up and free 4 pets, don’t worry too much about saving the Boulders for the enemies. You still need to shoot again to kill the head in most cases. Here is our first section: Saws intermixed with 4 zombies.
Kill the first one and begin your jump as the saw reaches your side, so you land as it’s moving away from you, giving plenty of time to continue forward. Make sure not to stand by either edge of each “trench”, as the circular saw WILL strike the edges and damage you. Land near to the center of each trench and shoot a zombie at neck height after each one before advancing to the next. كما هو الحال دائما, watch for incoming heads, but spamming rocks at neck height makes this unlikely.
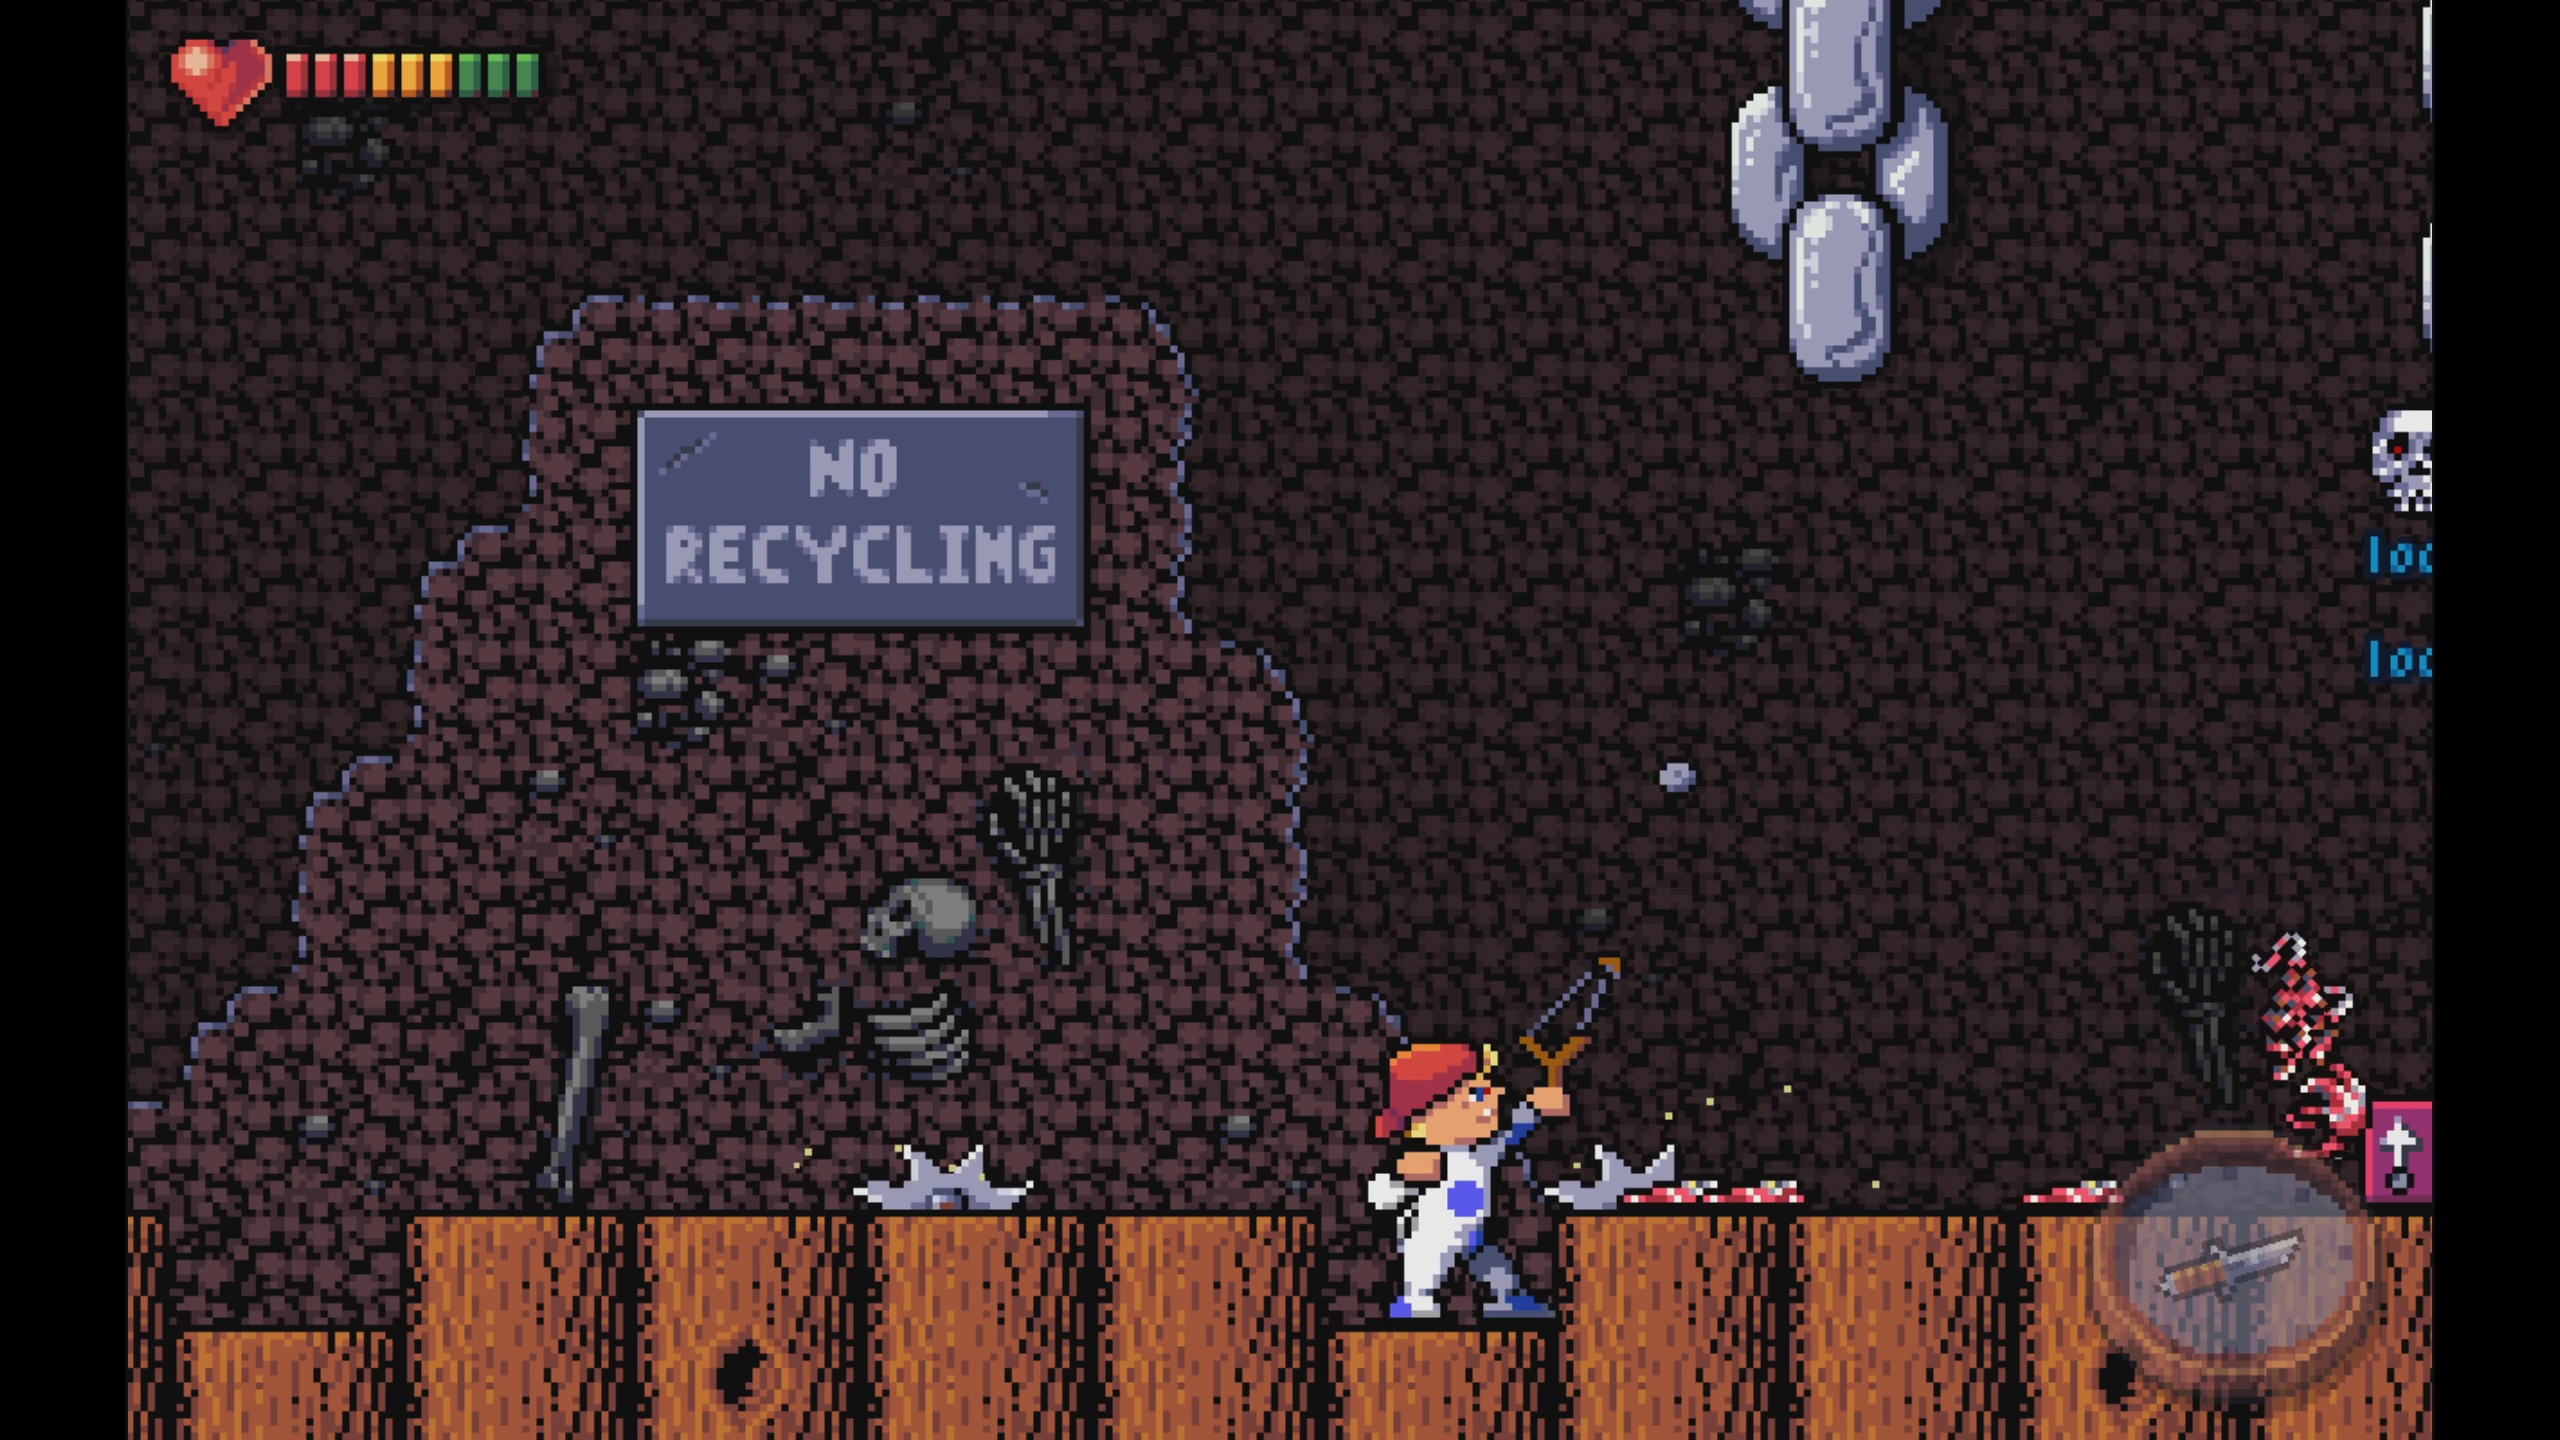
The only trench you don’t need to shoot from is when the “No recycling” sign becomes visible on the right side of the screen. Once in the final trench, shoot the final zombie and then aim up to destroy 2 skulls blocking the way up. Once the saw goes to the right, follow behind the saw, jump at the chain and shoot the 3rd skull midair.
Left Fork
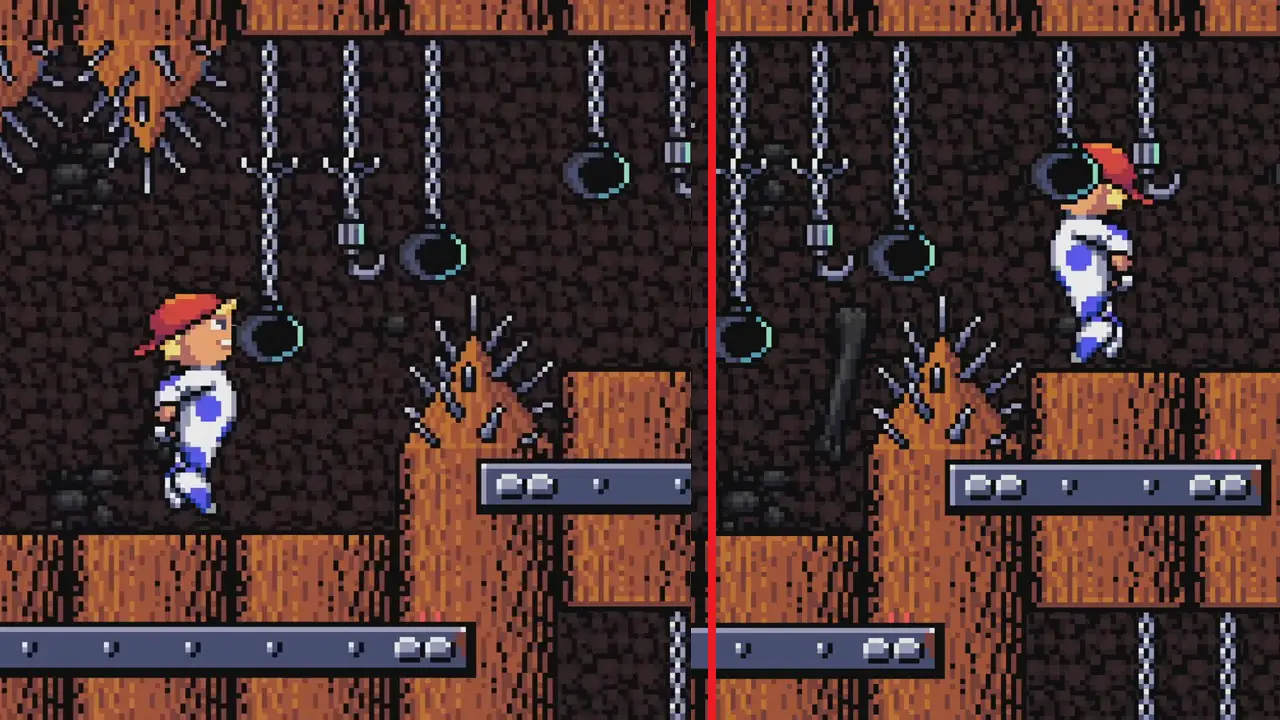
Proceed across 3 chains and climb the 3rd one to the fork in the level. The only worry here other than not catching yourself is jumping too high on one of the chains and striking a spike; there is no need to overdo the jump.
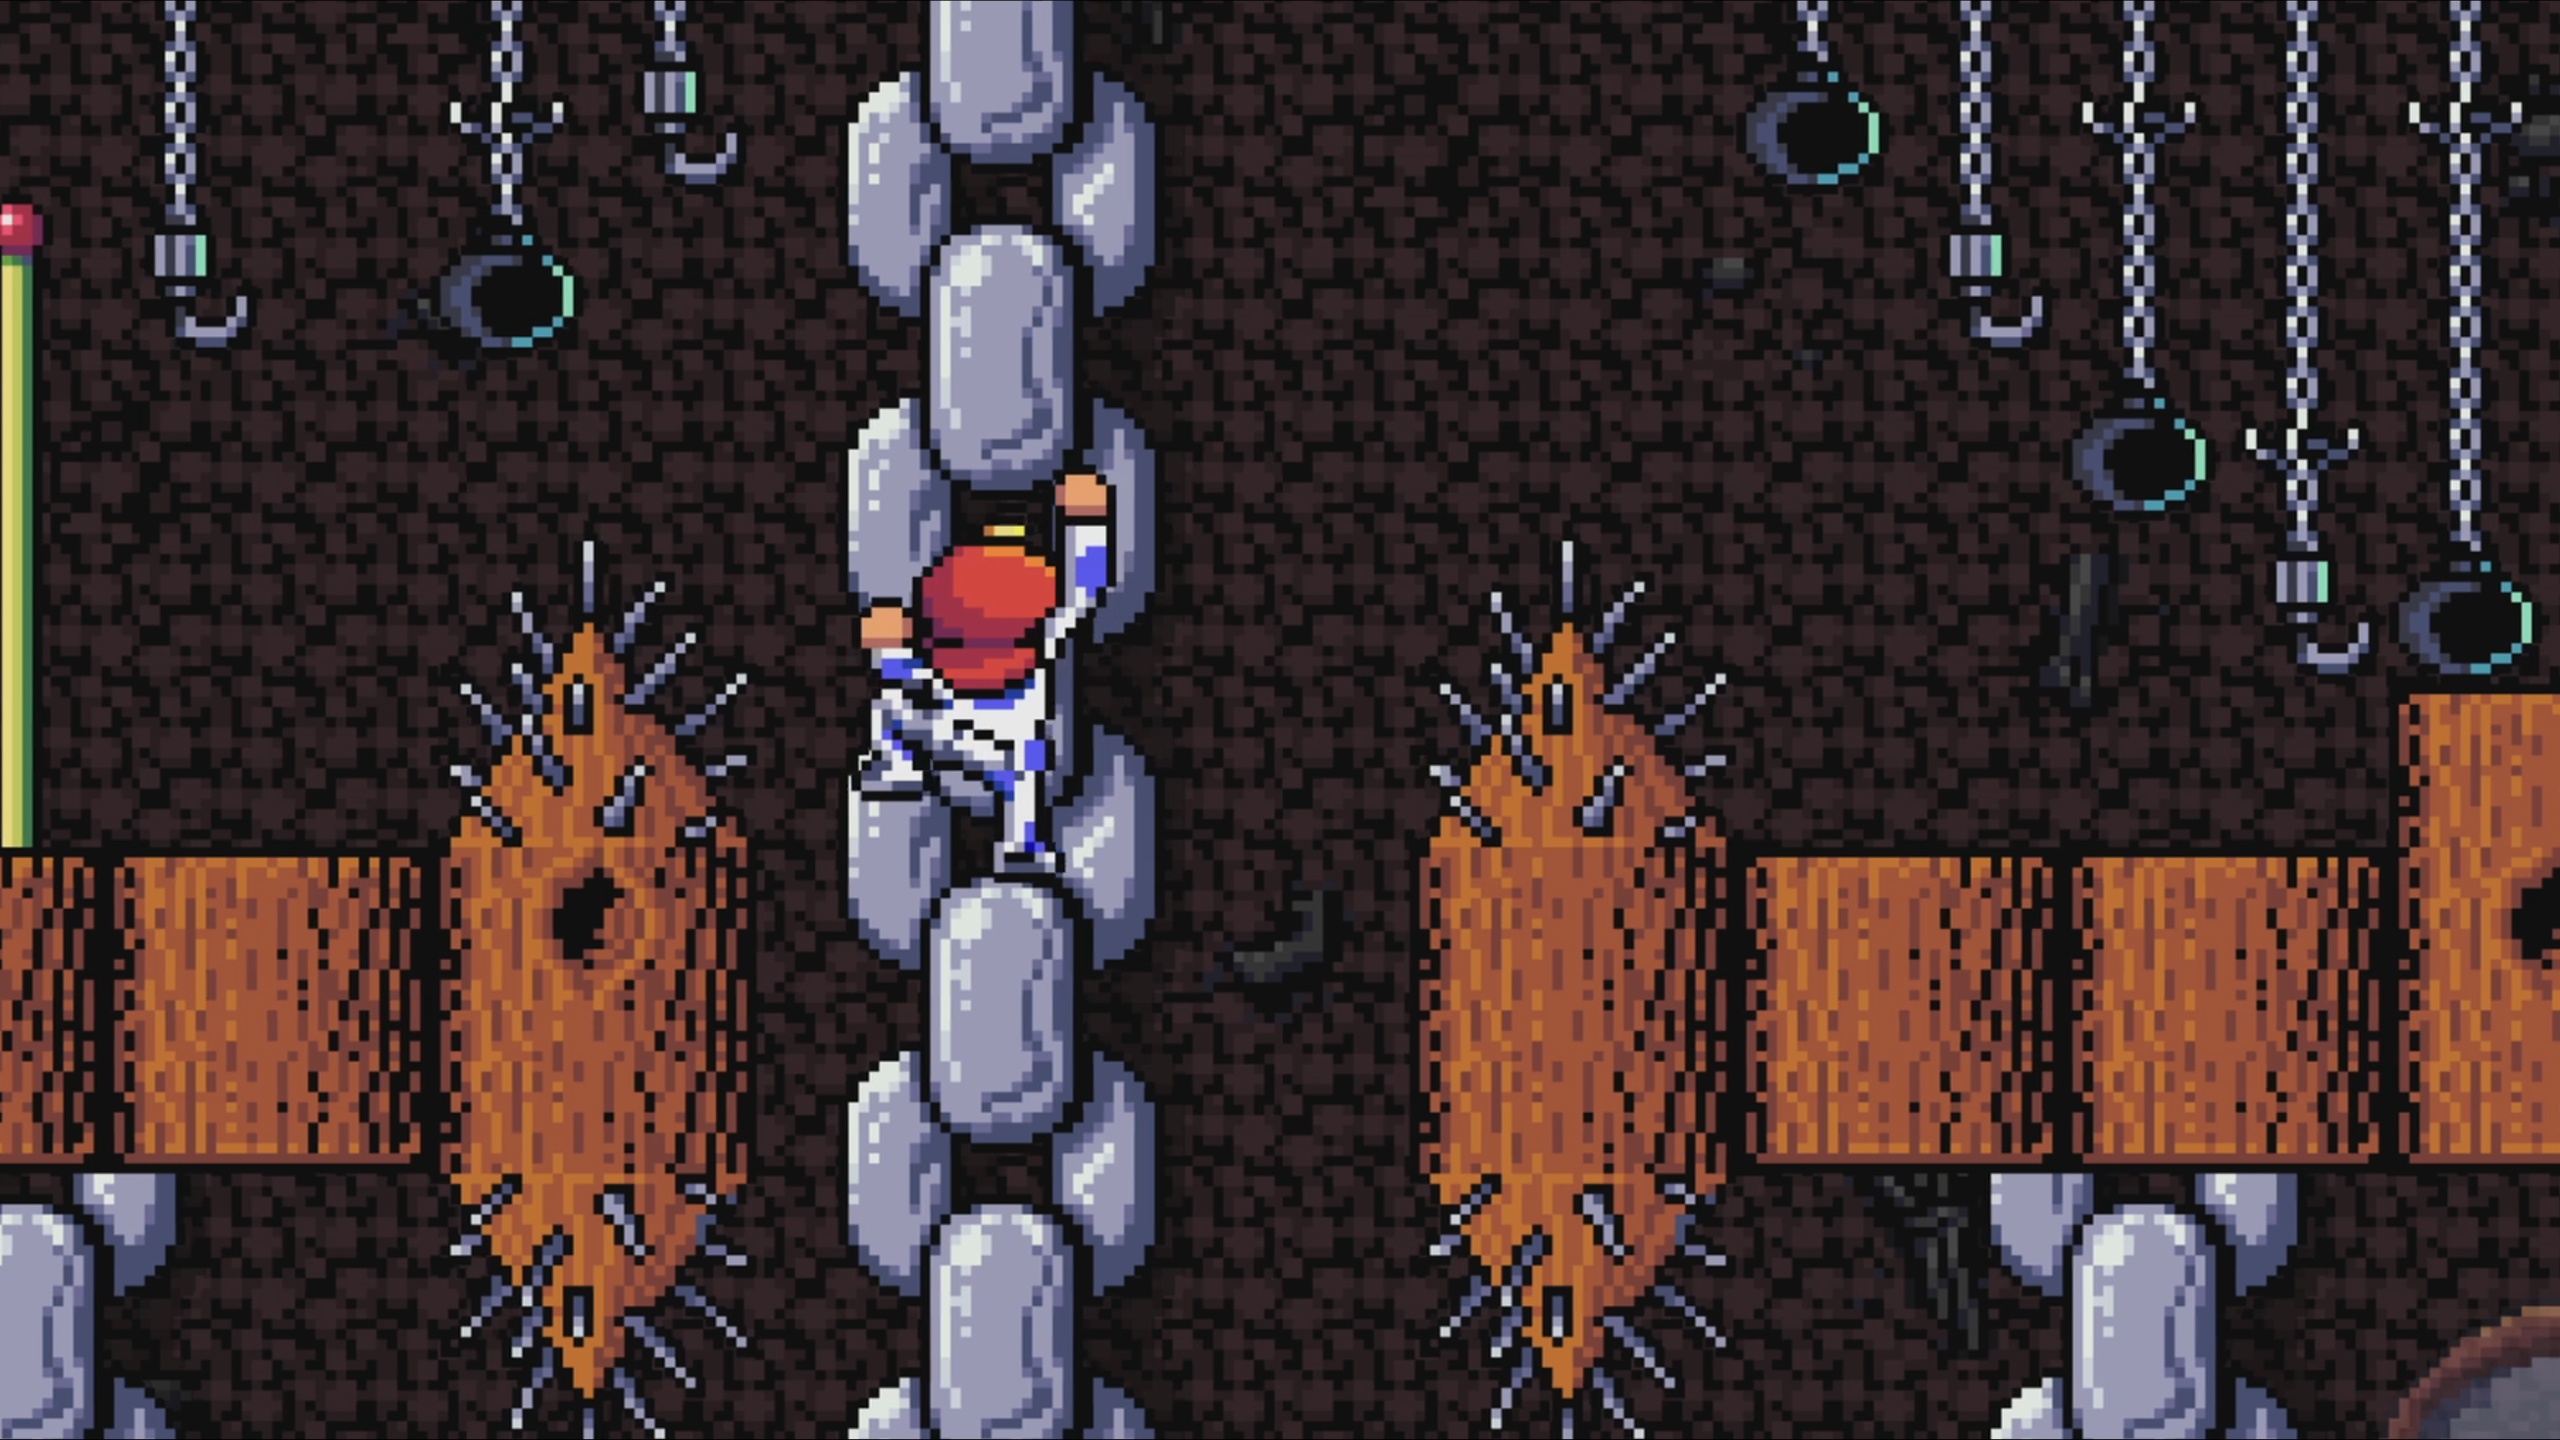
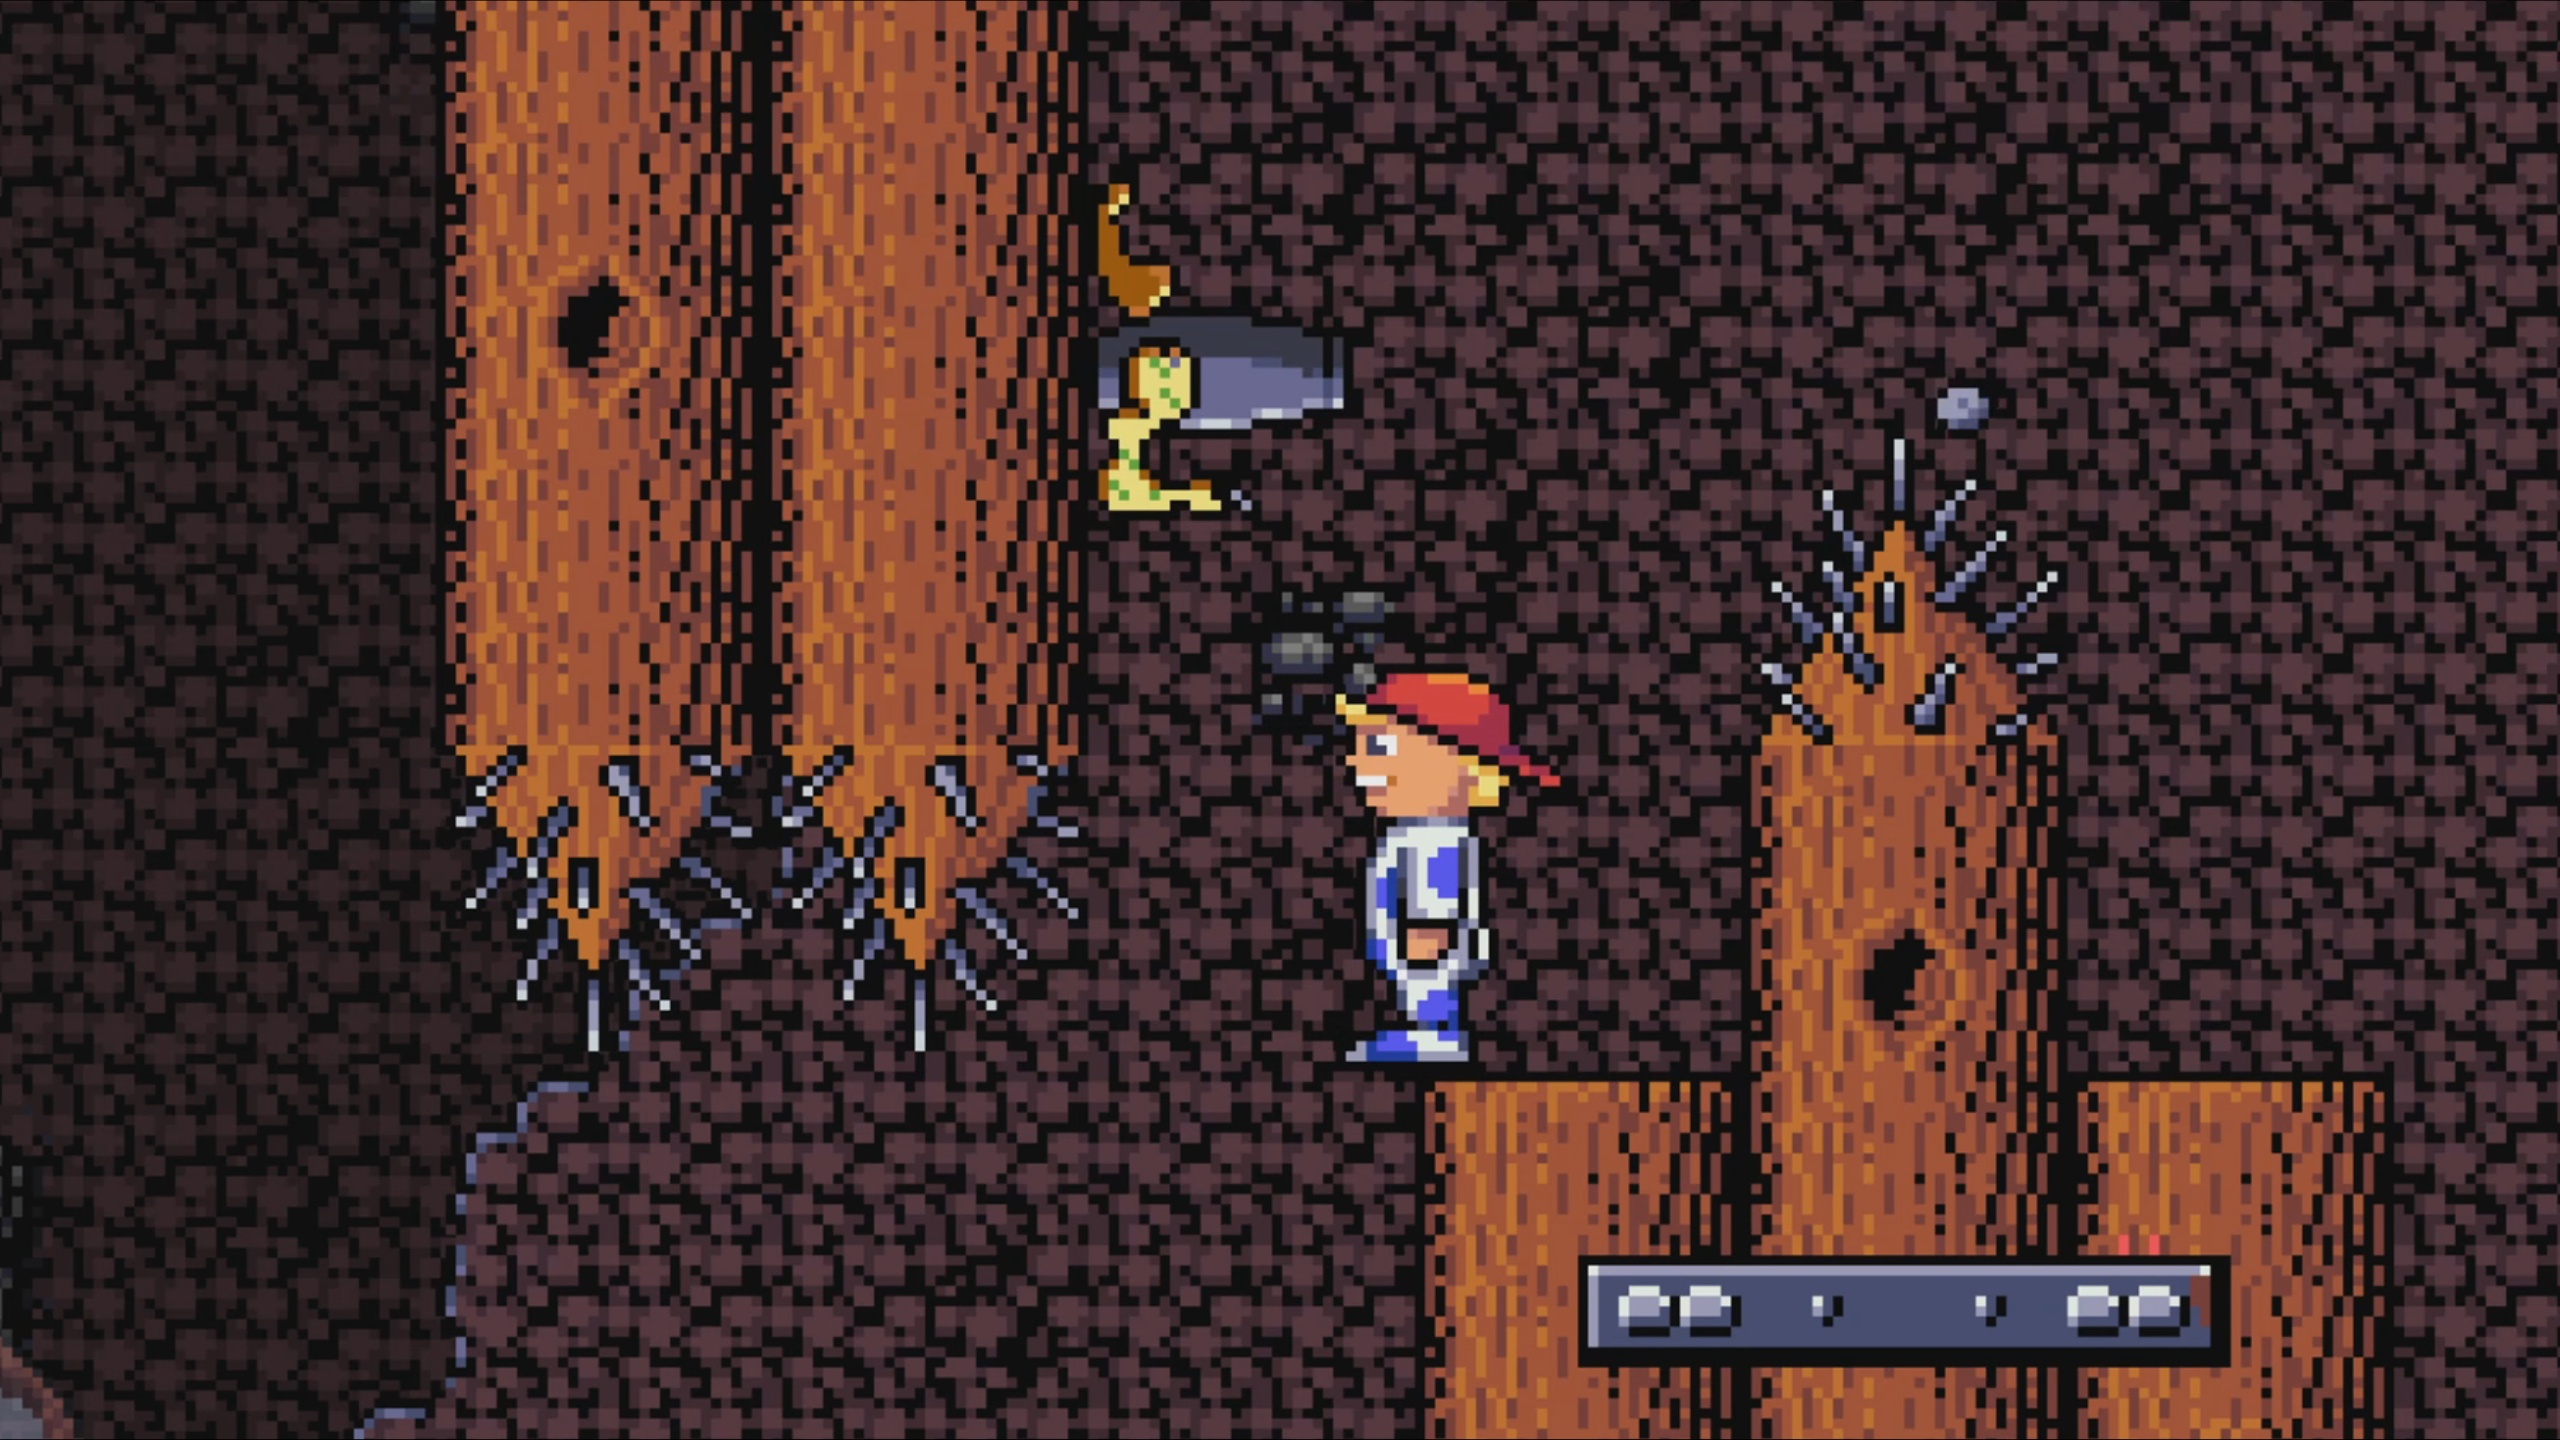
To the right is an easier set of jumps as well as the level exit, so we need to go left first. Fortunately the harder path is first and thus messing up here won’t set us that far back. Destroy each left and right skull and optionally kill the zombie to the right before heading left. Included is a reference image to assist in jumping the spikes.
After the inapplicable checkpoint, aim up and rebound rocks off the ceiling onto the zombie, increasing the chance of blasting its head. Stand where it was and kill another just past it. Continue until you get to a slight height change, where you need to shoot a zombie offscreen. For these shots, it’s tougher to kill confirm but do a small jump while spamming rocks towards it and that often works. Wait until you see your first cannon crawl up, then crouch and knock it out onscreen. There is no audio cue for knocking it out so ideally you want to see it happen. It cannot hurt you in any way once knocked out but it awakes soon so keep moving.
Jump while avoiding the knifehand and cling onto the chain and look down to ensure the saw moves past. After it does, follow it while spamming shots to kill a zombie quickly and keep shooting to start clearing out several skulls and a zombie from the next area below. Alternate between shooting and dodging the saw until it looks clear enough (عن 4 spaces clear under the heart). Finish off any other skulls remaining and aim up to rebound and strike the two skulls blocking the next jump. These tree trunk/lumber things have quite a large hitbox so you want to give them a wide berth when jumping over. Clear a couple more skulls and shoot an offscreen zombie before heading up the chain. Clear another zombie at the top while jumping and re-clinging back on. Crouch and remove another zombie and skulls to its right.
Upcoming is a jump that should be practiced several times before attempting a full run. It requires standing near the left spike and running 80% of the way to the right edge before jumping, but jumping too soon or too late will cause damage. Unlike most areas that have reference images, this must be a running jump.
Destroy more skulls and a zombie on the ledge, لكن you do not need to climb up it for this achievement. Just rapid fire until you free the pet and kill the zombie and its head before going back.
علاوة: I’ll include a jump reference here for those going for high points in a normal run, as there is a heart and candy piece that need to be collected, ideally without clipping the spike and ruining the heart bonus.
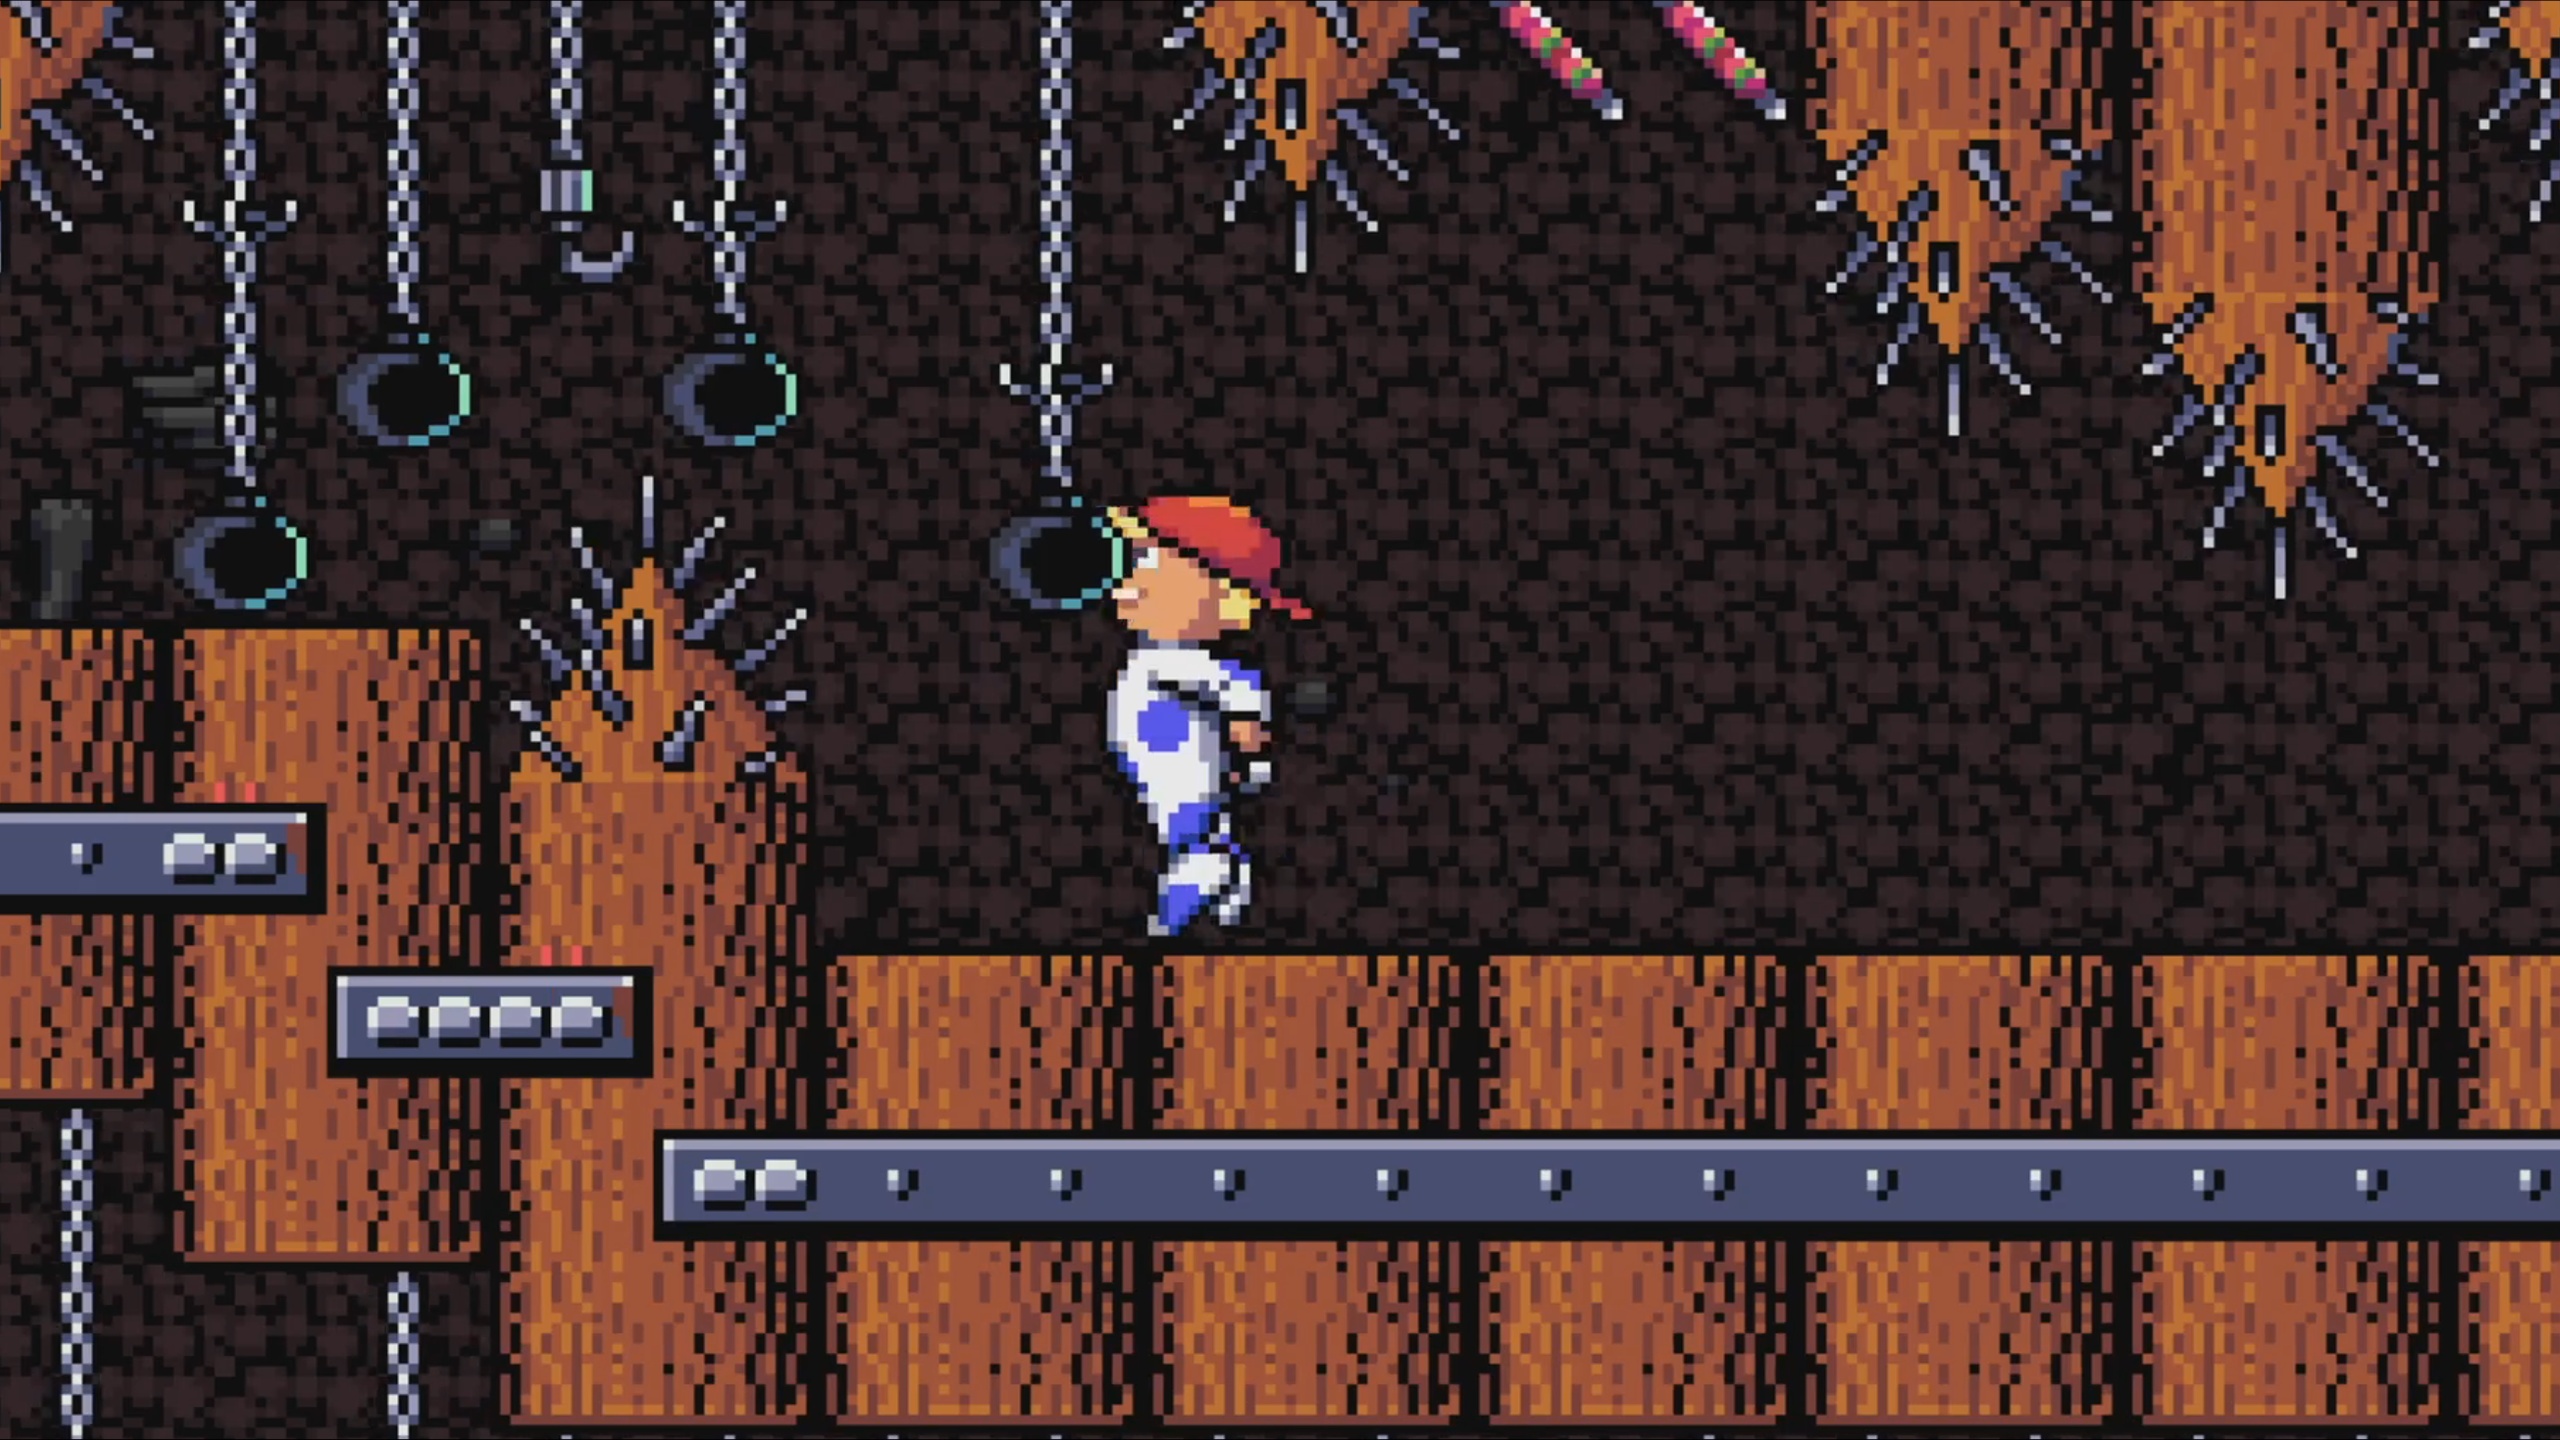
For jumping up either ledge, get a running jump and jump as Johnny crosses the line towards the final “stump” then stop before hitting the spike.
Now backtrack down with the consideration being the saw before you go back onto the ledge. Watch for the cannon that should be shot from a crouched position (standing position risks knocking it out offscreen and you’re unable to know when you go). Head back to the fork with the old checkpoint.
Right Fork

Jump to the right side and disable the 2 cannons before partially going down the ramp and luring the zombie back up. Don’t risk fighting it on the ramp. Now kill it and disable the same 2 cannons before going down the ramp proper.
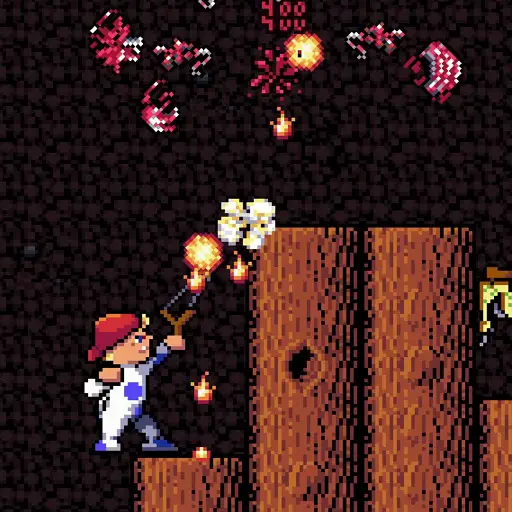
Enter the secret to the left and grab the Fireball. Stand below the zombie and shoot up at it for a clean kill. Use the lava that drips from it to disable the 3 cannons on the descent, otherwise you’re meant to rebound shots off different parts of the right-most wall with normal shots. Continue down and disable the wall cannon and shoot 4 fireballs over the spike stump to kill the zombie on the other side, as it can damage you as you land by the edge on the other side.
Now for my favorite jump reference: Line up the color divide between the blue and white parts of Johnny’s pajama feet with the edge of the stump you’re standing on, then press and hold jump and right at the same time for the entire jump arc and, assuming you were standing correctly, are guaranteed to clear the jump every time without damage. Just make sure the cannon has been freshly disabled before the jump.
Conveyor Chaos
The toughest jumps are over with now, just a matter of keeping cool on the conveyor belts. Make your way across to the upper right, and take the left path once you reach the spike ceiling. Crouch under the spikes and once at the heart, jump and shoot free the pet. Then head to the left area before the belt takes you back down.
Rebound shots off the wall to free the pet without hassle. Now go back down and around to the same belt fork and continue through the right path.
Once you get the zombie, aim up and rebound off the belt to slowly take it out. There is certainly room to jump down and combat it, but we’re aiming for consistency and it can turn around mid-patrol after all. Once it’s gone, ignore the zombie on the exit and climb the right side of the chain – there is a zombie at the top that can damage you if you are too close to the left side. Stand by the chest and blast the zombie and the final pet lock, freeing it and you from this achievement.
Companion Video Guide & Outro
To see this in action, I similarly have it in video form.
Thanks to Emberheart Games / Primoz V. for leading and developing a great soft remake of a classic! Also to Apogee for not sitting on their IPs indefinitely; here’s to future bigger re-releases!
هذا كل ما نشاركه اليوم من أجل هذا Monster Bash HD مرشد. تم إنشاء هذا الدليل وكتابته في الأصل بواسطة Ceekur. في حالة فشلنا في تحديث هذا الدليل, يمكنك العثور على آخر تحديث باتباع هذا وصلة.