- عنوان: Hammerting
- تاريخ الافراج عنه:
- المطور:
- الناشر:
Information about Hammerting is still incomplete. الرجاء مساعدتنا في ملء تفاصيل اللعبة باستخدام هذا نموذج الاتصال.
The game is really new, so there aren’t too many resources out there to help you. After spending many hours trying to figure things out, I decided to write my own guide for the early game, hoping that it will help newer players avoid spending hours looking at bug reports and release notes. Since I have not played the later stages of the game, this guide will be restricted to the early/early-mid game. Maybe guides for other stages of the game will come if I play that long.
مقدمة
أولاً, I created this guide for Quality of Life 4 تحديث – إصدار 1.2.39.0. The game is regularly updated so I will try to update the guide as well, but unless stated otherwise, the guide is about this version.
Note that I cannot vouch that doing what I propose will lead to easily (or at all) achieving the victory conditions since I haven’t won the game myself, so I will just lead through the basics of the early game, focusing on survival and setting up. لكن, so far the game appears to be quite predictable and thus if not for some huge miscalculation, the game should be able to progress in the same way until the end.
Hammerting is a colony sim game. If you have played other similar games (like Rimworld for example), you will be familiar with what you need to do in general, otherwise, let’s try to explain.
The goals of the game are as follows:
- أولا وقبل كل شيء, survive. You definitely can’t win if your dwarves are dead.
- Expand in every possible way. Number of buildings, number of dwarves, money in the vault, item stockpiles, amount of caves explored, good relations with the other factions.
- In the end, win. Achieve one of the victory conditions. This is the most optional however.
لذا, in the following sections, we will try to see how to work towards those goals during the early game.
Things that will not be covered (في الوقت الراهن) that are not necessarily late-game include Tailoring, mechanical stuff like drills and elevators, the Great Hall, and Whitesmithing. I will also not explain very many things about the Overworld (like relations), apart from trading.
نصائح عامة
Here are some general tips (in no particular order):
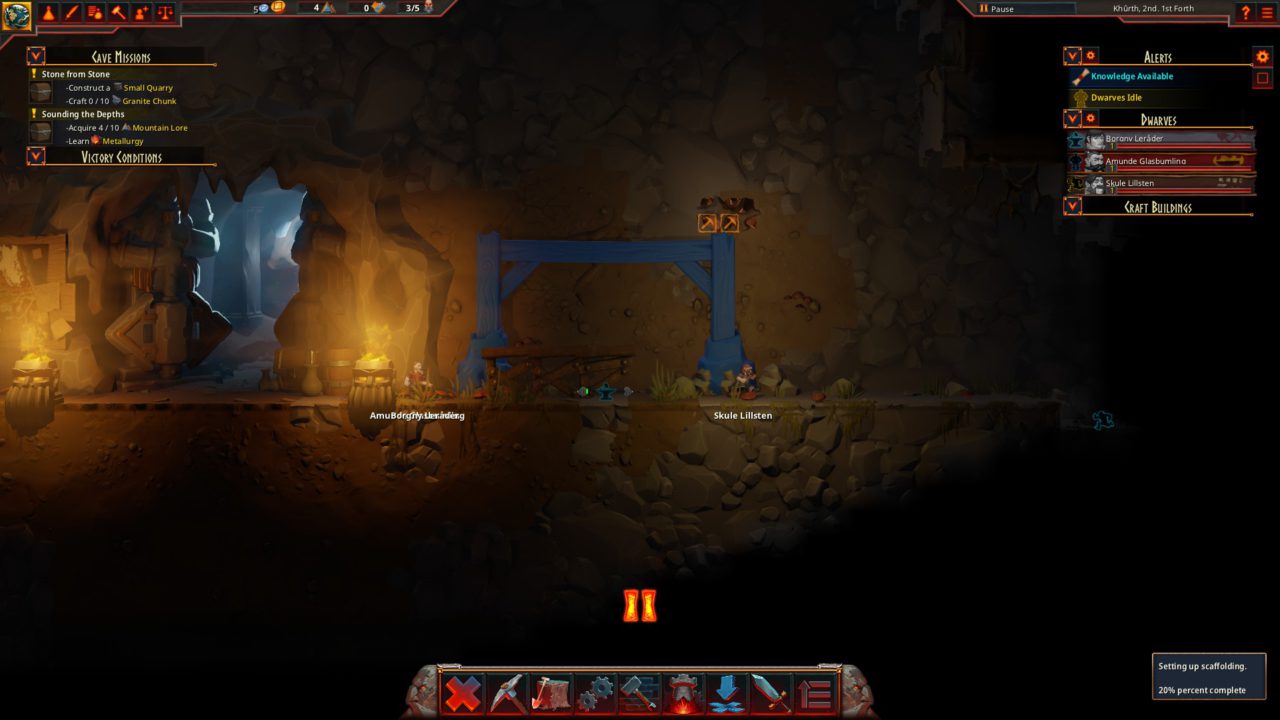
- ال Cave Missions the game offers in the top left are a great way to set goals in order to know what to do next at the start of the game.
- The currency that limits your expansion in terms of technology is Mountain Lore. You use it to unlock research, that in turn allows you to unlock buildings, crafting recipes, infrastructure and global improvements like Sovereignety. You gain it by استكشاف the caves, so make sure you always send someone to explore newly available places.
- Another important resource are of course Coins. Coin is kept in the Mountainhoard. You gain money by trading in the overworld and you need it to recruit dwarves and satisfy their greed.
- There are many items with different names but the exact same functionality. على سبيل المثال, fancy-looking Vendarii Lumber is exactly the same as old Reclaimed Lumber when you want to build a Room. لكن, items crafted with different materials will have different value when trading.
- Idle Dwarves are bad! Make sure they always have something to do.
- Your dwarves can’t be ordered directly to do a specific job in general, apart from movements and attacks.
- This in turn means that the only way to pick up items from the floor is either by having them be used in a recipe, or via the hauling job (which is low priority by default). So stop right clicking furiously like I did!
- The game is vertical so make sure dwarves always have a way to get up/down to a place. They have pretty long reach and can climb quite tall vertical spaces however.
- You can hold shift to place multiple of the same building. This is very useful for bridges and scaffolding.
- Mining terrain yields resources. There is a certain probability each dirt/granite tile will drop resources, and could also probably reveal an ore vein behind. You can see this chance by holding ctrl over a block.
- ال Maintain order button is very useful as to always have a supply of food, drinks, seeds building materials and everything else.
- Some buildings (like the Foundry and Smithy) require وقود, so you should have a stock of fuel ready for them to be refuelled. In the early game, the only source of fuel is الفحم.
- Be careful when you build something on top of a vein of ore! Any mineable blocks (terrain and ores) that are in the way of the building will be assigned to be mined but, if the building finishes first the will simply disappear. You can chose to first mine out the area if you want the resources or to just let the building be built quickly, ignoring the mining.
- Monsters can spawn in unlit areas, so make sure you light up the areas surrounding your base.
- If you come accross a spawner like Bleeding Atrium, it might be a good idea to not destroy it outright but build a gate to the path from it to your base, allowing it to hold until you send the dwarves to farm the monsters.
Starting a New Game
Let’s finally get to the good part!
The default settings are ok to start. You can lower enemy difficulty to Easy if you want a more chill experience, but Default is pretty chill too.
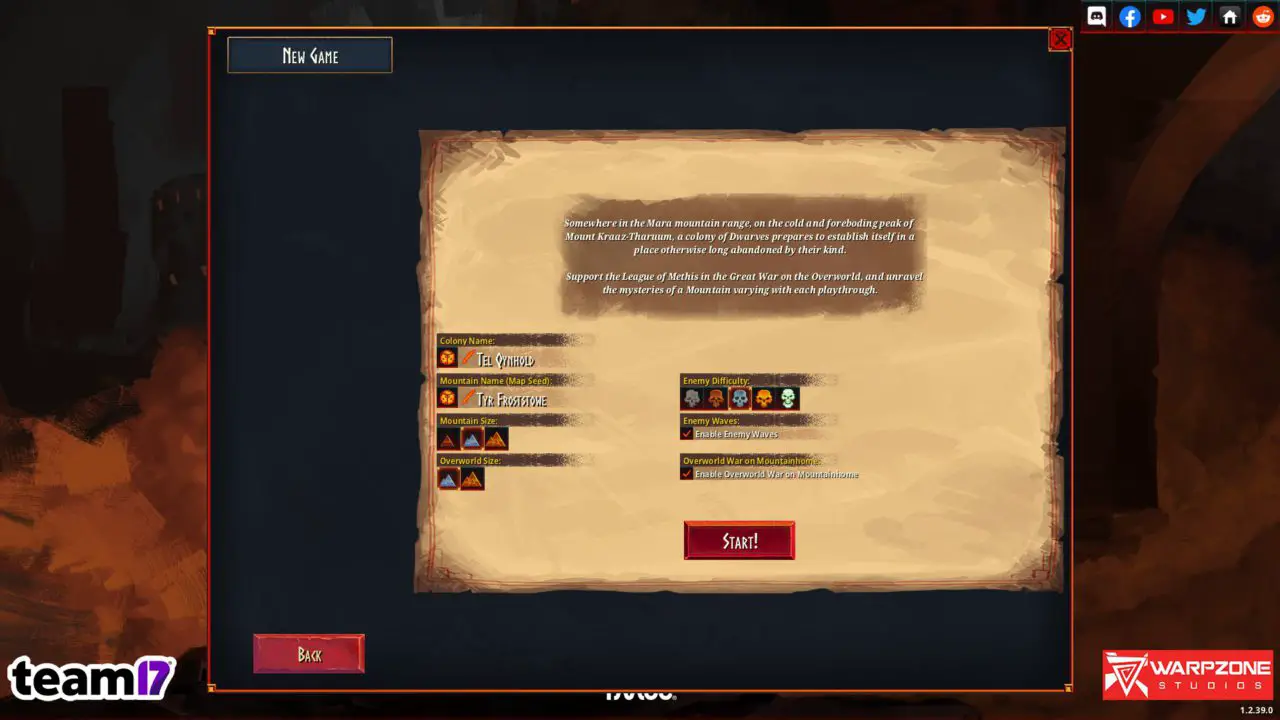
As soon as you start, you will be greeted by the in-game tutorial. Think of it as a mainly crash course for the UI, and a bit more info. I suggest you follow it for the first playthrough.
If you unpause, you will see your dwarves arriving in the Mountainhome.
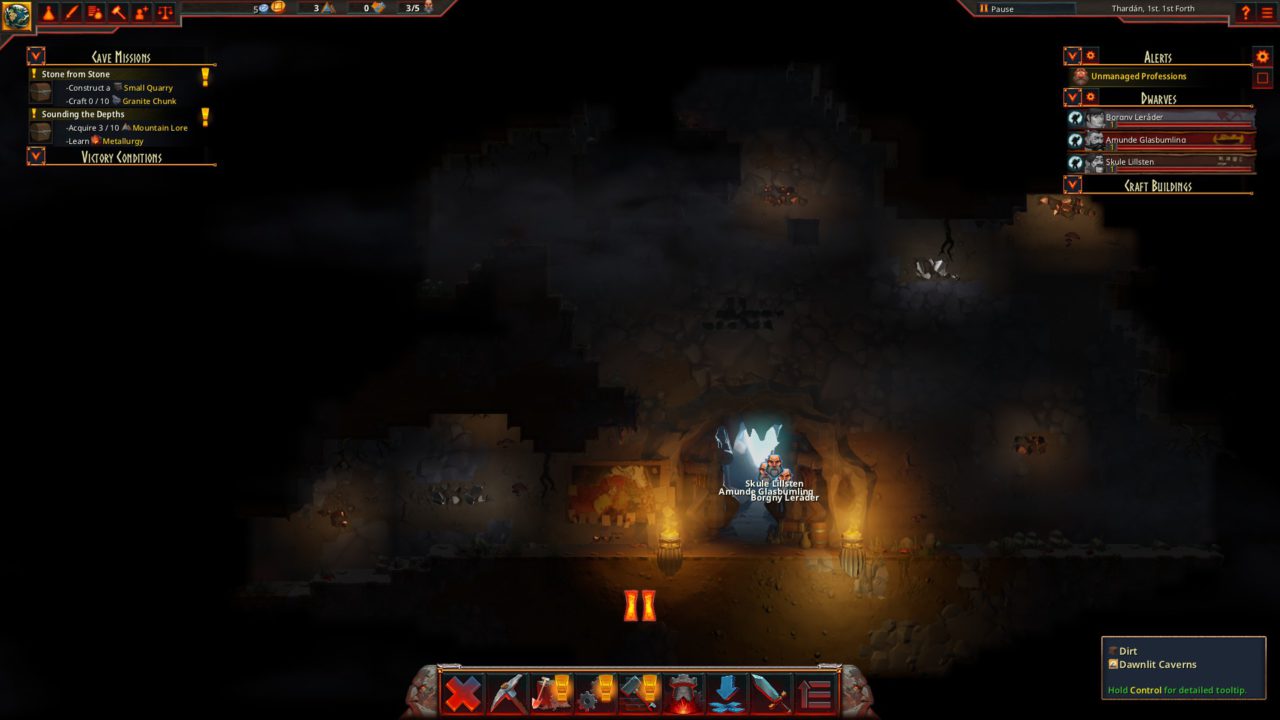
When they arrive, pause the game and take a look at them. In the Character view you can see their skill levels for each job.
See what their strengths are, in order to know what skills the dwarves you recruit need to be strong in to cover the starting trio’s weak points.
The most important jobs for the early game are Building, Stonemasonry, التعدين, Metallurgy and Blacksmithing, and dwarves with high levels at these will do the job faster.
You can also set some favorite jobs although it doesn’t really matter at this stage of the colony.
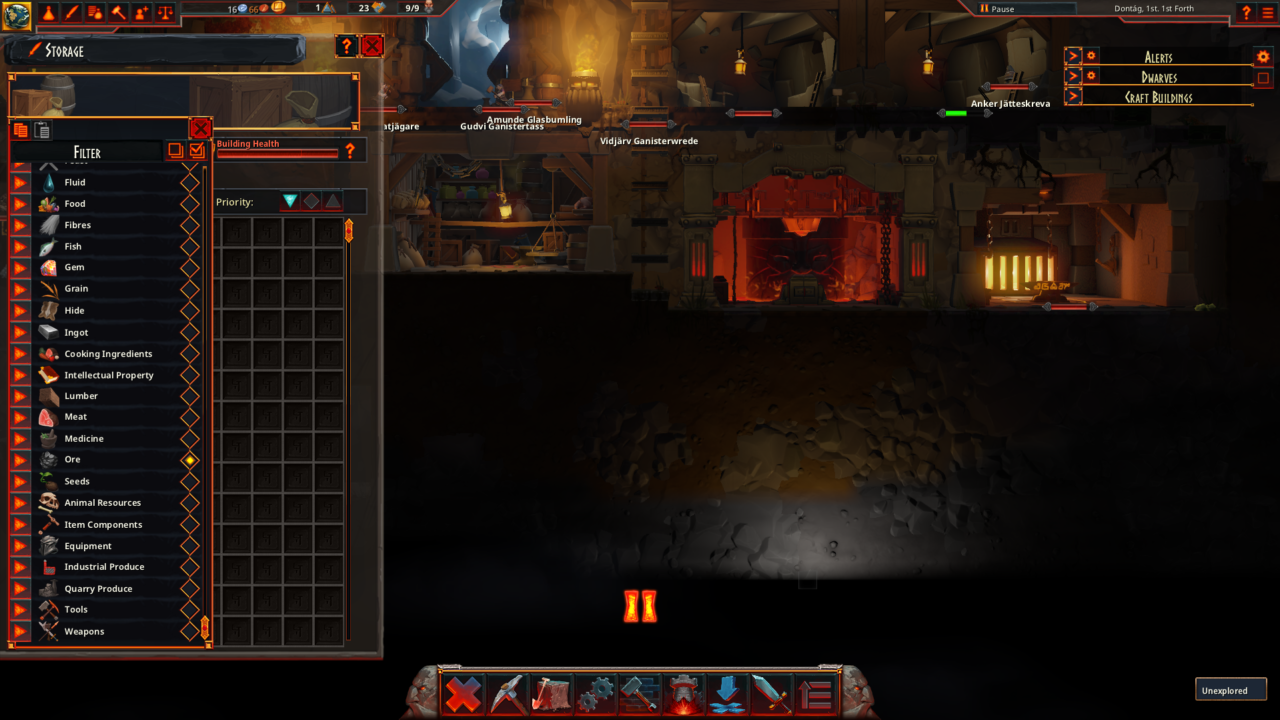
Next to the door, you can find The Great Mountainhome Chest. It contains the provisions that will be necessary for the start of your game, until you start producing your own food, drinks and medicine. Also note that this chest cannot be used as storage. Dwarves will just haul items to/from there but only as an intermediate step for overworld trades, they won’t pick them up from the ground.
The first order of business should be to build a Quarry. It is essential for the production of building materials and also in order to trade.
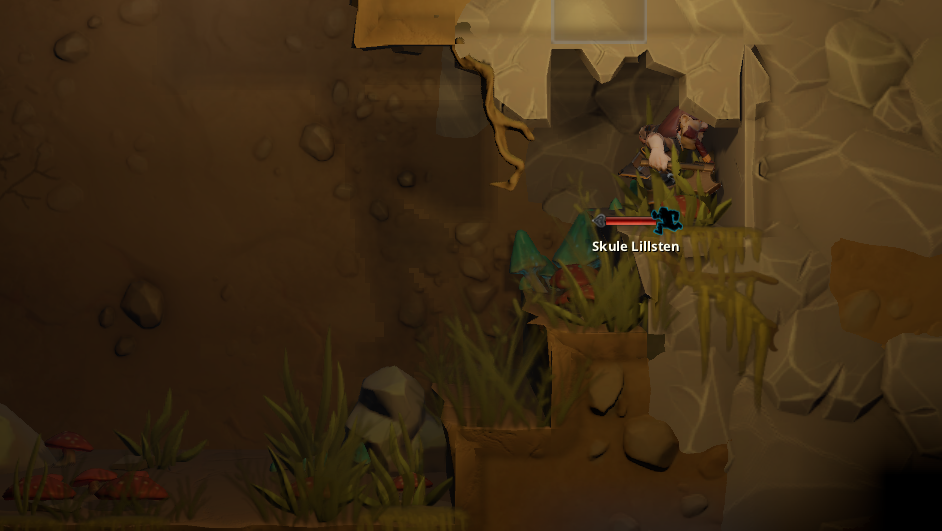
أيضًا, send the dwarf with the highest Exploration/Militia level to explore either left or right from the entrance.
Keep moving your explorer, while keeping an eye for big green mushrooms called Toncap Mushrooms so that you know where they are. If you stumble into any old supplies, abandoned minecarts etc, make sure to click on them and then Rummage.
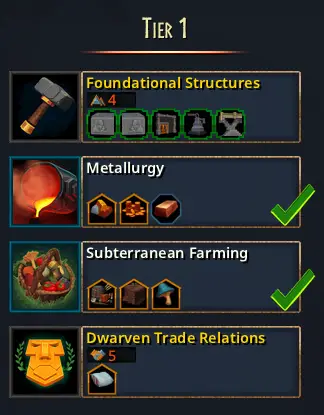
As soon as you have enough mountain lore, research Metallurgy and Cave Farming.
When the Quarry is complete, click on it and start crafting Granite Chunks. As soon as you complete 1 chunk, you will unlock further stone products.
Give the order to build a Foundry و أ Cave Farm and see what materials they require so that you can craft them at the quarry. Make sure you build any necessary scaffolding from the infrastructure tab in order for the dwarves to be able to reach them (or build them on “ground level”).
When they are done building, assign them to craft some Copper Ingots و ماء respectively. Make sure you maintain a steady supply of water for the dwarves to drink.
أيضًا, start your first farm by creating a row of fertile soil whenever you want (مع على الأقل 2 air spaces above it). ثم harvest the mushrooms you found in the wild and give the order to sow them there (the workers will automatically pick the harvested mushrooms up wherever they are). Both these options are in the landscaping tab.
فضلاً عن ذلك, find an easily accessible copper vein and assign it to be mined.
When you have crafted some Granite Pillars, go to the Overworld and sell them to the nearest settlement. If they sell wood (any kind of Lumber), food or medicine you can buy some too, although it will be quite expensive.
This should be enough to get you started, so I won’t continue in this “tutorial style” anymore, but rather just offer some important goals in this section and helpful tips and information in the following.
After you are set with those basic things (and you have planted at least some mushrooms so that they start growing immediately), continue exploring, trading and doing the missions in order to gain Lore.
The goal is to research:
- Blacksmithing – to start making some more money (compared to simply selling stone products)
- Cooking – because cooked stuff restore more hunger than their raw materials
- Medicine – to start producing your own health recovery items
After researching each of these, construct the building you just unlocked.
Always be aware of your food and water supply. Don’t be afraid to buy some food if you don’t think you have enough.
أيضًا, make sure you mine enough copper so that you don’t run out of ore to smelt (but also try to not overdo it in the early stages as you don’t have many dwarves).
As soon as you feel comfortable with your money, you can recruit another dwarf. You can dismiss and reroll them if you are not satisfied with their traits, or most importantly if you can’t afford them.
If your forge stops working, make sure they have coal in it (indicated by the yellow bar that represents fuel). If they don’t, try to mine some (you will definitely have found a couple of veins during your explorations).
الأقزام
Each dwarf is unique. They have their own Ancestry, their own سمات, Attributes, Stats, المواهب و Professional abilities. Their current status is represented by the Tools they have in their belt, their Condition و Effects and the items currently in their Inventory.
These values affect each other and ultimately have effect on gameplay, for example how fast the dwarf will mine a block of granite and how much health they have.
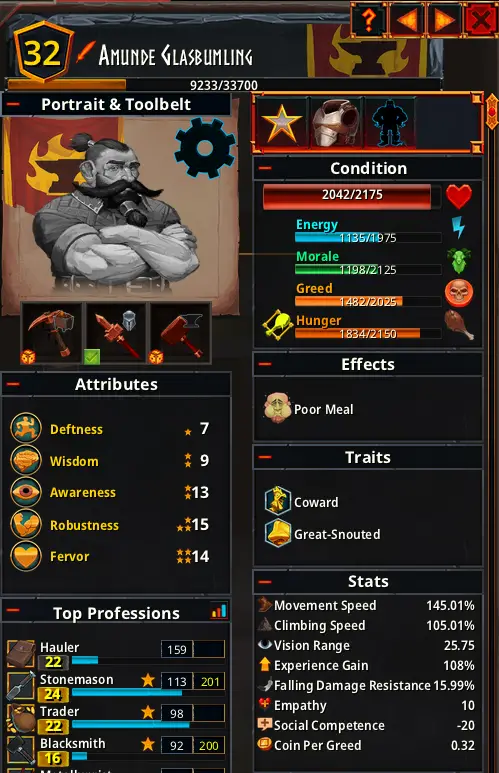
A short breakdown follows. You can always hover over something and hold ctrl to see detailed effects or what contributes to it.
- Ancestry يكون the clan the dwarf belongs to. You can see it and its effects by hovering over the flag in their profile.
- سمات نكون specific personality quirks that the character has. They mainly affect Attributes and Stats.
- Attributes are specific scores that improve the dwarf΄s stats, condition and abilities. There are five of them, Deftness, Wisdom, Awareness, Robustness and Fervor. The names explain a bit about the areas they affect.
- Stats are values that affect the presence of the dwarf on the map, as well as their relationship to others.
- ال professional abilities represent the skill level in a specific Job the dward performs. More on that on the Jobs section
- المواهب are skills that you can chose to learn as they level up. The talent tree is accessed with the yellow star. They improve the dwarf in all other categories. As the game progresses you can earn all of them, so the only thing that matters is the order in which you unlock them.

على العموم, apart from Traits which can also be negative or mixed, everything else has a positive impact so number go up good.
How to keep them happy
In order to be alive and happy, you need to keep their desires satisfied. Those desires mainly fall in 5 categories, represented by the Condition bars in the Character View:
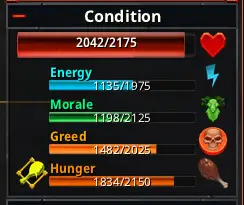
- Health (the red bar): You keep it high by not getting the dwarves wounded and have medicine that they can take if they are wounded.
- Energy (the blue bar): You keep it high by allowing the dwarves to ينام and by giving them food like Lichen Soup that restores Energy.
- معنويات (the green bar): You keep it high by having drinks available. ماء is ok for the beginning but other beverages are better when you unlock them.
- Greed (the lighter orange bar): You keep it high by keeping a lot of مال in the Mountainhoard (some of which they will take as payment from time to time) and give them a personal Dwelling to store their wealth.
- الجوع (the darker orange bar): You keep it high by having طعام that the dwarves can eat.
Recruiting
In the recruiting screen you see up to three dwarves that want to join your Mountainhome. There you can view their Profession levels, Attributes, Traits and Ancestry, in addition to the recruitment يكلف.
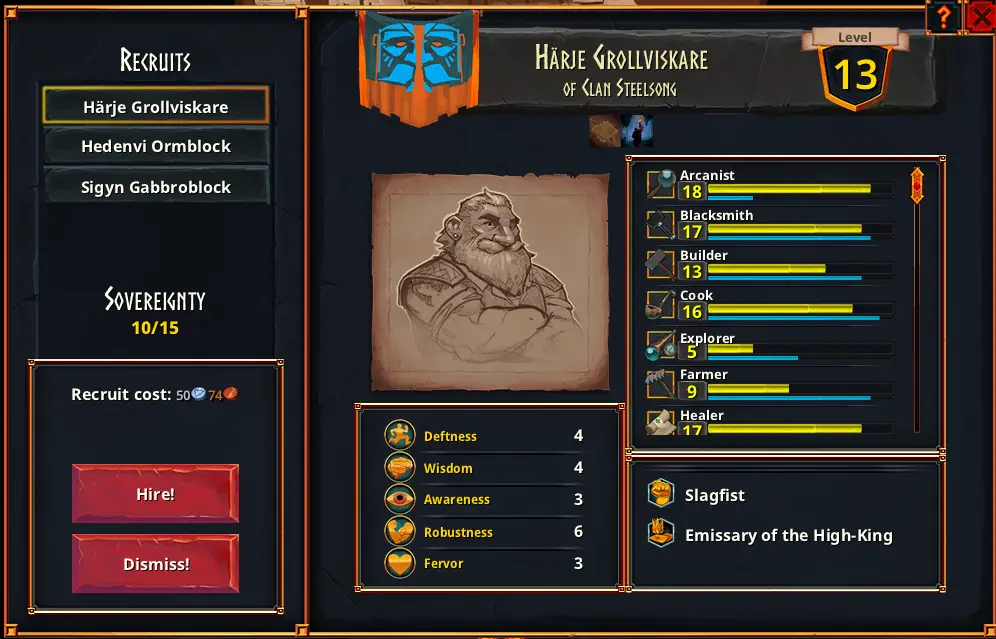
If you don’t want the ones that are currently available (either because of their traits or skills), you can dismiss them and keep an eye on for new ones to appear.
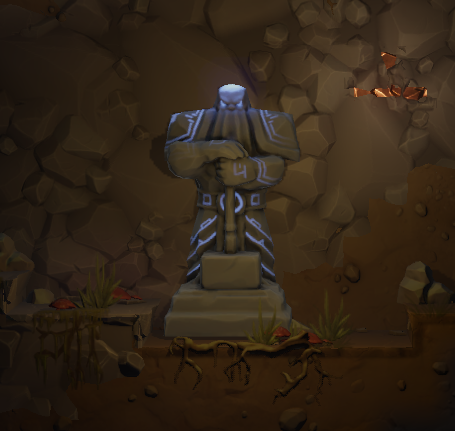
The number of dwarves that you can have in total is limited by Sovereignety. The only way to gain it is through research and by discovering Ancient Dwarven Statues:
Customization
You can rename them according to their preferred professions if this helps you know who everyone is, but if you like roleplaying you won’t. Or you can rename them if you prefer a different kind of roleplay I guess.
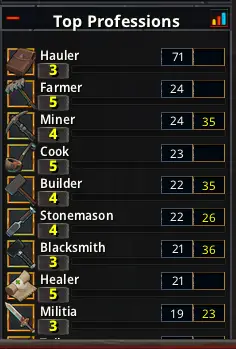
Jobs
Jobs (أو Professions) consist of all the work that a dwarf can possibly do for the colony. Things like mining, مبنى, crafting things like food and tools or attacking enemies.
Everyone is more skilled at certain jobs than others. This is represented by the level of the profession in question. These levels raise the more the dwarf works at the respective jobs.
لكن, this is not all there is. When the time comes to do the job, what is being taken into account is not the level itself, but the Production value for each job. This roughly represents by how much work is being done in a single movement (like a swing of the pickaxe). I am not entirely certain on how Production is calculated, but it is definitely improved by the skill levels, the attributes, and the equiped tools.
Managing Jobs
لحسن الحظ, you don’t need to tell each of the dwarves what to do. They are being assigned jobs automatically, thanks to a set of defaults.
لكن, this system can be tweaked to our advantage in several ways:
- أولاً, by allowing/disallowing professions for each individual dwarf. When the profession is greyed out, the dwarf will never atempt to do this job. This can help you save the dwarf’s time for things they are actually good at.
- فضلاً عن ذلك, by favoriting professions. A dwarf will be more likely to be assigned work in one of their favorite professions.
- Afterwards, by increasing the amount of workers for the specific job in the Job Broker. This will not affect the individual dwarves, but the whole colony, making it more likely for this job to be assigned before others.
- أخيراً, by setting the priority for a specific task either from its building, or through the 2nd page of the Job Broker (نعم, there is a second page to it, try the arrows on the top right). This is more of an emergency measure than anything else, I use it when some thing gets delayed for too long and set its priority to high and lower the rest a bit.
For the early game it is better if you leave more jobs open for each dwarf, slowly specializing as you have more people available for each job. As an example, you probably do not want your main Blacksmith to be hauling stuff from the furthest expansions of your base during the late game.
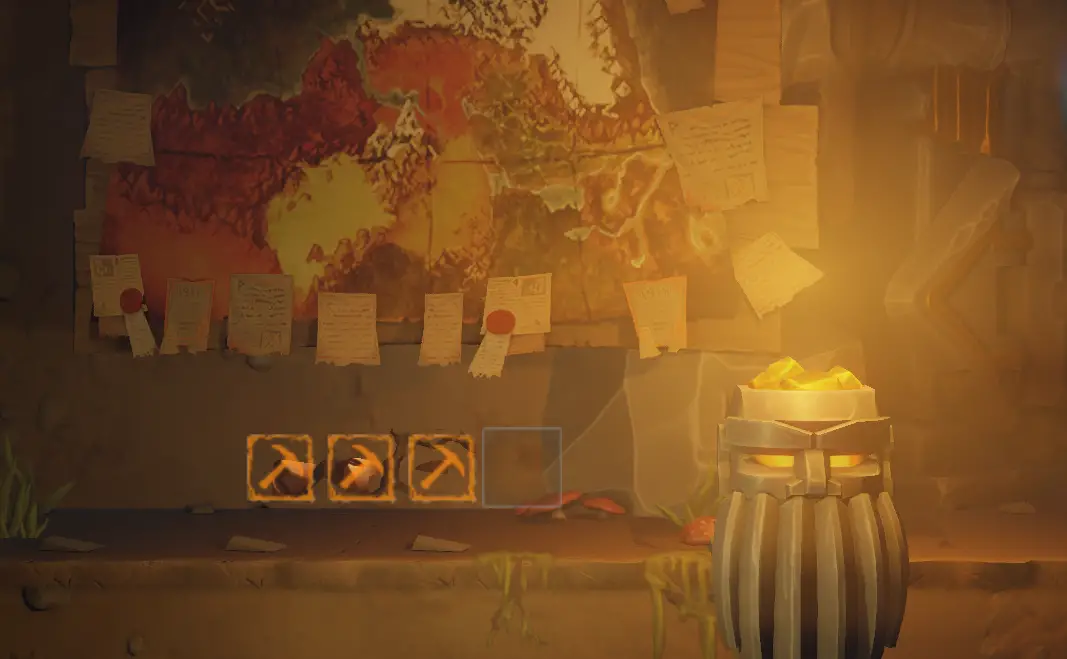
Tools
Think of tools as simply giving a production bonus on top of the base production governed by profession skill level and the other stats of the dwarf. You can see the difference between the two as in the character view, the white numbers represent the base value and the yellow also adds the tool’s bonus.
Crafting Tools
في رأيي, this is one of the most interesting parts of the game. Each material (for example Iron Ingots) has a few properties like وزن, Preciousness, Hardness and Resilience, which you can view with the hover+ctrl combo. These values affect the trade value of the material or byproducts but they are also important in crafting tools.
In turn, recipes modify these values too and by combining different parts (a toolhead and a handle) you gain tools that are better suited for different tasks.
I won’t go into much detail because you can discover it yourself by examining the tooltips and trying different combinations, and also there are very detailed guides available already.
As a starting point for the basic toolheads:
- التعدين: Pickaxes with more weight and less preciousness
- Stonemasonry: Chisels with more hardness and less weight
- Building: Sledge Hammer with more weight and less preciousness
- Backsmithing: Sledge Hammer with more resilience and hardness and less preciousness
- Metallurgy: Ball Peen Hammer with more resilience and less weight
- Whitesmithing: Ball Peen Hammer with more preciousness and less hardness
- Cooking: Round Ladle with more preciousness and less resilience
- الزراعة: Four-Tine Rake with more resilience and less hardness
- Tailoring: Needle with more preciousness and resilience and less weight
- أسلحة: Hewing Spear (before you unlock swords) with more hardness. Weapons are a little bit more complicated as there are different damage types though and speed plays a role.
Handle types also play a role (for example straight vs curved or bone).
There are also some types of tools that are good for more than one jobs (but not as good as the specialized items). The earliest example is the Butcher’s Axe that can be used for both combat and cooking. However I have not experimented much to know if they are worth in general, although they probably are in specific situations.
كما ترون, most of these make intuitive sense, so it’s not entirely necessary to try and min-max everything following some guide and and you are free to experiment on top of this. لكن, I leave this up to you.
You should know that all dwarves can do all jobs, even if they don’t have the proper tool equiped. In this case however, they will be a lot slower without the production bonus of the tool.
لذا, you should strive to provide the best tools for each dwarf in order to drastically speed up their jobs.
It is best if you give them the tools for the jobs that are their favorites, since this is what they will be doing most of the time.
There are some groups of professions that (at the very least) استخدم same tool type (as shown also the breakdown above), it is best if you specialiaze your dwarves to one (أو أكثر) of the following groups.
- Builder/Blacksmith both use the Sledge Hammer. In the early game Metallurgy too can be considered part of this to a lesser extent.
- Metallurgy/Whitesmithing both use the Ball Peen Hammer (or the Sledge Hammer before you unlock it). The other hammer jobs also get bonuses from some Ball Peen Hammers.
- Mining/Stonemasonry can both use the Pickaxe, although specialized stonemasons are better off with a chisel.
مثال
I usually have 1 slot for a weapon so that everybody is able to defend, and the other two are for one-two of those groups or another profession category like cooking, farming and tailoring that need their own dedicated tools.
Let’s look at Gyller for example.
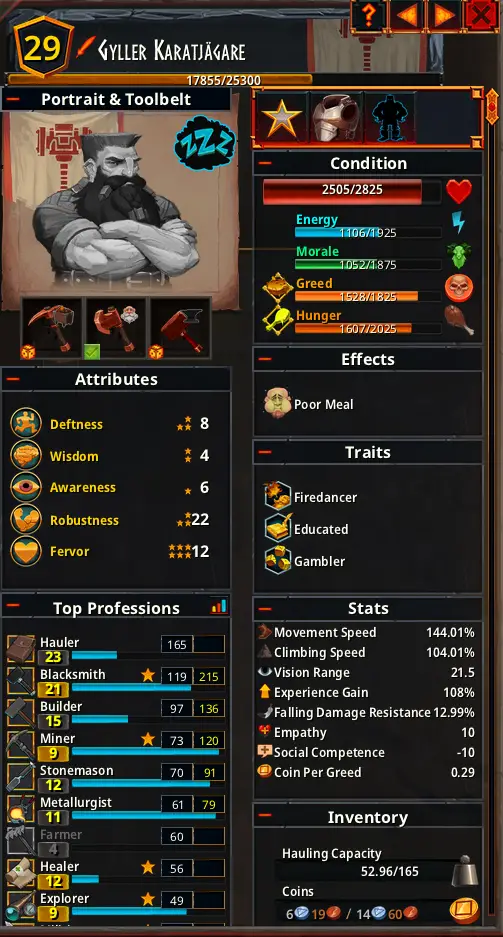
Apart from hauling (which is pretty situational for everyone), Gyller is an excellent Blacksmith. This means that he definitely wants to have this job as a favorite, and a Sledge Hammer equiped.
This also means that since he has the hammer, it is ok to have Builder and Metallurgist allowed, since his hammer will also give some bonus to this. Later when the tools will get even more advanced and varied it might not be worth it to allow Metallurgist, or even Building too but at this stage that there aren’t too many dwarves around, they need to be less specialized.
Then we see that he is a decent Miner and Stonemason, and pretty equal at the two despite the fact that he has done less Mining (لذا, the level of the skill contributes less to production but the attributes more than make up for it). لذا, I decided to make him mostly a Miner in order to train even more and leave stonemasonry allowed since pickaxes always give some bonus to that too.
We already have enough Farmers in this colony and it is better if we let him keep the pickaxe instead of giving him a Farmer’s Rake, so this job gets disabled.
He is also a very good Healer and luckily this job does not require a specific tool so it’s favorited.
The other skills are not as important for this example, I hope it helped.
Money and Trade
This resource is important for three things.
- أولاً, as we already talked about, maintaining the dwarves’ greed.
- ثانية, recruiting more dwarves.
- Third, trading to acquire resources.
There is a limit in how much Coin you can have stored. You will need to construct Vaults in order to be able to store more of it. This is important, as after surpassing your Mountainhoard’s limit, you will start losing coins.
Just build a small vault before you start trading in greater quantities.
You can easily go through the early game with one or two Small Vaults, just make sure you spend enough (by recruiting or trading) in order to not go over the limit. There are also Medium and Large vaults, the latter being part of the victory condition.
Trade
Trading is the main way you make money. You could also find abandoned treasure, but obviously you can’t rely on this.
Trading happens in the Overworld. There are settlements on the map, belonging to one of the factions. هناك, you can buy and sell items in exchange for Coin.
When you sell something, the dwarves have to haul it there and you will receive the money afterwards. لكن, when you buy something you buy it immediately and at some point the dwarves will bring the goods home.
There are different kinds of settlements, with distinct design which helps distinguish them at a glance: Mines and Lumbermills (that sell Stone/Ingots and Wood), Hunter’s Lodges (that sell animal products), Markets (that sell many things but at higher prices) and Towns and Capitals that sell more miscellaneous things like medicine and seeds.
When you raise your trade level with a settlement (by selling and buying goods), you will gain more visibility over the Overworld map. هكذا, new settlements will be progressively uncovered, giving you more opportunites for trade.
One of the most profitable things to sell early on, apart from Granite Pillars, is Simple Lanterns. They are cheap to make (copper is abundant) and they sell for quite a lot for an early game item.
Apart from this, there are several other general rules that can help you trade efficiently:
- Sell them things that they have a demand on and, respectively, try to buy the surplus as shown by the yellow exclamation marks.
- Capital citiies are more likely to give high prices for Granite Pillars. They also give high prices for food, so if you have a good farming set up you can start selling them mushroom stews. It is a little money but it quickly adds up and you have a literally infinite supply.
- When two factions are at war, keep an eye and sell building materials to the destroyed towns, as well as food (that they need to replenish manpower). This will also be indicated with yellow exclamation marks, but it’s best if you expect it.
- Forest villages (Lumbermills) will buy axes at good prices, and the same stands for Mines and pickaxes. Mines will also offer good money for lanterns most of the time.
- Before you start smelting Iron (and even after some times, since Iron Ore is not as abundant as Copper) you can buy Iron Ingots from Mining settlements and sell them lanterns at high price to make up the loses. This is not entirely worth it as at some point you will gey Iron for a lot cheaper yourself, but it can help you make Iron tools for everyone and give you a headstart.
- Keep an eye for cheap bones. In my experience you can never get enough and it does no harm to start stocking up on them earlier.
Αll of these rules (that make intuitive sense) are based on some values each settlement has:
Fortification is restored with Granite Blocks and Pillars, Manpower with Food and Drinks and Might with Weapons. You can view those as colorful bars on the settlement view.
There are also the trading missions that Overworld settlements give you. This is not much about money, but rather Trade Lore.
Note that you first need to accept them (by clicking the green tickmark)
When you accept them, the items will be sold automatically over however many trips are required by your trader(ق), or you can do it manually.
You can also upgrade the other factions’ settlements by building your buildings there. In general they provide either a bonus to Production (making the town sell more and in turn cheaper goods) أو Fortifications, making it harder for enemies to conquer them (أو, prolonging a profitable -for the dwarves- war). فضلاً عن ذلك, upgrades will help improve your relations to the faction and reveal a bit more of the map. ال Dwarven Milestone is very cheap and you can even start building them earlier on.
Rooms and Layout
One of the most fun parts of the game is designing your base, where goes what.
You need to make sure that your buildings that synergize are close by, so that the dwarves don’t have to haul from too far.
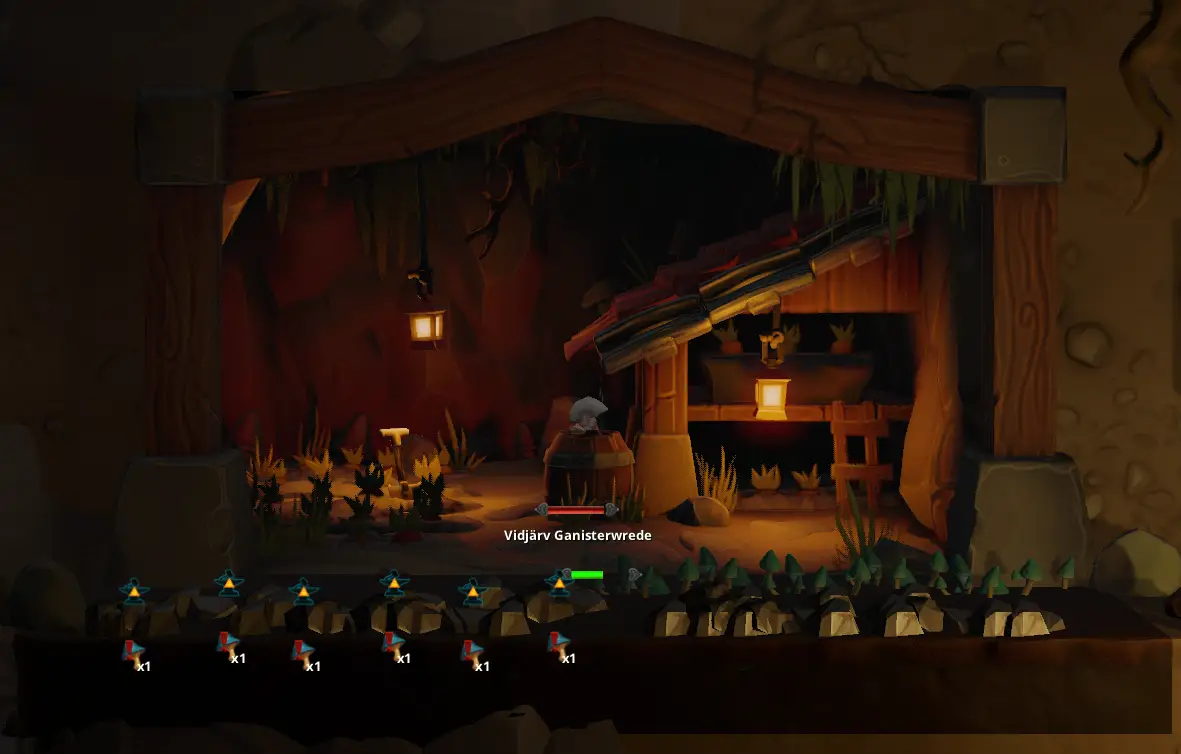
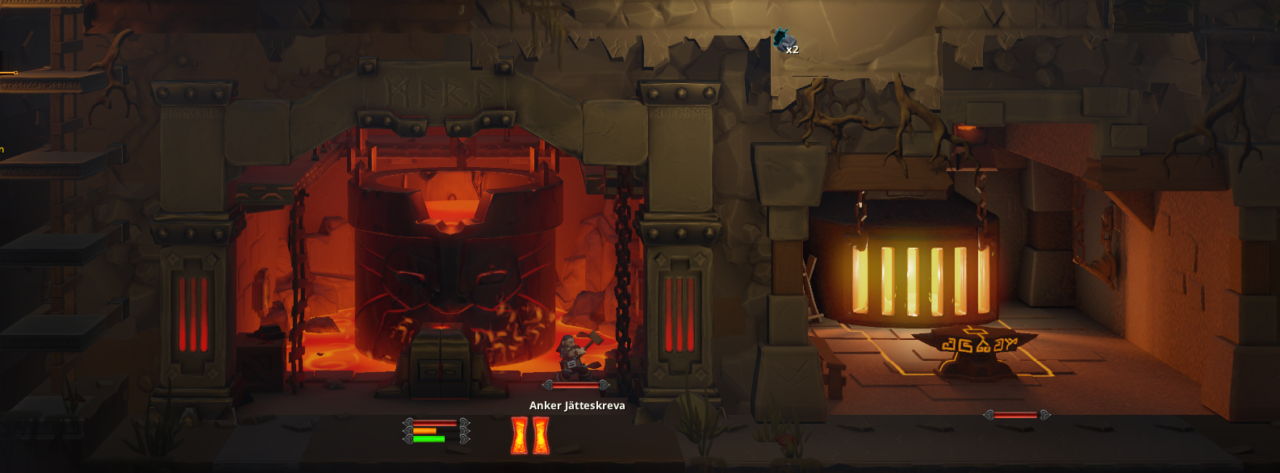
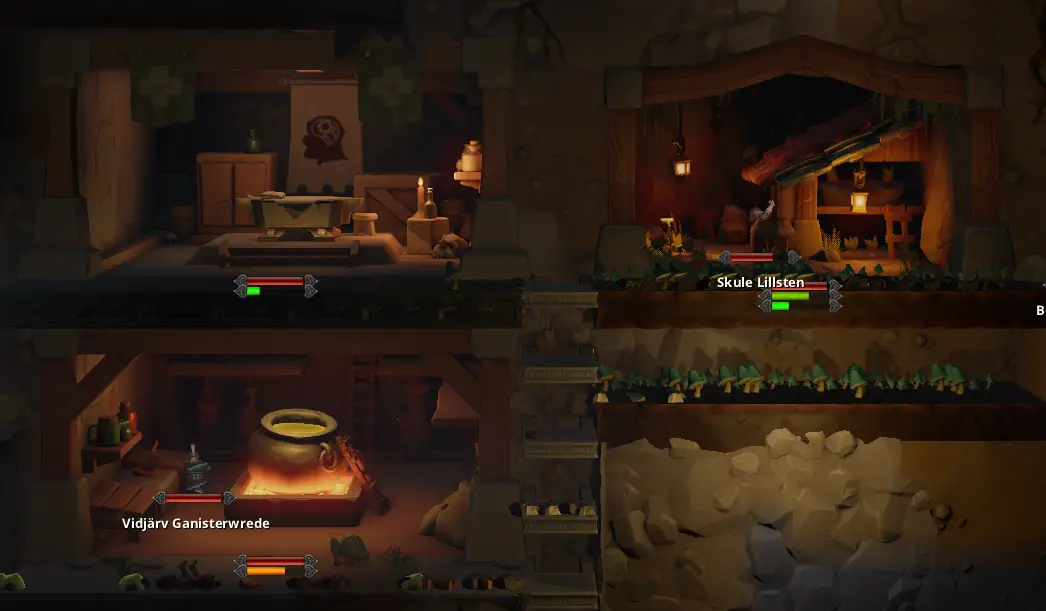
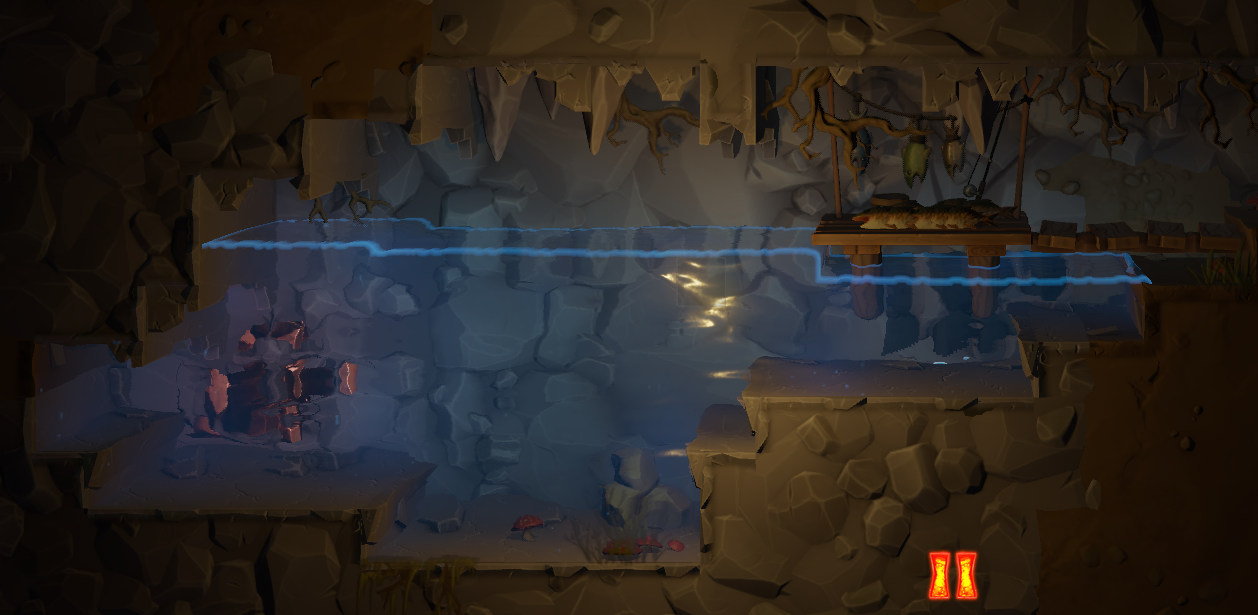
The simplest example is Foundry + Smithy (since the Smity uses the Ingots smelt at the Foundry), or Cook House + Infirmary + Cave Farm + المزارع (because they will use mushrooms and water) as shown in the pictures below.
أيضًا, it is important to have storages close by most of your production buildings, and set them to store the stuff that are relevant to each building.
على سبيل المثال, a storage for Ores next to the Foundry and Smithy, in order to store fuel and raw materials.
If you have later buildings in your mind too, you can combine even more buildings with more storages, like Infirmary, Cook House, Cave Farm, Brewery, Tailor’s Workshop and Arcane Workshop close to each other, the farms and storages for plants, water and animal products. Most of those buildings use each other’s products as input and need access to those storages.

This is just an idea for a building cluster, you can try whatever you think might work.
Dwellings should be somewhere central, or wherever you need your dwarves to be. على سبيل المثال, if you have a mining outpost somewhere further, it does not hurt to have a couple of dwellings for the people that work there close-by. And if your cook stays near the kitchen a lot of trips will be saved (as shown in the above screenshot with the building cluster, there are also two dwellings for people that work there).
Farming and Cooking
الزراعة
Farming is the way that you can get food and other resources sustainably, so that you won’t need to trade for them.
The most important crop is the Toncap Mushrooms. You can use it for everything in the early game, مشتمل طعام (Mushroom Stew) و Medicine (Mushroom Paste). لذا, as soon as you have a good supply of it, it is sure that your dwarves will not die (at least not out of starvation and aggregated injuries, إنه).
To produce beer, you need grain. Gloomwheat also works but it has other uses too, so the best crop for this job is Mountain Barley, especially since the seeds and the plant are a different item so you will always have seeds stored.
ال Citadel Mushrooms are your only choice if you don’t want to trade for Lumber, so at some point you will need to grow them. أيضًا, when you have enough of a stockpile you can use it to make Charcoal, eliminating the need to search for coal veins.
Before you farm anything, you need to first find the respective seeds.
على سبيل المثال, as we say in the first section, Toncap Mushrooms drop when you harvest the wild ones, and then you replant those at your fertile soil.
During earlier versions, you needed to replant mushrooms but this is no longer the case, you can use everything the farm produces. This can cause confusion if you search online.
The simplest way to get the basic seeds:
- Toncap Mushrooms: Harvest the wild ones that are found everywhere.
- Gloomwheat: You can get it as a drop by some enemies like rats. فضلاً عن ذلك, as soon as you will unlock it you will be able to convert Lichen (which there are multiple ways to get) to it at the Cave Farm. Note that the seed is the actual crop.
- Mountain Barley: I am not sure if there is another way to get its seeds otherwise, but there are usually available for trading at many towns. Note that the seed is a different item from the crop itself.
- Citadel Mushrooms: You also gain them by harvesting the wild ones. لكن, the chances that they will drop the spores is slimmer, so be careful. It will not be easy to set up this farm, and the big mushrooms take a long time to grow.
Farming Setup
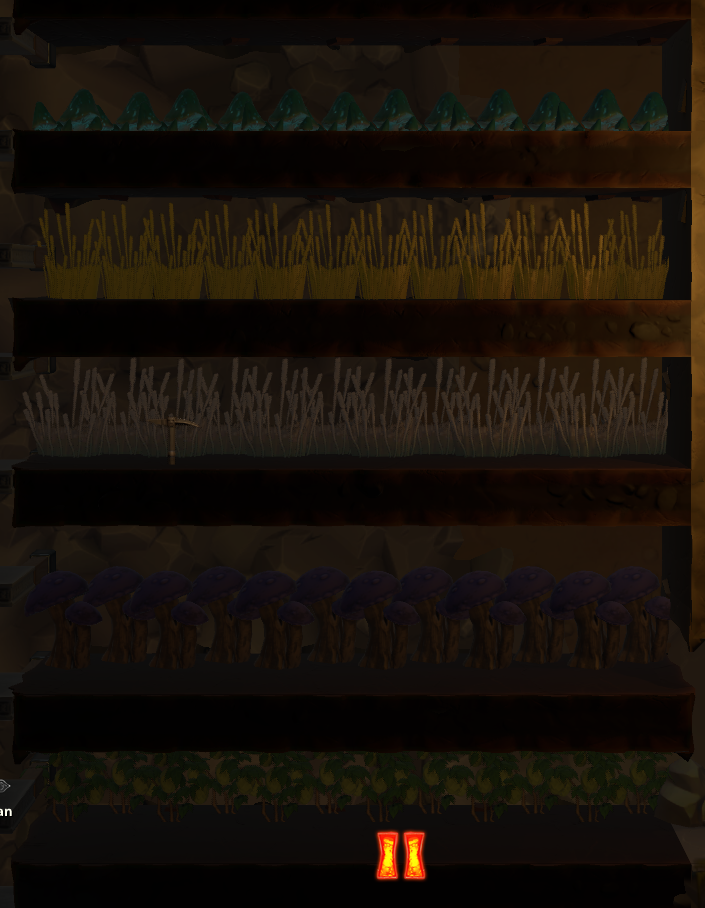
All crops have to be grown on fertile soil, مع على الأقل 2 air spaces above them.
The exception to this are Citadel Mushrooms, that need 3 blocks of air above the fertile soil in order to grow.
You can have many rows on top of each other like so, it doesn’t affect anything and it looks nice.
صيد السمك
If you have discovered a pool of water and have researched Cave Fishing, you can construct the piers on top of the water and give the order to fish (note that this is a Farmer’s job and not a Cook’s).
ال “ماء’ مستوى (shown if you hold ctrl on it) of the body of water you chose to fish in will deplete, ولكن لا تقلق, it will regenerate so you can fish again.
Fish are a good sustainable alternative to Mushroom Stew, which the dwarves don’t like all that much.
طعام
You should know that dwarves can’t eat everything, even if the item is “طعام” in a way. على سبيل المثال, raw rat meat. In order to see if they can eat something, hover over it and check if it says “Restores Hunger: XYZ”
If you have Wheat to make flour, you can start making Hard Tacks and Bread. Bread is awesome since it also restores health, but it requires eggs which you will need to trade for.
Roast Meat is another nice option, since you are bound to kill a lot of rats that will drop meat.
Brewing
As soon as you unlock it, create a Brewery. It is the way to keep morale high, and it is not expensive if you have set up your barley farm.
أيضًا, Mead can be sold for quite high at destroyed town due to it restoring Manpower.
Research Progression
To summarize all the things we learned before, we can take a look at how they are reflected in the order in which Knowledge is being unlocked.
As stated in the starting section, the basic Knowledge you need to unlock is:
- Metallurgy, Subterranean Farming (you will get both pretty quickly)
- Blacksmithing
- Dwarven Trade Relations for Dwellings as soon as you get 5 Trade Lore
- Cooking, Medicine (depending on what you need more first)
After these, Adequate Trading Records is important because it unlocks Storage.
Afterwards, you definitely need better weapons so Spear Making is the way to go.
From this point onwards, you should know enough to chose your next research. You will also have more time to plan and think about it since you will start gathering Lore a lot slower (and in rather big bunches as instead of just uncovering more caves, you will get it from uncovering important locations mostly, which are usually in caves that contain a lot of them).
Some goals to work towards:
- Complex Stonemasonry is useful to unlock Talents.
- Brewing is necessary in order to boost Morale (Dwarves will be sick of drinking only water at this point).
- Woodworking Techniques in order to be able to farm your own wood and coal and sell axes to Forest Villages
- Advanced Casting to smelt Iron
Established Authority is a good Knowledge too, since it does not require Mountain Lore (and getting Trade Lore is a lot easier) and it gives you a big Sovereignety bonus to reruit more dwarves, although the other items you unlock can’t be used until further down the road.
In order to build the big versions of Quary, Foundry and Smithy, you need to craft Support Beams first. They are unlocked through the Probing the Depths knowledge in Tier 4 (despite the buildings themselves being unlocked in Tier 3).
If you hover over a Knowledge, its prerequisites are colored red so use this to plan ahead.
هذا كل ما نشاركه اليوم من أجل هذا Hammerting مرشد. تم إنشاء هذا الدليل وكتابته في الأصل بواسطة Liakoyras87. في حالة فشلنا في تحديث هذا الدليل, يمكنك العثور على آخر تحديث باتباع هذا وصلة.