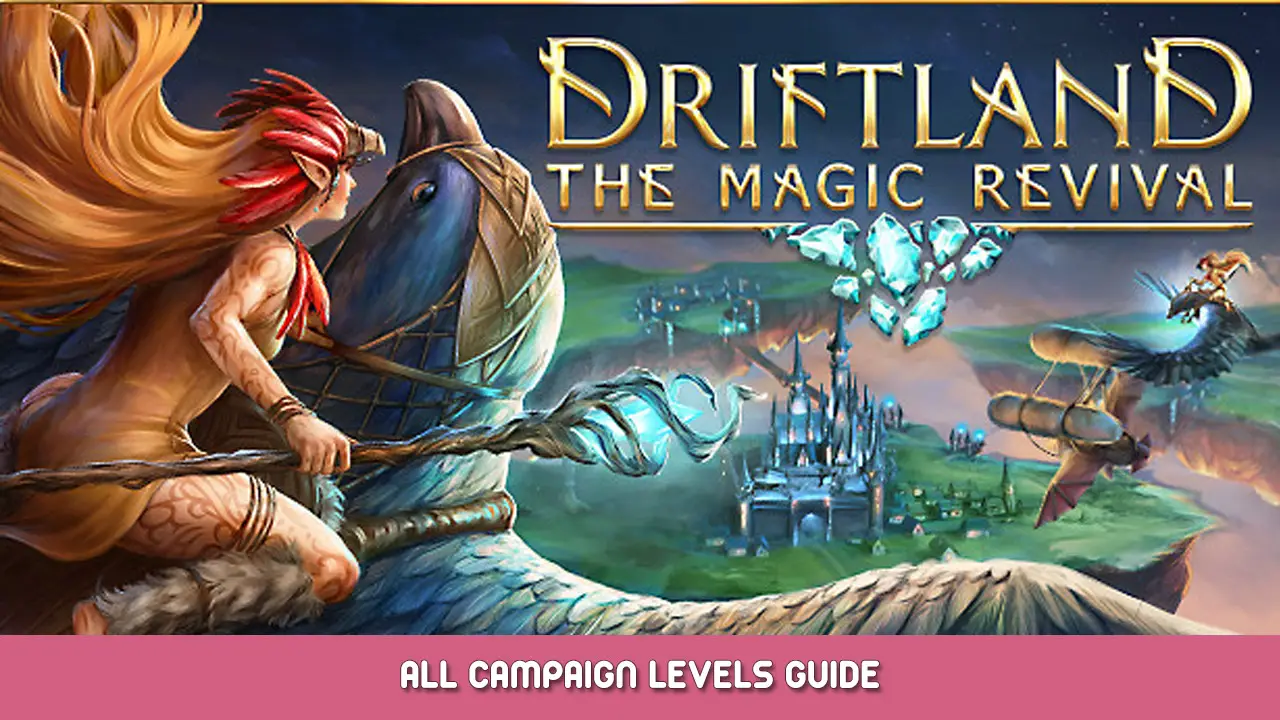
- عنوان: Driftland: The Magic Revival
- تاريخ الافراج عنه:
- المطور:
- الناشر:
Information about Driftland: The Magic Revival is still incomplete. الرجاء مساعدتنا في ملء تفاصيل اللعبة باستخدام هذا نموذج الاتصال.
Sometimes the campaign objectives aren’t clear enough. I’m here to fix that. (plus some advice where relevant)
Human Campaign
If you’re playing this game and wondering exactly what build orders are good and what should be prioritized, then this might not be the guide for you. If you just want to know which objectives are important though, and where on the map they are, then this is the right place.
ملحوظة: I will occasionally refer to spots on the map as being near the eagle, dragon, raven, or compass. This refers to the map you see when you scroll out (تحت) on the mouse until you reach the overhead map, wherein each of the corners is one of these reference points – eagle in the northwest, dragon in the northeast, raven in the southwest, and compass in the southeast. Or sometimes I’ll just refer to cardinal directions like I just did. Whichever is most convenient at the time.
Also note that your castle being destroyed is a loss condition in every mission across all four campaigns. It’s kind of important.
Light in the Dark
Win condition:
- Defeat all of Shalh’yra’s flying units.
Loss conditions:
- Urias gets killed
While the game names population as a goal, there is no such functional loss condition. Your population can be any number on day 75 and the game will just continue. The only thing that actually matters is Shalh’yra’s forces.
As for the actual goal, (before which it is advised to put together an army and/or build towers near your castle) this can be started by finding Shalh’yra’s camp in the far northwest, on an oddly shaped island near the Eagle’s talons. After visiting, this will trigger all of her units to fly to your castle in a couple of waves. كما, while an army is useful, no extra flying units after Urias need be recruited. As an alternative to building an army, it is also a viable option to build a bunch of towers around and to the north of your castle. The more you upgrade them, the fewer you’ll need. Just be ready to use the Heal spell on Urias when he goes to intercept the incoming flock of ravens & eagles, as he will do so automatically when you are attacked.
The Tale of Three Kingdoms
Objectives:
- Visit all three other kingdoms
- Investigate the two areas circled in purple in the southern kingdoms
- Recruit 4 flying units
- Destroy Prince Graven’s (Kingdom of Sol’s) Castle.
Loss condition:
- Urias gets killed
- Any allied kingdom’s castle is destroyed, unless they declare war against you first
A note: This level is one of two across all the campaigns to give access to the Diplomacy menu. It is useless in both.
To the northwest is the Kingdom of Sol, to the southwest is the Kingdom of Avos, and to the southeast is the Kingdom of Meetham. You only need to see buildings of each to fulfil that victory condition, although visiting the southern ones also triggers the purple circles to appear. These are also within the territory of each of those southern kingdoms, so finding those circles will effectively fulfil both, aside from meeting the northwestern kingdom.
The goal for “recruit 4 flying units” does not include Urias (or the Archseeker, an ally who you can find riding a dragon in the northeast). كما, you’ll also need to recruit four knights, marksmen and/or wizards. As for the birds, you can find a raven nest already tamed on one of your islands to the west, and a wild eagle nest on an island very close to the south. Each nest supports two recruits by default, so you’ll need to find more, or get the Path of Progress upgrade “Extensive Breeding” to recruit more with fewer nests. Still need at least two nests though.
أخيراً, once the flying units are recruited and the purple circled areas in the south have been investigated, your only goal will be to destroy the castle in the northwest. This will be directly indicated with a very small purple circle, and is guarded very poorly, so even the four recruits should be enough, with or without Urias or the Archseeker.
In Our Time of Need
Win condition:
- Gather 5000 ذهب, 1000 حديد, و 400 rubies
Loss condition:
- Urias gets killed
Like the first mission, the goal this level to rescue two dwarven squads by day 30 doesn’t actually exist. While it can certainly be beneficial to do so – you’d get 2-3 flying units with no hiring cost – you don’t lose for waiting too long, and they’ll still be saveable after that point if you want them. Also don’t worry about the more northern circle, as it contains no living dwarves.
بصورة مماثلة, as you are exploring, you may get new goals in the Victory Conditions menu regarding destroying dark elf camps. مرة أخرى, this is not actually a goal. While destroying them will make your life easier since it would stop their raids (them destroying your castle is still a loss condition, as always), you can win without destroying any of them. Since it’s useful though, below is a list of all of their locations:
1) To the west, just south of the cyclone field, on a large island.
2) Far to the north, slightly to the east, on a small island.
3) In the centre-north of the map, on a large island that is half still inside the cyclone field.
4) In the northeast, on a medium sized island on the top edge of the map.
In the end though, your only real goal is gold, حديد & rubies. While an upgraded Marketplace can aid this goal, it’s outright more efficient to just hire some explorers and use their Geology ability to find the resources yourself and mine them. You’ll need to pull in (or use Gates of Thyr to connect to) several islands to amass enough of each resource, but it’s doable without entering the cyclone field in the middle of the map.
The Better One
Objectives:
- Find Urias
- Destroy the dark elves’ Castle and rescue Urias
- Defeat Urias and his squad of dark elves (goal revealed after destroying the castle)
No loss condition this time except getting your castle destroyed, and the win conditions are all sequential.
The game says you need to get five flying units, but this is entirely optional. بدلاً من, you only need to go directly north and encounter the dark elf islands. They nominally control the top half of the map, but their grasp of the left half is incredibly weak, and the right half is not much better. بدلاً من, they just have a relatively firm grasp on a collection of islands in the centre-north of the map (marked with a purple circle), with their castle being at the southernmost point of the southernmost island amongst these. Destroy the castle, then destroy everything which comes out of the wreckage to finish the level.
Battle for the Ten Cities
Objectives:
- Capture five Ancient Tellurions
- Destroy Shalh’yra’s castle
What is a Tellurion? Apparently some sort of astronomical clock, but this game doesn’t care about that. Instead of worrying about that, you just need to capture five of these grey & blue ruined buildings with balls floating over them, found on the collection of green-blue jungle islands, without which the barrier to the dark elf base cannot be dispelled. There are ten in total, all on medium-large islands surrounding the barrier, and the locations of the nearest five are:
1) To the northeast, on one of the closer jungle islands
2) Far to the north, and almost too far for your castle’s magic radius to reach when fully upgraded. (including the Path of Progress upgrade “Web of Wizardry”)
3) Far to the east, also near the barrier, about as far away as Tellurion 2 was.
4) Very far to the east, just beyond the range of Tellurion 3’s magic radius
5) Extremely far to the east, although Tellurion 4’s magic radius can reach it. (alternatively, extremely far to the north, at the edge of Tellurion 2’s radius)
Once the barrier is down, your final objective – Shalh’yra’s castle – can be found well-defended near the centre of the map.
…أوه, and yet again, the three camps they tell you to pitch are unnecessary. مفيد, perhaps, ولكن ليس من الضروري.
Dark Elf Campaign
Darkness in the Light
Win conditions:
- Fully upgrade your castle to level 5
- Destroy three of the evil cult’s camps
A breath of fresh air, the objectives the game gives are are the actual, fully honest objectives of the mission. Nothing unnecessary, nothing brushed over, nothing added later. The only thing worth saying is that the camps will periodically raid you via Gates of Thyr, but you can use this against them, as clicking one gate will tell you where the other end has been placed, and thus where that camp’s island is (all far to the east). Once you’ve wrapped all that up, it’s time to move on to the next mission.
The Great Archives
Objectives:
- Destroy the five dwarven Illusionators
- Locate the Great Archives
هذه المرة, while the objectives are on the surface quite honest, the mission itself is not – You cannot build bridges, place Gates of Thyr, or cast Magic Eye to see far away. كما, this is less a mission, and more a linear path to walk. Basically none of the other islands have any resources on them anyway. The directions are pretty simple anyway:
1) Head west a long way, then northwest
2) Along this northwest path there is an Illusionator you need to destroy. The basic attack spell Banshee’s Feast will work, Although if you want to go overboard you could use Ritual Implosion. بدلاً عن ذلك, get close and build a bridge; the bridge will self-destruct, dealing a small amount of damage to everything on both connected islands. Since the Illusionator only has 25 صحة, even that much will destroy it.
3) Keep heading northwest, and push the small island in your path out of the way (or destroy it, I guess). Then head north and destroy the second Illusionator.
4) Now northeast, and soon you’ll run into the third Illusionator. Same deal.
5) Eastward, you’ll come across the fourth Illusionator to destroy, as well as a large island in your way. The Eye of Karhas Muir will tell you to destroy it (أي. use Ritual Implosion), but alternatively you can just push it eastward a while.
6) Once you and/or the large island can no longer go east, you’ll need to go southeast, then southwest. On the southwest path you’ll find the final Illusionator. After destroying it, head west to reach the Great Archives. Once you’re nearby, the mission is complete.
The Chains of Life and Death
Win condition:
- Collect 10,000 mana, 6000 diamonds, و 6000 rubies.
This campaign has been pleasantly clear so far in its mission objectives, and this one even teaches you of (and unlocks for free) what may the Dark Elves’ greatest tool: ال “Ritual of Avulsion” يتهجى. This spell can be cast upon any island you can see which has resources other than wood or stone. It will then take ALL of that resource and give it to you, without doing any further harm. This bypasses mining bonuses granted by Path of Progress upgrades, but also doesn’t suffer from the effects of mining manually from a biome not matching the building doing the mining (على سبيل المثال. dark elf buildings like swamps, human buildings want grasslands, and so on). As this mission is more a matter of time than difficulty, I’ll move on to the next one.
The True Shyh’yr
Win condition:
- Destroy the Seat of Shyh’yr
It’s essentially a “destroy your enemy’s castle” level with a bit of flavor added. I don’t really care about that though, so just know that the Seat is toward the southwest, about halfway between the map’s raven and the centre of the map.
Blood and Truth
Win condition:
- Kill 100 units (الطيور, dragons, ents & golems don’t count)
…And there goes the streak of clarity in mission goals. “Soul” isn’t perfectly clear, but reasonable guesses can be made.
The slow but easy way to do this level is to kill barbarians without capturing the things/places they are protecting. They’ll respawn in time, then you get to kill more.
If that doesn’t work out for you though, then know that there are four actual kingdoms you can fight here. To the southwest and near(ish) northwest are human bases with practically no defenses (albeit also almost no people, either), while in the far northwest is a dwarven base and in the far southwest a human base which both are very well defended and likely not worth the effort.
Dwarf Campaign
The Child
Objectives:
- Train 3 Berserkers
- Train 4 Geomancers
- Train (and/or find) 4 Engineers
- يبني 2 Gliders
- يبني 2 Zeppelins
- يبني (and/or find) 1 Frigate
The game initially says 4 berserkers, but Harbjorn, who you start with, counts as a berserker for most purposes anyway. بالإضافة إلى ذلك, there are three Engineers in Frigates on an old north of your starting location, so sending a Magic Eye out that way will be a quick way to increase your firepower significantly, in addition to completing a quarter of the mission’s goals. You still need a level 3 Engineers’ Halls though, unless you find a way to kill off a frigate.
Relatedly, you don’t need to have all 11 of the units at the same time – killing them off doesn’t lower the number of units trained for the objective. بالإضافة إلى ذلك, unlike Urias from the human campaign, Harbjorn isn’t a wet sock, and him dying won’t cause you to lose the mission. He’ll just hide away to recover until the next mission.
…Even if you “accidentally” deleted a bridge from underneath him. >_>
The Expedition
Win condition:
- Control all islands on the map simultaneously.
The objective may sound daunting, but it’s a small map with fewer islands than normal – فقط 21-22. Most are in a cluster around your starting western position, while the rest extend off to the east, ending in a clump of five islands. You’ll need to find or build ways to extend your magic radius to connect them all (Ravaged Mausoleums, Antique Tellurions, and/or Geomancer Towers) since they aren’t all close enough to bridge between, but this shouldn’t pose much of a problem.
The Succession
Win condition:
- Destroy the dark elf castle
The objective the game tells you implies that you need to destroy all of the dark elf stuff, but ultimately only their castle matters. The islands directly surrounding the castle are relatively well-defended, but the strings of islands heading northwest and southwest from their castle (which itself is in the northeast) are both poorly defended and will lead you directly to that ring of islands around the castle. How you go about it from there is up to you.
The Monolith
Win condition:
- Have a Statue of Anti-Magic built near each of the three Eskoim Mechanisms
Loss condition:
- Destroy an Eskoim Mechanism
The game doesn’t explicitly tell you this loss condition, but it does exist. You’d think destroying the mechanism would nullify its power, but apparently not.
As for where these mechanisms are, they are on Y-shaped islands to the east, southwest, and north (or north-north-west, I guess). They are just outside your starting magic radius, so you can’t initially bring the islands closer, but if you want to get past this mission quickly you can gate to a nearby island and push it next to the Y island. Bridge the gap, build a statue, and repeat for the other two mechanisms. Or do whatever else you want, so long as that doesn’t involve destroying the Y-shaped islands.
Freydha’s Great Day of Victory
Win conditions:
- Destroy the dark elf castle
- Destroy all the watchtowers on the Monolith’s island.
There are actually two dark elf bases in this level, both directly to the west of your starting location. The closer of the two is referred to as a “dark elf fortress” by Harbjorn, but is really just a handful of islands with a small defending force. While it’s not something you need to destroy or take control of in order to win, it would help to do so. Destroying the Assassin’s Bastion on the central island will remove the dark elf control from the island, just as destroying a castle would for an actual kingdom.
As for the actual objectives, the castle is relatively well protected near the centre of their main base, while the Monolith is at the end of a chain of islands further west. Destroying the bridge won’t remove enemy control, so you’ll need to actually destroy the towers there.
…And yes, destroying the entire island works. Even though the lore seems to say that the destruction of the Monolith would kill all the dwarves. Whoops.
Wild Elf Campaign
Mallevah’s Hand
Objectives:
- دور 5 islands into magic jungles with the spell Mystical Forming
- Summon 5 golems and/or ents
While there is a dark elf kingdom to the southwest who methodically turn all their nearby islands into swamps, whether or not you confront them is up to you, as there are 5-6 islands they don’t control which you can convert.
As for the other goal, you start with the spell “Lesser Ent”, so just use that five times. (Although don’t be misled; the fact that you can summon these doesn’t mean that wild ents & golems won’t attack you if you overmine stone or wood …but it does mean you have an easy way to fight back.)
With Humility I Serve
Objectives:
- Kill Chal’im
- Grab Chal’im’s Treasure
Lose condition:
- Destroy Chal’im’s island
The level starts off by showing you exactly where Chal’im is, in the distance northeast, while your base starts in the distant southwest. Your only objectives are to kill the large dragon and to take his large pile of gold (just as you would take any chest or bounty), although the pile of gold cannot be taken until all five surrounding dragon nests on the island’s fingers have been tamed. Not too hard, although Lanahel definitely doesn’t seem to be a fan.
Necessary Steps
Objectives:
- Destroy the dark elf camps
من الناحية الفنية, this level is possible to finish without ever seeing a single human building, but you’d have to be going pretty out of your way to do it. The dark elf camps are all near the centre of the map, in a line of unconnected islands going from southwest to northeast. The intended method is to take control of the various abandoned human buildings scattered around and build a military from there, but it is also entirely possible to finish the level with just using summoned ents & golems. Watchtowers can help too.
A pity that you can’t change an island’s biome until you find a Wizard Tower though.
Rewriting the Past
Objectives:
- Destroy all enemy units on or flying near the Great Archives
Lose Condition:
- Destroy the Great Archives
Like the dark elf mission featuring the Great Archives, the region has restrictions against Magic Eye and Gates of Thyr. That said however, you neither need to destroy any Illusionators, nor need to survive on just the islands you start with. While these three islands are very plentiful in resources, it also turns out that the wild elves’ magic forest biome protects against the destabilizing effects of the region, and so bridges will work but only when built between two of this biome.
As for the actual objective, it’s far off to the southeast.
Truth and Justice
Win Condition:
- See Telunne’s Castle
Lose Condition:
- Kill 20 wild elf units
This mission was what inspired me to make this guide. The goal “get into Telunne’s Castle” is pretty abstract, and based on previous missions in this game, implies that you need to attack the castle. But no, just seeing it will do. Get close-ish with a Druid’s Tower, Antique Tellurion, or Ravaged Mausoleum, then use a Magic Eye to find it. Do not, لكن, use a Gate of Thyr near any of your opponent’s islands, or else they will attack you (just as you can see where an opponent’s Gate of Thyr goes, so too can they see yours). You may be able to win that defense, but in doing so you will either kill too many enemies, or get dangerously close.
My strategy was to rush to capture a Tellurion on a small island off to the southeast of your starting location, then pilot it around the edge of the map until I saw islands which looked big enough to have a Castle on them. Magic Eye to confirm, then either win or move on.
…Also I think some of the barbarians might be wild elves. Not a lot, but some.
The Last Eskoim
Objectives:
- Destroy the 3 Focusing Stones
- Destroy the 4 Castles of The Order
The enemy does not expand their base, but starts well-fortified. Their bases are arranged in a diamond formation north of your starting location on very geometric-shaped islands (wild elves to the south, humans to the west, dwarves to the east, and dark elves to the north). You’ll recognize them immediately. While the castles can – وينبغي – be destroyed by conventional means, the focusing stones can only be destroyed by Ritual Implosion. Which is a pity, since they are on the same islands as three of the castles, and therefore are well-defended until their respective castle is destroyed.
Also it’s probably a lose condition to destroy the island the fourth castle is on, since it houses the titular “last eskoim” and this campaign has been good about making destroying important stuff as loss conditions, but I’m not about to go through that entire long-ass level just to test that.
هذا كل ما نشاركه اليوم من أجل هذا Driftland: The Magic Revival مرشد. تم إنشاء هذا الدليل وكتابته في الأصل بواسطة Sabbo. في حالة فشلنا في تحديث هذا الدليل, يمكنك العثور على آخر تحديث باتباع هذا وصلة.