
- عنوان: Alwa’s Legacy Achievement Guide and Pacifist Walkthrough
- تاريخ الافراج عنه:
- المطور:
- الناشر:
Information about Alwa’s Legacy Achievement Guide and Pacifist Walkthrough is still incomplete. الرجاء مساعدتنا في ملء تفاصيل اللعبة باستخدام هذا نموذج الاتصال.
This guide will walk you through the best way to earn all achievements (including videos for the trickier bits), how to beat bosses and a full walkthrough of Pacifist mode. The guide is cross-referenced so you can use it for both of your runs to optimize time, or you can pick & choose as required.
As ever with Metroidvanias, this gaame is open-ended so I recommend you get stuck in and see what you can discover. لكن, you may want to check out the section on ‘Missable Achievements’ first so you can watch out for opportunities on your way through.
تحذير: Spoilers ahead! أنا’ll make modest use of spoiler tags in the early sections but you have been warned.
Story Related Achievements
These achievements are unmissable in your first playthrough.
Chapter I – Finish the first chapter
- Runs from the beginning through to when you leave the Grand Library, having collected the Yellow Gemstone and talked to Saga again.
Chapter II – Finish the second chapter
- Concludes once you leave the Grand Library (مرة أخرى), this time having been given the Incantation of Umbra.
Chapter III – Finish the third chapter
- The final chapter wraps after you beat Vicar in the Arcane Halls.
Unchained – Defeat Imprisoned King
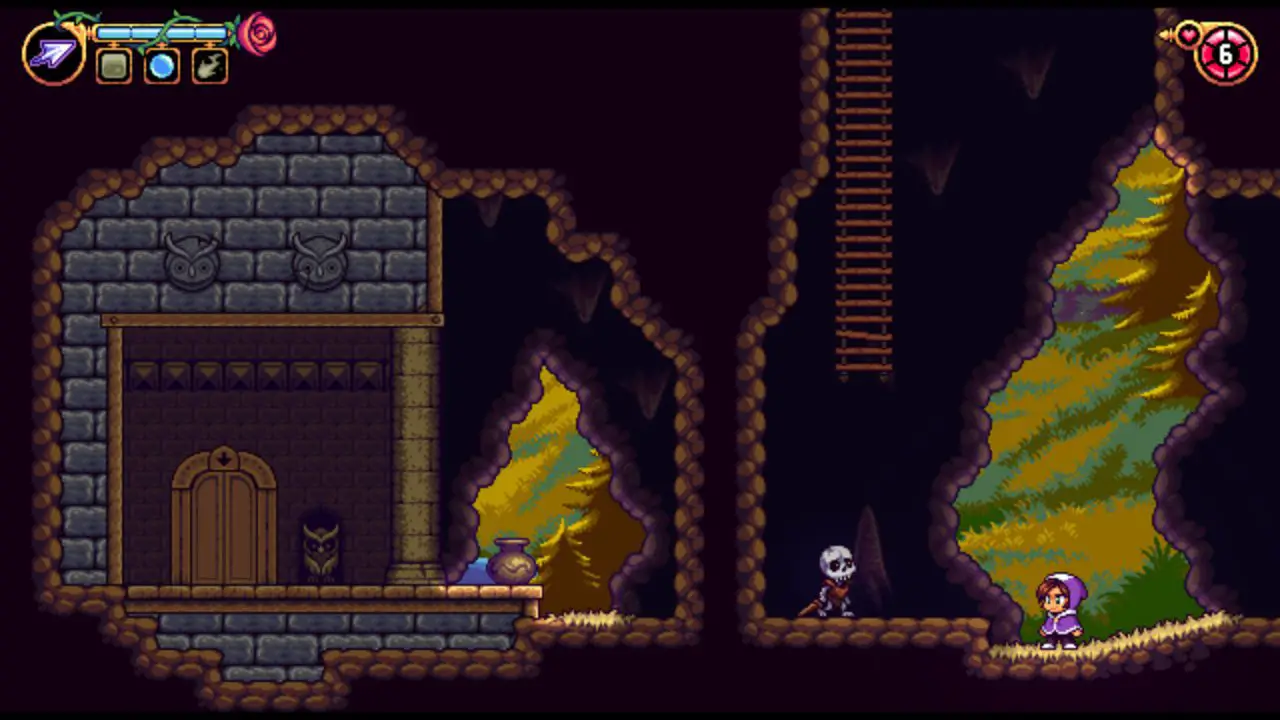
- A fairly straightforward battle in Rose Castle. Stay on or around the middle platform whilst he fires projectiles & flies overhead – once he reaches the far side jump back across and start getting hits in while he lowers & subsequently rests on the ground.
Note it’s also possible to skip the fight until later – getting the Yellow Gemstone & upgrading twice (11 Orbs total) trivializes the fight to point of a few seconds. To skip, from the warp point before the boss, descend the ladder and head back over the spikes – there’s a secret passage in the wall to the right. On the next screen, there’s another passage to the lower right – from here you can block/bubble up, solve the puzzle to get the Petal, and finally climb the ladder to the exit to Kloki’s Bridge.
Saving Imprisoned King for later can also be beneficial for the Slick Moves and/or Idle Hands achievements – see the ‘Achievements – مشتت’ القسم أدناه.
Rite Way – Defeat Sir Pent
- عادة, the 2nd boss fought in Sylvan Temple. The only tricky thing about this fight is keeping an eye on your air supply – I usually stay on the middle block so you’re never too far away. You can attack when he dashes across the screen, which is both a free hit and prevents him from damaging you. Pay attention to which hole he disappears into, and be ready to hit him when he re-surfaces.
Annihilation – Defeat Desmond Grim
- Usually the 3rd/4th boss fought in Abandoned Ruins. There are two phases to this fight – the second phase triggers when he hits half health and warps the stage to the ‘past’, which makes the spike pit larger and activates an occasional trio of shurikens along the track in the back wall. Given the shurikens always travel right to left, you should stick to the left side of the spikes to give more reaction time. You can only hit Desmond Grim when he opens his eyes. Use a bubble to each the left platform, then patiently dodge his projectiles and time your jumps onto the crumbling platform to hit his eye when it opens. Use a dash to get back to safety, or commit fully to the jump and land on the bottom crumbling platform (be quick!).
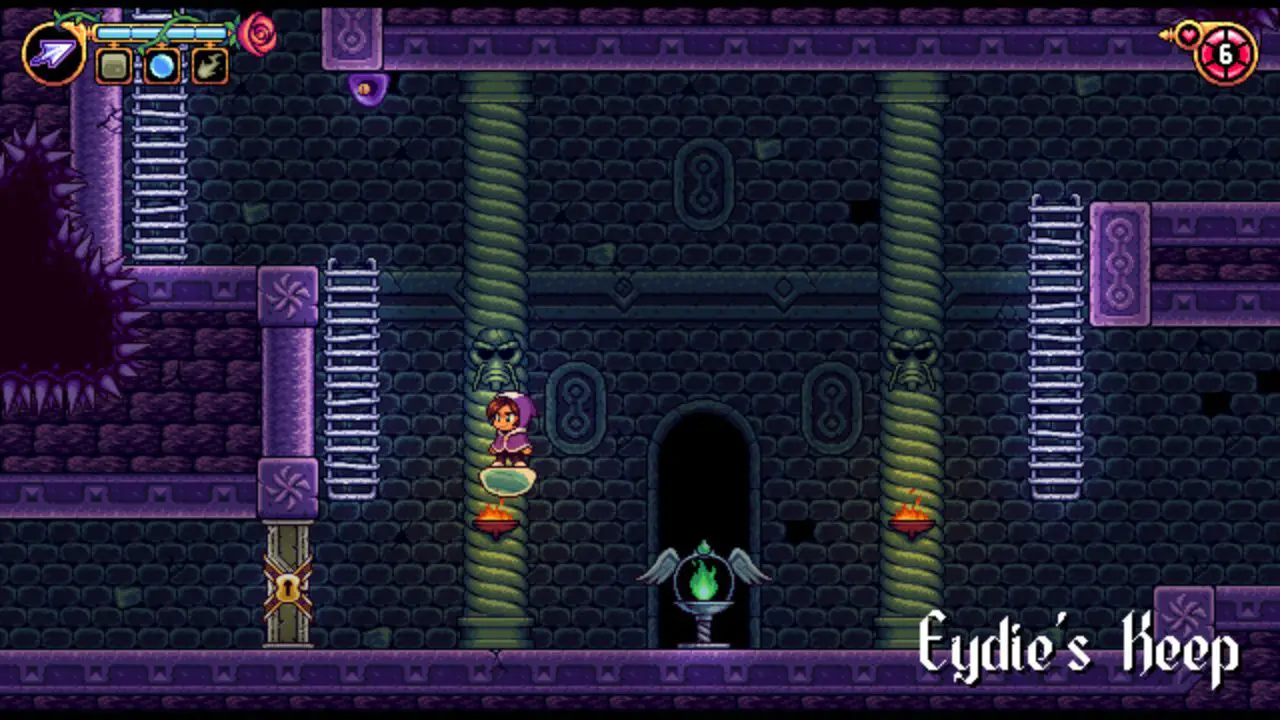
Hungry Eyes – Defeat Queen Eydie
- The other of the 3rd/4th bosses in all likelihood fought in Eydie’s Keep. As with Desmond Grim, you can only hit her in the eye when it’s open, لكن, given it’s a far bigger target and she keeps it open a lot more, هو - هي’s usually an easier fight. I highly recommend the first two Yellow Gemstone upgrades for this fight – fire point-blank when she closes in, immediately followed by a regular attack, to inflict 4 HP of damage. She won’t last long! Honestly, I would ignore the gravity pads altogether unless you really need to conserve health by dodging her dashing attacks – going upside down will only open you up to risk from confusion and insta-death spikes.
Regal Guardian – Defeat all Guardians
- هناك 3 Guardians, located in Valley of Reprisal, Central Alwa, and Eastern Highlands. In a normal playthrough, they must be killed to deactivate the pink forcefield, as the areas they block are mandatory to progression. They have a simple attack pattern of launching projectiles into the air, which fall back down on straight paths.
ملحوظة: Guardians do not count as bosses for achievements that care about this.
Great Success! – Finish the game
- After finishing Chapter III you’ll be warped to a small playable epilogue – proceed through this area (talking to the characters if you wish) and approach Saga to launch the credits and complete the game.
Missable Achievements
These achievements have a specific requirement that must be fulfilled at a certain time/place(ق) and can be permanently missed on a playthrough.
That’s Not Right – Upon waking up, immediately jump into the water
- If you’re anything like me this will be the first achievement you get… I did it in Alwa’s Awakening too, which works out even worse yet I didn’t learn. Missable if you leave the first screen to the right, but you can simply start a new slot anytime and get it right away.
Family Matters – Reunite a father with his son
- Rescue Lincoln in Sylvan Temple, and then talk to him back at his house in Boyd’s Farm. In order to do this, you must find two buttons to open the two doors holding him in, and then talk to him, before hitting any of the save points on either the same vertical level as Lincoln or above.
تحذير: If you activate a save point to raise the water level before releasing and talking to him, he will drown and the game will immediately lock it in with a save, making the achievement impossible on that run!
Despite the [well deserved] severity of that warning, أنا’ll now completely contradict myself and suggest that you actually do let him drown on your first run…! لماذا? Because this way, you can enjoy completely different dialogue & events by asking Trine the Necromancer in Central Alwa to resurrect him, allowing you to still obtain 100% completion and the Perfectionist achievement. You will then pick up the Family Matters achievement on your next run, which will be a Pacifist run (see the section below), where it is mandatory to save Lincoln meaning you can then see the other set of events.
Slick Moves – Finish any boss without being hit
- Both this achievement and the next one are technically not missable, since the Vicar fight will always be available even on a completed file. لكن, it makes life a lot easier to plan ahead a little and polish these achievements off on easier fights, as opposed to breaking your back in harder fights. I recommend two options:
- Skip Imprisoned King in Rose Castle, as described in the ‘Achievements – Story’ section above, until after you’ve gained more Orbs, some movement skills, and the Incantation of Orbis. This is the easiest way.
- Another late-game method available is to max everything else out and then beat The Collector in the Gloomy Cellar, since he counts as a boss.
Idle Hands – Defeat any boss using only the Incantation of Orbis
- See above. As an aside, the Incantation of Orbis is a fairly lackluster ability which pretty much finds its only use in this achievement… I find teleport/spike immunity infinitely more useful for swift movement across maps.
Equilibrium – Carry exactly 3 Keys, 3 Tears and 3 Petals in your inventory at the same time
- This is an interesting achievement… Keys are by far the scarcest and never hang around in your inventory for long, and Petals are quite rare too, yet it’s a frivolous use of Tears that will catch you out if you’re not careful… upgrading those save points is just so tempting!
This achievement synergizes very well with a Pacifist run, given that you’ll want to hang on to two keys from Eydie’s Keep, which you’ll be doing on your Pacifist run regardless to save time & make things easier. In a normal run, these keys are found in Eydie’s Keep and used in the same area to unlock rooms to fight the minibosses, which is a requirement to reach Queen Eydie. لكن, on Pacifists, fighting the minibosses is illegal as Tombstones are used instead, meaning you never need to unlock the rooms!
A third key can be found in either Abandoned Ruins if you haven’t already been there or failing that in Arcane Halls. You should have 3 Petals are this point (but won’t have the 4th to get the final upgrade, as this is located in Arcane Halls), so as long as you kept 3 Tears back you’re all set!
أقل: be very careful not to accidentally use a key here when you climb the ladder! Use a bubble to avoid this.
Special Achievements
The achievements in this section are for specific challenges that can be done at any time during a normal game mode playthrough, so there’s no harm in leaving them until the very end (even after you win the game).
Lord Of The Flies – Kill any enemy from above using a block
- Technically missable, but I think you’d be hard pushed not to do this by accident sooner or later (especially on a Pacifist run…!) The easiest method is for the first Guardian in Valley of Reprisal – use the ladder to travel up to the Tombstone on the previous screen, then jump along with the platforms and simply push the pre-spawned green block off the edge. If you’ve already killed the Guardian, there are also plenty of easy spots in the Castle Gardens to kill the white flower enemies.
Let There Be Light – Light every single torch in Ancient Catacombs
- Once you obtain the Ember’s Nest in Central Alwa, أنت’ll be able to see in the dark order to safely navigate the Ancient Catacombs, and you’ll also be able to light the torches by pressing up. This is fairly straight-forward if you work methodically across the level as most of them are in plain sight, but there are two areas worth calling out:
- At the entrance to Town of Westwood, أنت’ll need the fully upgraded Green Gemstone to knock a block across and then explode the wall with Lightning.
- At the lowest point of the map, located behind a locked door towards the western side, أنت’ll descend a ladder to seemingly a dead end with a spike pit. Using the exact same item/method as #1 (combined with dash) you can explode the wall and make your way across. (there’s also an Orb that requires Umbra to reach hidden in the passage at the very end of this area).
If you’re struggling, the official map of Ancient Catacombs by Elden Pixels contains all the torches.
Falling Down – Use Incantation of Umbra three times without touching the ground in between
- هناك’s a number of places in the game where this is possible, and two things to take into consideration – firstly, Umbra can only be performed between a solid wall where both sides are clear; and secondly, أنت’ll need to transition a screen between each use in order to instantly recharge the ability. I advise using the very top area of Grand Library, as it has a convenient warp point for retries, and ample opportunity to perform the required 3 teleports. The game seems to restore abilities twice during a transition, once at the start & once again at the end… in the video below I used this to pull off six teleports in the same free fall!
Note this trick is by no means necessary for the achievement, which will pop after the 3rd teleport.
Duck Tale – Make it over Kloki’s Bridge without being noticed once by an enemy
- The clues in the name for this achievement – hold down to duck and the ghost enemies won’t notice you. They can only see in front of them for about ¼ screen length of uninterrupted LoS, and will never see you while crouching. هناك’s no rush for this achievement so I highly recommend leaving it until you have the dash and the fully upgraded Blue Gemstone for infinite bubbles, as it makes the final section much easier.
Video below shows the method – working left to right from the checkpoint near Rose Castle, أنت’ll encounter 3 screens with enemies:
- Dash across the gap to the middle structure and crouch at the second balustrade; run on once the ghost passes.
- Proceed straight to the lower-left platform; crouch until the left ghost turns around & passes overhead. Move to the center platform, create a block and jump to the lower right platform; crouch again. خذ وقتك, and create a block and a bubble to move to the top ledge, crouching one final time. This is the hardest part, so if any step is too tricky just break it down into smaller tasks between crouches.
- Enter the final screen and immediately fall to the screen below. Head to the righthand ledge, then create a bubble in line with the edge and ride it back up to the screen above. If done correctly you’ll come out directly beneath the ladder – jump onto it as soon as you’re able & run to the exit.
Remaining Achievements
Collector achievements. As with the previous section, these are not missable and can be finished off at any time.
Conjuror – Fully upgrade all magic gemstones
- Requires all 99 Orbs, which you can then spend with the Wizard. Most of them are fairly straightforward – if you can’t work it out, try getting a new ability or switching around your gem upgrades before coming back to try again.
Some general tips:
- The Wizard can re-spec at any time for free! This allows you to spec into an ability, warp around and use it to collect some Orbs, then return to switch back again.
- Complete Alice’s quest in the Grand Library to unlock the Old Melody Box. This item plays a short jingle whenever you enter a screen containing a secret passage and is extremely useful for some of the less obvious passageways (especially the ones with Orbs completely concealed within them).
- Pay attention to cracked walls, as well as the color of any buttons you find. The blue button on the floor? Use the ability to pass through a bubble and stand on it. Two green buttons? Same again, but this time place the bubble inside a block before passing through it. Bubble not lasting long enough/reaching high enough? You likely need the final upgrade!
- The annotated map guide by Demajen and the official maps by Elden Pixels is also helpful for locating Orbs.
Don’t hesitate to ask in the comments if there are any specific items you need help with!
A Hard Day’s Knight – Help a Knight realize her true mission in life
- أنت’ll first encounter Gwen the knight in Central Alwa, and will then bump into her a further three times as you process through the game as follows. Note that you must complete these steps in order to enable her to show up in later locations.
- Central Alwa (unavoidable – initial meeting)
- Monk’s Mire (unavoidable)
- Eydie’s Keep – top right, by the Tombstone and the walkway into Valley of Reprisal. The area is the intended way out after beating Queen Eydie (ملحوظة: not the only way out, making her missable), but can be reached before ever having entered Eydie’s Keep by simply climbing up in Valley of Reprisal
- Arcane Halls – use Umbra to head as far right as possible from the first warp point. She’s by the Tombstone again and will give you a Petal and the achievement will unlock.
A Tear for Wellness – Transform every Save Point into a Warp Point
- There are enough Tears for every save point in the game. This is a desirable thing to be working towards anyway in order to minimize backtracking time, just be careful not to get carried away and spend all your tears before you unlock Equilibrium! (see ‘Achievements – مشتت’). A few tips (مرة أخرى, please ask if stuck!):
- Lincoln in the Syvlan Temple has a Tear that he will give you after returning to Boyd’s Farm, which is obtainable regardless of whether you save him or not – see ‘Family Matters’ أقل.
- Outside in the lower area of Monk’s Mire, there’s a ruined house on the water line with a Tear on top – press down on the chimney Mario-style to enter and you’ll find a hidden save point.
- Mary (the child) is holding a Tear to ransom in the house in Valley of Reprisal until you somehow figure out her ‘لعبة’ and get her to give it to you… pass through a green bubble and talk to her.
- An NPC named Ghost in a hidden area in Arcane Halls wants you to beat her to the very top of the map and rewards you with a Tear. لديك 90 seconds with which to do this and may not use save/warp points at all. See video for the route:
Ready To Rumble – Have the Incantation of Orbis fully maxed out
- The Incantation of Orbis is located in Monk’s Mire – you need to defeat the Architect in order to obtain it, meaning it can’t be done in a Pacifist run. Once you have it, get all 99 Orbs (see ‘Conjuror’ above) and this will unlock.
Perfectionist – Find 100% secrets in all areas
- Requires that you find all Orbs, دموع, Petals, and ability items, and transform all save points to warp points. هنا’s an endgame checklist, not including items either covered under other achievements or mandatory to complete the main story:
- 99 Orbs (and the Old Melody Box – see ‘Conjuror’ section above).
- 42 Tears applied to 42 save points (don’t forget the inside one in Monk’s Mire, mentioned in the ‘A Tear for Wellness’ section above). Note that the save points in Sylvan Temple and Abandoned Ruins already have another function and cannot be converted to warp points.
- 12 Petals, handed into Jean-Baptiste in the Castle Gardens to acquire the Harmony’s Rose (unlocks Pacifist mode – see the section below).
- The Incantation of Orbis (see ‘Ready to Rumble’ section above).
- The Upgraded Staff from Gloomy Cellar – once you have the Incantation of Umbra, warp to the furthest right point in Ancient Catacombs and head left into Central Alwa, then teleport through the wall to reach the door as below.
Pacifist Mode Overview
Just Like Kieran – Finish Pacifist Mode
Pacifist is an entirely separate game mode and is unlocked by acquiring Harmony’s Rose from Jean-Baptiste in the Castle Gardens in exchange for 12 Petals scattered around the world. Given you’ve already beaten the game to unlock this mode, I will not use spoiler tags from here on out.
- You may hit enemies, but you may not kill them – if you do, you will immediately lose and the game will turn into a Standard mode run with no other differences.
- الرؤساء, Guardians, and some minibosses can be removed by activating Tombstones with the Rose, which allows you to pass through without combat. These are usually either en route or require a small amount of exploration. ملحوظة: there is no Tombstone for The Architect nor The Collector, so the Incantation of Orbis & Upgraded Staff (as well as the Old Melody Box) are unobtainable on Pacifist mode.
- Any enemy that suicides without player intervention, either by design or by accident, does not break the run.
- Hitting enemies with more than 1 HP will grant a brief period of invincibility, which you can use to pass through them if you become cornered.
Biggest watch-outs are accidental deaths caused by blocks/bubbles:
- Accidently pushing a block off a ledge onto an enemy below.
- Pushing a spikey block (be especially cautious around the red flower enemies in Castle Gardens!).
- The multi-directional projectile burst from the bubble upgrade. The ceiling dwelling Slimes in Monk’s Mire / Eydie’s Keep like to die unexpectedly to these… For this reason, I recommend delaying this & all subsequent Blue Gemstone upgrades until late-game when you have enough Orbs to get them all at once.
So long as the run is intact there will be a Harmony’s Rose icon on the HUD, and an alive rose in your inventory – see below. When you fail, a distinctive sound will play, the HUD rose vanishes and the inventory rose permanently wilts.

Pacifist – Safeguards
Accidental failure is common and the game is quite long – fortunately, هناك 3 methods available for backing up your progress if the worst happens:
- Use the ‘Copy File’ functionality on the ‘File Select’ to periodically back up your main Pacifist run file to a different slot.
- بدلاً عن ذلك, you can physically create a backup of the save files in Explorer, located as below. This is useful given the game only gives you 3 file slots.
…\AppData\LocalLow\EldenPixels\Alwa's Legacy - Immediately Alt+F4! Although the game constantly logs your progress, it seems it only physically writes the progress to the save file when you either ‘attack’ or select ‘Save Game’ from a save point, or quit via the menu. Warping is not enough. This means if you immediately Alt+F4 upon failure, you can salvage the run and return to the last point you did one of the above actions (might be quite far if you’re not conscious of tagging those save points, so be careful!).
يتذكر: so long as the rose is on the HUD, أنت’re still in business.
Pacifist Walkthrough Part 1
On Pacifist mode, having more than 3 health is an absolute must, whilst dash allows you to avoid many obstacles/enemies altogether. The high-level route will therefore focus on acquiring health & movement upgrades ASAP.
Following the linear section of the game (i.e. Chapter I), we’ll be spending a lot of time in ‘hub-like areas (Central Alwa, Ancient Catacombs & Eastern Highlands) to unlock abilities and gather Orbs to progress movement skills, and then we’ll tackle the remaining dungeons in the order: Eydie’s Keep > Abandoned Ruins > Sylvan Temple. The latter map has some nasty bits on Pacifist (and can even result in a soft lock at the time of writing), so we want to prep as best as possible before heading there.
- Start out as usual heading through Valley, Town, and Gardens, keeping your eye out for Orbs that you’ve hopefully remembered from your previous 100% run (e.g. the hidden one on the screen next to the Green Gemstone in Castle Gardens).
- The part below is Rose Castle is quite tricky with only 3 health and no dash. Jump towards the platform as the Skeleton approaches, and hit it once to avoid damage. Stand and create a block (أنت’ll take 1 HP damage), then from the top of the block create a bubble and jump to the next platform. يكرر, and jump to the final ledge. إذا فشلت, remember to at least dip onto the screen below for a second to replenish the enemies’ صحة, and fall to the save point below for your own health if needed.
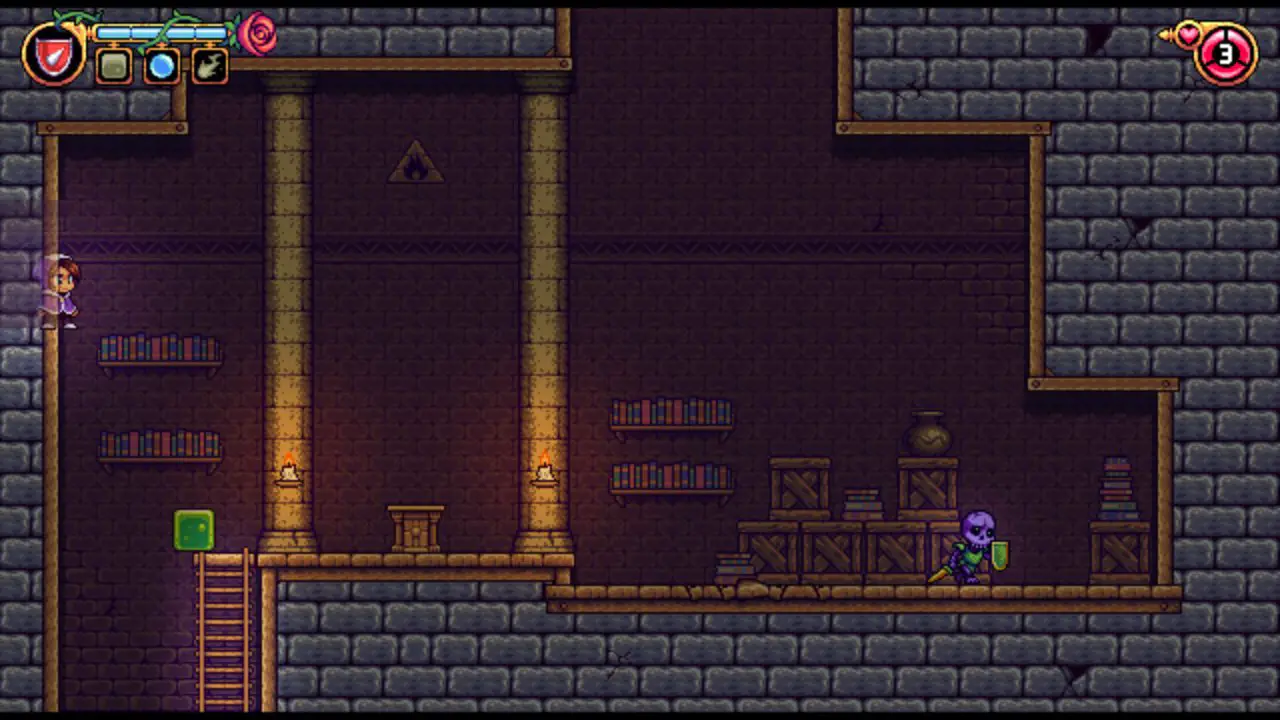
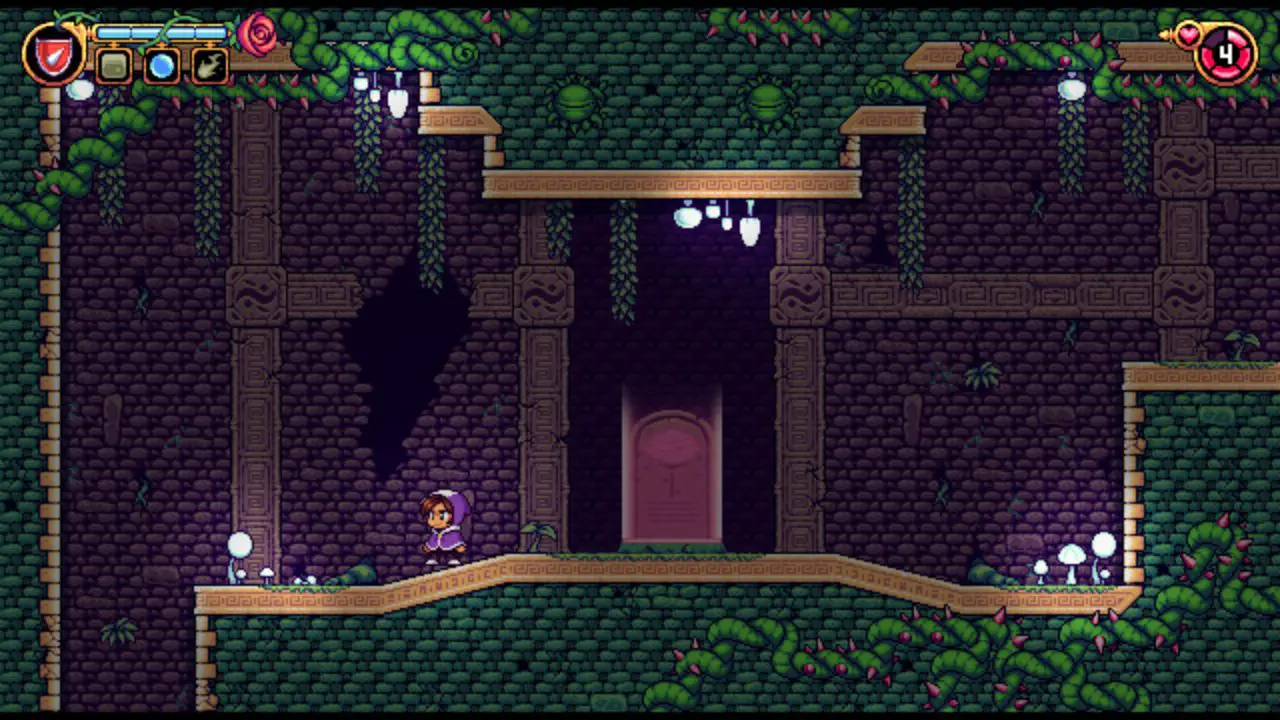
- Head across Kloki’s Bridge and through the Grand Library. Immediately below the Yellow Gemstone, أنت’ll reach a room with an impossible switch in Pacifist mode, given there’s a purple skeleton blocking it. بدلاً من, head back up to the gemstone room and use the secret passage to the left, per the screenshot below.
- Back in the Town of Westwood, spec into green upgrades as much as possible, as yellow is pretty much useless to us, and we want to avoid getting bubble-projectiles for now as mentioned earlier.
- Explore Central Alwa – hit the Tombstone in the top left, get the Gold Bullion and deliver it to Beth in town, and drop through to get the Ember’s Nest (i.e. night vision). Use Tears in strategic places to set up a small warp network, which you can then use to switch abilities to get more collectibles. The ability to create ledges by hitting green blocks into the wall can get you surprisingly far! Prioritize collecting Petals whenever you get a new upgrade/ability, but if you need Equilibrium don’t purchase the second health upgrade (i.e. ل 5 صحة) until after you’ve unlocked it!
- Get the Letter of Recommendation from Dourif in the Ancient Catacombs; warp up to the Village of Mila to exchange for the key, then warp back again and get the Norse Belt to enable breaking stone walls. Make sure you grab the Petal to the far west.
- Pick up Letharic’s Bell from Beth if you haven’t already, then re-spec with the Wizard to get the infinite bubble, reducing your green upgrades to 2. Go to the Eastern Highlands.
- The bit below requires some creativity given we can’t go through the water without the increased lung capacity. Place a block & stand on it, then jump straight upwards and create another block mid-air & knock it across into the higher part of the opposite wall. التالي, stand as close off the edge as you can, create a bubble and ride it to almost the top of the screen, then jump onto the block from earlier. You can create another bubble from here to reach the ledge.
- Continue onwards & upwards to get the dash ability.
Pacifist Walkthrough Part 2
- Warp back and proceed to Eydie’s Keep. As detailed in the Equilibrium section (see ‘Achievements – مشتت’ above), remember that we won’t need to use the two keys collected in Eydie’s Keep, so we can use them to unlock Equilibrium and also take shortcuts in the Arcane Halls. أنت’ll need to hunt out 4 Tombstones in this area (3x miniboss and the main boss) – this is quite easy with a bit of exploration. Don’t leave without the Petal!
- Go to Abandoned Ruins. Providing you heeded the warning on Tears from earlier, you should unlock Equilibrium when you collect the first key in this area. Complete the map as normal.
- Collect any remaining Petals, and cash in the upgrade to 5 health at the Castle Gardens.
- هو - هي’s time for Sylvan Temple. I advise creating a backup at the entrance using one of the methods explained in the ‘Safeguards’ section above.
- يتذكر, you must save Lincoln in a Pacifist run! This means hitting both switches and talking to him before hitting any save points of equal/higher level. If you open the doors but forget to talk to him, as I once did, he will drown on the spot anyway just to spite you… See the section on Family Matters above for a refresher. After saving Lincoln and hitting the save point behind him, remember to get the Petal on the west of the map before raising the water level again.
- Complete your ascent, get the Elixir (lung capacity), and start heading down the east side of the map. هناك’s a tricky part in the lower right corner of the map with almost-impossible-to-dodge fish that will make you appreciate your 5 صحة & dash. Continue to the left and you’ll eventually reach the Tombstone…
- The Tombstone can be activated once and once only to remove the boss, but it also lowers the water level to the very bottom of the map. If you die and load after this point the water level will be restored to just below the Tombstone, making the section that follows all but impossible (the devs have confirmed this is a soft lock and is on their to-do list to fix). لكن, we’ve prepared for this! أولاً, don’t die…! ثانيًا, if you do die, with your shiny 5 health and dash ability you should be able to make it through, albeit still with quite a lot of difficulty. حظ سعيد!
- Back to the Grand Library again; use Umbra to pick up any last items you want (e.g. the Petal in Abandoned Ruins), then over to the Arcane Halls. You should ideally have green & blue gemstones maxed out at this point, but don’t worry too much about green if you’re a bit short.
- Once you reach the first save point, head east to meet Gwen, hit the Tombstone, and receive the last Petal. Warp to Castle Gardens to receive your final health upgrade (and the Rose that you already have?!)
- Back at the first Arcane Halls save point, climb the ladder. هناك’s no reason on Pacifist to go left, so go straight through the door to the right using a spare key from Eydie’s Keep. إذا لم تفعل’t hold a key back, there’s a secret passage from the room up 1 & left 1 that leads down to the key.
- Follow the route around to the right and up, and again go through the door with your second spare key to bypass a large section. Above the door, go right and use the infinite bubble to take a shortcut. Head outside, deactivate the forcefields, and loop back around to the upper-central save point.
- Homestretch now! Go left from the save point and head straight to the room with the bat miniboss. هناك’s a secret passage to bypass it but it takes quite a lot of screens to reach… بدلاً من, we can do a double-Umbra to teleport through the wall from an infinite bubble, which I demonstrate just after the 1-minute mark in the ‘Ghost Race’ video embedded in the ‘Achievements – Full Completion’ section above.
- Reach Vicar’s tower to grab the book and win the game – تهاني!
Gloomy Cellar Shortcut
هناك’s a skip right at the beginning Gloomy Cellar – أنا’m not aware of anyone else posting this to date and it only requires the Incantation of Umbra to pull off, which is needed to access the area in the first place.
This method doesn’t miss any Orbs, أغراض, or characters, nor any content you haven’t already seen elsewhere, so this shortcut is useful if you’re not a fan of upside-down / insta-death spike shenanigans and would just like to finish the boss for the reward.
You can still play the level normally afterward (as I did) if you so choose.
هذا كل ما نشاركه اليوم في هذا الدليل. تم إنشاء هذا الدليل وكتابته في الأصل بواسطة Stubbsy. في حالة فشلنا في تحديث هذا الدليل, يمكنك العثور على آخر تحديث باتباع هذا وصلة.